
Another week of the Spring 2022 One Room Challenge is complete and I made some more progress in the nursery!
First, I updated the window by ripping off the old window trim, painting the window itself Sherwin Williams Tricorn Black, and installing a chunkier window trim like we’re slowly doing to all the windows in the house. I painted the window trim Sherwin Williams Evergreen Fog to match the walls for a monochromatic look. and installed a new curtain rod and room darkening curtains.
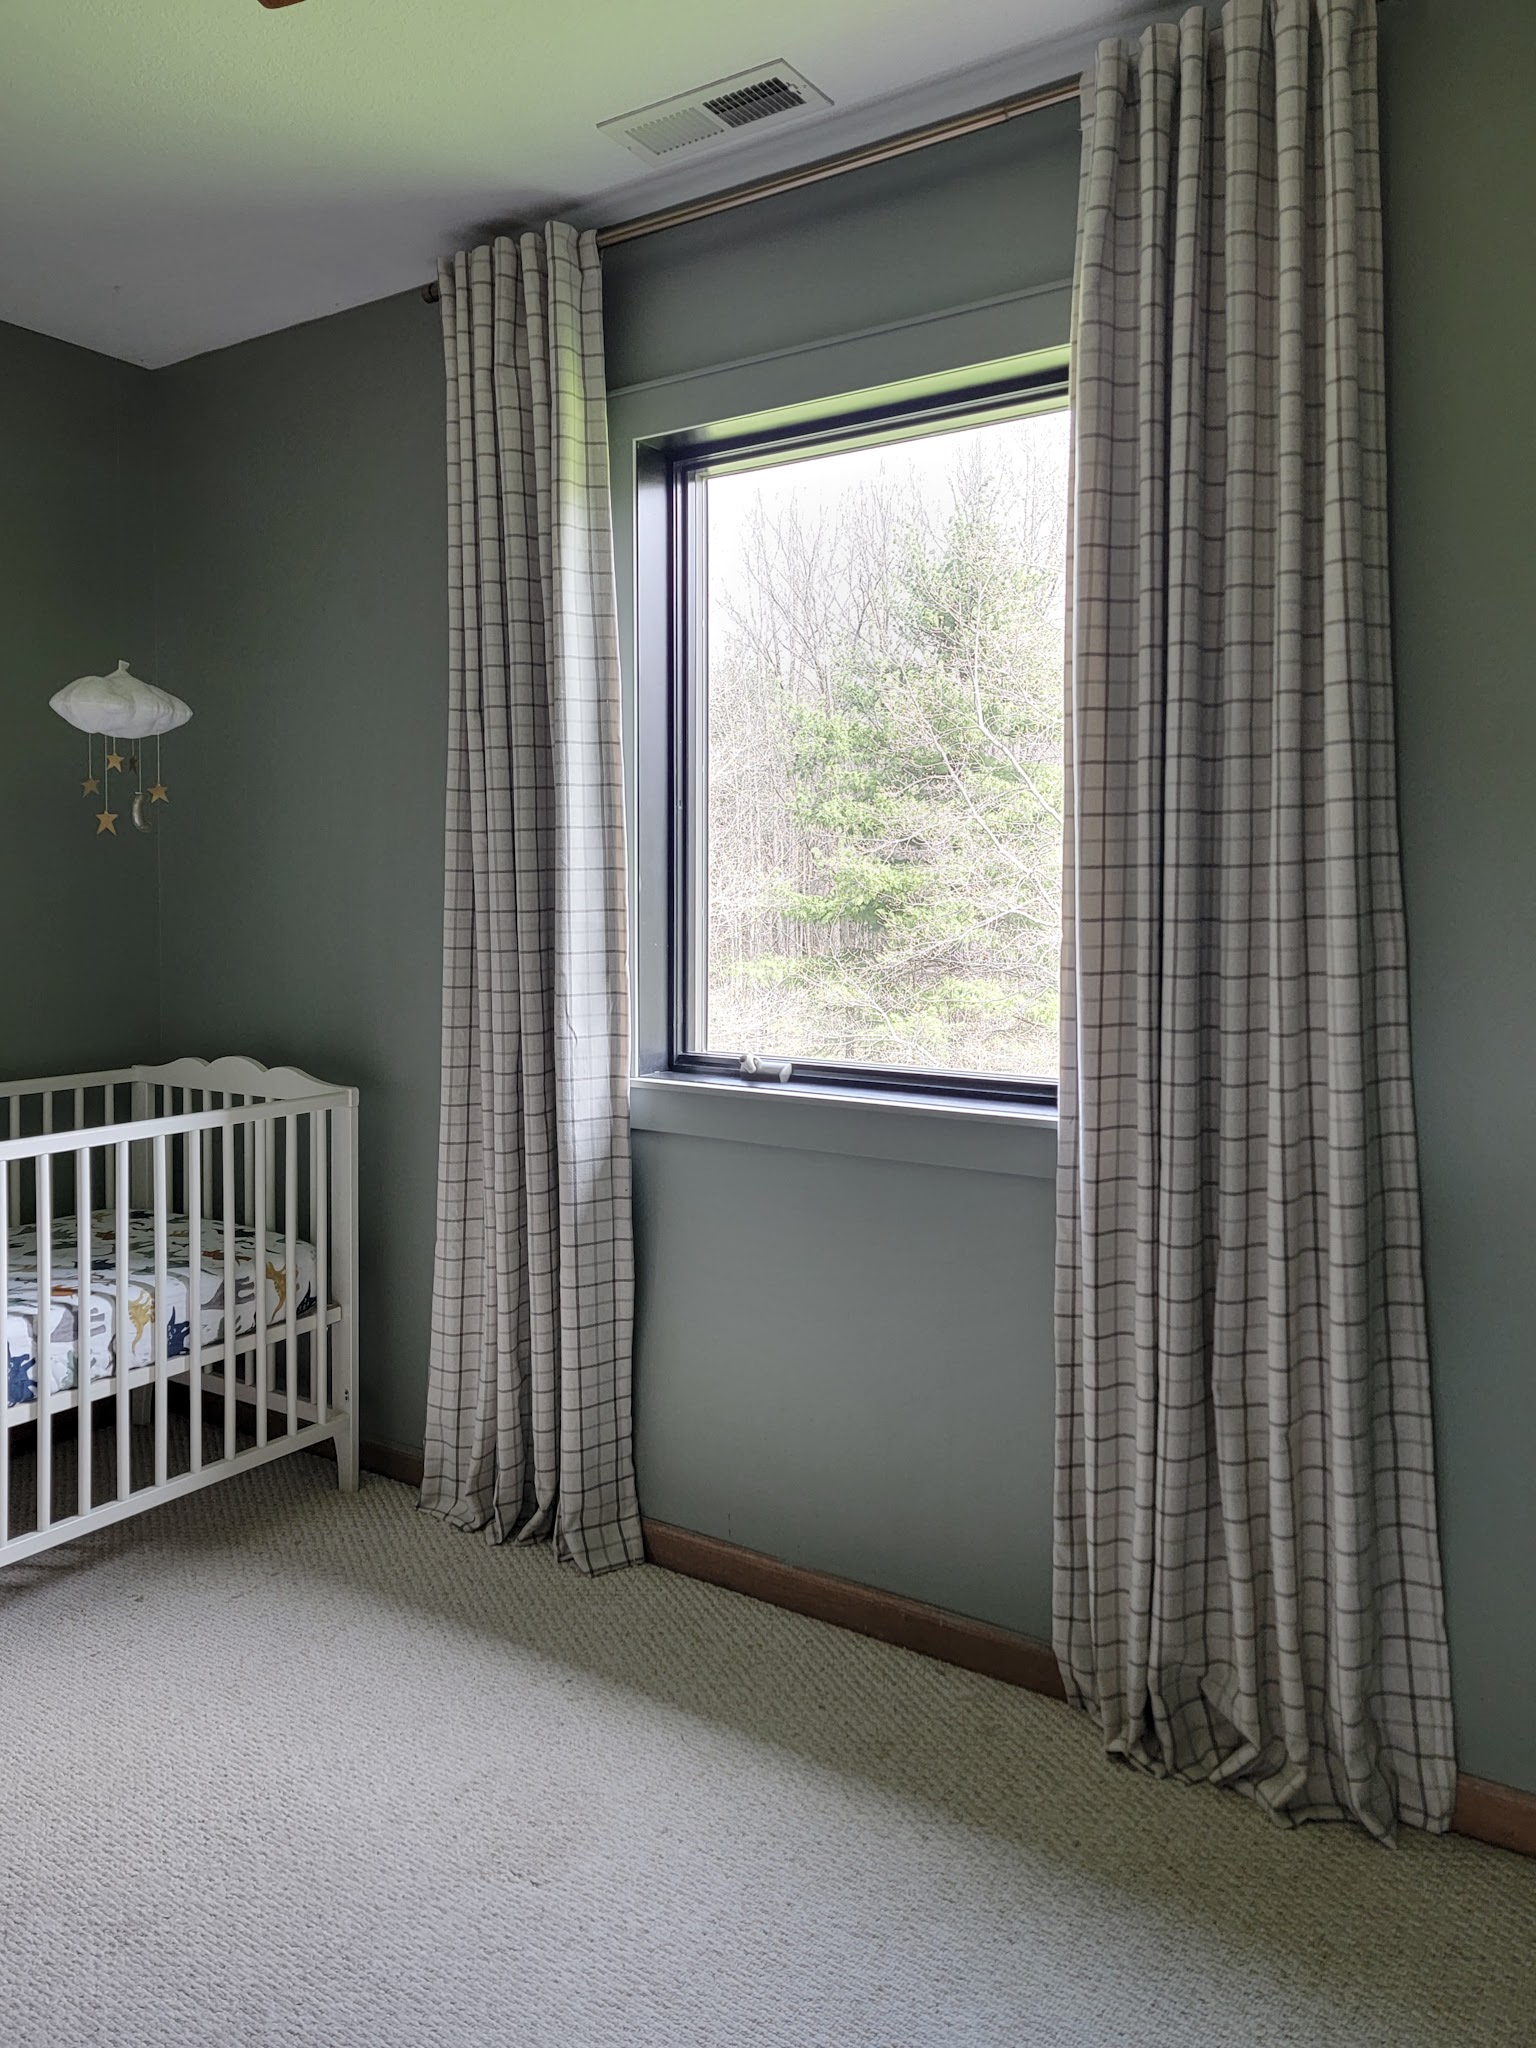
I love the curtains so much! They’re not marketed as blackout but they work as blackout so I decided to nix blinds for this room. It’s a double win because the room only has one window and doesn’t get direct sunlight so this helps maximize the natural light!
I also started adding in some artwork. I downloaded this gorgeous print as a digital download from Juniper Print Shop – the colors are absolutely perfect for the nursery and I thought it would being a nice organic feel to balance the grid print of the curtains. I like that it doesn’t feel like a traditional nursery print – it elevates the room from feeling too baby-ish and then in the future it will translate well to another part of the house when it’s no longer needed in the nursery. I had it printed through Mpix; the quality is awesome and you have to look really closely to tell it’s a print!
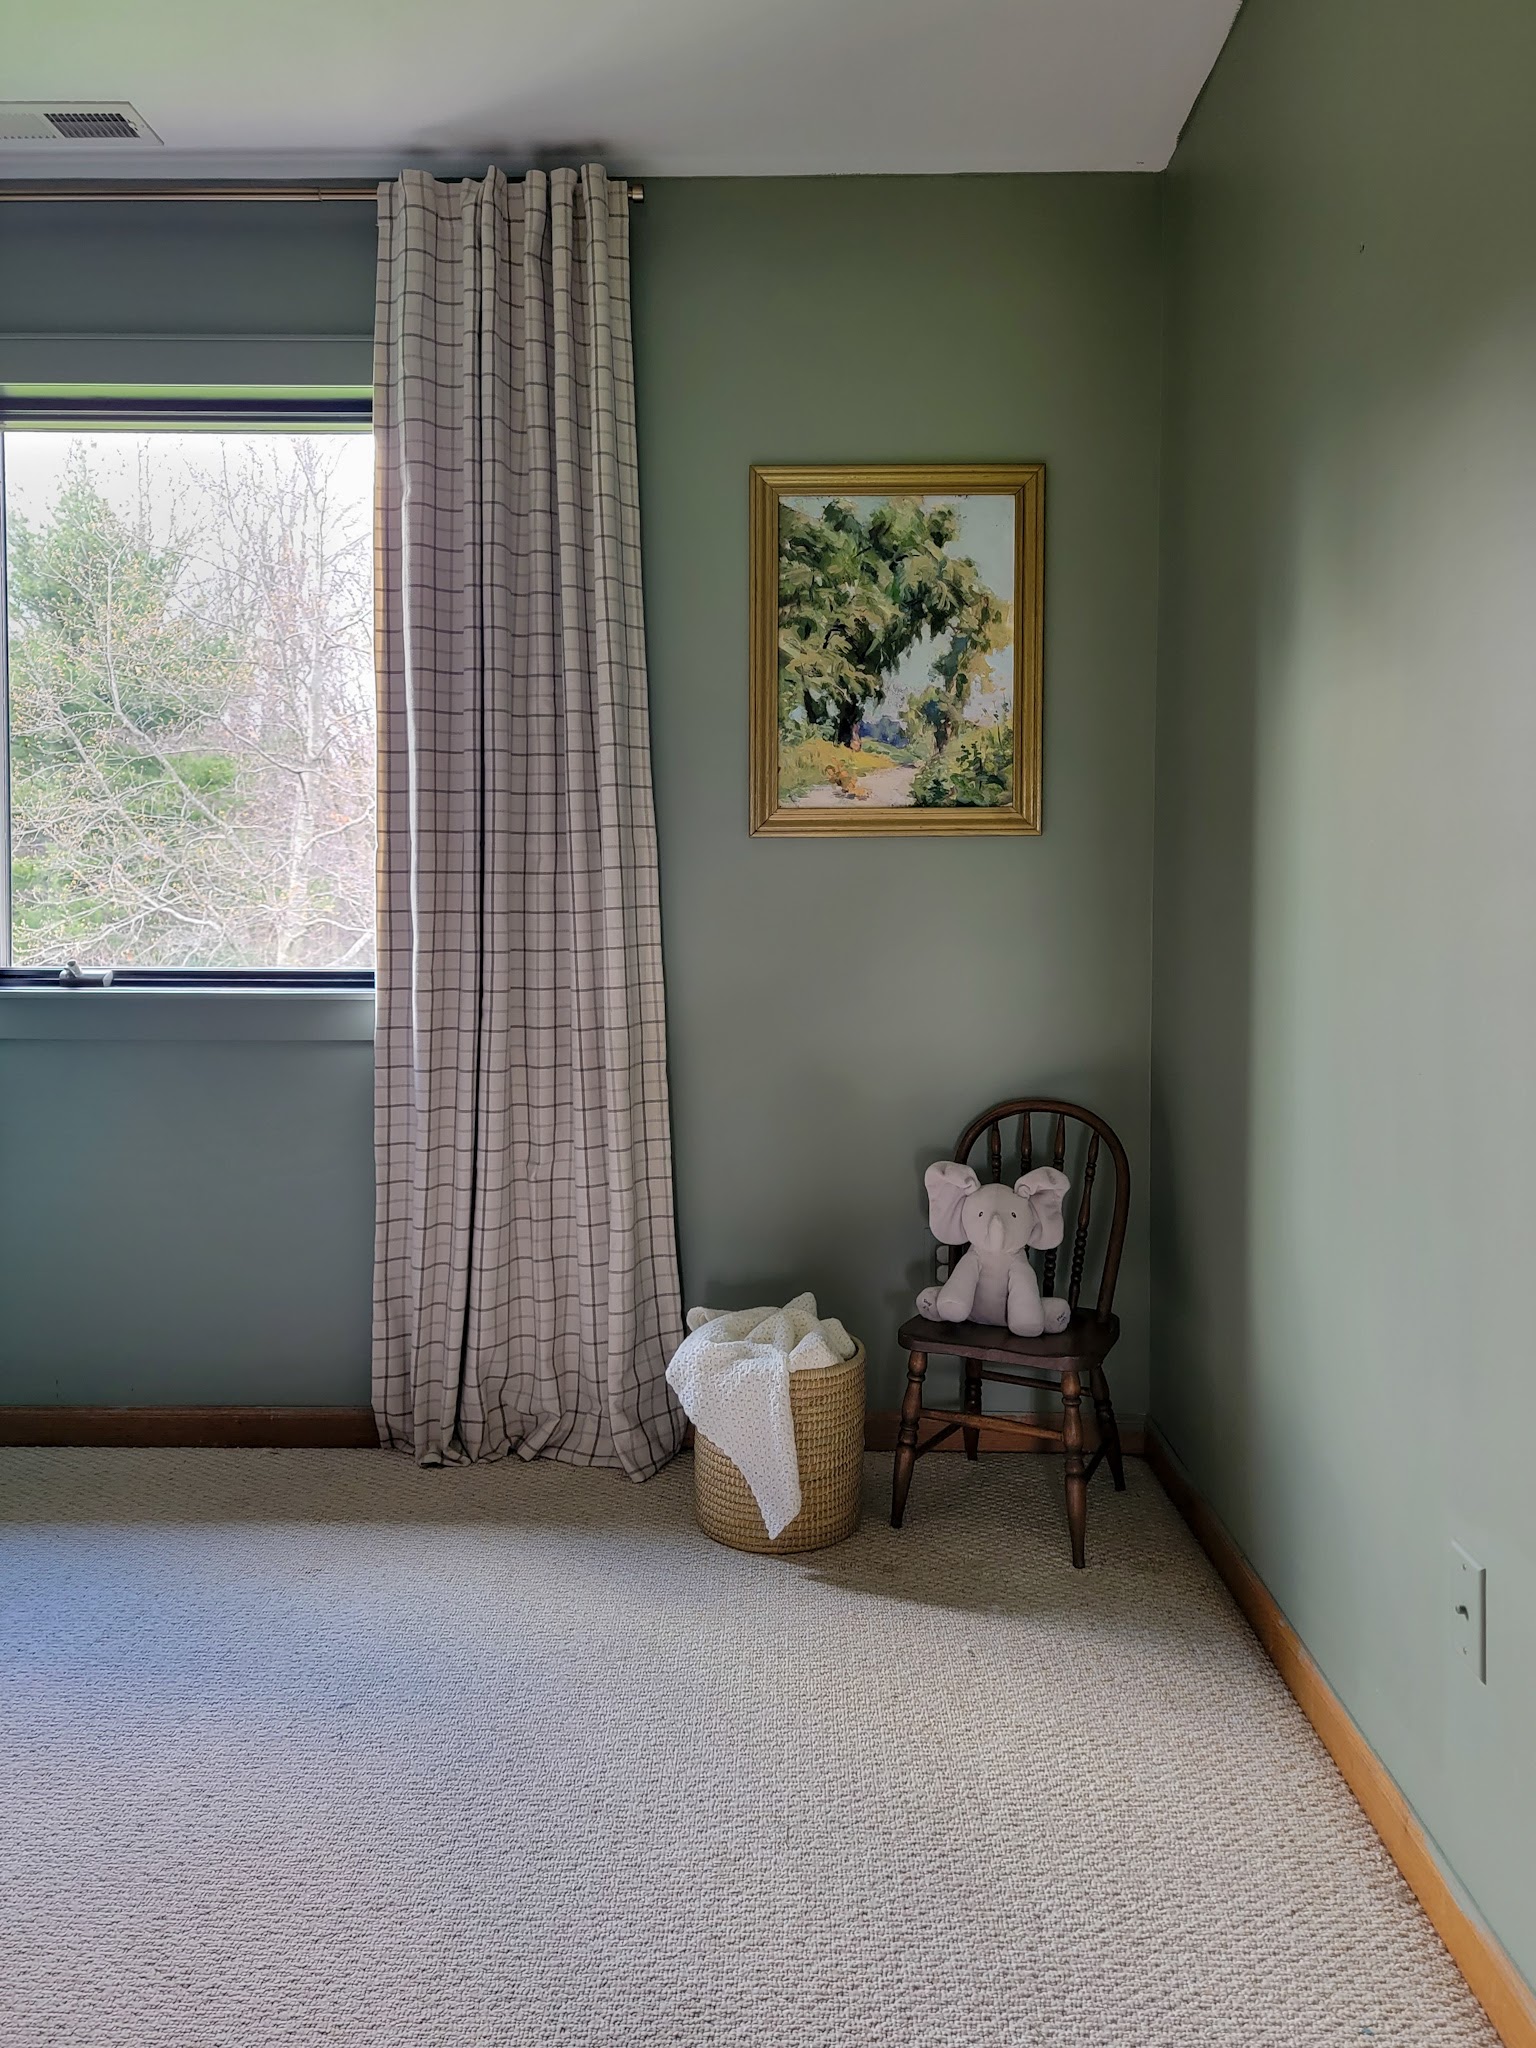
I wanted a substantial size and chose to have it printed in 18″ x 24″. Getting a large size in a quality paper and finish meant the print itself was a splurge so I wanted to save on the frame. Large frames can be pricey so I challenged myself to create a really simple DIY frame by only using materials I already had on hand.
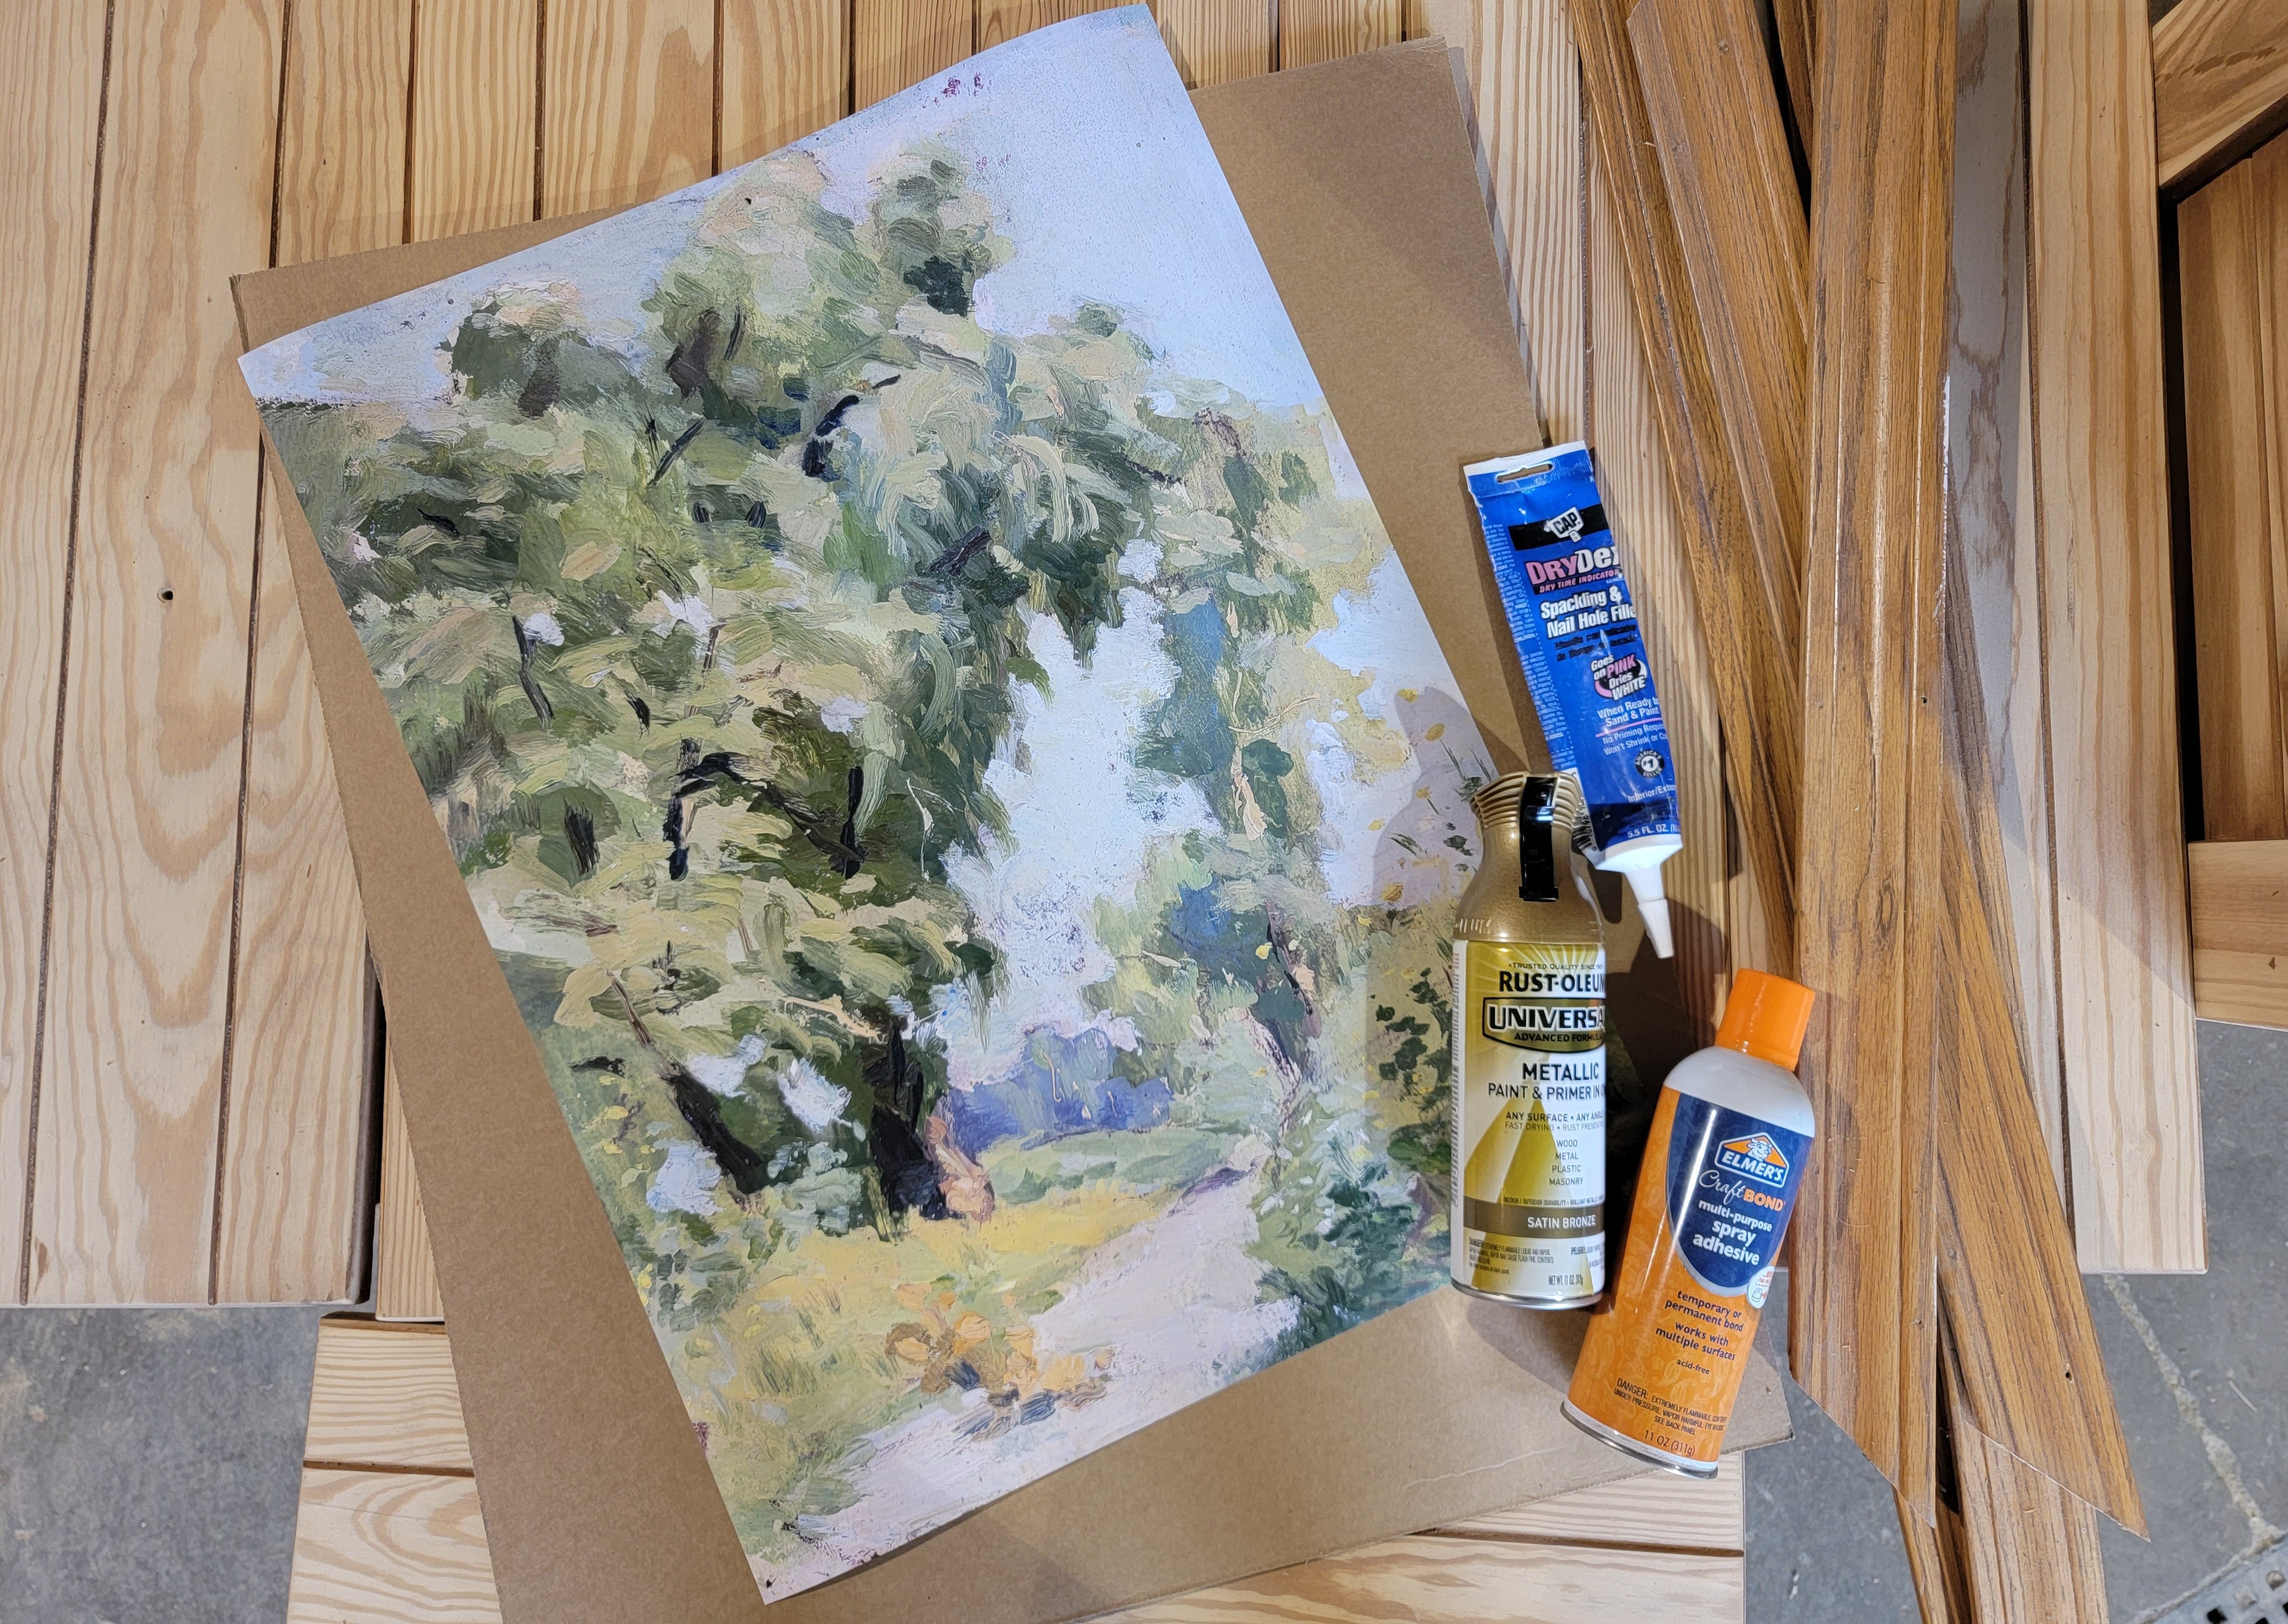
Materials
-large piece of cardboard (flat, no creases)
-scrap pieces of window trim
-tools used: scissors, miter saw; clamps
I cut the cardboard down so there was about 2″ overhang on all four sides of the print (my cardboard piece wasn’t quite wide enough to accommodate the full width of trim all the way around, so there was a little trim overhang, which you can’t see in the finished product). I used the spray adhesive to spray all over the back of the print and pressed it down onto the cardboard, making sure the print was pressed flat and smooth and there were no air bubbles.

As we update all the window trim in our house, we save the old trim and remove the nails so we can use the trim as scrap wood. I took four pieces of old window trim and used the miter saw to cut them down to size for each side of the frame (what length you cut to depends on how much you want the frame to cover the edge of the print). I cut each end to a 45 degree angle and did a dry fit of the pieces to make sure it looked good. I used nail hole filler to fill in any nail holes showing.

Then I sprayed a few light coats of my favorite gold spray paint on each piece of trim.

Once the pieces had dried, I used the spray adhesive again to attach the trim to each side of the cardboard around the print.

There were two trim pieces that had a slight warp, so I added a few daps of gorilla glue on the back for an extra strong hold and that worked well!
There was one small corner that didn’t quite come together flush, so I used the nail hole filler to close the gap, taped off the print with another piece of cardboard, and spray painted over the dried nail hole filler.
I used picture hanging strips to attach the back of the frame to the wall and voila – a beautiful frame that cost me $0!

We’re halfway through the ORC and I have several things left to do: update the nursery dresser/changing table, install book shelves, install thicker baseboards, and possibly add planking to the ceiling. We also are going to be installing new carpet, although I don’t anticipate that will happen before the challenge is over since it’s about a 6-8 week timeframe right now. The room is coming together slowly but surely!

Be sure to check out all the other ORC projects happening here!

4 thoughts on “ORC Week Four: Curtains, Artwork, and a $0 DIY frame!”