The tiniest room in our house just got a dramatic makeover! Welcome to our little secret nook under the staircase.

My goal was to make a big impact with a tiny budget, and I am absolutely thrilled with how it turned out.

As a refresher, here is where this room started. Seven square feet of potential!

Since it’s so small, it just made sense to go through paint that I already had to find something that would work rather than buy more. After trying out a few colors on the wall, I settled on the leftover paint from our guest bathroom renovation: Benjamin Moore Smoky Mountain (color matched at Lowe’s). I painted both the walls and the trim the same color and I love the effect that had.

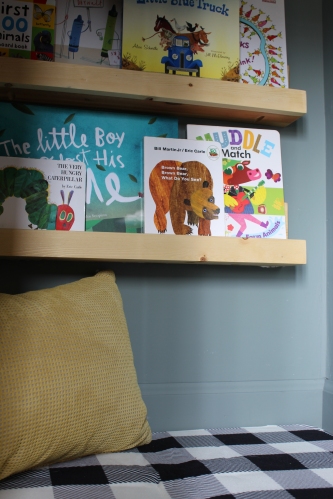
About a month ago, Justin and I had a DIY Date Night and built these cute little book ledges using scrap wood from our garage and stain we already had. This project was so fun (and free!) and I think they look great in this space!

I really wanted to trick out this space as best I could and have some little secret surprises that you can only see if you’re inside. I’ve always pictured it as a Harry-Potter-style cupboard under the stairs, so I wanted to make it seem a little magical without actually being Harry Potter themed. One thing that kept coming back to me was stars on the ceiling – when I found these metallic gold constellation decals on Etsy, they really stood out to me as the perfect option!

The set I bought came with nine constellations and then a bunch of extra stars. I may have gone full nerd and actually looked up online to see how each constellation should be oriented and where they appear in general relation to one another if you look outside in our specific geographic location…is my type-A showing? Once I figured out where I wanted everything, these decals were super quick and easy to apply!
Another thing I’ve always wanted to do in here is make a chalkboard wall – the triangular wall above the door was the perfect space for it. A friend of mine had some chalkboard paint she was willing to let me use so I didn’t have to buy another jar and I picked it up off her porch. I primed and painted 2 coats and voila!

Justin used a scrap piece of wood and a router to create a ledge for chalk to sit above the door frame and it worked perfectly. We initially thought we’d have to glue it to the frame but he made the wall-to-wall size so precise that we were able to just push it in and it’s very securely wedged.

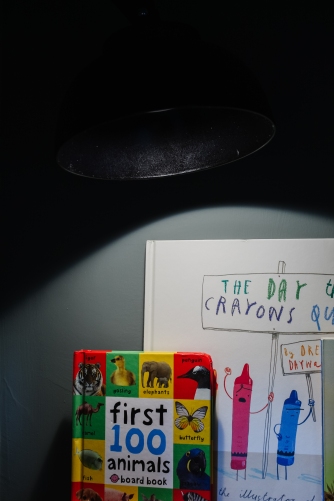
The last thing this space really needed was a light source. There is no plug and we didn’t want to spend the money to hardwire lighting, so I came up with a plan for a DIY sconce using a 79 cent plastic bowl, scrap wood, black spray paint, and a puck light. Justin and I (ok, mostly Justin haha) created this in another DIY Date Night – it turned out so well and works perfectly for providing a little light to read or play.

Such a big difference just having a light source!

I wanted the space to feel cozy and comfortable, so I finished it off with a microfiber floor mat that had a little extra squishy padding and a cute textured pillow that was 30% off at Target.

Because of all the DIY projects using leftover materials from other rooms and projects, the total cost of this entire room makeover was right at $75. I’m so pleased with what a huge difference it makes and imagine our kids will spend many hours entertained in this space!

Sources
Wall Color: Benjamin Moore Smoky Mountain (color matched at Lowe’s)
Chalkboard Paint: Benjamin Moore Chalkboard Latex Paint
DIY Bookshelves: Tutorial here

12 thoughts on “The Completed Secret Nook!”