Friday Features {8.27.21}

We are currently en route to Pennsylvania for the weekend for Justin’s grandma’s memorial service. We’ll be gone all weekend so I thought it was a good day for a small roundup of Friday Features – just the random little things that have happened around here lately!
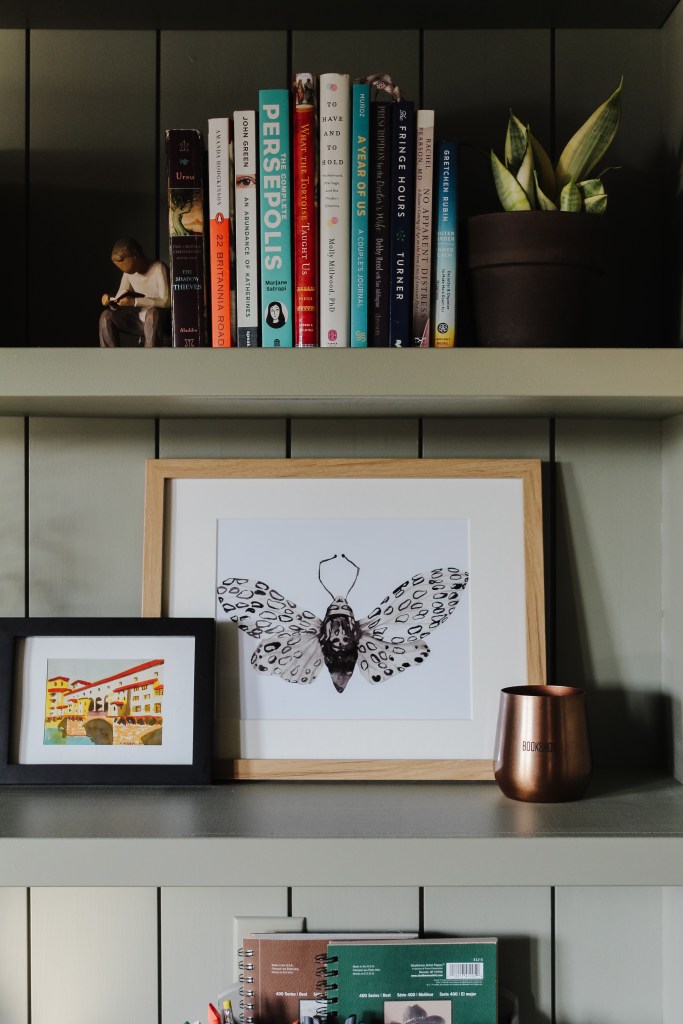
Cozy Bedroom Corner

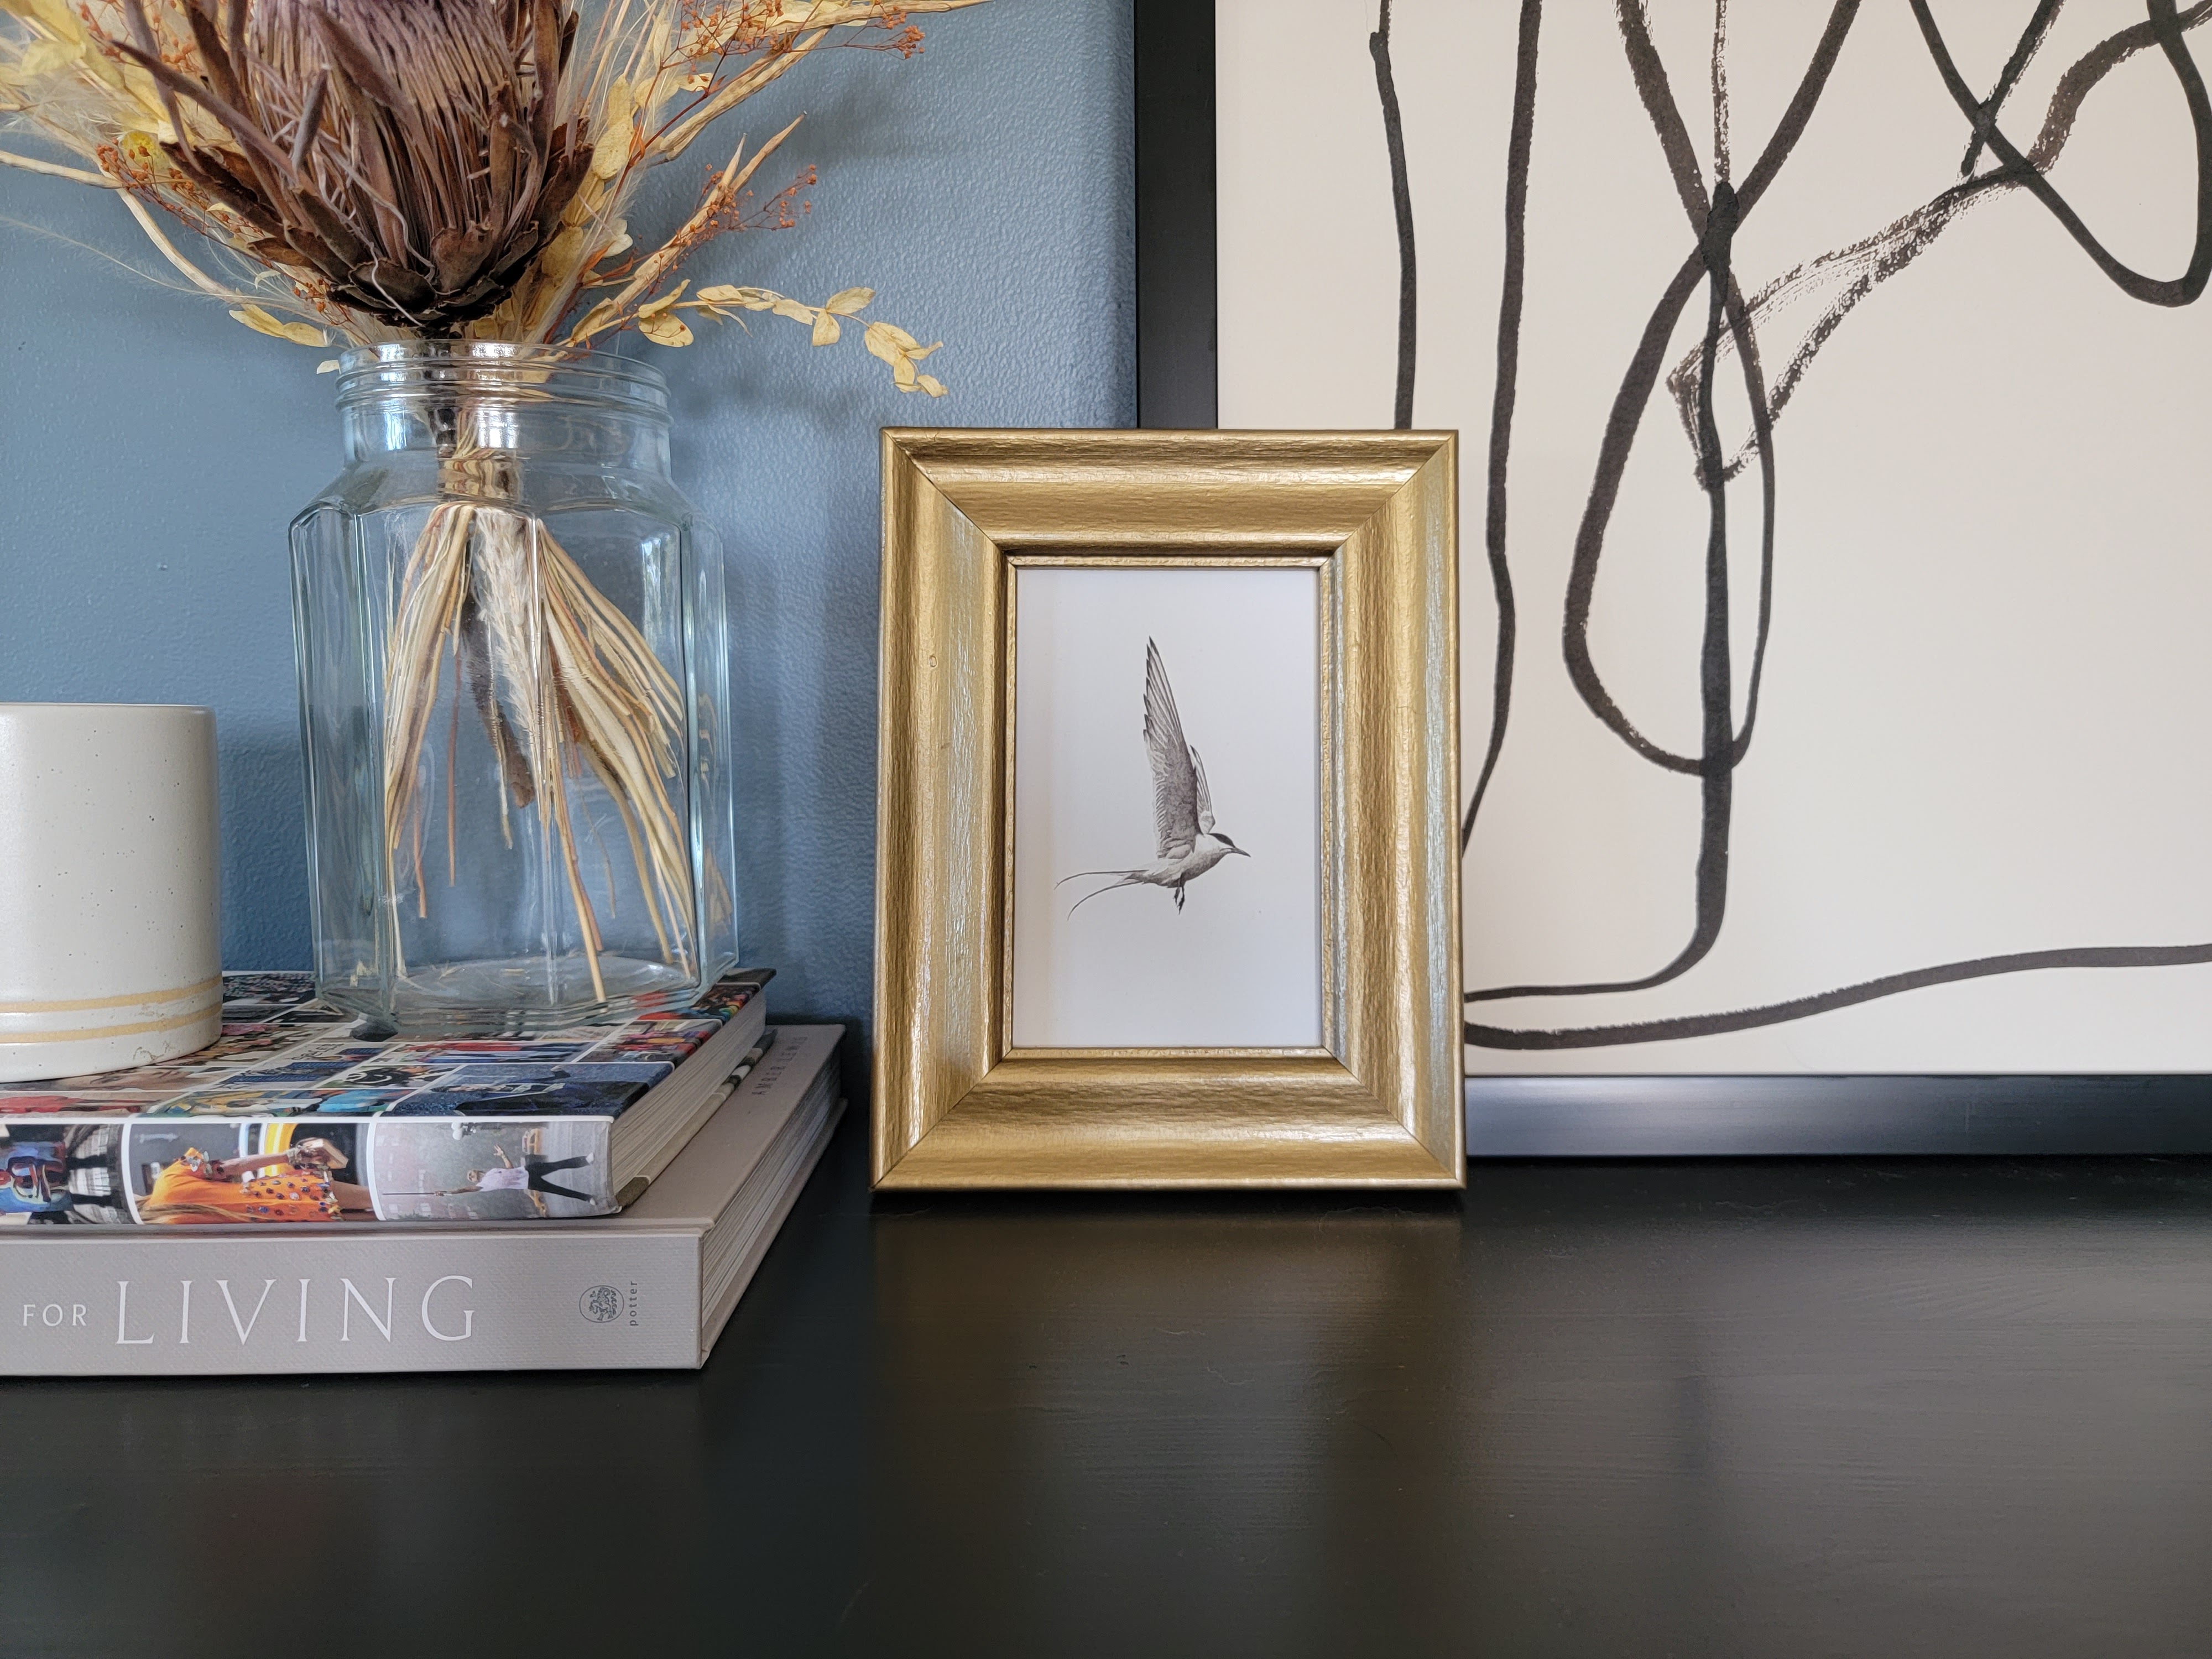
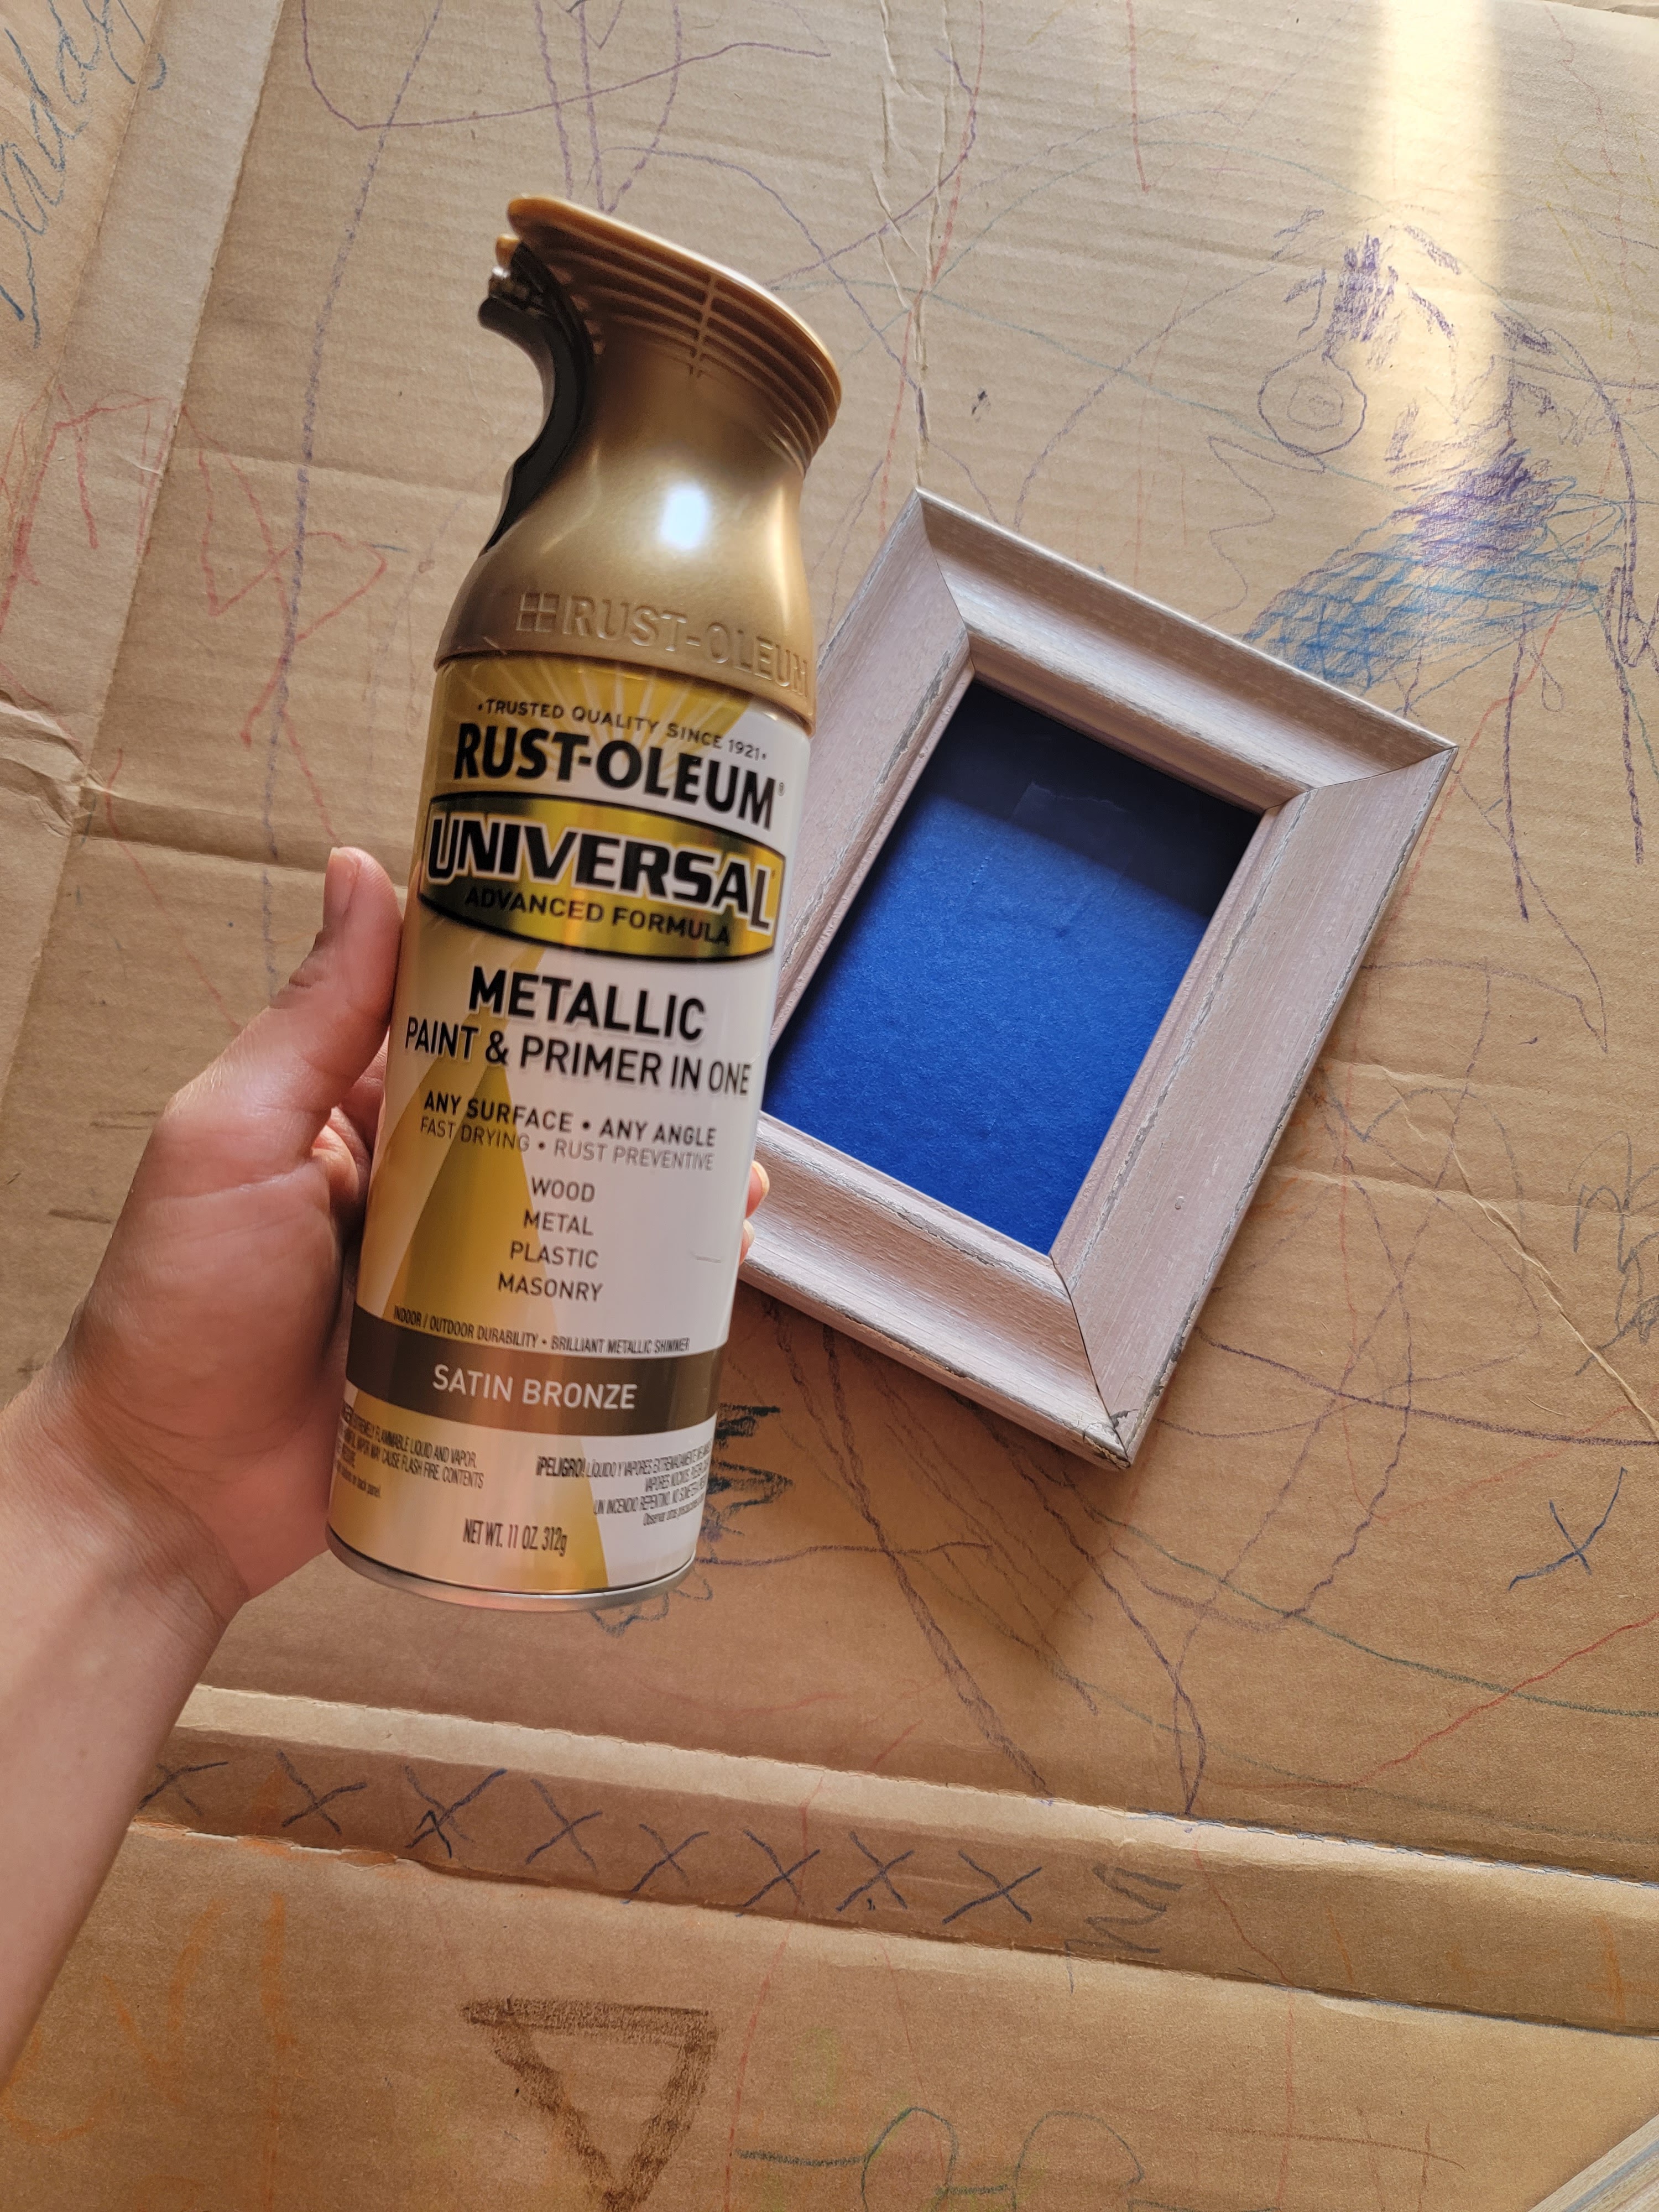
A few weeks ago, I shared how I brought this gorgeous rust colored chair into what was a somewhat awkward corner in our bedroom and this week, I finally got around to finishing off the space. I considered adding artwork above the chair, but since I’ve included so much in the gallery wall I decided to print off and frame one of our new family photos instead. I like that the asymmetrical mat makes it feel a little extra unique! I snagged a small black table from Target and topped it off with a dried floral arrangement from a local florist with a candle and book. I also tossed a soft textured striped throw blanket over the chair. Now the awkward corner that I wasn’t quite sure what to do with is such a cozy spot in the room – I love it!

Playing Chalk

On Wednesday, Justin had the kids for most of the day while I got lots of work done and ran multiple errands. When I got home from one, they were all playing outside. LJ saw me and asked in his sweet little voice “Mommy, will you come play chalk with me?” It was one of those perfectly ordinary moments that stopped me in my tracks. I love that he loves to involve me in his activities and genuinely wants to play with me. He has such a sweet, tender heart and it was so nice to put everything else on the back burner and spend some time drawing shapes and lines (LJ “taught” me how to draw an x haha) with my little boy.

Vintage Sale Finds

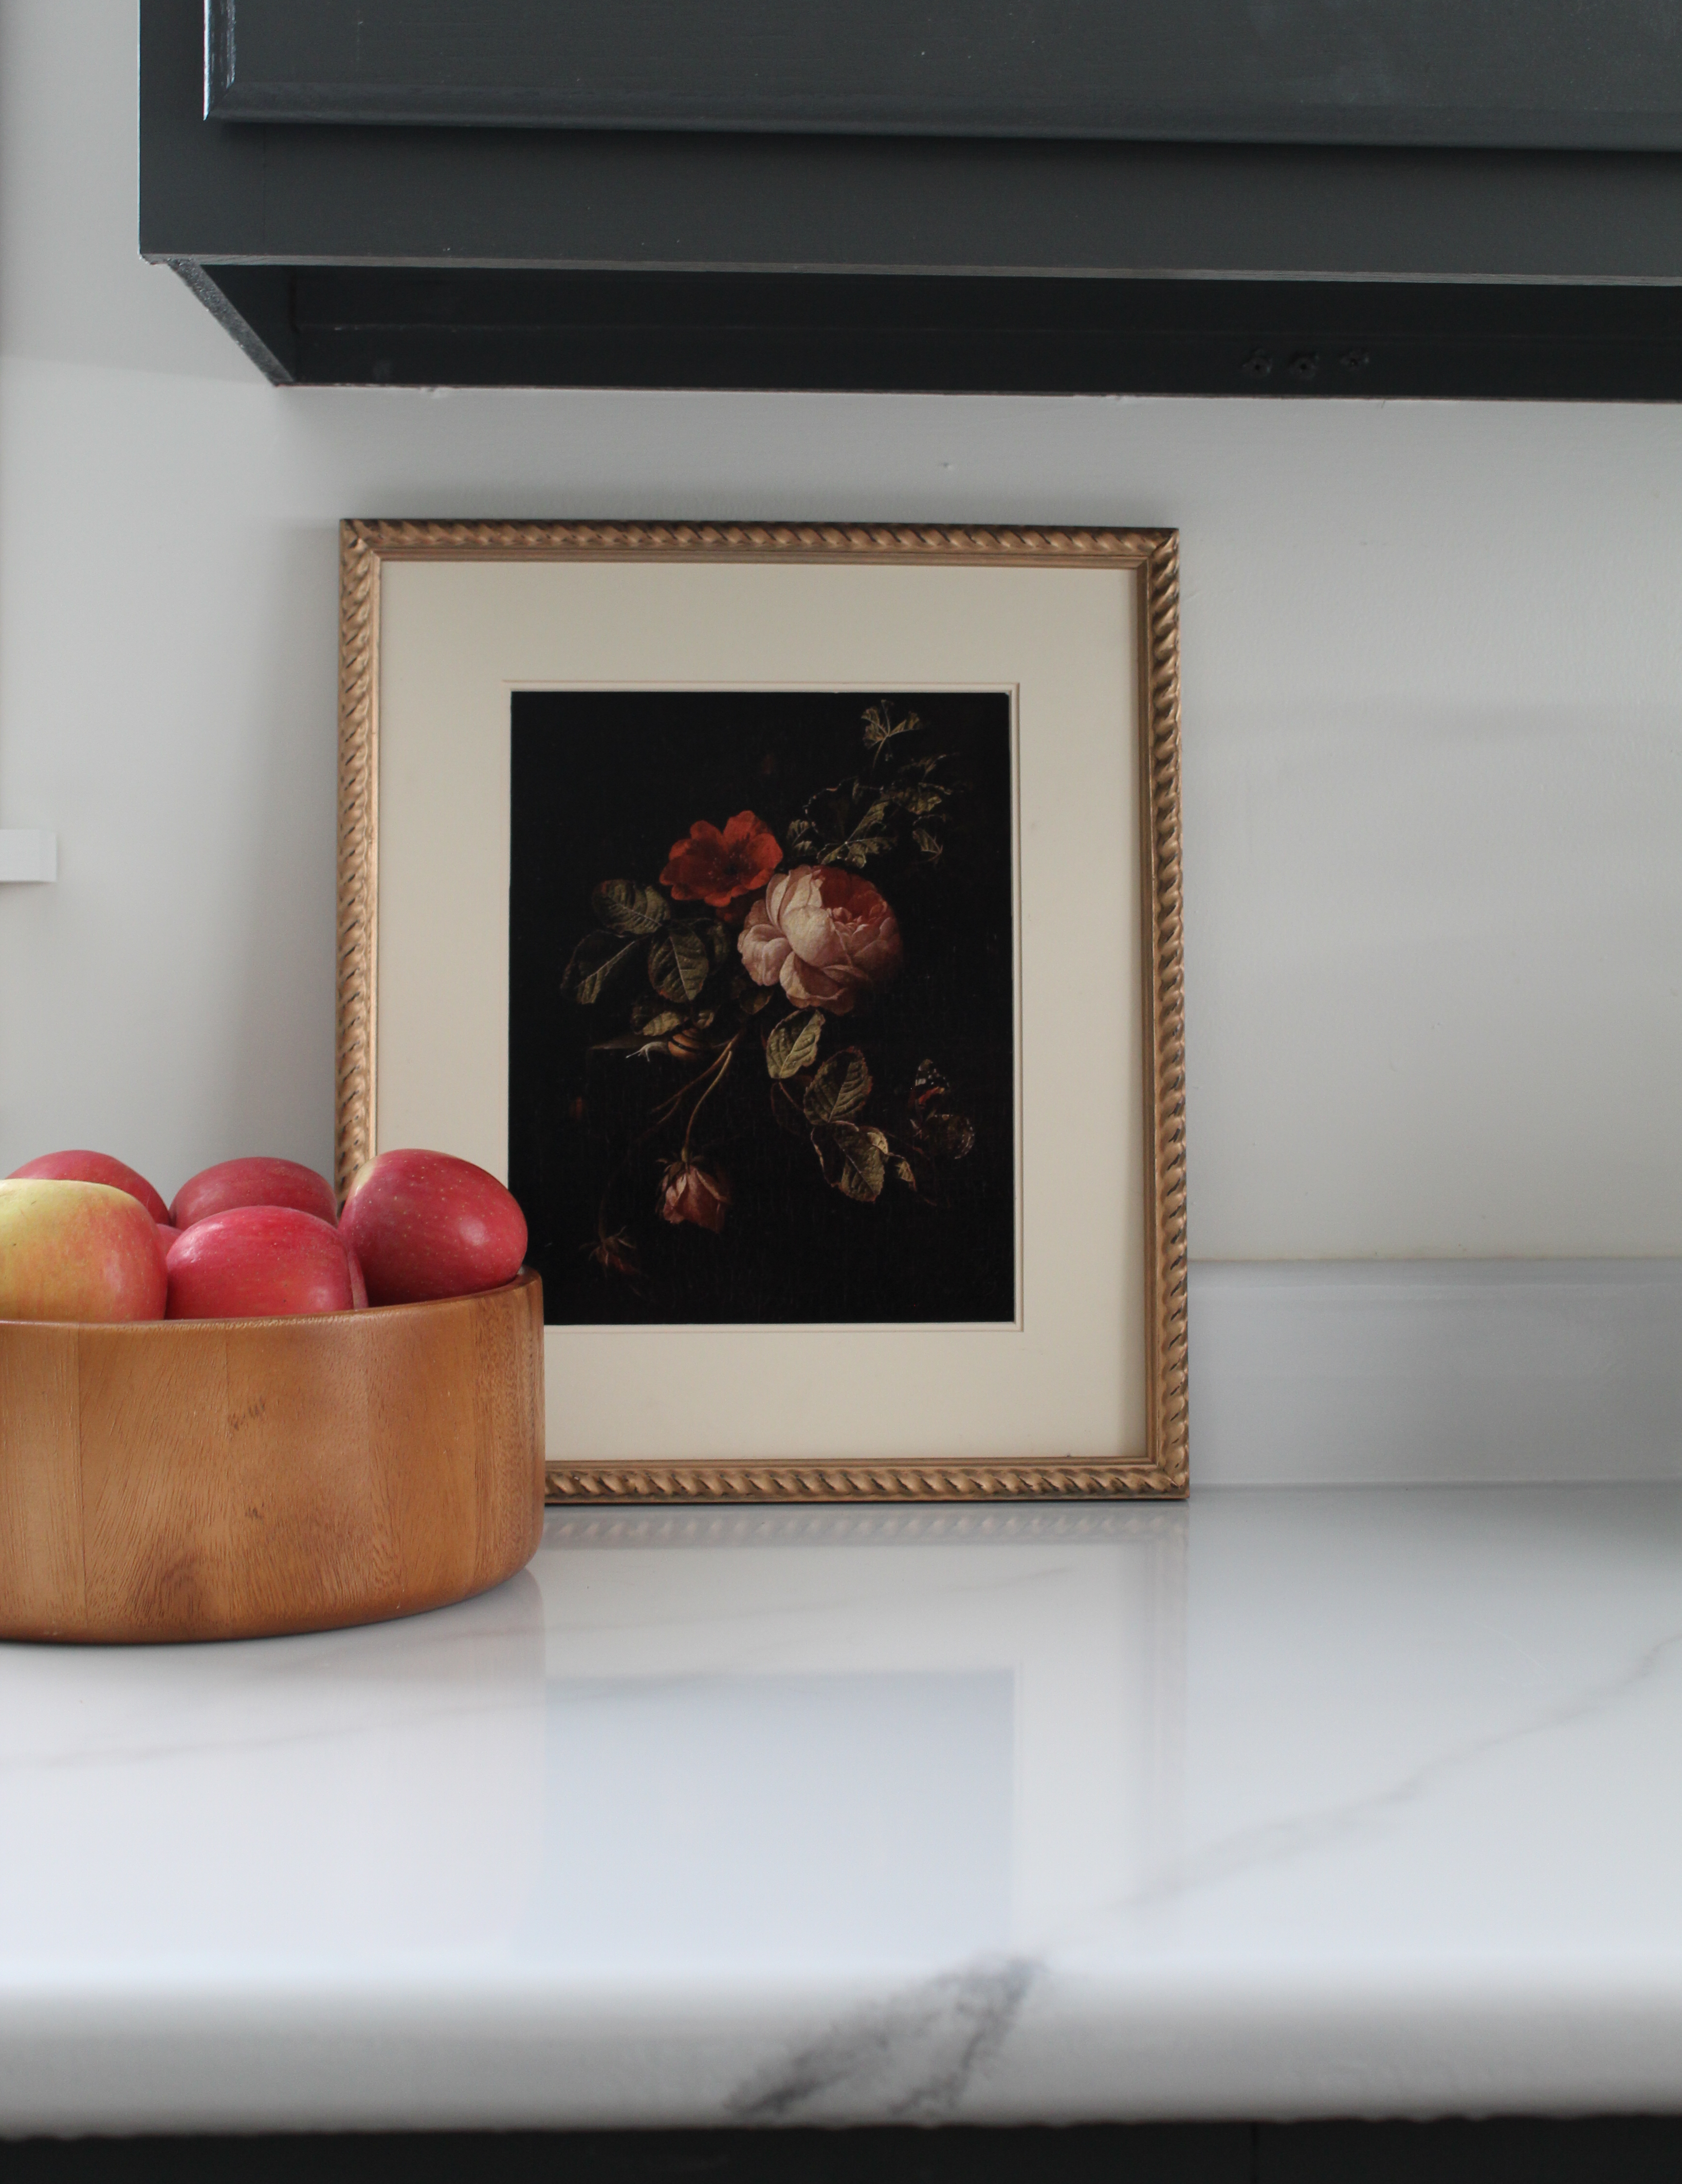
I love going to @carpendaughter‘s vintage sale and this year’s was another great one! I scored some really cool pieces that I’m excited to incorporate into our home. I shared this on Instagram: “There is something about being able to find little treasures that are unique and come with a story and some history. They have passed through different hands, been part of different homes, and now they’re going to be part of ours. It makes me so happy!”
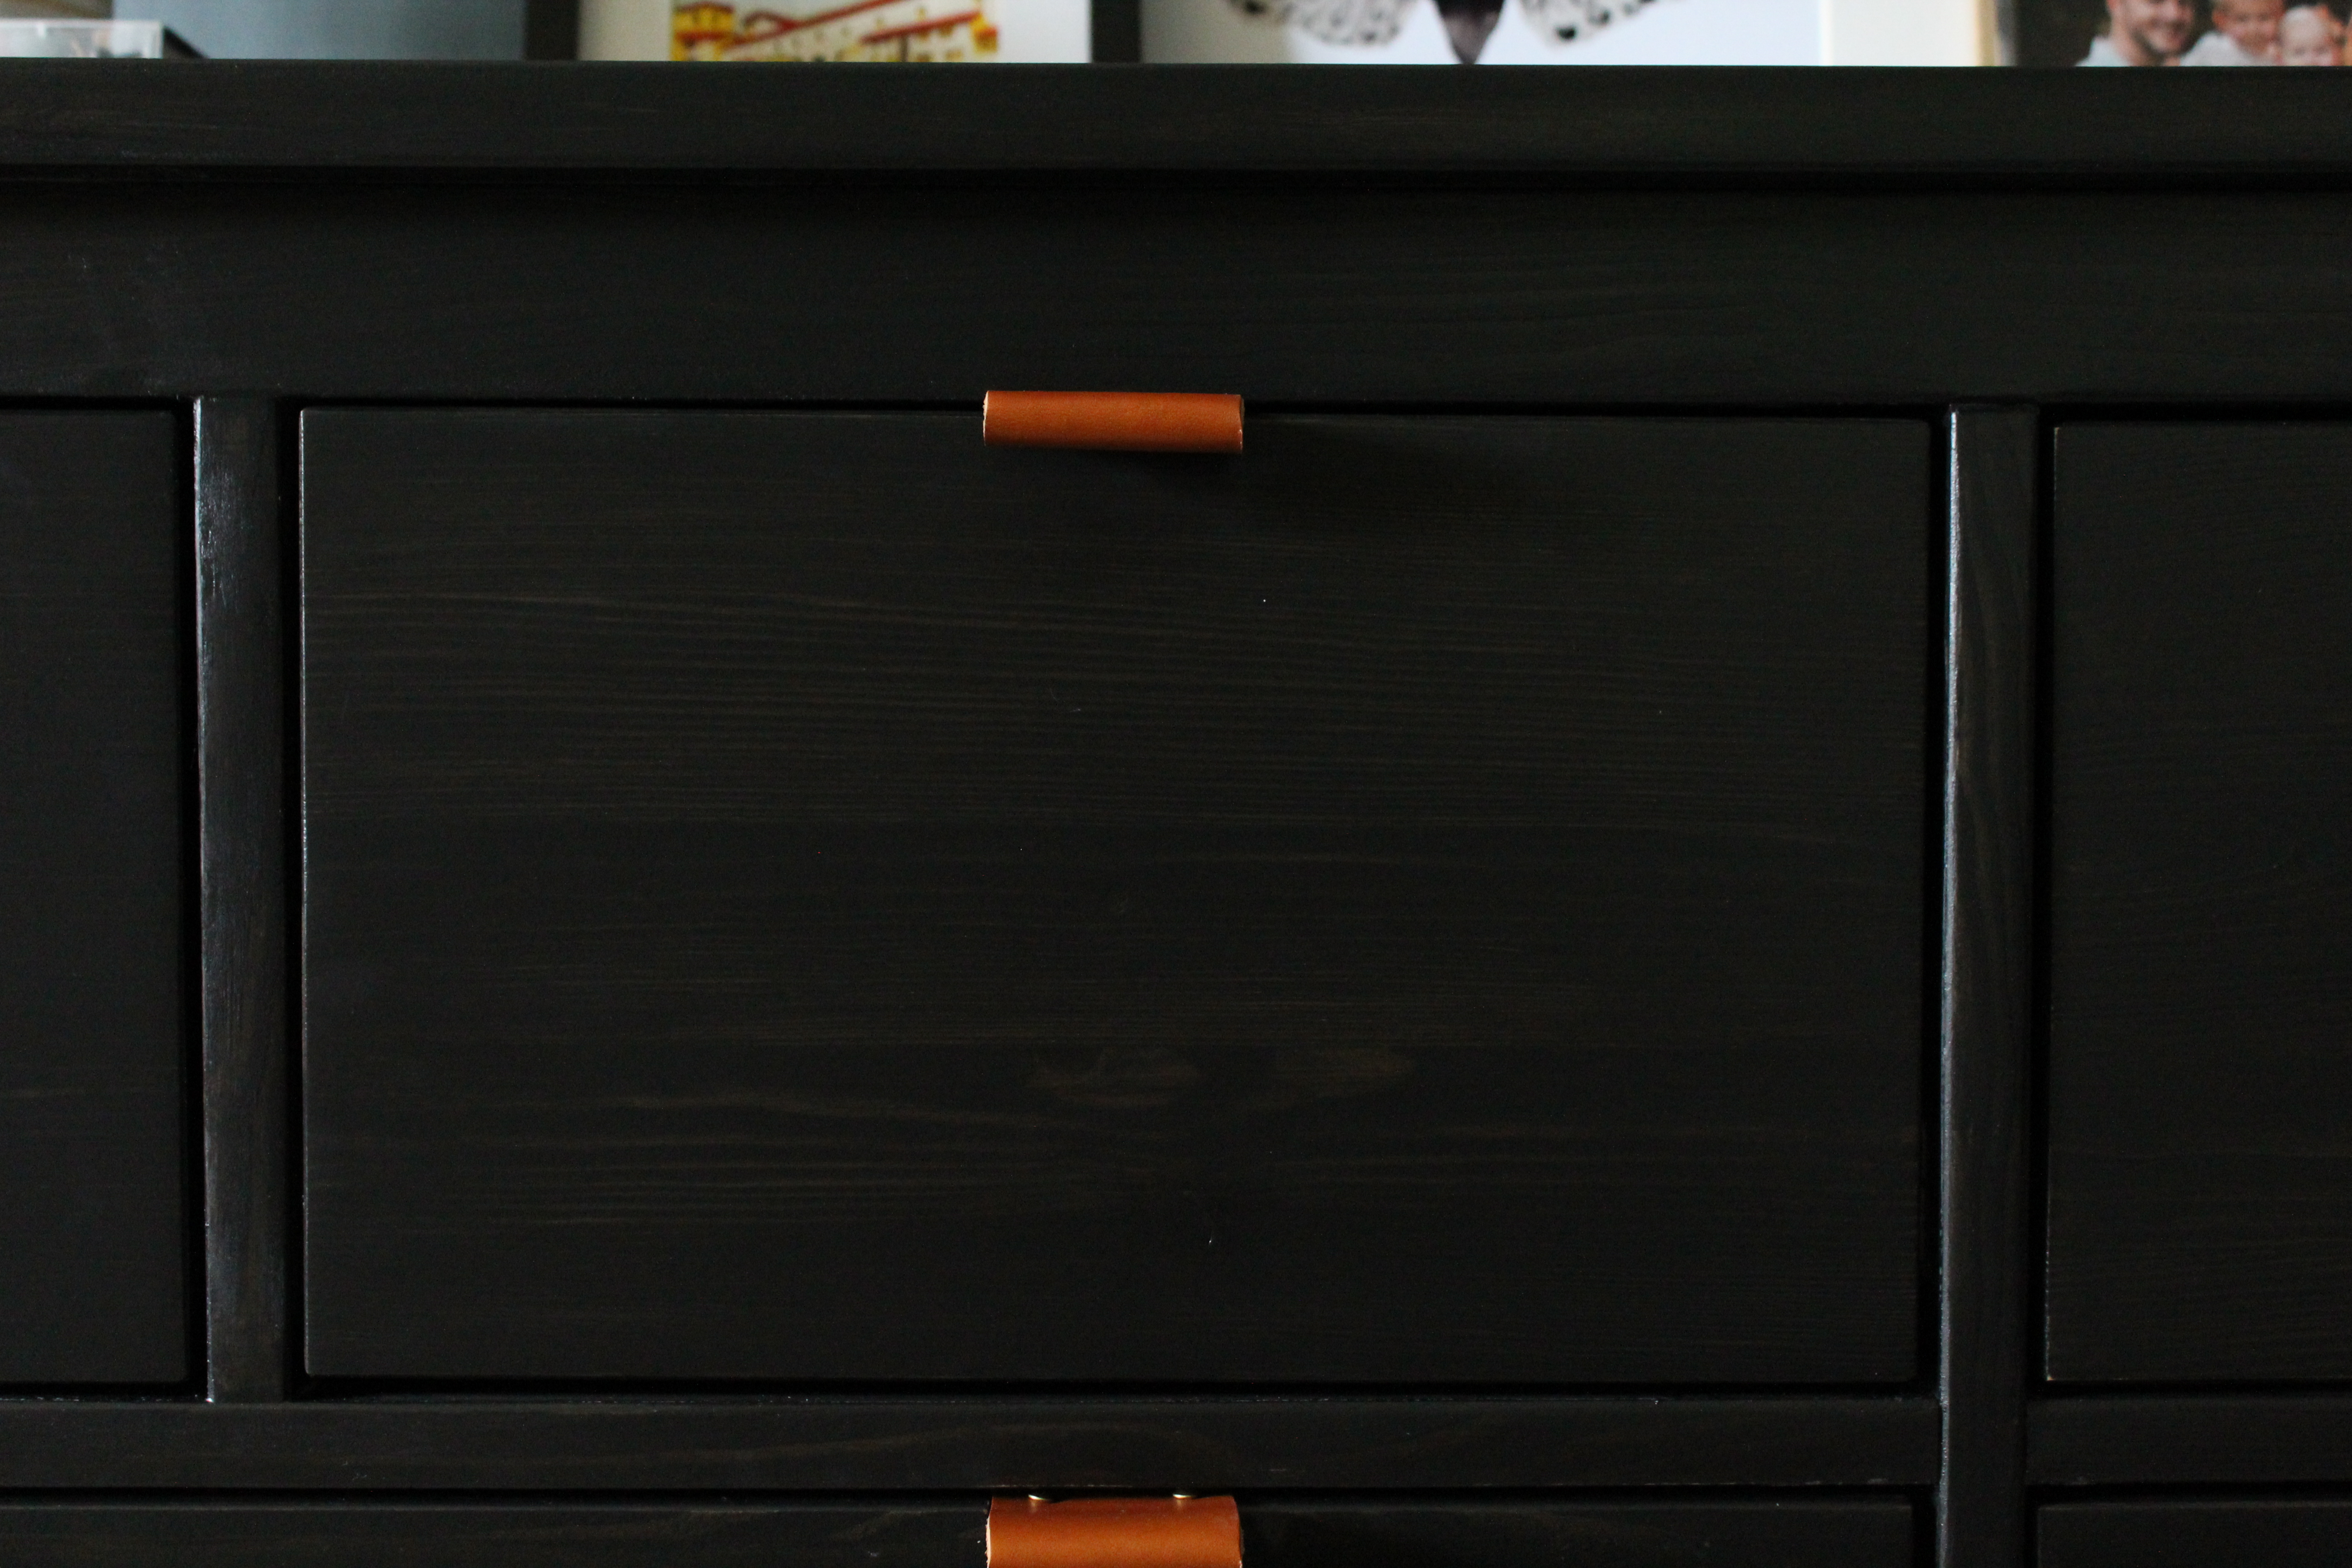
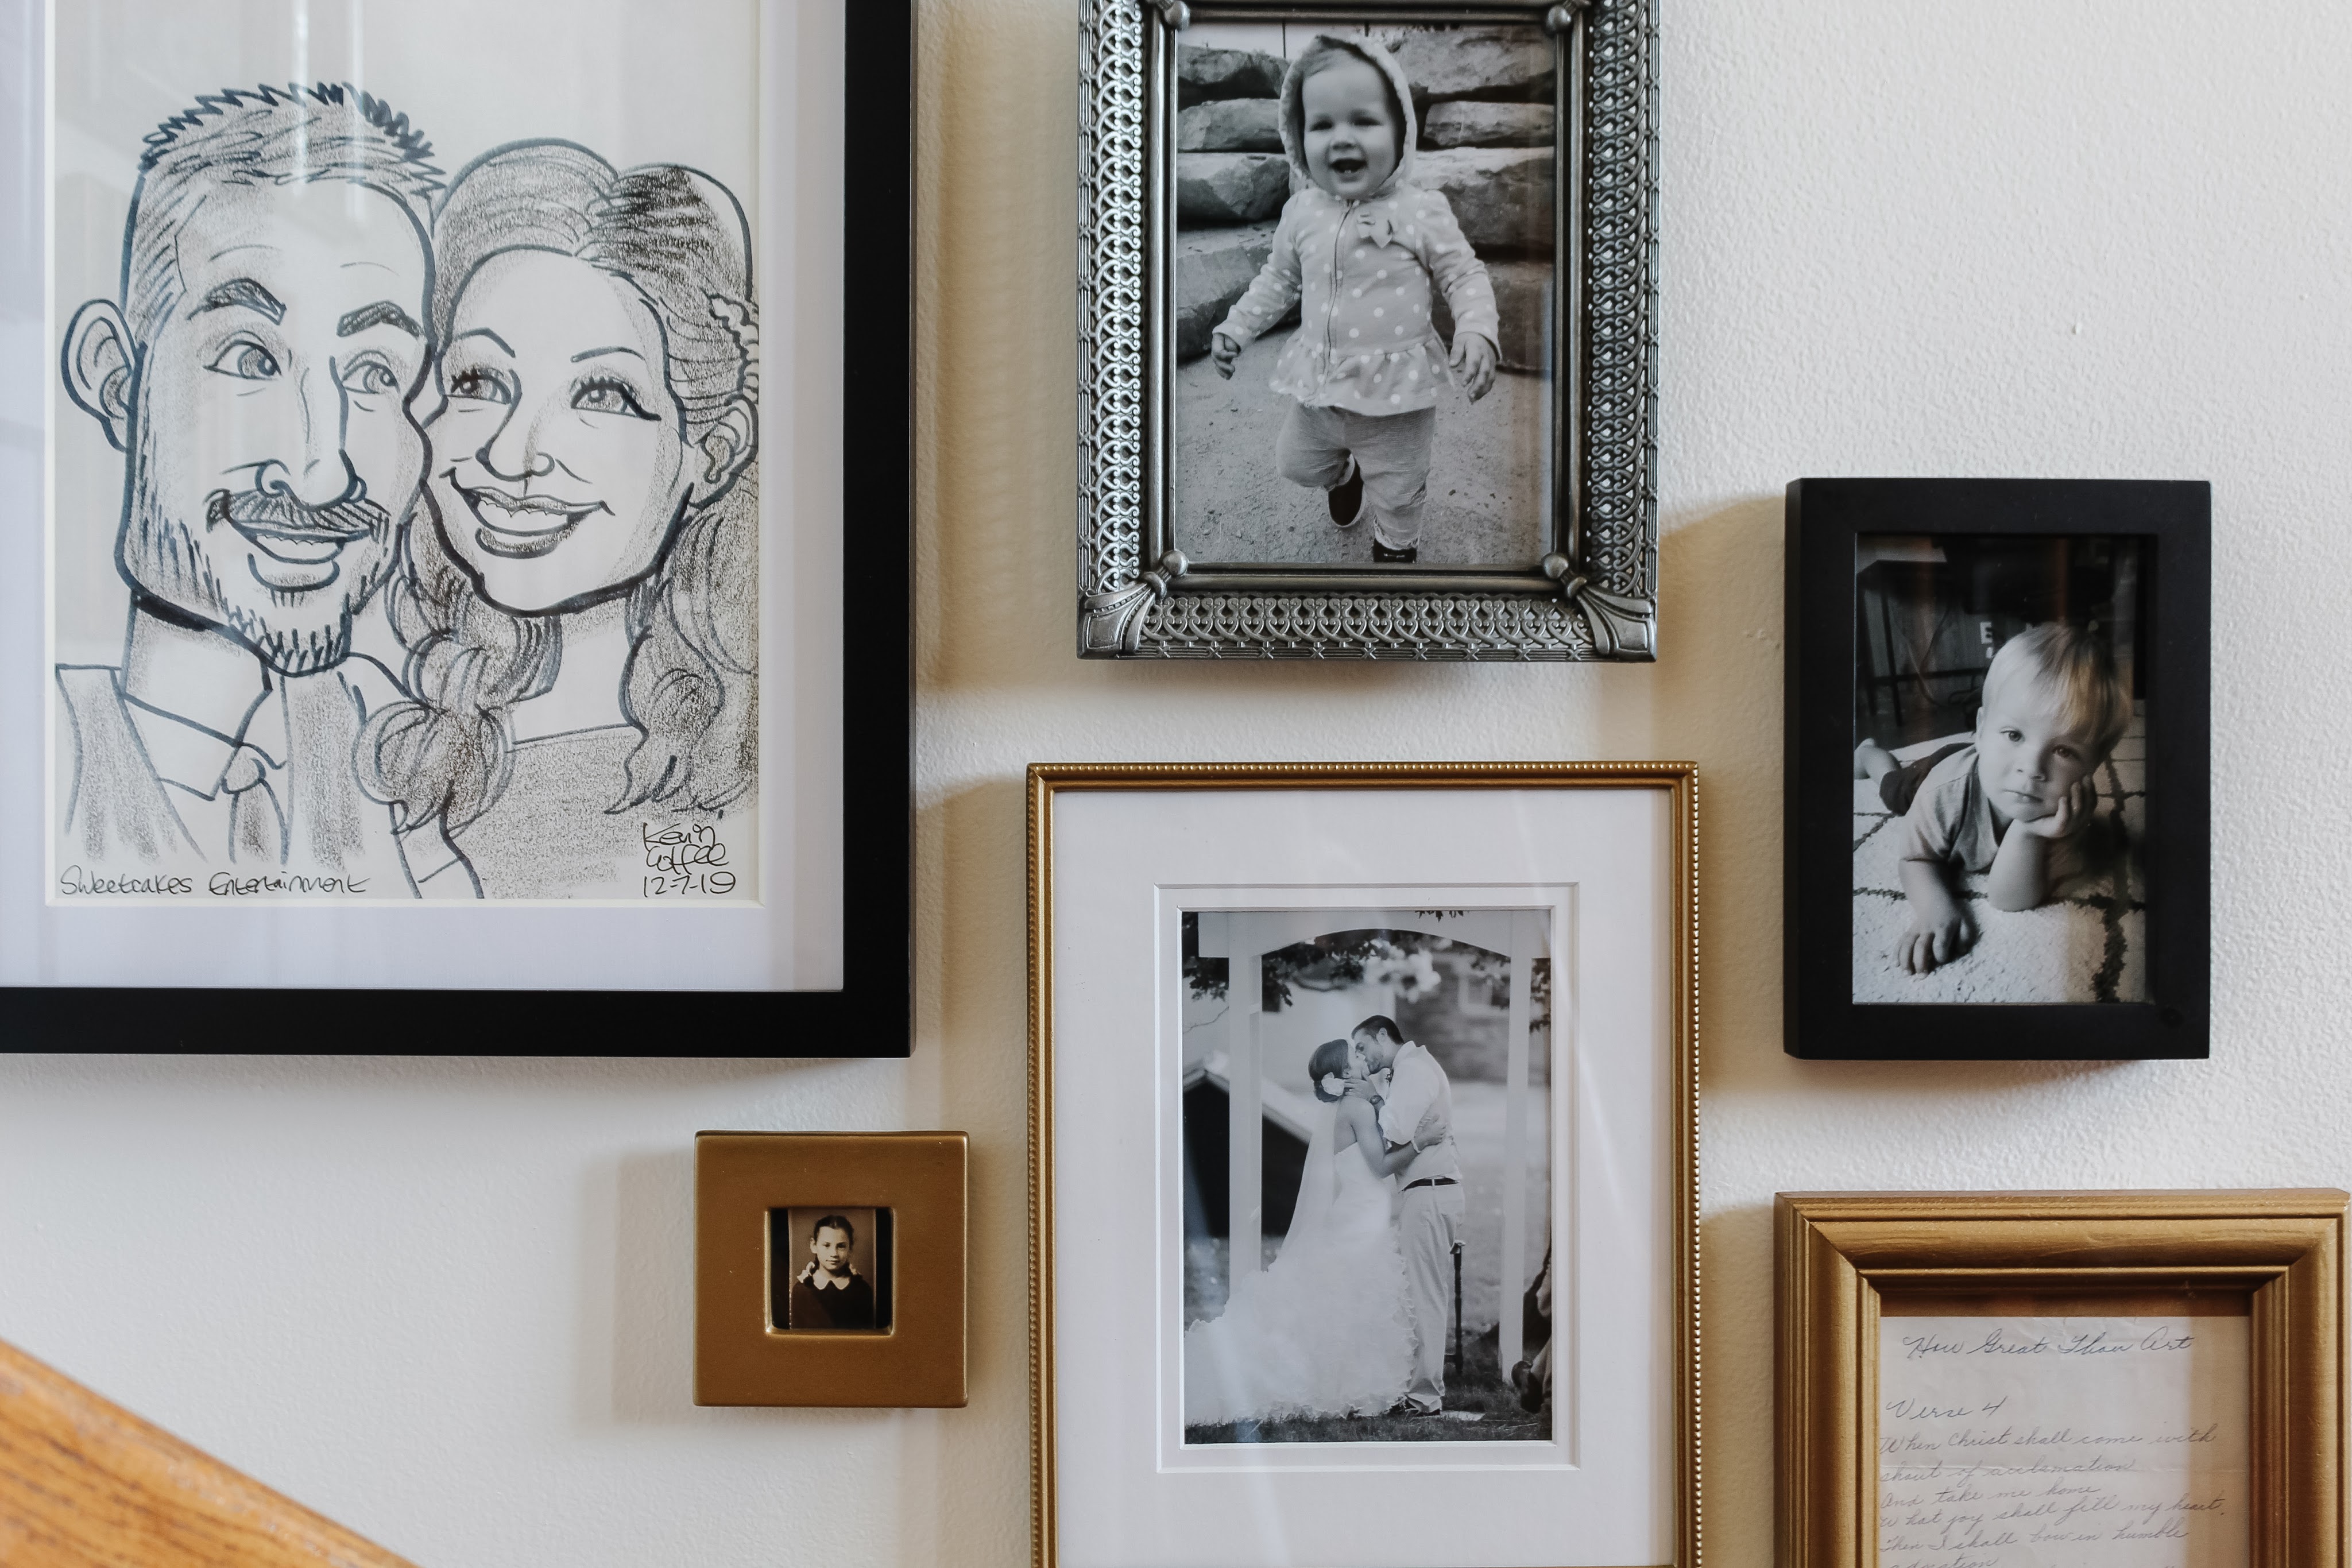
Unlocked Memories

While putting together our gallery wall, I wanted to include some special mementos of ours. It was so fun to comb through our memory box and find ticket stubs from concerts, movies, and museums, a coaster from a Wisconsin bar, our honeymoon boarding passes, notes, cards, and letters we wrote, chips from a casino event we attended, the list goes on! I loved how each item unlocked a memory of trips we’ve taken, events we attended, things we’ve done together. It’s just a special little collection of our relationship and I really enjoyed picking out a few things to display on our wall, including this museum pass from our trip to Italy several years ago. Art doesn’t have to be fancy and it doesn’t have to be the most special and/or valuable things. Frame what makes you happy – and this memento definitely does!

National Dog Day

Apparently yesterday was National Dog Day? Thanks to social media for letting me know! I don’t share much about the dogs these days, but they are definitely a big part of our family life at home! Macie is spunky and playful and always up for swimming, playing fetch, or doing anything with people. She’s slowed down a bit over the last couple years but she’s still our energetic girl! Scout has always been our more reserved boy – he loves to curl up and cuddle for most of his days, but he perches up on our landing so he can see out the window and is so faithful with letting us know when someone is coming up our driveway. He’s our little guard dog! We love our fur babies so much.

Have a wonderful weekend!

Easy DIY: Thrifted Frames + Printed Artwork

There is a DIY that I’ve done at least 10 times in the past two years and am currently doing once again as I tackle our bedroom gallery wall. It’s one of those projects that is so quick, simple, and easy that it almost doesn’t even feel like a project: printing digital downloads to use as artwork.

When it comes to making changes in your home, everyone has to start somewhere. If you’re new to DIY, this is a very straightforward and simple DIY that is perfect for beginners!

The first step is pretty obvious: choose artwork! I shared in this post some of my favorite places to find artwork and one of them was digital downloads. While it varies a bit depending on where you buy the print, in most cases once you purchase the print, you receive an email with instructions for downloading. I especially like that Juniper Print Shop gives you a few different ratio options so you can use the one best suited for the size print that you want!

Once I download the file, I’m able to upload it to whatever site I’m using to print it off. I’ve used both FedEx printing for large prints (bonus: I can do local pick-up within one day!) and Mpix for prints both large and small and have been really happy with the quality of both services. For this particular batch of prints, I chose Mpix and had everything printed on their Giclee Deep Matte Photographic paper.

While I have my fair share of frames from places like Target and TJ Maxx, one of my favorite things to do is find frames at thrift stores and use them in gallery walls. I can usually find frames between $1-$3 and that price is just hard to beat!

Sometimes I like the original finish of a frame, but in most cases, I rely on spray paint to upgrade the frame a bit. I remove the glass and the back first; if the back is hinged, I will use painters tape to tape it off so I don’t get spray paint on the back (which can make it tacky and stick to whatever is in the frame).

I love using Rustoleum spray paint and my go-to colors are matte black and Satin Bronze. I make sure to be in a well-ventilated area for spraying, and I’ll give the frame multiple rounds of light coats, making sure to keep the can moving while spraying so paint doesn’t pool in any one area.

Once the frame finished drying, I can pop in the print. I usually choose to remove the glass from the frame so there’s not a glare on the print.

That’s it! How easy is that? It honestly takes less than an hour of active work start-to-finish and the cost is usually pretty comparable to piece of mass-produced artwork from a place like Target. My budget breakdown was:

Digital Download: $18 (I got a small discount!)

Mpix Printing: $0.89 for a 4×6

Thrift Store Frame: $3.99

I already had the spray paint and painters tape (they’re staples I always stay stocked up on for projects) so my total cost was around $23 for this print.

I love that this DIY allows me to fill my house with artwork that I really like in my choice of sizes, styles, and frames. While the prints aren’t originals or one-of-a-kind, they still feel personalized and unique and bring just the right touch finishing touch to whatever room I’m working on. If you’re looking for a way to elevate a space in your house, this is a great DIY to try!

Vi is TWO!

I can’t believe I’m typing these words, but my baby girl turns two years old today!

Vi is my totally fearless adventurer. She eats pretty much any new food that is placed in front of her and she is always up for trying new things. She always wants to be thrown high in the air or climb up on the big kids playground or jump around in the bounce house. I think she’s a bit of a thrill-seeker!

She absolutely loves anything to do with water. Whether it’s splashing in the bath tub or playing in the water table or participating in swimming lessons or jumping into the pond (with her floaties on!), she loves to be in and around water. She loves to run into the pond and swim and swim and swim. Her current favorite movie is Luca and I think it’s because of all the water!

She also loves animals – she is interested in everything from a dog at the park to a horse in a pasture to a bug crawling on our floor. She loves going to the zoo (a surprise zoo trip is her birthday present today!)

Vi is a mama’s girl through and through. She insists on mama putting her down for bedtimes and naptimes and she’s always reaching for me and wanting to be with mama. I’m trying to soak it up now, because I know being the preferred parent won’t last forever!

Vi wants to do anything and everything her big brother does. While they often bicker and struggle to share, they are also really great about looking out for one another and loving one another well. They color together, play together, hug one another in the morning and blow kisses good night. I love watching their sweet sibling bond develop!

Recently, she has become very into dressing up. I’ve lost track of how many times I’ve found her in my bedroom, trying on all my bracelets and necklaces. She also loves getting her nails painted and has started requesting dresses to wear during the day. For her birthday I made her a clothing rack for dress up clothing and asked our family members to contribute something to a dress up collection. It was a HUGE hit!

Her party was simple and didn’t have a theme or much in the way of decorations, but we did order some Luca-themed cookies for our water-loving girl.

My sweet V, I love you more than words can say. You changed our lives two years ago and we are so so grateful for every day with you. ā¤

DIY Clothing Rack for Kids

On Monday, I shared my inspiration for a DIY clothing rack to store dress up clothes, which I planned to make as a birthday gift for Vi. Thanks to Justin’s day off Wednesday and a little childcare help from my babysitter yesterday, I was able to finish it up just in time for her party tomorrow!

I shared all the progress in real time on Instagram, but I also wanted to write out a full tutorial for how I made this clothing rack to permanently be a resource on the blog. This was really a pretty simple DIY and I would estimate it only took about 5 hours of hands-on work time (mine took more time with stopping to take photos and video of everything). It’s definitely a project you could do in one day!

Materials

-2 8 foot pine 1×2’s

-2 8 foot pine 1×5’s (I used a base floor trim that was 7/16 x 4 1/4 x 8 for a thinner look)

-4 foot dowel rod, diameter 3/4″

-two wood screws, size 9 x 2 1/2

-1 inch nail gun nails

-sandpaper (80 grit, 220 grit, 400 grit)

–Polycrylic

–Synthetic Bristle Brush

–Tack Cloth

-I used thin scrap wood for the shelf supports, but you could also use roughly 4 feet of another pine 1×2

Tools used: miter saw, power drill, nail gun, clamps, straight edge, right angle, measuring tape, level

I started out by measuring out the space where I wanted to put the clothing rack so I could get a feel for the dimensions to use.

I used the miter saw to cut down my 1×2’s into four pieces, each 48″ long.

I laid two of the pieces on the ground and fiddled with the angle of teepee shape until it looked the way I wanted it to. Then I took a straight edge and ran it from tip to tip of the bottom outside corners.

I then took a pencil and traced along the straight edge. This marked a line that I needed to cut in order for the pieces to sit flush on the ground. Once the line was marked, I was able to use that + a right angle tool to determine the angle I wanted was 15 degrees.

I set my miter saw to make a 15 degree cut and trimmed off the edges on both the bottom and top of all four pieces, making sure the top and bottom of each piece were cut in the same direction.

Next, I took the pieces and got them back in the teepee shape I wanted and then used clamps to secure the wood to my workbench to make sure it didn’t budge. I also took my pencil and lightly traced along both edges of the piece on top, so just in case the boards did slip, I could easily line them back up again.

I marked the center of the wood overlap (for me, it was 8 inches down from the top of the wood) and used a 3/32″ drill bit to drill a small pilot hole all the way through.

I then used a wood screw (size 9 x 2 1/2) and a star bit on my power drill to attach the two pieces together.

I flipped the pieces over, re-clamped them (the line I traced came in handy for making sure they were back at the right angle!), and then measured out a scrap piece of wood for the bottom shelf. I wanted the bottom of the shelf support to be five inches off the ground, so I measured and cut a piece of scrap wood to fit. I trimmed off the edges at 15 degrees so it would run flush with the side pieces and I attached the support to the side pieces using a nail gun and 1 inch nails.

I repeated those steps until I had two identical side pieces. (Side note: I now wish I had made them mirror images of each other instead of identical. It doesn’t change anything structurally, but just aesthetically I think I would have preferred that look)

Next up was the bottom shelf. I took pine boards (7/16 x 4 1/2 x 8) and cut them down to my desired shelf length: 30 inches.

I used my nail gun and 1 inch nails to nail down each shelf into the shelf support. Four boards fit perfectly across! I wanted a little extra support in the middle since the shelf was pretty long so I got a piece of sturdy scrap wood and nailed it to the center of the bottom of the shelves.

Last up was attaching the dowel rod. Remember the wood screws I used to attach the criss-crossed part at the top? These actually went all the way through the wood and stuck out the other side. I measured from screw to screw across the top and cut the dowel rod to length (because of the way the wood overlapped, it was not the same length as the bottom shelf boards!)

I used my power drill to reverse the screw out until it was no longer visible on the inner part of the teepee, then held the dowel rod tightly up against the 1×2 and drove the screw back in. I recommend using a small level to make sure that your dowel rod is going straight across!

I then took some sandpaper (first 80 grit, then 220 grit) and sanded down any rough areas. I wiped it down with tack cloth and applied two coats of a clear matte polyurethane (giving it a light sand with 400 sandpaper in between coats).

I’m really pleased with how this turned out and I know Violet is going to love it. I can’t wait to see it full of fun dress up clothes after her party tomorrow! This little clothing rack is about to get lots and lots of fun use!

Inspiration for a Guest Room Update

When Justin and I started our bedroom renovation, the #1 thing on our lists was to upgrade our mattress to a king. My plan had then been to move our old queen mattress down to the guest room (which had just been a full size). It felt like such an easy solution to upgrade our guests as well! Except, if you’ve followed me for any length of time, you know that “one simple change” is rarely ever just one thing . . . and this time was no different. Enter: project spiral.

20200227_151337
The guest bedroom “before” with a full size mattress

The full size mattress had been sitting on an old metal frame that we thought would easily extend to fit a queen. Long story short, it did extend, but we did not have faith in the integrity of the metal bars going across at that length, so we decided to just get a new bedframe. Except all the bedframes we liked were platform beds, which would not work with our old queen mattress + box spring combo. Before we knew it, the project had spiraled to getting a brand new bedframe and memory foam queen size mattress. But wait there’s more! We realized the increased width of the mattress made everything feel too tight with the nightstands, so we needed to swap those with the smaller ones from our bedroom upstairs. And! All the queen size sheets we used in our room don’t match the bedding we have in the guest room. Oy vey.

Current Guest Room with new bed and swapped nightstands

What started out as “one simple change” has now spiraled into a much larger project. It’s kind of crazy but at the same time, I’m thinking “why not go all in?” When I wrote a “one year later” post about the guest suite renovation, I mentioned that I was itching to add some interest to the white walls with a wallpaper or something. This project has already expanded beyond our expectations, so let’s just tackle that now too, right?

Unfortunately, since this is entirely a result of a project spiral, there’s no budget for wallpaper. I just can’t justify spending several hundred dollars on wallpaper and installation (we do a lot of DIYs around here but after the playroom accent wall, installing wallpaper isn’t one of them haha). So I’m going a much more cost-effective route: stencils!

I’ve never stenciled a wall before, let alone a whole room, but I’m feeling pretty optimistic so far and I’ve been gathering lots and lots of inspiration!

This is one of the earliest images I saved when I started dreaming about adding something to the walls and it remains one of my favorite choices. I love the organic, soft flow of the olive branches and I love the varying shades of green throughout. I want to imitate the subtle differences in leaves, but I also want to infuse a little more color in my palette.

Credit: Home Depot

I love this color palette – give me all the muted shades of green and pink! – but the actual pattern itself is larger and busier than what I’m looking for. I also don’t like how all the flowers line up precisely and prefer a little bit of a looser pattern.

This one is similar to the one above and isn’t as precisely lined up. I actually really love this one and wish I could consider it for the guest room, but at $92/roll, it’s just not a realistic option for the entire guest room. I’m definitely keeping it in mind for Vi’s room down the road though!

Coffman 33' L x 20.5" W Wallpaper Roll
Credit: Wayfair

Okay, I am not a bird person, but there are still a lot of things here that speak to me. I like the white background. I like the varying colors of green in the leaves and I really love the subtle pops of color (particularly pink and yellow!) in the flowers. I’m drawing a lot of inspiration from this one!

Here are a few other photos of wallpapered rooms that I’m drawn to. While none of them show exactly what I have in my mind for the guest bedroom, they are all giving me inspiration for the feel I want to create in the space.

I purchased a few of these stencils from Hobby Lobby and I’m going to test out different color palettes (I’m thinking shades of green with small touches of muted yellows and rosy pinks). Once I finish up Vi’s birthday gift, my focus is going to shift on getting this project done and then updating the bedding to coordinate. We have guests coming on September 10 so that is my timeline for finishing – just over three weeks away!

How We Minimize Gifts at Birthdays (+ Inspiration for Vi’s Birthday Gift!)

I cannot believe I am typing these words, but in one week from today, Vi will turn TWO. YEARS. OLD. What!?

We are having a small birthday party on Saturday with family to celebrate our sweet girl. I’ve shared this before, but until our kids turn three (in my opinion, the age they start to actually understand birthdays) we keep birthday celebrations very low key. Gatherings are small and family-only, food is simple, decorations are minimal, and we get a little creative with gift-giving.

To be clear, I’m throwing zero shade at people who like to go big on baby/toddler birthdays or shower their young children with gifts. Truly, you do you; we’re not judging anyone else’s choices. For me personally, planning an elaborate party feels like a lot of work and stress for low reward (my one year old is as happy with a single balloon as an entire balloon arch). And when it comes to gifts, which are generally toys, Justin and I just personally want to keep things at a level that is manageable for our family. Our house feels better when it’s not overrun with toys, our kids play with toys longer when they aren’t overwhelmed with choices, and at ages one and two, our kids don’t realize what they’re “missing out” on by not receiving toys anyways. Cards are always appreciated though and our kids love receiving them!

Today I thought I’d share what we do for their first and second birthdays (at age three, we ramp things up a bit – LJ had balloons and gifts and understood enough to be so excited to celebrate!) I’m also sharing our plans for Vi’s birthday gift this year, which also just happens to be my next DIY project.

First Birthdays: No gifts, but donations are appreciated!

A straight-up “no gifts” request can be awkward. Some people feel bad showing up with no gift, so they bring a little something anyways; unfortunately, this can then make those who listened to the request and didn’t bring a gift then feel bad because others brought gifts and they didn’t. It’s uncomfortable for everyone and can be frustrating for the hosts who truly didn’t want gifts. We have found that a solution that works for everyone is donations. No one feels uncomfortable arriving empty-handed, but no gifts are given and a great cause is supported. Win win win!

For their first birthdays, we asked that in lieu of gifts, anyone who wanted to could bring donations for a cause that was special to us. We are so thankful that our families were super supportive and happy to donate instead of buying gifts. For LJ’s first birthday, we collected books for a local organization that distributes them to hospitalized children and for Vi’s first birthday, we collected household items (paper towels, cleaning supplies, basic hygiene items, etc) for our church’s ministry supporting local families in need.

20200809_164139

I especially like this because it works for many budgets. People could bring one small, inexpensive item or multiple items. We didn’t unwrap them, there wasn’t a big production – just a table set aside for people to put donations on when they arrived.

I think it helps people to honor your requests if they can hear your reasonings for it and understand the impact they can have with their donation, so we send an email with the party details ahead of time. I usually say something like “While we are requesting no gifts for [child], if you would still like to bring something, we ask that you consider bringing a donation to xyz. This organization is important to us because of ____ and we’re looking forward to making a donation in [child]’s honor.”

Second Birthdays: One “big” gift + family participation

For LJ’s second birthday, we decided to give him one big gift – a secondhand train table – and we asked everyone in our family to decorate a train to go with it. This was actually a really fun way to get our families involved without getting a ton of gifts, and we loved seeing everyone’s decorated train. We have some super creative family members and it’s a truly unique train set that is so special! LJ loves it and has gotten SO much use out of it – much more than he would’ve gotten out of 15 individual toys.

20191126_084955

Which brings me to Vi’s birthday! We wanted to find a big gift that family could contribute items to in a way that fit her unique needs and interests. I came up with the idea to gift her with a small clothing rack (she is currently obsessed with trying on all my jewelry and shoes!) and ask family members to consider contributing something to a dress up collection.

As I said in my email to the family: “This can be a costume, play shoes, accessories, whatever! It can be new, it can be hand-me-down, it can be found secondhand, it can be an outfit, it can be a small item like a necklace or hat or something.” I didn’t want anyone to feel an obligation to spend lots of money or find something fancy because she will honestly love anything.

Trying on mama’s bracelets after church

My plan is to DIY the clothing rack so it fits the dimensions in our playroom perfectly. I don’t have much time (the party is in five days!) but it’s okay because I’m imagining a relatively simple design. I just want it to include a rod for hanging clothes and at least one shelf for storing a bin or two for shoes and accessories.

Here’s some of the inspiration I’ve gathered so far:

Credit: Target

Let Operation DIY Birthday Gift project begin!

A Modern Look for an Ikea Hemnes Dresser

Our bedroom dresser is finally finished! And can you believe it’s Ikea!?

It took me a long time to find a style of dresser that felt right for the room, and then I came across this one and fell in love . . . with everything except the price tag.

I decided to try to recreate this look using a much less expensive Ikea Hemnes dresser. Last week I shared how I sanded off the old gray stain and re-stained it in black (read all about that process here). Although the Hemnes does come in a brown-black stain, my Ikea didn’t have it in stock. This ended up being a blessing because it would’ve been too hard to try to fill the drawer pull holes and stain those as an exact match to the original black stain so my only choice would have been paint (and I am so glad I still have a stained wood look!)

I searched and searched for leather pulls to attach to the top of the drawer fronts and stumbled upon these beauties on Etsy. I chose brass nails and cognac leather.

When the pulls arrived, I realized that there wasn’t quite enough space for them to sit on top of the drawer front without catching the dresser frame so I asked Justin if he could cut small notches at the top of each drawer front to create space. This ended up being a slow, laborious process and we’ve spent our evenings working on through it. We set up shop in our basement, turned on the TV, and tackled each drawer pull one by one.

First, I measured exactly where I wanted each drawer pull to be (it ended up being just shy of 5 5/8″ from the end of each drawer front). Once I had the pull in place, I marked it on each side with a pencil.

Then Justin clamped down a straight edge to create a guide marking the bottom depth of where he wanted the notch to be. He took a hand saw and sawed over the lines I had marked until his saw hit the depth of the straight edge.

He then took a chisel and started chipping away in between the two saw lines.

By far, the chiseling took the longest! He had to try to be as precise as possible so that he wouldn’t chip away too much that the drawer pull wouldn’t cover it.

Once the notches were finished, I took over the rest of the process.

The notches often had the tiniest of chips on the edges, but I took a black permanent marker and colored them in and they became invisible! This would have actually been easier with a fine-tip marker, but I worked with what I had.

Once the edges were colored in, I set the drawer pull inside and hammered it in using the brass nails that came with the pulls.

Repeat twelve times and you have yourself a fully functional dresser! I am really happy with how these drawer pulls turned out. It looks like they were always meant to be inset like that!

I knew I loved it before, but once everything was in place in our bedroom, I couldn’t even contain my excitement. It is PERFECT for the space and I love that we spent the extra time and effort to really make it shine.

I still plan to create a large gallery wall above the dresser and I’ve been slowly gathering things to include – I think that will be the perfect finishing touch to this part of our bedroom!

Dresser Budget Breakdown

Ikea Hemnes Dresser: $298.53

Black Stain: $13.32

Polyurethane: $17.09

Synthetic Bristle Brush: $7.60

Leather Drawer Pulls: $101.61

Total Cost: $438.15 – much much better than my inspiration dresser’s $1800!!

Top 12 Tools for DIY Projects

Just over a year ago, I wrote a blog post about the Top 10 Staples I always have on hand for DIY Projects (check out that post here). Looking back over that list, those ten items are still the ones I always keep in stock at our house so I’m ready to jump into a project whenever I want. Today I thought it would be fun to have a follow-up post that focused on the specific tools that we have that we use the most for our projects. Yes, we have more specialized equipment in our workshop, but the twelve items I’m going to share are what we use to complete 95% of our projects. Some are big, some are small, some are investment pieces, some are inexpensive, but these twelve things are the top items that we find ourselves reaching for again and again to successfully accomplish DIY projects at home. And I promise you, even if some of these tools feel intimidating, you can learn to use them!

A small disclaimer before we start: I believe everybody should have a quality hammer and two screwdrivers: one Phillips head (the tip looks like an x) and one flathead (the tip is, well, flat!) These three tools are the most basic items that I think should absolutely be in your home/garage/toolbox and aren’t included on my list, but if you don’t have them already, definitely start there!

Compound Miter Saw

By far, this is our #1 workhorse. A good miter saw is an investment for sure, but it is completely worth it. We use ours for nearly every single DIY project we do! Our miter saw has helped us build everything from small shelves to play kitchens from scratch, update window trim and baseboards, shiplap our office, create a geometric accent wall, even built our basement dining table! It doesn’t have a huge footprint and is easy to set up on sawhorses in a garage, yard, or directly in your workspace. We highly recommend it!

Orbital Sander

We have both a cordless and a corded orbital sander and they each have their pros and cons (battery means more flexibility, but might die midway through on a large project while a cord can be limiting for location, but it lasts as long as you need it to). Regardless of which one is your preference, I highly recommend a sander. We use ours from everything to sanding off old stain to smoothing edges and surfaces on a finished DIY. Having a variety of sandpaper grits available (Justin usually stay stocked with at least 80, 120, 220, and 400) allows you to be ready for any project.

Quality Tape Measure

This one seems so simple, but there really is a difference between a solid, quality tape measure and a cheap and flimsy one. It is definitely worth spending a couple dollars more on a high quality one (or three!) that will give you accurate measurements and last a long time.

Level

We actually have three levels: nine inch, 24 inch, and 48 inch and choose whatever size we need based on the size of the project. From the most basic of DIYs, like hanging a picture frame or shelf on the wall, to more advanced projects like building a play kitchen or custom built-ins from scratch, a level is super helpful for ensuring precision. In the picture below, Justin is using a level to make sure the window trim is perfectly vertical while he attaches it with . . .

Nail Gun

I will admit, a nail gun seemed like an intimidating tool at first but now I actually love using it! It makes installing projects like window trim and shiplap so much quicker and easier, and I just think it personally feels empowering to use. Anytime we are installing trim or baseboards or are building anything with wood, we’re pulling out our nail gun. Ours attaches to an air compressor but there are battery-operated options available too. We keep 1 inch, 1.5 inch, and 2 inch nails on hand so we’re ready for different depths based on the scope of the project.

Stud Finder

Another small but mighty item, a stud finder is incredibly helpful in the install stage of DIY. If you’re nailing, screwing, or installing an anchor in a wall, you want to know if you will hit a stud or not ahead of time. While you can gently knock across the wall to listen for a difference in hollowness, a stud finder is a more precise way of finding exactly where the stud is. We use ours for everything from hanging a picture to putting up trim – any time we’re attaching something to a wall.

Circular Saw

In the picture above, Justin has created a guide using scrap wood and clamps and is cutting a large piece of plywood using a circular saw. We do have a table saw as well, but we’ve found that we often use a circular saw in place of a table saw for various projects (plus it’s much cheaper and more versatile!) Justin uses this saw whenever we need to cut down a larger piece of wood, like an extra wide plank that is too big for a miter saw to handle or a sheet of plywood.

Power Drill

When I shared the Top 10 Staples I use over and over, an electric screwdriver was one of them. I use ours all the time for small projects around the house and while it is incredibly versatile and handy, a power drill just brings a lot more power (obviously) to a project. It’s great for drilling holes and installing screws quickly and easily. We also feel like it works really well when we’re using larger screws or heavier-duty materials.

Kreg Jig

15413

With our power drill, a kreg jig has come in handy for many projects where we need to screw pieces together securely, particularly when two pieces are coming together at a right angle. We’ve especially used it for projects like shelving, whether it’s a small shelf for books or our large built-in, and attaching table legs.

Clamps

We use clamps over and over (and over) again. Justin frequently uses them to keep wood in place when he needs to make a precise cut, and whenever we use wood glue to attach two pieces together, we use a clamp to keep them tightly bound while the glue dries. I recommend several clamps of different sizes so you’re able to easily clamp in place whatever you need to!

Sawhorses

20200609_162801

We have two sets of sawhorses and they get a ton of use during projects. They do everything from holding Justin’s miter saw on projects outside of our home to providing a level surface for a long piece of wood being cut to holding my trim pieces in place while I paint them. Ours are light and collapsible and very easy to cart around the house depending on where our project is.

Right Angle

This image has an empty alt attribute; its file name is 20201003_140006.jpg

When I asked Justin what tool he thought should round out the list, he was quick to say a right angle. He has four different sizes of right angles and finds himself reaching for them again and again. It’s always helpful to know when you’re bringing together two pieces squarely, or to test whether the corner of a wall comes together square (spoiler alert: walls rarely do haha!) He is very precision minded and this tool is incredibly helpful in making sure each project is precise and corners are accurate.

And that’s our list! If for some reason something would happen to our workshop and we needed to start over from scratch, these are the twelve items we would start out again with. These are the tools we have to thank for most of the transformations we’ve been able to make in our house and they’re the ones we know we’ll be reaching for again and again in the future. In fact, as I think about the next big project I’m considering tackling, I already know I’ll be using almost this entire list of tools. Time to start planning!

My Go-To Places for Finding Artwork

Big news around here today – the hardware for the dresser arrived early! Once it’s installed I’ll share it on the blog, but in the meantime you can see the hardware I chose, as well as a little problem I’m encountering with it, on my Instagram stories today. Since the dresser is so close to being finished, I’m ready to shift my focus to planning the wall around it. We already have a full length mirror in the room and we never used the mirror over our last dresser, so instead of a mirror I’m going to pull together a gallery wall above the dresser.

A portion of our playroom gallery wall blends family photos with original artwork (peach & pineapple) from JBeck Studio

When it comes to buying artwork for our home, I refrain from buying everything at places like Target, TJ Maxx, and Hobby Lobby. There’s nothing wrong with art from those stores (and I definitely have some pieces from them!) but it’s mass-produced and can feel like everyone has the same things. I prefer to create a more collected look by mixing in framed family photos with artwork that feels a little more unique and personal to me. I’m going to spend the next few days gathering all the prints and images I want to use for our bedroom, so today I thought it’d be fun to round up my go-to places for finding artwork for our home.

Butterfly print from BFF Print Shop paired with an original piece bought from a street artist in Florence, Italy

Juniper Print Shop

Juniper Print Shop’s Dab paired with a postcard I received from a friend

Whenever I need a print for my house, this is the first place I typically look. I love their curated collection of unique prints and it is really easy to mix and match them throughout the house. You can purchase a physical print and they’ll print it on high quality paper and ship it or you can purchase the digital download and have it printed yourself. I’ve always purchased the digital download and have never been disappointed! Their resolution is fantastic and many of the prints look like they have texture even though they do not. I’ve been eyeing this cute one for years now and I think the bedroom gallery wall will be the perfect place for it! I’ll mostly likely also incorporate a landscape print, like maybe this one or this one.

BFF Print Shop

I downloaded and printed this vintage Cracked Flower from BFF Print Shop

I think I’ve purchased four prints (again via digital download) from this store so far and I’ve been really happy with them all. The collection is huge so it’s a little harder to sift through and find just what you’re looking for, but the positive side is there are a lot of options so you’re more likely to find something that fits your vision. Their vintage collection is especially good and I love pairing a good vintage print with a thrift store frame for an elevated look at a low price. I also like their nature prints and modern line drawings for creating more eclectic pairings. I like the idea of finding some travel photography this time around to add to the bedroom gallery wall – maybe something like this or this?

Etsy

Modern, Bright Entryway Makeover

Etsy is a bit of a mixed bag and there are soooooo many options to sift through, but it’s always rewarding when I can find the right thing! The landscape above is one of my favorite prints in our home and I’ve had guests over who can’t believe it’s a print. I also got the prints in LJ’s room from Etsy, so I’ve had some success there, but it does help to search for something specific. As the gallery wall comes together, if there’s a certain type of piece I feel like I need, Etsy will be a great option to search!

JBeck Studio

20200214_064518

I have several pieces from Jenni (who just so happens to be my very talented sister) and they bring such a unique touch to whatever space they’re in! I also love supporting small businesses and having original art in my home, so this feels like a triple win.

Turn Mementos into Art

Art is so subjective and it should be meaningful to you, so don’t be afraid to think outside the box – it’s the easiest way to make your house feel uniquely yours! I have framed postcards from travels, recipes written by our grandmothers, handwritten lyrics of a hymn found tucked away in a family bible, and even an old wallpaper label found buried beneath layers of plaster in my grandparents’ farmhouse. I’ve framed a graphic print of the map of city that’s important to us. I’ve picked up original art from both a street vendor in Italy and my local farmers’ market. One year at the Christmas party for Justin’s work, they hired someone to do caricatures and ours is now framed in a gallery wall. Things like this always give such fun, unique touch to any wall so I’m constantly on the lookout for interesting finds to add to a wall.

Since this gallery wall will be in our bedroom, I’m going to add a few personal touches from our relationship. Several years ago I had a lettering artist create artwork out of our vows and that is already in our bedroom, but I think I’m also going to dig through a box I keep of other mementos and maybe frame a handwritten card or ticket stub or other small item that signifies something special about our marriage.

I’m so excited to dive in to this project and curate a gallery wall that feels just right for our bedroom!

Friday Features {08.06.21}

Happy Friday! I’m currently hanging out with Justin and two of our close friends at a lake house for the weekend and we’re loving some unplugged time reconnecting. I thought it’d be fun to just share another round of “Friday Features” – just some imperfect pictures of little moments that have been making up our life lately.

LJ’s Glasses

The big news around here lately has been LJ’s new glasses! Honestly, I wasn’t sure what to expect with convincing a three year old to wear glasses all day, and while we’ve had our challenging moments, overall it’s gone really well. I think he recognizes that they do help his vision so he’s overall pretty cooperative. I might be biased, but I think he’s also pretty dang cute in them!

New Chair for our Bedroom

I’ve talked before about how our primary bedroom is an awkward shape and too large, which has created some challenges with layout. There was one corner that was really giving me a run for my money, and after a friend suggested putting a reading chair there I started looking around to see if I could find the right fit. When I saw this rust-covered beauty in a local small business’s front window, everything snapped into place immediately in my mind! I still want to finish off the corner with a plug-in sconce of some kind and a little side table and throw blanket, but I’m already so much happier just having the chair there!

Lazy Pond Days

We have spent so much time swimming in our pond lately. The weather has been gorgeous and my kids are both obsessed with swimming. There was even a day where Justin offered to take them outside and swim so I could get work done . . . but then I decided work could wait because it looked too fun by the pond and I had to join. It’s so fun to watch my kids enjoy this childhood! I’m also glad that they’re both at the point where they’re happily content playing in the shallow end so I can occasionally just enjoy the warm sunshine and watch from the deck. Everyone wins šŸ™‚

Inclusive Playgrounds

On our road trip home from visiting family in Virginia, we stopped to play at a playground and I was thrilled to see communication boards installed around the edges! I taught special education for six years and simple additions like this make such a huge difference for children with communication needs – I’d love to see these pop up in playgrounds everywhere!

Our New Favorite Chicken Nuggets

Okay, I’ve posted some very random things here before but this might top the list of most random ever. I don’t even care though because these chicken nuggets are JUST THAT GOOD! We buy them at Costco and they taste just like Chik-fil-a; we also bought Chik-fil-a sauce to go with them and it was game over. They are a new family favorite and I’m now even more excited for chicken nugget dinners than my kids are.

That’s a little glimpse of life around here lately. Glasses, chairs, lots of outdoor time, and some chicken nuggets haha. I hope you have a great weekend!