Phase One Renovations & How They Help me Love my Home NOW

With the exception of our living room, main floor half bathroom and a basement utility room, I have now updated, in one way or another, every space in our house.

The thing is, the house is still far from being done.

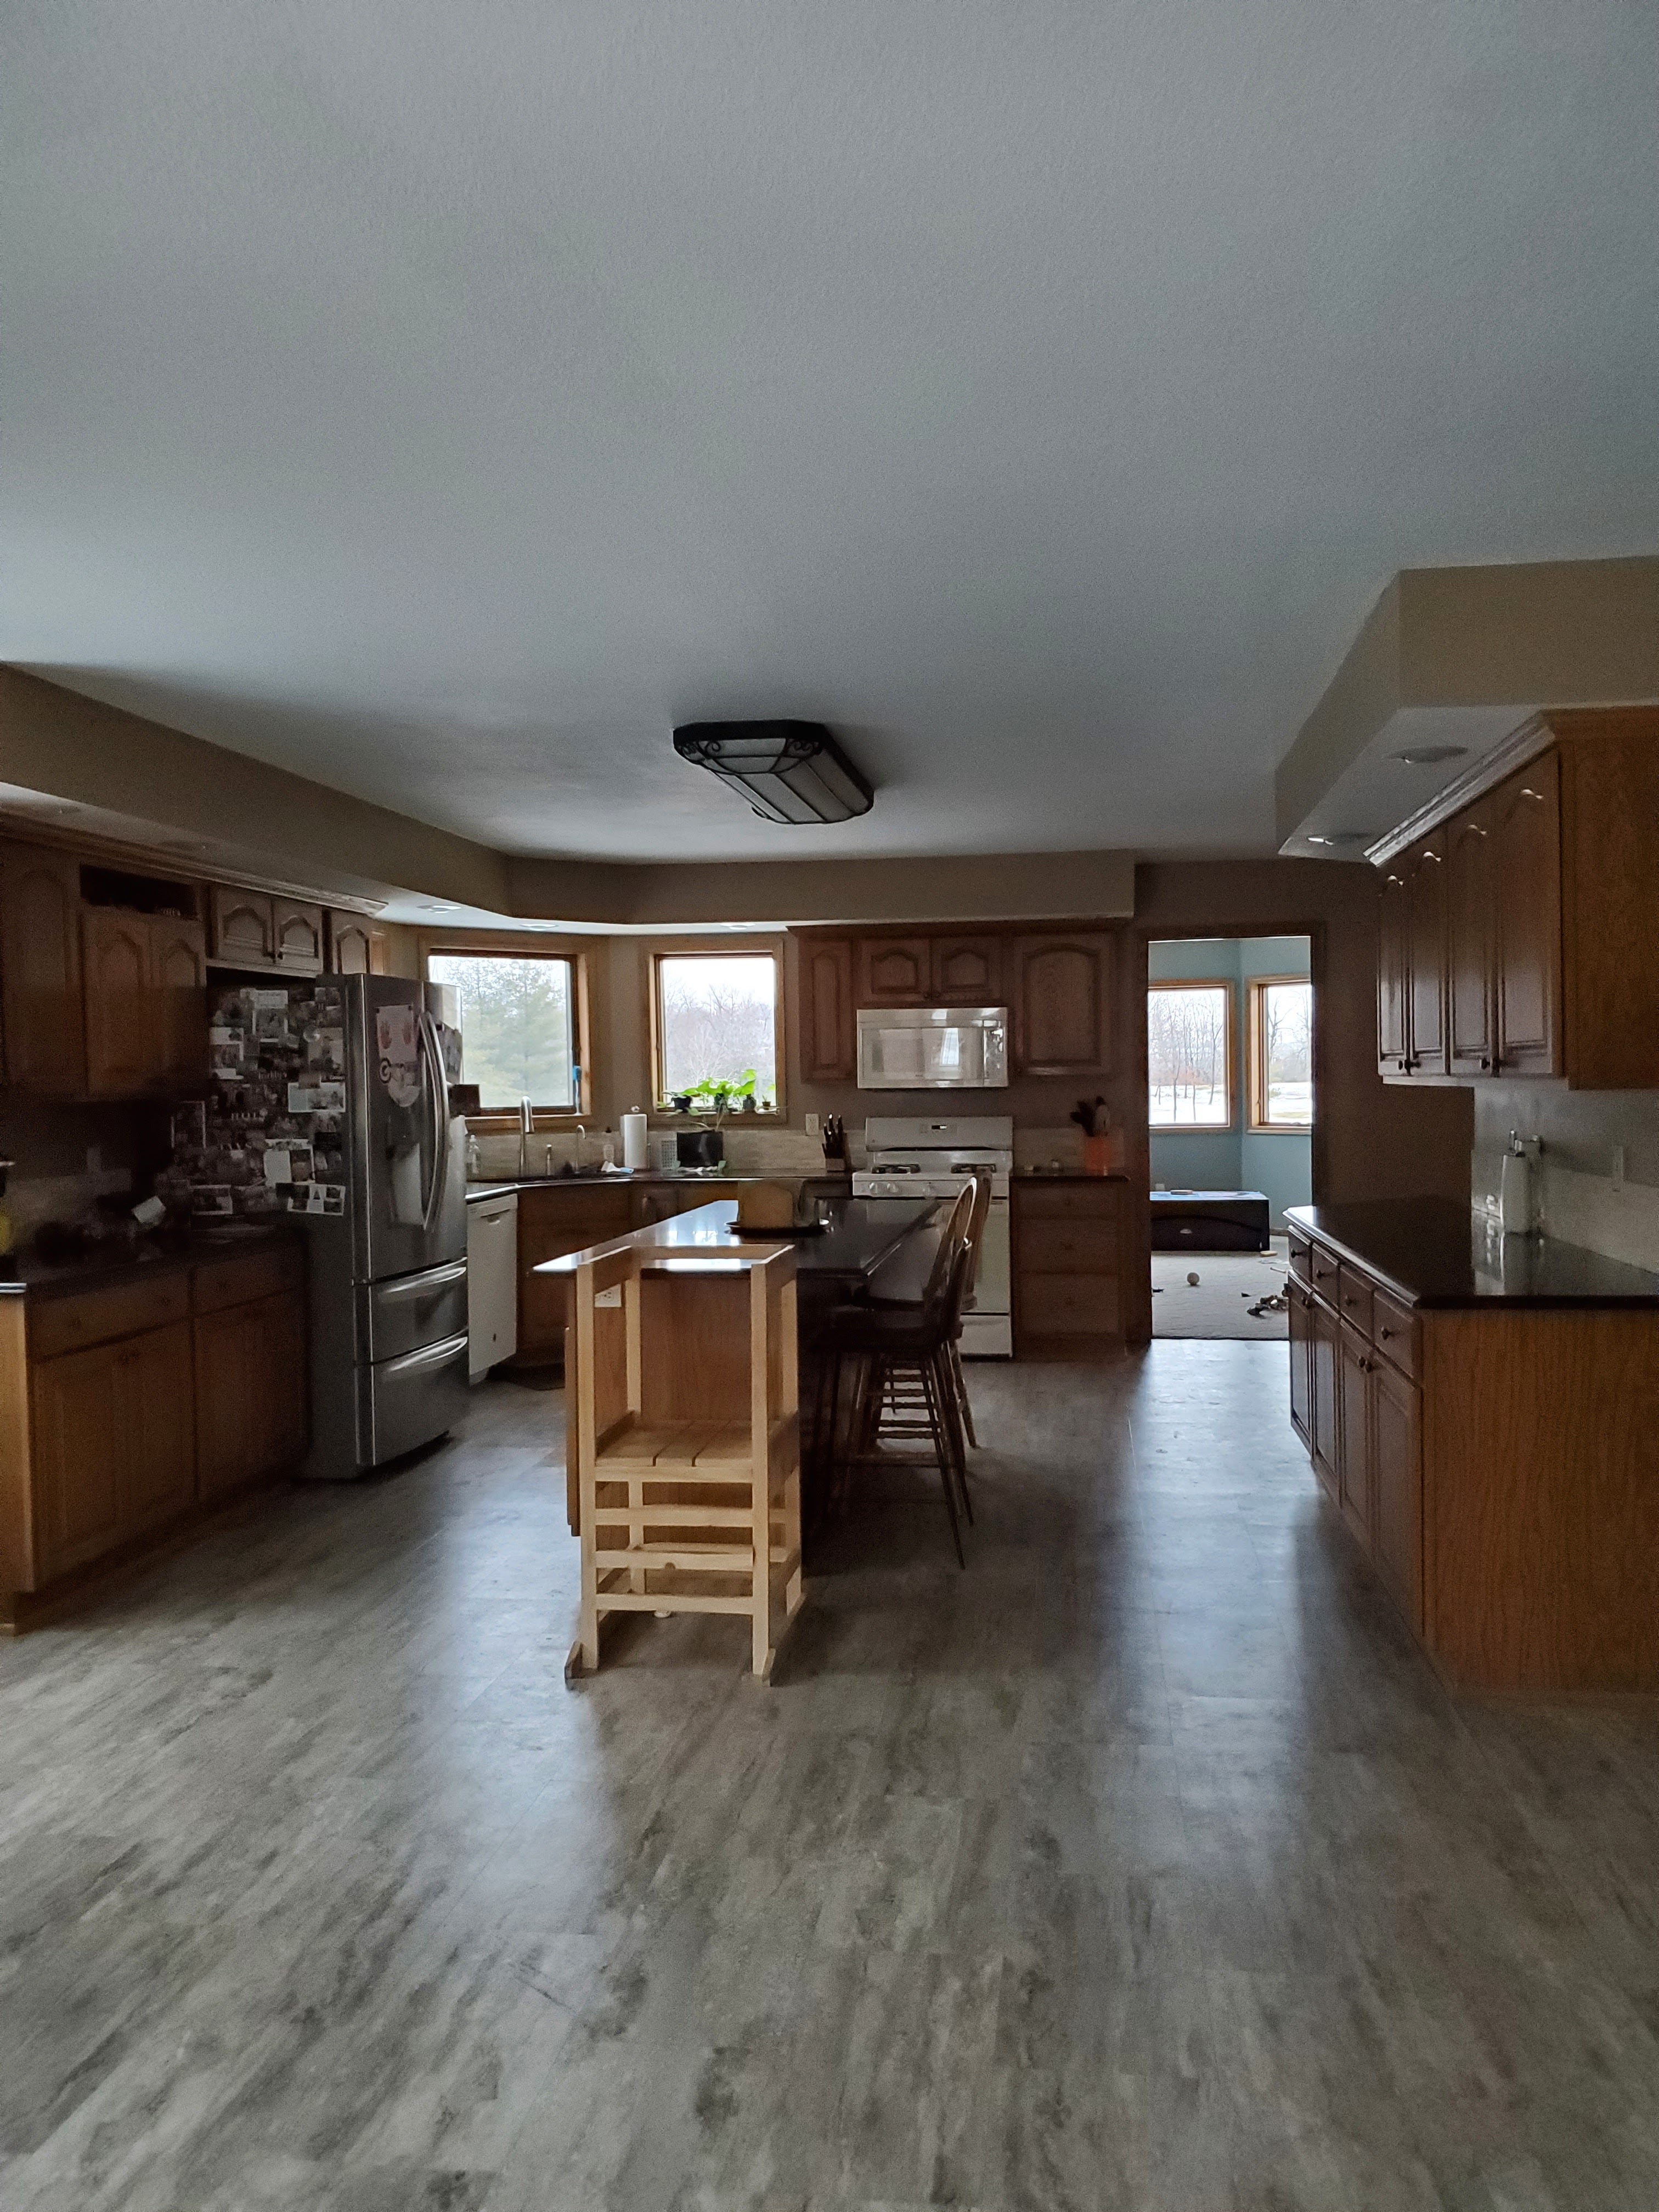
Don’t get me wrong, I love my house and the updates that we’ve made. Each project, each gallon of paint, each change big or small, has made this house feel more and more like a home that truly reflects us. That being said, nearly all of the updates I’ve done so far in this house are “phase one” renovations. In other words, they were just the first step towards updating a space. When we first moved into the house, every room was painted brown. There were a ton of orangey-brown wood finishes and boob lights. The bones were great and I loved the layout and the possibilities for our family, but it didn’t yet feel like us. It actually felt like I was living in someone else’s home for a while and that was an uncomfortable feeling.

We poured a lot of money into the first big transformation (the guest bathroom + bedroom) and while we love how it turned out, we realized just how expensive a full gut renovation of a space was. We knew we had big plans for this house, but we were going to have to go slow with the major renovations and save up + budget for them over many years.

In the meantime, I didn’t want to live for years in a house that didn’t feel like me, so I rolled up my sleeves and started with some smaller phase one renovations. One of the first spaces I did this for was Justin and my bathroom. Our bathroom had dark brown walls and carpet when we moved in. Not me at all! We ripped out the carpet and put down an inexpensive peel and stick tile. I painted the walls and vanities, updated the hardware, swapped out the faucets, and gave everything a fresh layer of caulk. The room is honestly still far from where I’d like it to be, but it was worth doing these minor updates to bring it to a place that felt fresh and reflects us more right now.

Phase 1 Bath 2

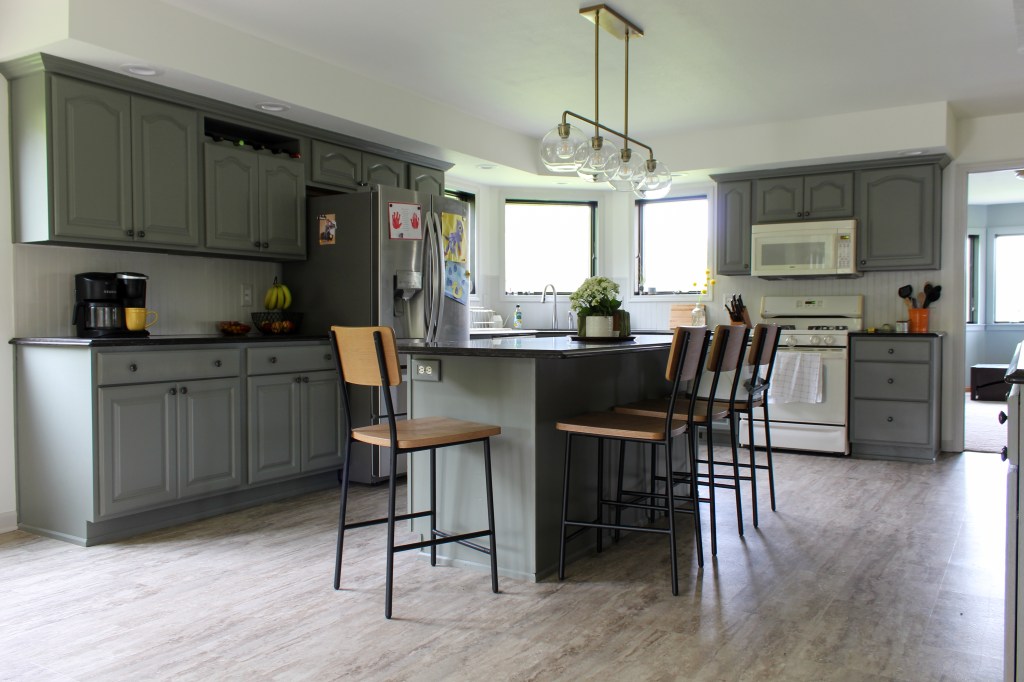
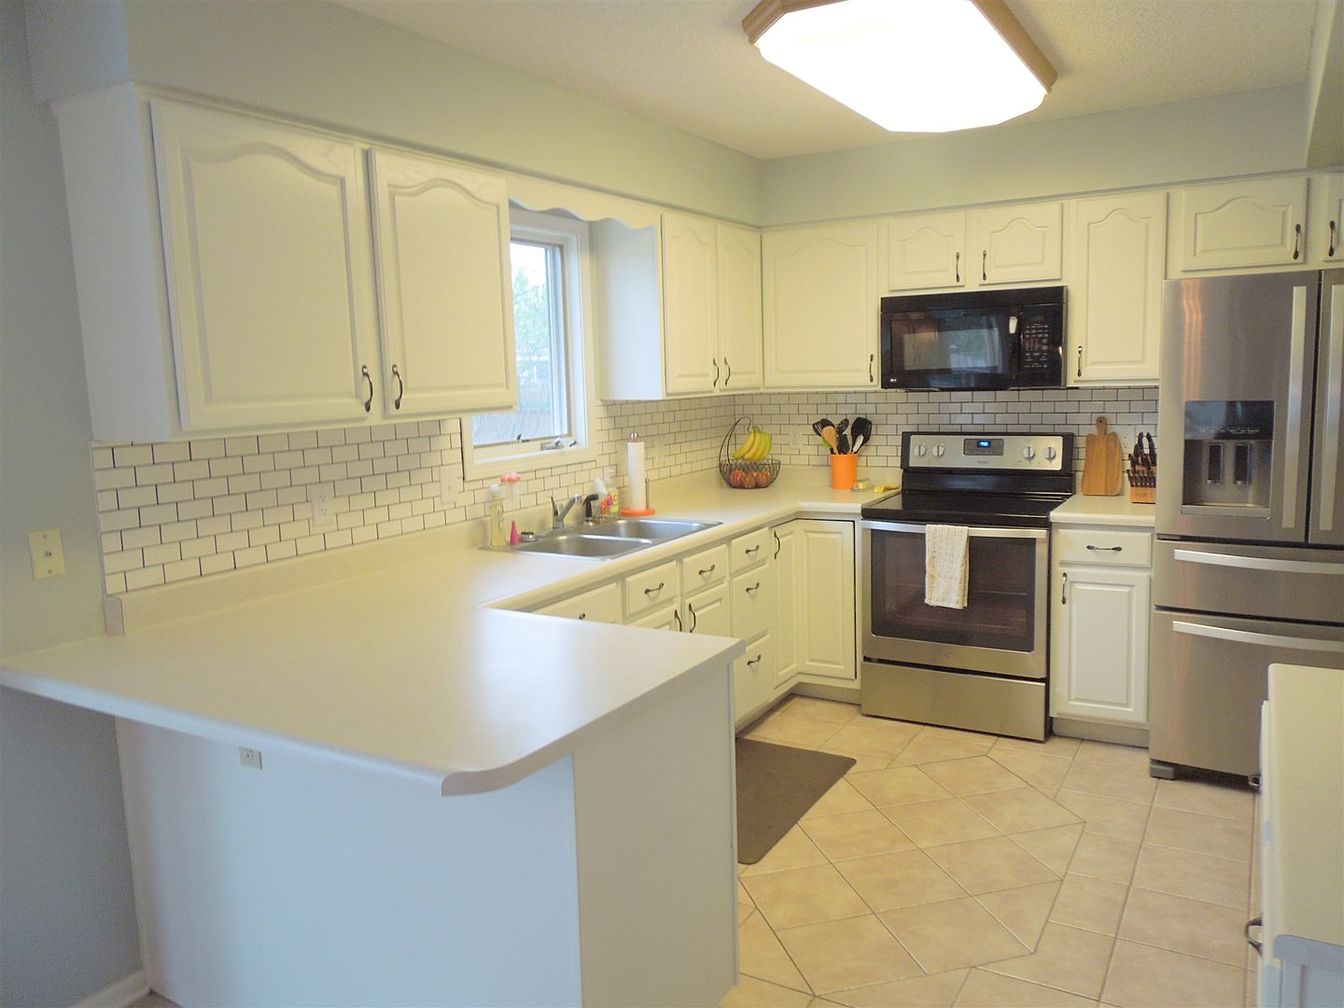
Same thing with our kitchen. Someday, I plan to fully gut and renovate the whole space. But since that is likely at least 10 years down the road, a phase one renovation (painted walls and cabinets, updated backsplash, new light fixtures, matching seating) was the perfect solution. I now enjoy being in my kitchen! There are things I want to change and we will still remodel someday, but I’m so much happier in the meantime.

I could go on. The kids’ bathroom is a phase one until we have the money to update the vanity, flooring, etc.

20200726_152316

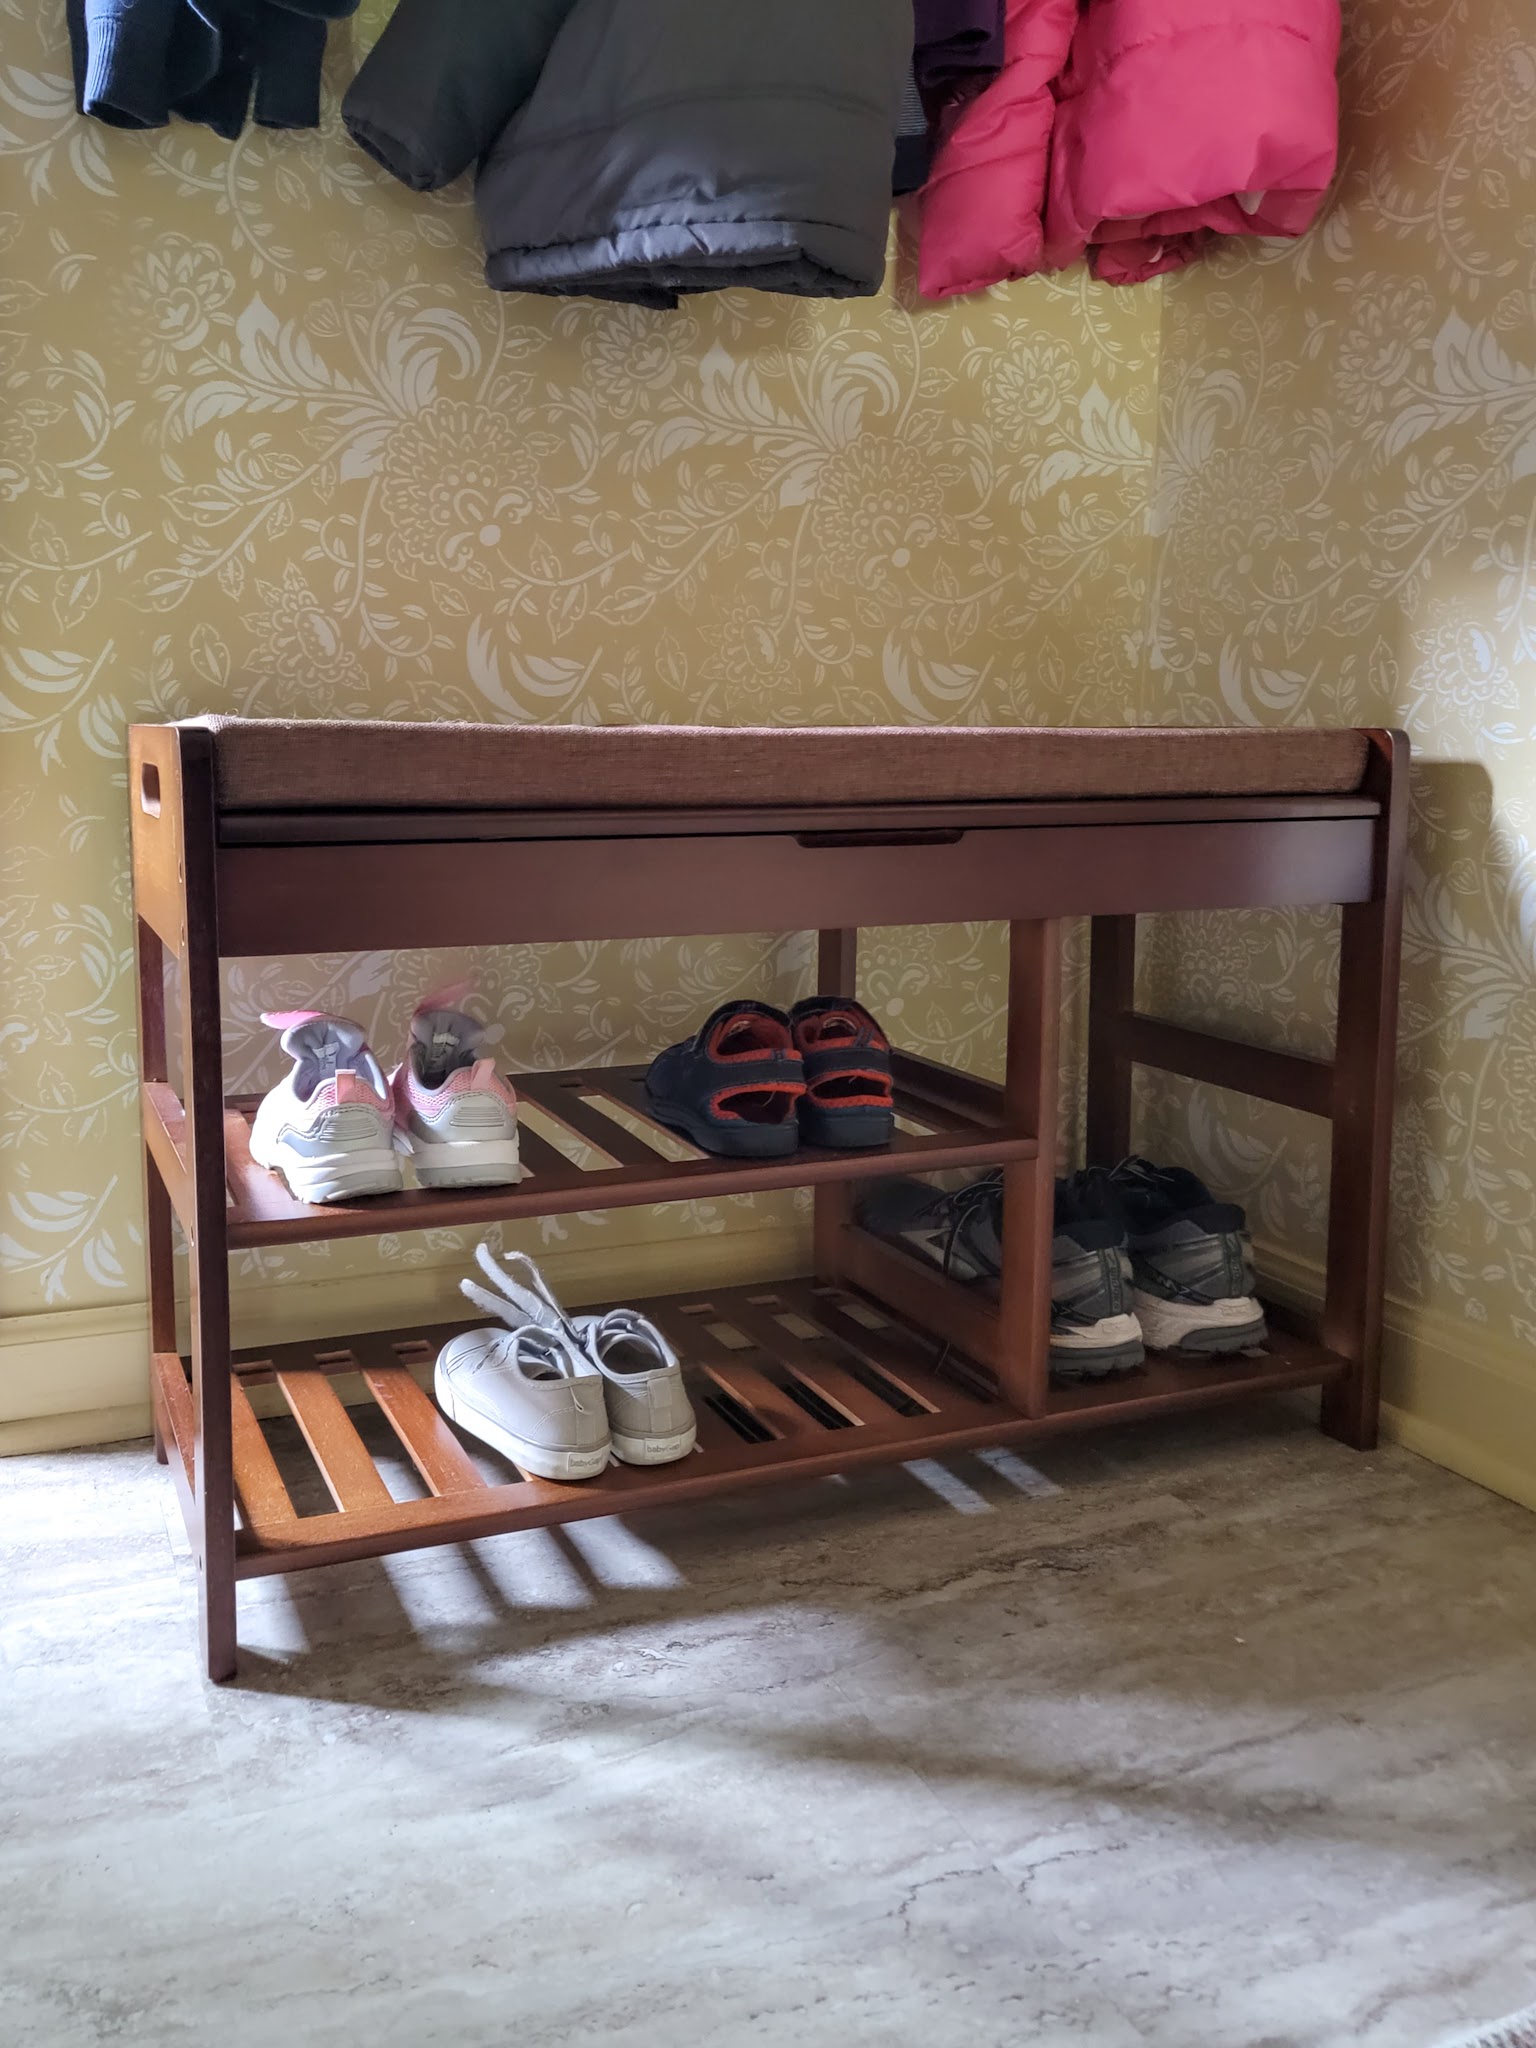
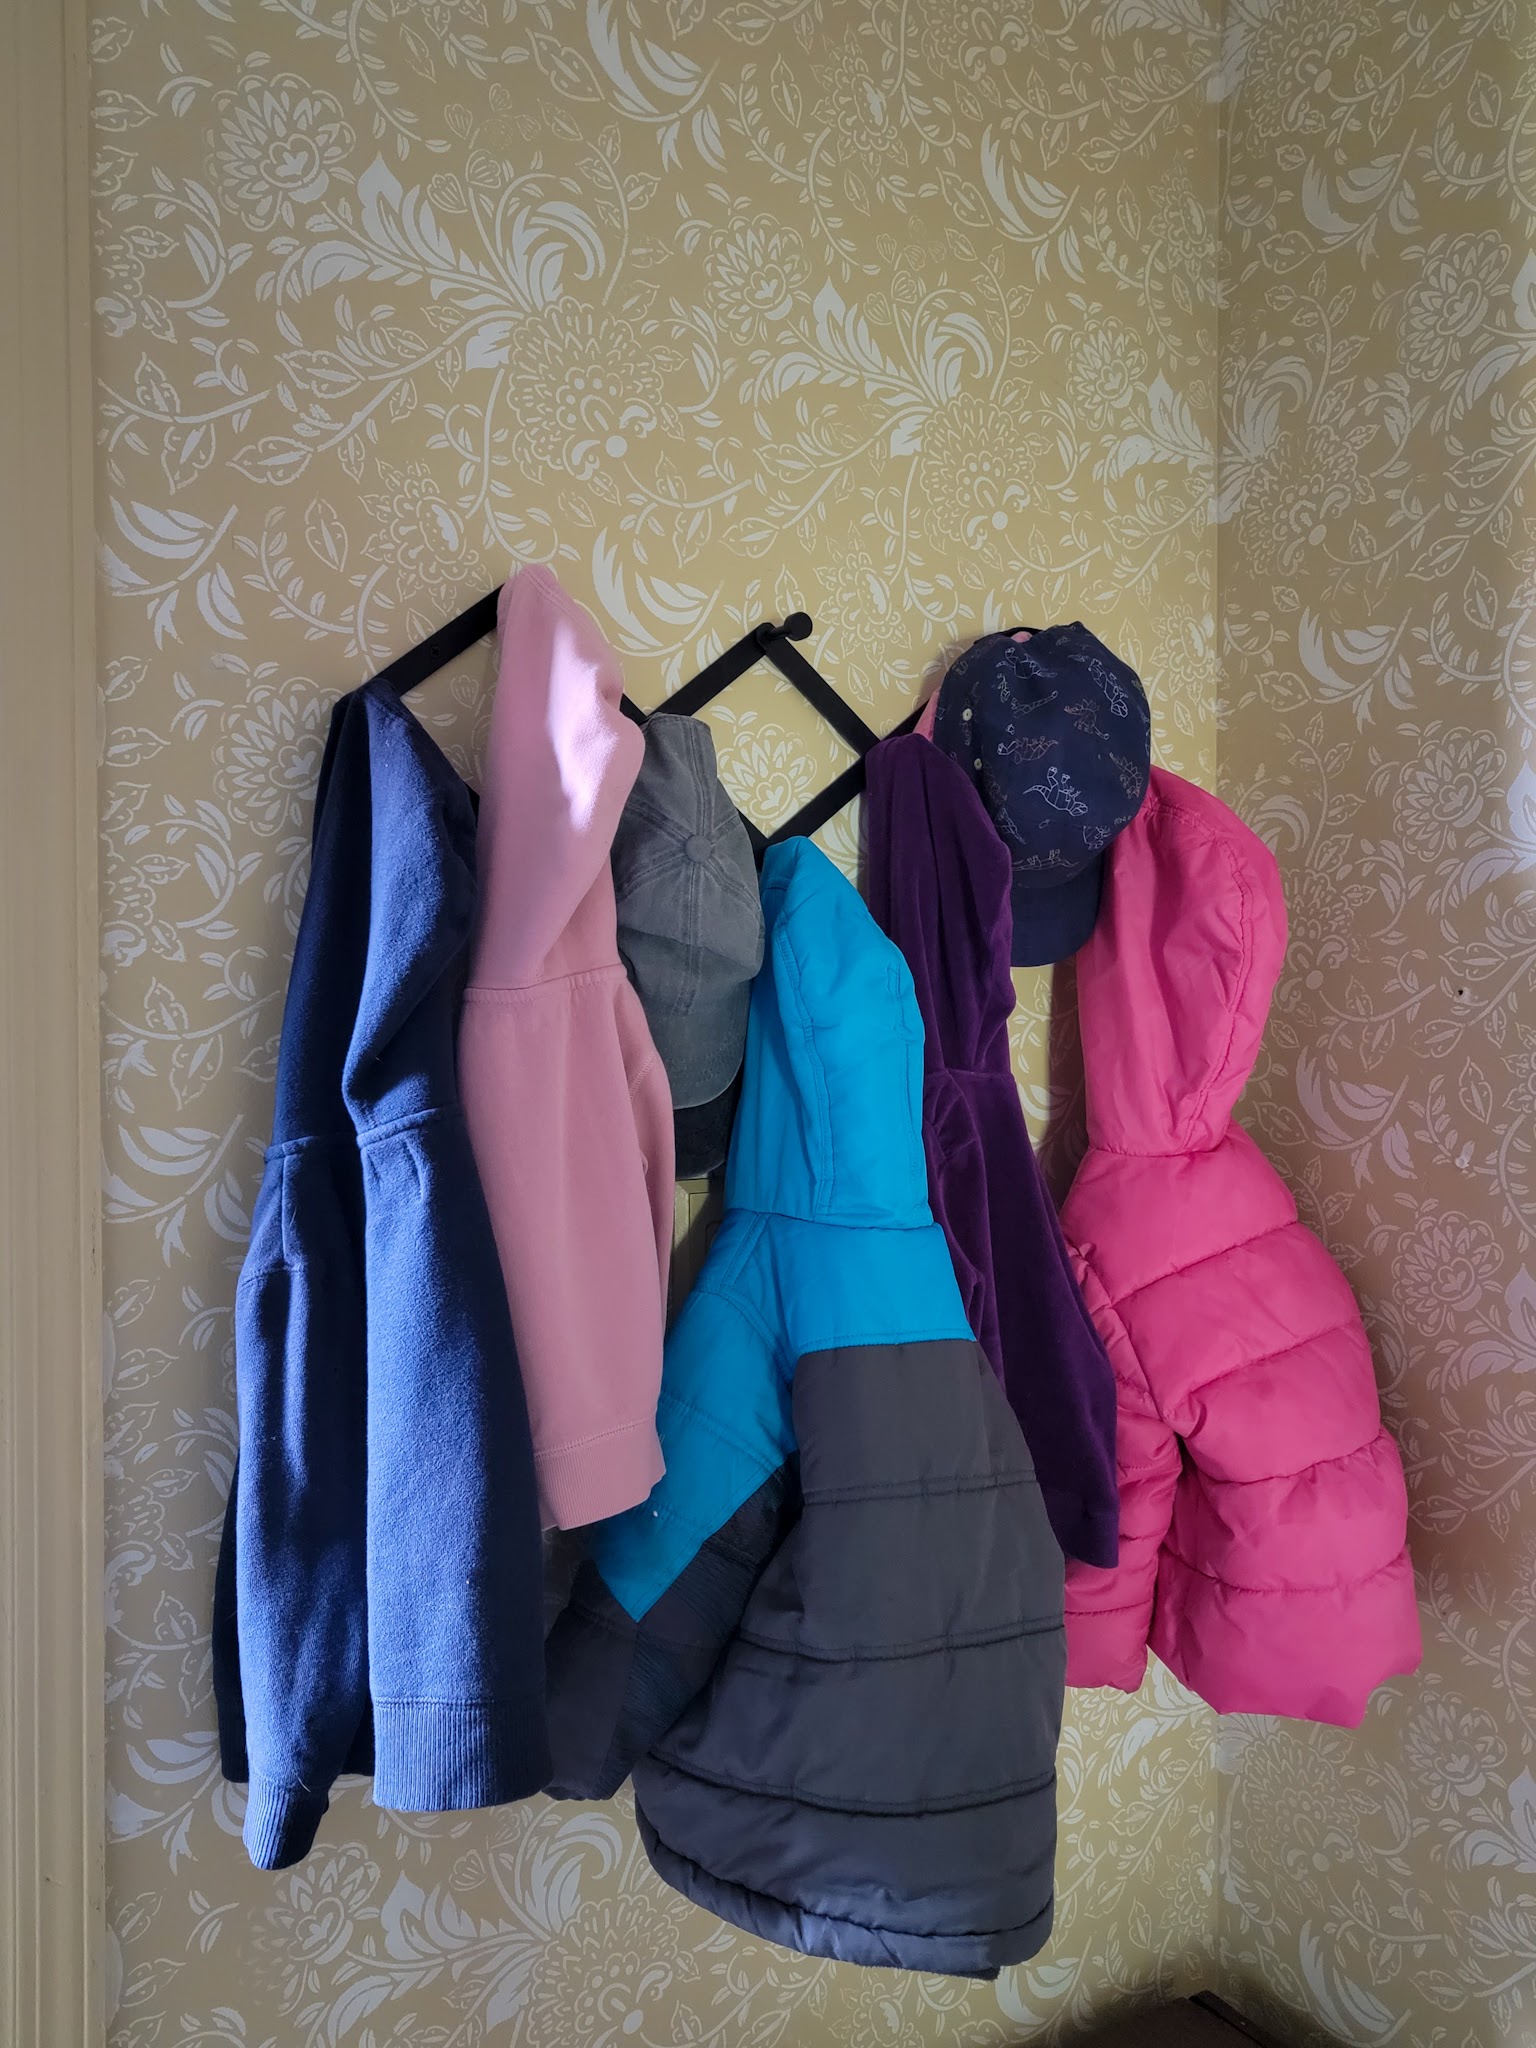
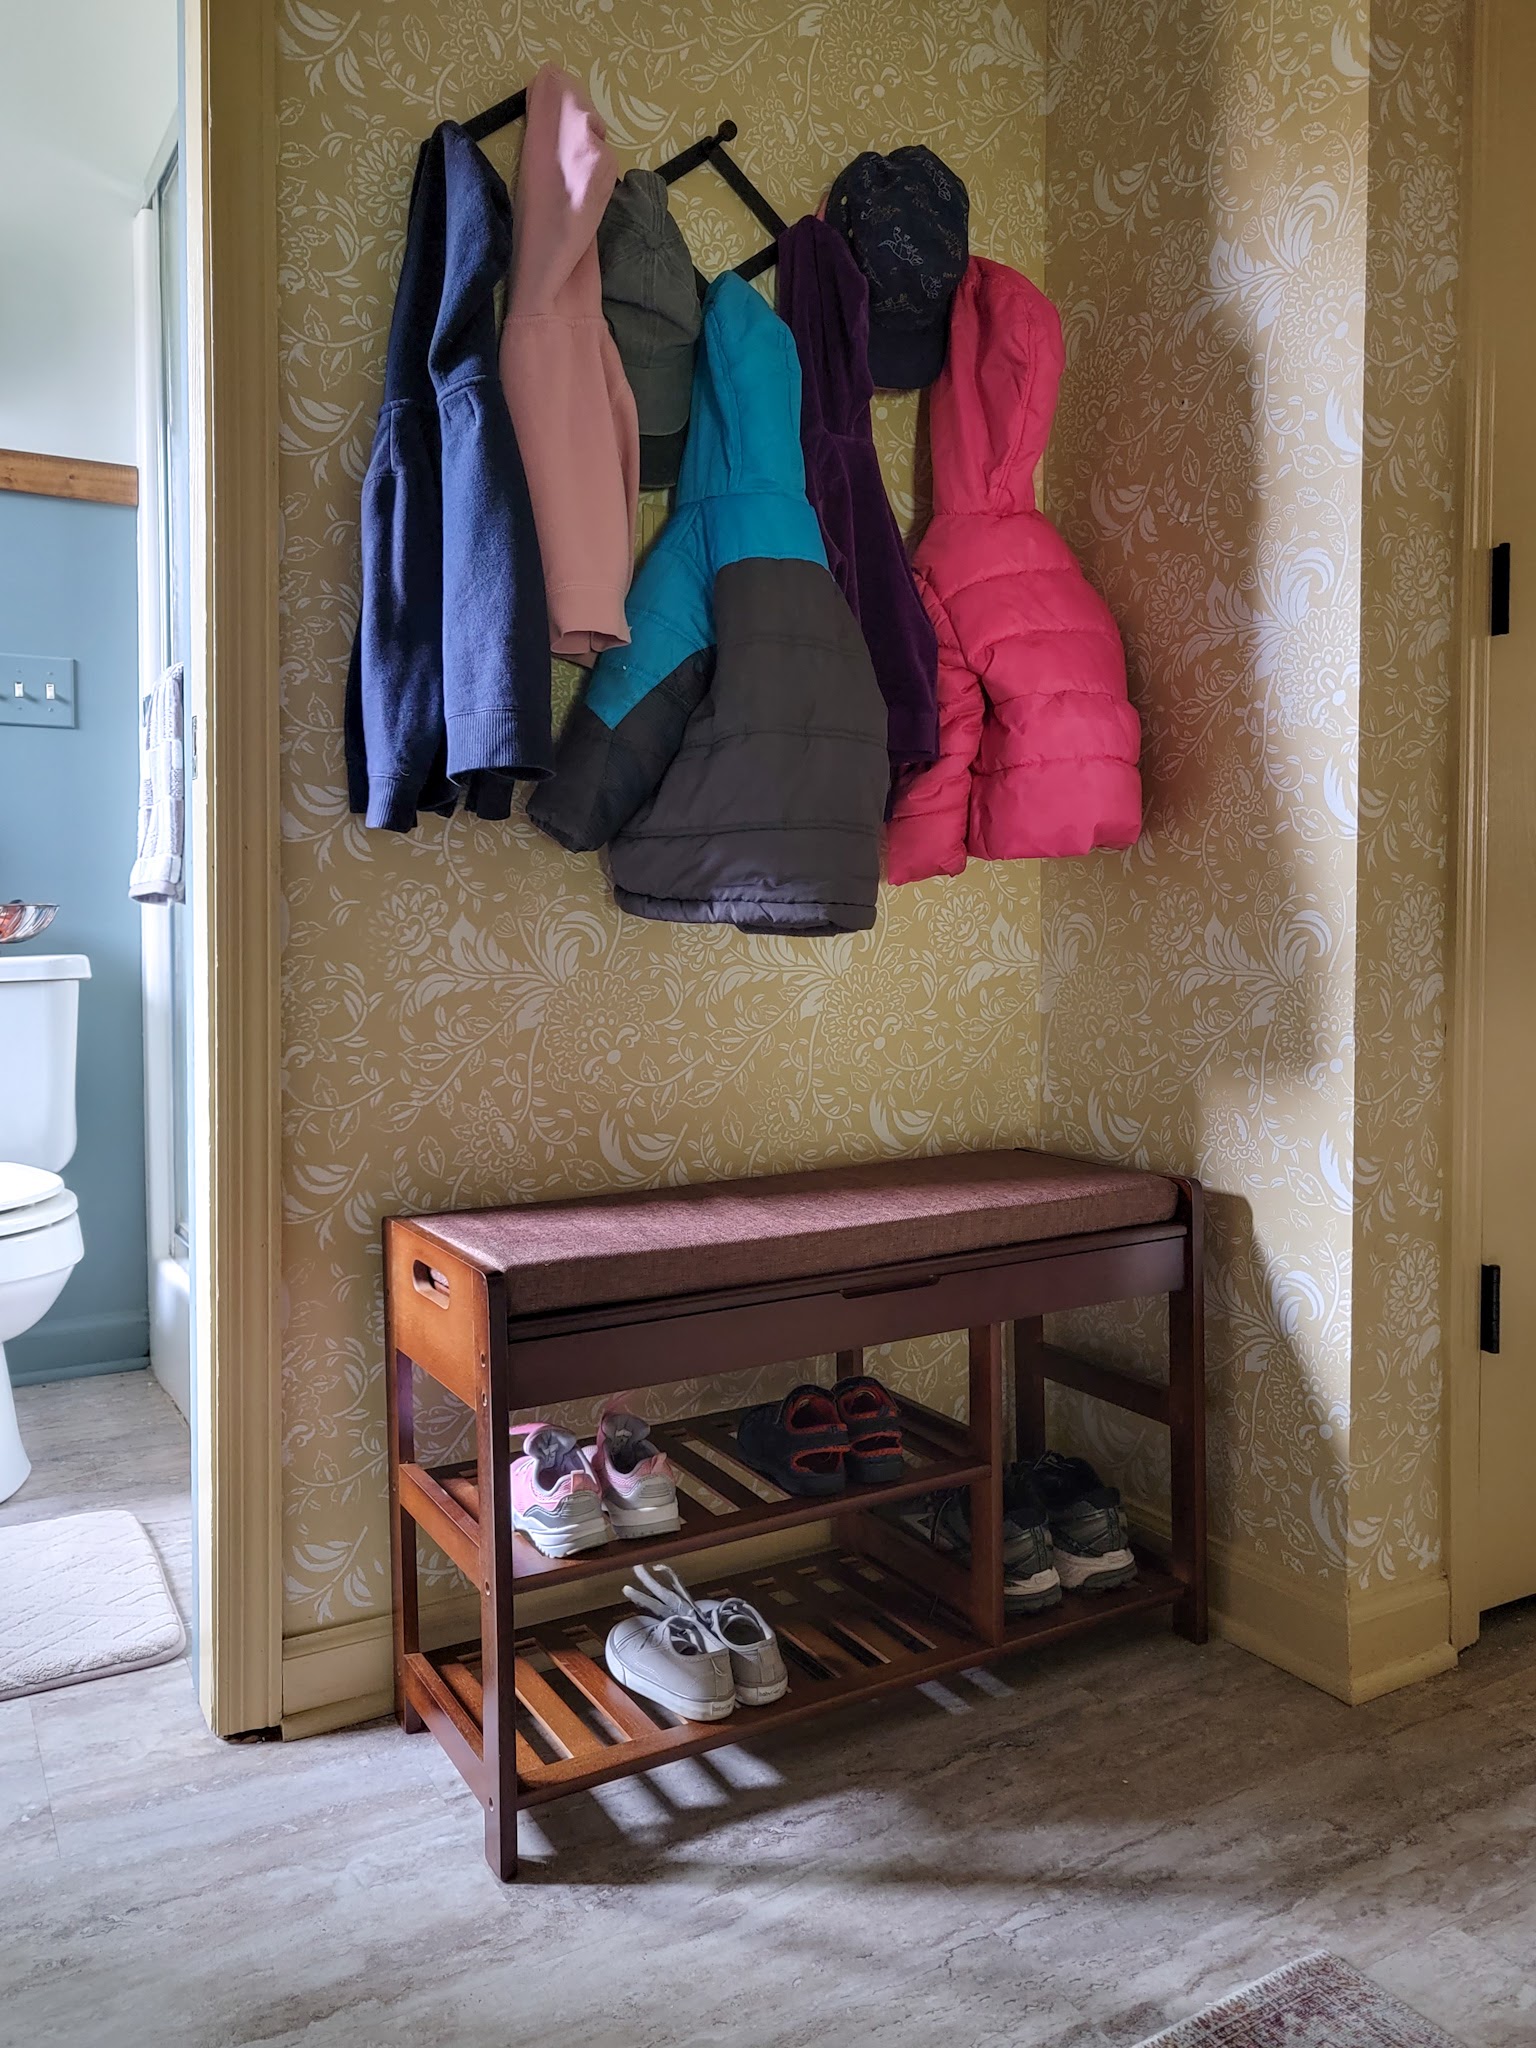
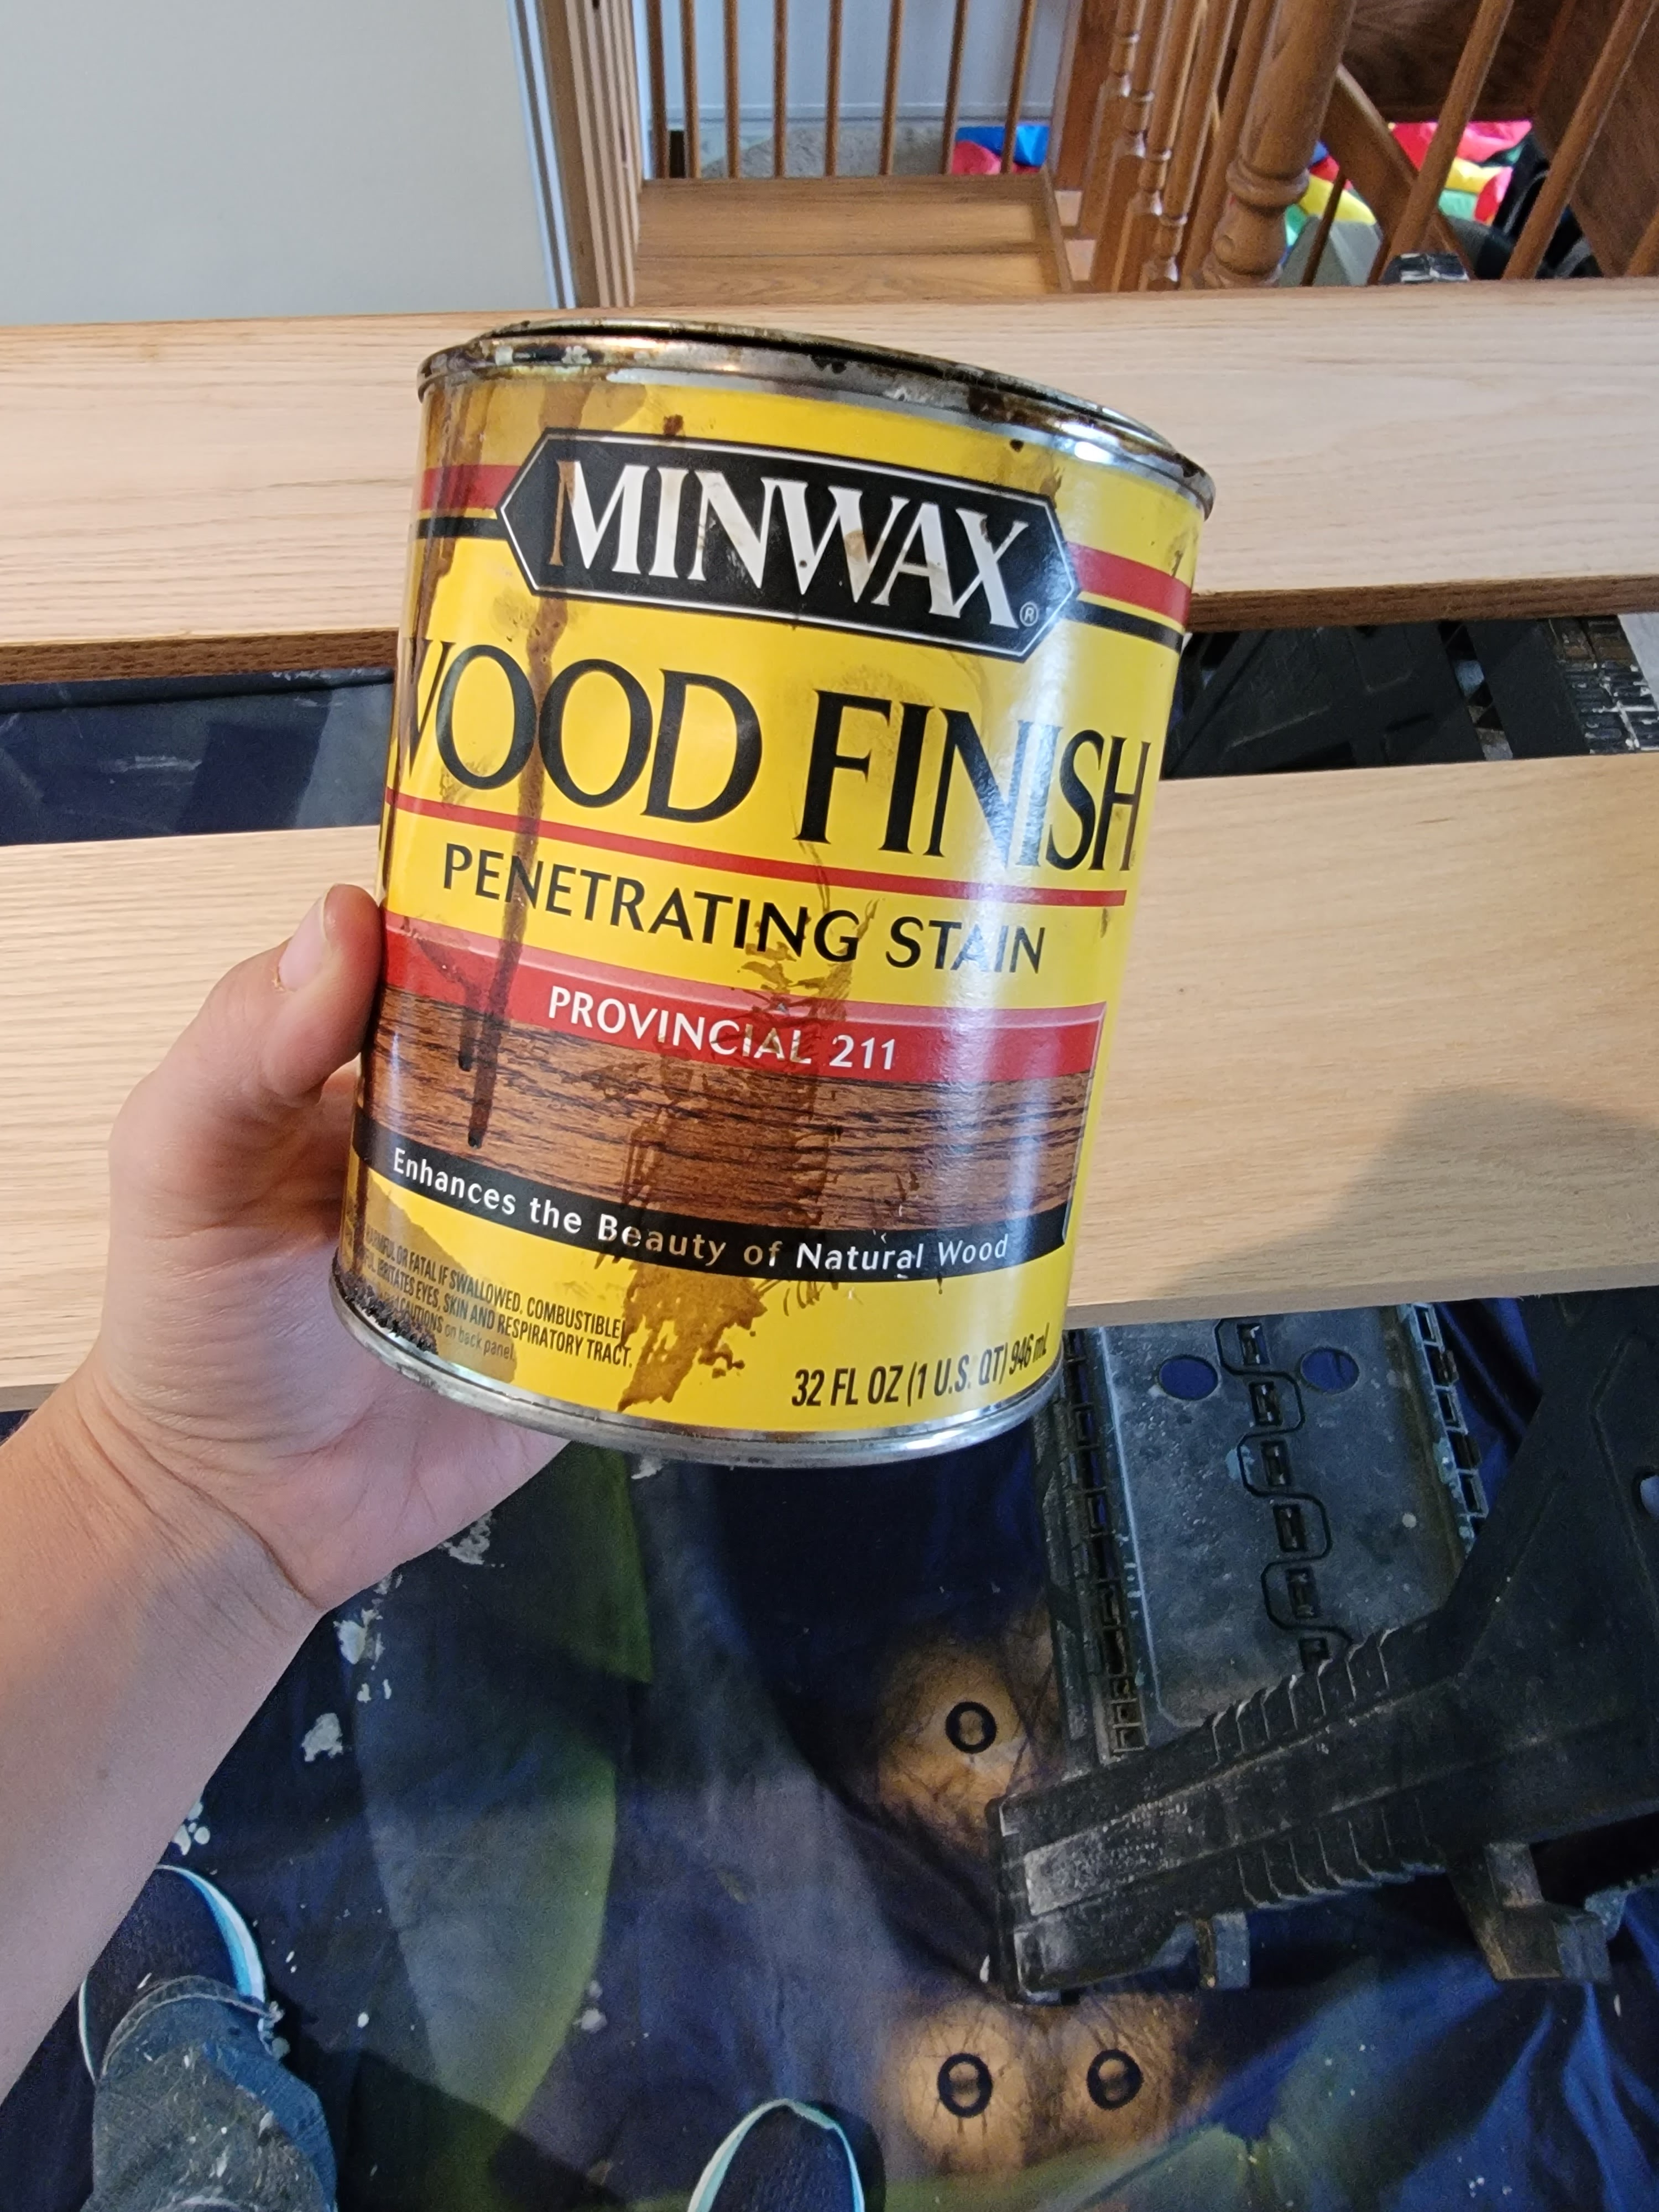
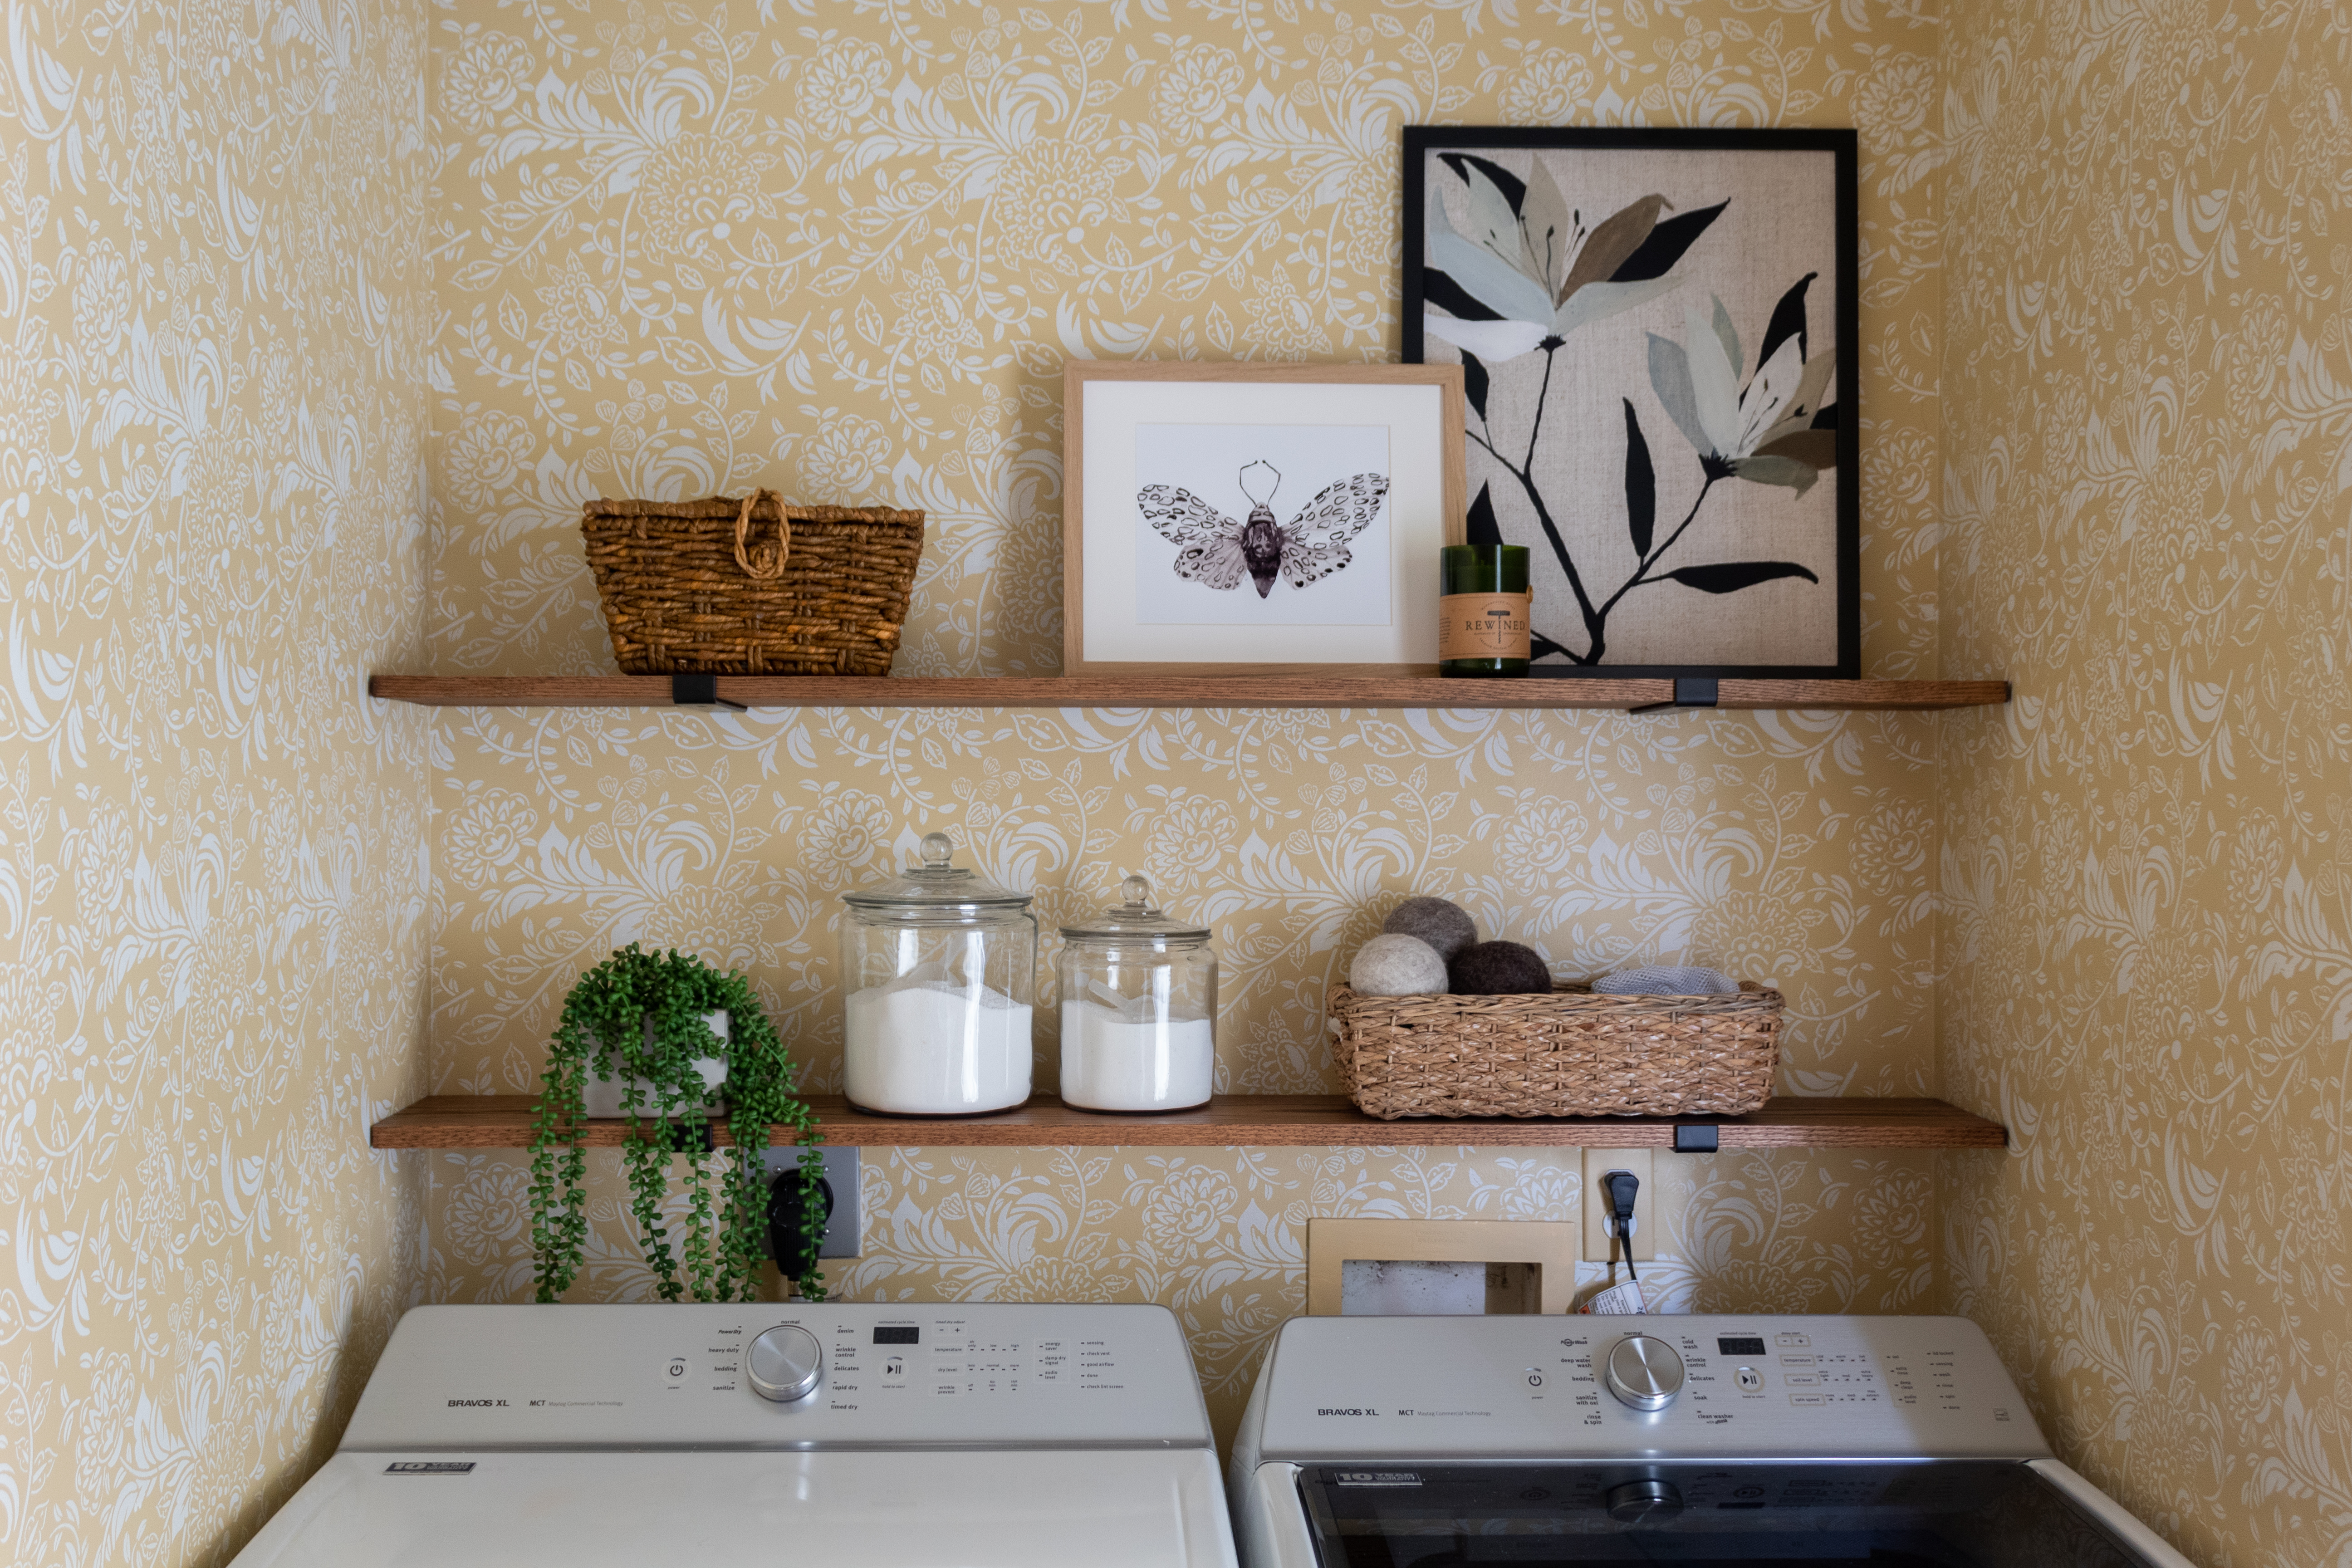
The laundry room is a phase one until it can be expanded into the adjacent bathroom space (which we plan to gut) to create a large laundry + mudroom.

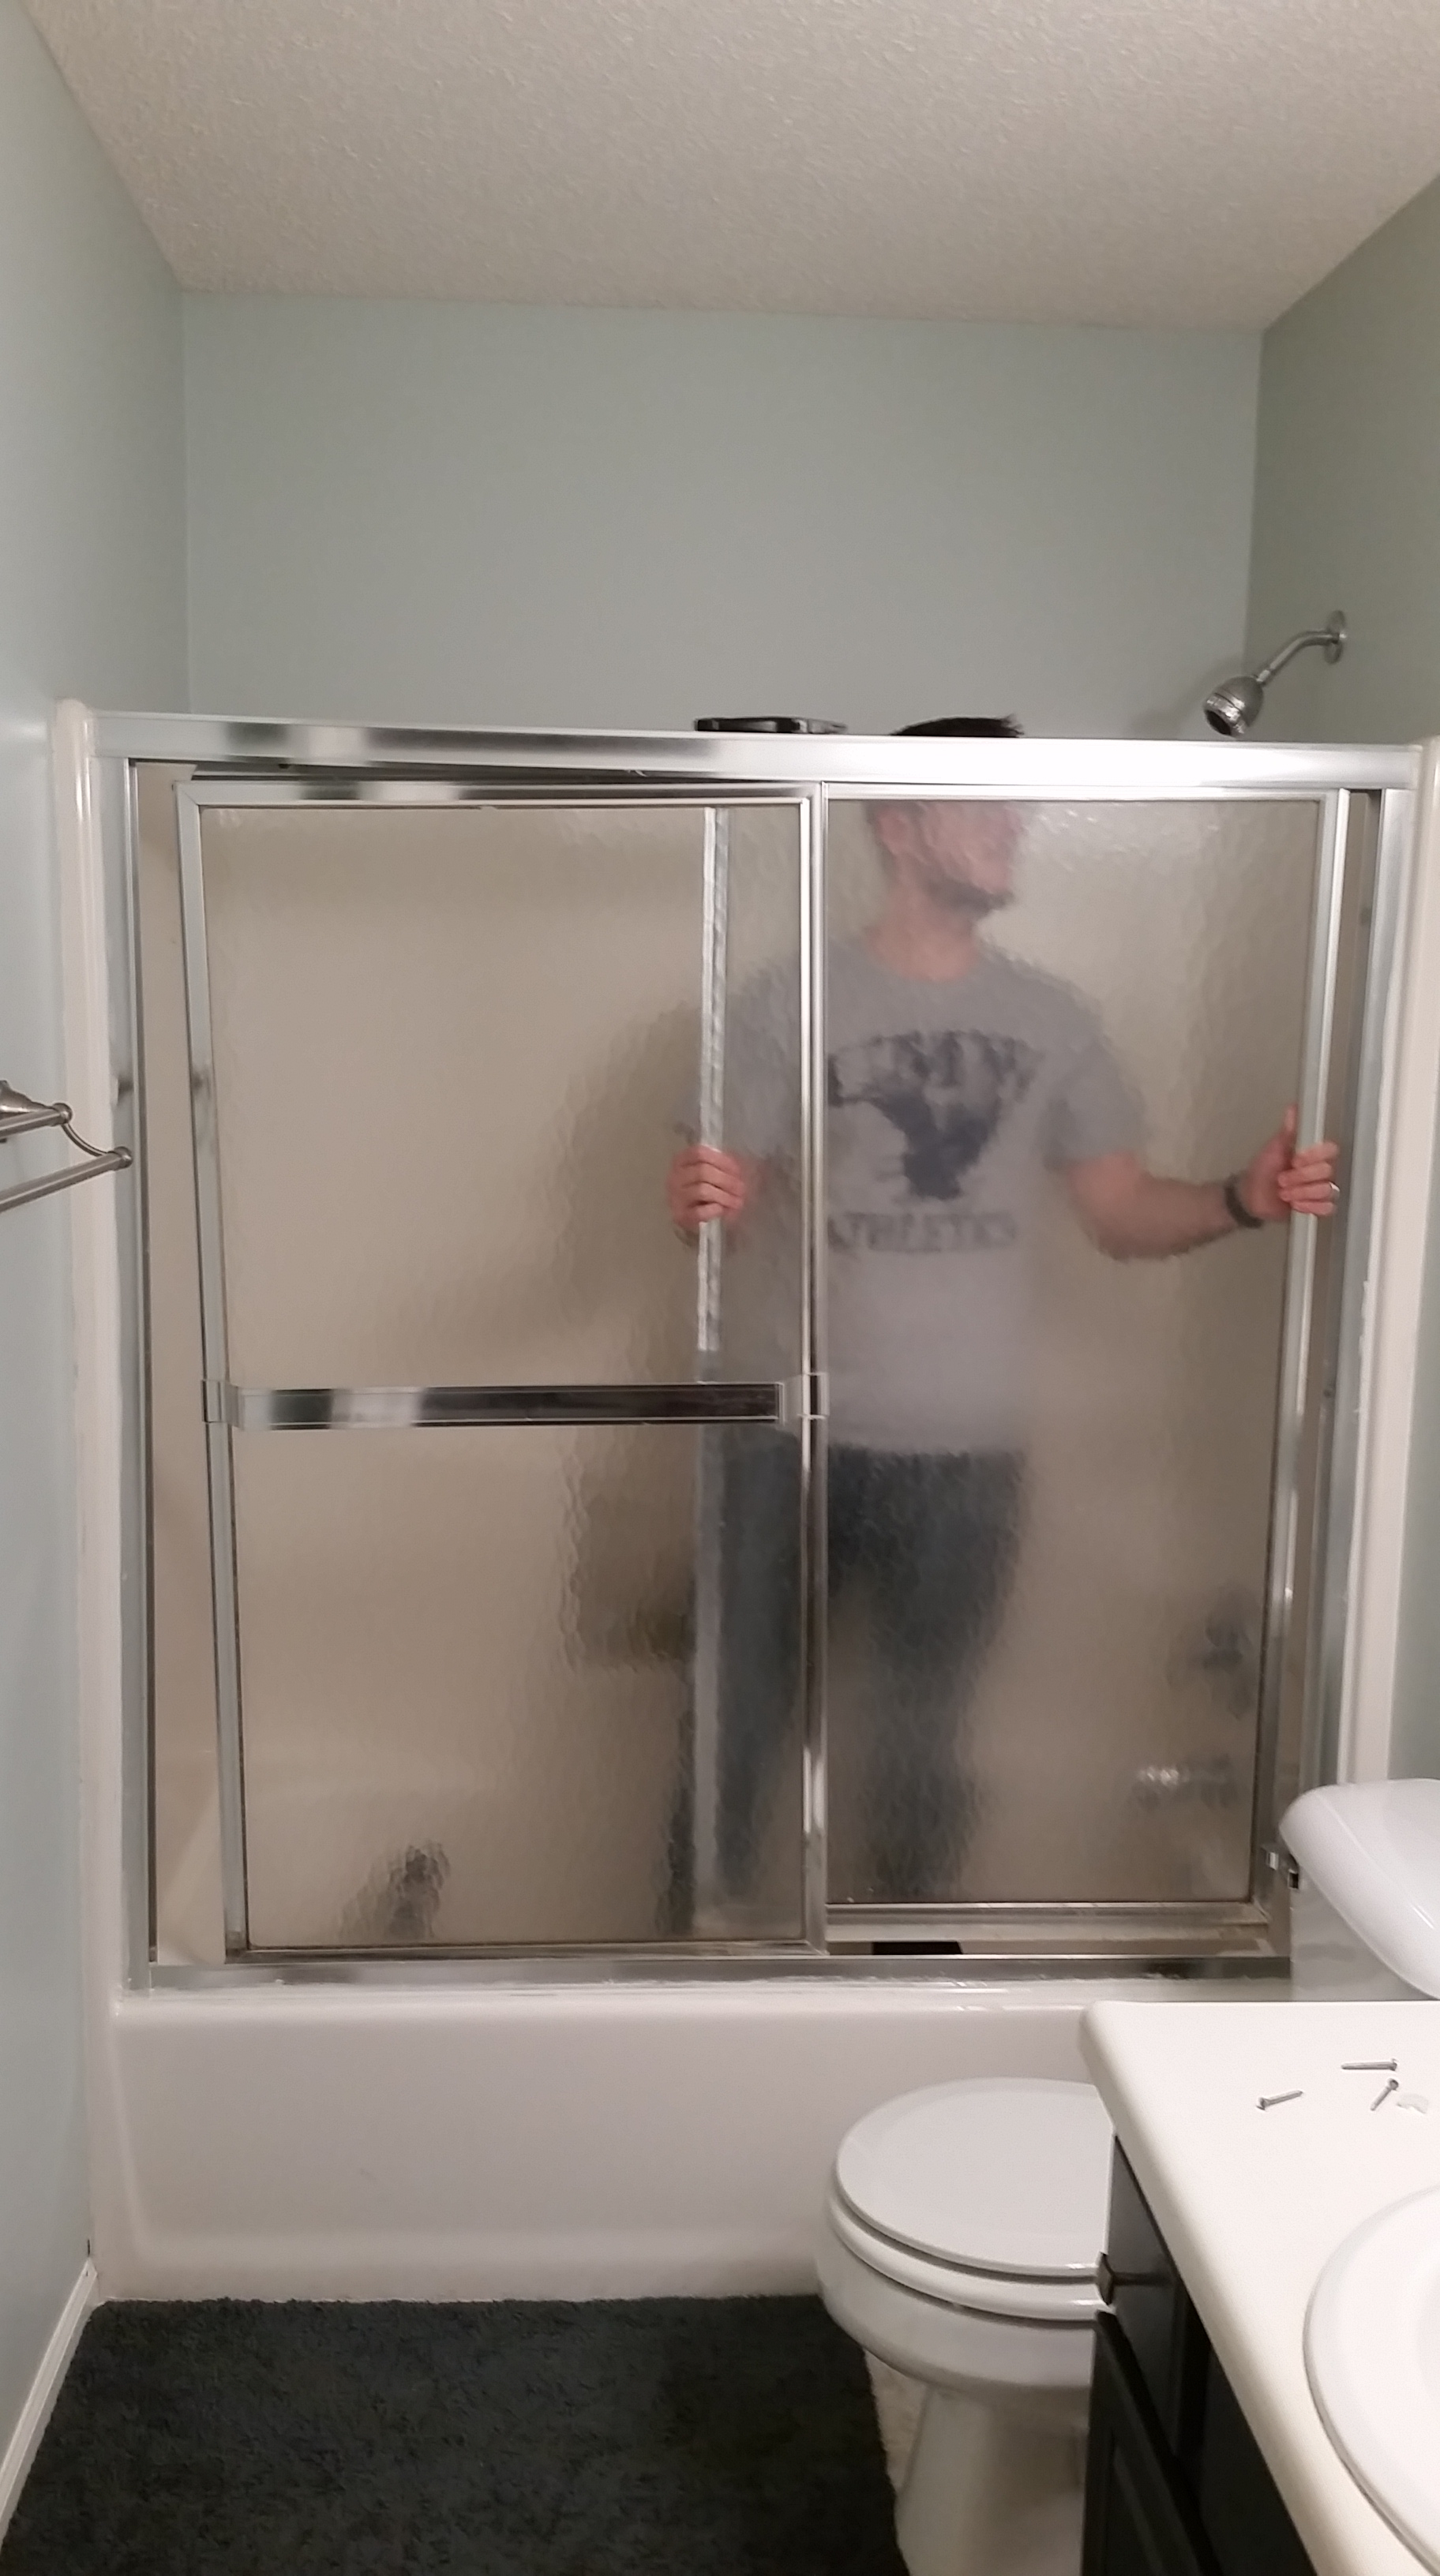
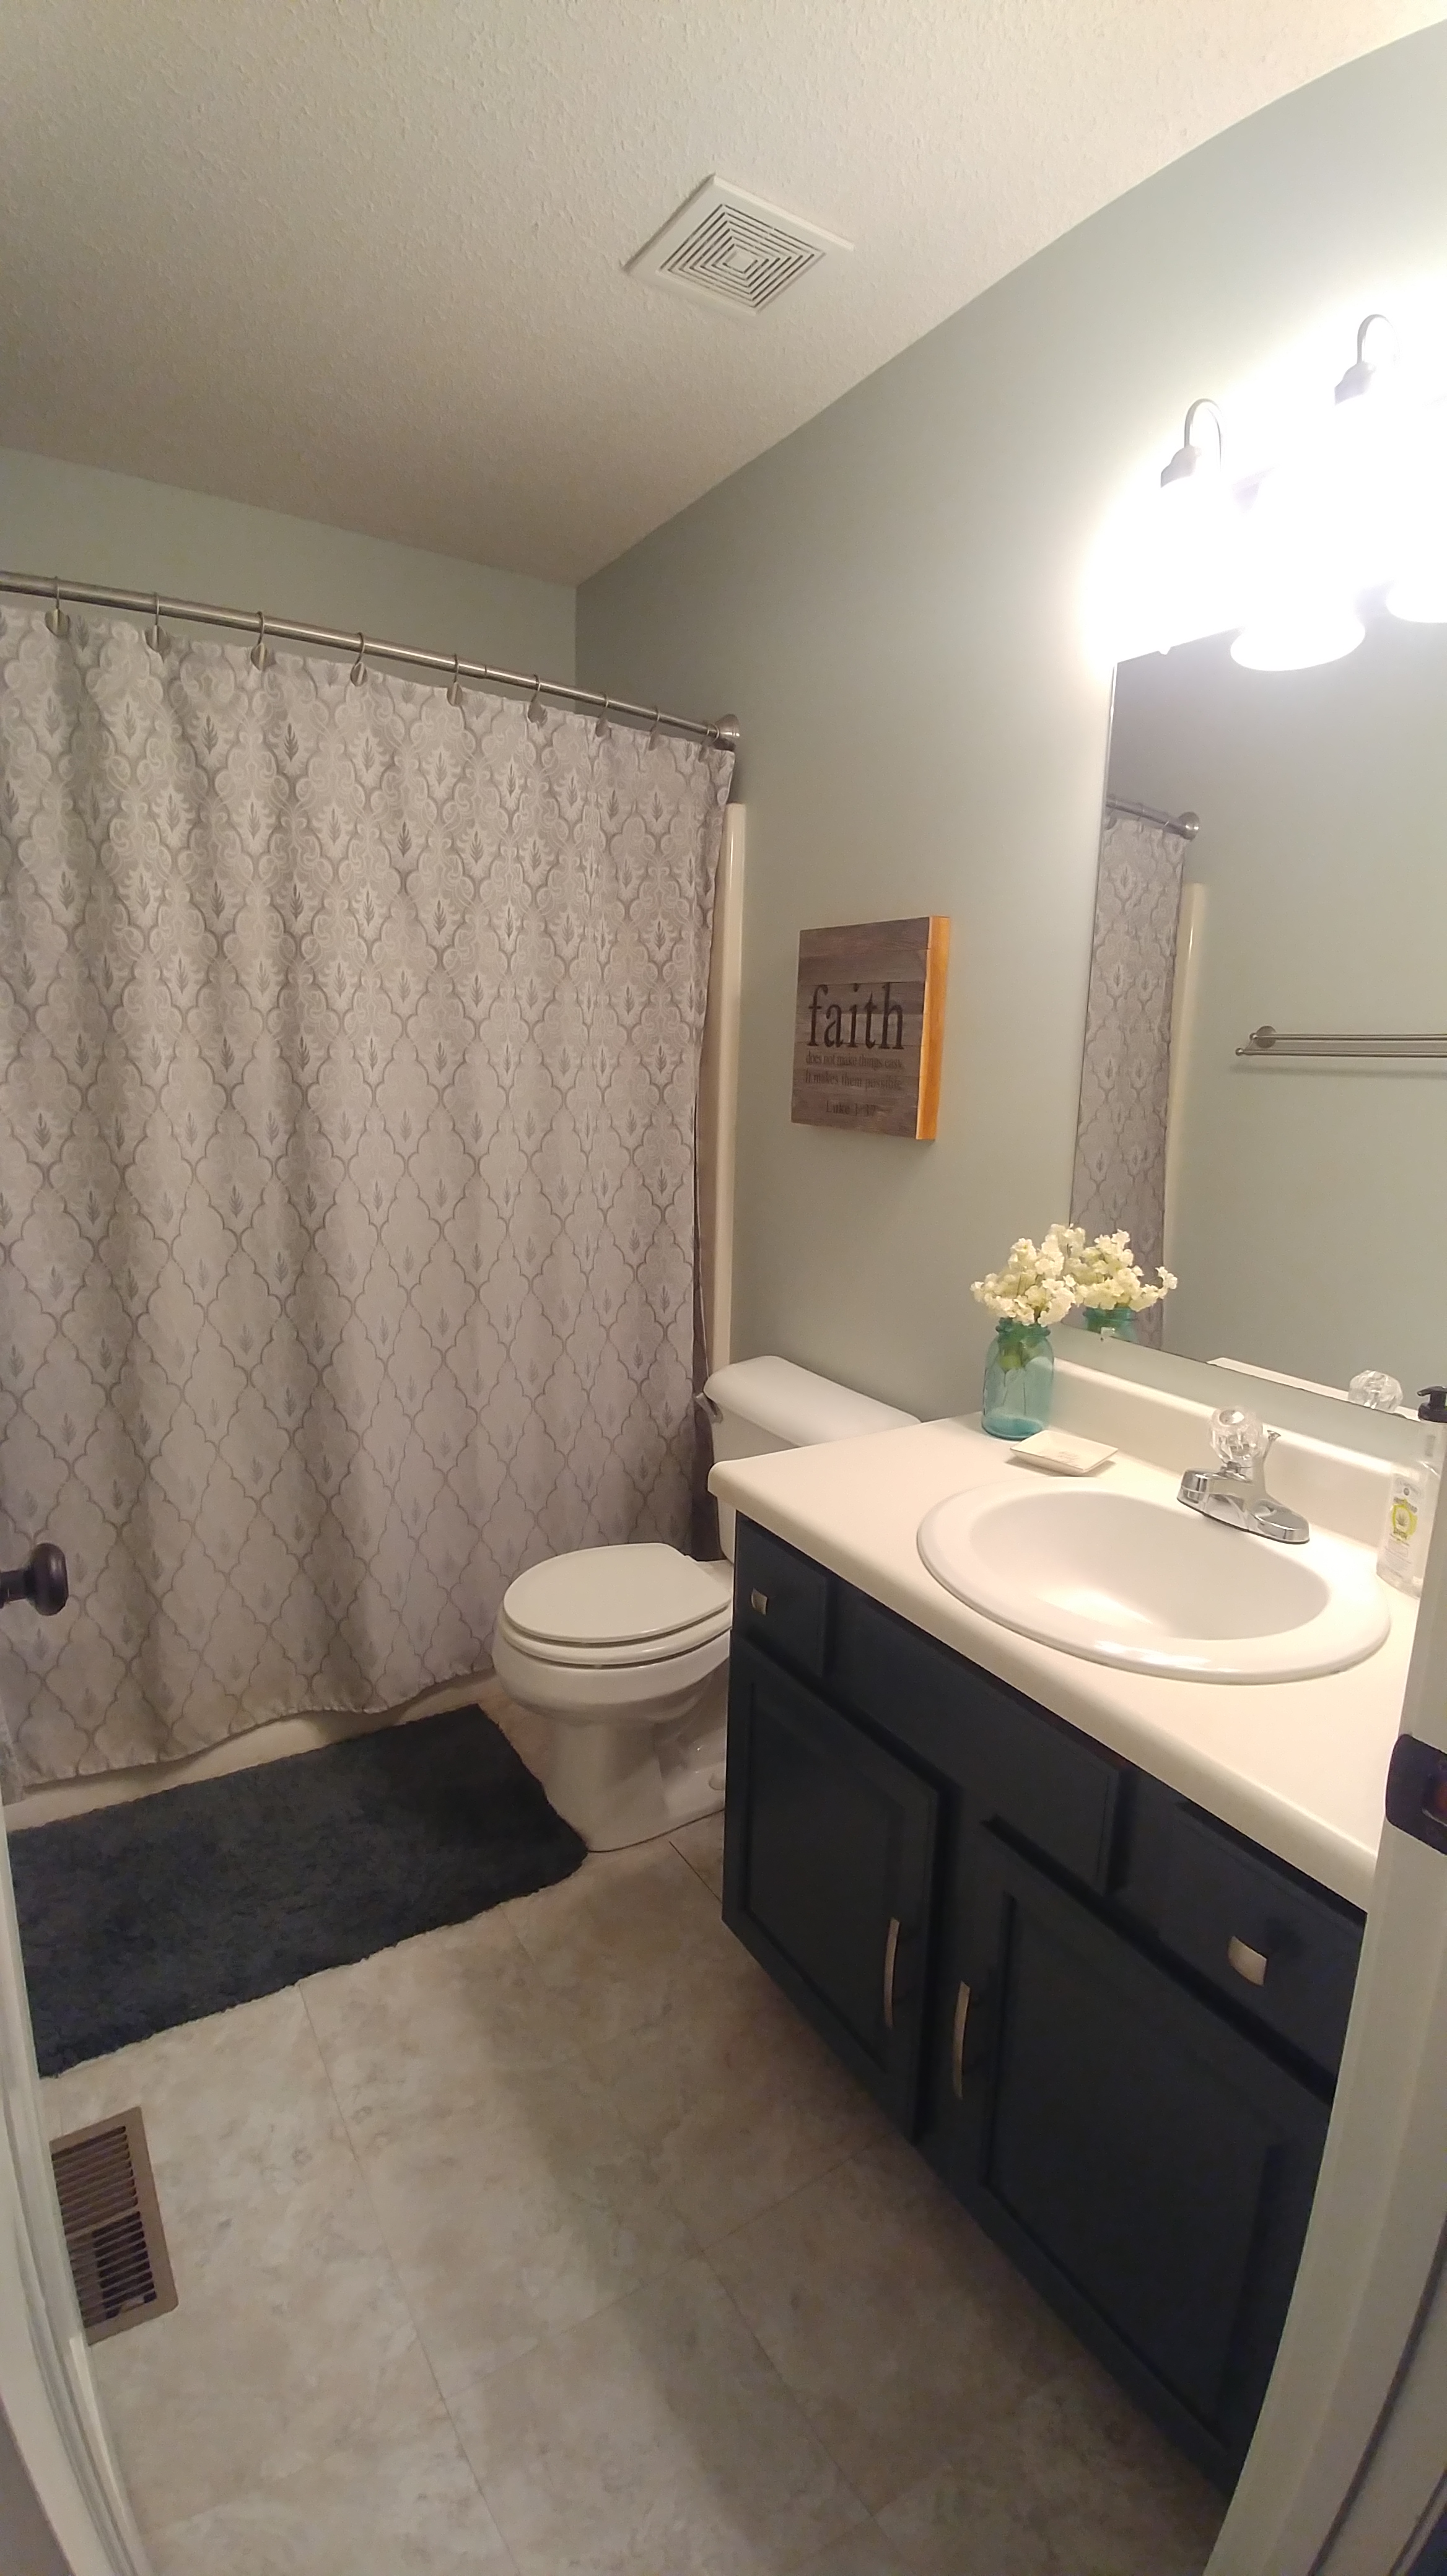
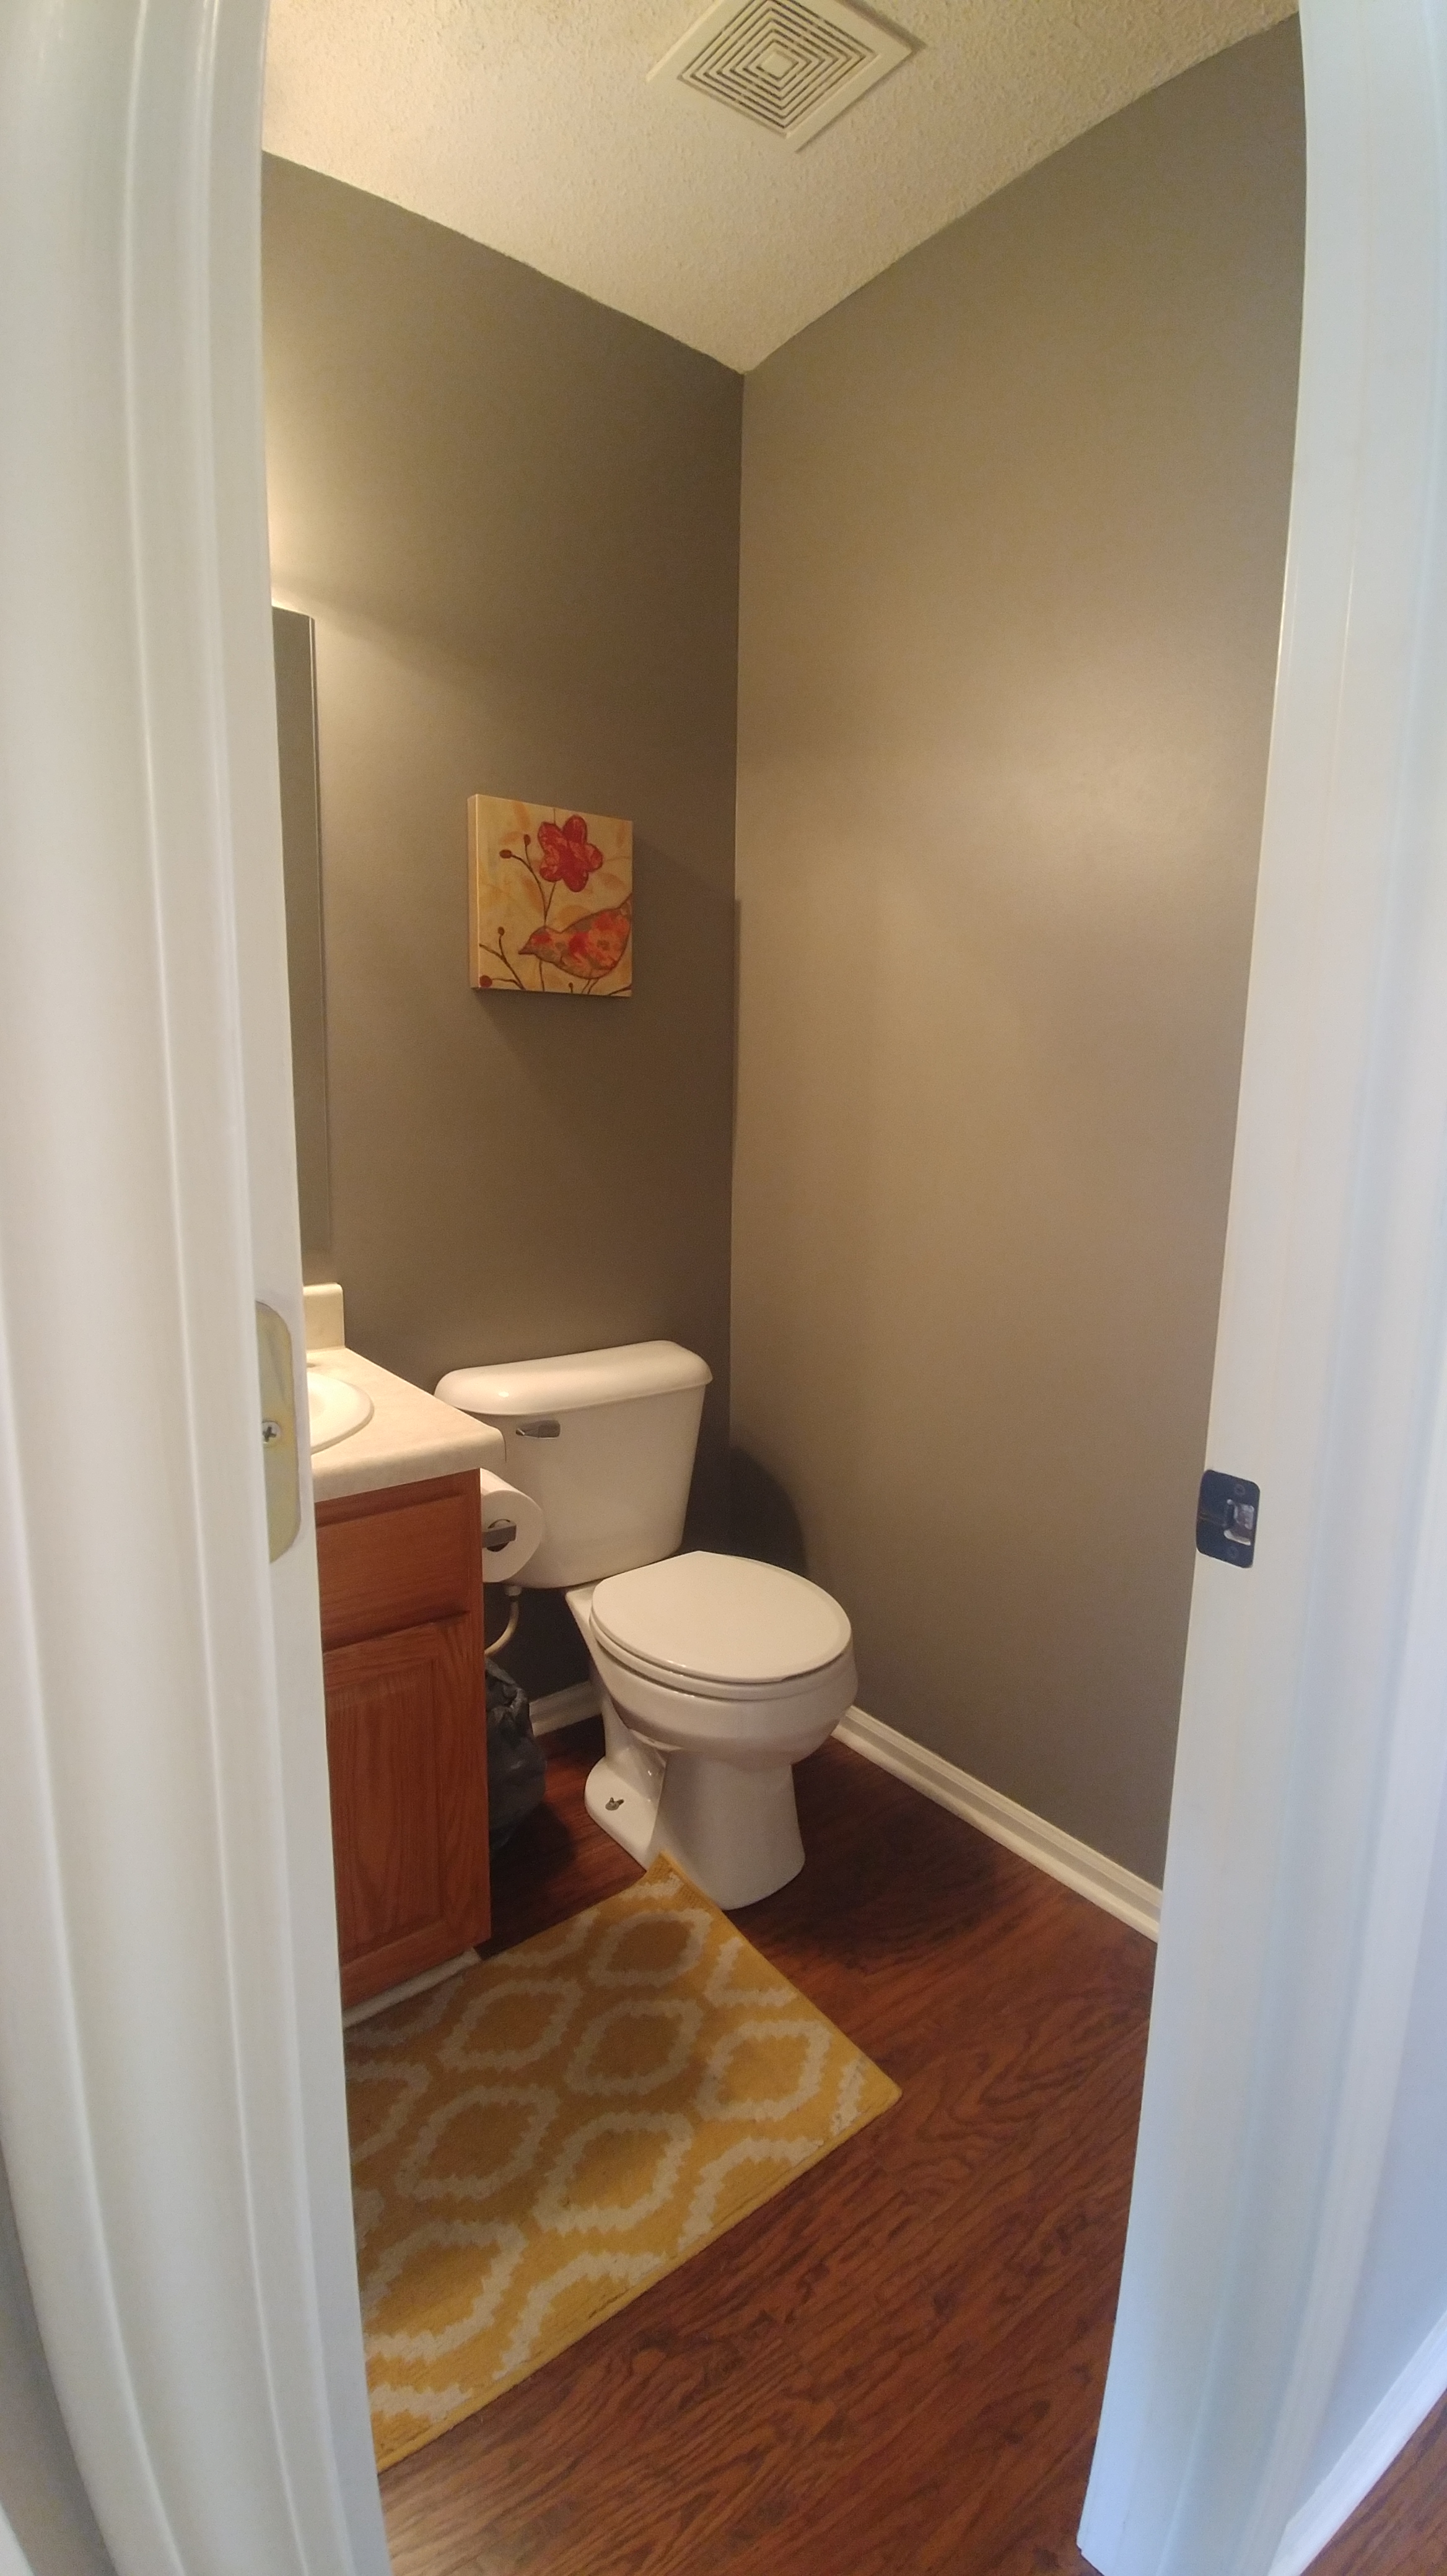
I spent $0 (yes, zero!) updating that bathroom off the laundry room to look nice until the day comes to remodel.

20200722_151004

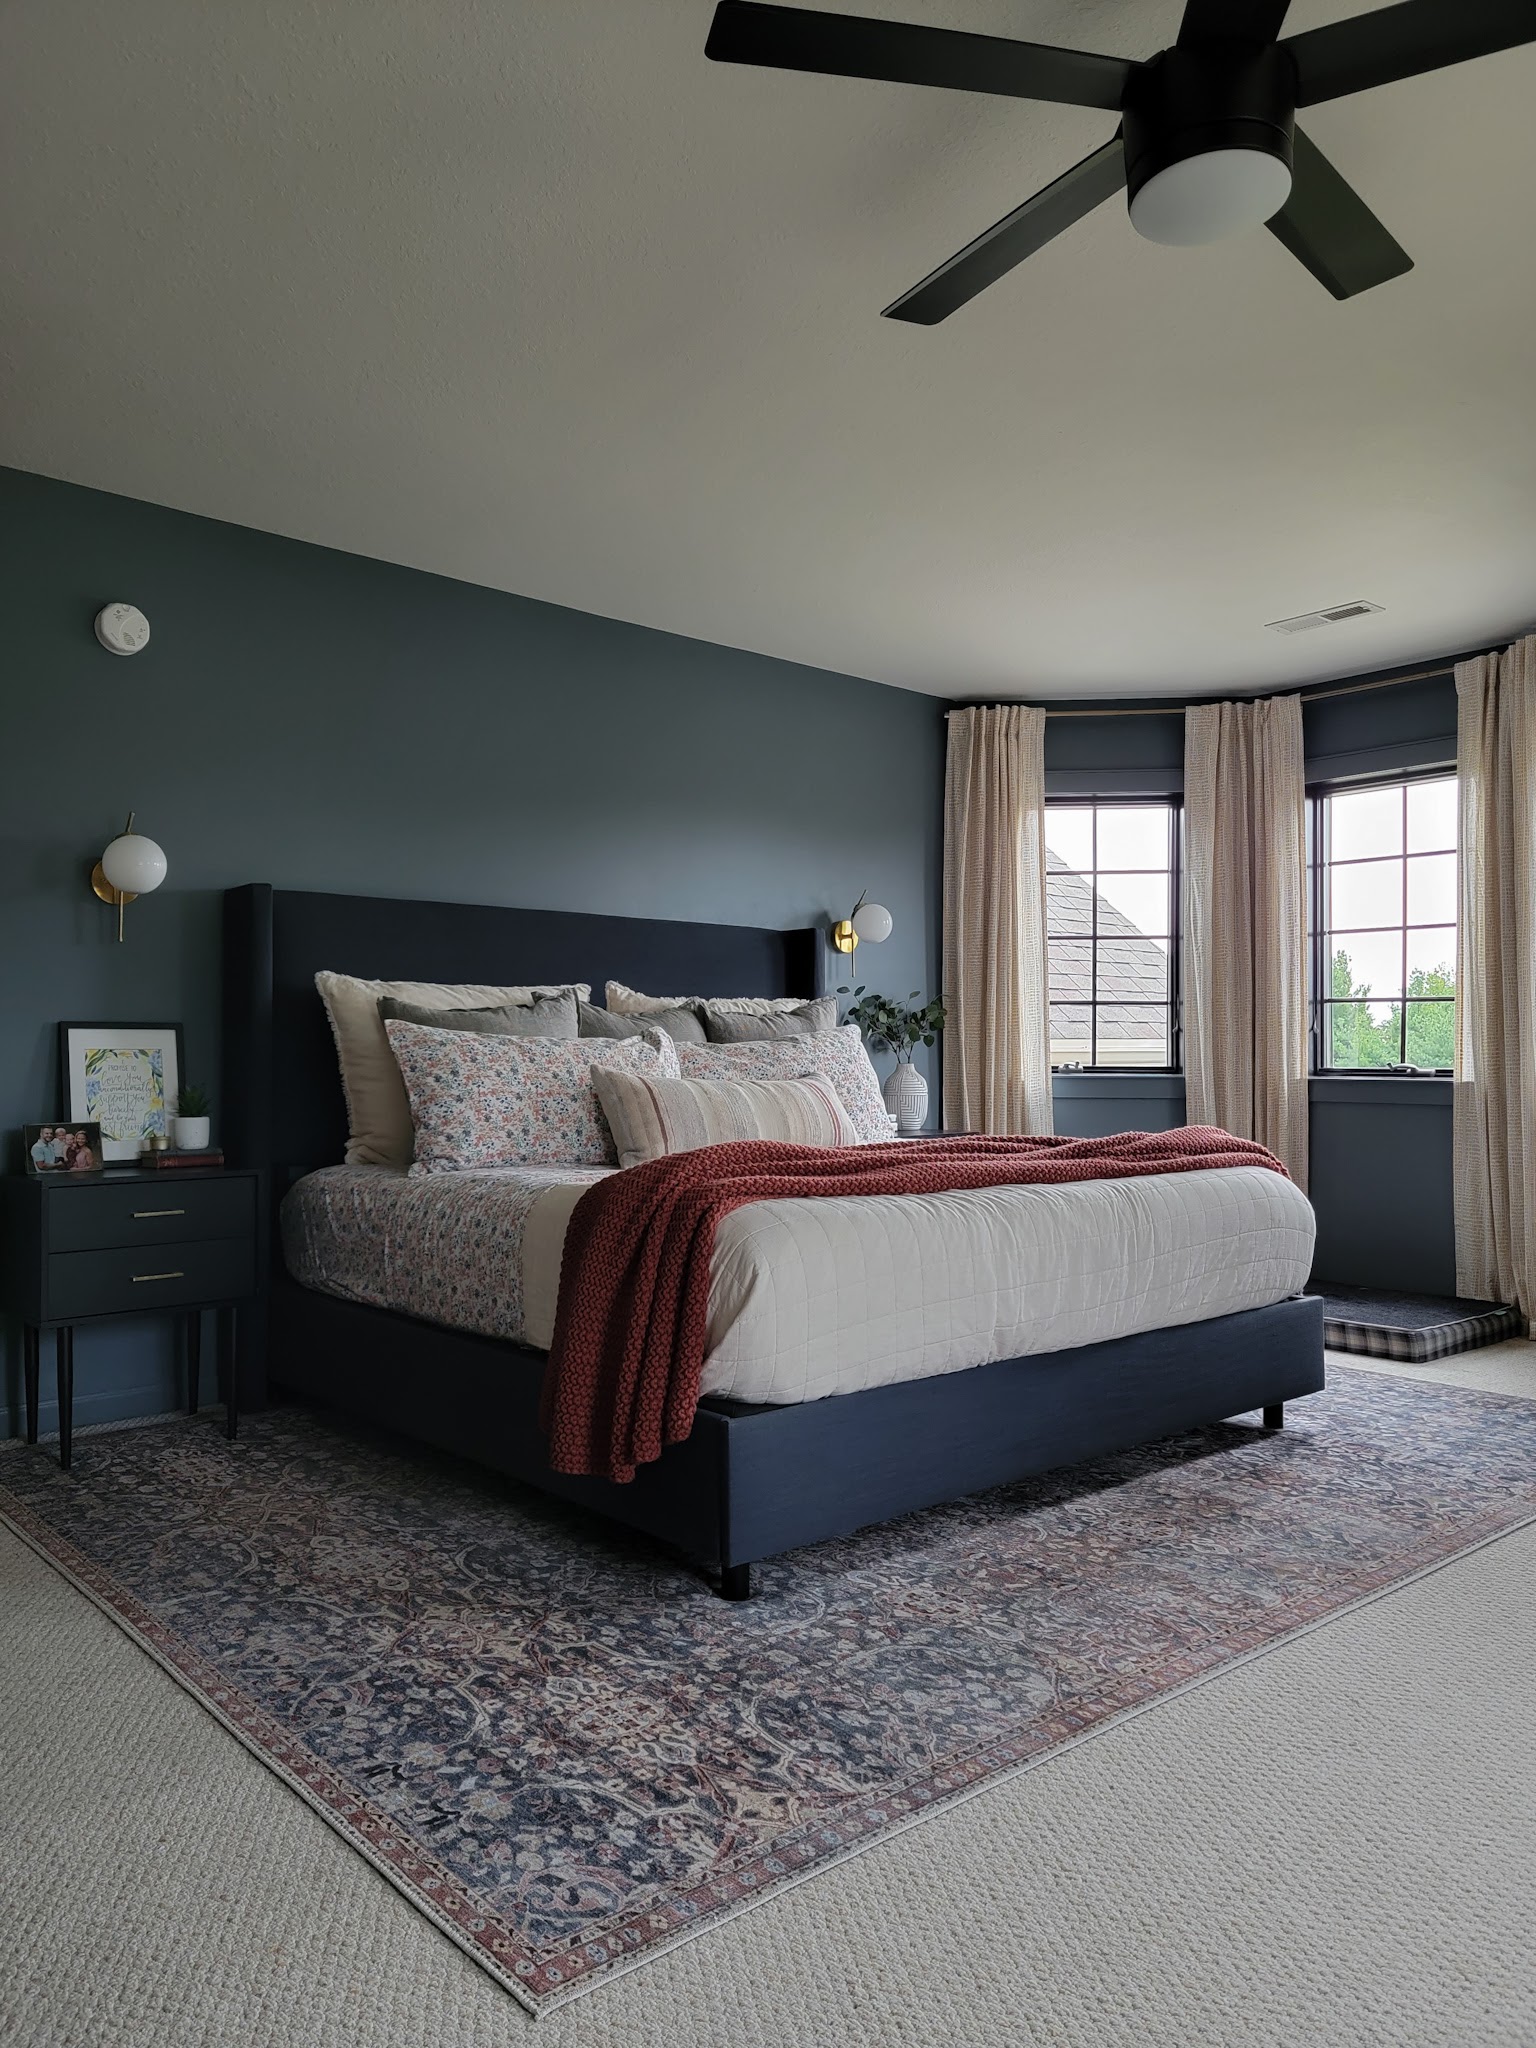
Phase One doesn’t just mean it’s temporary until a huge gut remodel happens. It’s more like a starting place that can be leveled up over time. The kids’ bedrooms are phase ones until they’re a little older and have bigger beds and more say in how they want their room to look. The dining room is a phase one until we can add a wall to separate it from the kitchen a bit more (and update furniture and maybe add wallpaper!) Even our bedroom is technically a phase one. When we eventually update our en suite bathroom and closet, it’ll involve some layout changes that will extend into the bedroom. This won’t be a “completely start this room over” change, but it will alter the shape of the bedroom and I’ll be rearranging the furniture, actually hardwiring the sconces, etc.

With the exception of the guest bathroom and basement kitchen, we also want to change every square inch of flooring in this house. Carpet, vinyl, laminate – it all needs updated! That’s a project we’re going to have to tackle slowly but we’re hoping to start in 2022. As the flooring goes in, there are some smaller changes that we’ll make at the same time (removing a hall closet, adding a wall in the dining room, etc). Our house is truly going to be a labor of love over many, many years.

I understand that some people might argue that phase one renovations are a waste. Why spend the time, effort, and money on something if you’re just going to change it again? Or why not put more money into one big renovation instead of spread it out and spend smaller amounts on multiple renovations. I spent about $1000 on the kitchen update, $600 on the primary bathroom update, and $400 on the laundry room update. So taking just those three rooms, I’ve spent about $2000 on updates over the course of two years. And while that is a good chunk of money, it would not have been anywhere close to enough to completely gut and renovate any one of those rooms. It made a lot more sense to me to have three updated rooms that reflect our taste better while we save up more money for complete remodels in the future.

It’s also worth mentioning that a lot can happen in the coming years! Yes, we plan to renovate more, but we can’t know for sure that we’ll be able to when we want to, or even at all. It might be five, ten, or fifteen years until we can tackle the large renovations we dream of. Smaller, more manageable transformations have helped me fall more in love with our current home. It feels more like us and honestly, putting a little time, money, and effort in now has made me way happier with the spaces as they are. Phase One updates make the bigger renovations feel less urgent. For example, if the two year plan for remodeling the laundry room becomes a five year (or longer, or never!) plan, I would be content with the room as is now.

I walk around my house now, and while it may not be “finished” (is any home ever?), I feel content seeing my family reflected in every space. It’s not perfect, but I love it. It doesn’t feel like I’m in a stranger’s house anymore, it feels like our home.

Bottom line for me: don’t wait for a huge, expensive renovation to fall more in love with your home. Part of the reason I do so many DIY projects is because it allows me to stretch a small budget to maximize a transformation. Maybe it’s just updating a throw pillow case or adding some artwork. Maybe it’s painting a room or installing a geometric accent wall or learning how to swap out a light fixture (or spray painting the one you already have). I literally spent ZERO dollars updating a bathroom with leftover paint and supplies from other projects, so I know it doesn’t have to cost a lot to change a space. Small changes can make a big difference and I believe it’s worth it to love where you live!

LJ is Four!

Today, my sweet boy turns four years old.

I can’t believe it has been four years since heard the words “It’s a boy!” That moment changed my life.

LJ is energetic and playful. When he’s in motion, he’s really in motion – running, jumping, and climbing. He loves to be active and play outside. Some of his favorite activities are riding his balance bike, golfing, driving his little gator, digging in the sand, swimming, fishing, and running around on playgrounds. He also loves to help Justin mow the grass or his grandpa drive the tractor. If something is happening, he wants to be a part of it!

LJ is also incredibly affectionate. He gives hugs and kisses generously and loves to snuggle with us. He tells me he loves me frequently and greets me with a tender little hug every morning. When Justin comes home from work, he makes sure we give each other a kiss and hug 😉 and it’s really sweet to see how much value he places on seeing his parents show affection to one another.

It’s been really incredible to watch him grow in his role as big brother too. Don’t get me wrong, he has his fair share of moments where he’s annoying Vi and making her squeal, but he also spends just as much time loving on her. He gives her hugs and kisses, looks after her, and encourages her in whatever she’s doing (“You are doing it! I’m so proud of you!” or “Watch me, this is how you do it.” or “Be brave! God is with you!”)

One quick little side story about LJ: I was able to go on a little field trip with his preschool class to the pumpkin patch. As we arrived and walked up, three girls came running, calling his name excitedly. They all started running around playing together and the parents all said “Oh Levi! We hear all about him!” It was so fun to see that he has little friends at school that were so excited to see him and immediately play. I haven’t really gotten to see him in that role outside of playdates that I plan, so it was fun to see how he makes those connections without me around.

I just love this little boy so much and I’m so excited to celebrate him today! Now I’m off to make some sprinkle pancakes before he wakes up 🙂

Where I’m Looking for Meaningful Gifts This Year

It’s a little hard for me to believe, but with Thanksgiving less than one week away, the holiday + Christmas season is upon us! I’ve already been slowly accumulating gifts to give to friends and family for the holidays and today I thought I’d share just a little bit about some of the sources and general places that I’m looking to when coming up with gifts. While I do my fair share of just buying something that someone asks for, I also like to put a little extra thought and try to find meaningful gifts to give when I can!

In previous years, I’ve shared non-toy gift ideas for kids, toys with a bonus greater purpose, and some small businesses that I like to shop for toys. I still love all those ideas and I look to all those businesses and sources for gifts to this day! For this post, I just wanted to include a few more ideas for ways to buy meaningful or unique gifts for both kids and adults. If you have places or ideas to add, I’d love to hear them in the comments!

Books from Small, Locally-owned Bookstores

Personally, I think books are always a good idea! I have even been known to gift library books when my kids were little (which is a great gift hack if you have very young kids and not a lot of space: they get to enjoy new books for a couple weeks, then just when they start to lose interest, you can send the books back!) If I buy books, I really try to support a small, locally-owned store instead of Amazon or Barnes and Noble. This year I’m gifting each of my kids a couple books (and requesting a few on my own list!) all from a small bookstore I love.

Highlights for Kids

Last year, my mom gifted each of my kids a subscription to Highlights and it truly is the gift that keeps on giving. My kids get excited to receive their magazine in the mail each month! Vi’s is for younger kids and is made of a special type of paper that is hard to tear or destroy – perfect for early readers! LJ’s is more of a typical magazine and has fun stories to read and activities to do. I also love that the magazines show a lot of diversity (our magazines have included children with Down Syndrome, limb differences, and from various races and ethnicities and I love that they cover models are specifically diverse from month to month). They meet my kids with educational and fun material at their developmental levels and provide us with something to look forward to each month. For adults, maybe you can find a subscription box or magazine subscription catered to their personal interests that will be a fun gift to receive all year long!

Personalized Song

I adore the company Mama Sing My Song – they create custom songs for children that are so beautiful and magical. Just check out their Instagram to see videos of kids reacting to their songs and it will melt your heart! You fill out a detailed questionnaire about your child and choose a style of melody, then they write a personalized song for your child and send you the file. I had one made for LJ for Mother’s Day and I cried listening to it! The first time he heard it, he was grinning from ear to ear because he recognized the special parts that were just for him. It captures him so perfectly! I now sing it to him every night and it’s just the most special thing. You can also order a stuffed animal that comes with a recording of the song inside if you want or the music sheet or artwork – what an amazing and personal gift for the child in your life!

Gift an Experience

Concert tickets. Pottery Class. A day at a local spa. A mini session with a professional photographer. Sporting Events. There are so many experiences that you can gift to your loved one to make them feel special and seen. This year my parents are creating an Escape Room for all my siblings as part of our gift and the anticipation of fun and all the memories we’ll make is a gift that will keep on giving for years to come!

Custom Artwork

I think anytime you can put a little extra time and thought into a gift, the one receiving it feels extra special and loved. One way to do that is through custom artwork. Maybe there’s a special building (a childhood home, a beloved vacation spot, a family cabin, etc.) or a cherished pet (still living or perhaps one that has passed away) that you’d like to memorialize for your loved one. A custom piece of artwork can be such a special gift. And bonus, you’re supporting an artist with their livelihood! You can even gift your loved one with a certificate to commission a work of their choosing, which is an especially good option if you’re not 100% sure what they would want or if the artist you love is already booked through the holidays. I do just happen to have an extremely talented sister who does commissions (check out her work here) but there are also many talented people selling custom work on Etsy of their own websites. Or if you walk through an arts and crafts fair or farmers market and see an artist selling work in a style you love, don’t be afraid to ask if they take commissions.

Secondhand Treasures

Don’t get me wrong, I’m not talking about giving a used gift just for the sake of being cheap, and I’m definitely not just talking about re-gifting or giving someone else’s junk. I’m talking about thoughtfully curating gifts that have been loved before and are still in amazing shape for another owner. The other day on Instagram, I say @shelbygoodman talk about how she found small, very inexpensive glass jars at a thrift store and planned to wash them, fill them with a homemade infused olive oil, cork them, and gift to friends. What an amazing, creative idea for gifting DIY + secondhand! If your loved one is a home decor lover, maybe it’s pairing thrifted vintage brass candlesticks + new tapered candles. If they’re a book nerd, maybe it’s a collection of classics and/or bestsellers from a secondhand store (books are always sold SO cheaply!) Maybe it’s a puzzle (make sure it has all the pieces!) or a vintage rug or a unique planter or container that you transplant a cute plant into. I just bought my niece a dress for her American Girl doll from Poshmark. It’s in good condition and I guarantee she will not care for one second that it’s used. Gifting secondhand is a great way to give a unique gift in a sustainable, often more budget-friendly way!

Shop Small (when you can!)

I get it. Amazon, Target, Wal-Mart, all the bigger stores are often cheap and convenient. I’ve used them in the past, I’ll use them again in the future, and I’m truly not judging if that is the route you take. But whenever you are able to shop small and support a small business (bonus if it’s local to you), I would really encourage you to try to do so. Small business owners are working SO hard, particularly in this pandemic. They are passionate and driven. They are often working to provide creative, unique, and high quality items. Yes, the shipping can be longer and the cost is sometimes higher. But more isn’t always more; sometimes one high quality item is much better than three gifts that will break, wear out fast, or quickly go out of style. Buy once, buy well and give a gift that lasts!

I bought myself some earrings from Kipepeo and I’m considering buying more as gifts this year. They’re handmade clay earrings made by a young girl working out of her home. She’s created her own business as a teenager! The earrings are beautiful and high-quality and unique. They’re also a little pricier than something I could find at Target and the shipping is often a little slow. It’s. Worth. It. It might mean I can only gift this one item instead of multiple items. It might mean I have to order now and wait a few weeks for them to arrive. It’s worth it to me! There are a lot of small business making and/or selling very cool things that you might feel are worth it to you too and I encourage you to consider it if you’re able. Even if most of your gifts are big box stores and you buy one thing from a small business, that made a difference to the small business!

What places do you like to turn to when shopping for meaningful gifts?

ORC Week Eight: Laundry Room Reveal!

We made it to the end of the laundry room renovation and I am so thrilled with how this room came together!

It might be little more than a laundry hallway, but the view sure has changed from eight weeks ago. I can’t believe how dark and dingy it felt looking back!

I’ve said it multiple times throughout this process, but many of my decisions were based on keeping this project very budget-friendly since this renovation is somewhat temporary. Justin and I still plan to eventually gut the adjacent bathroom and expand the laundry room, which will also create a true mudroom space. Since that remodel is still a couple years down the road, I wanted to find inexpensive ways to update the existing space in the meantime, making it more functional and beautiful.

I loved the look of wallpaper but found that a gallon of paint and a couple $12 stencils gave me the look of wallpaper for much less. You can read the full tutorial here.

I took down the cabinet + rod combination that previously hung above the washer and dryer and replaced with some simple shelves. I cut down, stained, and sealed two 1 x 8’s and Justin installed them on top of simple black brackets. A mix of baskets + decanted jars and bottles keep all my laundry supplies looking chic while staying within easy reach.

I felt pure joy in taking down the two ugly boob lights and replacing them. The hallway light got replaced with a simple low profile mount and the light above the laundry was a simple DIY dupe. An inexpensive white shade got a couple coats of spray paint and elevated the look for less! You can read more about that process, and the process of making and installing shelves, in this post.

The mudroom nook also got a few simple upgrades. An accordion rack gives me extra hooks for all the jackets and coats my kids have and a shoe bench with built-in storage provides plenty of space for shoes, gloves, and hats.

Since that bathroom is rarely used, I am borrowing the hooks in there for some extra bag storage (you can see a tiny glimpse in the mirror!) It also helped that I cleared out the adjacent closet to create space for the dog food and purged all the shoes we weren’t using! And speaking of the closet, all the doors and trim got painted SW Blonde in a satin finish and I upgraded all the hinges and levers to matte black. Justin also swapped out all the receptacles and switches for white ones and I replaced all the switch and outlet covers with painted wooden ones. Little details make a big difference!

I know there are likely some people who would make the argument “Why go to all this trouble if you’re just going to redo the laundry room in two years? Why not just live with it the way it was?” And on the one hand, I get it. But on the other hand, two years is a long time to live in a space that doesn’t work well for us and I don’t even like to look at. We use the mudroom portion daily and the laundry portion at least once a week, often more. Over the course of two years, 100+ uses as a laundry room plus 700+ uses as a mudroom . . . that’s well worth the time, effort, and approximately $400 I spent on this entire reno. I could’ve spent less and chosen fewer things to update (the most expensive part was actually new door levers!) and it still would have felt fresh. It’s also worth saying: a lot can happen in a year or two and who knows if we’ll be able to proceed with our plans in the future. The good news is, a full remodel doesn’t feel urgent now. If the two year plan for the laundry room becomes a five year (or longer, or never!) plan, I’m now okay just living with the room I have.

ORC-Guest-400x218.png

I’m thankful to the One Room Challenge for the motivation to push through and get this room finished! If you’re interested in checking out all the other guest participants, you can do so here.

Sources

Wall Color, Trim, & Door Color: Sherwin Williams Blonde (eggshell on walls, satin on trim and doors)

Stencil Color: Sherwin Williams Alabaster

Stencil

Shelf Brackets

Accordion Rack

Bench

Rug

Low Profile Flush Mount

Semi-Flush Mount (shade is spray painted Krylon Fusion Matte Pale Sage)

Art: Flower Print, Abstract Print, Do Less Print

Clear Jar

Gray Ceramic Box

A look back on our DIY journey

If you follow me on Instagram, you might have seen my stories yesterday and how I took a little trip down memory lane. It all started when I packed up my fall decorations and decided to finally clean out the very bottom of the bin.

I found some paper decorations I made for a Halloween party Justin and I hosted back in 2013. I had created cute little black and orange pennants with construction paper, ribbon, tape, and a marker. I also created little construction paper food labels and spray painted a mason jar orange and filled it with dried plants from our yard. They were simple and most importantly: very very inexpensive. I saved them and used them for three straight years!

It might seem silly, but this discovery really got me reflecting back on our marriage and specifically our DIY journey. When we first got married, Justin was in school and did not have an income and I was supporting us both on a very humble teaching salary and picking up extra childcare jobs to pay for our needs. We were renting a house, trying to pay off a ton of student loans, and didn’t have extra money for home decor. All that being said, I was still passionate about creating a nice, cozy, comfortable home for us however I could and for us at the time, that meant inexpensive DIY.

Today I wanted to reflect back on some of our DIY journey and the projects that Justin and I have done along the way. Sometimes people ask me how we know how to do things and the answer is: we learn as we go! We started out knowing very very little and have learned so much through trial and error. We started with very small projects and went bigger and bigger as we gained confidence. It’s been a journey, one that started out of necessity and now is more of a passion.

Just a quick note: these pictures are not good. Haha! I took them with crappy cell phone cameras, bad lighting, strange angles, and no staging. I wasn’t trying to make them look blog-worthy, I was just documenting our life! So…apologies in advance. 😉

Pallet Flower Boxes (2014)

Justin would drive around and find old, abandoned pallets, bring them home, dismantle them, and use the scrap wood for projects. In fact, this Flower Pallet Box from seven years ago might have been the very first DIY tutorial on the blog!

DIY Pallet Flower Boxes :: simplifythechaos.com

I wish I would have blogged about more of our projects back then, but I’m glad I at least have this one to look back on! At the time I had no idea that I’d eventually be sharing so many other home projects on this blog.

Kitchen Island (2015)

In our rental house, we had a big open space in the middle of our kitchen that just begged for extra workspace. Justin collected a bunch of pallet wood, splurged on one nice edge-glued piece for the top, and created this awesome working island for me. This was one of my favorite pieces he made – I loved it so much!

Bathroom Counter Storage Jars (2014)

I needed a storage solution for the bathroom counter and got creative with canning jars and some discounted drawer pulls. I actually think I must have been planning to do a blog post about these, because I had taken pictures of each one of the steps. I’ll spare you that and just show you the first and last picture of this little DIY.

Side Table + Wooden Tray (2015)

When we were first married we did not have the money for any new furniture so every single piece of furniture in our first home was either a hand-me-down (and usually it had been through multiple people before us) or made by us. Every single thing! We didn’t have any side tables for our living room, so Justin made one out of wood he salvaged from old pallets. He also made a cute wooden tray for us to corral things on our little ottoman. I wish I had a better picture, but at least you can get the idea here.

Wine Racks (circa 2015)

One of Justin’s favorite things to make back in our rental house were wine racks out of pallets. He made several of these (and even sold a few!) We still have ours, although we haven’t determined a good spot for it in our current house. A friend just sent me this picture though – they still have theirs up after 5+ years!

Dining Chairs (2016)

A couple cans of some spray paint and discounted fabric from a going-out-of-business sale allowed me to finally update these hand-me-down chairs!

Necklace Holder (2016)

I really wanted this necklace holder I saw on Anthropologie, but it was $40. Justin made me a gorgeous dupe that honestly looked the same for a tiny fraction of the price!

First House Kitchen Renovation (2016-2018)

fter three years of renting, we were able to buy our first home. We were so excited! We finally had the ability to make some changes to the actual home we lived in, and we had some (still small) means to make some updates.

This kitchen renovation process was slow and steady. We waited for sales and replaced appliances one at a time. We painted the walls. After about a year, Justin borrowed a friend’s tile saw and learned how to install a backsplash. We had the cabinets painted. We took our time, budgeted carefully, and were happy with the end result (although I still wish we had been able to replace the fluorescent light – now we know how easy that would have been!)

Shower Upgrade (2016)

The first house had a sliding shower door that we didn’t like. After watching a YouTube video, Justin felt confident with how to remove it and just went for it. We caulked the holes, added a shower curtain, and loved the space so much more! In this bathroom we also painted the vanity and updated hardware. It was my first venture into choosing a dark color for cabinets and I think this vanity is what started my love affair with moody colors!

Painted Buffet (2016)

This used to be in my grandparents’ home growing up and when they moved, asked if I could have it. The piece looks cool, but wasn’t in very good shape so I had the confidence to try going bold with a color. It made for such a fun TV stand + toy storage!

Playroom toy storage 1

Nursery Furniture (2017)

LJ’s first nursery included a thrifted midcentury dresser. We bought it for $30 and I painted everything but the legs and spray painted the handles. Justin made the triangle shelf hanging on the wall!

Updating with flooring + paint (2016-2017)

We painted every surface in this home – walls, trim, baseboards, doors, most cabinets, even the stair railing! We also updated a lot of the flooring and removed all the wallpaper. It was done slowly over time and I started to gain more confidence making decisions and honing in on what I liked. This was a process and a true labor of love and it really made me become passionate about starting to document our renovations.

There’s so much more that I could share, but I think that gives you a good idea of our DIY journey. Looking back, I’m so glad we decided to have the courage to try new things! We honestly did not always know what we were doing and we’ve had so much trial and error along the way. There were just things in our homes that we wanted to add/change/remove/etc and we came up with plans to tackle whatever those things were. Every single project taught us something and our skills and confidence have built up over the years.

Nowadays, Justin can easily swap out all different kinds of light fixtures and build a full dining table. We know how to plank an entire room, install crown molding, and update window trim. We made an entire wall-to-wall builtin bookcase! We’ve wallpapered when we had the budget and I’ve stenciled when we haven’t. We’ve installed butcherblock and I learned how to paint laminate and tile. Our DIYs have certainly scaled up, but I’m also still in awe of how much a simple can of spray paint or a few pieces of scrap wood can do. DIY has been a part of our home-making journey from the beginning and honestly, I don’t see that changing any time. There is still much more to come!

ORC Week Seven: Creating a “Mudroom” in a tiny nook!

I’m back for another week of the laundry room transformation!

I’ve mentioned it before, but this small space needs to serve a couple different purposes for our family. Laundry, yes, but we also need it to function as a mudroom. Since it is directly connected to the garage, the laundry room is the main entrance our family uses to enter the house. I needed a functional space to put shoes, jackets, and now that winter is coming – hats, mittens, and scarves, too!

The laundry “room” is hardly more than a laundry hallway, but there is a small nook sandwiched between the bathroom and a closet that is currently serving as our mudroom. Eventually, we plan to do a gut renovation to remove the bathroom and expand the hallyway into a true laundry room + mudroom but for now, we need to make the most of this little nook!

Previously we had six hooks and a shoe rack here, but it was unorganized and didn’t really serve our purposes well. There was nowhere to sit, no storage for mittens/hats/etc, and not enough hooks for our needs. Here’s a little look back:

I really wanted to swap out the shoe rack for a more functional bench storage, but it was hard to find a bench that fit my needs and was the right size for the wall. I finally came across this bench and the dimensions were perfect! It took me a while to find the right color (I ordered it in three different colors!) I landed on Amber Brown and it works great in the space!

I removed the shoes that no longer fit my kids or were summer shoes and there is now plenty of storage for the ones we’ll use this fall and winter. The bench is perfect for my kids to sit on to put on their shoes and bonus – the lid lifts and perfectly fits all their winter gear!

I originally thought I would have to build a hanging coat storage system to include a shelf and space for hats and gloves, but since the bench fit everything, I was able to just upgrade the hanging storage with a simple matte black accordion rack. This one had ten hanging hooks so I have more space to easily hang all our coats, jackets, and a couple extra hats. It works great and was super easy to install!

I also spent some time reorganizing the closet so I could move the large dog food container inside and that helped free up a lot of room too! This little nook may be low on space, but it’s high on function now and will serve our family well until we tackle the larger renovation in a few years.

There’s only one more week of the One Room Challenge and for once, I’m done ahead of time! All the major changes are done and all that’s left is a little tweaking of the shelves/decor this week. I’m excited to be almost finished with this room transformation!

ORC-Guest-400x218.png

Be sure to check out all the other One Room Challenge participants here!

ORC Week Six: Laundry Room Shelving, Lighting, and More!

This week was a big week for progress in the laundry room! Shelving was built, lighting was installed, doors were finished – the room is really coming together and I am loving it.

And because it’s always fun to look back on how far we’ve come, here’s where that same view was six weeks ago:

Originally, I envisioned creating floating shelves from wall to wall, but as it came time to work on the shelves, I decided to pivot a bit.

Floating shelves are pretty time-consuming to make from scratch and I haven’t had as much time as I had hoped to work on this room lately. Plus, the more I thought about it, I realized that since this is just a phase one renovation (we still plan to fully gut and renovate this room and the adjacent bathroom to create a bigger laundry + mudroom in a few years), shelves with brackets would be easier, quicker, and less expensive. It just made more sense to keep this project simple!

Justin had a few extra 1 x 8 oak boards leftover from a previous project and they were the perfect width to create two shelves. Using our miter saw, I cut two boards down to fit wall to wall and then gave them a light sand with our orbital sander + 120 grit sandpaper.

I wiped them down with a tack cloth and stained them with a stain we already had. Once the stain dried, I used a foam brush to apply a layer of this polyurethane and boom – shelves were ready for install!

I purchased these black brackets and Justin installed them after work using his new laser level (this thing was SO handy and I know we’ll be using it many times in the future!) The whole project took maybe 3-4 hours of active work time start to finish. Simple, easy, and inexpensive – win, win, win. I am so thankful to have functional storage that looks great!

A few other things that happened this week: I finished painting all the doors and trim and Justin installed new matte black door hardware. It’s always surprising to me how small details like door hinges and levers can pack such a big punch!

We also finally updated the two boob lights. I wanted a recessed light for the ceiling above the hallway portion but the type of junction box that had been installed prevented my first two choices from working. I settled on this low profile light and we’re happy with it – it is inconspicuous enough that it sort of just fades into the ceiling and doesn’t take visual attention away from other elements of the room.

I mentioned last week that the initial light I wanted for above the washer and dryer was out of stock or backordered on several different sites, so I once again decided to pivot a bit. I really liked this light from Rejuvenation but I struggled to pick a color. It’s just so hard to know if the color you see on screen will translate to real life like you expect! At $229 . . . I wanted to be very sure I liked the light. Then yesterday evening, I was walking through Lowe’s and happened to see this light out of the corner of my eye. I was immediately inspired to do a little DIY upgrade and create the look I wanted for less.

I purchased the light and a can of this spray paint. I use painter’s tape to block off the lightbulb hole of the dome and set it down flat on a large piece of cardboard. I sprayed several light coats of the spray paint until I had even coverage and let it dry. Justin installed the mount and I screwed on the dome.

The Rejuvenation light was $229 and this one was $59. Add in tax and the cost of spray paint, and this light ended up costing me around $70. A big savings and I think it’s a pretty good dupe! This also served as a reminder that a little creativity and bravery can go a long way. Justin couldn’t believe I would spray paint a brand new light, but I knew the look I was going for and just went for it. I’m so glad I did – I’m thrilled with the light and the way it fits the space!

We’ve got two weeks left in the challenge and I’m just about finished with my to-do list. I still have some tweaking to do – for now I just shopped my house and pulled some art, a rug, and a few little decor pieces to get a feel for what works in the space. I also still need to create some hanging storage for coats above the shoe bench to finish off the little mudroom corner. The end is in sight!

Be sure to check out all the other ORC participants here!

ORC-Guest-400x218.png

October 2021 Book Review

Happy November 1!

I’m kicking off the month with a look back on all my October reads. Last month was an unusual one where I read some books I liked but also read more than one where I finished without knowing exactly how I felt. I liked them . . . but I also didn’t . . . but I didn’t actually hate them. Does that even make sense? They had things I enjoyed and things I didn’t and it felt kind of strange to read books so close together that I couldn’t really discern my feelings for. Maybe I was just feeling off personally or maybe it was the book choices, but either way, despite not knowing if I liked them all, I have lots of thoughts on each one. Let’s get into it!

Summer at Lake Haven by RaeAnne Thayne

Summer at Lake Haven: A Novel (Haven Point Book 11) by [RaeAnne Thayne]

Samantha is an aspiring fashion designer living in the heavy shadow of her mother’s expectations. Ian is a single father of two who is also struggling with the weight of family expectations and duty. When Ian rents the summer house next-door to Samantha to work on his research and attend his sister’s wedding, the two find their lives intertwining quickly. The question is, can they keep their hearts from intertwining as well?

This was a win for me because this book exactly met my expectations: I liked the cast of characters, I liked the dynamics, I liked the charming setting, I liked the fact that there were a lot of cameos from characters I’ve met before. It was predictable but with enough substance to still be fun to read. This was another installment of the Haven Point series, and I reviewed a bunch of the other books in this post. This book fell right in line with the others – a light, sweet, slightly cheesy, feel-good, Hallmarky read that you can read pretty quickly. Reading this book felt like returning to a nostalgic vacation spot and I really enjoyed popping back in to Haven Point again. When you’re in the mood for a nice, easy, rated-PG romance read, this series is a great choice!

The Dating Playbook by Farrah Rochon

No matter what she tries, Taylor is struggling to make ends meet and get her personal training business off the ground. Then Jamar comes to one of her pop-up boot camp classes and offers her a mind-boggling deal: he’s willing to pay an obscene amount of money for Taylor to help him train to get back into the NFL. The catch is, no one can know she’s training him. When they’re accidentally spotted together and rumors start, Taylor tries to cover as his girlfriend. They find themselves having to fake a pretend relationship for the public, but pretty soon it doesn’t feel like there’s anything pretend about it.

A couple months ago, I read The Boyfriend Project and enjoyed it. When I happened to see this book on the shelves by the same author, I decided to check it out. It turns out it’s kind of a series – in The Boyfriend Project the story was about Samiah and heavily focused on her friendship with two other women, Taylor and London. The Dating Playbook was now Taylor’s story (with both other women making multiple appearances) and at the end of the book there was a note that London’s story is coming soon. If I’m being completely honest, I did not enjoy this book as much as the first one. I wasn’t quite as invested in Taylor’s character and found the repetition of her struggles to be tiring. At 350+ pages, the book felt much longer than it needed to be. I did like Jamar, I did like their dynamic, I did like a certain plot line that I won’t give away here but that spoke to my heart, and I did like that female friendship was portrayed as strongly as the romantic relationship. It wasn’t a home run for me, but I did enjoy it enough that I’ll probably give London’s story a try when it comes out.

The Wicked City by Beatriz Williams

The Wicked City: A Novel (The Wicked City series Book 1) by [Beatriz Williams]

1924 – Gin Kelly is a flapper who frequents Christopher’s, a speakeasy thriving in the midst of Prohibition. After a raid, she’s brought in by Prohibition agent Oliver Anson who wants her to help take down the operation of a powerful bootlegger: her stepfather. 1998 – Ella Gilbert needs a safe place to land after her marriage falls apart and moves in to the apartments at Eleven Christopher. She’s told there is a speakeasy in basement and she hears the music playing…but then learns the place has been empty for decades. What exactly happened in that speakeasy sixty years ago? And why is there a scream heard in the middle of the music?

When it comes to favorite authors, Beatriz Williams ranks highly for me. She’s delivered book upon book that I’ve devoured and loved so I went into this one with some pretty high expectations. It made the shock even greater when those expectations were not at all met and I was left feeling confused and disappointed.

There is a writing principle called Chekhov’s gun and the simplest way to explain it is: if a gun is introduced to the plot in the first part of the story, it needs to go off before the story ends. In other words, when an object/person/event of significance is introduced, it needs to contribute to the plot or the significance needs to be explained at some point. This book violates that principle multiple times and leaves so many loose ends and questions! I ended it feeling really frustrated and unsettled and went online to find out what other readers thought. At that point, I discovered it is actually the first book of a series! I read the synopses for the future books in the series and let me tell you, I’m confident I already have several of the connections/future twists figured out. I can’t say this for sure, but judging by this book and the things I’ve already guessed, I bet that this series could’ve been condensed down into fewer books with faster paces.

Overall I’m not really sure what I think. The pace was slower than I normally like and we got breadcrumbs along the way but no connections or real answers. There are some disturbing moments and the whole book left me feeling disoriented. But…if I had known all along it was a series and not a standalone story (it’s absolutely not able to stand on its own), I would have had a different set of expectations and might have enjoyed it more. I just don’t know! I’m still debating if I want to continue with the series but if I do, at least I’ll know more of what to expect.

Mexican Gothic by Silvia Moreno-Garcia

Mexican Gothic by [Silvia Moreno-Garcia]

After receiving an unnerving letter and plea for help from her newlywed cousin, Noemi heads to High Place, a remote mansion in the Mexican countryside, to figure out how to help. Upon arrival she finds the house is falling into disrepair and neglect, her cousin is acting very strangely, and the family is unwelcoming and secretive. Before long, Noemi starts to feel her mind being invaded by nightmares and strange visions and it seems everything, including the house itself, is hiding a sinister darkness.

The horror genre is far outside my typical choice but this book was recommended to me several months ago and I’ve had it on my TBR list ever since. I decided Halloween week was the perfect time for a gothic novel and finally dove in. I’m not sure I liked it, but I also didn’t hate it? I do think the book might be over-hyped, or maybe it’s just not a genre I’m ever going to really connect with. There are some really creepy and disturbing descriptions and the isolated setting is eerie, but the pace was not great for me. The first 2/3 were slow and that lead to me skimming quite a bit. It’s hard to truly be immersed in a horror if you’re skimming, but I just wasn’t interested enough to absorb every word. There are also a lot of situations where it’s difficult to discern reality and follow what is happening to Noemi’s mind (it’s confusing, but also leads to a nightmarish vibe which I’m sure was the goal). So much was crammed in the last 1/3 of the book and for me, that’s when things started to get really interesting (and really horrifying), but it was a little too late to save the whole book. All that being said – it may not be my favorite, but I’ll probably be thinking about this one for a while. It’s just so bizarre and sinister and macabre. I’m not surprised to see it’s being developed for a Hulu limited series – I think it will translate really well to an on-screen horror. I’m still not sure I actually liked it, but I can’t deny it leaves an impression. If horror is your thing, you’ll probably enjoy this one!

Whew! There you have it. Four books in October. One I really enjoyed, one that I thought was pretty good, and two that I’m just not sure if I really liked or not. What a month! I’m really hoping that November has some knock-my-socks-off reads so if you have any recommendations of books you loved, please share them in the comments below!