A Look Back on Our April Activities

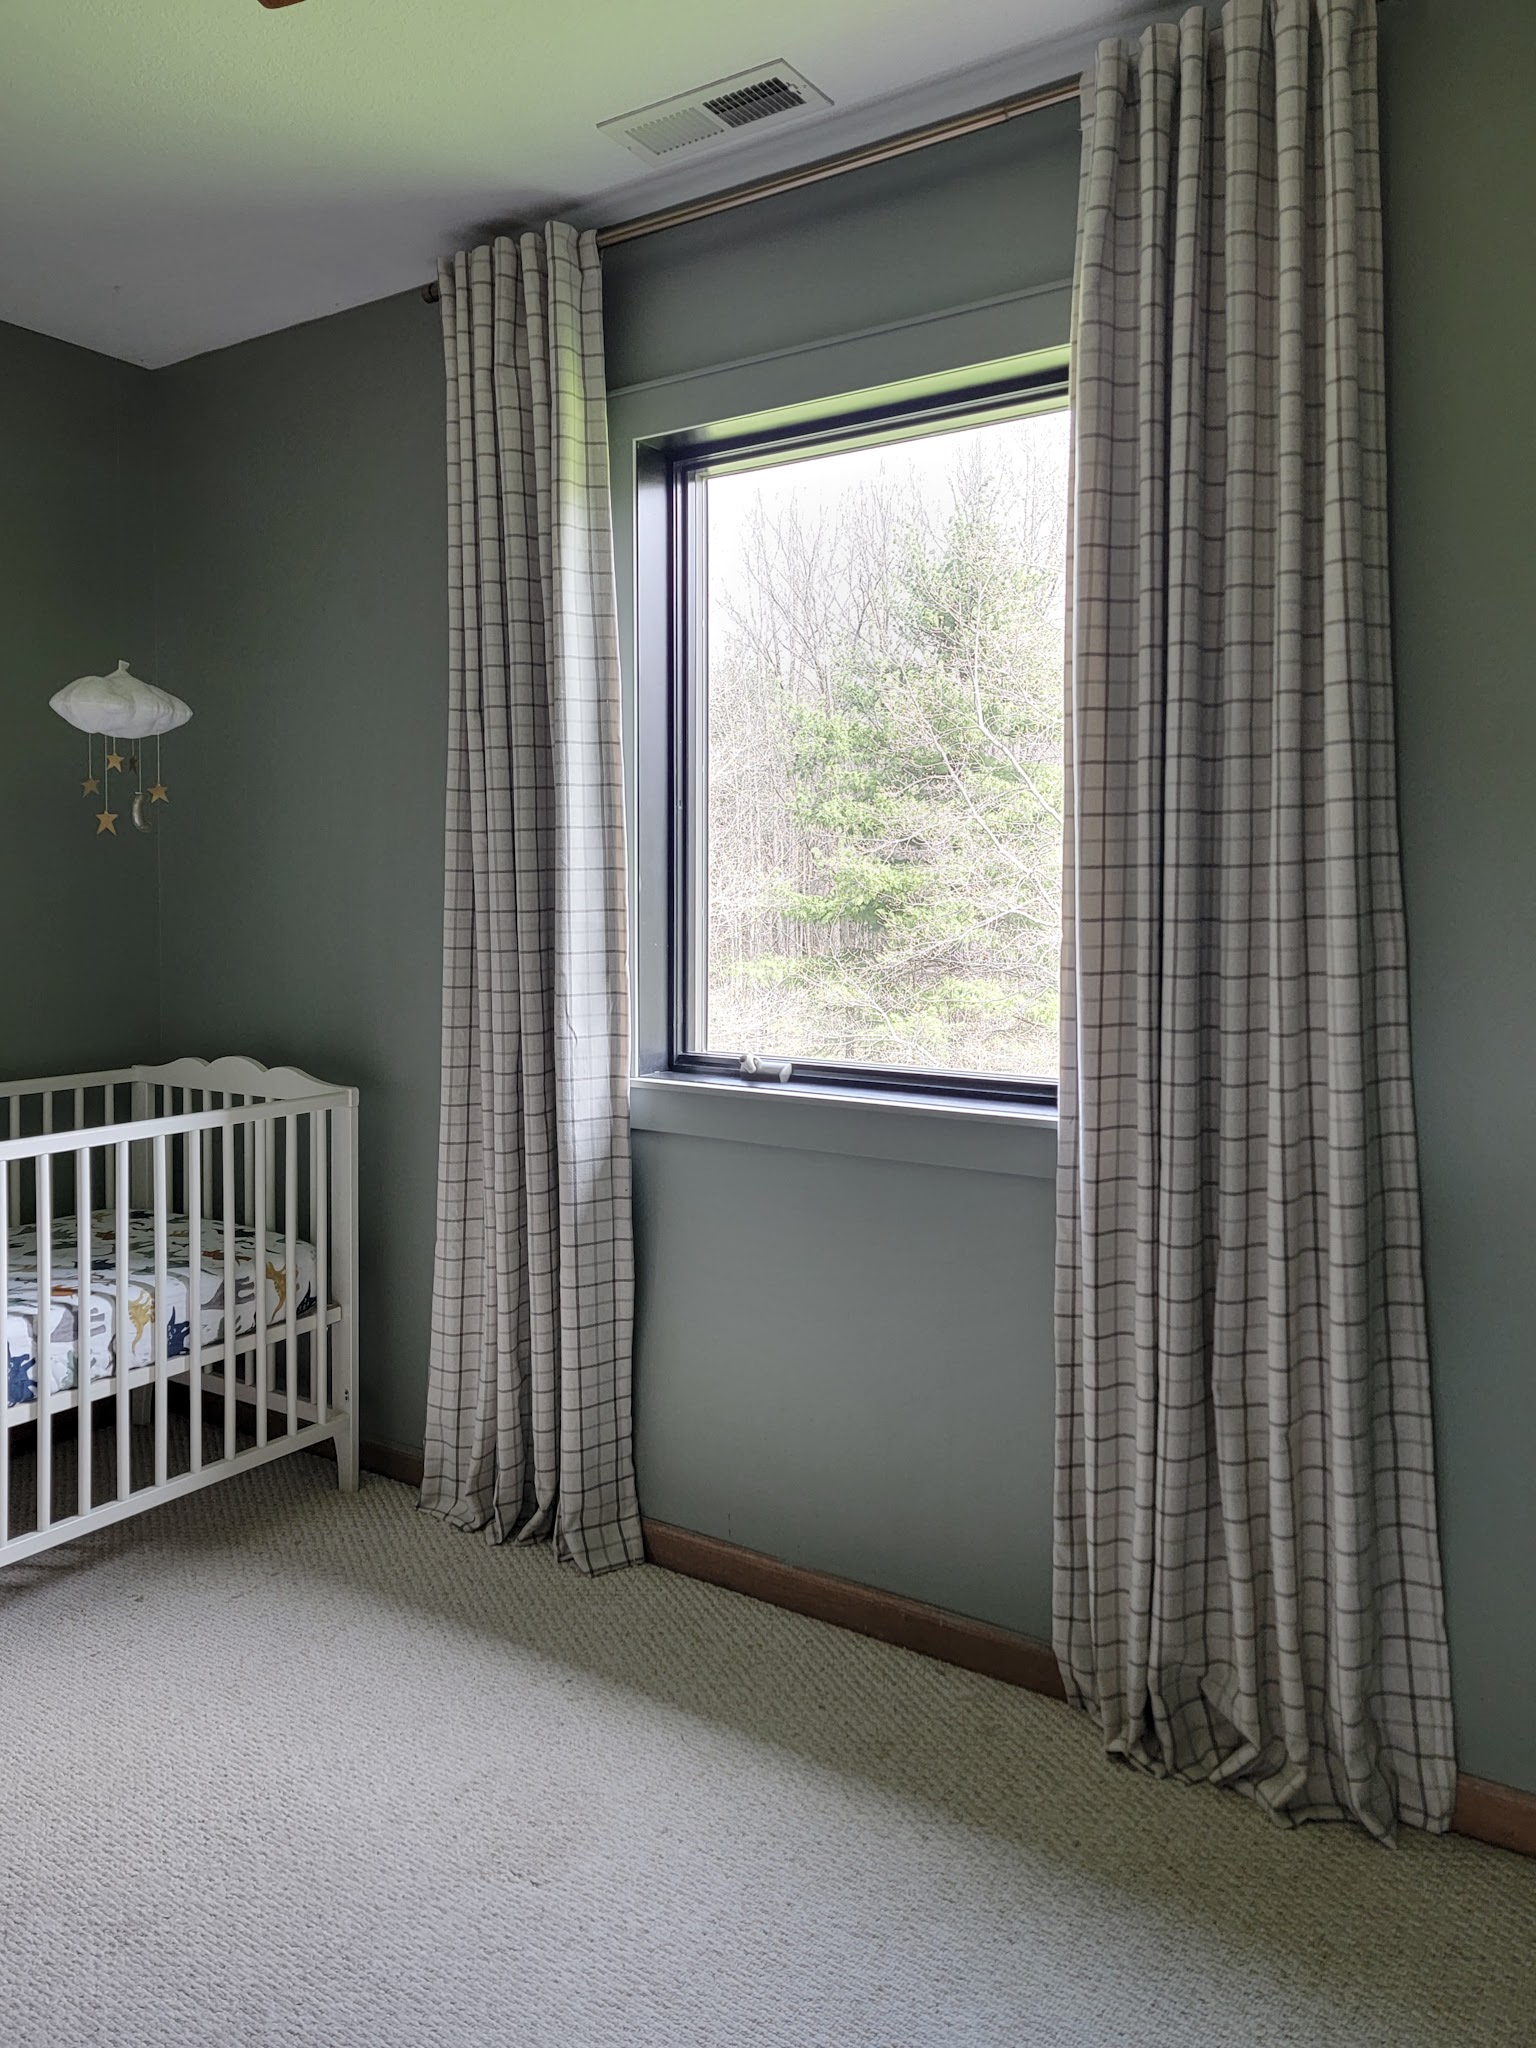
April was a good month around here! Today I just wanted to look back a little on our family’s activities this past month outside of the projects we completed. These posts serve as little mini time capsules for me and I love looking back on life in our family at different stages!

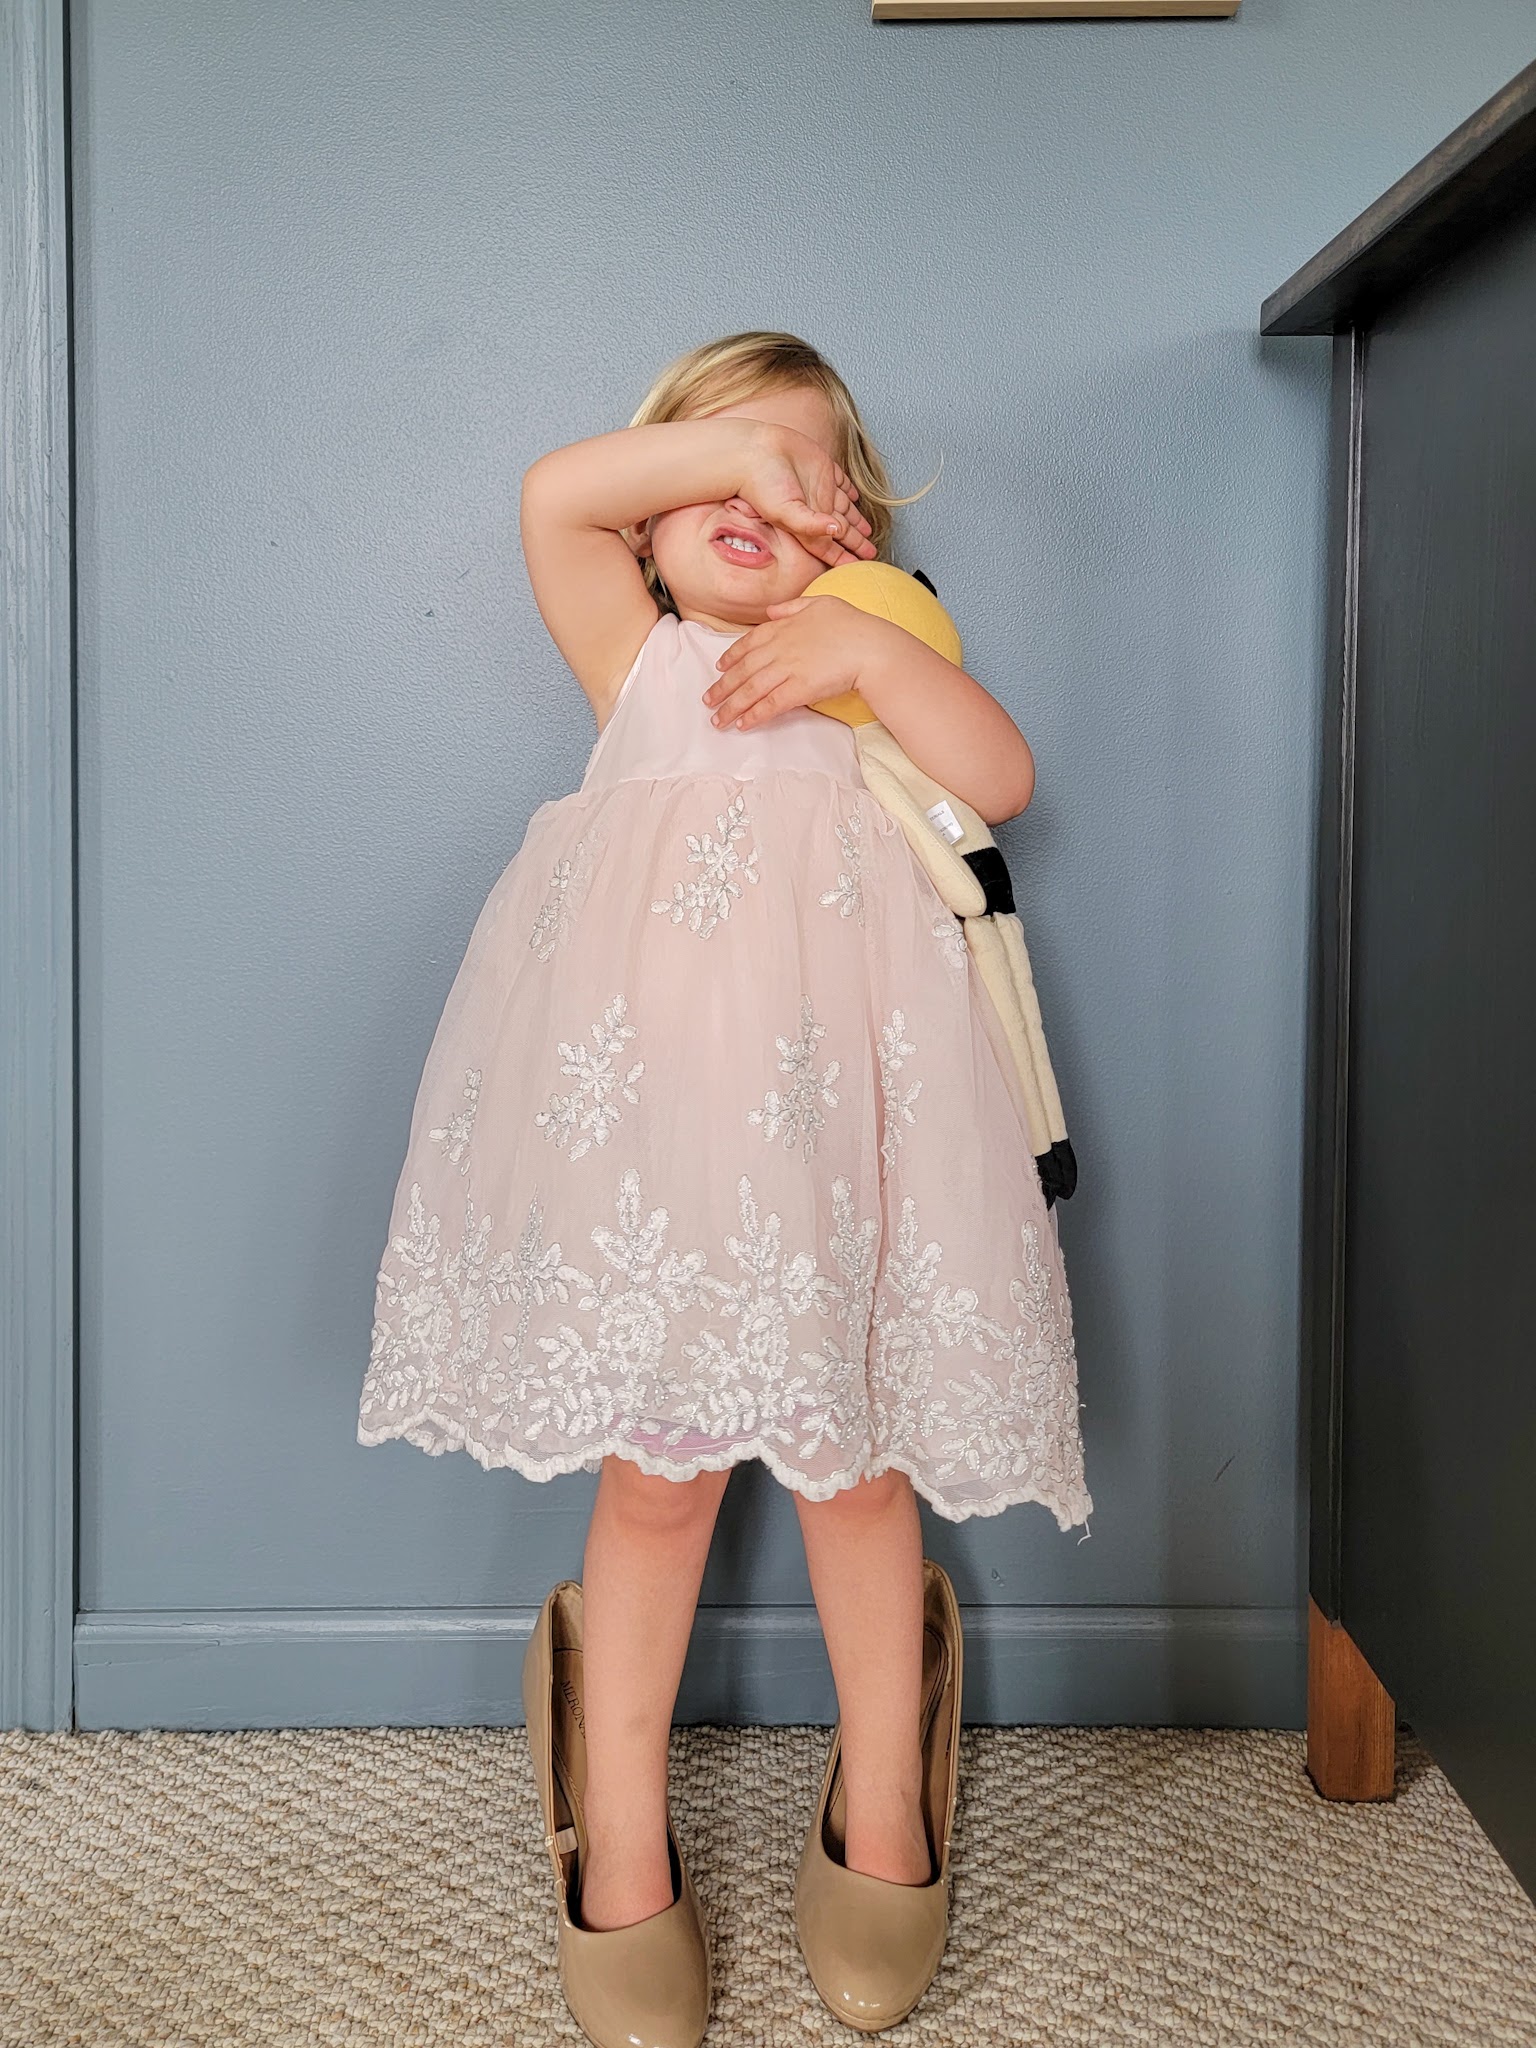
I love this picture because Vi is just as likely to be carrying a doll while dressed up in a princess dress and heels as she is to be up to her knees in water, digging in sand, or touching caterpillars. She has such a fun little personality!

Here’s a little peek at the rest of our April:
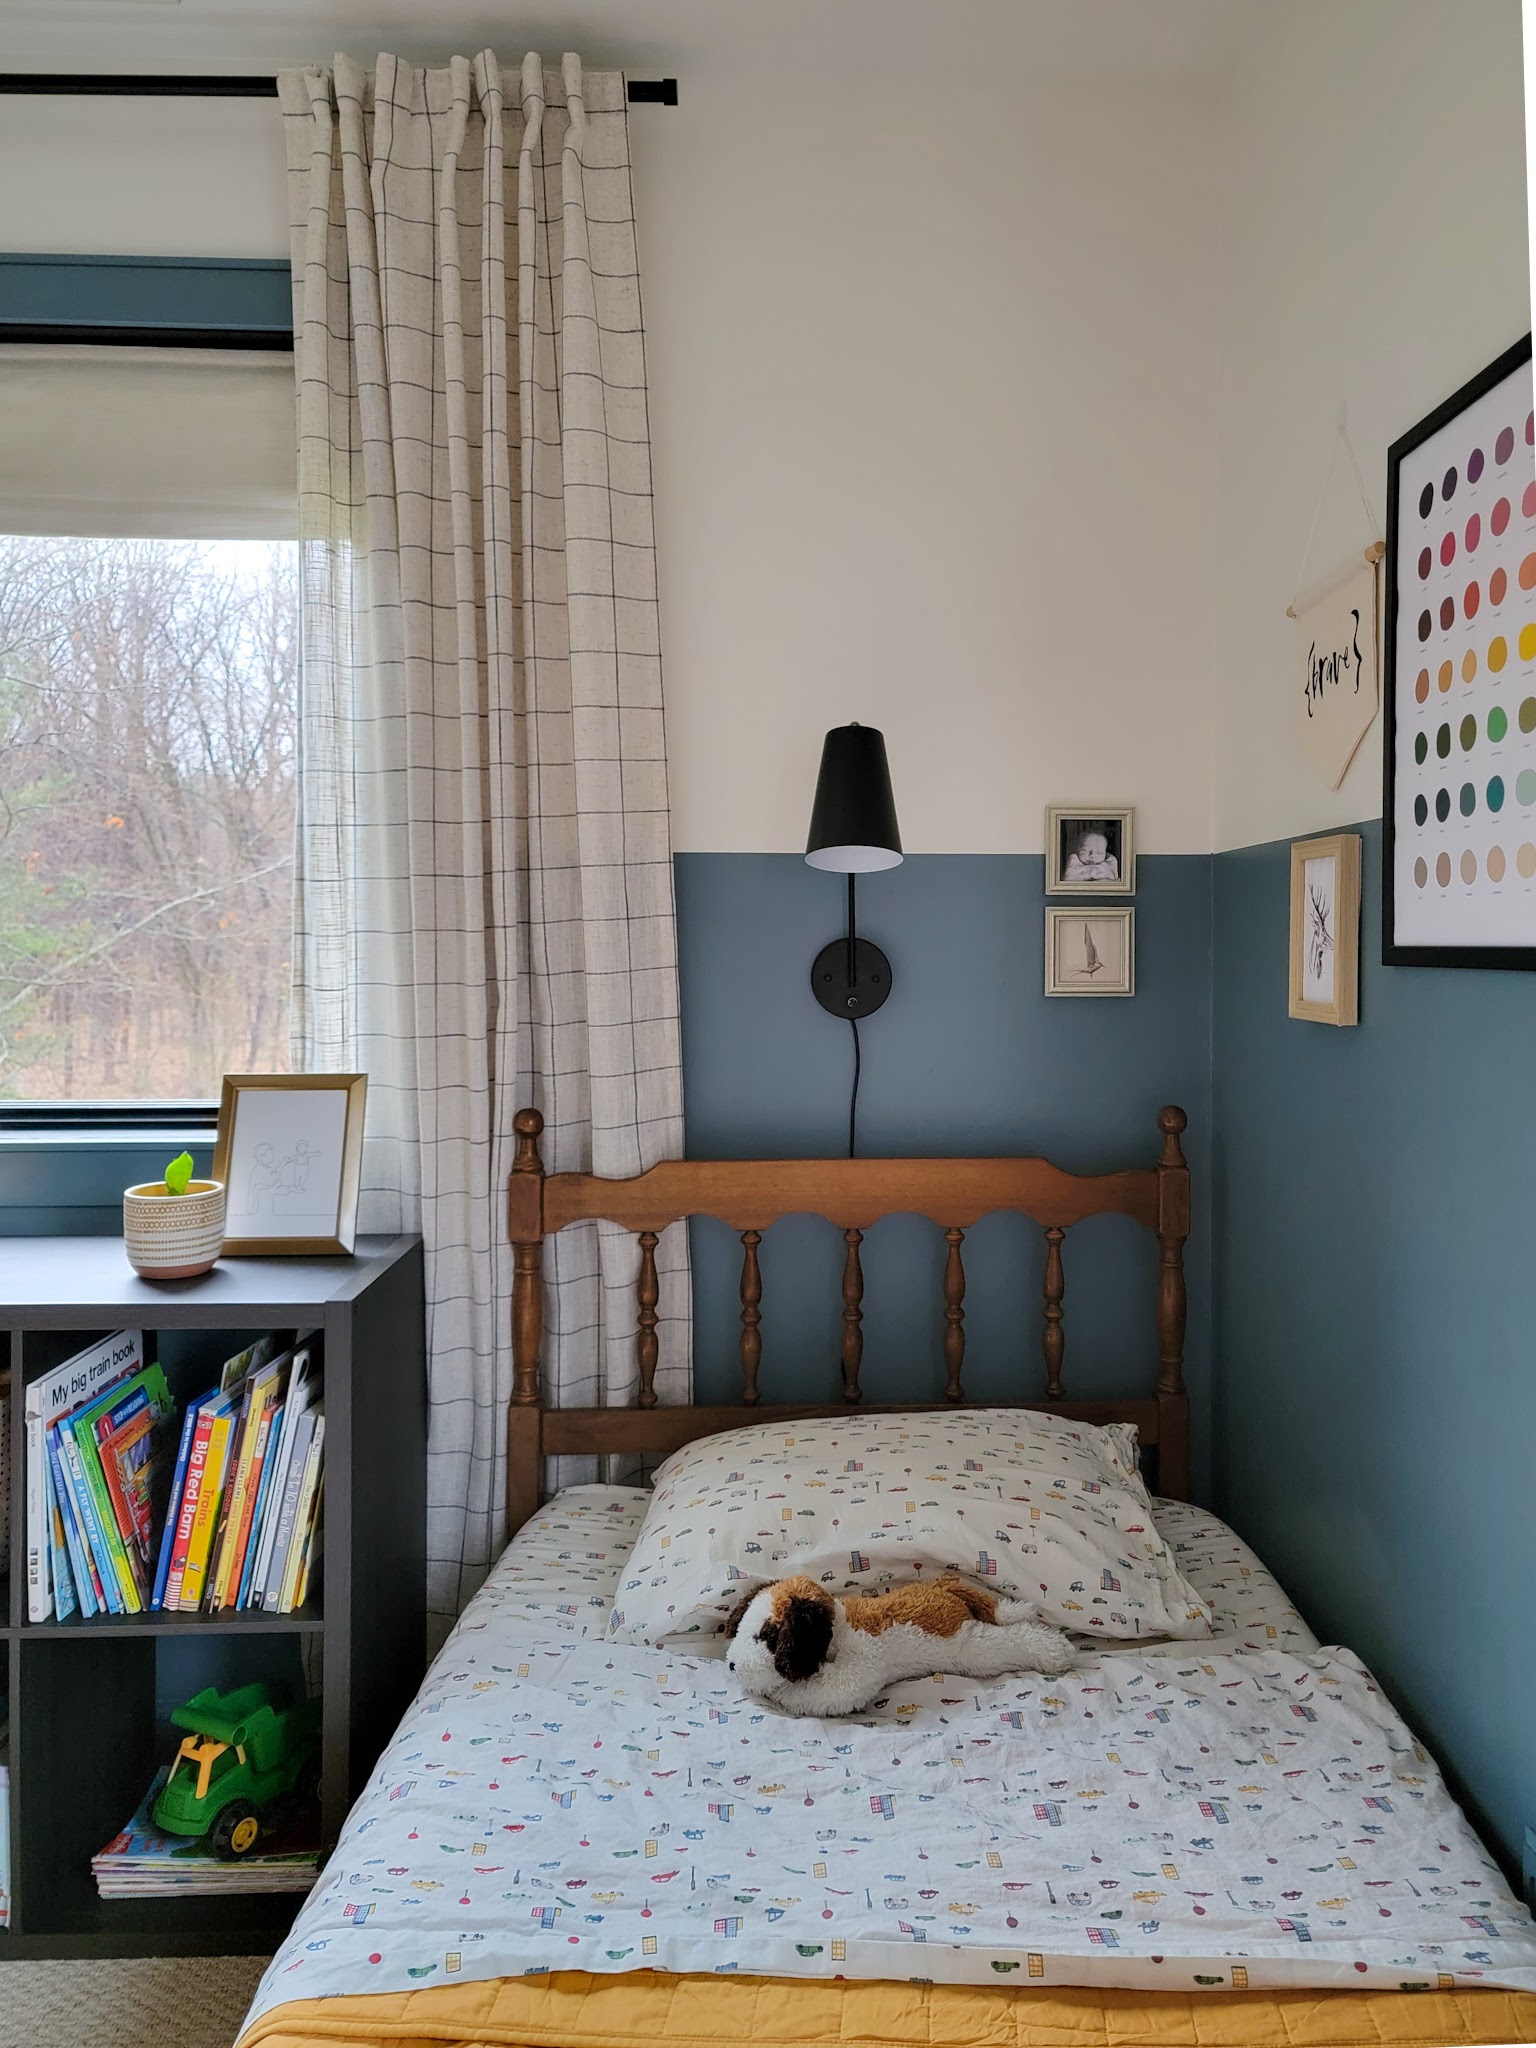
Vi’s First Braid

I had been looking forward to this event for a long, long time. Vi’s hair is finally long enough to braid, and thanks to her current obsession with Frozen, she will sit still long enough for me to do it so she can look like Anna and Elsa. Her hair is pretty fine so it’s a little tricky, but I care less about the end result and more about the sweetness of the mother-daughter hair braiding time. I love our little moments together!

My Sister’s Baby Shower

My mom, sister, and sister-in-law all co-hosted a baby shower for my sister Jenni and it was so much fun to celebrate her! It has been so fun to see my sister experience the beginning stages of motherhood and I know she is going to be a fantastic mother to her little one. I also love that we get to enjoy this process together as she enjoys her first and I enjoy my (likely) last. We are due two months apart, and our cousin is actually due right in between us with her first baby as well, so this summer is going to be full of babies and I cannot wait!

Games, games, games

I snapped this picture the other morning – LJ and Vi just got out CandyLand and started playing together first thing in the morning before they even had breakfast. Melt my mama heart! LJ has recently gotten VERY into playing games. He loves to make up his own games and he also loves to play any game he can – board games, card games, iPad games, etc. Justin and I both are big game lovers so it’s been really fun to get to teach him the basics of gameplay and also how to be a good winner and loser (we’re still working on that one ha!) I might have to write up a post of all the games we’re loving right now because there are actually a surprising amount of games that are great for toddlers and young kids (LJ is 4.5, Vi is 2.5). It’s so fun to do as a family!

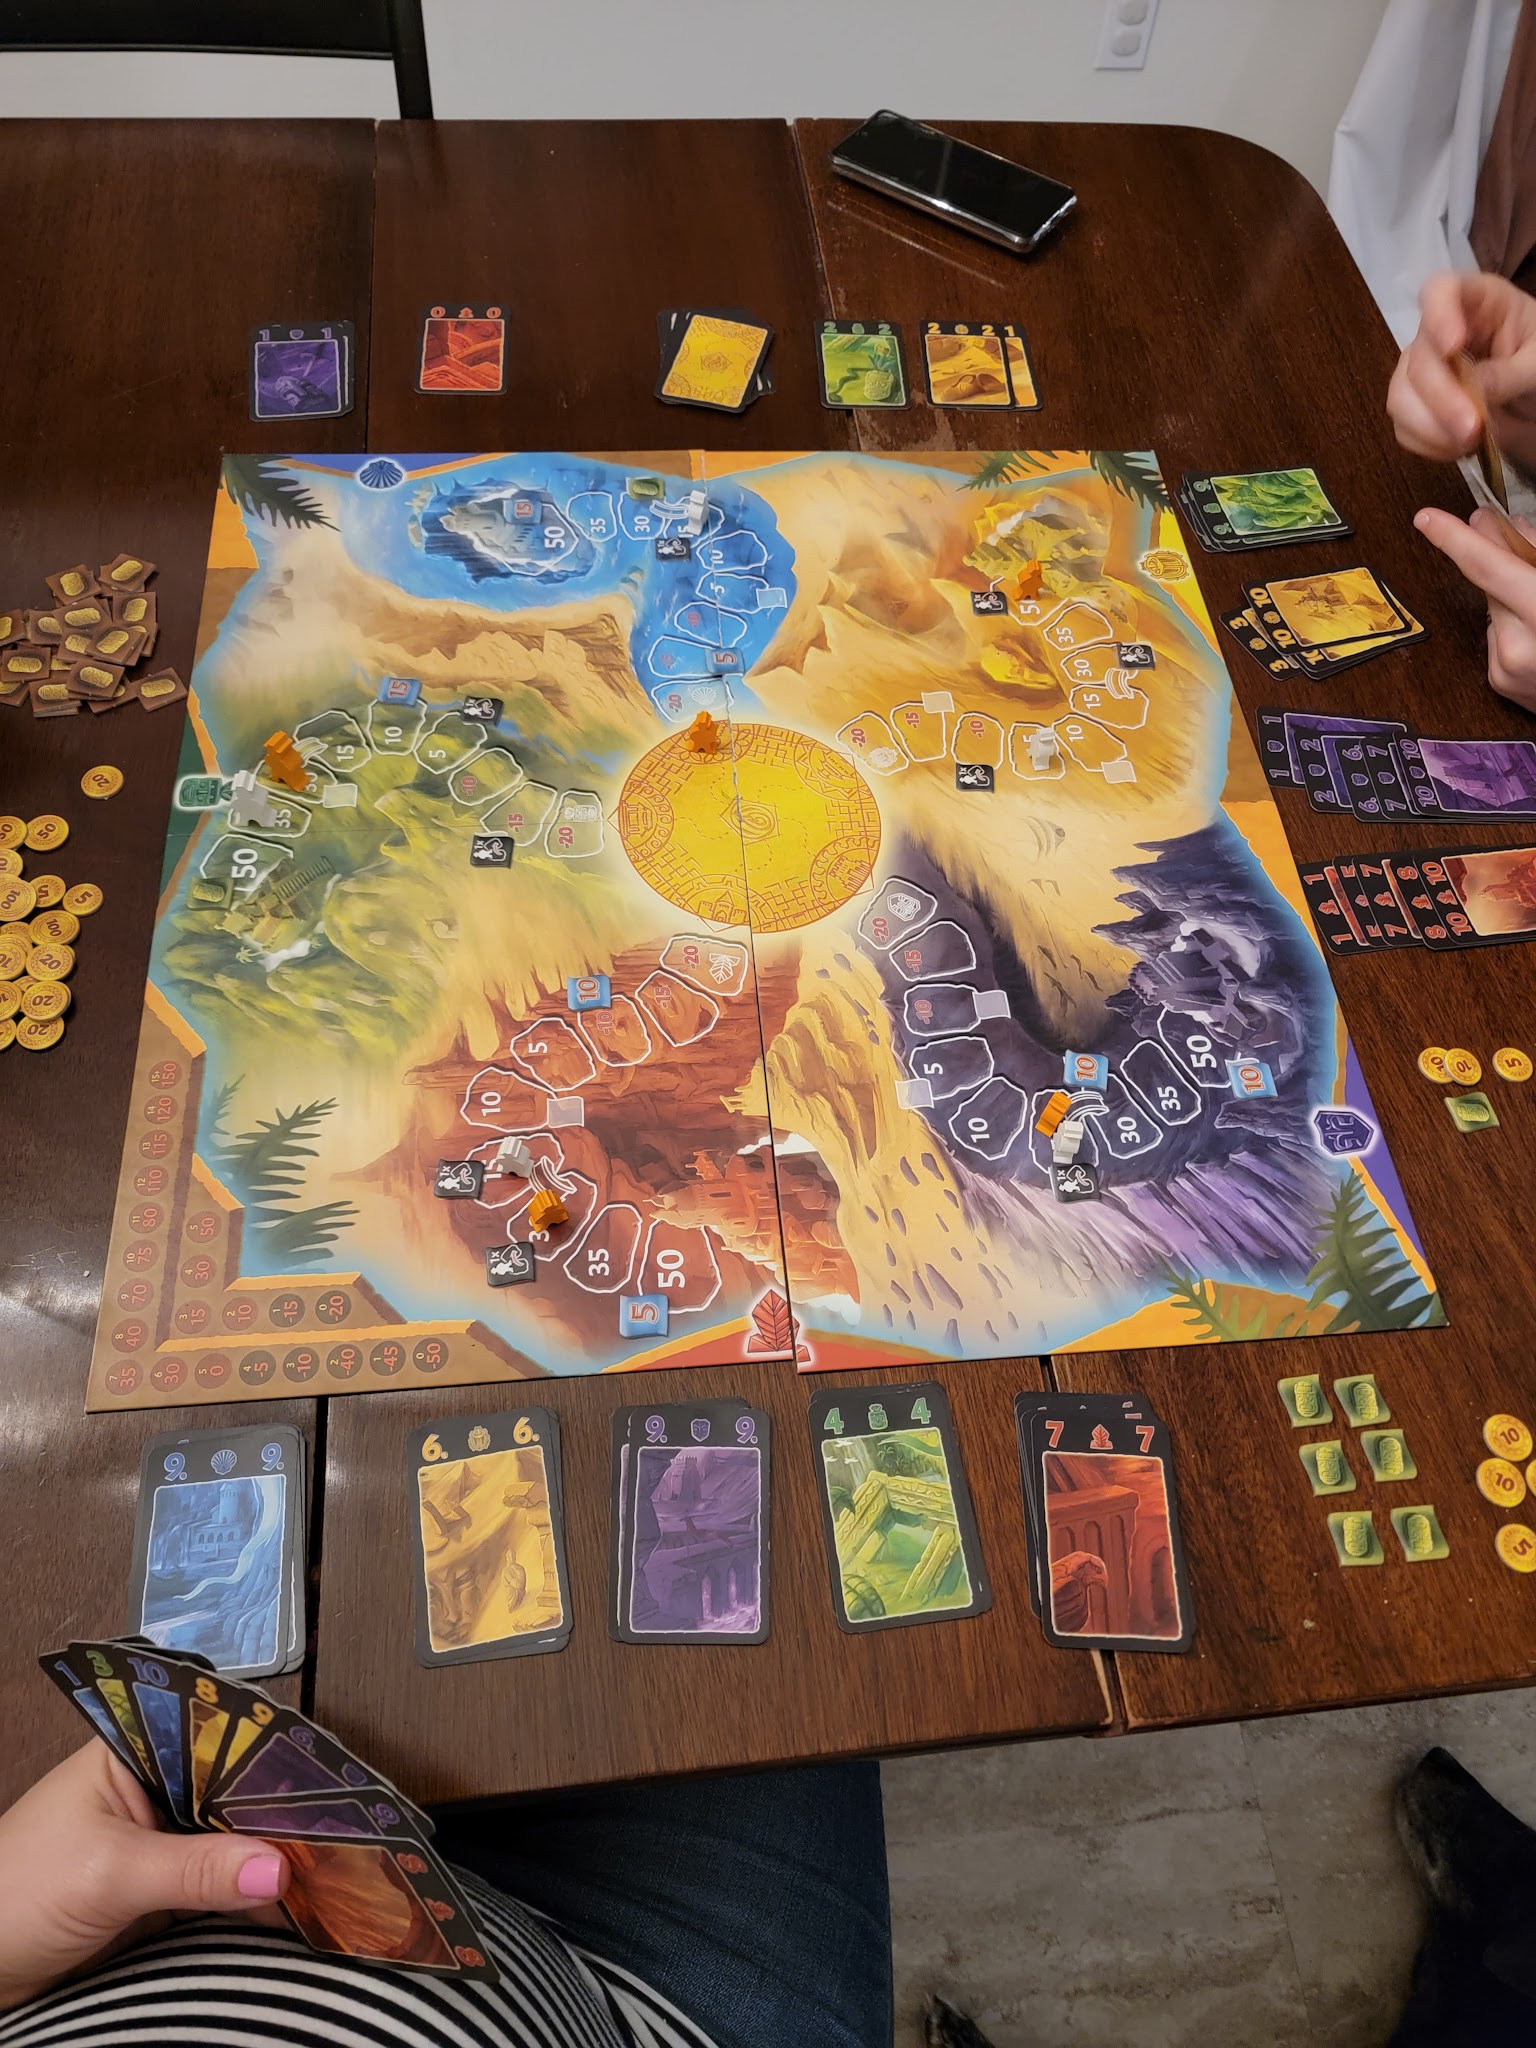
And speaking of games, I recently discovered that our library has a big collection of puzzles and board games to check out. Jackpot! Justin and I love to play games or do puzzles as an at-home date night after the kids go to bed. Board games can be expensive so it’s fun that we get to trial a lot of different games without having to buy them for ourselves or add more stuff to our house (although we’re already going to buy the first game we tried out because we enjoyed it so much!) We also did a large puzzle together, which was great because puzzles aren’t always fun to do over and over so a new one to do and send back was perfect. It’s been a great way to add some variety to our date nights at home and we can’t wait to try more out.

Soccer Season!

The kids are both in soccer this year and while our first practices were very cold, they both had so much fun! It’s LJ’s second year of soccer and Vi’s first and they’re both really loving it so far. I love this stage of life where they get to try so many new things and see what they learn and enjoy. I also loved that LJ cheered for Vi the ENTIRE time her team was practicing haha. He was so sweet and just cheering her on and encouraging her from the sidelines – it made me so proud.

Busy Toddler Activity

We’ve been outside as much as we can, but April can still be really cold. We’re all over winter and being inside, so I’ve been trying to come up with new activities to do while we’re still indoors. I got the idea for this activity from @busytoddler on Instagram and it was a HUGE hit. It’s just little containers of baking soda in a tub, and I filled little medicine dispenser cups with water + food coloring. The kids used medicine droppers to color the baking soda and had an absolute blast! They played uninterrupted for like 30-45 minutes and only needed my help with water refills so I could clean the kitchen and do dishes while they played. Major win all around.

Happy Birthday Justin

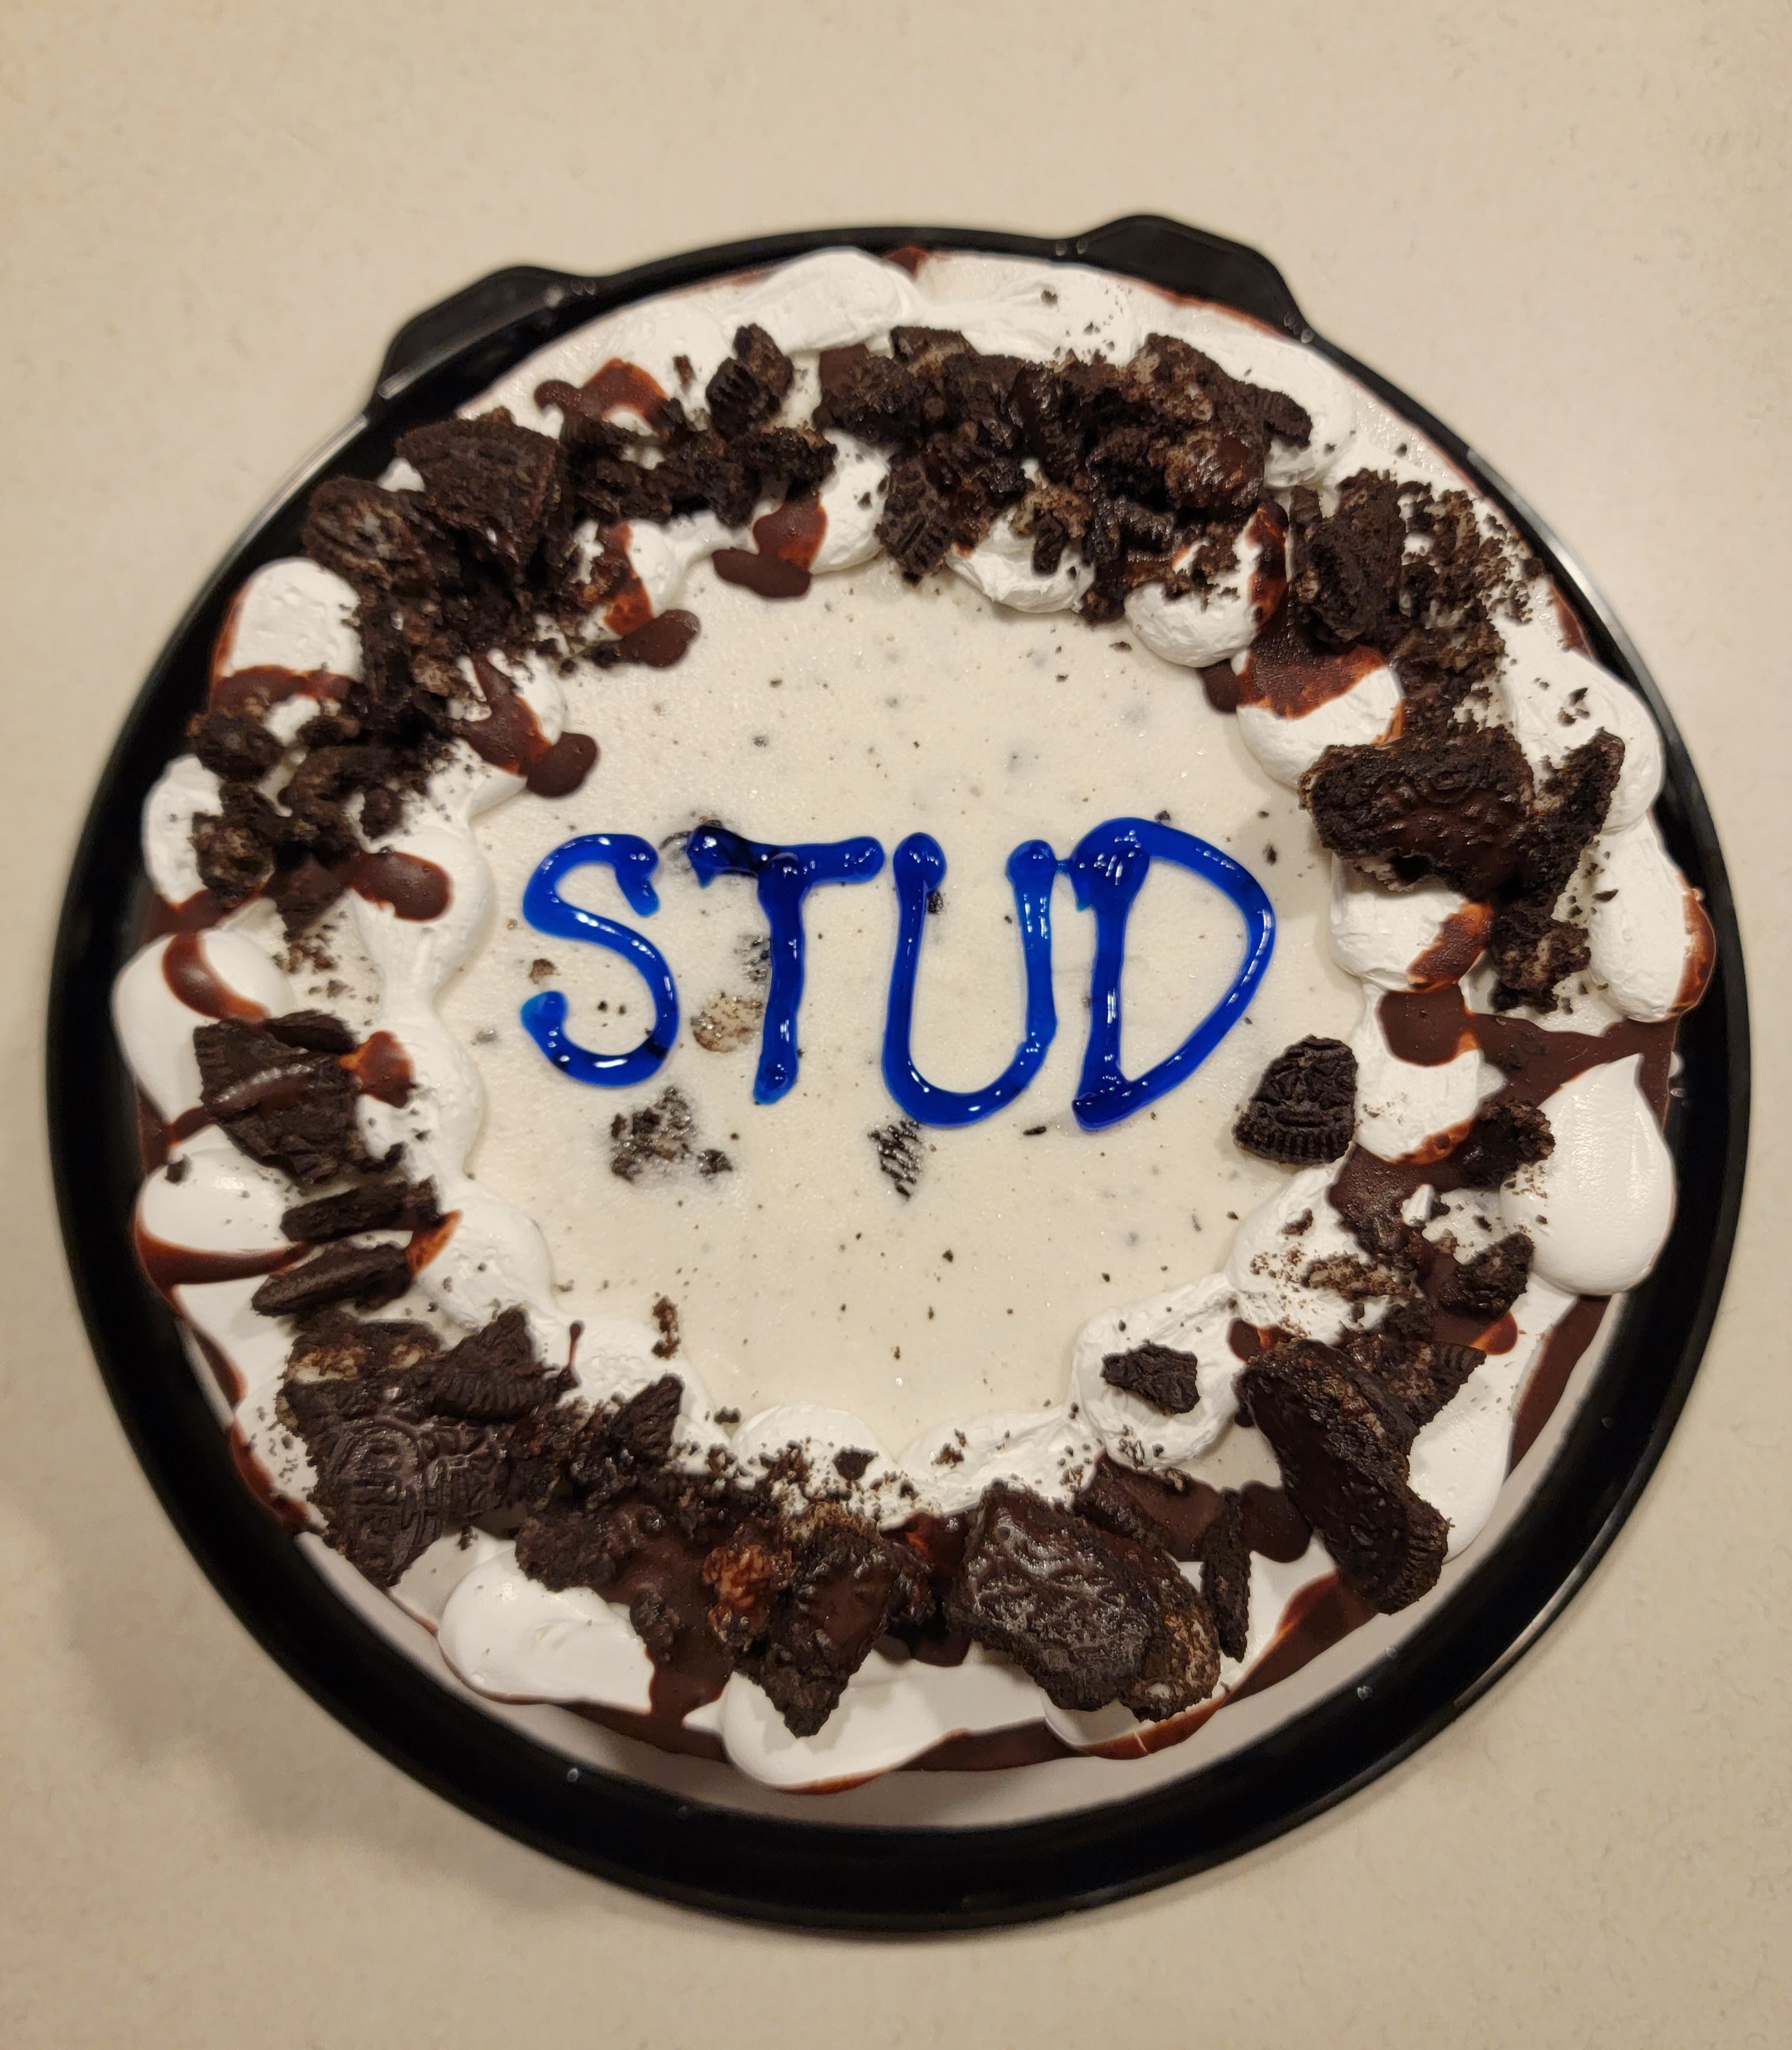
April is also Justin’s birthday month, and while I don’t have any pictures of our celebration for him, it is always such a treat to celebrate my favorite guy. Speaking of treats, he picked his own cake out this year – can you tell? Haha!

I hope you had a great month too!

ORC Week Four: Curtains, Artwork, and a $0 DIY frame!

Another week of the Spring 2022 One Room Challenge is complete and I made some more progress in the nursery!

First, I updated the window by ripping off the old window trim, painting the window itself Sherwin Williams Tricorn Black, and installing a chunkier window trim like we’re slowly doing to all the windows in the house. I painted the window trim Sherwin Williams Evergreen Fog to match the walls for a monochromatic look. and installed a new curtain rod and room darkening curtains.

I love the curtains so much! They’re not marketed as blackout but they work as blackout so I decided to nix blinds for this room. It’s a double win because the room only has one window and doesn’t get direct sunlight so this helps maximize the natural light!

I also started adding in some artwork. I downloaded this gorgeous print as a digital download from Juniper Print Shop – the colors are absolutely perfect for the nursery and I thought it would being a nice organic feel to balance the grid print of the curtains. I like that it doesn’t feel like a traditional nursery print – it elevates the room from feeling too baby-ish and then in the future it will translate well to another part of the house when it’s no longer needed in the nursery. I had it printed through Mpix; the quality is awesome and you have to look really closely to tell it’s a print!

I wanted a substantial size and chose to have it printed in 18″ x 24″. Getting a large size in a quality paper and finish meant the print itself was a splurge so I wanted to save on the frame. Large frames can be pricey so I challenged myself to create a really simple DIY frame by only using materials I already had on hand.

Materials

digital download print

-large piece of cardboard (flat, no creases)

spray adhesive

gorilla glue

gold spray paint

Drydex nail hole filler

-scrap pieces of window trim

-tools used: scissors, miter saw; clamps

I cut the cardboard down so there was about 2″ overhang on all four sides of the print (my cardboard piece wasn’t quite wide enough to accommodate the full width of trim all the way around, so there was a little trim overhang, which you can’t see in the finished product). I used the spray adhesive to spray all over the back of the print and pressed it down onto the cardboard, making sure the print was pressed flat and smooth and there were no air bubbles.

As we update all the window trim in our house, we save the old trim and remove the nails so we can use the trim as scrap wood. I took four pieces of old window trim and used the miter saw to cut them down to size for each side of the frame (what length you cut to depends on how much you want the frame to cover the edge of the print). I cut each end to a 45 degree angle and did a dry fit of the pieces to make sure it looked good. I used nail hole filler to fill in any nail holes showing.

Then I sprayed a few light coats of my favorite gold spray paint on each piece of trim.

Once the pieces had dried, I used the spray adhesive again to attach the trim to each side of the cardboard around the print.

There were two trim pieces that had a slight warp, so I added a few daps of gorilla glue on the back for an extra strong hold and that worked well!

There was one small corner that didn’t quite come together flush, so I used the nail hole filler to close the gap, taped off the print with another piece of cardboard, and spray painted over the dried nail hole filler.

I used picture hanging strips to attach the back of the frame to the wall and voila – a beautiful frame that cost me $0!

We’re halfway through the ORC and I have several things left to do: update the nursery dresser/changing table, install book shelves, install thicker baseboards, and possibly add planking to the ceiling. We also are going to be installing new carpet, although I don’t anticipate that will happen before the challenge is over since it’s about a 6-8 week timeframe right now. The room is coming together slowly but surely!

Be sure to check out all the other ORC projects happening here!

Podcasts I’m Listening To These Days

It’s no secret that I love to read, but you might be surprised to learn that I almost never listen to audiobooks. With the exception of a really long car ride by myself, I will choose the physical book over an audiobook every time. There’s just something about curling up with a book and a blanket! That being said, I’m also a busy mom of two and a lot of my days are filled with things that make reading a physical book difficult – running errands, doing dishes, cleaning, tackling the laundry, plus all the DIY projects I like to work on when I have some time. I won’t lie, sometimes I’m ready for a break from auditory stimulation (two kids and two dogs make a lot of noise!) and I’ll complete my tasks in silence, but often I do enjoy listening to something. It feels like adult interaction even though I’m the only adult at home and is truly a form of self care for me! Instead of listening to audiobooks while doing these tasks, I love listening to podcasts.

I think I prefer podcasts because they’re more easily customizable to my mood and the time I have. I can choose a 20 minute episode or a 50 minute episode. I can choose to learn something new or choose to laugh at funny stories. I can choose to binge three in a row or just listen to one episode from a podcast I haven’t caught up on in a few months. With an audiobook, it’s hard for me to just start and stop in short bursts and then maybe not listen again for a few days. With podcasts, it’s easy for me!

Way back in December 2018, I shared the podcasts that I enjoyed listening to. Over the past 3.5 years, I’ve tried out many podcasts and have different ones that I now enjoy, so I thought I’d share a list of my current favorites. These are the ones I turn to again and again, whether I’m folding laundry, painting a wall, driving to the grocery store, or any of the many other things that fill up my days.

Happier

This was the top of my list way back in 2018 and it still ranks highly as a favorite these days. It is hosted by Gretchen Rubin (whom I adore!) and her sister Elizabeth Craft and discusses happiness, good habits, and human nature. They share happiness hacks, strategies for knowing yourself better, and tips and tricks for meeting goals and improving your overall quality and enjoyment of life. There are things that the podcast suggested that I’ve implemented that have honestly been game-changers in my life! I’ve read every book Gretchen has written (some of which made it to my all-time list of book recommendations) and think her insights into human nature, particularly with habit formation and her personality framework of The Four Tendencies, is fascinating. I also thoroughly enjoy the dynamic that Gretchen and Elizabeth have. They have two smaller, sort of spin-off podcasts called “A Little Happier” and “More Happier” that you can choose to add in as well. It’s just a really fun and enjoyable listen that can help you maximize different areas of your life for the better.

Sharon Says So

I have been following Sharon and her Instagram account @sharonsaysso for over a year now and appreciate it so much. Sharon shares factual news and information in a non-biased, non-partisan way and has taught me (and her 850,000+ other followers!) so much. One of her frequent sayings is that “facts don’t require your approval” – in other words, you are absolutely allowed to have your own opinions and your own feelings about things, but facts are facts regardless of how you feel. It’s so refreshing! Her Instagram focuses more on current events (which I also highly, highly recommend following) and her podcast focuses more on interesting stories about people and places. Sharon just seems like someone you want to be friends with and her enthusiasm for brain tingles and new information is contagious. She interviews experts in various fields, shares little-known stories about historical figures and locations around the United States, and even has interviewed political candidates, congressman, and others working in government on all sides of the aisle. It’s a fascinating variety of topics and I always learn something!

The Bad Broadcast

This podcast is hosted by a 20-something woman named Madi Muphy and it’s been a fun, bingeable listen for me. Madi…enjoys complaining. Haha! But not in a negative way if that makes sense? She likes to discuss pop culture (deep dives on things like TV shows and Lindsey Lohan), random things like Trader Joes finds and beige foods, and has fun segments like “Dumb Dumb Club” (where listeners submit things they should’ve known a long time ago but just found out) and “Love/Hates.” But my favorite thing about her podcast are the listener submission episodes. She’ll ask her listeners to submit their own stories and experiences on a variety of topics and it is HILARIOUS. She’s done things like bad dates, petty things you’ve done, embarrassing moments, bad jobs/bosses, white lies you’ve told your kids, gynecological stories (lol), legal things that give you a thrill, breakups, in-law stories, wedding frustrations, and more. I am constantly cracking up at both the submitted stories and Madi’s responses to them. I also love the episodes where people submit situations that she judges – things like am I the a-hole and petty fights between friends and family. It’s just entertaining and fun and perfect for when I want to zone out and laugh.

HERself

This podcast is hosted by two friends, Abby and Amy, and discusses a variety of topics that women encounter. They discuss things like setting boundaries, combating overstimulation, prioritizing self-care, apologizing, saying no, motherhood, marriage, finances, sex, confidence, etc. Some episodes are just the two of them discussing things and they also bring in experts to talk about topics like financial investing, mental health, setting boundaries, adult friendships, and more. I especially enjoy the episodes where they bring on their husbands to talk about the triumphs and struggles in marriage, parenthood, and life. I used to listen to every single episode but now I tend to pick and choose the topics that most interest me or apply to my life and am more of an occasional listener, but I still find there’s some good food for thought in whatever episode I listen to!

Young House Love Has a Podcast + The Chris Loves Julia Podcast

These are two different podcasts but I share them together because they’re both not currently active but the archives are still available. Both podcasts were started by DIY couples with blogs (Young House Love and Chris Loves Julia) and both cover a wide variety of topics related to DIY, home, renovating, etc. I follow each of their accounts/blogs and it’s fun to get another perspective of their DIY journey through podcasts. It’s definitely worth checking out their archives if you’re interested in any of those things!

Do you listen to podcasts? Which ones do you enjoy?

The Wallpaper Decisions Continue

A few weeks ago, I posted about the issue we ran into while installing wallpaper in the kids’ shared bedroom – the wallpaper was accidentally sent to us at 2x the scale and we only received half of the pattern.

I do want to give a thumbs up to Spoonflower’s customer service. I was initially very frustrated by the situation but they got back to me the same day and were very helpful with looking into the issue. I received a full refund for my initial purchase and a complimentary sample in the correct pattern scale (I asked about just getting the second half of the pattern in the larger scale, but they were unable to do that). It was my first time using this company but despite the setback, I feel the experience has been a good one overall. I just received the second sample a few days ago and taped it up to the wall to compare:

My initial thoughts are: I do prefer the larger scale. It feels bold and different and extra fun. That being said, I don’t hate the smaller scale. It’s still whimsical and unique! I do wonder if it would feel too busy over the whole wall, but we’re only doing one wall and there is a door, a mirror, and a dresser on that wall so the pattern will be broken up a bit.

Another thing I want to consider is the look of the installed wallpaper. Justin and I both remarked on how easily the installation was, but we were disappointed to see that the wallpaper bubbled up in the days following install.

I have smoothed it down repeatedly, and the bubbles continue to reappear. We did start in the corner with the worst section of wall (our walls aren’t textured, but the previous owners just didn’t paint very carefully on this side and it wasn’t super smooth) so we’re wondering if the paper would stay better on other parts of the wall. I’m uninterested in shelling out money if it’s not going to stick flat to the wall though.

I think what I’m going to do is take some of the original paper they sent us and install it over other a couple small sections of the wall to see if the bubbling up occurs elsewhere. If it’s going to be an issue throughout, my decision is easy and we will not be purchasing the wallpaper. If it is just in the one section in the corner (which will be behind a door most of the time), I think I can live with that. If we don’t end up purchasing the wallpaper, I think I’ll just use different colors of paint to create a fun little pattern on the wall. We’ll see!

What would you choose if you were in my shoes here? Go with the smaller scale wallpaper or keep looking for another option (or just paint a pattern)?

ORC Week Three: Curtain Choices + Plans for the Window

I took a complete break from projects over the weekend, which was a wonderful time of gathering with my family and celebrating Easter (my favorite holiday!) I didn’t make any progress on the nursery but I did get some deliveries over the past week that have me excited to dive back in!

Curtains

The blackout curtains I ordered have arrived! I ordered them in two colors because I wanted to see them both in the space before deciding. They’re the same pattern and color palette, but the use of the colors in each makes one panel lighter and one panel darker. I wanted to incorporate some warm earthy browns in the room and I think this will be a great way to do it!

In addition to the curtains, the curtain rod arrived. It’s the same rod I’ve used in the our primary bedroom and kids’ shared bedroom – I got it in gold this time which I think will look great against the green wall color.

Artwork

I ordered two digital download prints from Juniper Print Shop and had them printed at MPix – they just arrived two days ago and I’m in love! I think the bunny print is so darling for a little boy’s nursery and the landscape print is what originally inspired the color palette for the whole room! I had it printed at an 18″ x 24″ size which feels so substantial and will really help elevate the room. It was worth the investment because even when this room is no longer a nursery, I know it’s a print that I’ll use in my home for years to come.

What’s Next

It’s time to address the window. I will be painting the window itself black (specifically, Sherwin Williams Tricorn Black) and removing the old window trim. I’ll update the trim just like we’ve done in other rooms (click here for the tutorial) and then hang the curtain rod, choose a curtain, and install the blackout blind as well. It’s going to totally change the feel of the room!

I actually also have a plan for the old window trim too. Hint: it involves the artwork prints I just got . . .

Be sure to follow along on Instagram for real-time updates, and you can also check out all other One Room Challenge participants here.

ORC Week Two: The Nursery Paint Color

We’re officially finished with one week of the Spring 2022 One Room Challenge and I’ve finished one simple but very impactful step: painting the walls!

After choosing Sherwin Williams Evergreen Fog for the dresser I painted for my sister, I fell in love with the color and knew it would be perfect in the nursery. I chose a velvet finish and could not love the result more.

No matter how many rooms I paint, I’m always reminded of the power or paint. With no other changes made, fresh paint single-handedly altered the feel of the entire room. What once felt like an airy, albeit plain nursery now feels like a calm and moody retreat. Here’s a little look back at the room’s evolution:

There is only one window in the room and thanks to the position of the house and the path of the sun, it never really gets direct sunlight. The darker color embraces that and creates a cozy little space that I think will be perfect for soothing a little baby.

I did not paint the baseboards because we are looking into replacing the carpet now (it is 20+ years old and in rough shape). Once the new carpet is installed, I plan to replace the baseboards with a thicker option and paint them the same color as the walls.

Looking ahead at this week, my next task is addressing the windows! I plan to paint the windows black, update the window trim, and hopefully install the curtains which are set to arrive Monday!

In the meantime, be sure to check out all the other One Room Challenge projects happening here.

How to Upgrade a Frameless Mirror with a DIY Frame

A couple weeks ago, I shared the $20 goodwill dresser that I fixed up for my sister’s baby’s nursery. While I am so proud of that DIY transformation, I’m equally proud of another DIY transformation: the mirror that hangs above it!

Way back in 2019 when we renovated our guest bathroom, we took out the 2′ x 3′ frameless builder-grade mirror the previous owners had hanging. (Also, enjoy this little flashback of the deer-themed wallpaper!)

I originally tried to donate it to our local ReStore, but they don’t accept frameless glass for safety reasons so it’s just been sitting in our garage ever since. Once I saw Tiffany’s awesome upgrade to her mirror, inspiration immediately struck and I knew it would be the perfect surprise to gift my sister along with her nursery dresser.

This ended up being a fairly simple DIY project, so I wrote up a tutorial for anyone who wants to give this a try. We added a few extra things from Tiffany’s original inspiration video and that’s one of the great things about creating a frame from scratch – it allows you to customize to fit your exact needs!

Materials

-Sheet of 1/2″ thick plywood

-1″ x 2″ boards

-1/4″ x 3/4″ trim (optional; only needed if you’re doing the inner piece of trim)

heavy duty liquid nails adhesive

caulk gun

wood glue

-clamps; various sizes

-nail gun + 1 1/2″ inch nails

-circular saw

-miter saw

-long level (optional)

-table saw (optional; only needed if you’re doing the inner piece of trim)

gorilla glue (optional; only needed if you’re doing the inner piece of trim)

-foam brush

-paint or stain

picture hanging kit (if hanging the mirror)

Step One: Trace the mirror onto plywood

We laid the mirror on top of the sheet of plywood, lining up two sides with the edges of the plywood, and traced the outline of the other two sides with a pencil.

Step Two: Cut the plywood on the traced lines

I used a circular saw to cut on the lines we marked.

Optional Step: For an extra precise straight cut, we clamped a long level to the plywood to use as a guide. This did require careful checking and re-checking before starting the cut to make sure that the placement of the level would correctly align the blade of the saw with the line we had traced, but it was worth the effort. I held the saw in place against the level while running the saw and it ensured that the cut was perfectly straight all the way across.

Step Three: Attach the mirror to the plywood

Once the plywood was cut to the same size as the mirror, I used the caulk gun to apply the heavy duty liquid nails adhesive all over one side of the plywood.

We set the mirror down on top of the glue and made sure all the edges were lined up with the plywood.

Our plywood was old and slightly warped, so we used some scrap wood and clamps to tightly seal the mirror to the plywood and let it set overnight.

Step Four: Cut the wood for the frame

Once the mirror was fastened to the plywood, Justin used the miter saw to cut the 1″ x 2″ boards to size for each side of the frame. We considered two options for fit: straight cut corners or 45 degree corners.

We chose to cut each corner at a 45 degree angle rather than straight cuts. It did require a little extra thinking through and measuring before cutting, but again, it was worth for us to get the look we wanted.

It was very important to make sure the corner of the each cut was exactly lined up with the corner of the plywood. If it was a little too long, there would be a gap between the wood and the mirror. If it was a little too short, there would be a gap where the frame corners didn’t quite meet. In the picture below, the wood was cut a little too long – see how there is a small overhang of the side piece? We marked where the end of the plywood hit the side and Justin cut to that line to make sure the corner exactly lined up.

Step Five: Paint or Stain the Wood

Before securing any of the wood in place, I used a foam brush to apply everything with a light coat of stain to the wood. I decided to stain instead of paint because my sister chose a natural wood crib so I knew it would tie in nicely, plus the light wood color coordinated well with the color I chose for the leather dresser drawer handles.

Note: This step could definitely happen after all the wood is installed. I chose to do it in this step to avoid having to try to stain in corners and potentially have uneven coverage or get it on the glass. Just my personal preference!

Step Six: Attach the sides of the frame to the plywood

We did a dry fit to make sure the sides all lined up perfectly (they did!) and then applied a small bead of wood glue to the bottom of each piece where it would meet the plywood.

We fit each piece in place, then used the nail gun to add a couple 1 1/2″ inch nails to each side, making sure to aim low enough to hit plywood and not glass. I did not want a lot of nail holes, but we also wanted to make sure things were super secure, so the combination of wood glue + nails worked for us.

We used clamps to keep things in place while the wood glue dried (this was probably unnecessary but it gave us peace of mind that things would dry tightly in place).

(Optional) Step Seven: Cut wood for inner trim

We could have stopped at this point and probably would have under normal circumstances. This looked great! Except for one thing . . . our mirror had sustained a bit of damage in the garage and was missing a small corner. We decided to fix this by adding one more trim piece directly on top of the glass to hide the damage.

We bought 1/4″ x 3/4″ strips of wood. They were originally a little wider than I wanted (right one in the picture below), so we used the table saw to rip each piece down to 1/2″ wide (left one in the picture below).

Justin used the miter saw to cut each side to size (with 45 degree angles on each end) and after checking placement with a dry fit all around, we used a bead of gorilla glue on the back to secure each piece directly onto the glass.

(Optional) Step Eight: Attach hanging hardware

We gave everything time to dry and then Justin used heavy duty wire and d-hooks from a picture-hanging kit we have (here is a similar kit). We used an online reference guide to help us decide exactly where to place the d-hooks for best hanging. If you choose to hang your mirror, it is very important to weigh the mirror first and make sure the hanging materials you’re using can support the weight of the mirror safely!

I absolutely love how this mirror turned out. I was so excited to surprise my sister with it – it’s the perfect complement to the nursery dresser and fits the room so well. She loved it!

The cost of this project will vary depending on the type of wood you use and how many materials you have to buy vs. what you already have on hand. I used oak boards, which are a little more expensive than other types, but I already had the plywood and all other materials, so that kept cost down for me. Large mirrors can be expensive, and I’m so glad I was able to take a mirror I already had and give it a completely fresh look that was considerably less than the cost of a brand new mirror.

What do you think? Are you ready to try this DIY yourself?

Spring 2022 One Room Challenge Week One: Baby Boy Nursery Plans!

Today marks the start of another round of the One Room Challenge and I am excited to join in the fun once again! I’ll be honest, up until yesterday, I didn’t think I’d be participating this time around. But I have been feeling a growing nesting urge to start in on the nursery for baby boy and I decided this would give me a great opportunity to focus in on his room while I’m still in my second trimester sweet spot of having the energy and drive to tackle it!

I’m currently 21 weeks pregnant, and in this post a few weeks ago, I revealed that we’re having a boy and shared my initial thoughts of what to do with the nursery now that Vi has moved over to a shared room with LJ. At first, I just planned to do a few minimal updates, but the more I thought about it, the more I wanted to go a little bigger. Justin and I feel confident that this will be our final pregnancy, and it’s the first time we’ve found out the baby’s sex before birth. Since it’s the first (and only) time I’ve had the opportunity to plan out all the nursery details in advance, I decided why not have some fun with it?

Here’s what the room looks like right at this very moment:

An absolute hot mess.

As Vi shifted over to LJ’s room, we had to move some furniture around and this room basically just became a catch-all storage spot until we can decide what we want to keep for the nursery and what we want to get rid of. Here’s what it looked like when it functioned as Vi’s nursery:

I have a feeling that this renovation is going to be one of those times where things slowly come together piece by piece, but I threw together a simple mood board with some of the initial ideas I have for the space. This just gives me an sense of the direction I want to head: lots of earth tones and graphic prints, with plants to bring in an organic feel and soften things up.

First things first, the pink scalloped wall needs to go. While it is super cute, it was really done as a simple solution to update the room and move it away from feeling like a sterile white box for Vi. This week, my plan is to prep and paint all the walls (99% sure I’m going to go with Sherwin Williams Evergreen Fog). I’m also strongly considering adding a ceiling treatment in the same color – perhaps something similar to the planking we did on the ceiling in the office? We’ll see!

I’ll be sharing my real time progress over on Instagram, so be sure to follow along there if you want more frequent updates. You can also check out all the other ORC participants here – lots of fun projects happening this time around!

New Sconces for the Kids (and a wallpaper mishap)

On Friday, I posted that my weekend plans were to wallpaper in the kids’ shared bedroom. Unfortunately, that didn’t happen quite like I expected.

We got one strip up and in place and then realized . . . we only have half the pattern. After checking in with customer service, we found out that there was a glitch in their system that caused the pattern to print twice as large so we only got half of it. We’re sorting out the issue with customer service and figuring out a solution but for now, what we have is unusable and the wallpaper project is on hold.

To say I was disappointed is an understatement, but there was nothing else I could do about it so I decided to pivot our weekend project to a simpler one. I purchased these sconces for the kids’ room a few weeks ago and had been waiting to hang them above the beds until the curtains were in place. With an unexpectedly free weekend, it felt like the perfect time to knock this project out!

I have talked before about the asymmetrical struggle of this room. The window between the kids bed is not centered on the wall and Vi’s side has four more inches of wall space than LJ’s side. Curtains have helped give the illusion of symmetry – I cheated Vi’s curtain out just a little bit farther so that now the same amount of wall space shows on each side. The dilemma now was: hang the sconces in the middle of the wall space (off-centered above the bed) or hang them above the center of the bed (off-centered on the wall)? Ideally, I would have been able to have perfect symmetry and hang them in the middle of the bed AND the middle of the wall, but that’s just not possible here.

After going back and forth for a long time and weighing pros and cons, I settled on hanging them centered above the beds. In order to balance the off-centered feeling on the wall, I hung small art (a yarn rainbow for Vi, small picture frames for LJ) on the opposite sides of the sconce from the curtains. I think this solution worked well and keeps things feeling visually balanced. Side note: I have to give Justin a huge shoutout for not only putting up with my indecisiveness and patiently holding sconces in various places again and again so I could visualize, but also for getting these installed and working!

The kids both love having lights above their bed. I specifically chose these sconces for a few reasons: I loved the modern black look and subtle gold detail paired with the traditional look of the wooden bed frames. I also wanted plug-in sconces rather than hardwired for ease of install and removal in case we decide to move around the room’s layout someday (they do have the option to be hardwired if we want). I also wanted lights that the kids could easily turn on and off themselves, and these are operated by a dial on the wall plate that is easy for them both to turn. Plus, at just under $100 for the set of two, the price was hard to beat!

It may not have been the progress I had hoped to make this weekend, but I’m glad I was able to check one more thing off the list of things to do before this phase of the kids’ room renovation is complete. Mishaps are just a part of renovations and when they come up, the only thing you can really do is roll with the punches and aim for slow and steady progress. I have just one or two more small things to do right now, then I plan to shift my attention over to the nursery until the wallpaper comes in.

Sources

Wall Color: Sherwin Williams Eider White and Nordic Bleu

Bedframes: Vintage

Windowpane Curtains

Blackout Blinds

Curtain Rods

Sconces

Vi’s Sheet Set

LJ’s Sheet Set

Yellow Quilts

Striped Throw Blanket

The First Look at the Wallpaper for the Kids’ Room!

A couple weeks ago, I started a little mini renovation on the bedroom that LJ and Vi recently started sharing. It all started with thrifting matching headboards for their twin beds, which naturally led to upgrading bedding. I also put together a new shelving unit in between beds to double as a nightstand and bookshelf and switched up their artwork. I then installed some blackout blinds and new curtains, and this side of the room is feeling very different now!

I’m ready to turn my attention to the other side of the room now. This side has the entrance to the room and the closet door, so it’s mostly a walkway area. It does have the dresser along the wall but I’ve wanted to add some more visual interest to this area.

I previously shared that I was wanting to put up wallpaper and after some internal debating back and forth, I decided to go with my gut and ordered a pattern. It just arrived this week! And I’ll be honest, my selection might surprise you. It was not an obvious yes for me, and at first it wasn’t even in my top three. But the more I thought about it, the more I loved the idea so I went for it!

I chose . . .

party whales!

Since we’re only doing one wall, which will essentially have two doors (the closet door and the entrance door when left open) and the dresser and mirror, it’s really not that much wall space. I think a large, bold pattern will bring much needed fun and whimsy without being too overwhelming and this pattern is just so unique and charming!

Here’s a peek at the large pattern on the wall as shown on the Spoonflower website. I will note that the colors, particularly the orange, feel more muted in person than they do on screen, which I expected based on the sample I received.

Image from Spoonflower

I know this is not a forever type of wallpaper pattern. LJ and Vi are going to share this room for at least three years, then when he’s ready, baby boy will transition over and Vi will go back to her own room. At some point my boys will more than likely want a change – I think of this phase that I’m creating now as their “kid” bedroom. It’ll last for maybe a 6-8 year period and then we’ll move the room into their tween/teen phase with their input and preferences. Kids rooms are always evolving because their needs are ever changing. For just one small accent wall, I still feel like it’s totally worth the investment of wallpaper for this phase!

When I was talking about my options on Instagram, I received a lot of input on the various options but one comment stuck out to me with regards to the whales: “…the design is so distinct that it will stick in their minds as they grow. When they are much older, they will still remember their whale room!” I love that idea and honestly, it’s what tipped me over the edge to team whales. To think that someday our kids will feel nostalgic for the little whale room of their childhood – the place where they got snuggles and bedtime stories from mom and dad, the place where they whispered the secrets of their young minds to one another long after the lights went out, the place where they laughed and played and felt safe from the worries of the world – well, that just makes my heart feel all sorts of soft and happy. May the whale room be a place of childhood memory making for many years!

I’ll be sharing real-time progress on my Instagram this weekend so be sure to follow along there for how the installation is going!