
Life lately has included things like a fairly major surgery, family activities, and a realignment of priorities, and it feels good to get back into the swing of things here! Monday of this week I rounded up all my 2024 books and today I’m catching up on everything I’ve read in the first half of the year. There are some really good ones here – a few that are even going on my top recommendations list! – and it has been such a satisfying stretch of reading for me.
Let’s get started!
This is Not a Holiday Romance by Camilla Isley (2/5 stars)

Tristan is Nina’s older brother’s best friend, and for years they have been enemies, never hesitating to try to outdo one another in a never-ending prank war. When Tristan gets invited to Nina’s family’s Christmas, tempers flare and pranks ensue until a snowed-in truce is called and they realize that beneath all the animosity, there is something else simmering.
I love holiday romcoms and an enemies-to-lovers trope, so I went into this book expecting to love it but unfortunately . . . did not. The prank wars and tantrums thrown feel extremely childish and I was not into it. I didn’t love the (underdeveloped) main characters and thought there was way too much immaturity all around so the chemistry isn’t particularly believable. Suffice to say, this one just wasn’t for me!
The God of the Woods by Liz Moore (5/5 stars!)

In August 1975, Barbara Van Laar goes missing from Camp Emerson. To make matters more complicated, she is not only the daughter of the wealthy camp owners but her older brother also went missing from this same place 14 years ago, never to be found. As a search ensues to find Barbara, questions resurface about what might have really happened to her brother all those years ago. Woven across decades and told through multiple point of views, this novel intricately layers events and perspectives about what has happened within the camp, the Van Laar family, and the greater community over time.
I could not put this book down! It has a really great historical fiction-meets-camp thriller-meets-murder mystery vibe and I could so clearly visualize the camp and characters. I do have to throw in a disclaimer that by the halfway point, I couldn’t decide if I absolutely loved it or if it was an absolutely maddening read. The classism and sexism was so frustrating to read and I was getting so annoyed! That being said, I think the fact I felt that way is truly a sign of a well-written book. It was incredibly immersive and I was so invested, it got my emotions, good and bad, involved too. I’m glad I stuck with it because by the end of the book, I was putting on a movie for my kids because I just HAD to finish it. It is long and there are several characters and timelines to keep track of, so if that’s not your thing you probably won’t enjoy it. For me, I loved the pacing, I loved the varying character perspectives and timeline shifts, and I loved seeing all the breadcrumbs and clues connecting as I read. Ultimately I found it to be a very satisfying read – it’s going on my top recommendations list!
An Academy for Liars by Alexis Henderson (3/5 stars)

Lennon Carter has no idea Drayton College exists until she receives a mysterious phone call inviting her to apply for acceptance. Driven by curiosity and the need for direction in her life, she accepts the invitation and learns that Drayton is a school of magic that has been concealed deep within Savannah, Georgia. Everyone at this school has the gift of persuasion and it soon becomes clear that Lennon is one of the most gifted of all. Amidst the highly competitive atmosphere of Drayton, she starts to discover more of this new world she inhabits and just how important it is that she learns to harness and control her own power.
The setting wants to be the college version of Hogwarts, and in some ways, it nails it. I loved the concept of persuasion as magic and the overall idea of the school and thought the plot started out strong. That being said, I just did not personally enjoy the actual writing style, and I had a very hard time with the main character. She was inexperienced but gifted and often came across as entitled, needing to know more and include herself in every situation that came up. There is a relationship that I feel was underdeveloped and lacked chemistry, and the side characters don’t add much depth either (I couldn’t even keep them straight, they all blended together). It was definitely dark academia, emphasis on dark with several violent actions and overall this book just didn’t hit for me.
The True Love Experiment by Christina Lauren (4/5 stars)

Fizzy Chen is a highly successful romance author who has lost her spark, both professionally and romantically. Connor Prince is a documentary filmmaker who has been tasked with coming up with a new reality dating show. A chance encounter has him inspired and he approaches Fizzy about starring as the lead in his TV show, which plans to bring some new spins to a familiar format. This show could be the answer to both of their problems . . . as long as they can ignore any attraction they may feel towards one another as production begins.
I enjoy Christina Lauren’s books so I went into this book hoping for an entertaining, flirty romcom and that’s exactly what I got. It’s a standalone novel but is also a follow-up to The Soulmate Equation in which Fizzy was a side character. I thought all the overlap in characters and plotline from The Soulmate Equation made this book extra enjoyable and would recommend reading them both in order. This book felt fresh and fun with relatable and likeable characters. I totally bought into the chemistry between Fizzy and Connor and loved watching their relationship unfold; it was easy to root for them the whole time! And while I haven’t watched The Bachelor for five+ years now, I was a longtime watcher in my 20s and really enjoyed this author’s twist on a similar reality show dating scenario. The banter is great, the relationship feels realistic, and it’s just a perfect read for when you want something engaging and easy, entertaining and romantic. It does have steamy scenes and language, and because of Fizzy’s zingy, unfiltered wit it definitely has some raunchier lingo than other Christina Lauren books I’ve read so if that’s not your thing, you wanna skip this one. I do want to also emphasize: if you think romance is cheesy, this is probably not going to be the book for you. The dedication is written to fans of the romance genre, and it leans into that throughout the plotline. The authors wove in specific things that are meant to be appreciated by lovers (no pun intended) of romance novels so if you fall into that category I feel like you would especially love this one.
The Briar Club by Kate Quinn (5/5 stars!)

As a boardinghouse for women tucked in 1950’s Washington D.C., Briarwood House has seen quite a bit over the years. Most recently, it bears witness to the weekly dinner parties hosted in the attic by the newest resident: Grace Marsh. Grace is a beautiful, somewhat mysterious widow and prior to her arrival, each resident kept mostly to herself. Now, Grace has slowly drawn each resident into her weekly dinners, joining the eclectic bunch of women from various backgrounds and stages of life together in community and friendship. But that friendship is about to be tested, because there is one more thing the house has recently borne witness to: a shocking murder on Thanksgiving Day.
I absolutely LOVED this one! I loved the structure, with a different character’s perspective in each chapter and a shifting timeline. The characterization is incredible; I loved the mix of personalities and their dynamics. I loved the Briarwood House setting, and that the house itself felt a bit like a character. I loved the era. It feels like a huge majority of historical fiction leans into the WWII era (don’t get me wrong, I love those too!) so it felt refreshing and fascinating to get this imagining of what it was like living in Washington D.C. during the years of McCarthy and his Red Scare. The pace is great, the plot is spellbinding, and it’s one I wish I could read again for the first time to enjoy all over again. I read it for my book club and it received ALL 4 and 5 stars, even from those who typically don’t enjoy historical fiction so it definitely appeals to a wide range of readers. I can’t recommend it enough, this is going to be a top read of the year for me for sure!
The Housemaid by Freida McFadden (3/5 stars)

Millie Calloway can’t seem to escape her past and find and keep a job to support herself. When Nina Winchester offers her not only a job as housemaid but also a place to stay inside her gorgeous mansion, Millie cannot believe her luck has finally changed. That is, until she actually starts working for Nina and realizes the job is less of a dream come true, more of a nightmare, cleaning up disgusting messes and navigating erratic instructions. The pay is too good to turn down though, so Millie persists, getting to know the unpredictable Nina, her impudent teenage daughter CeCe, and her handsome but often absent husband Andrew. What exactly is going on in the Winchester house? And what has Millie gotten herself into?
This is a bit of a different review than I normally give, but it was an unusual reading situation. A friend of mine absolutely loved this book and lent it to me to read so I went in excited for a domestic thriller. I was hooked for the first 75-100 pages but the more I read, the more I realized I could predict all the twists because it is as if two other domestic thrillers I have read had a book baby. The vibes are so so similar to those other books that I could guess what happened and was not surprised by anything. It was like book deja vu! When I mentioned this to my friend, we realized she hadn’t read either of those two books so she was surprised by all the twists and loved this one. If you have read one or both of those books, you probably won’t be impressed by this one. And if you haven’t read them, you will likely enjoy this one (although I do have questions about how this book could be so similar to the other two). Personally, I would recommend the others over this one – they are so well written and original! PS – If you want to know the books it reminded me of, click here and here. I didn’t include the titles in this post to avoid spoilers for those who still want to read this one.
The Glass Castle by Jeannette Walls (5/5 stars)

“The Glass Castle is a remarkable memoir of resilience and redemption, and a revelatory look into a family at once deeply dysfunctional and uniquely vibrant. When sober, Jeannette’s brilliant and charismatic father captured his children’s imagination, teaching them physics, geology, and how to embrace life fearlessly. But when he drank, he was dishonest and destructive. Her mother was a free spirit who abhorred the idea of domesticity and didn’t want the responsibility of raising a family. The Walls children learned to take care of themselves. They fed, clothed, and protected one another, and eventually found their way to New York. Their parents followed them, choosing to be homeless even as their children prospered.” (summary from Goodreads)
Wow. This memoir was incredibly compelling and nearly impossible to put down. The author has a very unique way of sharing truths about her childhood – the neglect, the struggle, and the persistence – that paints an honest yet compassionate portrait of her family. There is a deep sense of loyalty woven throughout, even as she acknowledges the hardships she experienced due to neglect, erratic behavior, addiction, and dysfunction from her parents. It’s often difficult to read about her experience, and the author doesn’t hold back from or sugarcoat some truly desperate times in her childhood; however, it also manages to demonstrate resilience and hope amidst heartbreaking circumstances. I found it to be engrossing and impactful in a way that lets me know I’ll remember it for years to come. Highly recommend.
There’s No Such Thing as Bad Weather: A Scandinavian Mom’s Secrets for Raising Healthy, Resilient, and Confident Kids by Linda Akeson McGurk (4/5 stars)

Part memoir, part self-help, this nonfiction read was a (pun intended) breath of fresh air. After an entire childhood spent in her native Sweden, Linda Akeson McGurk is now living in Indiana, raising two daughters with her American husband. Despite her best efforts to encourage outdoor play and exploration in nature, she’s noticing the barriers and difficulties with getting outside: everything from deserted playgrounds to getting fined for letting her children play in a stream. When her father becomes ill, she decides to take her daughters to Sweden for an extended period of time. They move into a small rental near the author’s parents, enroll in school, and spend the next six months embracing Swedish culture, particularly in prioritizing time spent outdoors.
This book gives practical advice and gentle encouragement to change our thinking about the outdoors and the importance of playing, exploring, and having unstructured time outside for children. As a mom of three young children, I found it to be both refreshing and inspiring. It validates so much of what I sense deep in my bones – that my kids need to be spending unstructured time outdoors and not just 20 minutes at recess time. I wouldn’t say there is anything particularly groundbreaking in this book, but it offers advice, solidarity, and inspiration along with charming anecdotes and interesting reflections on the author’s experience and life. My one critique is I wish there had been more time spent reflecting on how to create a more “Swedish” outdoor mindset while actually living in the United States. I loved reading about their time in Sweden and how different it was, but when the culture changes and you move back to a less-outdoor-loving society, how can you keep it up? She touches on it a bit, I guess I just wish there was more. Overall, I enjoyed this read and would recommend to parents who want to get outside more and who enjoy travel and different cultures, as this was a lovely peek into Swedish daily life as well.
Born a Crime: Stories from a South African Childhood by Trevor Noah (5/5 stars)

In this revealing memoir, Trevor Noah is not a rich and famous celebrity. He’s not yet a famous comedian, host of The Daily Show and multiple Grammy awards. Instead he is a scrappy child growing up under intense poverty in apartheid (and then, post-apartheid) South Africa where his very existence as the son of a white man and black woman was legally considered a crime. Told with a structure that gives both a history and explanation of South Africa and a very vulnerable look into his own life and experiences, this memoir is both horrifying and humorous. Perhaps it doesn’t seem like those two words belong together, but that seems fitting for a story about a young boy who, according to his country’s government, was born from parents who shouldn’t belong together either.
I cannot in any way relate to growing up under poverty, violence, intense political and racial unrest, or any number of things Trevor experienced, yet he shares the truths about his childhood in ways that are both eye-opening and still somehow relatable to the shared human experience. We read of his relationships with his family, his peers, and the broader community and even though it is often heartbreaking, he never shares in a way that seeks pity. He is just being real about his life and experiences and his likeability captures the reader’s attention from the start. He manages to weave both wit and warmth into his stories, even when they are about incredibly heavy topics. I learned so much about the complicated dynamics of South Africa along with his life and it’s a book that I will be thinking about for a long, long time. I highly recommend, and I don’t often say this, but I do wish I had listened to the audiobook instead of a physical copy. I think it would have had an even bigger impact on me hearing these stories from his actual voice!
Say You’ll Remember Me by Abby Jimenez (4/5 stars)

After a fairly disastrous first impression, Xavier and Samantha have the chance to start over and proceed to have the best first date of their lives. It’s so epic in fact, that they both know this could really be something . . . if only Samantha wasn’t moving 2,000 miles away to take care of her mother. Continuing the relationship is impossible so she tells Xavier to forget about her as they both move forward in their separate lives, but knowing you should forget someone and actually doing it are two very different things.
It was a little hard to buy in initially because the attraction between Samantha and Xavier is so abrupt and has practically no build up, although I was willing to look past that and just go with it. I’m glad I did because other than the insta-love component, the development of their relationship was fun to follow along with. This book has heart; I loved the dynamics of Samantha’s family and how the author navigated us through their shared experience. I enjoyed rooting for Samantha and Xavier and appreciated that we felt their chemistry but also saw their realistic ups and downs. There are just enough side plots and characters to give the story some weight without it being too much to keep track of. It does venture into slightly cheesy territory a couple times and makes a few too many references to current pop culture but overall I enjoyed the escape. There is language and some spice, but if spice isn’t your thing I do feel like this one has less than other books by this author (and stays quick and mostly closed door so it’s skippable if you want). I like Abby Jimenez books because I know I’ll read chemistry that feels natural and the plot will give me beach-read-with-substance quality and that’s what I got here. It’s not my favorite book from this author but I did enjoy it and would recommend!
The 7 1/2 Deaths of Evelyn Hardcastle by Stuart Turton (4.5/5 stars)
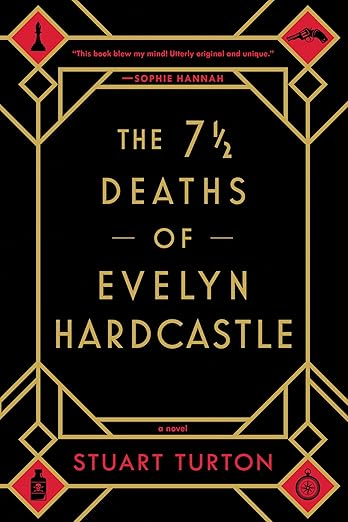
Evelyn Hardcastle will die at 11:00 pm tonight, in the middle of a party. And she will die again tomorrow night at the exact same time, in the exact same way. She will continue to die every night at 11:00 pm until Aiden Bishop can figure out who her killer is, because her death is not what it seems. For the next eight days, Aiden will relive the day of the party over and over, waking up each morning in the body of a different guest at the party. Each guest is very different, and each has secrets and talents he can use, but he must make the most of his time in each host in order to find the killer and escape the cycle.
I read this book while on vacation and it actually made for a fantastic vacation read because my understanding of the plot benefitted from having long stretches of uninterrupted reading. I can understand that this book is not for everyone. It’s incredibly complex and gets dark at times, but it is also so cleverly written. It’s an original, creative concept, a engrossing mystery, and it had me guessing until the very end. I actually read it twice in a row! Once I finished it, I immediately felt the need to read it again and take notes to see how everything worked together. The second read caused me to bump up my rating for the book; it made me realize just how brilliantly everything is all woven together. I would give it 4.5 out of 5 stars; I can’t give it the full five because it is long, it took me a while to feel invested (though once I was, I was hooked!), and I think that any time a plot involves bending time my brain gets stuck around some of the logistics that don’t quite add up. Despite all that, I really enjoyed the journey with this one and would highly recommend if you’re in the mood for a thrilling mystery.
Everything is Tuberculosis by John Green (5/5 stars)

After an encounter with a young man suffering from tuberculosis in Sierra Leone, John Green became interested in learning more about the infection and how it has pervaded through centuries and continues to affect millions of lives around the globe. What he learned astounded him: effective diagnostic tools, treatments, and even cures exist for tuberculosis. But the cure is where the disease is not, and the disease is where the cure is not, so millions of people continue to die from it each year. This book is a non-fiction deep dive into what tuberculosis is, how society’s perception of it has shifted over generations, and how we still live in a world where this is a massive global health problem.
John Green made a name for himself writing young adult fiction, and he is gifted with the art of storytelling. This book may be nonfiction, but it reads like a novel in many ways and makes learning about a disease not only informative but even riveting. He infuses facts with his own anecdotes and brings a personal touch to a disease that feels far away for those living in countries where tuberculosis is not a large threat. It opened my eyes to a disease I knew very little about and also the upsetting injustices that surround its presence in our global society. It’s insightful, informative, thought-provoking, and inspiring – you will read it and want to take action! (And good news: there are ways you can take action!) Green is clearly a passionate global health advocate and has used his gifts and talents to spread a message towards better access to screening and treatments in the most vulnerable communities. I highly, highly recommend this read!
Here’s to more great reading in July!


