Baby #3: Third Trimester Update

All photos in this blog post are credited to Natalie Joy Photography.

This past Tuesday I hit the 37 weeks pregnant mark which means baby boy is officially full-term!

While I have a repeat c-section planned, he could decide to surprise us early at literally any moment now so I’m soaking up each day as the potential last day of pregnancy. Knowing this is most likely our final biological baby has made this pregnancy a bit bittersweet – each milestone is a huge blessing and is also a goodbye to another stage of this journey. While I am so so SO excited to snuggle this sweet little babe, I’m also enjoying the final days of feeling his kicks, rubbing my belly, and feeling all the pregnancy feels.

Symptoms/How I’ve Been Feeling

Up until this past week, I had honestly been feeling really great! I’m still overall feeling pretty good but hitting 37 weeks has really started to shift things though. I’m feeling some increased nausea, some changes in my GI system, and more stretching/pain in my pelvis as things shift around. I’m also feeling more uncomfortable (things are pretty squished in there now!) and quite a bit of lightning crotch. Baby has officially dropped too! I felt him really turn around maybe 3-4 days ago and now it’s like my belly is reversed – where I used to always feel his butt is now where his limbs are and vice-versa. My belly is markedly lower than it was before so honestly, at this point, we would not be surprised at all if he surprises us early.

I’ll also say – my fatigue has also increased and I’m wishing I could nap more during the day. My quality of night-time sleep has dropped significantly but every once in a while I still get a decent night’s rest. Hoping for a few more of those nights before his arrival!

My Preparations

I’ve joked that I don’t know if I hit nesting mode so much as panic mode, but I’ve been very busy with preparations over the past week or so. It dawned on me in the grocery store about a week ago that I hadn’t bought any supplies for baby – no diaper cream, no diapers, no nipple cream, nothing! I’m blaming my lax approach to third-time motherhood but even so, I needed at least a few things! Thankfully, my family had already planned to surprise Justin and I with a little sprinkle on Saturday and they brought us lots of diapers and wipes (so sweet!) I also had a friend offer to bring dinner for us a few days ago and she brought some diapers and wipes too. I’m so grateful for the love and support from family and friends!

I’ve also spent time getting things around this week. I bought and set up a new video monitor as well as all-purpose ointment, diaper cream, baby shampoo, and nipple cream. I’ve packed the hospital bag for myself and baby. I’ve dug out and washed the parts to our infant car seat and baby bassinet. The boppy pillow is freshly cleaned, I’m caught up on laundry, and things are finally feeling ready for baby.

LJ and Vi’s Awareness

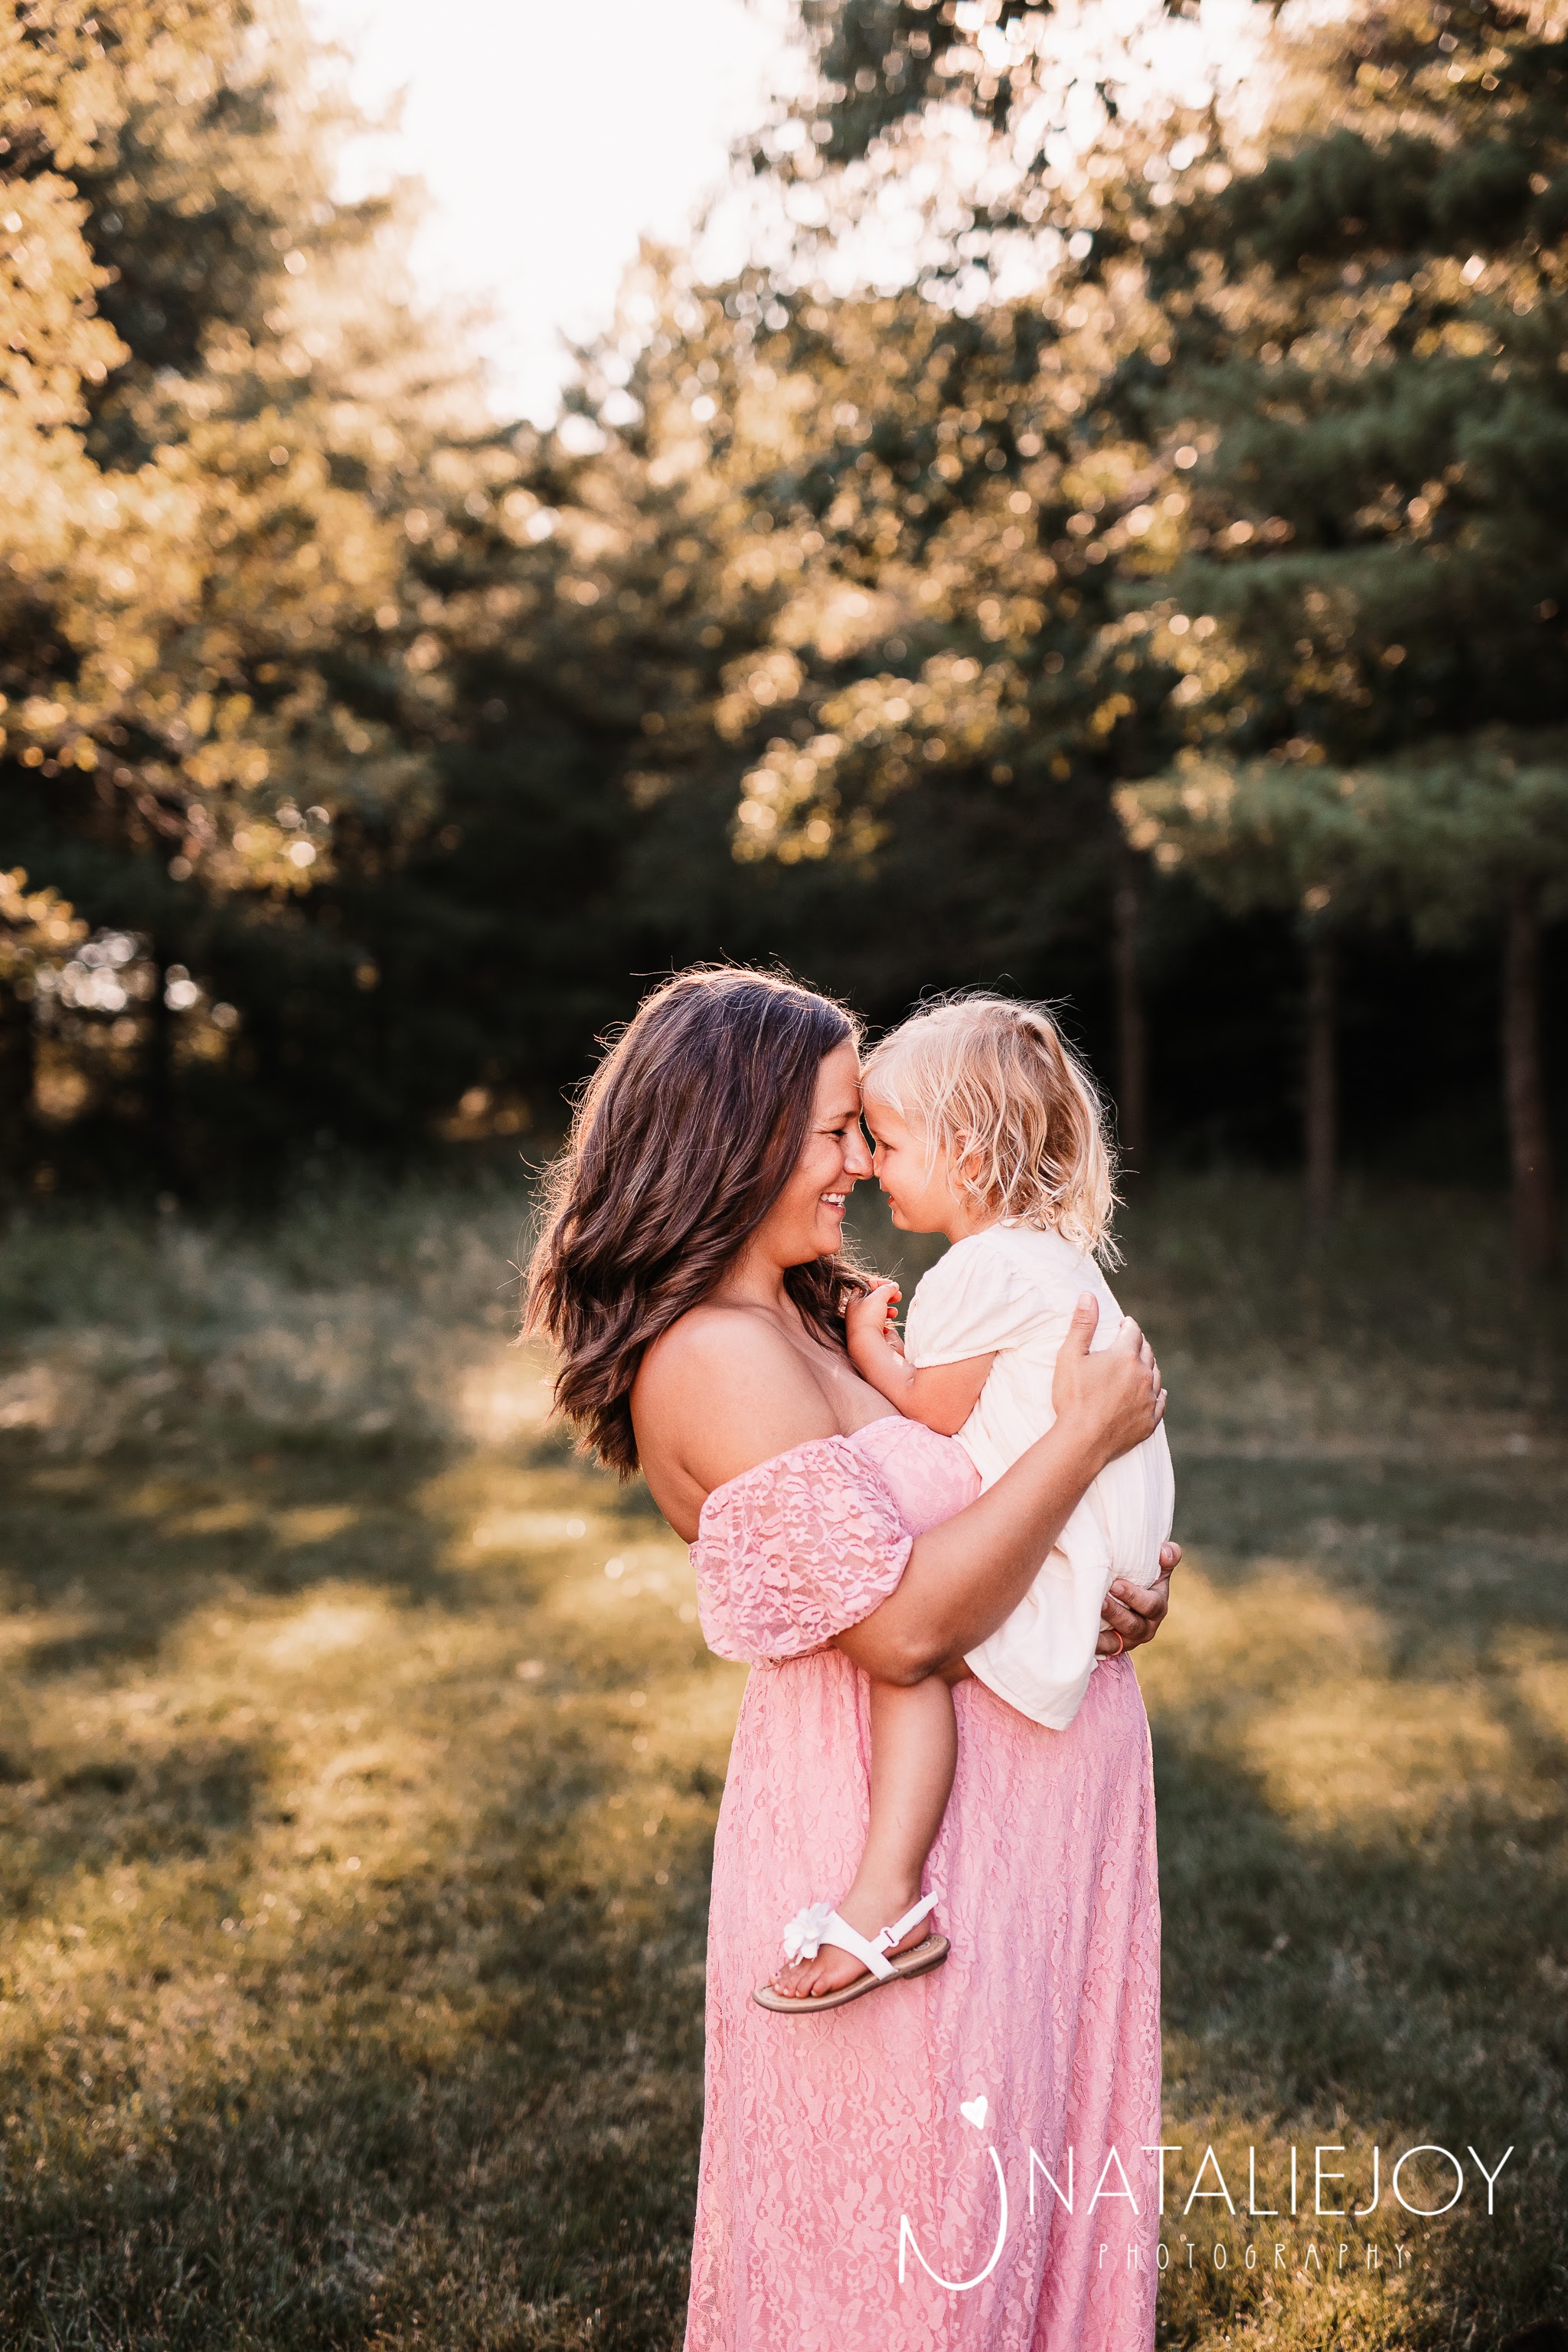
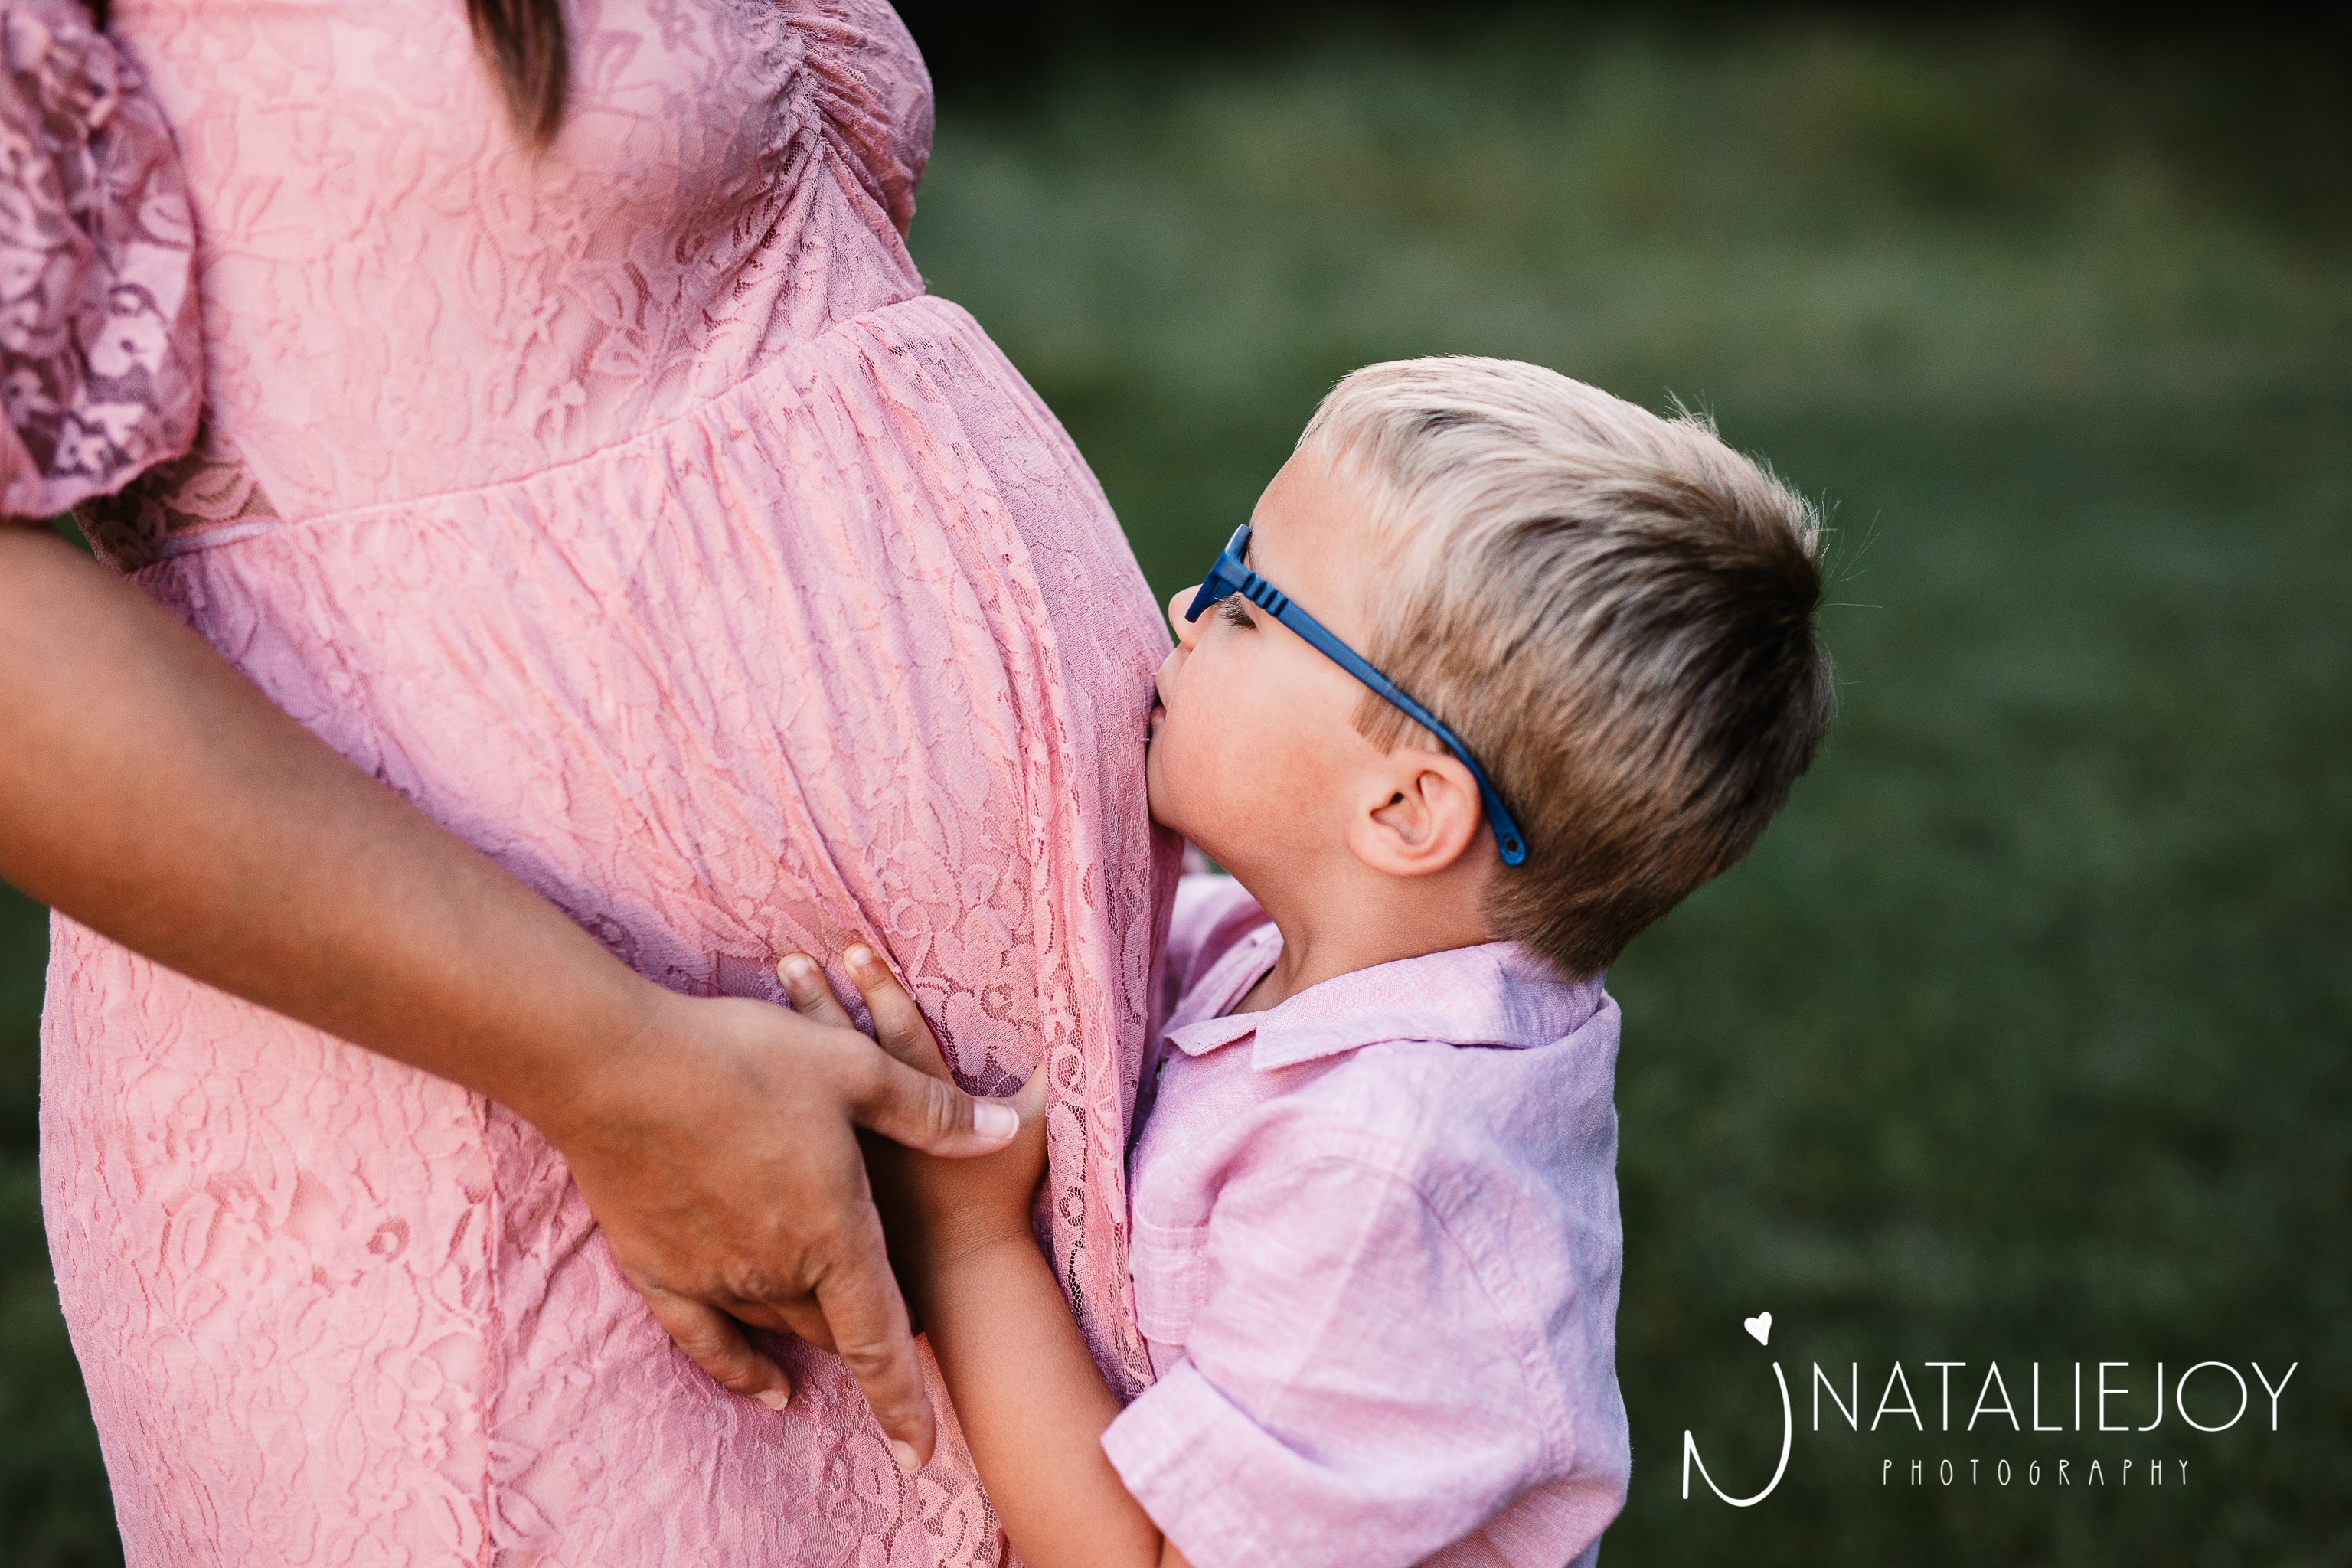
The kids are so aware of the baby’s impending arrival and are beside themselves with excitement. They constantly talk about the baby, rub my belly and give it hugs and kisses, and talk to the baby. When we’re out and about, whether we’re meeting a new person or literally next to a stranger, they’ll share that their mom is having a baby. LJ regularly asks how many days until baby comes. The other day Vi started talking to my belly and I asked her some questions about the baby and she said “Shh, I’m talking to him!” I guess she didn’t want mom to interrupt their conversation – ha!

The kids both say they’re excited to hold the baby and change his diapers and I think they are going to be the best big brother and sister. I just know my heart will feel so full and happy seeing my three kids all together at last!

What I’m Looking Forward To

Other than seeing LJ and Vi meet their new baby brother, I’m most excited to just see what he looks like. Will he look like LJ and Vi or will he have a totally different look? They take after me more, so maybe he’ll look more like Justin? I can’t wait for baby snuggles and tiny coos and that sweet newborn smell. I can’t wait to just meet him and start to get to know him – I already know he’s a very active little boy by the way he’s constantly moving in my belly but I’m so excited to get to know more.

I’m also looking forward to the simple moments like gently rocking on the porch swing and snuggling on the couch and going for stroller walks. I’m just excited and ready for the next stage of parenthood! Whenever you’re ready baby boy, we are ready for you. ❤

Final To-Dos before Baby Arrives

Yesterday Justin and I were sitting outside on our deck and I remarked on the fact that it’s finally sunk in that we’re about to have a teeny tiny baby in our family. It might sound strange, considering the fact that I’m 36 weeks pregnant and have known about this baby since December, but it has always seemed like a “future” thing. And now, it’s sinking in that it’s not very far in the future at all and in fact will be coming in just a few short weeks – we will soon be a family of five!

We got our maternity pictures back and to say I’m in love is an understatement. Knowing that we plan for this to be our final pregnancy has made every milestone that much sweeter this time around and I loved having the opportunity to document this special time. While I want to continue to soak up every little baby kick and belly rub in the remaining weeks, there are also a few things I’d really like to accomplish before baby arrives:

1 – Finish the nursery! It’s come a long way since it was Vi’s bedroom and I’m really happy with the progress, but I still have a couple things to check off the list. We just installed bookshelves last night (more to come on that soon!) but I still want to put up some artwork on the wall above the crib, add some plants to the room, touch up the paint on the little side table, and re-install the doors that I just painted yesterday. I think I’ll be able to finish all that this weekend so we’re super close!

2 – Finish the Outdoor Space Refresh. A goal of mine this summer was to refresh the outdoor space. While I didn’t get as much accomplished as I had hoped, we did add seven tons of sand to the beach area, complete a DIY umbrella stand (a game changer on our deck!) and added a few updates like a new patio umbrella and outdoor rug and a few Adirondack chairs around our firepit. We have two more chairs to assemble and I’m hoping to snag a couple side tables to fit in between because our firepit has been a huge hit this summer and will continue to be well into the fall. I also think it’s not too late for us to try to get our string lights hung – our travels are done for the summer and the next few months are going to primarily be spent at home, with a lot of time outside, so they’ll still get use.

3 – Finish the Kid’s Shared Bedroom. This is a project that has gone on way longer than expected thanks to a wallpaper fiasco. I had finally decided on a wallpaper and was really excited about it . . . then it came in the wrong scale and was unusable. The correct scale was smaller than I wanted, which was disappointing, and my enthusiasm for the project kind of drained. I haven’t been too motivated to finish up this last wall, but I’d really like to try to do that before the baby arrives – whether that means find another wallpaper or go with a painted accent wall. I also still want to replace the baseboards and paint the doors, so a few things to accomplish!

4 – Actually prepare to have a tiny human live here. I realized yesterday in the grocery store that I have not bought anything for baby yet – no diaper cream, no baby wash, not even a single newborn diaper. Whoops! I stocked up on some all-purpose ointment, diaper cream, and baby wash but I still need to get diapers and wipes. I also need to pull out and clean things like the infant car seat, breastfeeding pillow, and my breast pump + parts as well as dig out things like breastmilk storage bags and the bassinet. You know, just the things that I need to actually have a tiny human live here in this house, haha!

The list feels long, but luckily everything on it is pretty manageable. And for the most part (other than the things on #4), nothing really has to get done before baby arrives. Whatever gets accomplished will be good enough, but it’s nice to have this list as a guide to help me focus over the next three weeks to prepare!

How we made a DIY Umbrella Stand (with built-in storage!)

When we first looked at this house as potential buyers, we weren’t quite sure what to think of the pond. We never specifically looked for a property with water and had no experience with maintaining a pond; however, one step out onto the patio looking out onto the water and we were hooked. We knew this could be a very special place for our family and now three years later, we absolutely love it and are out there all the time. The previous owners created a small beach area along the edge of the water and installed a little wooden deck beside it. This has become my favorite spot to lounge and read a book while watching the kids play in the sand and swim. The one thing it was missing was an option for shade and this year I decided it was high time to come up with a solution – and we did!

We looked at weighted umbrella stands, but most options would’ve cost around $500 and we weren’t even confident what we chose wouldn’t tip over since the deck is not near anything to block a strong wind. Instead, we came up with a DIY version that not only looks much cuter (in my humble opinion haha) but is sturdier and MUCH less expensive. Granted, we used a lot of scrap wood and supplies we already had, but this version cost us right around $200. Today I’m sharing all the details with how we did it step-by-step. Here we go!

Materials

Umbrella Stand

16″ x 16″ outdoor planter

-umbrella – I used this one

-4×4 wood for filler (optional)

-level

concrete mix + water

-5 gallon bucket

-large stirring stick (we used an old broom handle)

-spade

-large piece of cardboard (we used the box the planter came in)

-box cutter

Tabletop

-3/4 inch plywood

-1 x 1/2 inch slats of wood (I used pine)

-black spray paint

-wood stain

-wood glue

-nail gun + 1 inch nails

spar urethane spray paint

-other tools used: table saw, miter saw, jigsaw

Umbrella Stand Directions

I wanted something that felt streamlined and modern so I bought this planter off of Amazon for the base of the stand. Justin took an old wooden 4×4 post we had in our scrap wood pile and cut it down to create a filler border around the inside edge. This is not a necessary step, but he did it to reduce the amount of concrete used and the overall weight of the finished product.

We plugged the hole at the bottom with the plastic gasket that came with the planter and moved the whole thing around outside until we found level ground.

Justin poured the concrete mix into a bucket and added water according to the directions, using an old broom handle to stir the mix.

Once the concrete mix had reached the desired consistency, he poured it into the planter and used a small spade to smooth the top flat.

Justin ended up using about 1 1/3 bags of concrete. I think one bag would have been sufficient if your umbrella is going to be near a house or other structure that would help to block wind, but since ours is out on a deck with no windbreak around it, we wanted a little extra stability.

Then it was time for the most meticulous part – getting the umbrella stand perfectly in place. This can be done solo but was easier with two people, as one of us used a tape measure from side to side in each direction to find the exact center while the other carefully set the pole in place, then we used the level to make sure it wasn’t crooked. We also stepped back and visually confirmed with one another from all angles that the pole looked straight up and down. We really took our time with this step and it was well worth it!

Once we were fully satisfied that the pole was not crooked, I took a piece of cardboard from the box the planter arrived in and used a box cutter to cut an “x” in the center. I slid the hole made by the x down over the pole and it created a kind of holder to keep the pole from moving in the wind. We weighted it down with some scrap wood and shovels and left it to dry and set for about 36 hours.

Our original plan was to stop here and fill the top half of the planter with soil and flowers, which I think would’ve been lovely! But before we could do it, we actually used the umbrella over the weekend when friends came to visit and we quickly realized that the base made an awesome catch-all spot for sunscreen, books, phones, etc. I was immediately inspired and came up with a vision for a removable tabletop that allowed us to access the storage underneath.

Tabletop Directions

Once I explained my vision to Justin, he was excited to jump right in. He used his table saw and miter saw to cut down a piece of 3/4 inch plywood to size (in two pieces) to fit inside the planter.

He then used a jigsaw to cut a small notch on the edge of each piece of plywood for the umbrella pole to fit through.

Tip: Justin spent a lot of time on these first two steps measuring and re-measuring to make sure the pieces would fit as flush to the inside edges of the planter as possible. We’re not including dimensions, because every planter and umbrella will be slightly different and it’s important to measure your own to make sure it fits well!

Once the pieces were cut to size I spray painted each one black.

I wanted slats for the tabletop, but rather than buy new wood, we had leftover pine 1×5’s from the DIY clothing rack I made last year and Justin took one and ripped it down into one inch wide strips. He cut them to length so that they would hang over the edge of the plywood by a half inch and I tested a few stains from my stash before landing on Varathane’s Golden Oak.

Justin applied a small bead of wood glue to the back of each piece, then used a nail gun and one inch nails to secure each slat in place (he used a thin piece of scrap plywood in between each one to evenly space them out). This is one step where I didn’t communicate my vision with Justin well and I wish we would’ve spaced the nail holes differently, but honestly, it’s fine and doesn’t bother me too much!

He used the jigsaw again to cut a notch in the top slats that matched the one in the plywood underneath and I stained that little notch as well.

Since this is going to be outside, I sprayed several light coats of clear spar urethane over everything to give it a good protective coat. We let it dry overnight and then we installed it in the planter.

I am in LOVE with how this turned out – it honestly looks like it was always meant to be this way! I love that Justin took the extra time to make sure the slats were cut and spaced in a way that created an equal amount of space around the edge all the way around. It looks so good!

The top lifts off easily to provide plenty of storage underneath – it’s so nice to have a shaded place to store things out of the way!

Here’s a close-up of how the top looks in place. The plywood goes all the way to the edge inside and the slats keep it in place with a half inch overhang.

I have to give a huge shoutout to Justin here. This umbrella stand was my vision, as was the design of the tabletop, and he worked to execute my vision perfectly! I am so thrilled with how it turned out.

Ultimately, there is still a lot of work to do here. The deck actually needs completely replaced (boards are warping and breaking off) and we have plans to expand it to accommodate more people. For now though, this is such a nice little spot to hang out and enjoy and I’m thrilled that we now have the option for shade. In fact, it’s calling to my eight-month-pregnant self and I think I’ll spend some time out there today!

June 2022 Book Review

Good morning and Happy July!

Our June was absolutely nuts around here. For one thing, we went on two different vacations: eight days in Virginia Beach with Justin’s family and then six days in Maryland with some friends. That’s 14 days of being on vacation (with kids!) AND roughly thirty-eight hours in the car total on the road trips. That’s right. THIRTY. EIGHT. HOURS. In a car. With two small children and a woman in her third trimester of pregnancy. I honestly don’t know what we were thinking haha, but suffice to say we made lots of memories!

We’re thankful that we had the ability to get some traveling in, but traveling with kids is basically just parenting in a different location. While each trip was fun, neither was what I would call particularly relaxing and I had virtually no time for reading. When we were home, I was either packing, unpacking, repacking, or going about our normal days of cleaning/laundry/playground days/home projects/etc. It was such a full month that I was only able to get through one book, but it was one I have a lot of thoughts about!

The Stationary Shop by Marjan Kamali

Teenaged Roya is growing up in Tehran, Iran in the 1950s amidst quite a bit of political turmoil – there are people passionately loyal to the Shah, those who think Russia and the communists have the right idea, and those who are striving for democracy and have hopes pinned on their prime minister. An encounter in her beloved stationary shop introduces Roya to Bahman, a young man with a yearning for justice and democracy, and it isn’t long before they fall deeply in love. But certain forces are at work to keep them apart, and on the date they are supposed to get married, violence erupts – a violence that will change their country, and their lives, forever.

This was historical fiction like I’ve never read before. Prior to this book, I knew next to nothing about the Iranian Coup. While these characters were fictional, many of the events talked about really did happen and it was eye-opening for sure. I will say, Roya and Bahman are characters you want to root for, and it’s such a mixture of feelings to see how their lives play out. The book started out a little slow but picked up as I went along. While there are some lighthearted, enjoyable parts, overall this book is a sweeping read through the decades and covers some heavier moments – while it’s hard to use words like “enjoyed” when I think about my feelings, it is powerfully written and poignant and I can almost promise you’ll have thoughts afterwards. We read this for my book club and there was no shortage of discussion! It’s got romance, it’s got some mystery, it’s got some tragedy, it’s got some hope, and it’s got a lot of references to Iranian people, places, foods, and events. If you enjoy historical fiction about lesser-known events in world history (I don’t think anyone in my book club knew much, if anything, about this history in Iran and how the United States was involved as well), I think this is a great choice!

***

Now I’m curious – do you find you read more or less during the summer months? I would normally say more, but this year is definitely much less. Our July is hopefully going to be much calmer – we’re staying home and hosting quite a bit, but I think there will be much more room for reading in my life in the coming weeks. I’m excited to get back into my reading stack!