
I love a good budget-friendly DIY and today I’m so excited to share our kitchen refresh – a low cost transformation using paint, repurposed materials, and a few simple swaps!
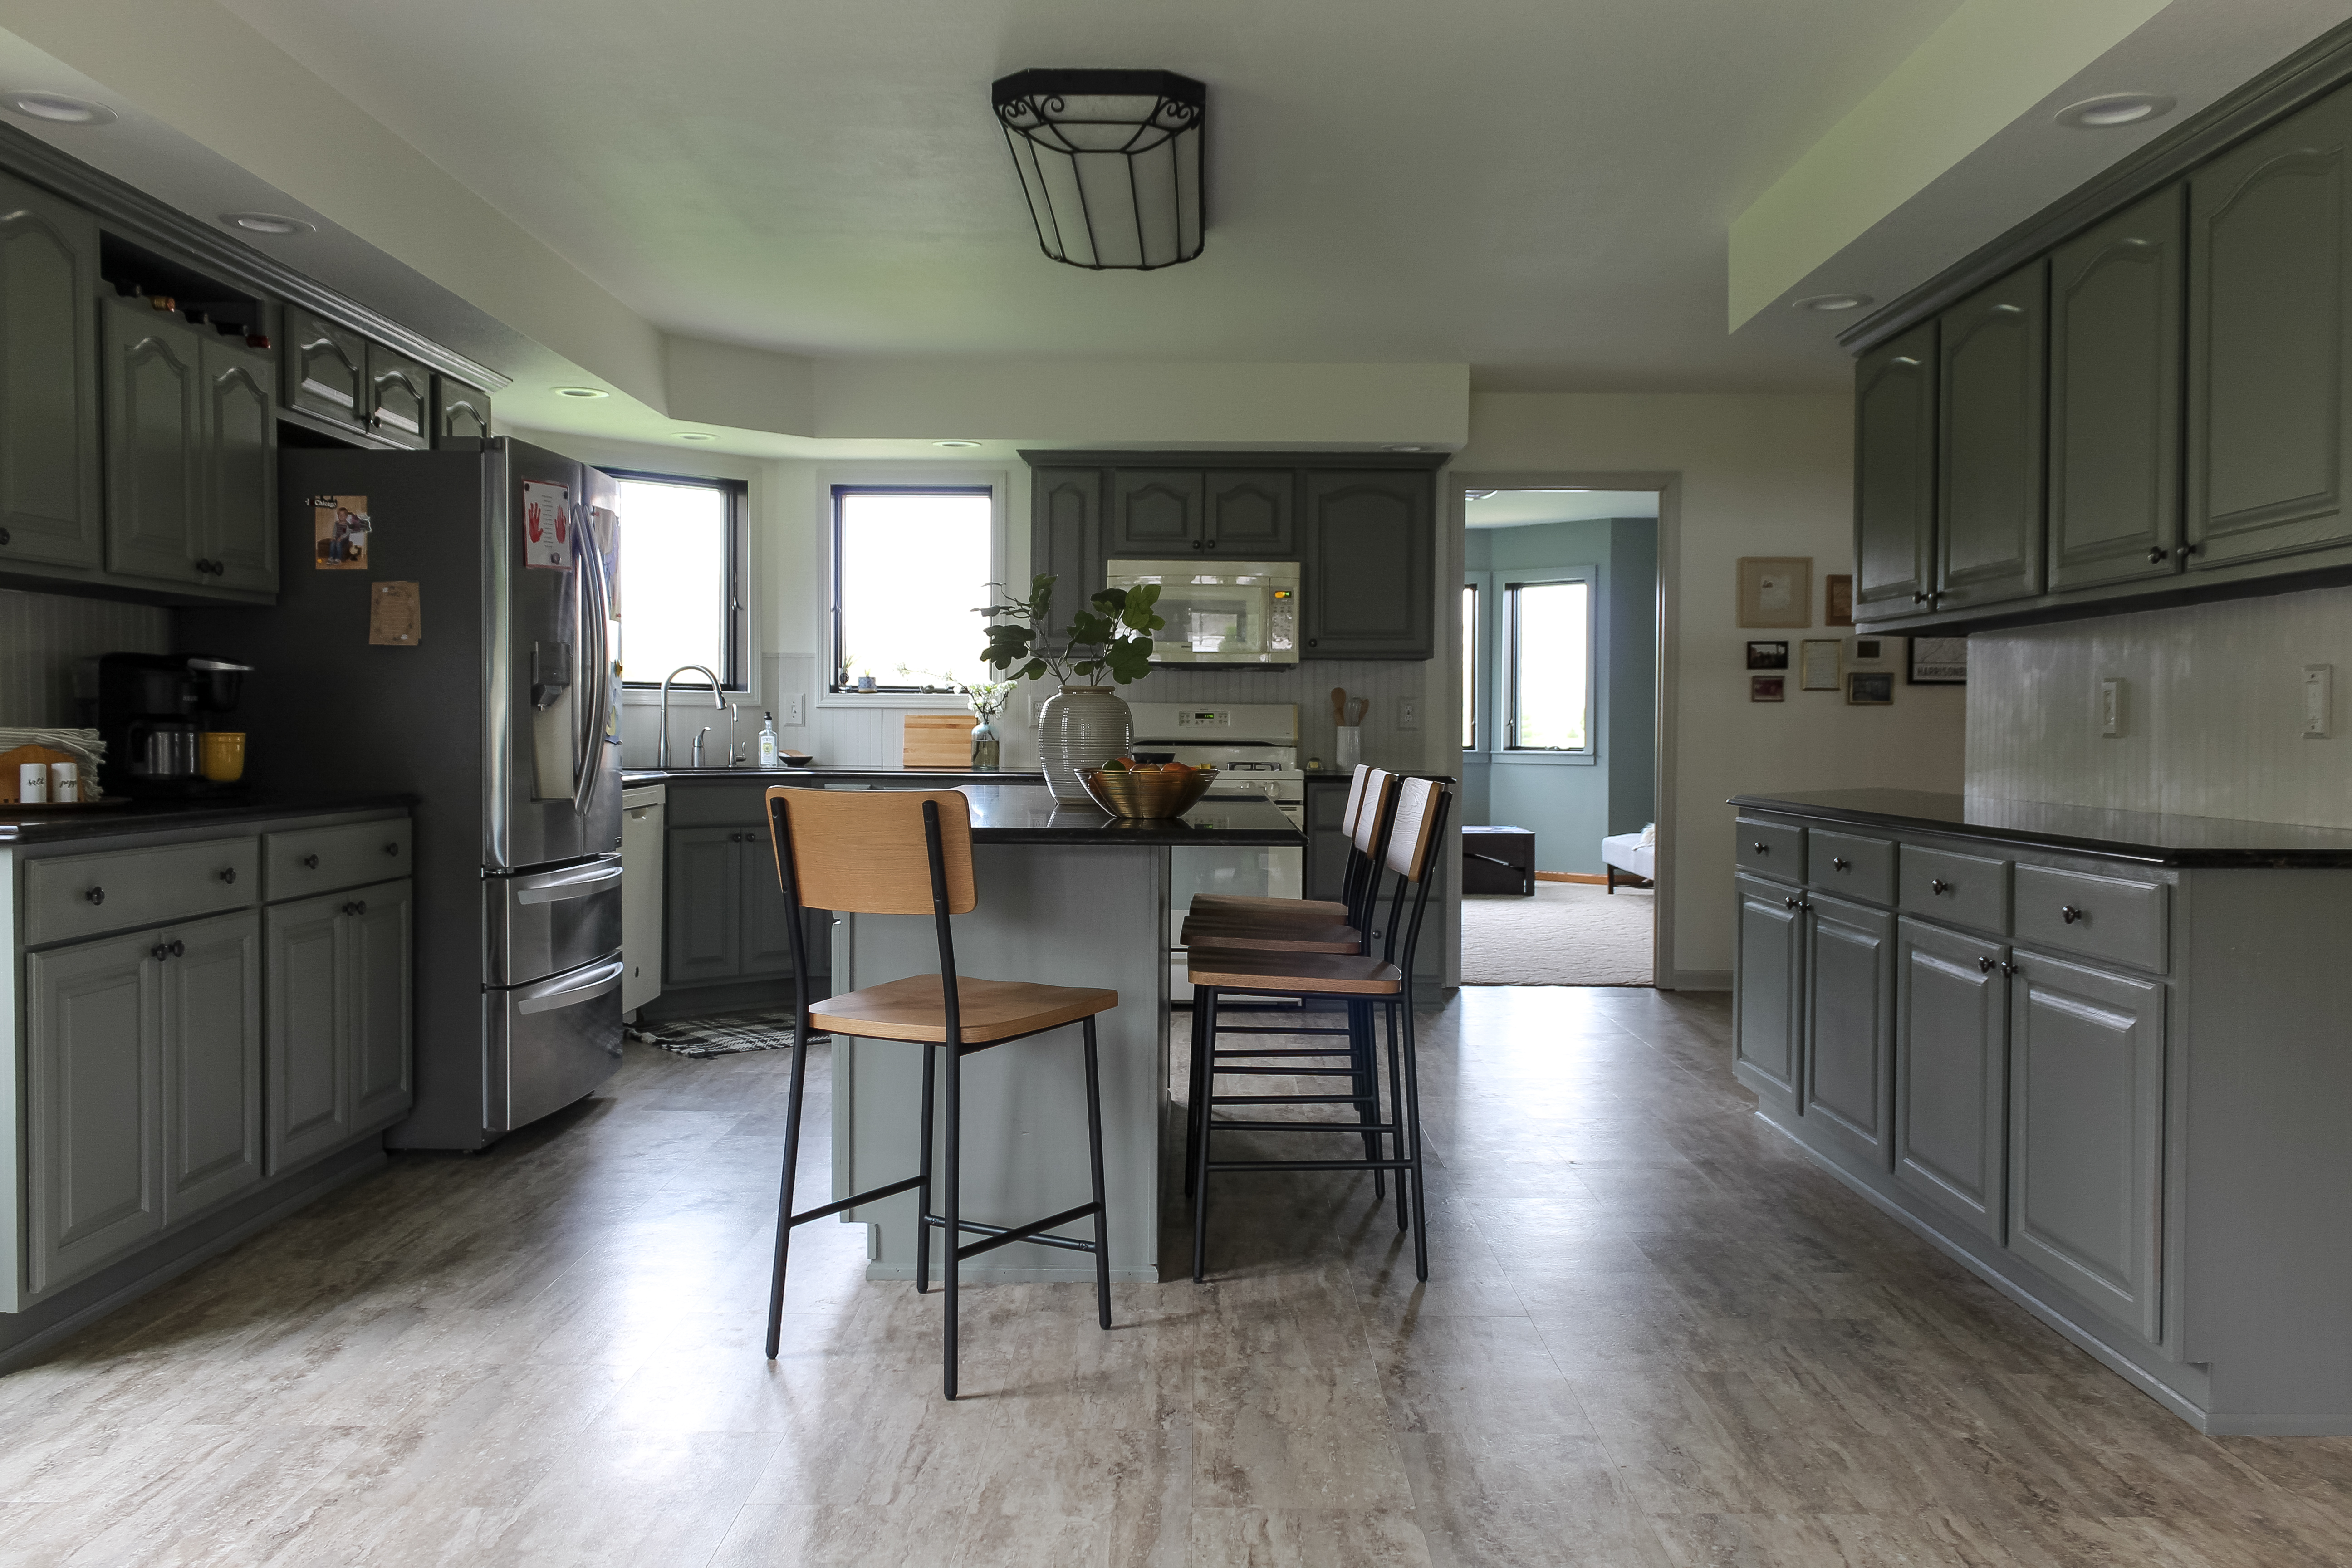
At the beginning of 2021, one of my goals was to paint the main floor of our house. Every wall was brown and the whole space felt dark and dingy, so I decided to lighten everything up by painting the walls (Sherwin Williams Alabaster) and trim (Sherwin Williams Agreeable Gray). The more rooms that got painted, the more the kitchen just felt out of place.
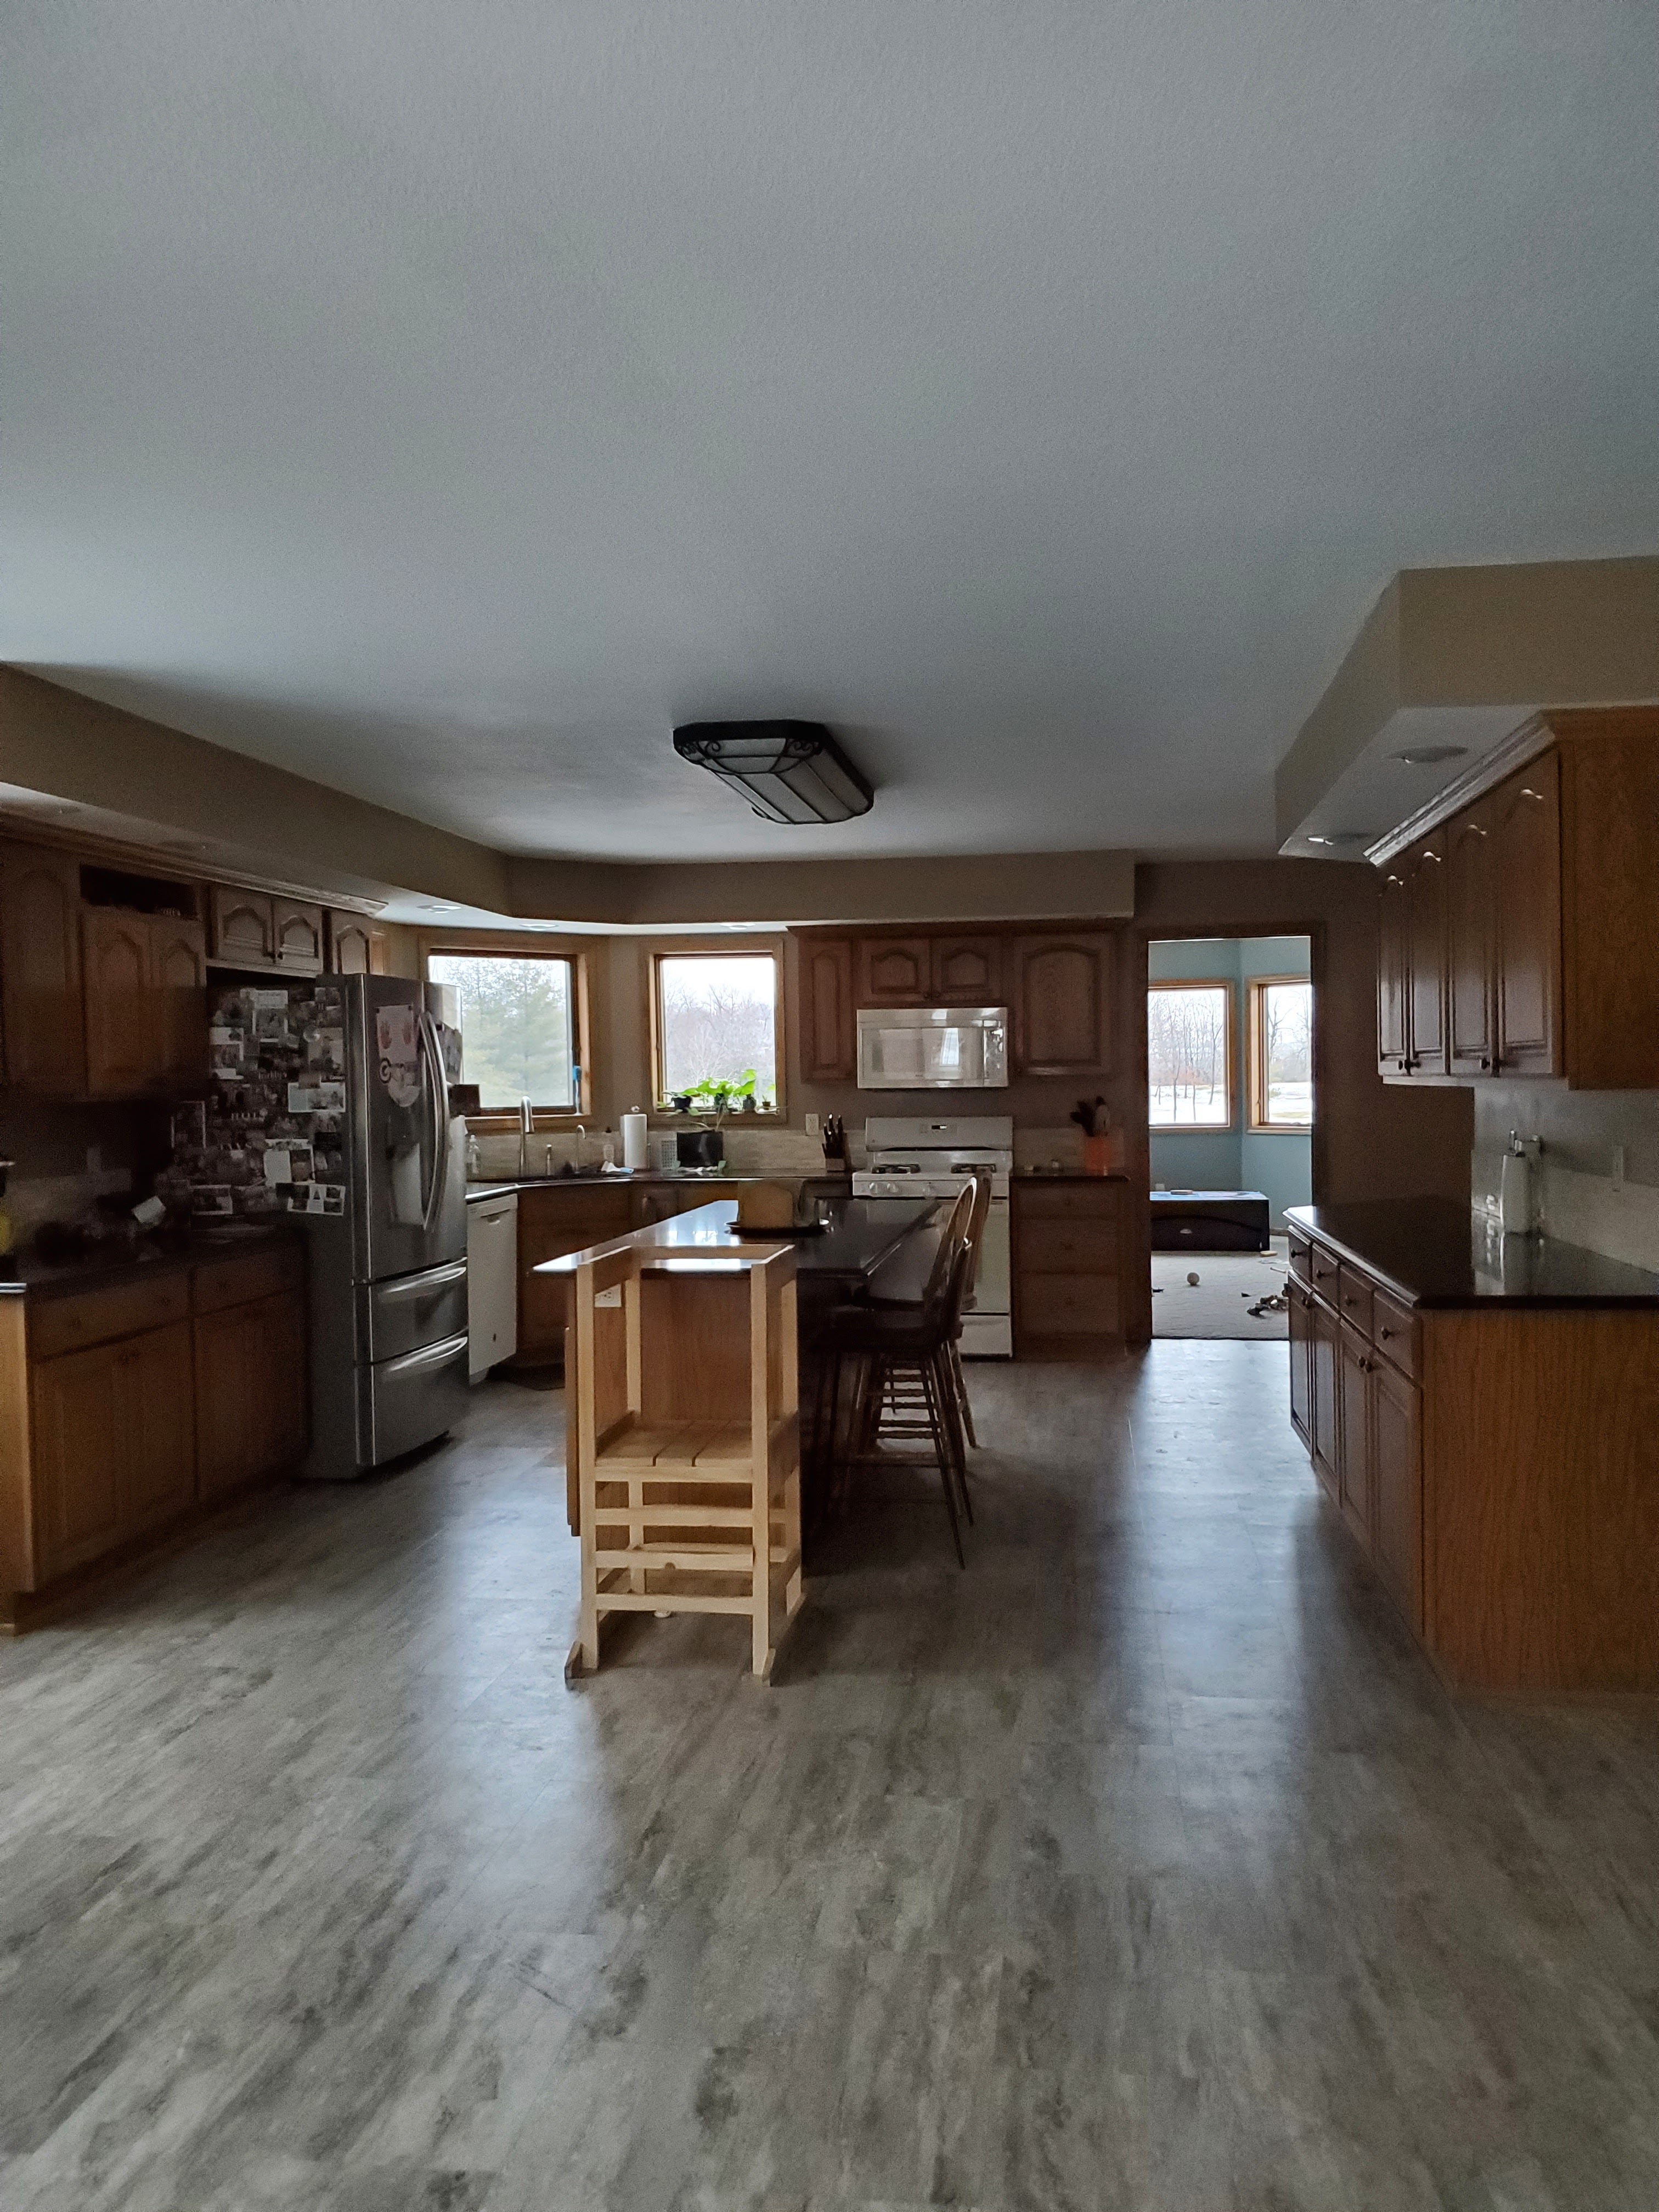
Justin swapped out the old recessed light bulbs for these LED options a couple months ago and that change alone went a long way in updating the look of the space, but I knew I wanted to do a bit more. We have dreams of completely renovating the kitchen (the current layout does not work well for our family) but that won’t happen for several years. In the meantime, I decided to do a low-cost, big-impact facelift that would help the space fit in better with the rest of the house.
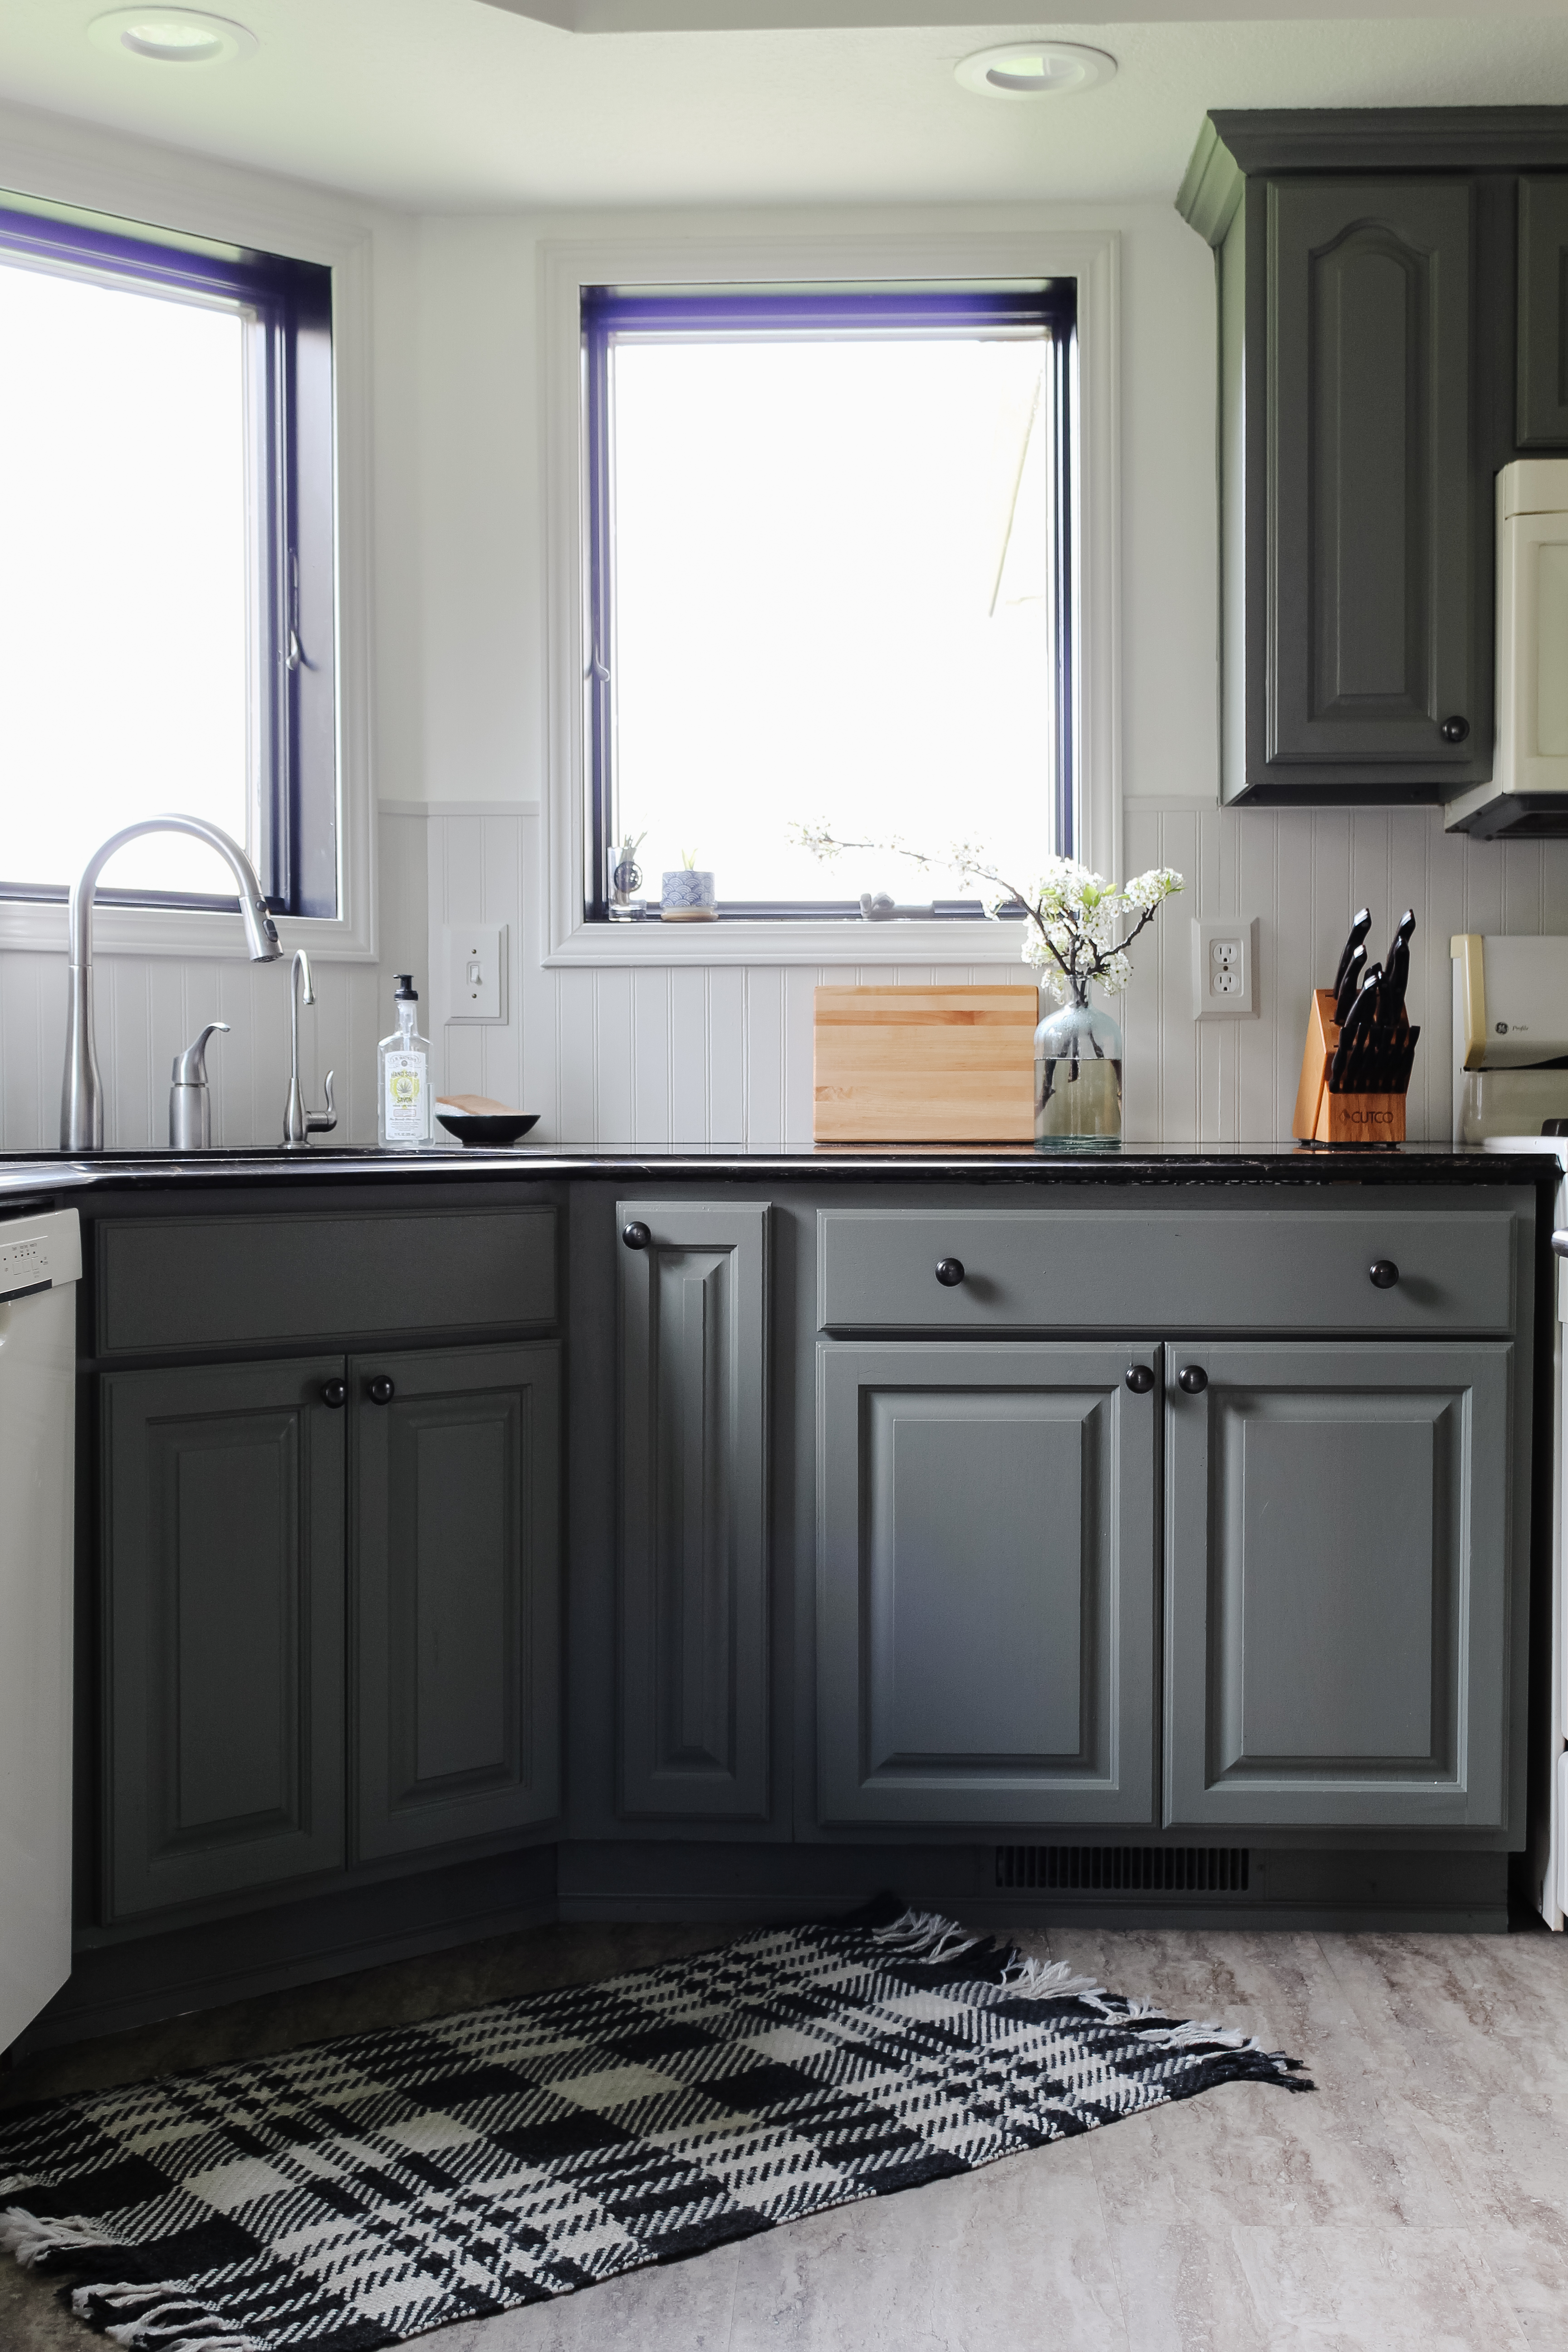
The previous owners had made a few updates shortly before selling and one of the updates was new quartz countertops. While the style isn’t my first choice, the countertops are high quality and I didn’t want to alter them. The black quartz has a lot of veins in shades of brown, taupe, and gold so I wanted to work with that even though I was moving the kitchen away from all the brown.
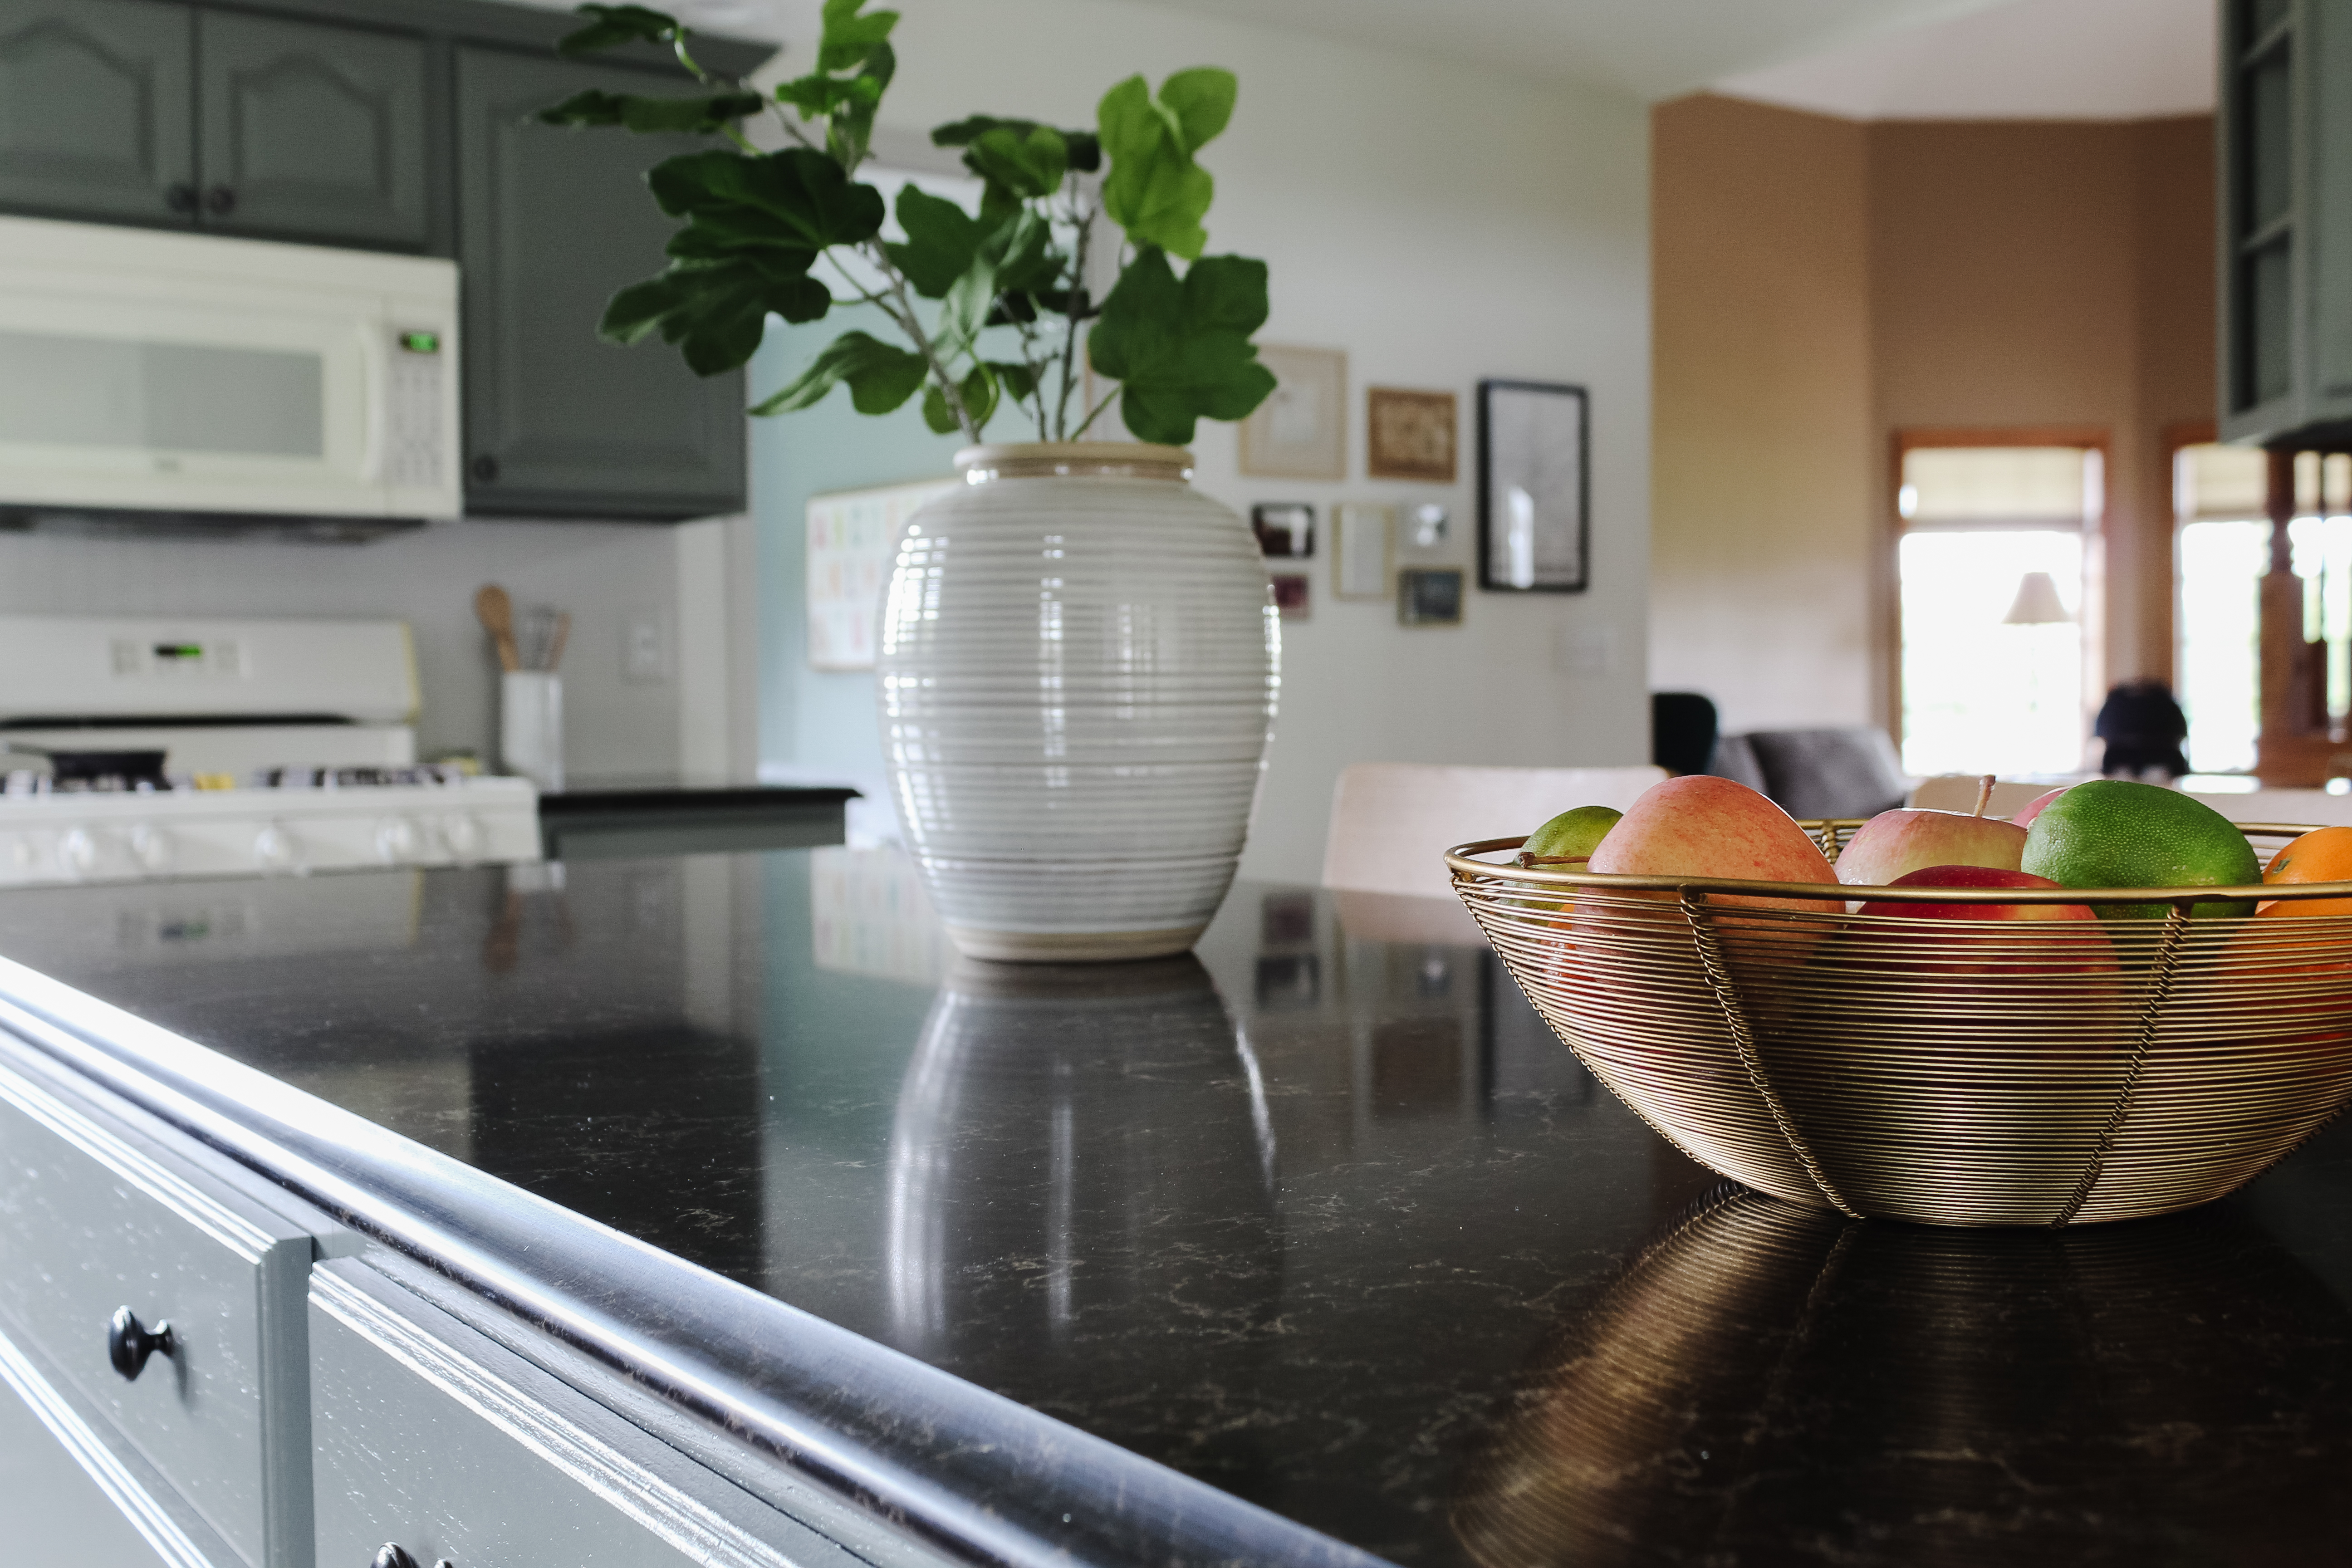
I chose Sherwin Williams Link Gray for the cabinets (you can find the full painting tutorial here). The color is very hard to accurately capture on camera – it’s a warm, versatile color that changes from green to gray to blue depending on the light. You’ll notice that there is even some variation between pictures in this post because the look of the cabinet changes depending on where I stand to take a picture!

The previous owners also updated the backsplash, but unfortunately, it was a big miss for us. It only went up about halfway to the cabinets, there were noticeable gaps between the backsplash and outlets, and visible seams in between the sheets of backsplash tile. In our opinion, it did nothing to help elevate the look of the kitchen and we wanted to take it down.

Using two putty knives and a hammer, I was able to peel the old backsplash off the wall. The drywall was a mess behind it, as it appears they had torn down a previous backsplash and then just put the new one up over the torn drywall paper. This was a fine solution on the interior wall, but for the exterior walls, especially around the sink, we wanted to create a better seal. I used primer over the torn drywall, then a layer of joint compound, then another layer of primer (after lightly sanding the joint compound) to create a smooth surface.
When we demoed our home office, we removed beadboard from all around the room and we saved every piece so we could repurpose it for backsplash. Justin cut away the parts with previous outlet holes and cut every piece down to fill the entire space from countertop to upper cabinet.
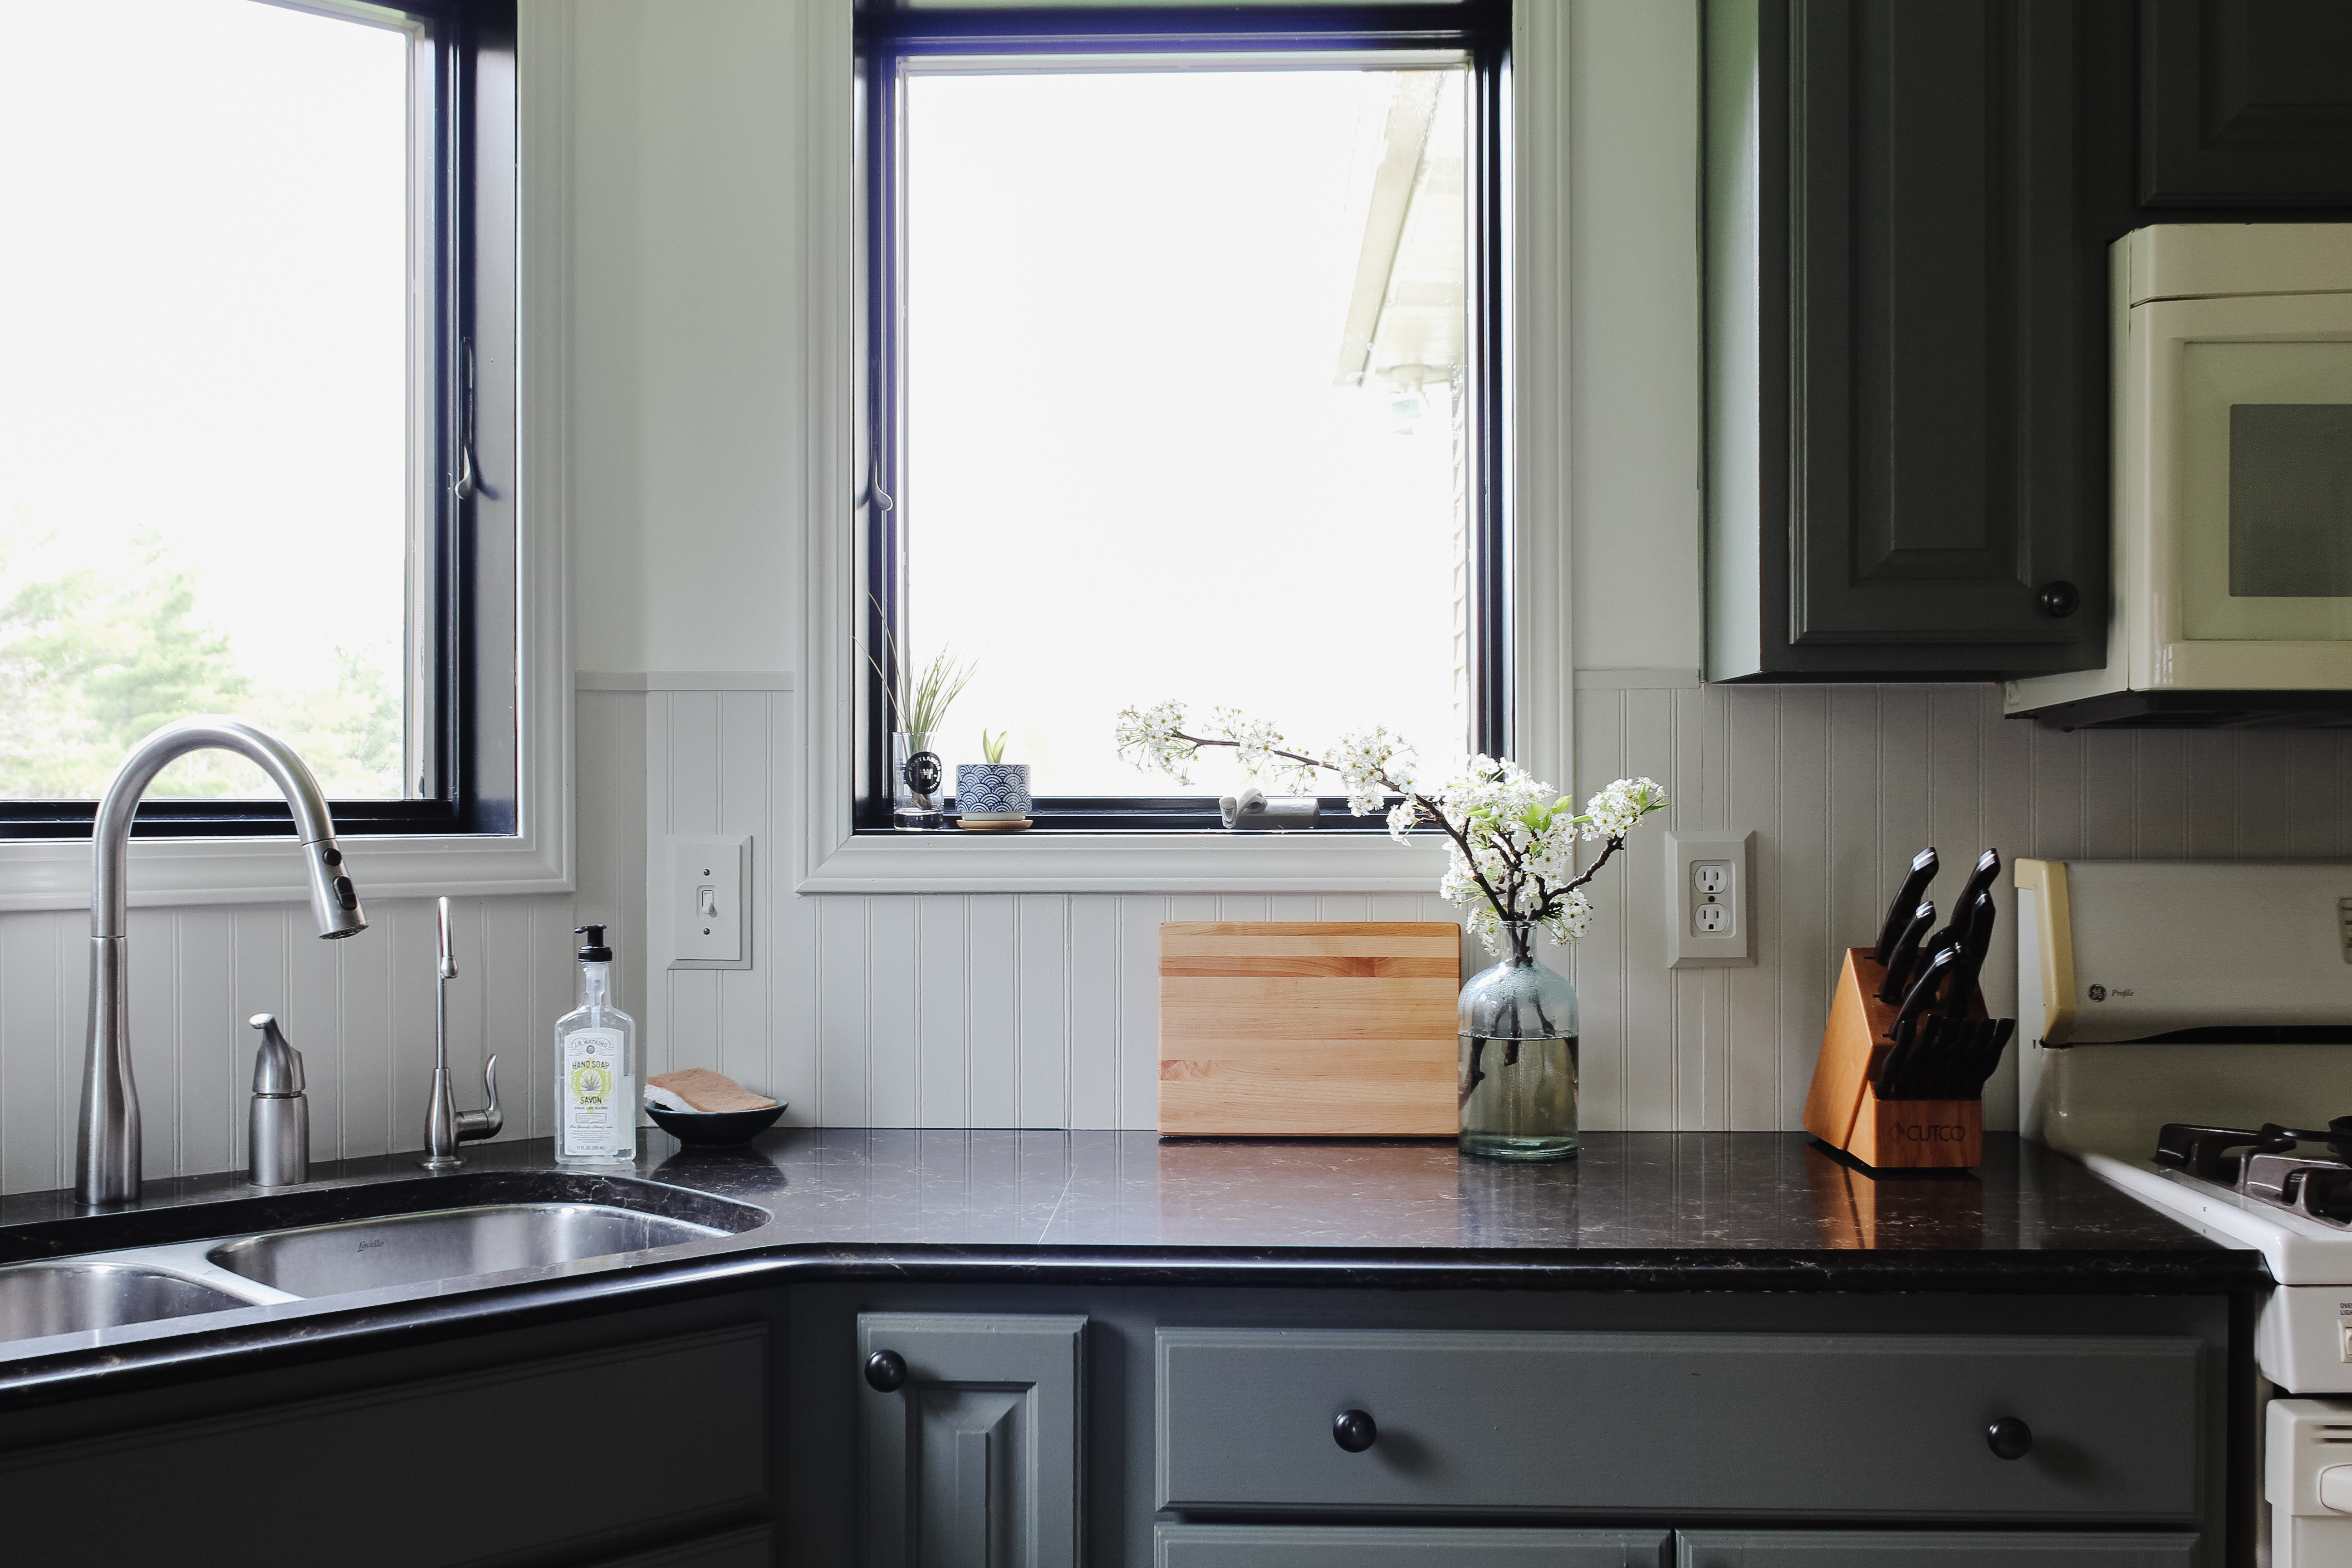
We used scrap wood with a rounded edge from previous projects to trim out the ends under the cabinets and top around the bay window. I used paintable caulk to fill in all of the seams between pieces and edges and then painted everything, including the window trim, Sherwin Williams Agreeable Gray. The windows themselves got two coats of Sherwin Williams Tricorn Black. I also ran a bead of clear caulk along the bottom edge of the beadboard to keep everything sealed off from water. To complete the look, we swapped out the old almond colored outlets and switches for white ones and I painted wooden switch plates to match the beadboard.
I also swapped out our hodgepodge of counter stools for these steel and wood ones from Target. It took me a long time to find stools that had a back (Justin’s requirement), worked with our color scheme, and didn’t cost more than $100 per stool. I’m so happy I found these – they’re comfortable, inexpensive, and look great!

I mostly shopped my own house for pieces of decor to finish out the space but I did purchase a new kitchen rug from Target and a small, locally-made maple cutting board from a small business. These little details helped make this space feel complete!
We still plan to swap out the fluorescent light fixture but other than that, this kitchen refresh is finished! It has made such a huge difference in the way our house feels and even though we’re still planning a bigger renovation someday, this has made me love our current kitchen a lot more in the meantime.


Budget Breakdown
Liquid Nails – $4.57
Joint Compound – $6.64
New outlets (two GFCI), switches, and wooden plates – $21.96 (I saved almost $40 on these items using Menard’s Rebates!)
Cabinet Paint – $41.71
Counter Stools – $365.90
LED Recessed Lights – $74.83
Kitchen Rug – $20
Maple Cutting Board – $35
Total Cost: $570.61
I already had the primer and paint for the ceiling, trim, windows, and walls since I’m using the same paint throughout the main floor, so this wasn’t an additional expense. We also had all the caulk, painters tape, brushes, tools, etc. from previous projects. So while it might be hard to recreate this exact project for the same amount of money, I do think it shows that you don’t need to spend a ton in order to see a big difference!

7 thoughts on “Transforming our Kitchen for under $600!”