Upgrading a $20 dresser for my sister’s nursery!

Over the weekend, I finished up and delivered a special DIY project I’ve been working on: a dresser and mirror for my sister’s baby nursery!

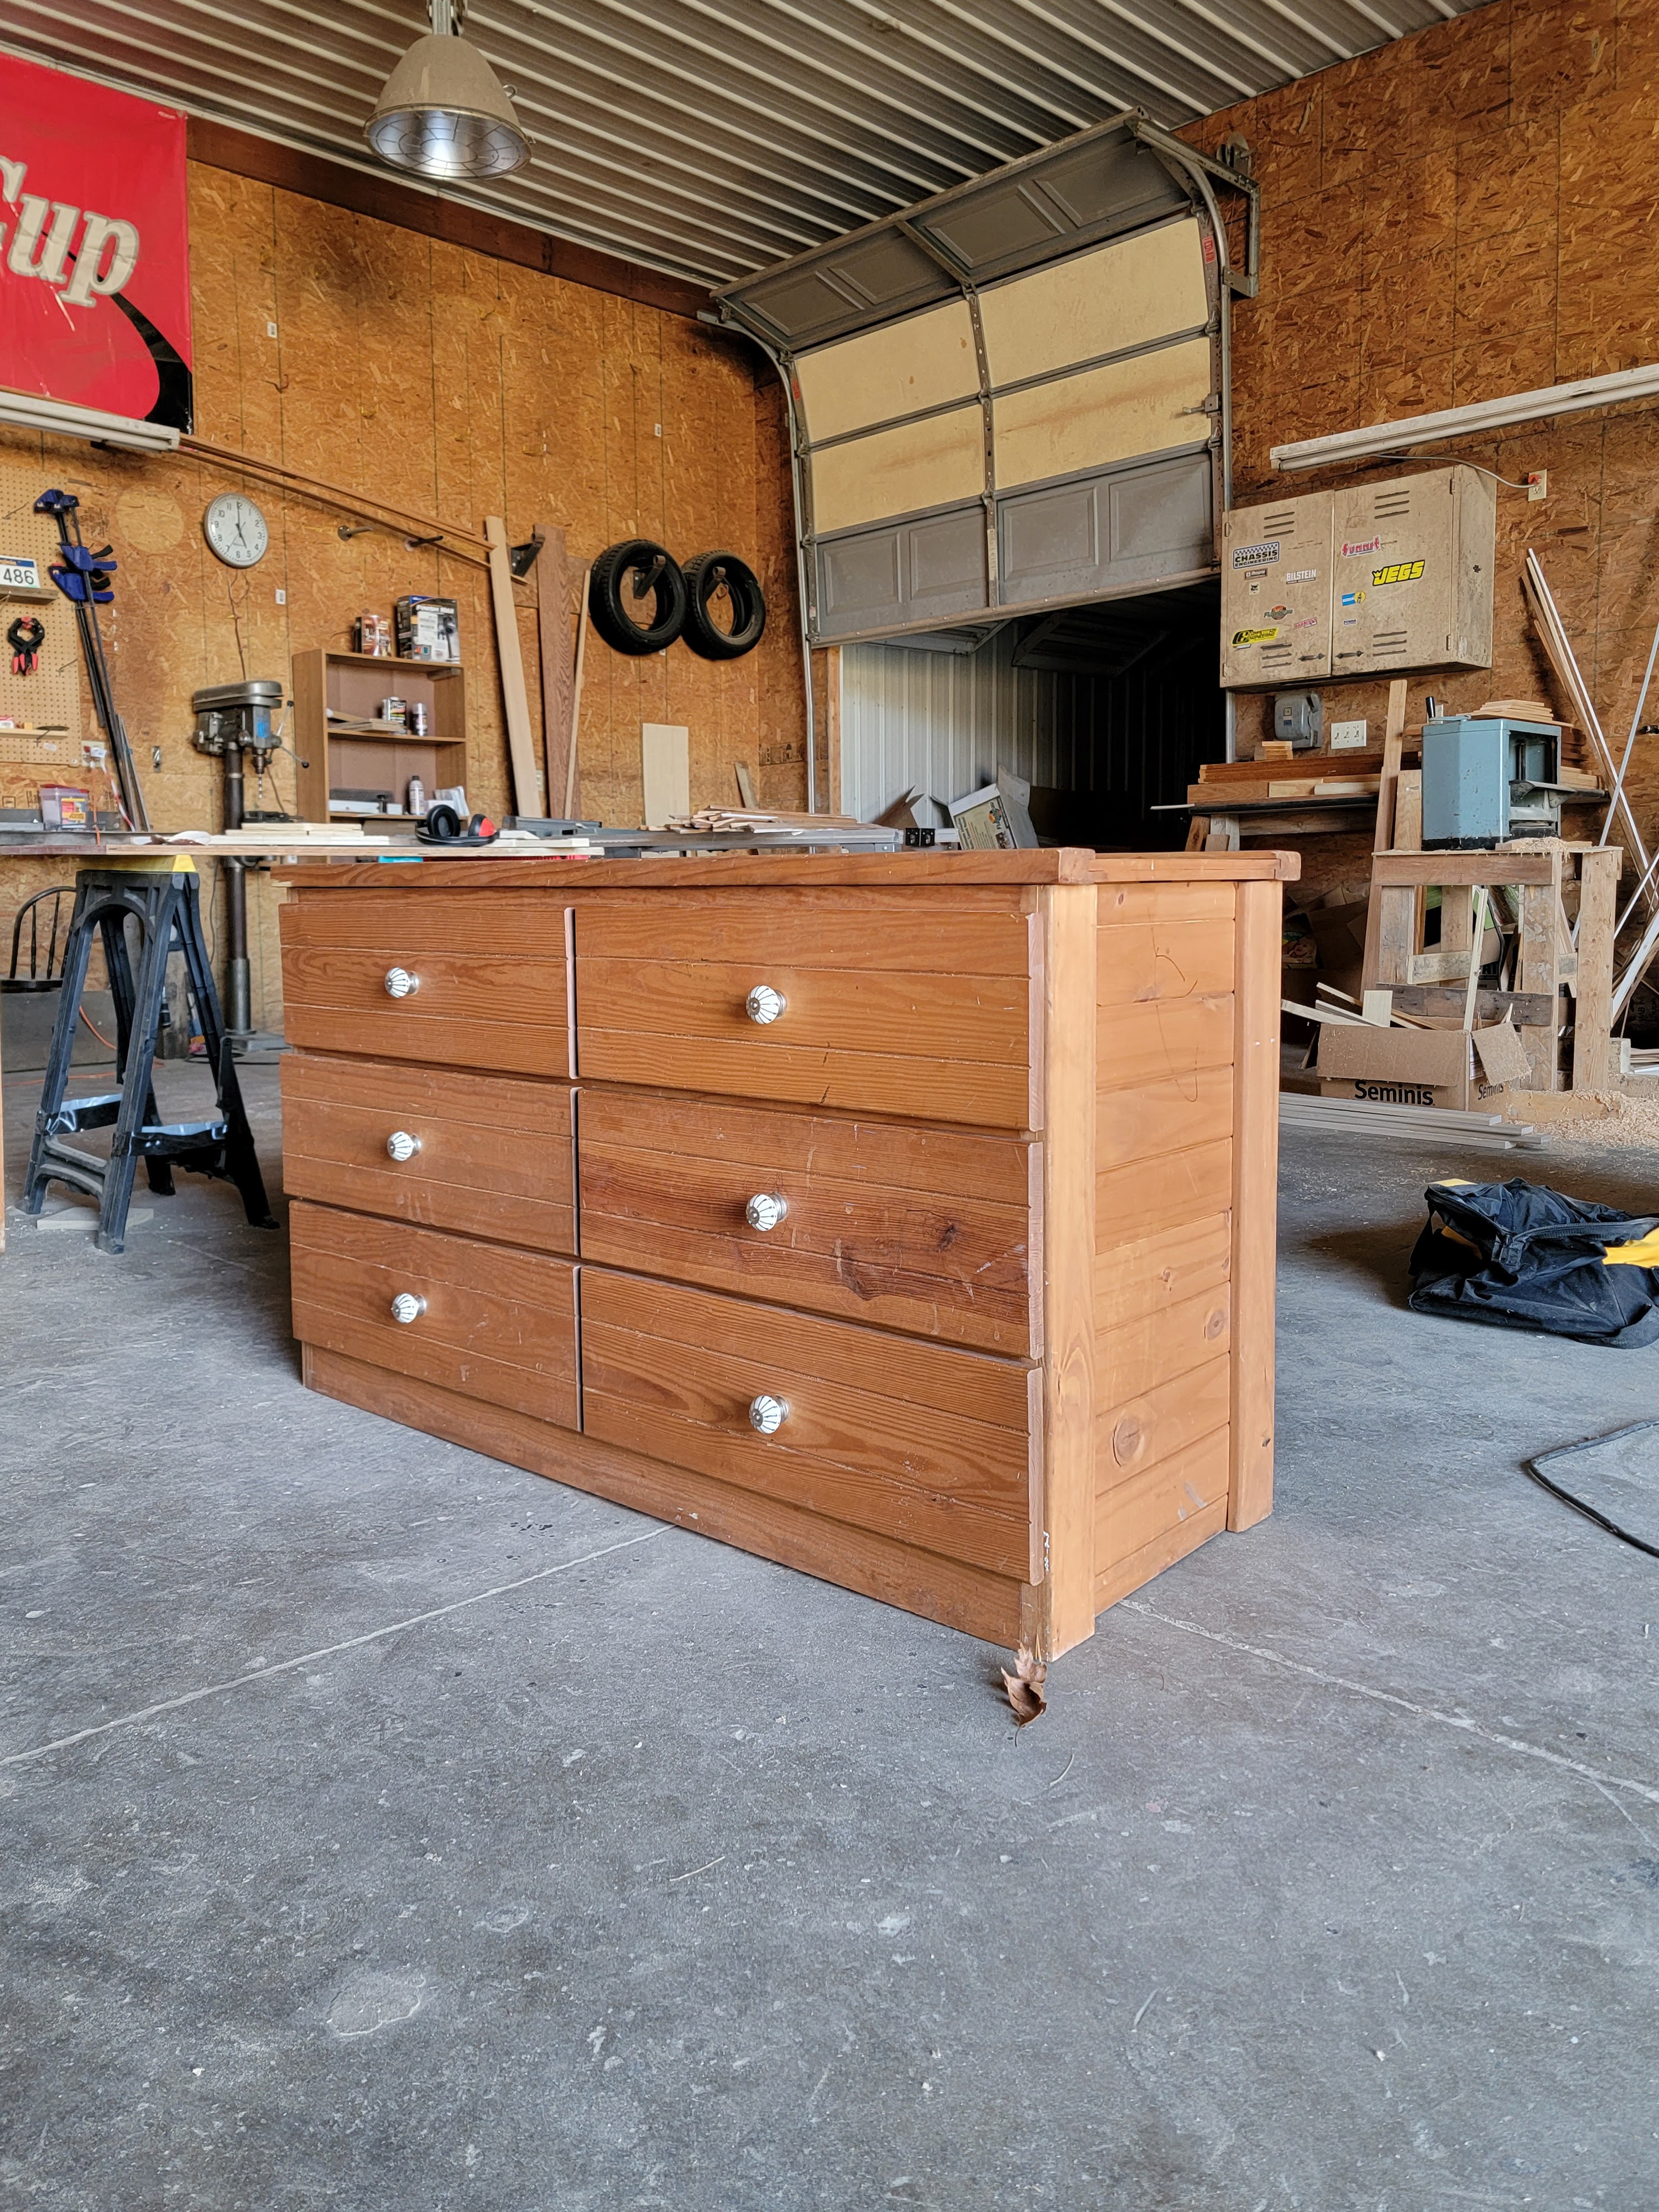
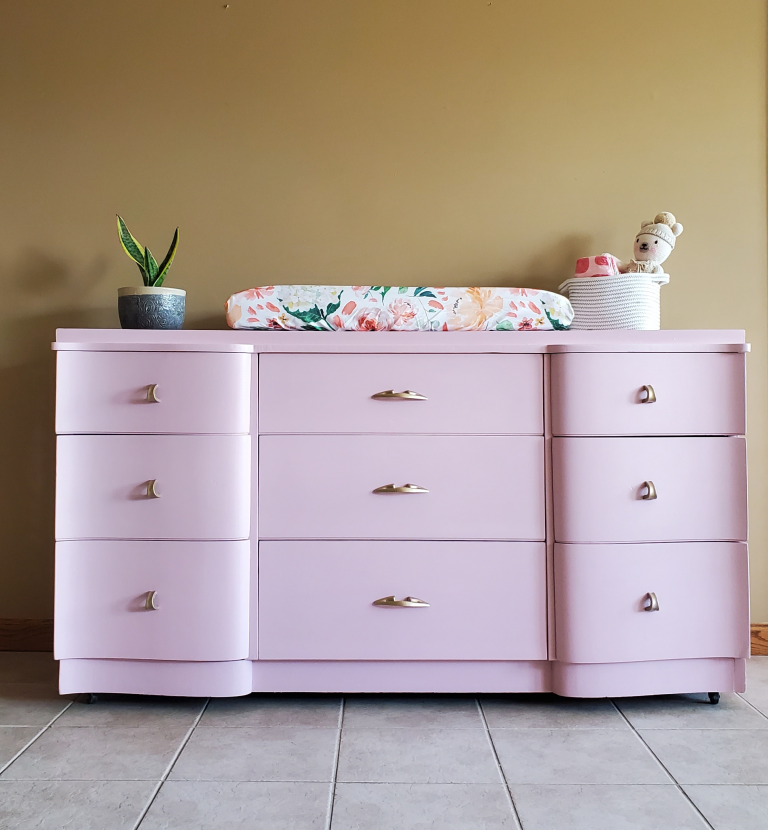
I’ve thrifted and upgraded dressers to use as changing tables in the nurseries for both my kids and also my brother’s daughter, so when my sister announced she was pregnant and asked me to do the same for her child, I of course said yes! My aunt actually spotted this dresser for sale in a local Goodwill and sent me a picture. It had nicks, scratches, patches of missing veneer, very gooey sticker residue on one side, and a wobbly leg – it was perfect. It was discounted down to $20 and just begging for new life!

The first thing I needed to do was clean up the roughest parts to get it ready for paint. I worked hard using a combination of Goo Gone, a multitool with a flat blade, and a lot of scraping to remove the sticker residue on one side. I used an orbital sander to smooth out most of the nicks and dings on the dresser top, sides, and drawer fronts. I also took a piece of 80 grit sandpaper and sanded the little detailed edge around the drawers and other areas that the sander couldn’t reach.

I turned the dresser on its side and used a wrench to tighten up the bolt underneath supporting the wobbly back leg, and then turned my focus to the side of the dresser with chipped off veneer.

Kwik Wood is a product I learned to use when I worked on an old dresser for my brother and sister-in-law. You just mold the putty to soften it up, press it onto the space where veneer is missing, and let it harden. It looks terrible at first, but that’s okay!

Once it’s hardened, it’s totally sandable and paintable. So I sanded it down super smooth with the orbital sander and then was able to paint it just like the rest of the dresser!

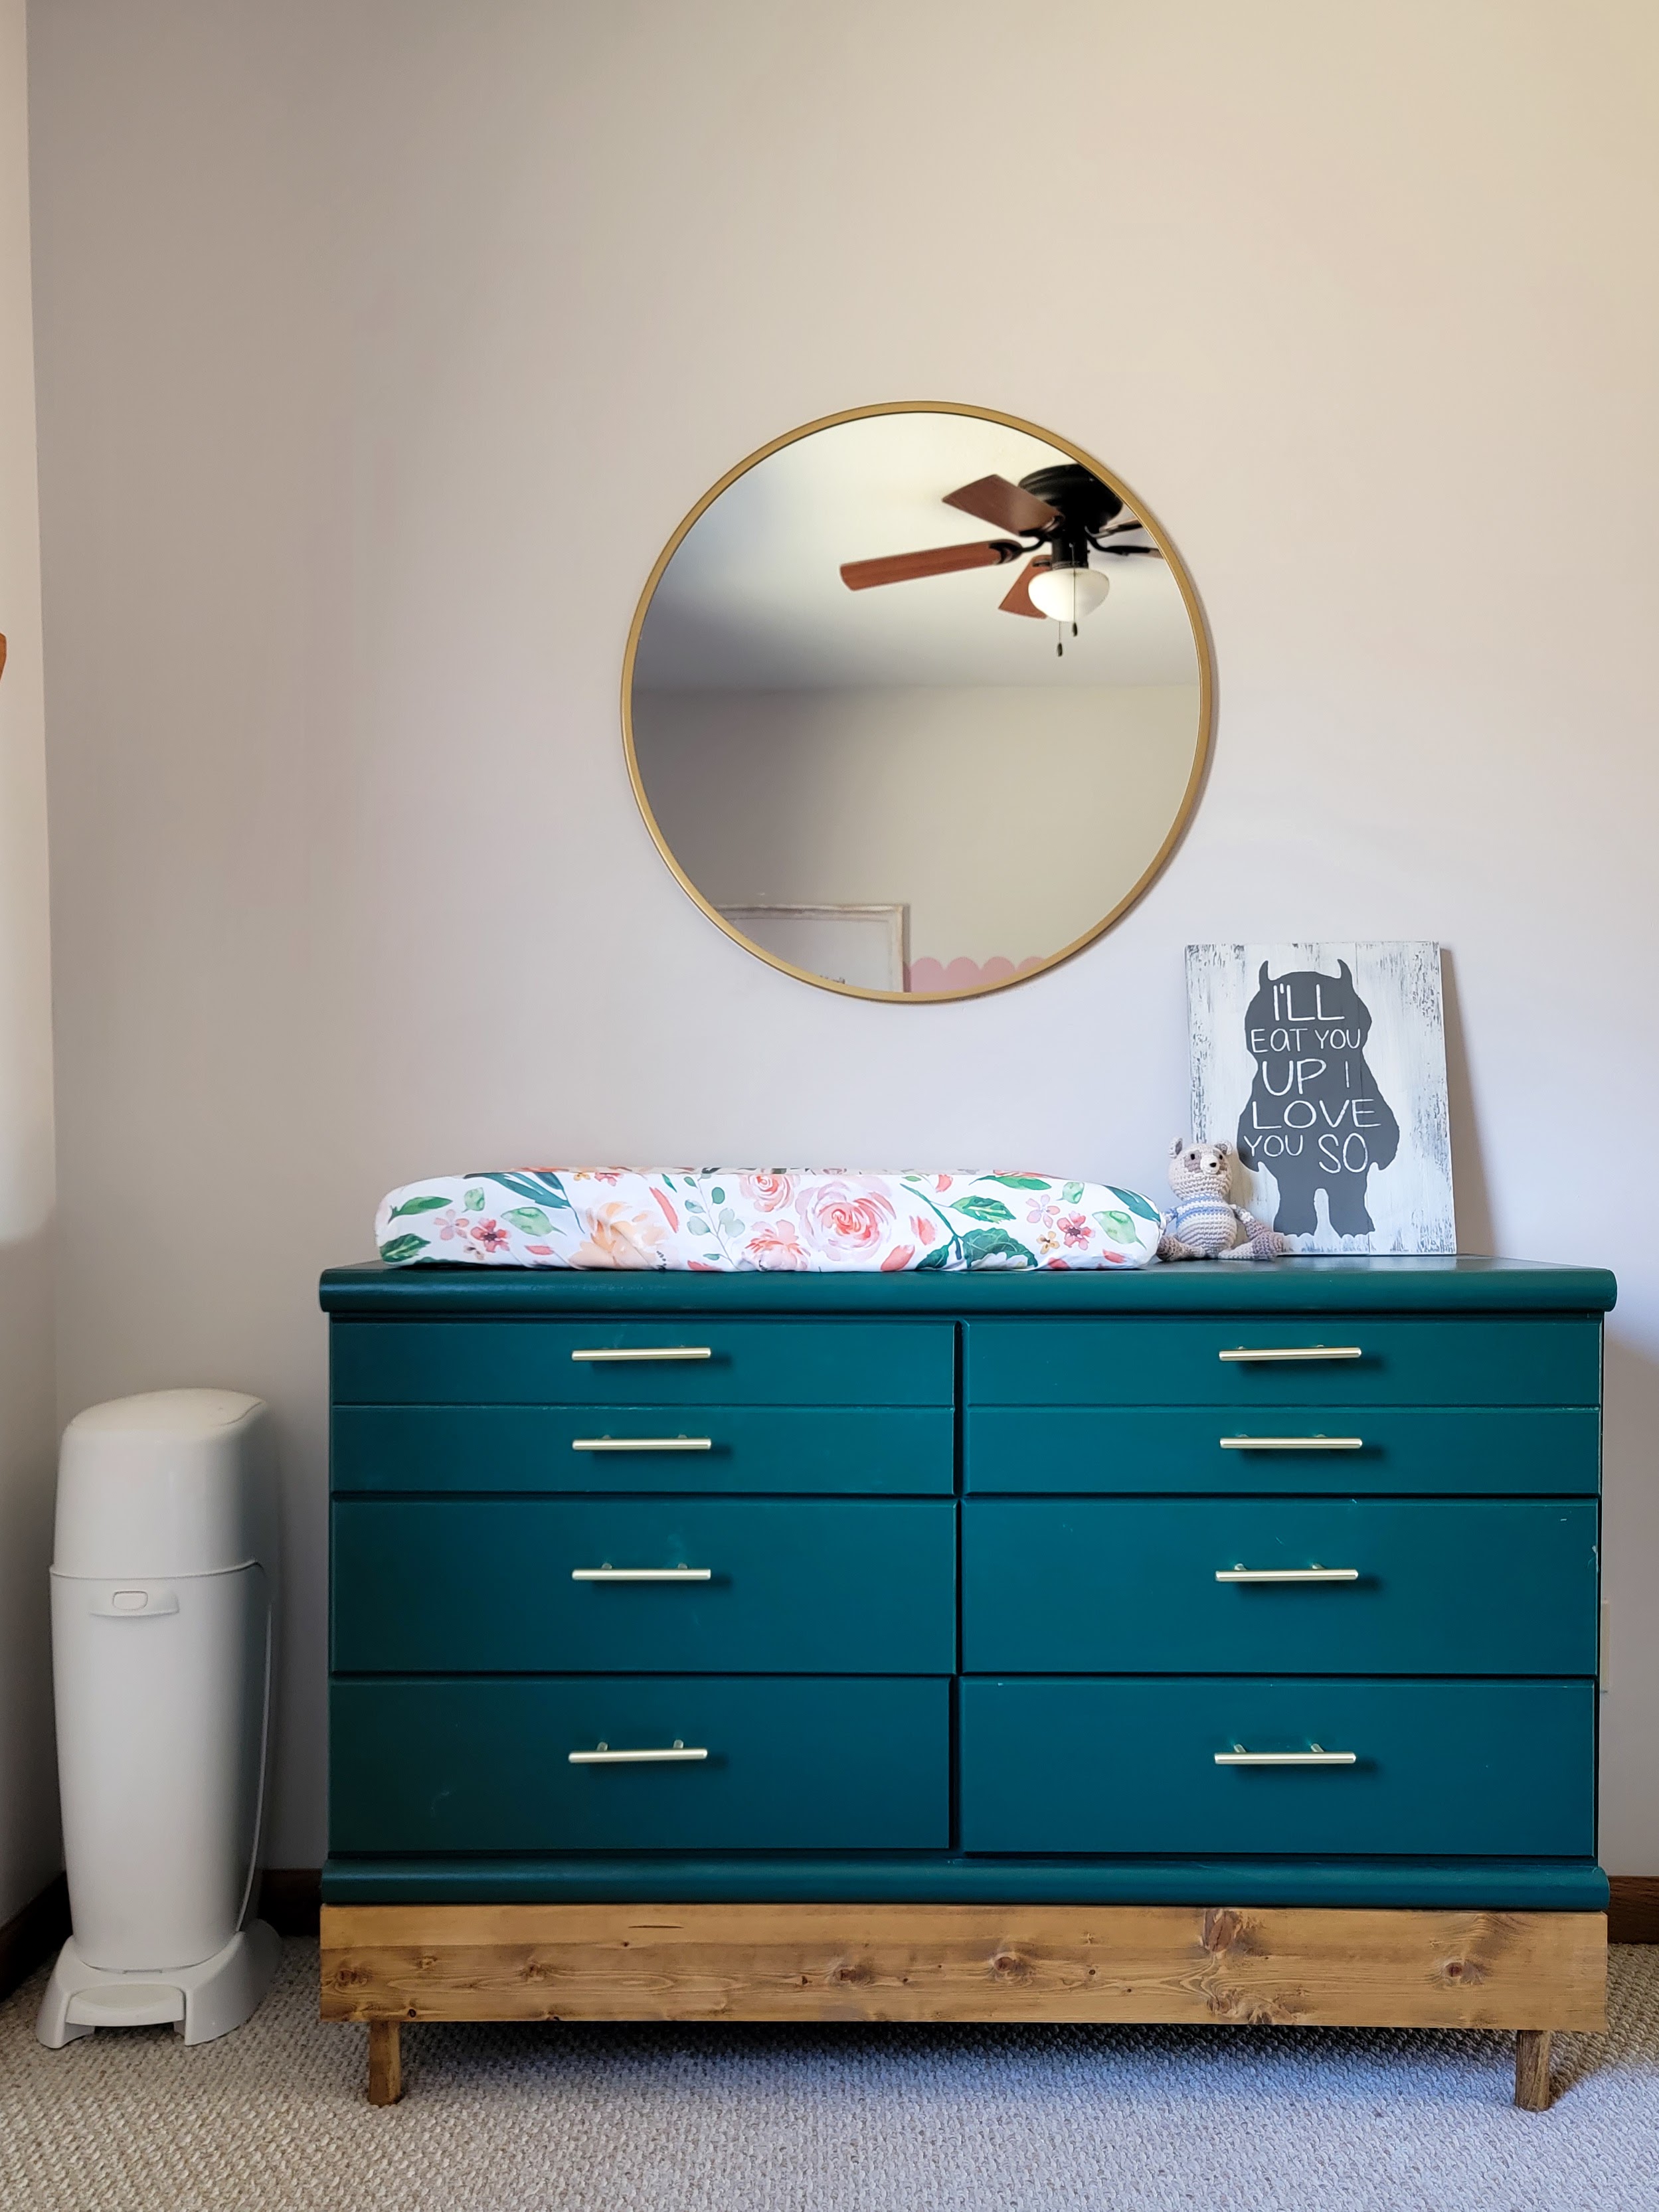
Using a brush for the detailed sections and a foam roller for the sides, top, and drawer fronts, I applied one coat of primer and two coats of paint (I chose Sherwin Williams Evergreen Fog in Satin). Then it was time for the hardware.

My sister’s style is a unique combination of artistic, eclectic, and boho so leather drawer pulls felt like the perfect touch for this midcentury dresser. I bought a set of these leather drawer pulls and they were just right for the project.

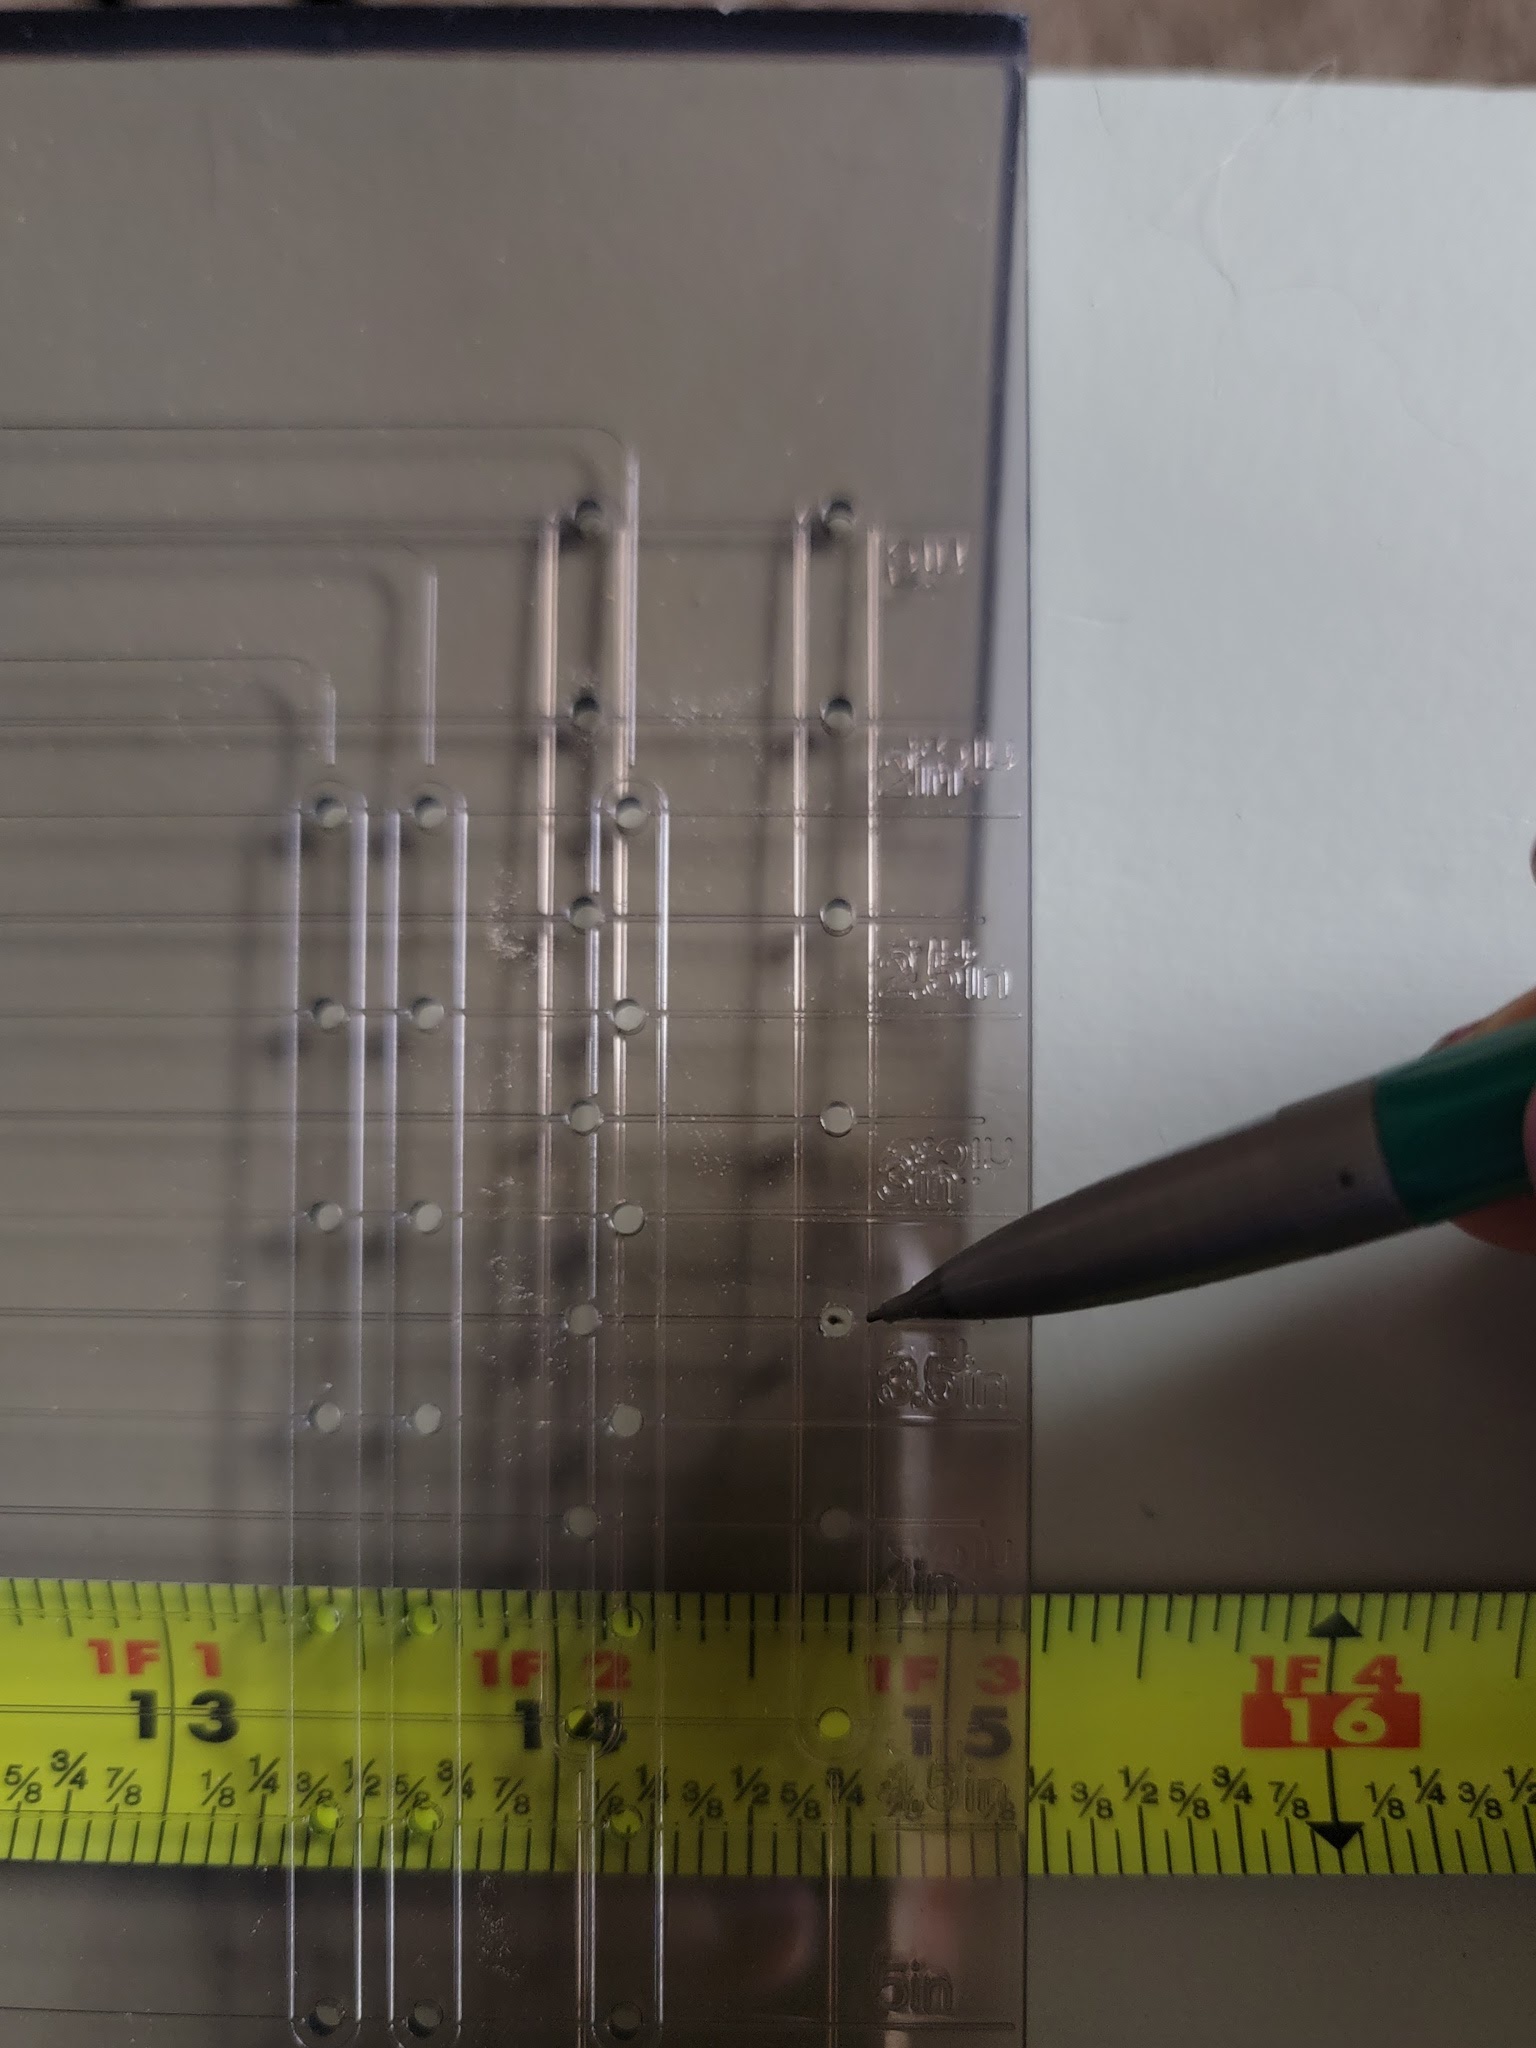
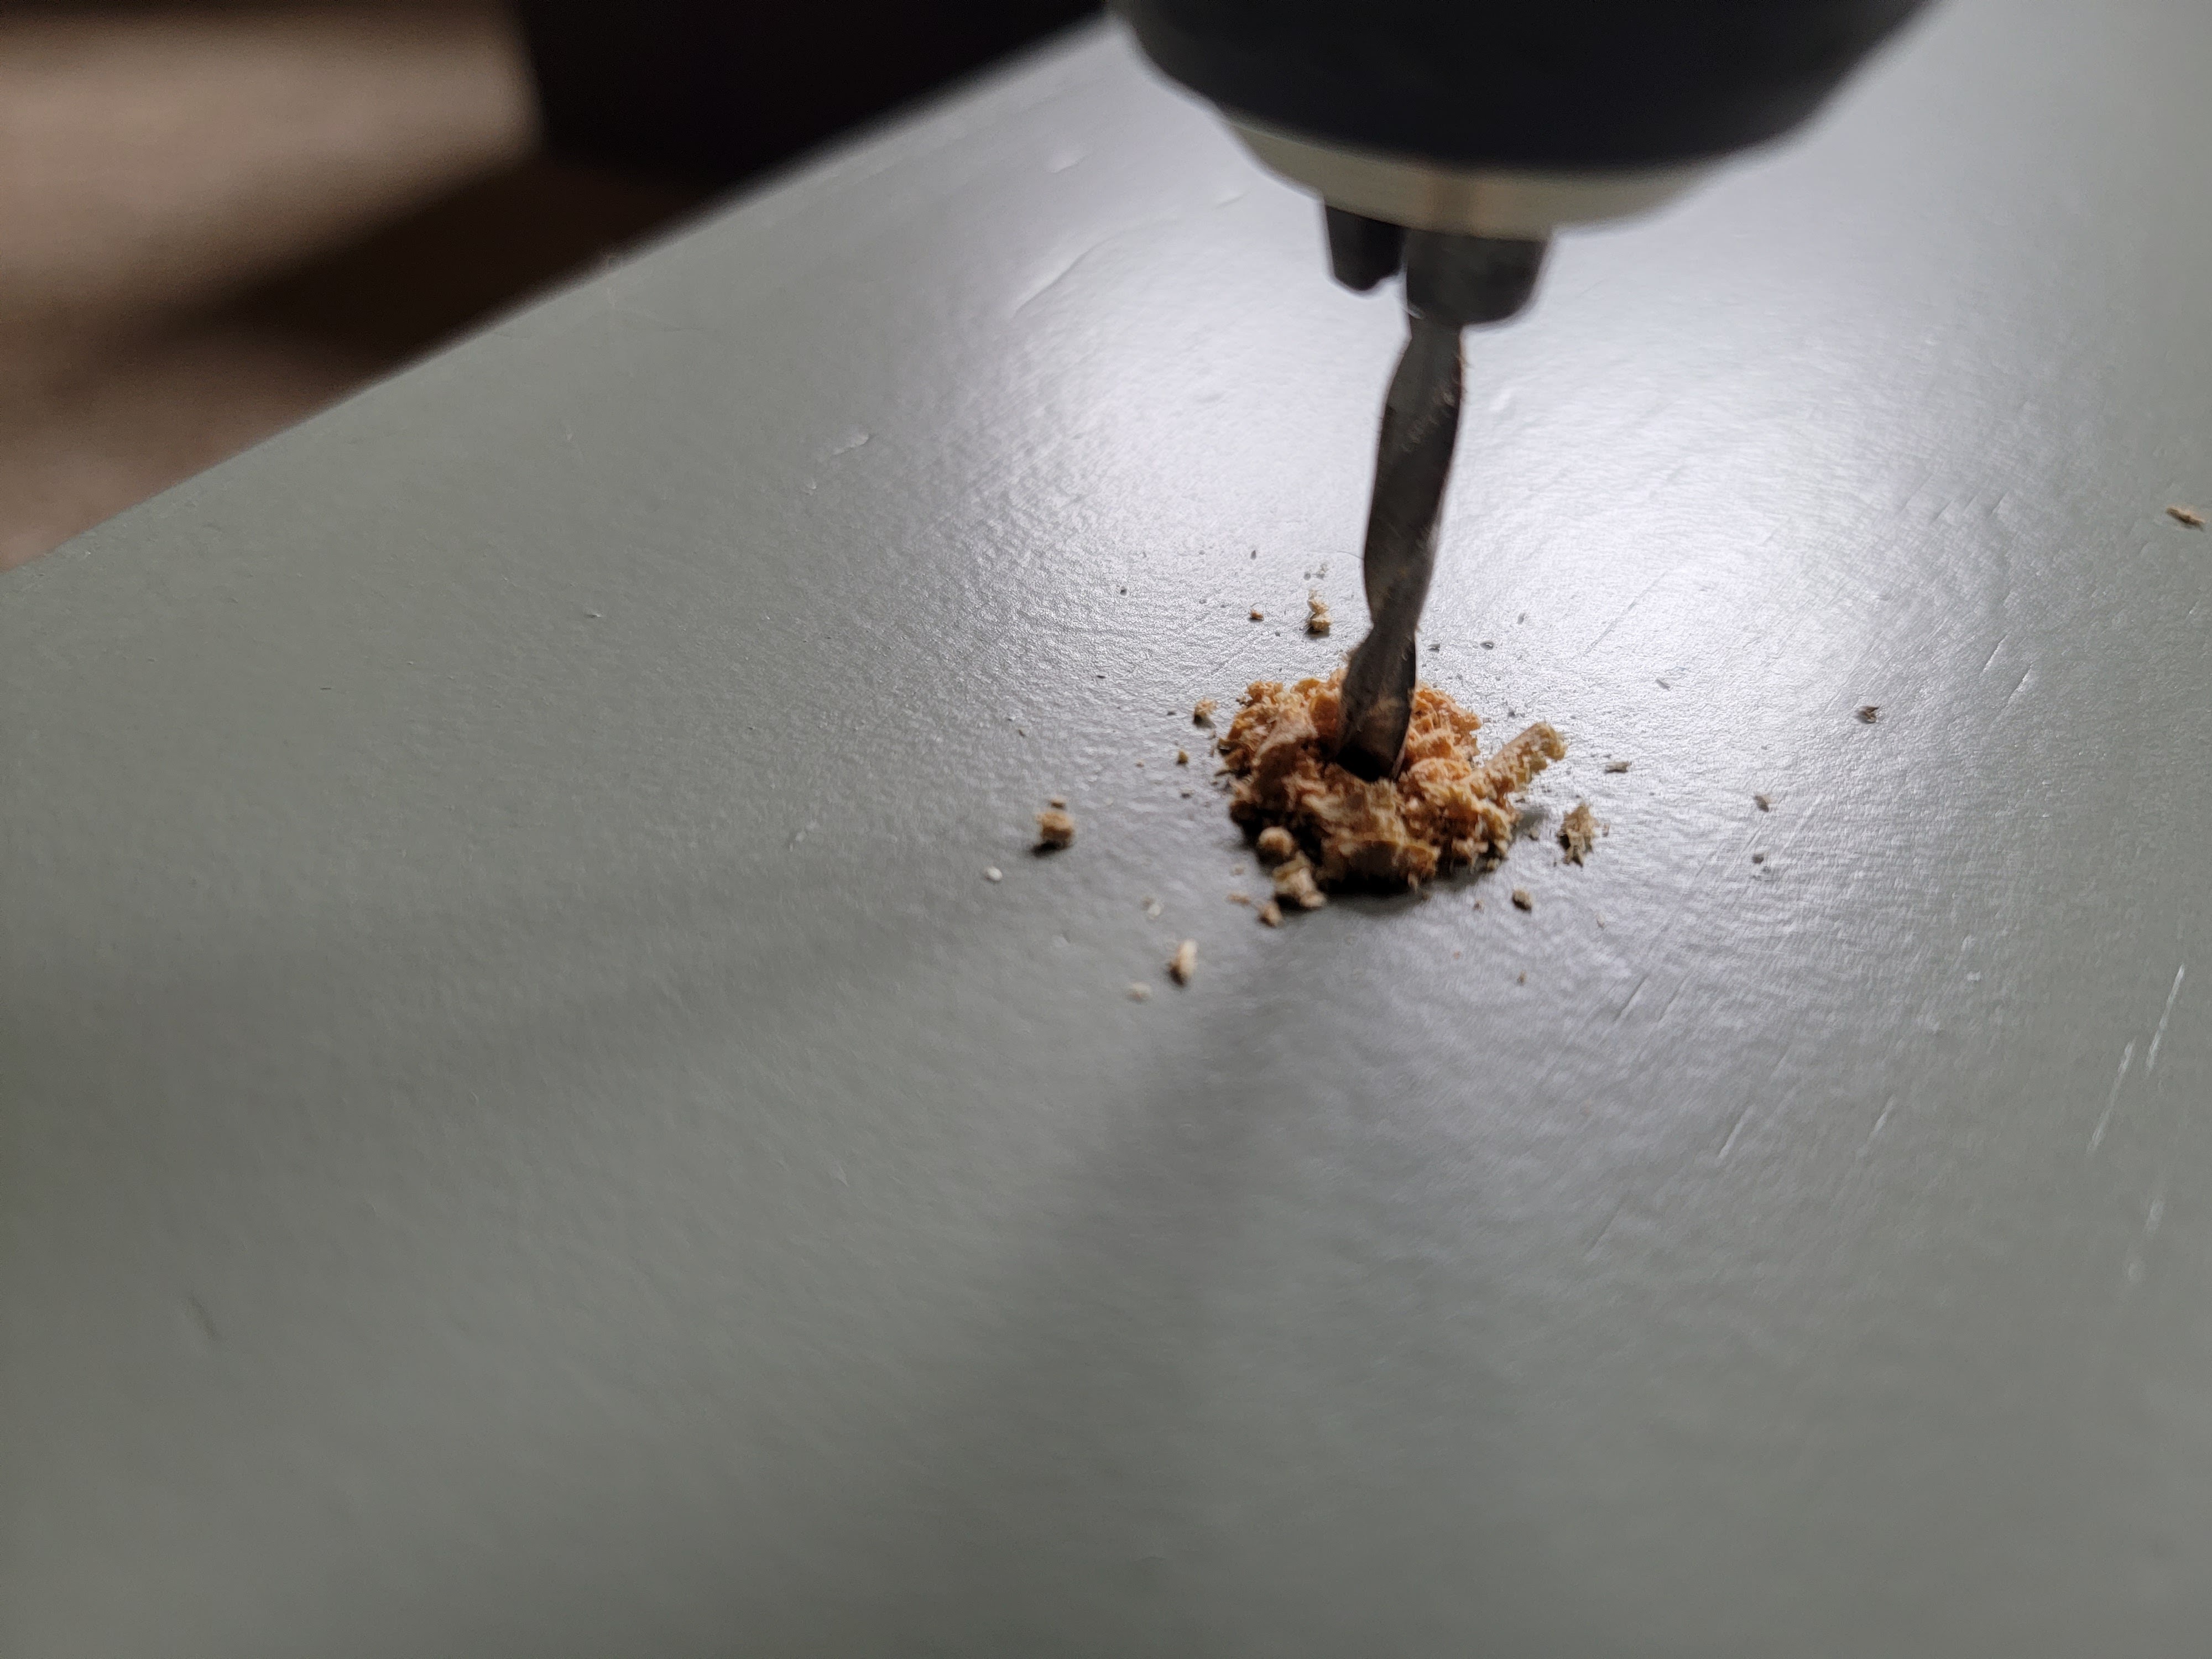
One of the best purchases I’ve made for myself with regards to DIYing things is this cabinet knob/pull template. It is SO HELPFUL to use when you need to drill holes for hardware, whether on doors or drawers and is well worth the $10 investment. Once I determined the amount of curve I wanted the leather pulls to have, I used the template to mark out exactly where to drill holes to fasten them in place and it allowed me to keep everything perfectly lined up from drawer front to drawer front. It gave me the confidence to drill into the drawer front, which is good because there’s really no room for error – one hole being off will throw off the look of the whole dresser.

Justin and I also made a mirror to go with the dresser (a tutorial will be coming soon!) and we surprised my sister by driving them out to her and setting everything up with the help of her husband while she was out of the house. It was so fun to see her reaction when she came home!

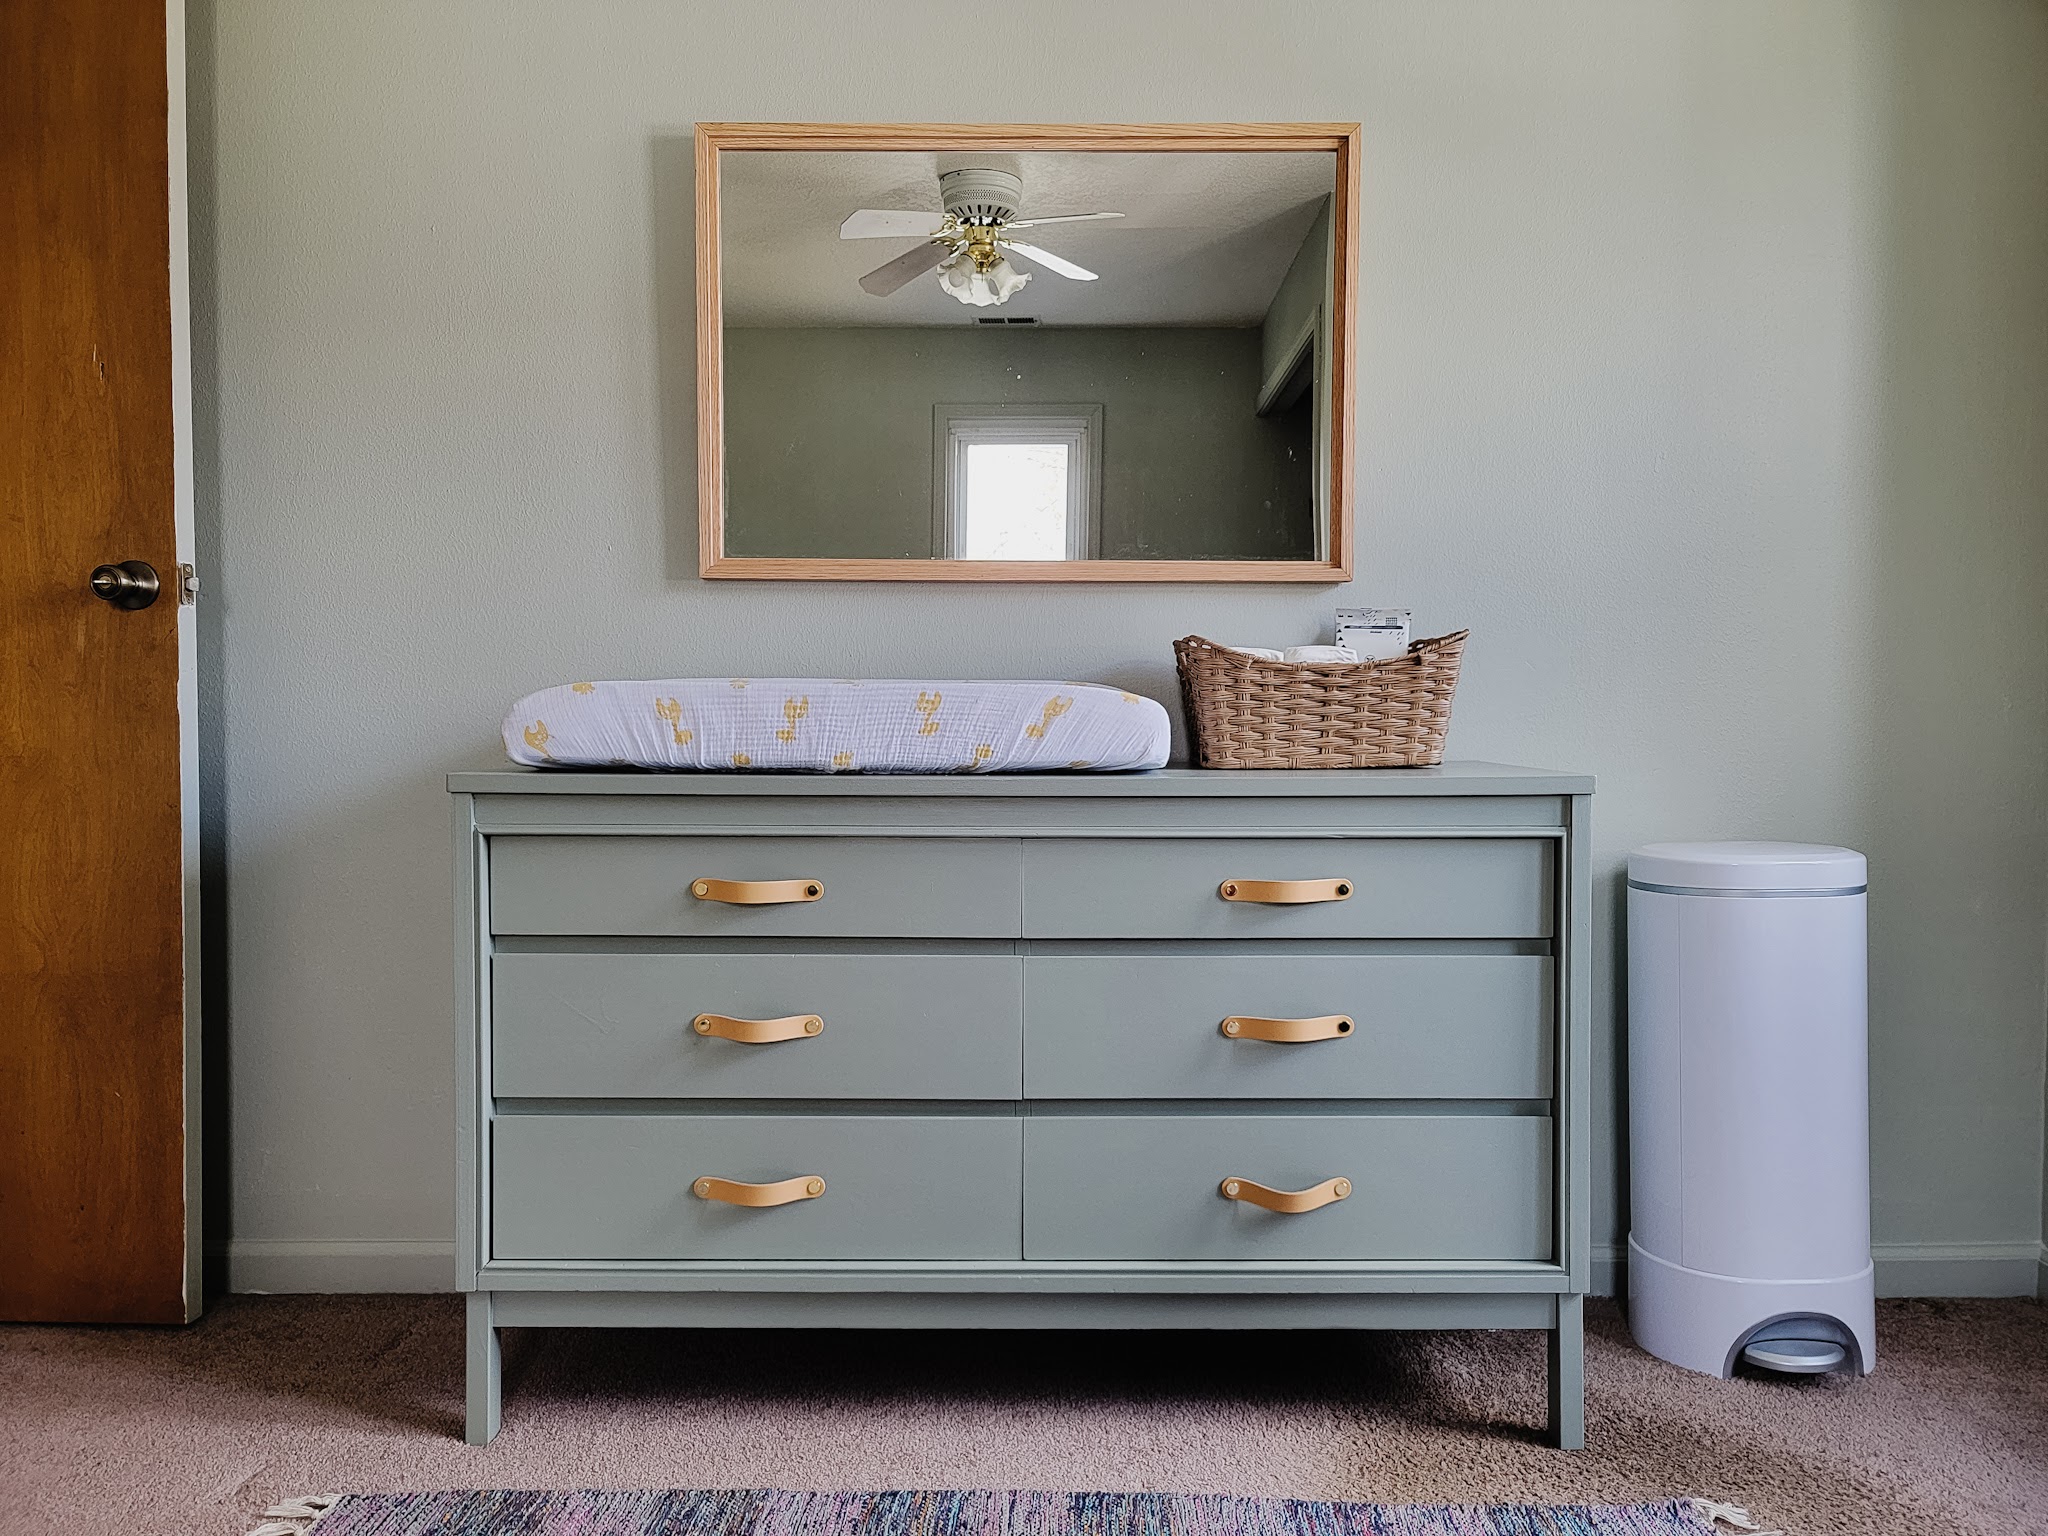
The color of the dresser is only a couple shades darker than the nursery walls (Austere Gray at 75% saturation), which gives a cool monochromatic feel to the space. Jenni plans to incorporate a lot of color through bedding, artwork, and other decor so it feels right for this dresser to be a more subtle feature of the room.

Jenni wanted to be able to use the dresser as a changing table as well so we set it up with a changing pad and cute little basket with diapers and wipes. She plans to add diaper cream, lotion, and anything else she might need to be able to access easily during a diaper change to the basket as well.

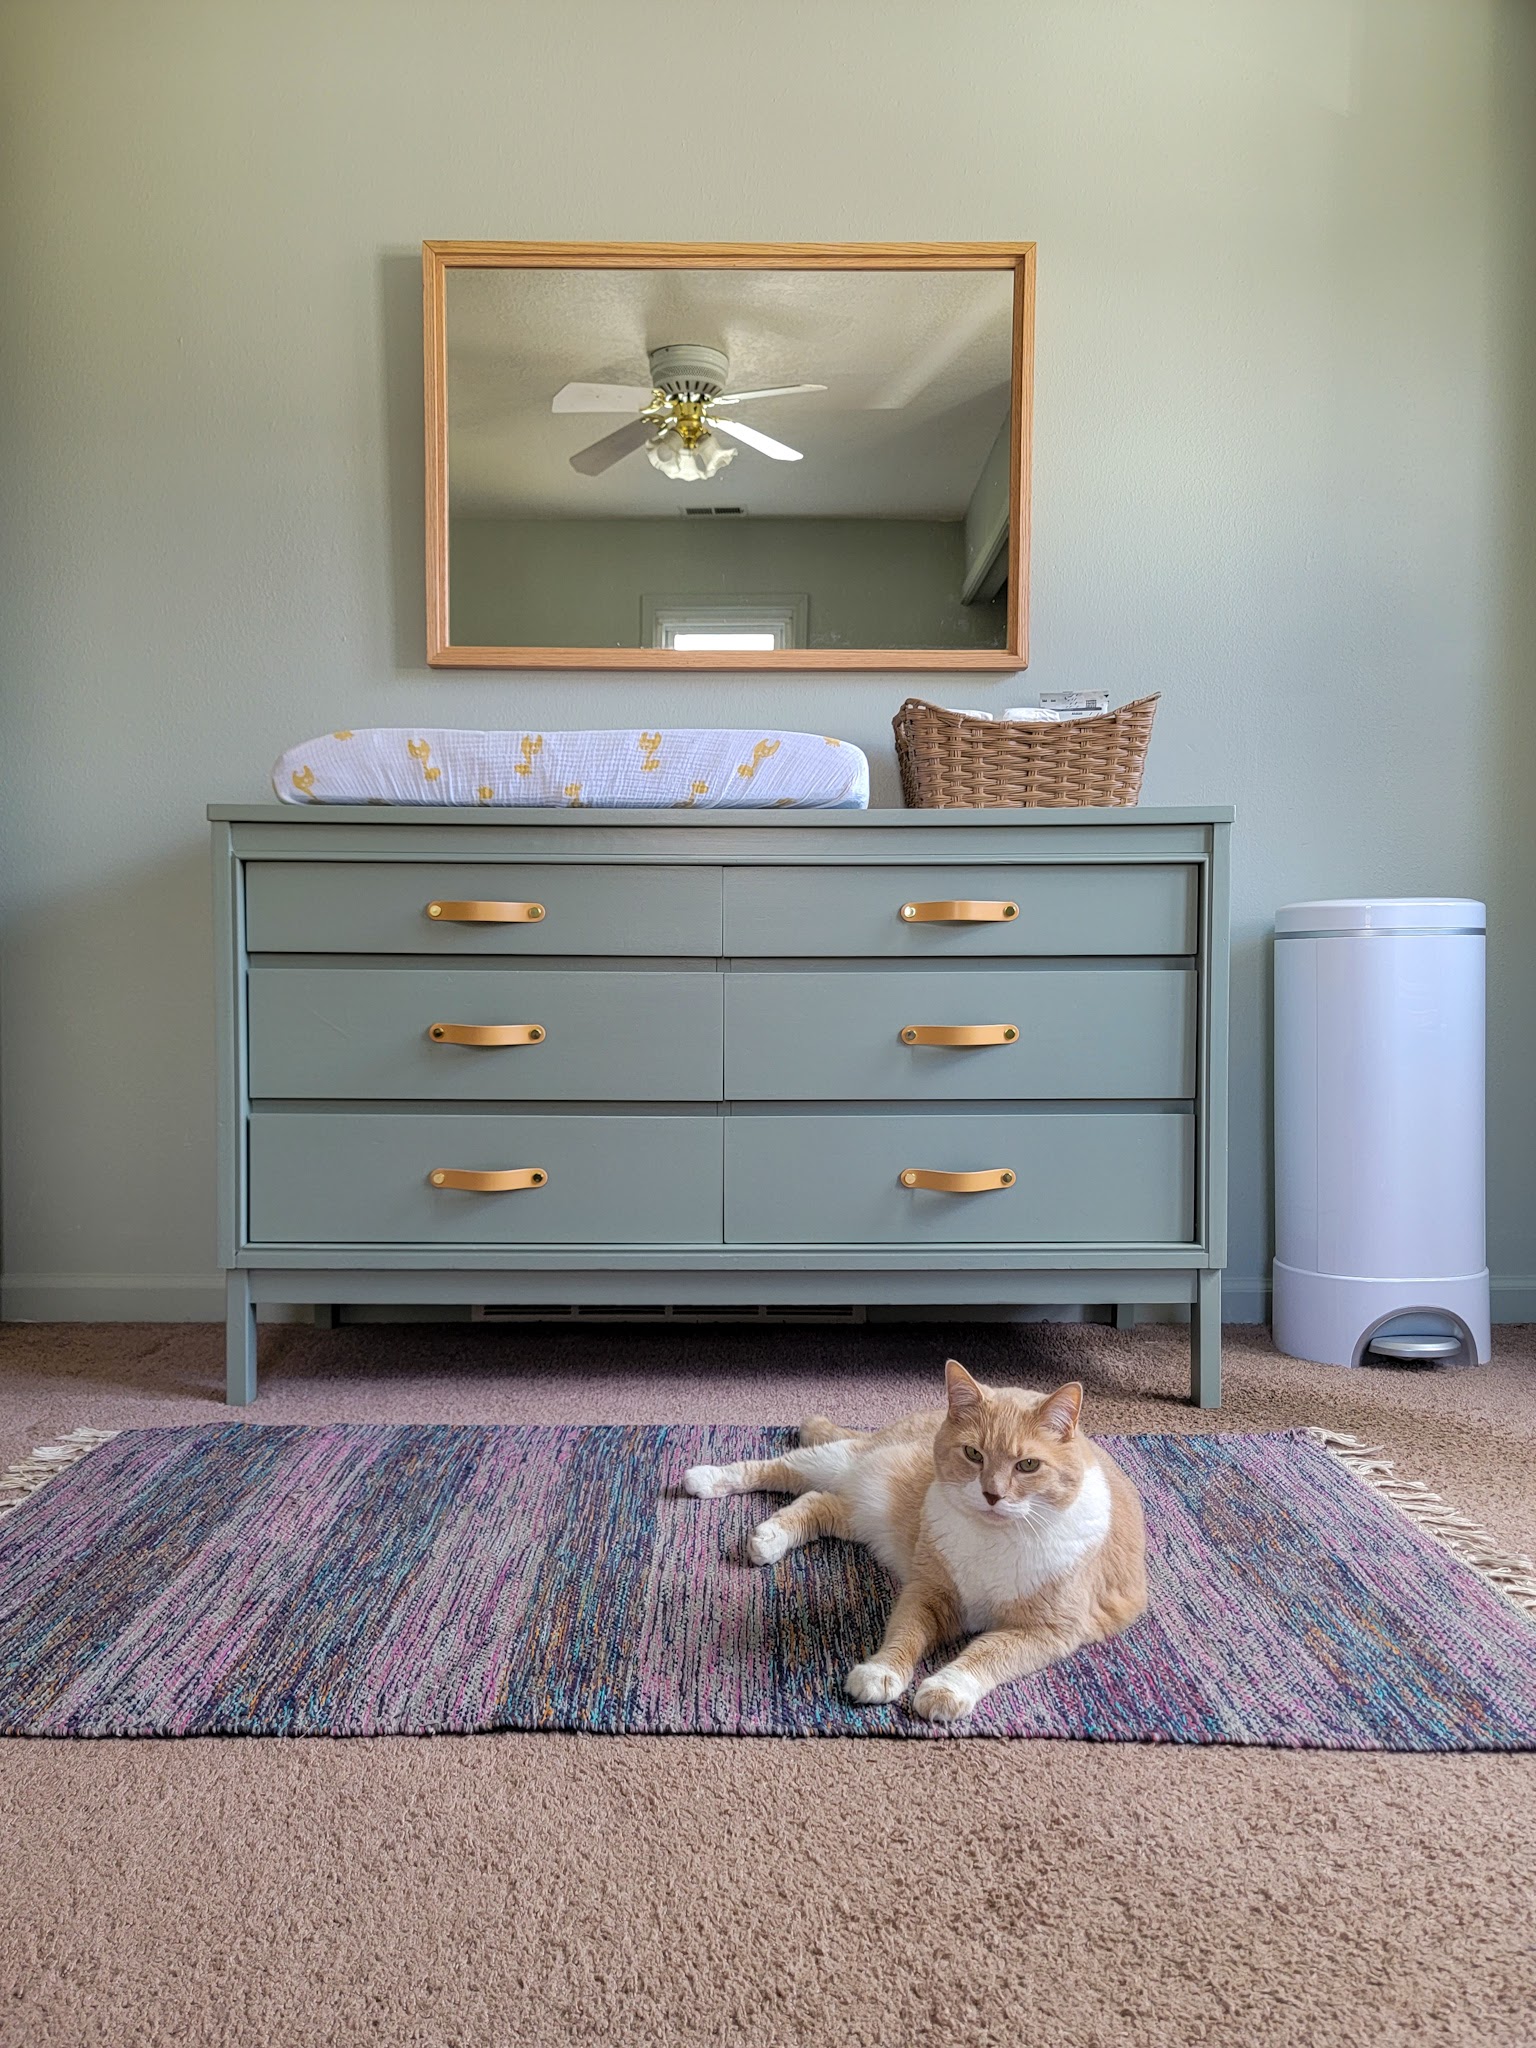
Even her cat, Simba, approves of the space! Although we’ll see how he feels once his little brother or sister arrives and takes the spotlight. Ha!

Total Cost of Dresser Upgrade:

Dresser: $20

Quart of Paint: $22.45

Drawer Handles: $20.32

Total: $62.77

Note: I already had all the tools needed, as well as primer, brushes, rollers, sandpaper, cabinet template, and Kwik Wood, which definitely kept the cost of this particular project down.

Overall I’m so happy with how this turned out, and my sister is thrilled with it too. It’s such an honor to help her prepare for this next stage of her life and use my skills and interests to gift her a dresser/changing table. I can’t wait to see my niece or nephew get to use it in just a few months!

Thrifted Dressers: My next project(s) and a look back on past transformations!

If you follow me on Instagram, you may know that I’ve gone through a bit of a thrifted dresser saga lately.

One of my sisters is pregnant and she asked me if I would thrift a dresser and fix it up as a changing table for her. I of course said YES and started searching for a dresser. I spent a few weeks searching local thrift stores and online selling sources only to keep coming up empty. That’s often the nature of the game with thrifting – when you’re looking for something specific, it pays to be patient!

Finally, I found a picture online that looked like something I could work with: it was the right dimensions and a fairly basic shape. The seller was asking $50, which I normally would have tried to negotiate down, but due to my own pregnancy and needing help lifting, I needed her to hold it a few days for me and agreed to her asking price. (Mistake #1: this dresser was absolutely overpriced and should have been negotiated down). Unfortunately, Justin and his dad went to pick it up (Mistake #2: I should have gone with them to see it myself before paying) and when they brought it home, it was not what I expected. There was damage that the seller didn’t disclose, including a big chunk taken out in the front corner, marker drawings all over, and a piece missing from one of the sides, and the top and sides were planked, not smooth like I was expecting (Mistake #3: she only posted one picture, which was of the front and had things piled on top of it and I did not ask to see more).

The dresser gave a rustic cabin vibe, which was not at all what I wanted for my sister. For a few days, I tried to convince myself I could still make it work, but the truth it, it’s just not the right style for what my sister wants. So, I’m going to pivot and just fix this dresser up a bit by sanding, repairing, and staining it black and then sell it once again. It would be great if I could turn a small profit on it, but if not, I’m going to at least try to come out even and chalk this up to a lesson learned!

Thankfully, my aunt, who knew I was searching for a dresser but didn’t realize I had already found one, texted me a picture of one she saw in a local thrift store and it was absolutely perfect for what I wanted! I asked my parents to pick it up (the store was over an hour from my house but only 10 minutes from theirs) and they brought it out. It was priced for $20 and is going to feel like such a steal when I fix this thing up! I love the streamlined look and midcentury vibe which will go perfectly with my sister’s artistic and eclectic style. I plan to sand everything down, repair a wonky back leg, paint everything to match her nursery color scheme and possibly add some hardware. This baby is going to shine!

The reason my sister asked me to do this at all is because I’ve now fixed up three dressers for nurseries. I thought it’d be fun to look back on these past projects as I prepare to jump into this next one!

LJ’s Nursery

Way back when I was pregnant with LJ, I decided that instead of a changing table, I wanted to just have a regular dresser with a changing pad on top. We had bought a midcentury dresser on Marketplace (I think for $30 if I remember right) a few months before and it was perfect for the nursery. I cleaned it up a bit, painted everything but the wooden legs a neutral blue (Sherwin Williams Slate Tile) and voila! I loved it and it only cost me the price of paint and some time. It worked perfectly with a changing pad on top and now translates well to the “big kid” room for LJ and Vi.

Vi’s Nursery

When I was pregnant with Vi, I knew I needed another dresser for her nursery. This time I found a dresser on Craigslist for $10! It need quite a bit of sanding, then I primed it, gave it two coats of deep green paint (Sherwin Williams Green Tartan), and swapped out the hardware. Then Justin used dowel rods to create legs and give it more height to be comfortably used as a changing table. I also had him add a stained board to the front because the piece of plywood that was there was very flimsy and cheap. With the additions I made, the total cost of the dresser came in at just under $50 and once again, it worked perfectly in the nursery!

My Niece’s Nursery

When my sister-in-law became pregnant with her first, I offered to gift her and my brother a dresser to use as a changing table as well. They eagerly agreed and I started the hunt for the perfect dresser. After a lot of searching, I came across a very ugly dresser on Marketplace and negotiated the price down to $15. This thing was in rough shape and needed a lot of repairs, but I got to work sanding, replacing a side, and patching chipped veneer. I then primed and painted it (my SIL’s choice was Sherwin Williams Fading Rose) and spray painted the existing hardware. Once again, the total clocked in at just under $50 and they had a whole new look to the dresser!

Side note: one thing that has been a little surreal with working on my sister’s nursery dresser is that it’s been exactly two years since working on the one for my brother and sister-in-law. This is the project I was working on when the pandemic started and the world shut down. It’s such a strange feeling to be essentially doing the same thing two years later, but our world has changed so so much. It’s been on my mind a lot this week!

There is something really thrilling to me about taking an old dresser of diminished value, fixing it up, and giving it new life! It’s more sustainable for our planet than always buying brand new, it’s a great way to customize a specific look you want by choosing paint color, hardware, etc, and it’s incredibly satisfying for me to see a transformation of something unwanted to something beautiful and functional. I’m excited to jump into my now TWO dresser projects and see what I can do. I’ll be sharing real-time updates on Instagram so if you want more frequent updates on these projects, be sure to follow along there!