Baby Boy Nursery Reveal!

We’re still waiting on baby boy’s arrival but as of yesterday, his nursery is finished and ready!

This was the first time I’ve really been able to go for it with decorating a nursery space. With my previous pregnancies, we chose to be surprised with the baby’s sex at birth so this is the first time we’ve ever known in advance. We also feel confident that this is our final baby so there’s no need to try to keep things somewhat neutral for the future. It was really fun for me to get to plan and design a nursery with a specific little boy in mind and I’m so happy with how it turned out. My goal was to create a soothing place for lots of baby snuggles, late-night feeding sessions, and (hopefully!) restful nights for our sweet boy. I wanted a blend of graphic prints and organic elements in earth tones that mimic the gorgeous woods you can see right outside his window. [And speaking of window – this room only has one window, never gets in the direct path of the sun, and is always a little moody and dim. I love it in person, but it does make it challenging to photograph well – the room isn’t quite as dark as these photos make it seem!]

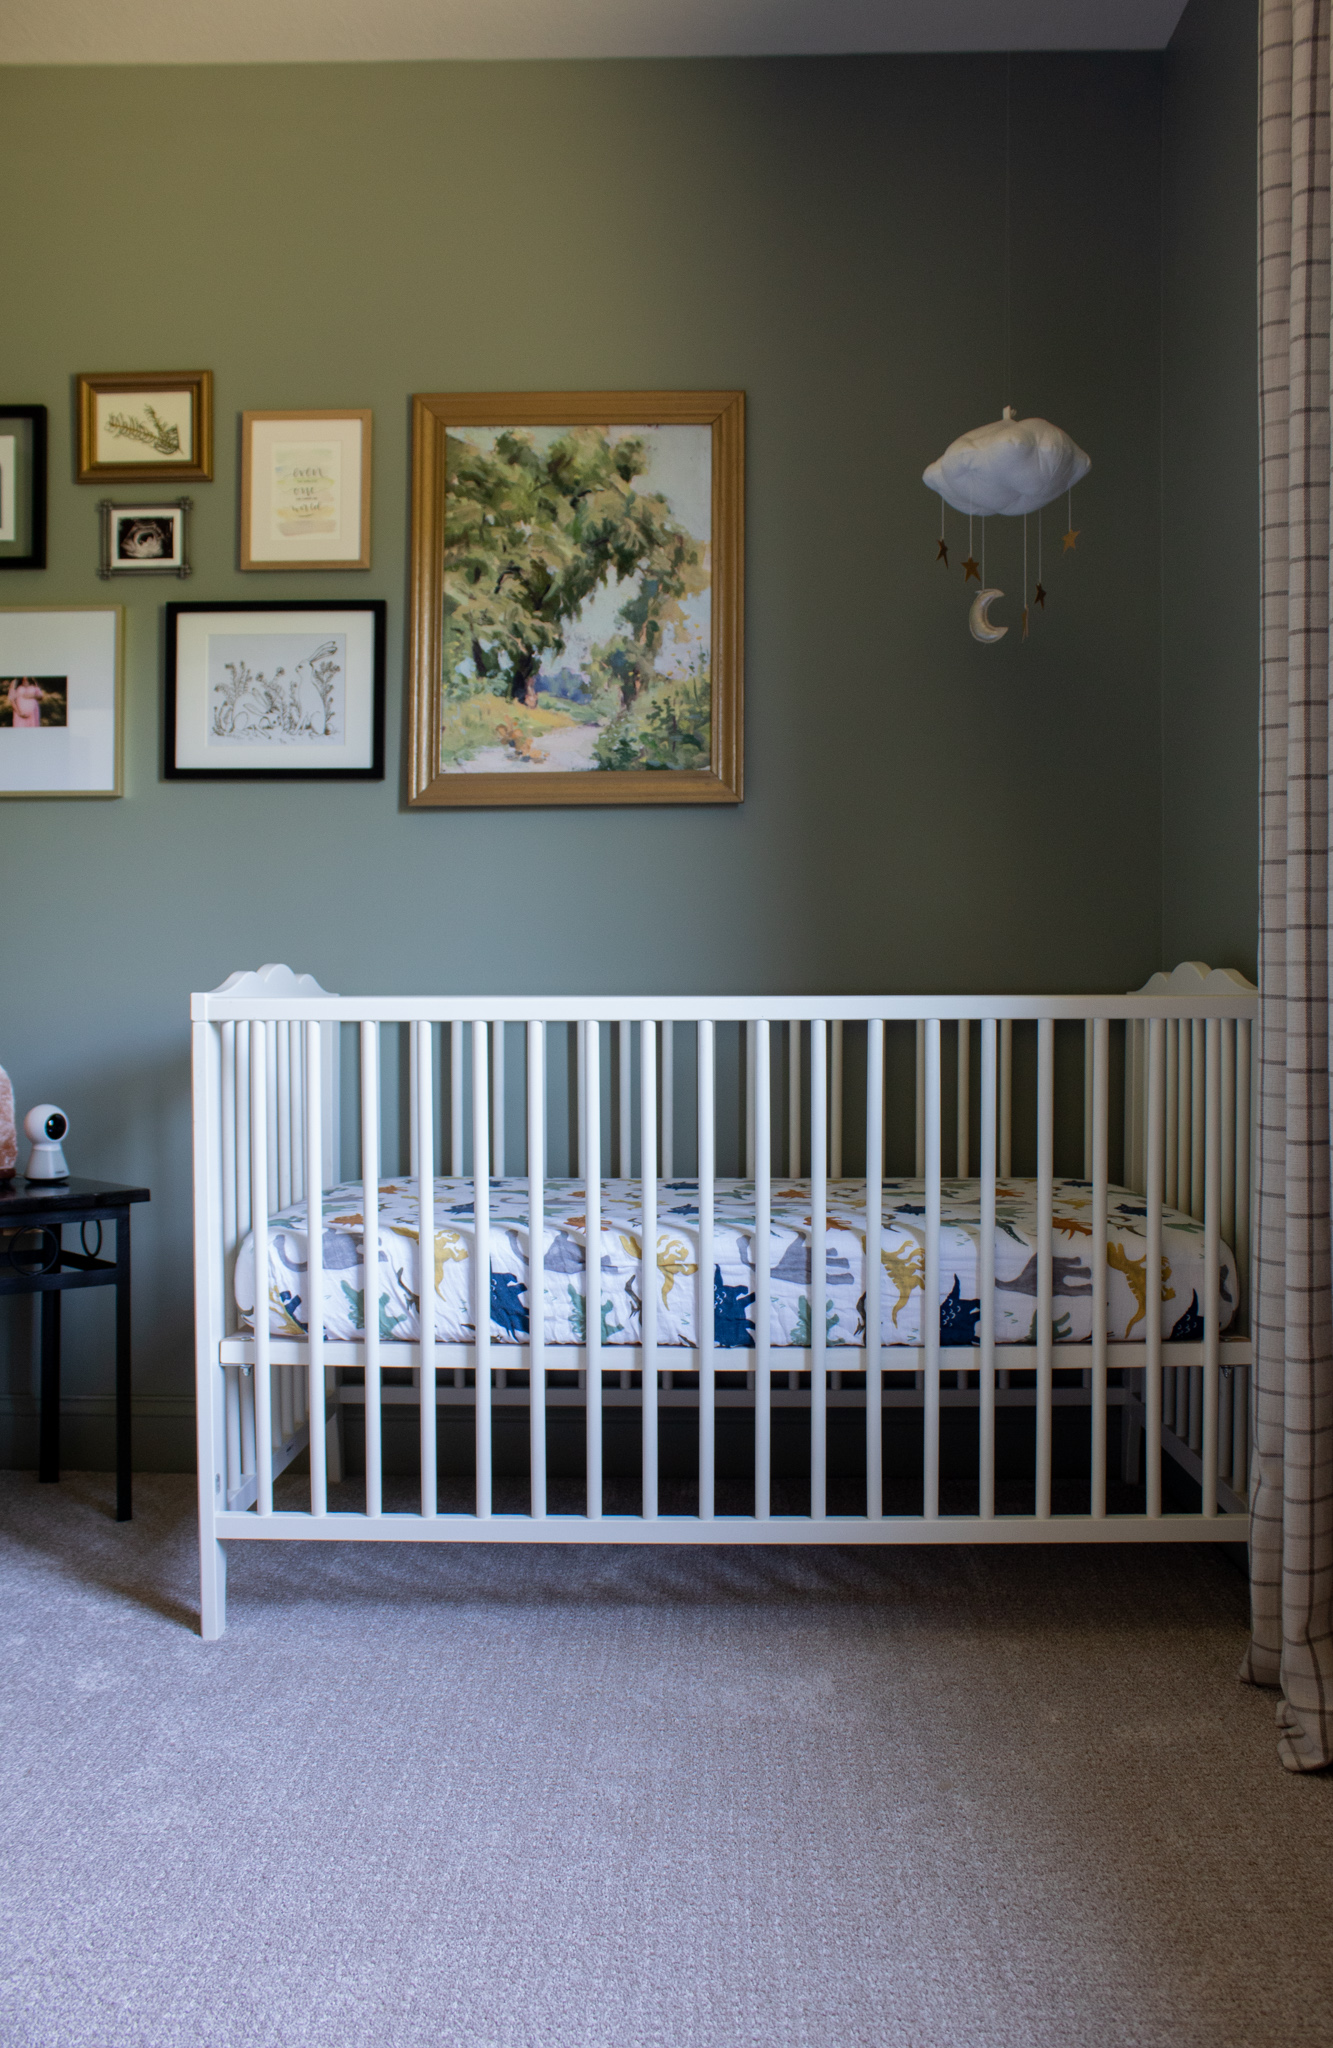
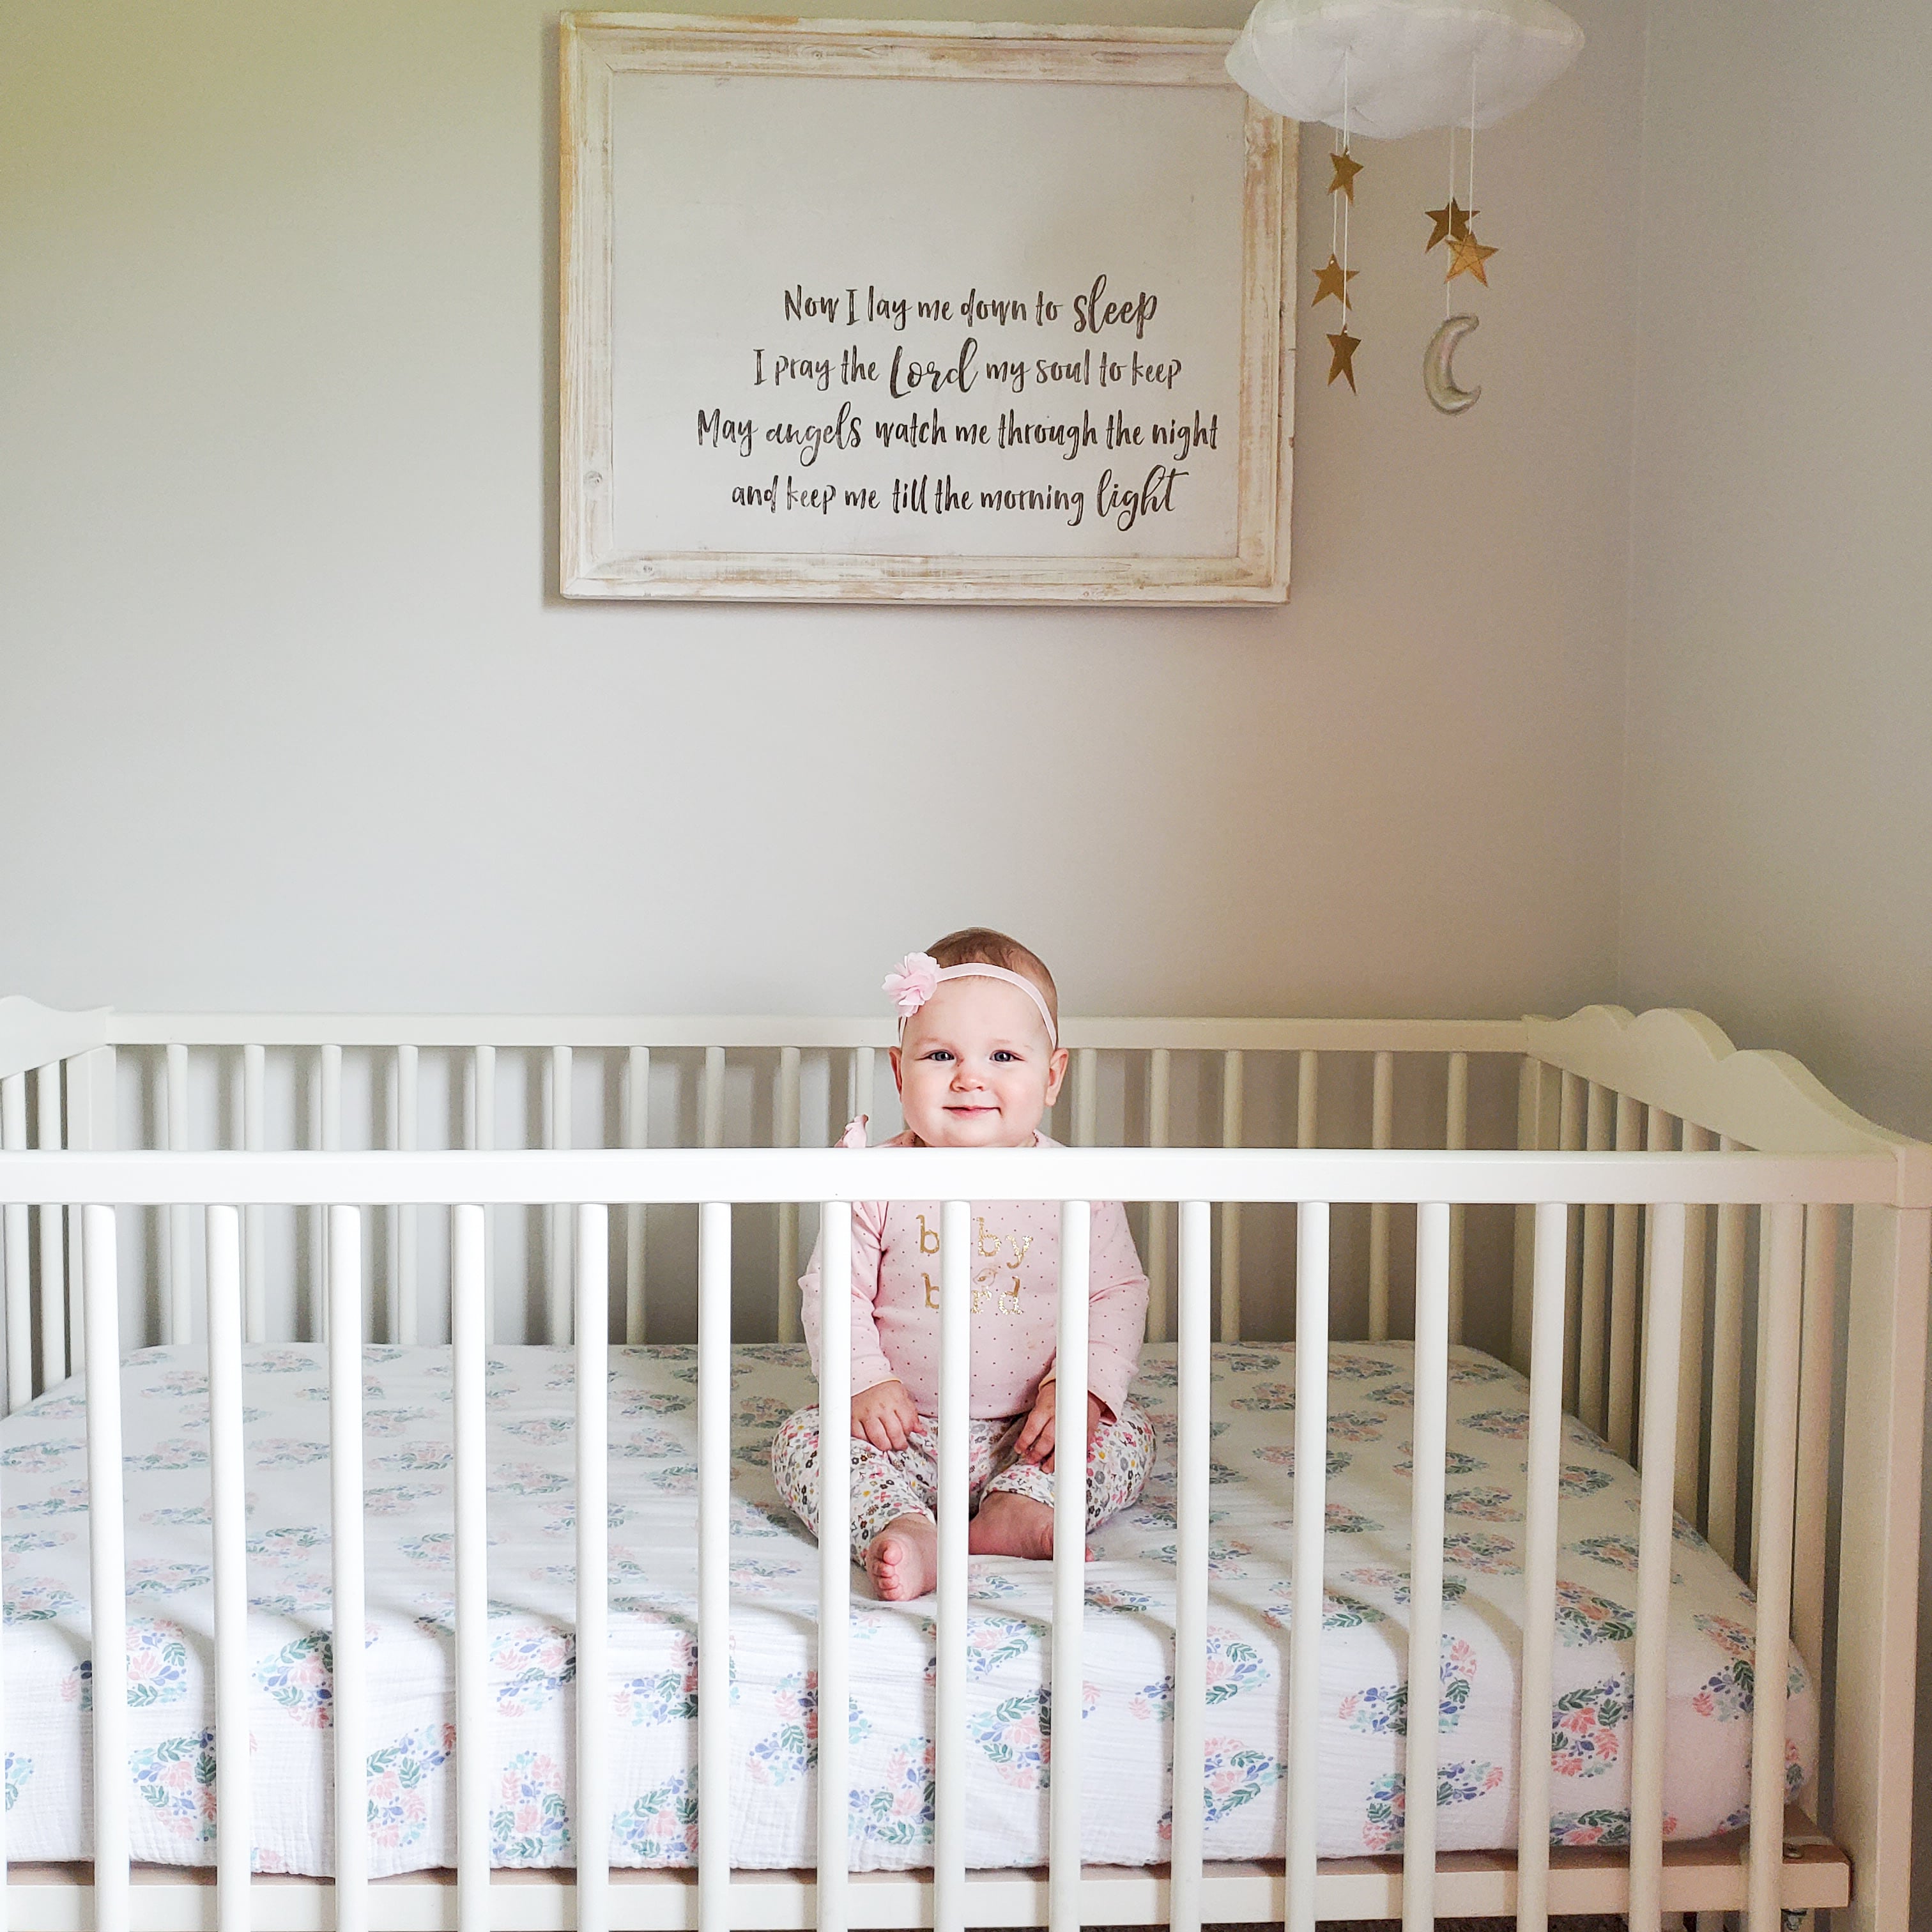
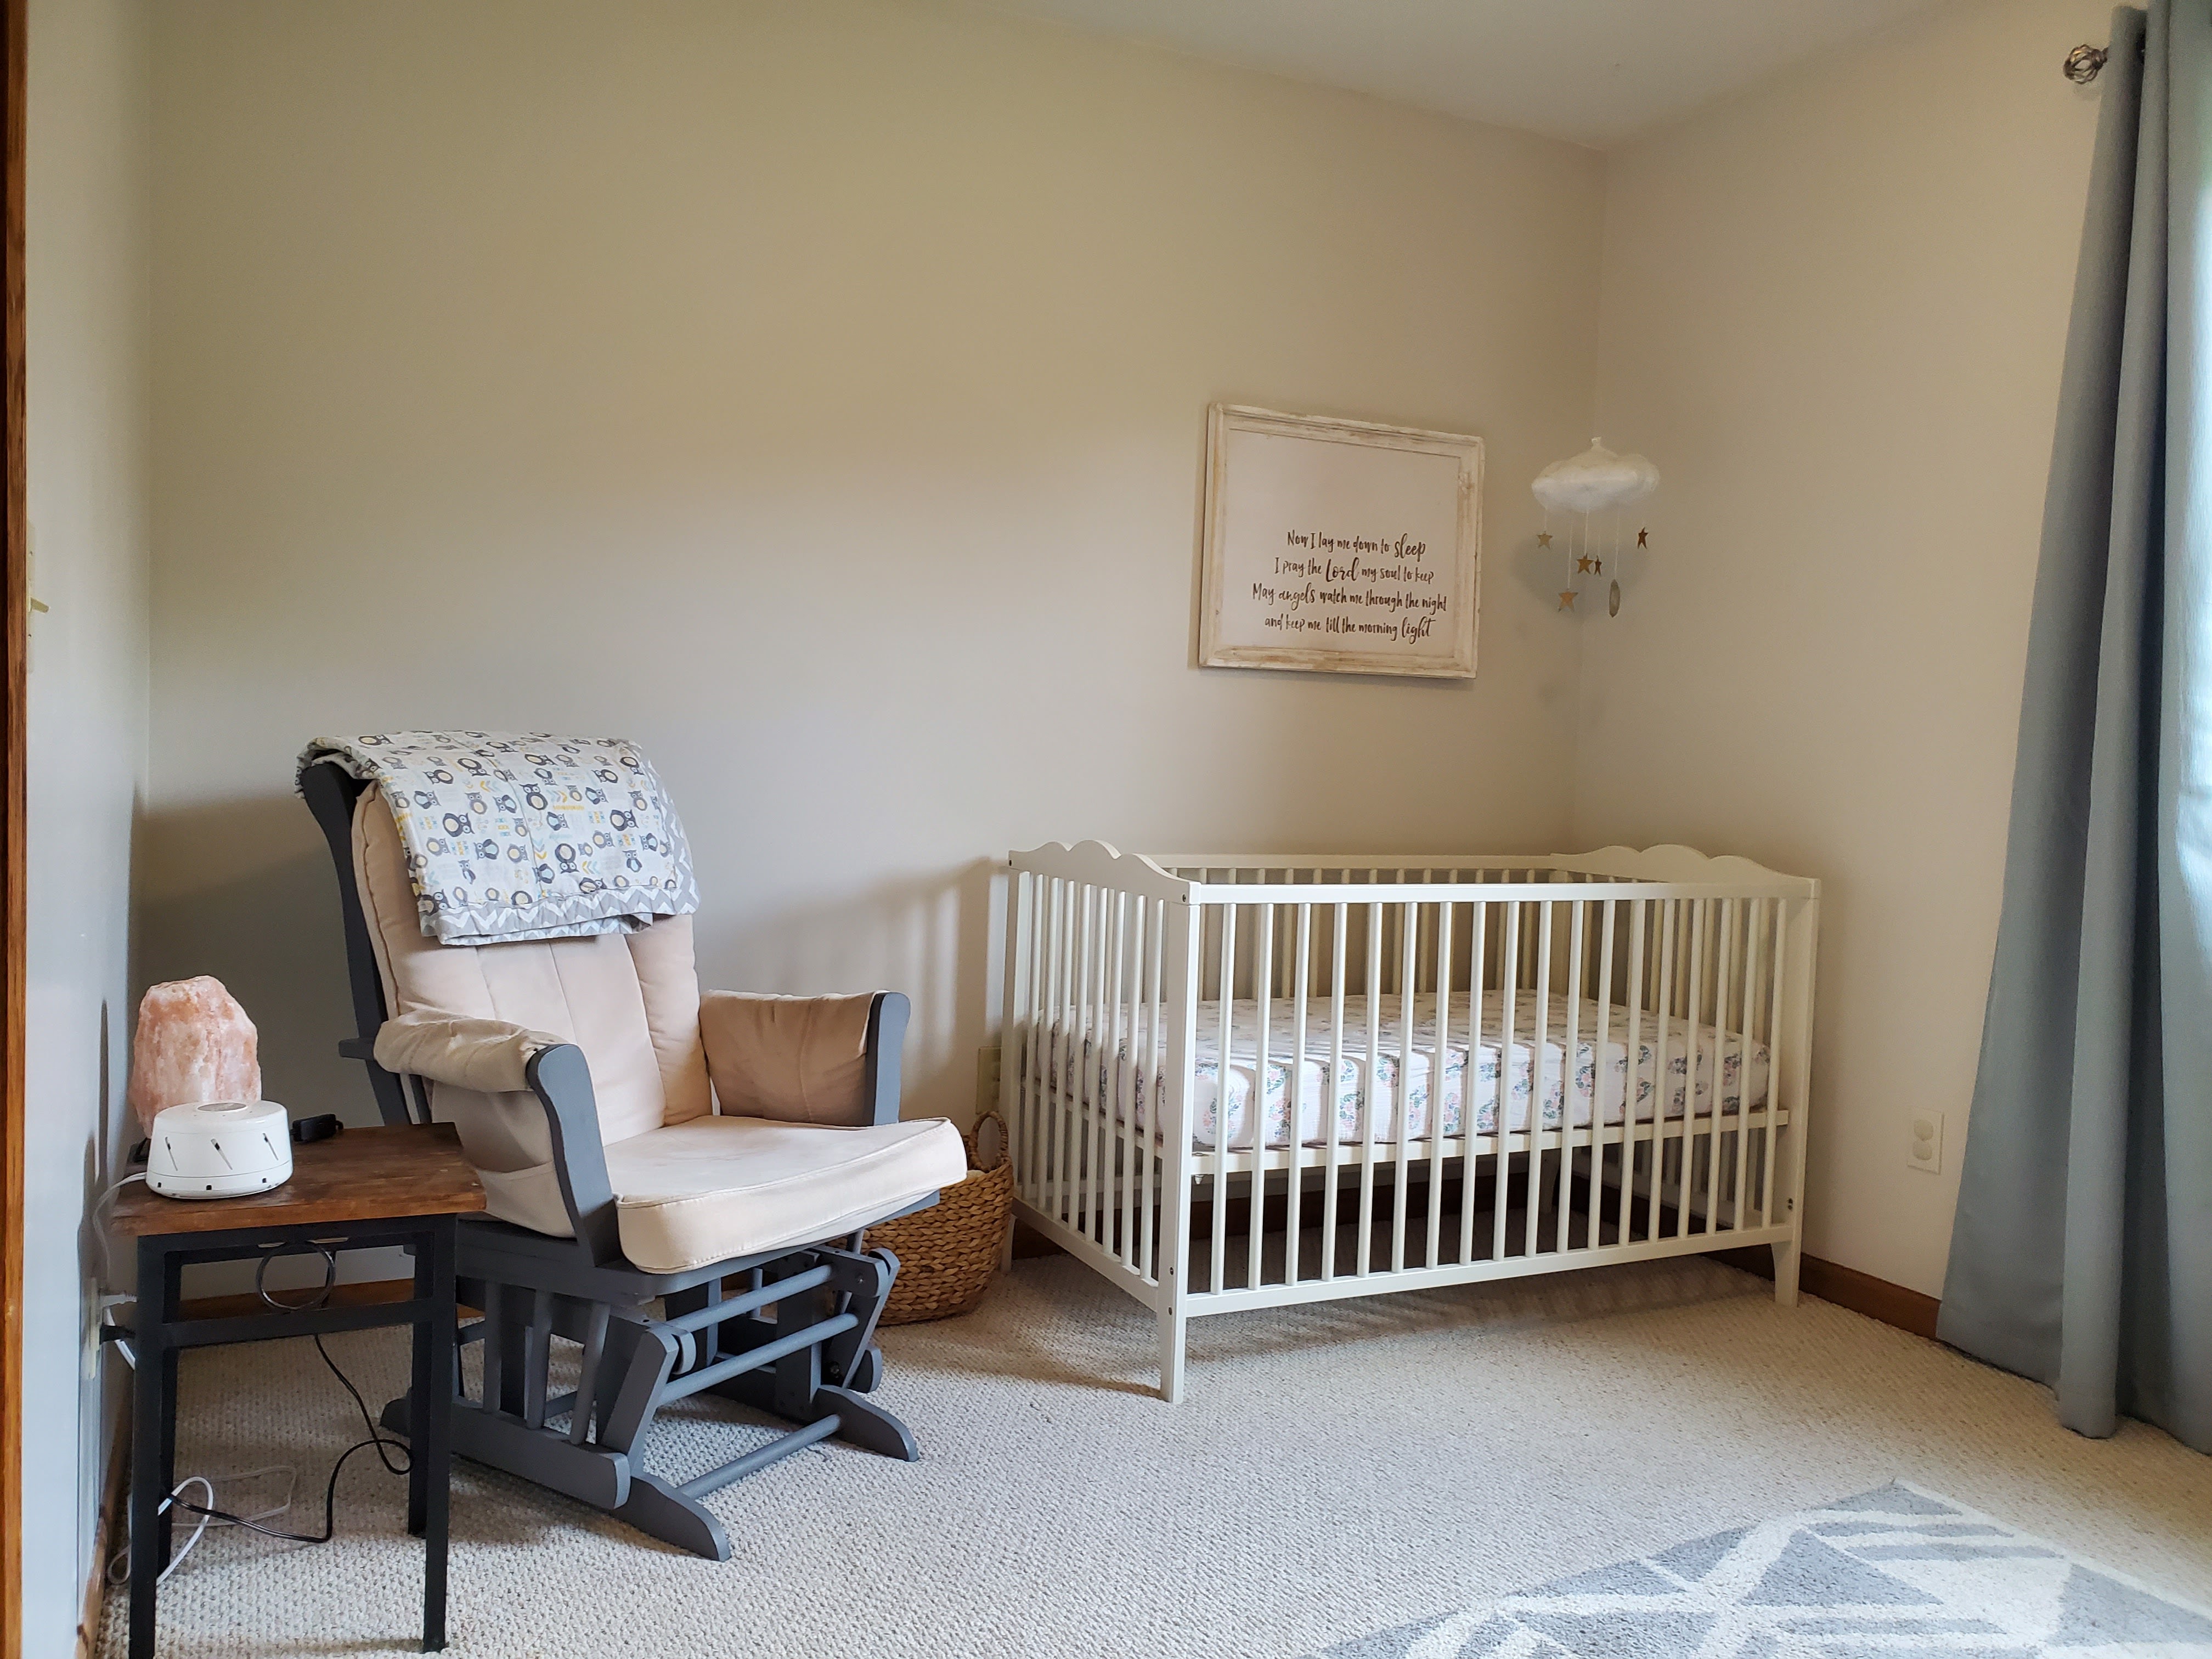
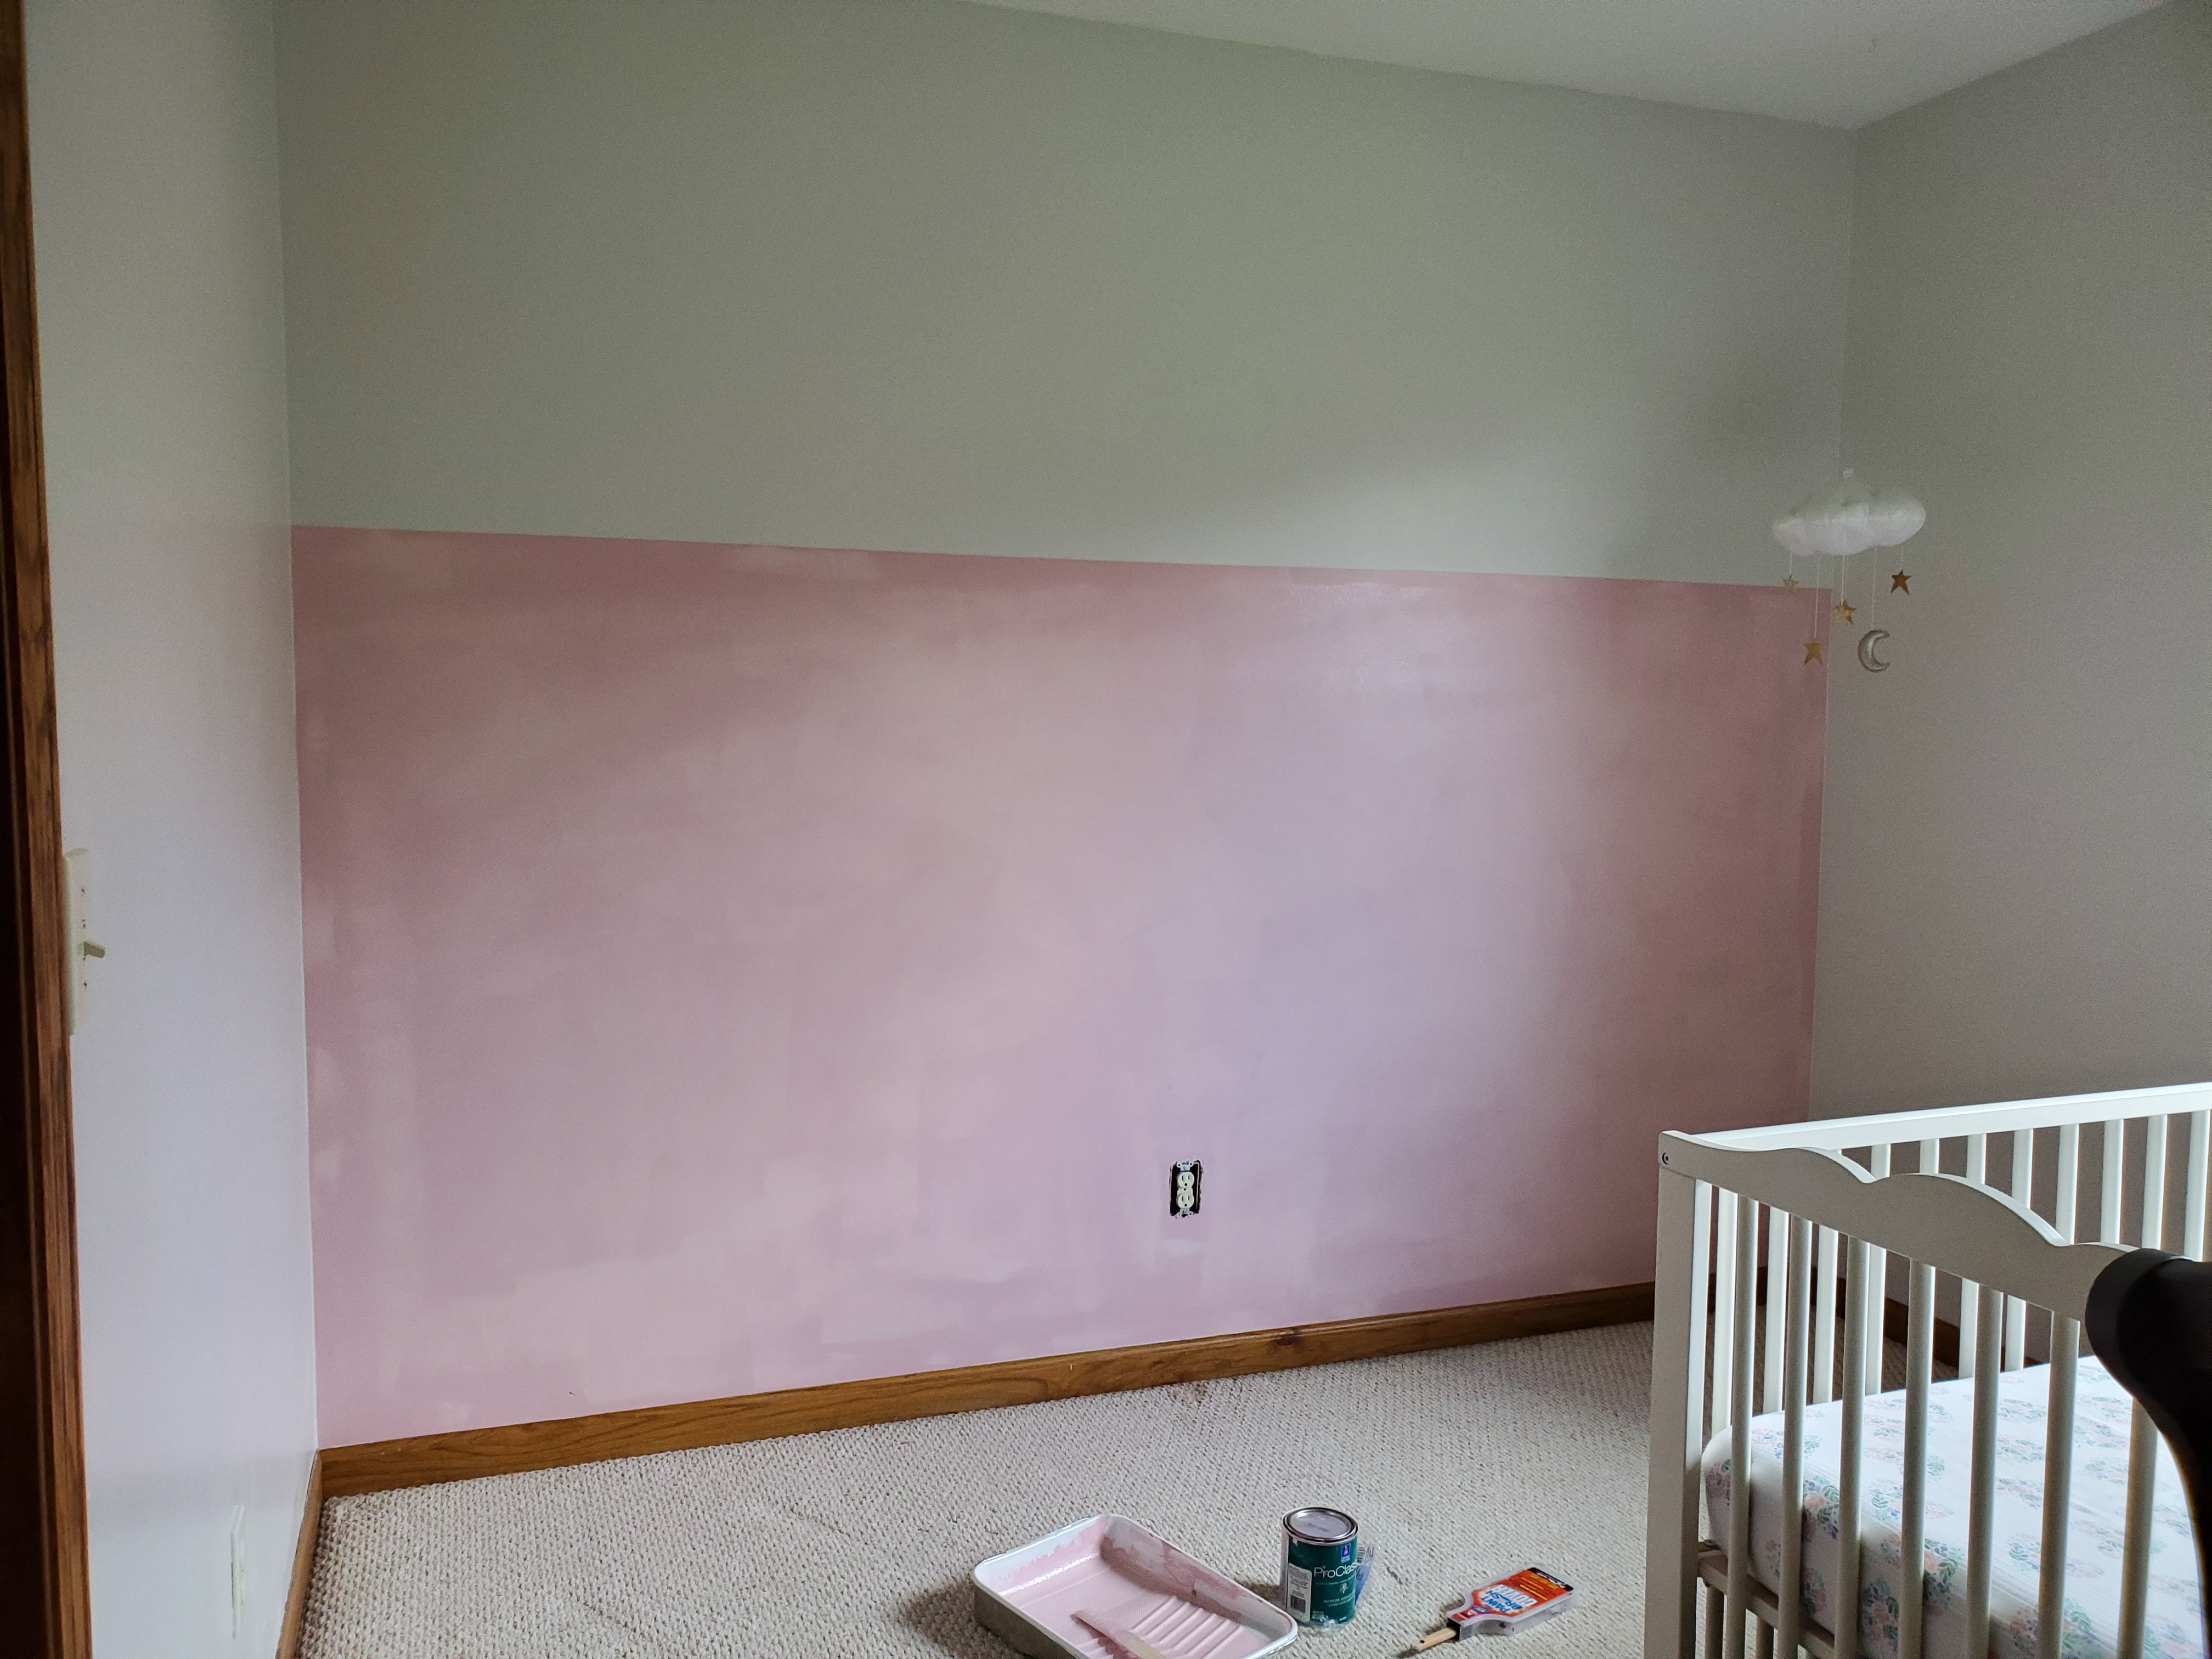
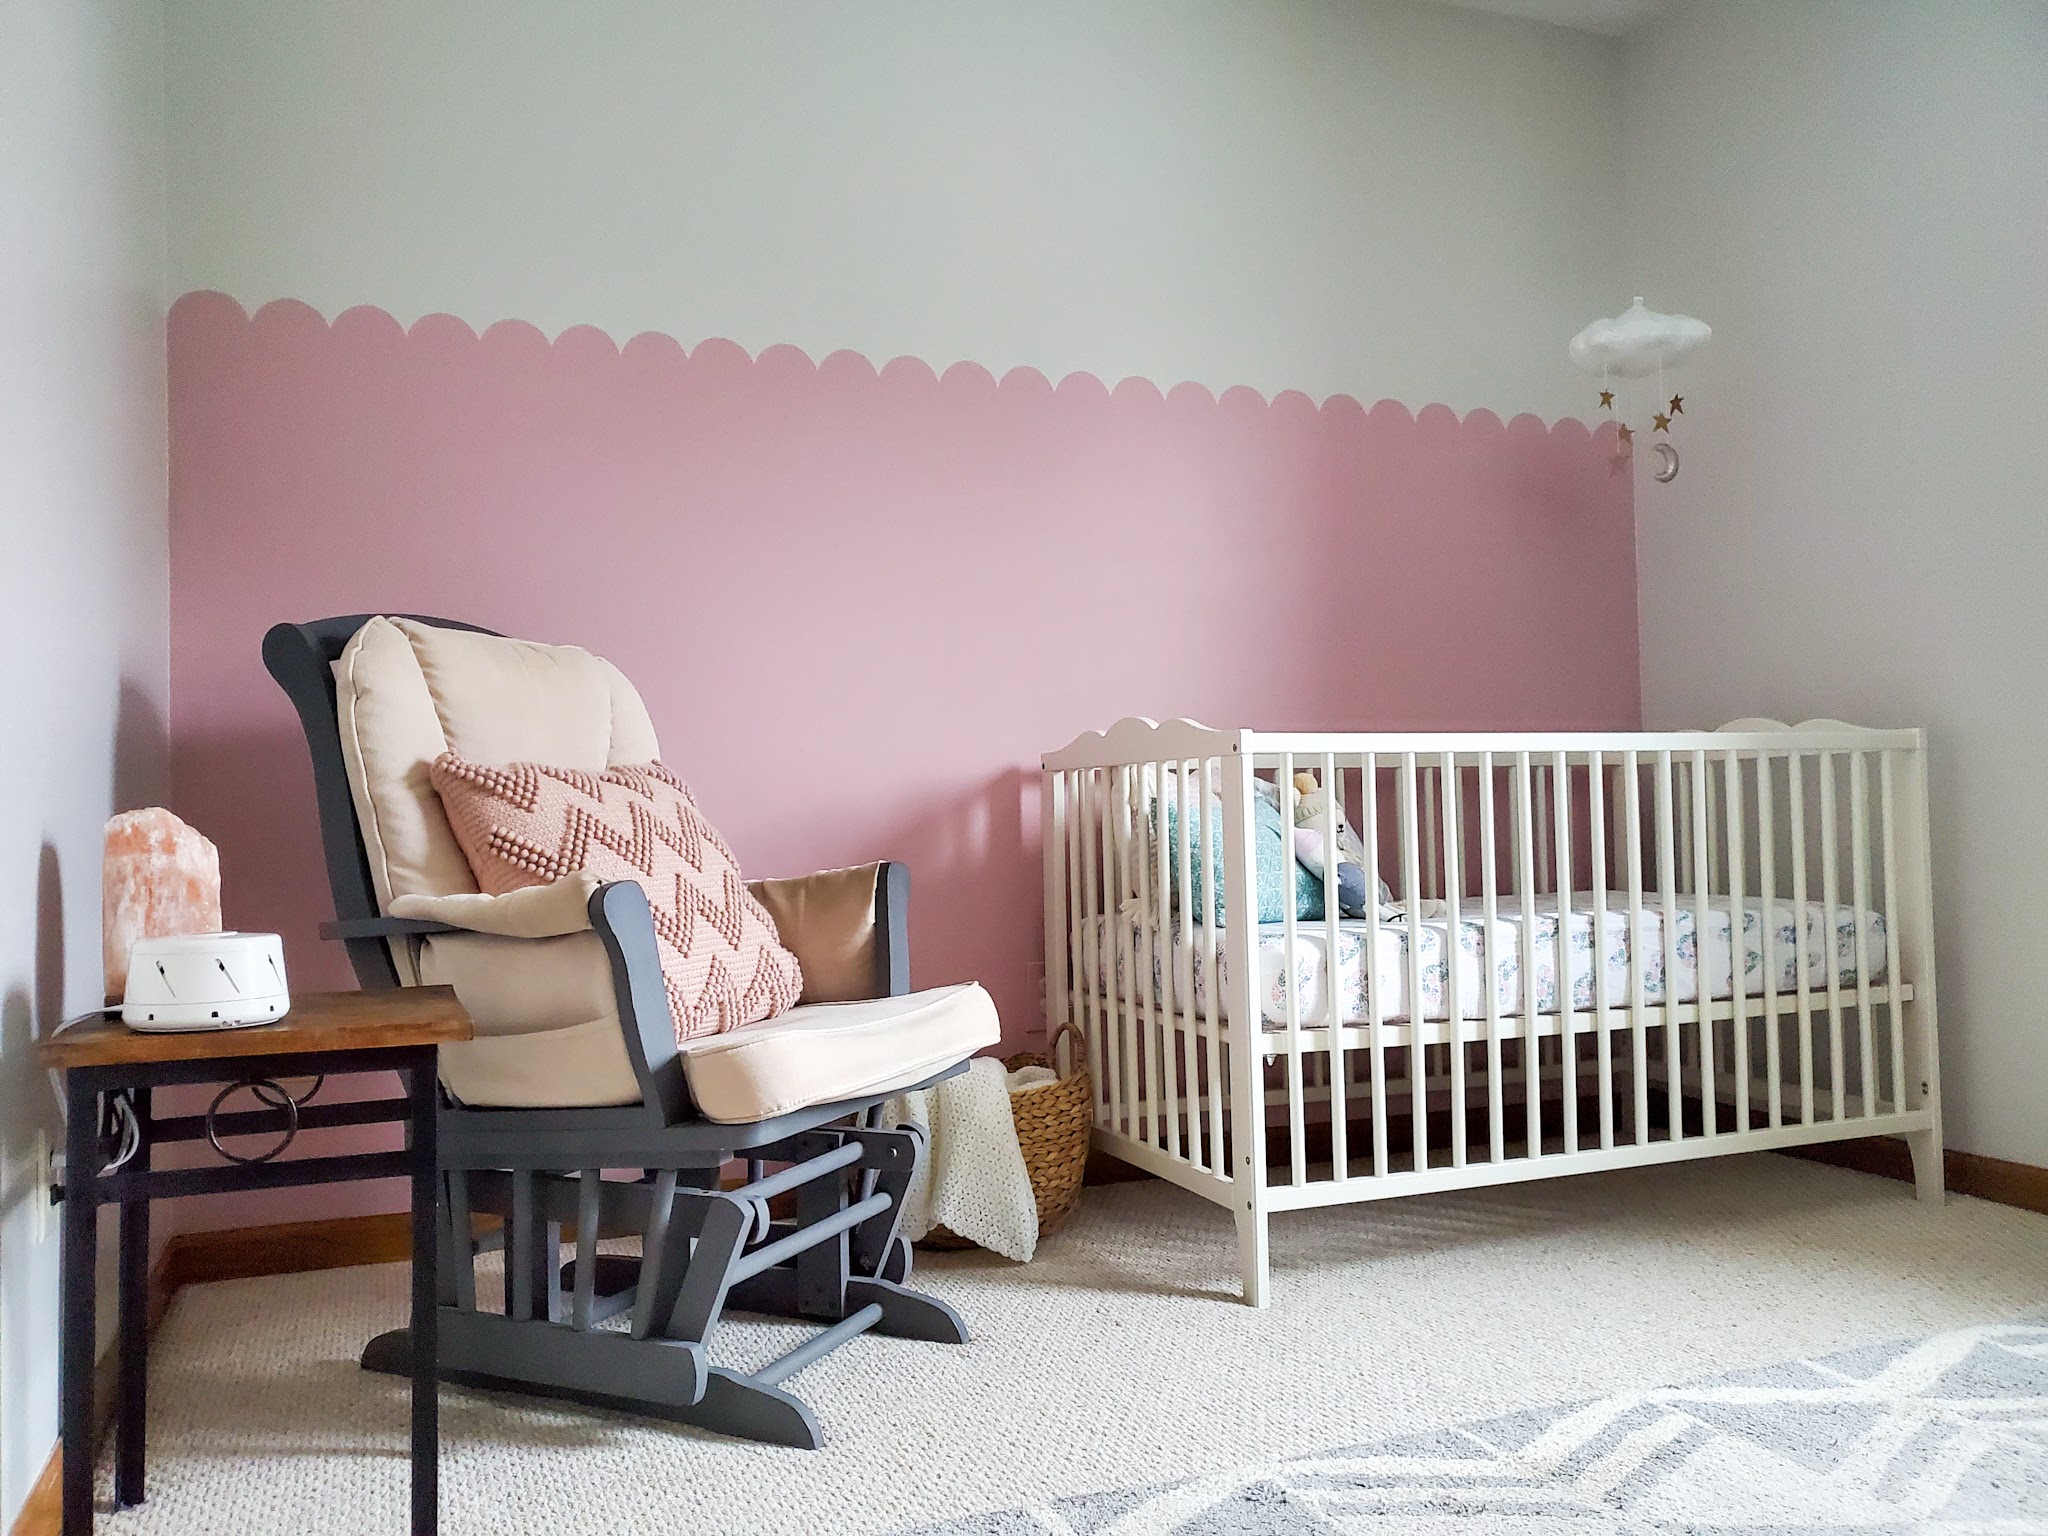
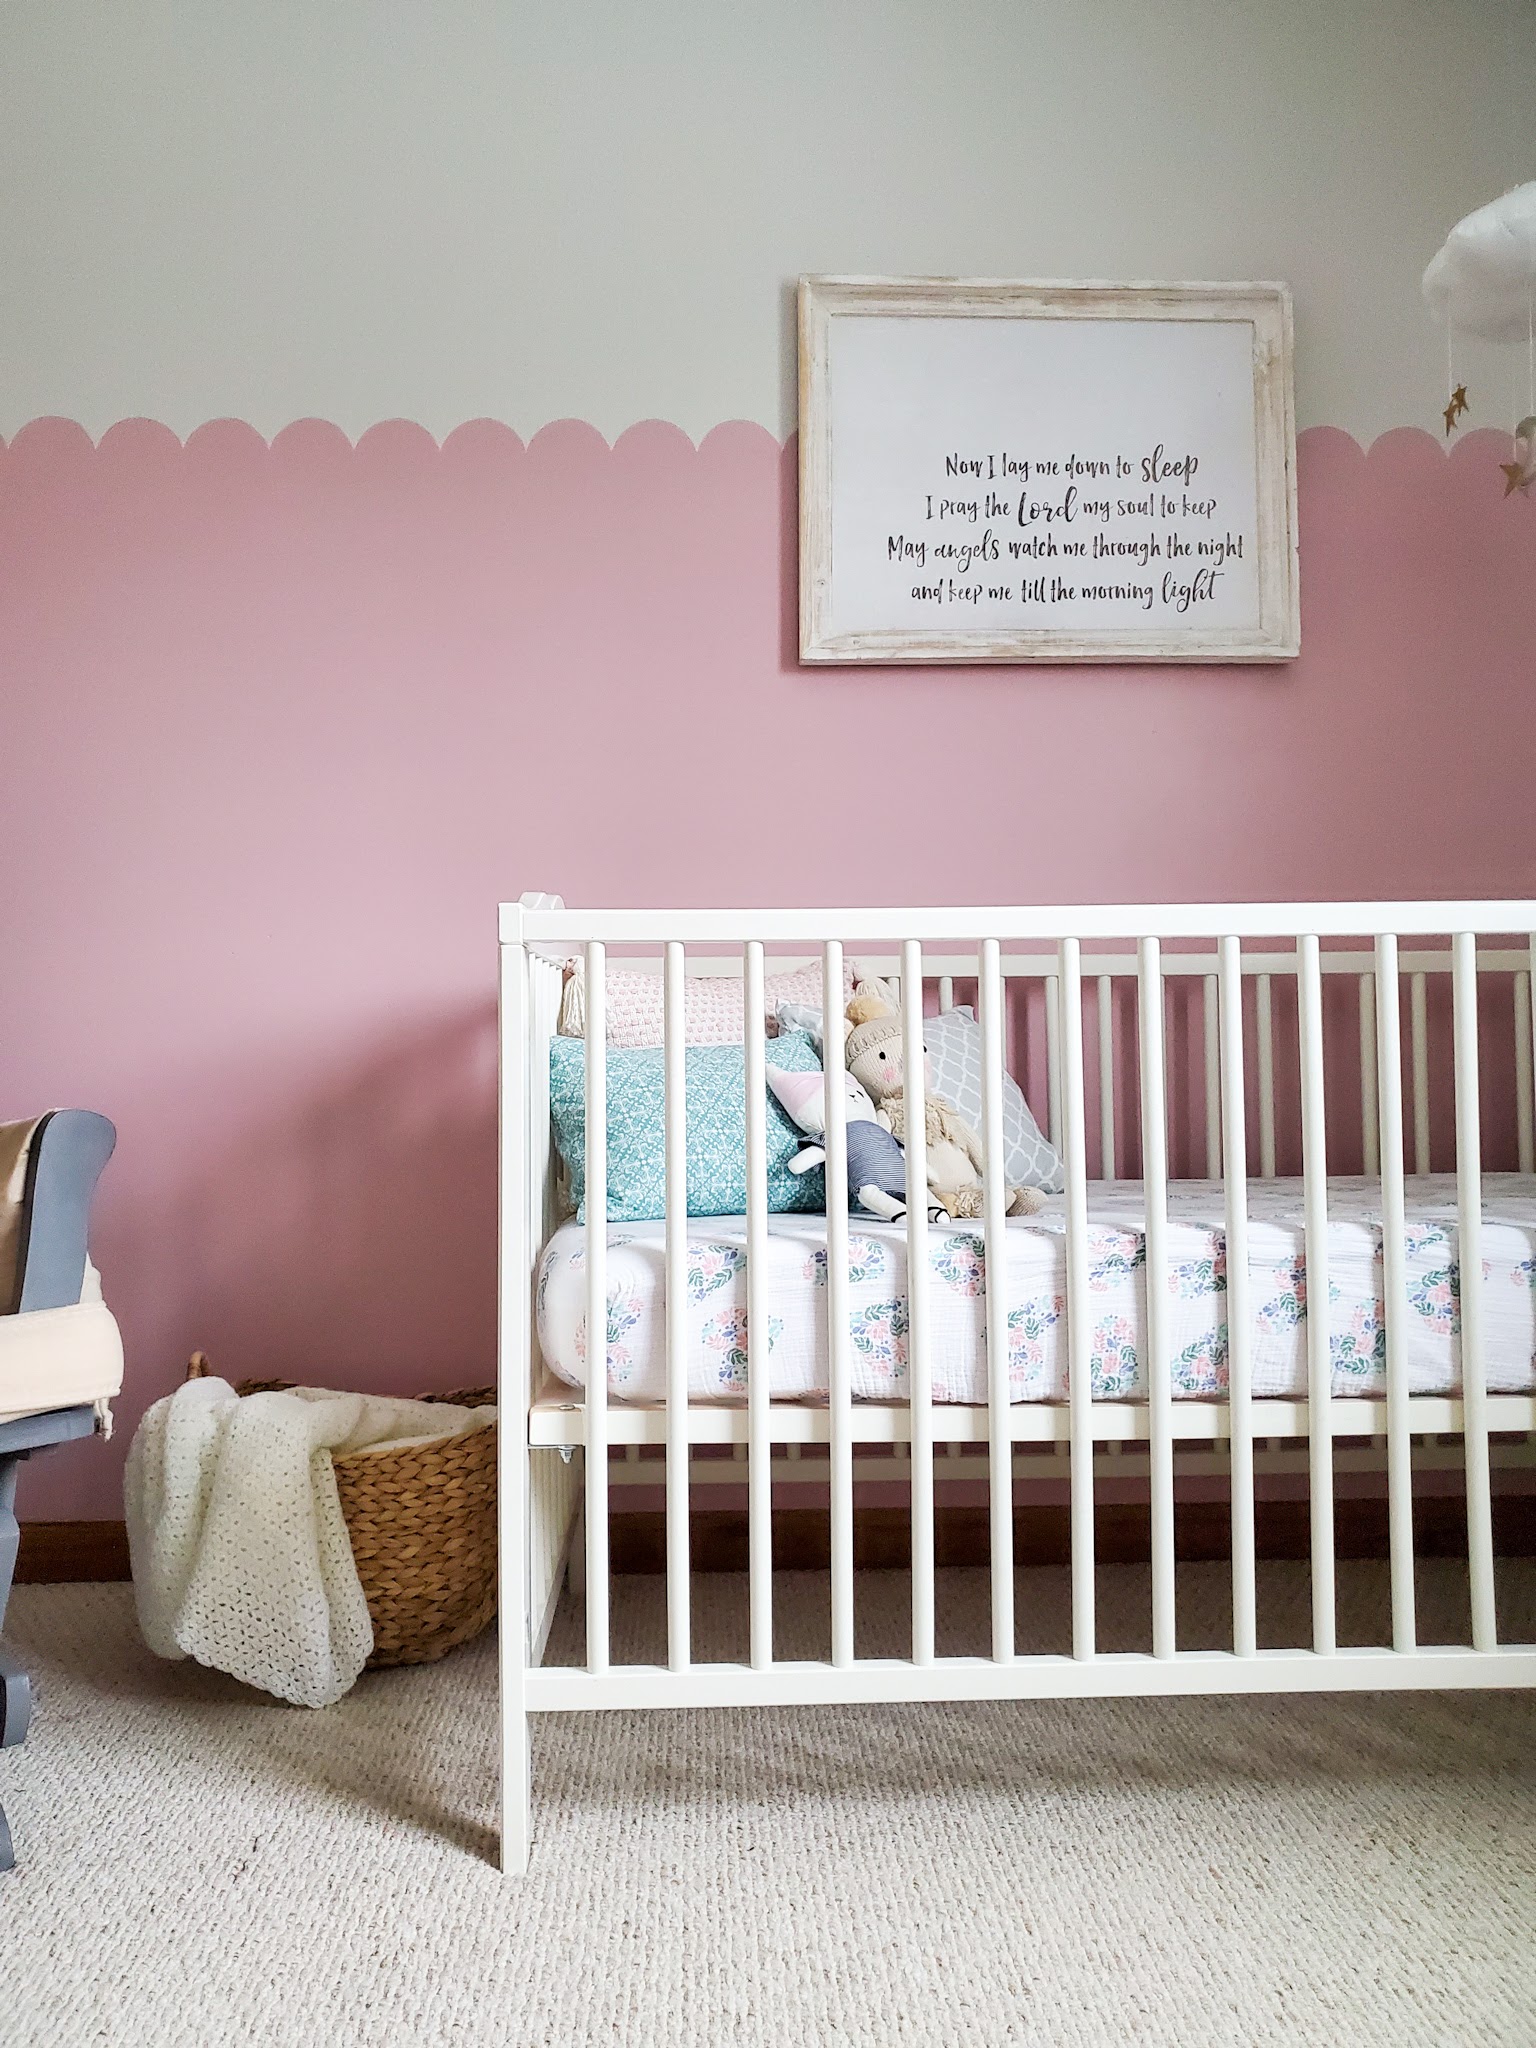
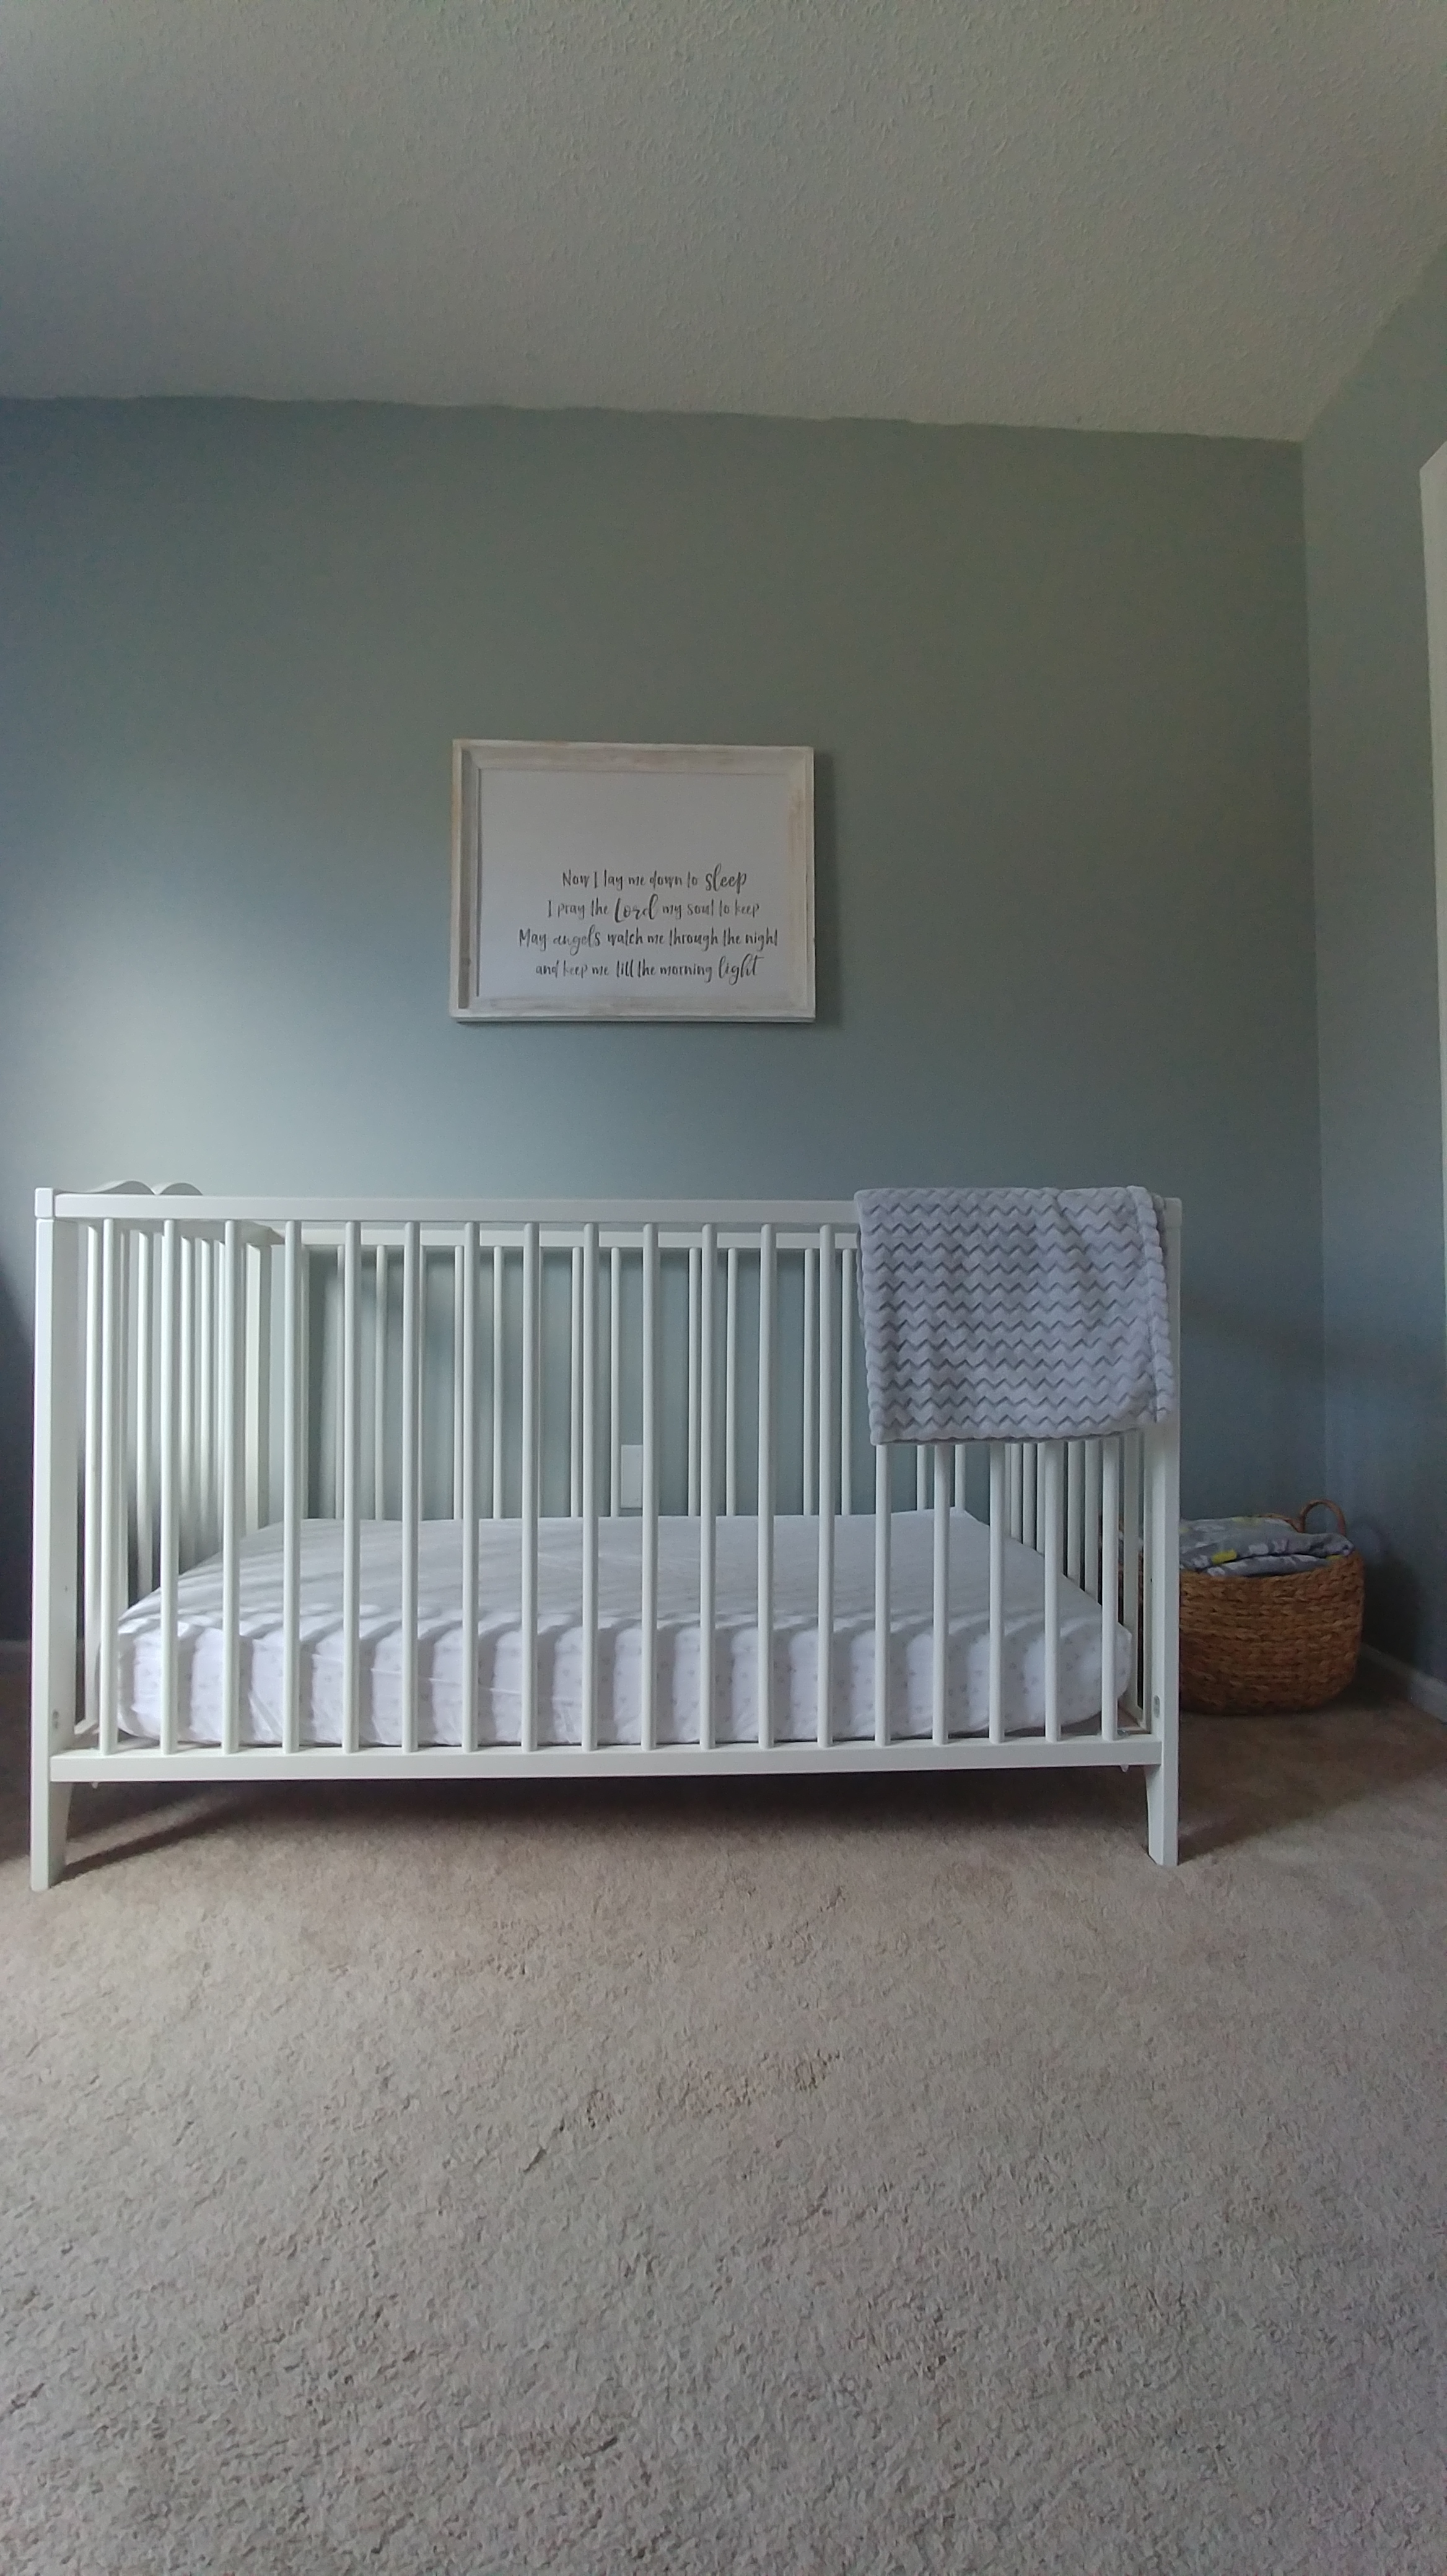
Obviously, the main focus of a nursery is the crib. I’ve had the same Ikea crib for all my babies and it has served us so well. I’ve also used this little cloud mobile in all three nurseries (although not always above the crib) and I love how sweet and whimsical it is! The dinosaur sheet was a clearance find from back when LJ was still using the crib, but I never actually used it for LJ. It wasn’t exactly what I was envisioning for this nursery, but it’s hard to argue for buying new when you have a nice option on hand already and I’m satisfied with this choice.

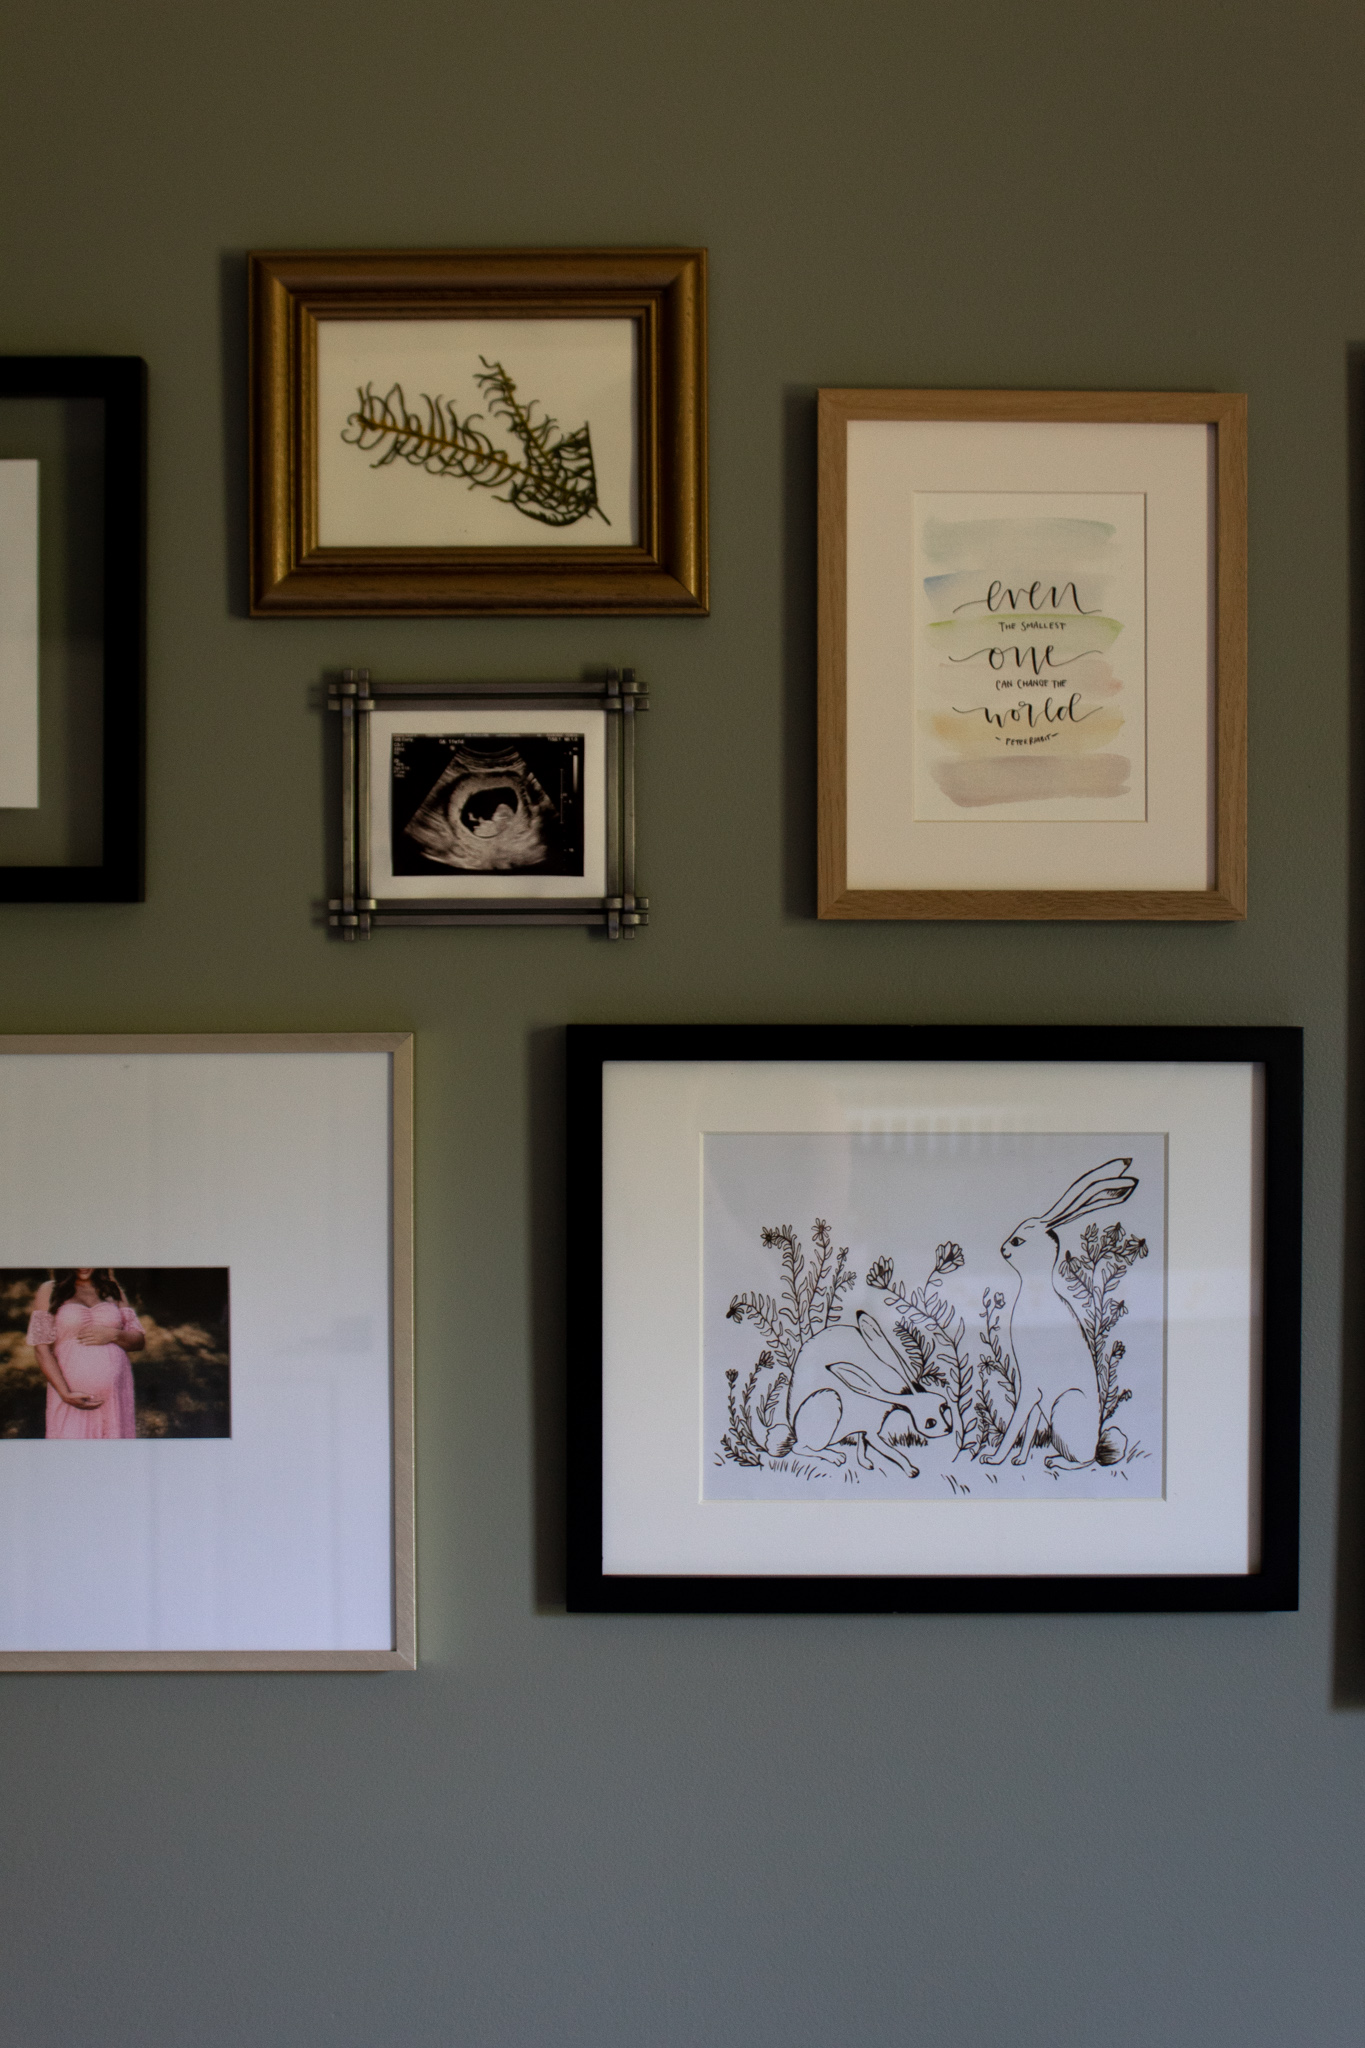
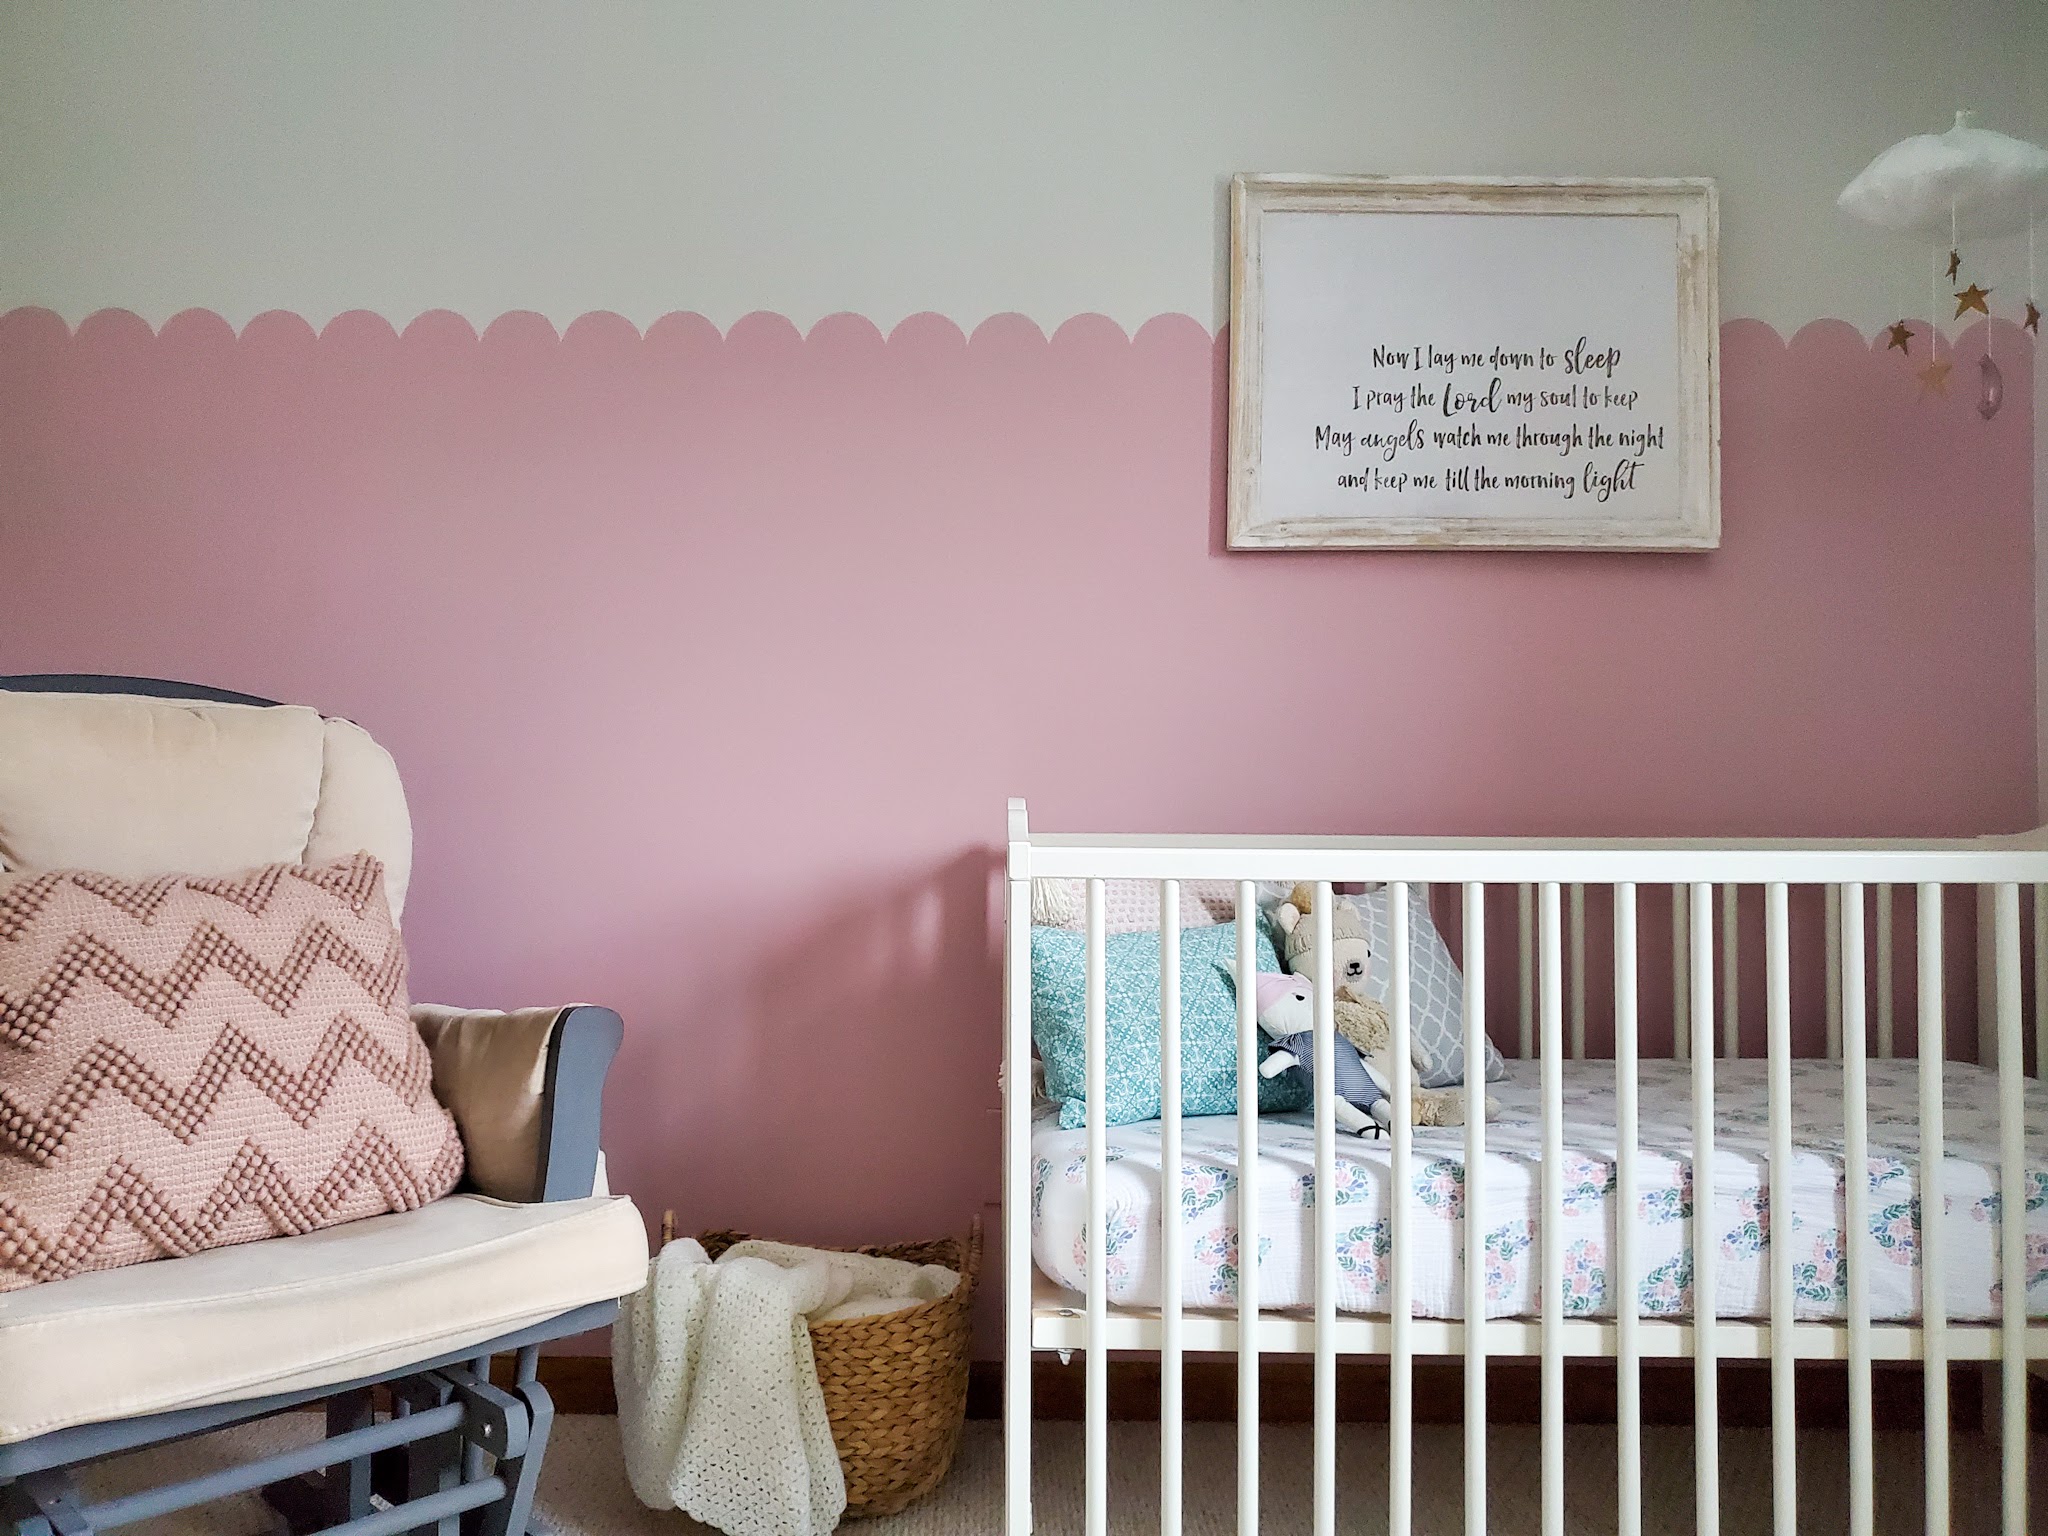
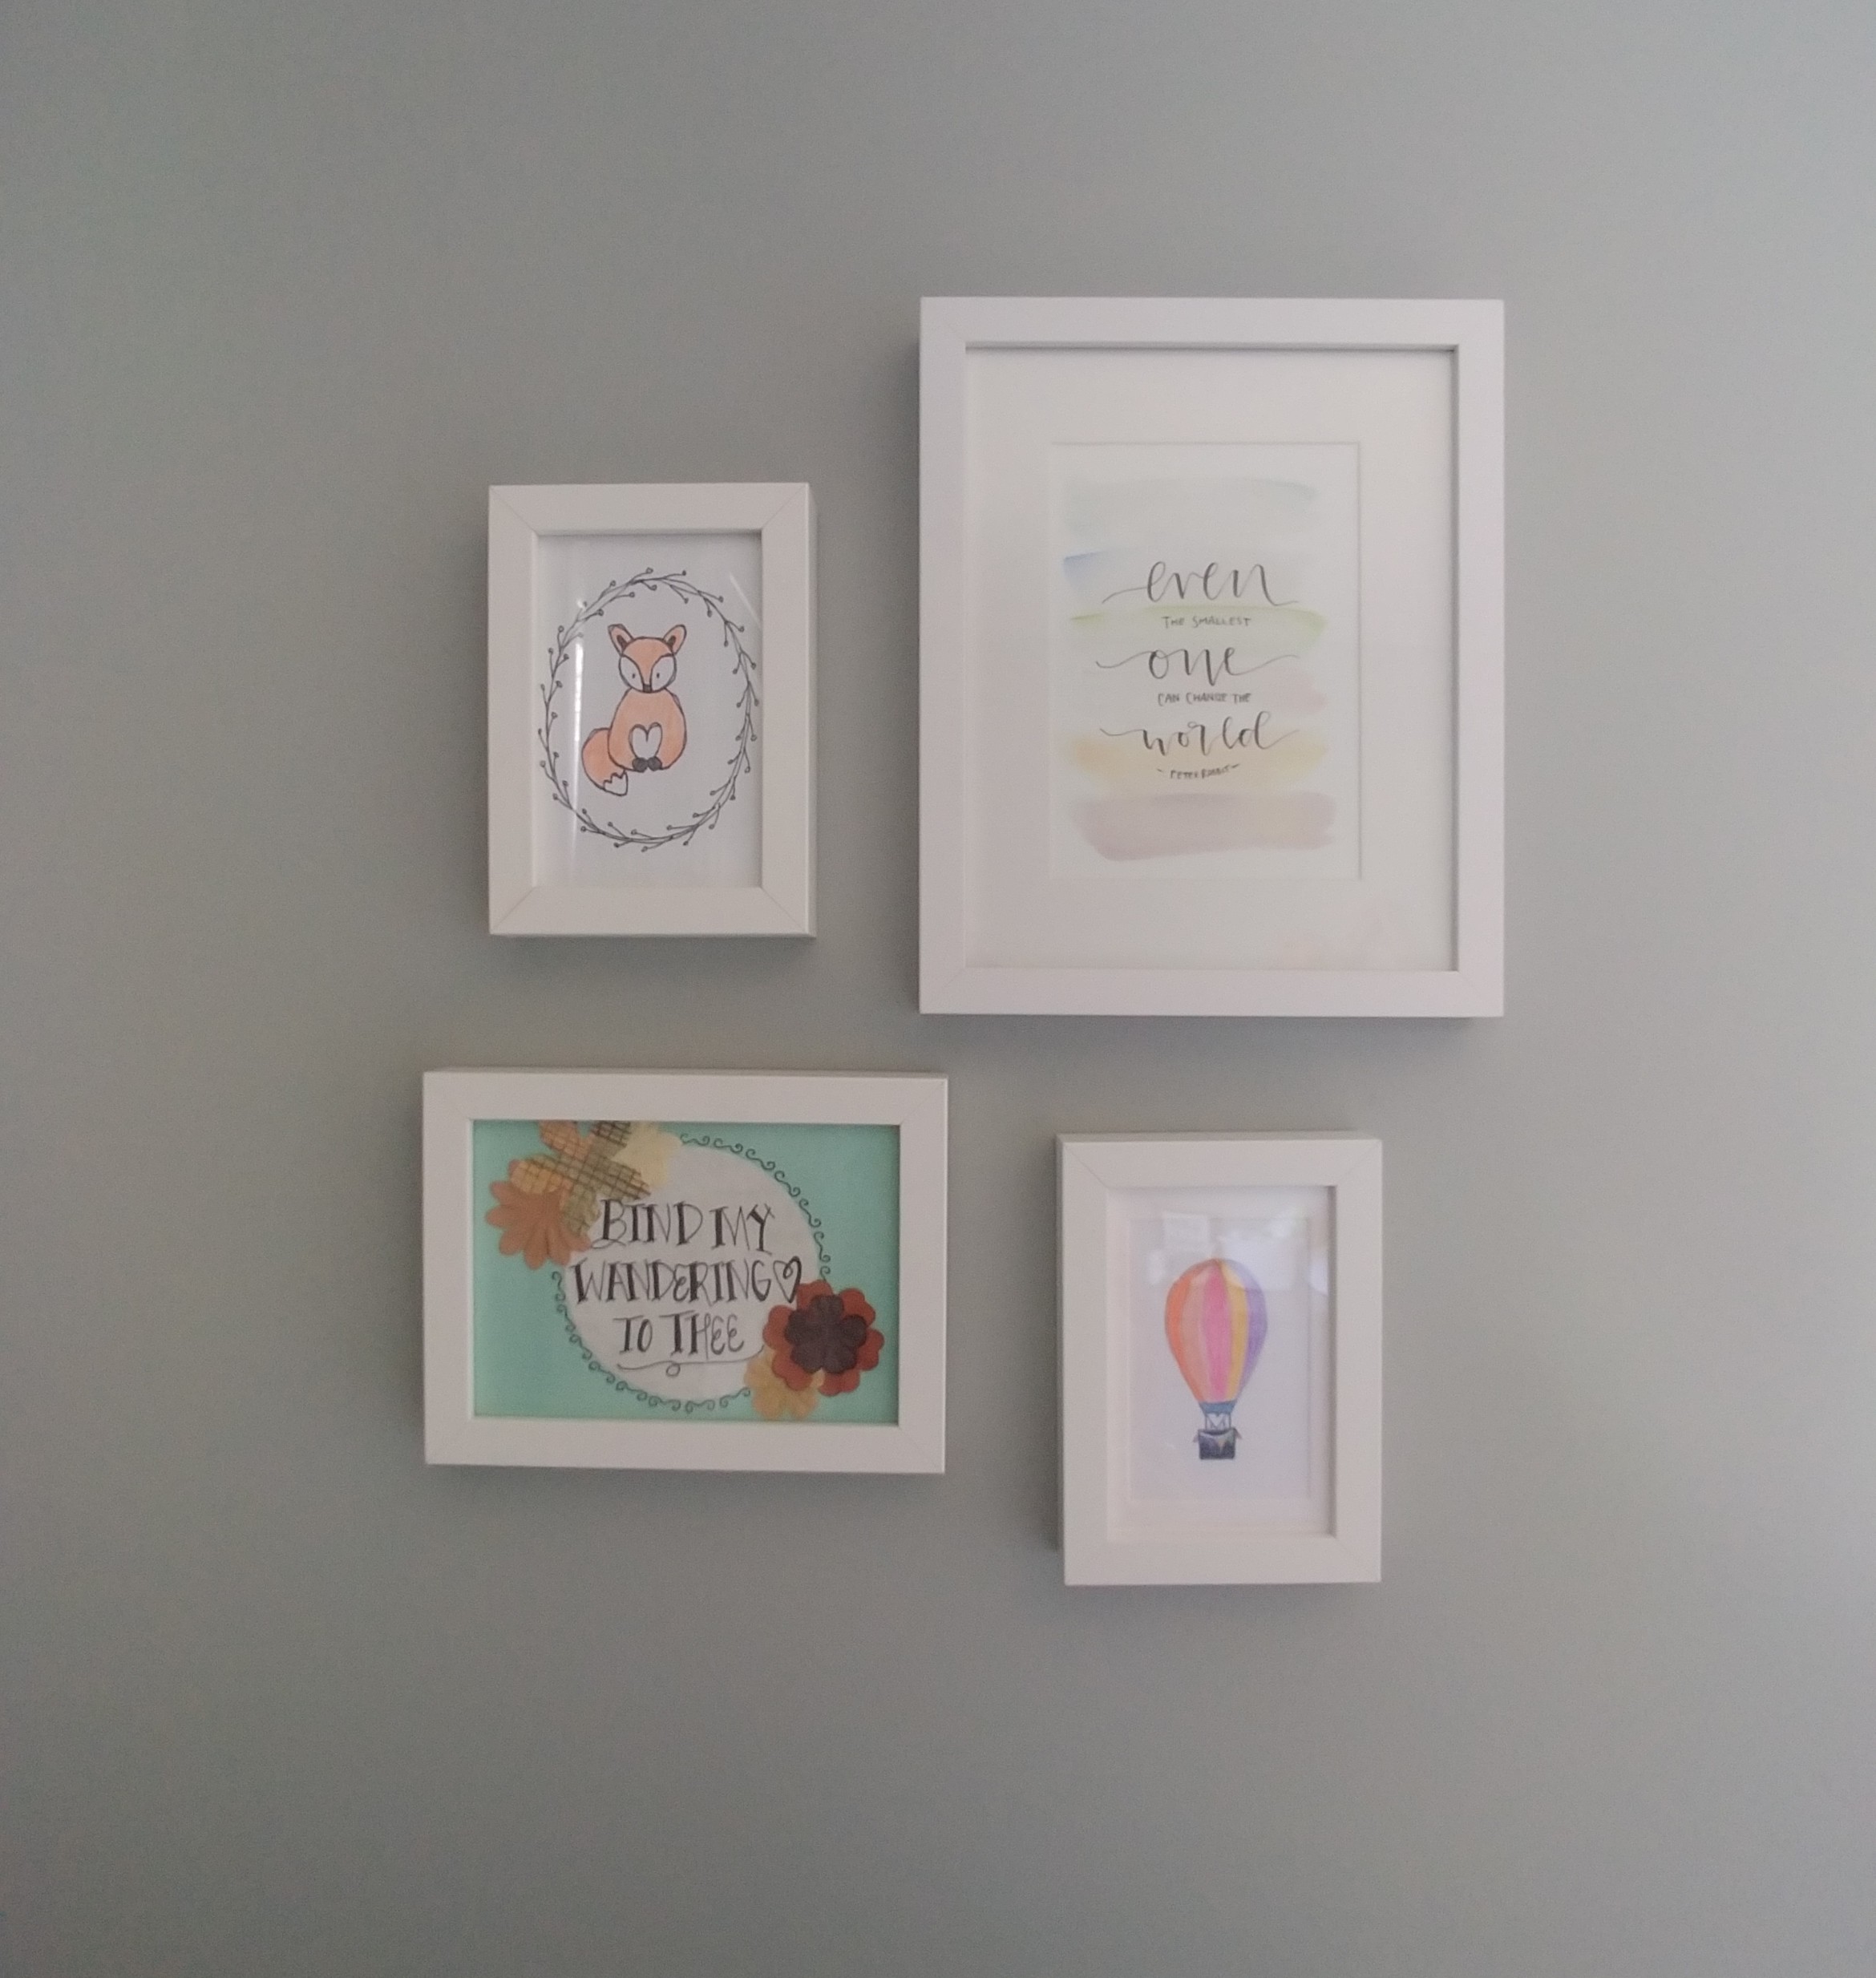
I decided to forgo one large print above the crib and instead create a gallery wall, specifically choosing to center it on the wall instead of over the crib. I wanted a collected look so I pulled together some digital download prints, a maternity photo, the baby’s sonogram, and a simple dried fern in a variety of frames, some new and some thrifted.

The chair we had in here previously was a handmedown La-z-boy from Justin’s grandma with a slipcover over it. It is comfortable and worked just fine, but when I spotted this dark mustard colored recliner with a grid pattern in a local thrift store, I just couldn’t resist! I knew it would be perfect in this room and I was right. The only downfall is that it doesn’t rock, but we are currently brainstorming solutions for finding a way to make it rock.

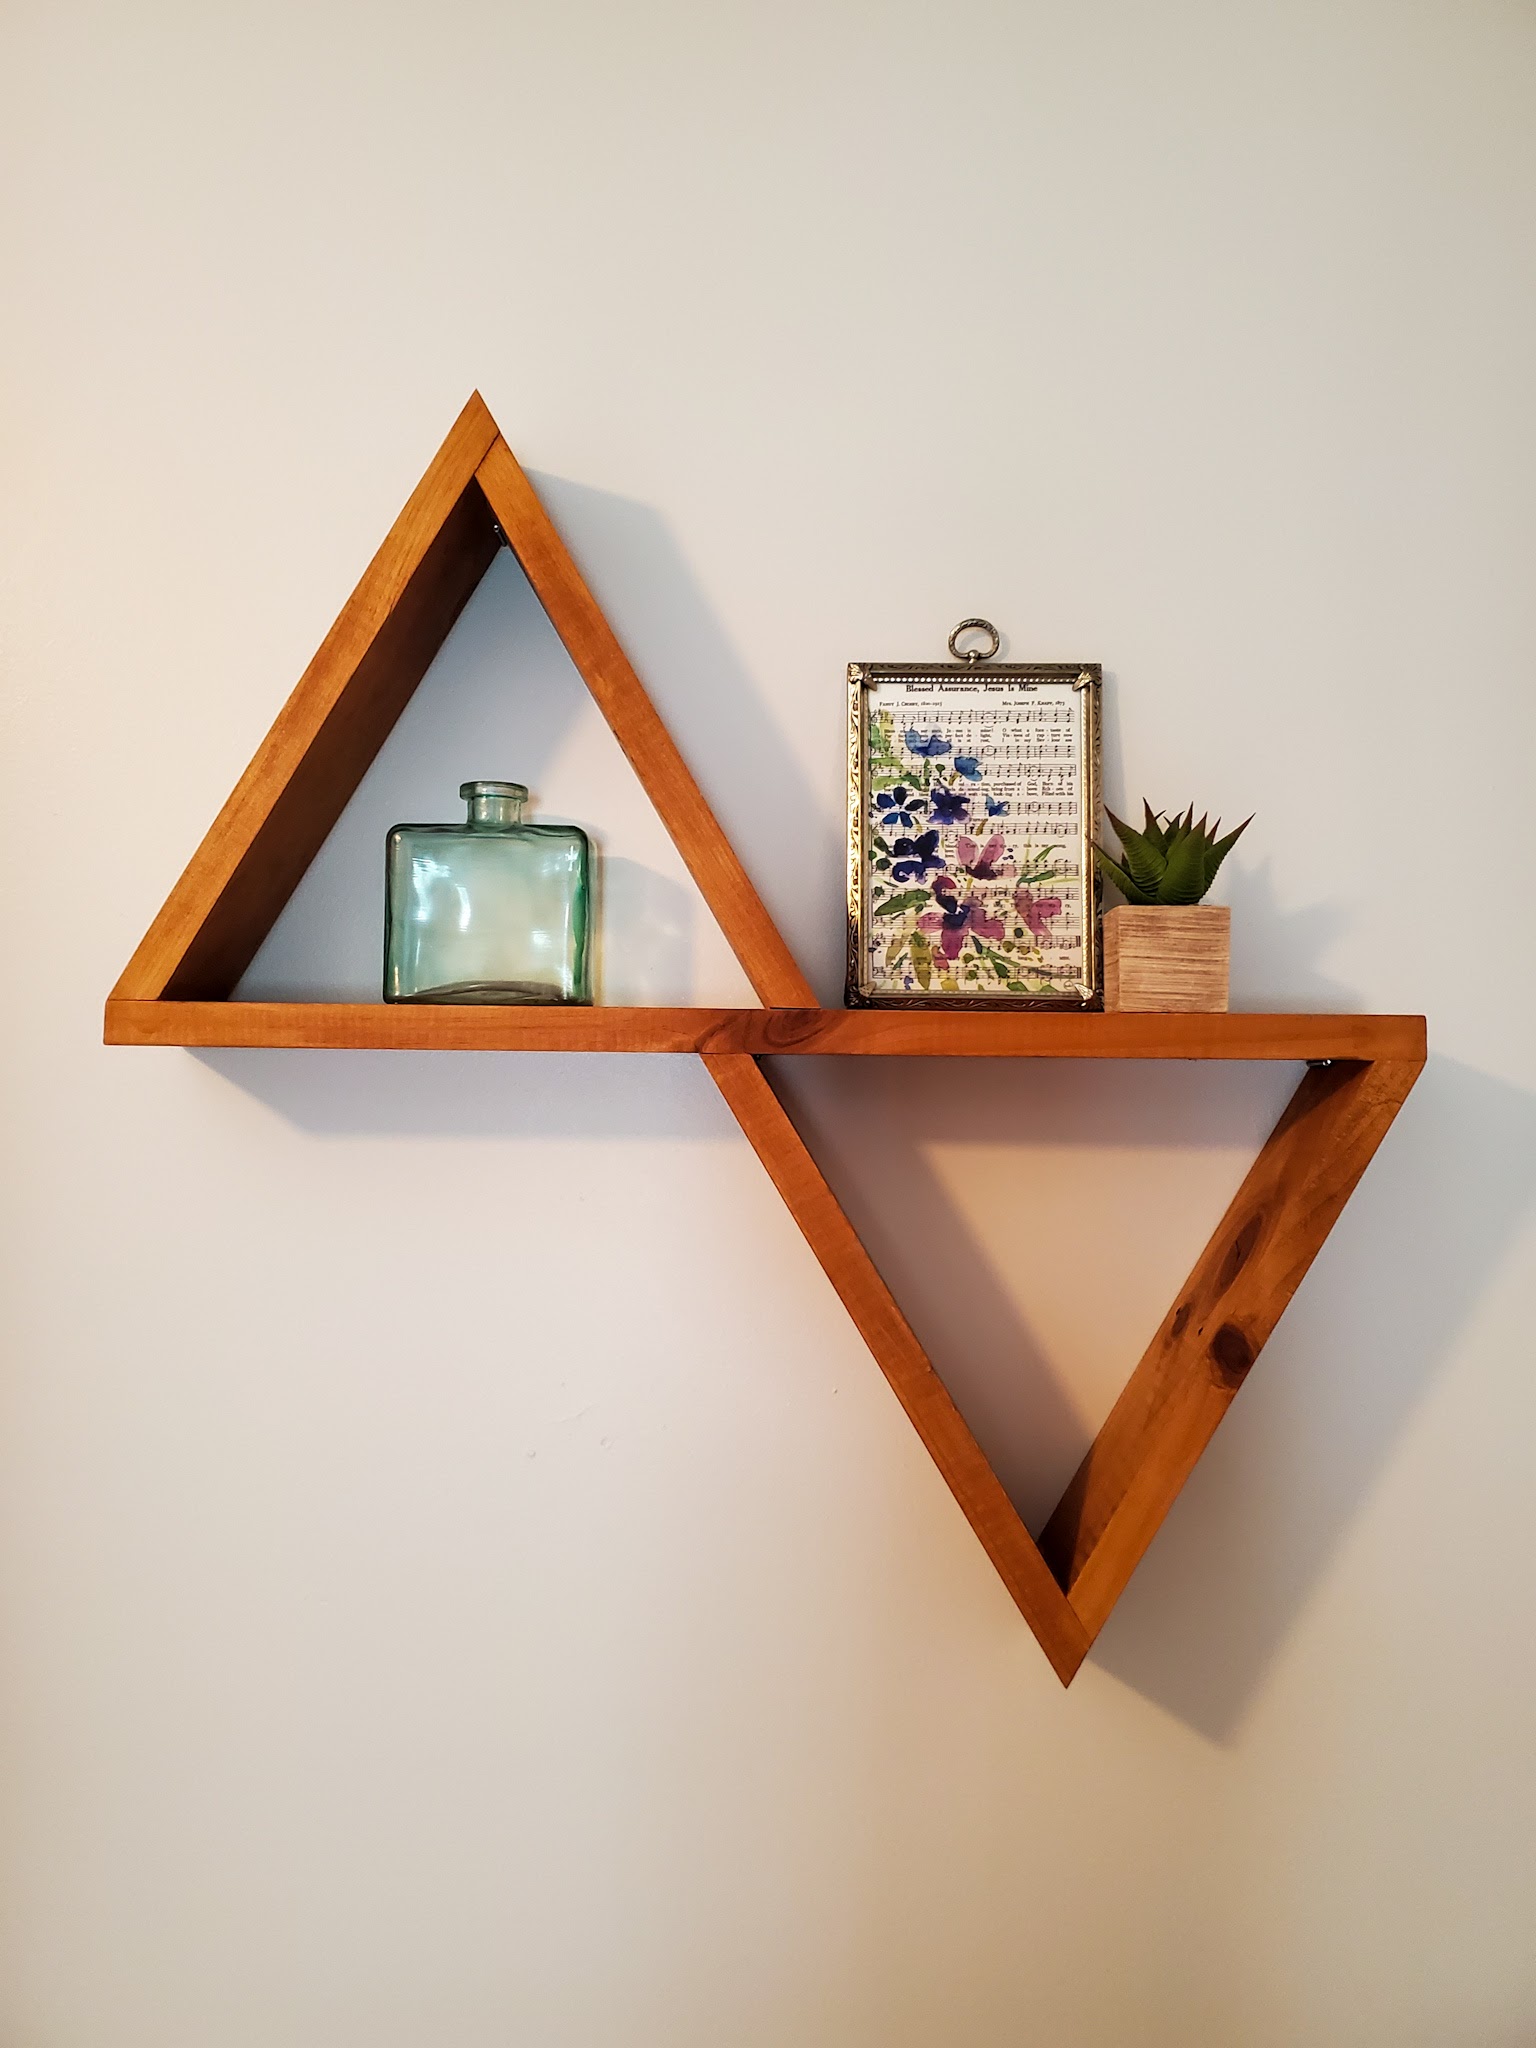
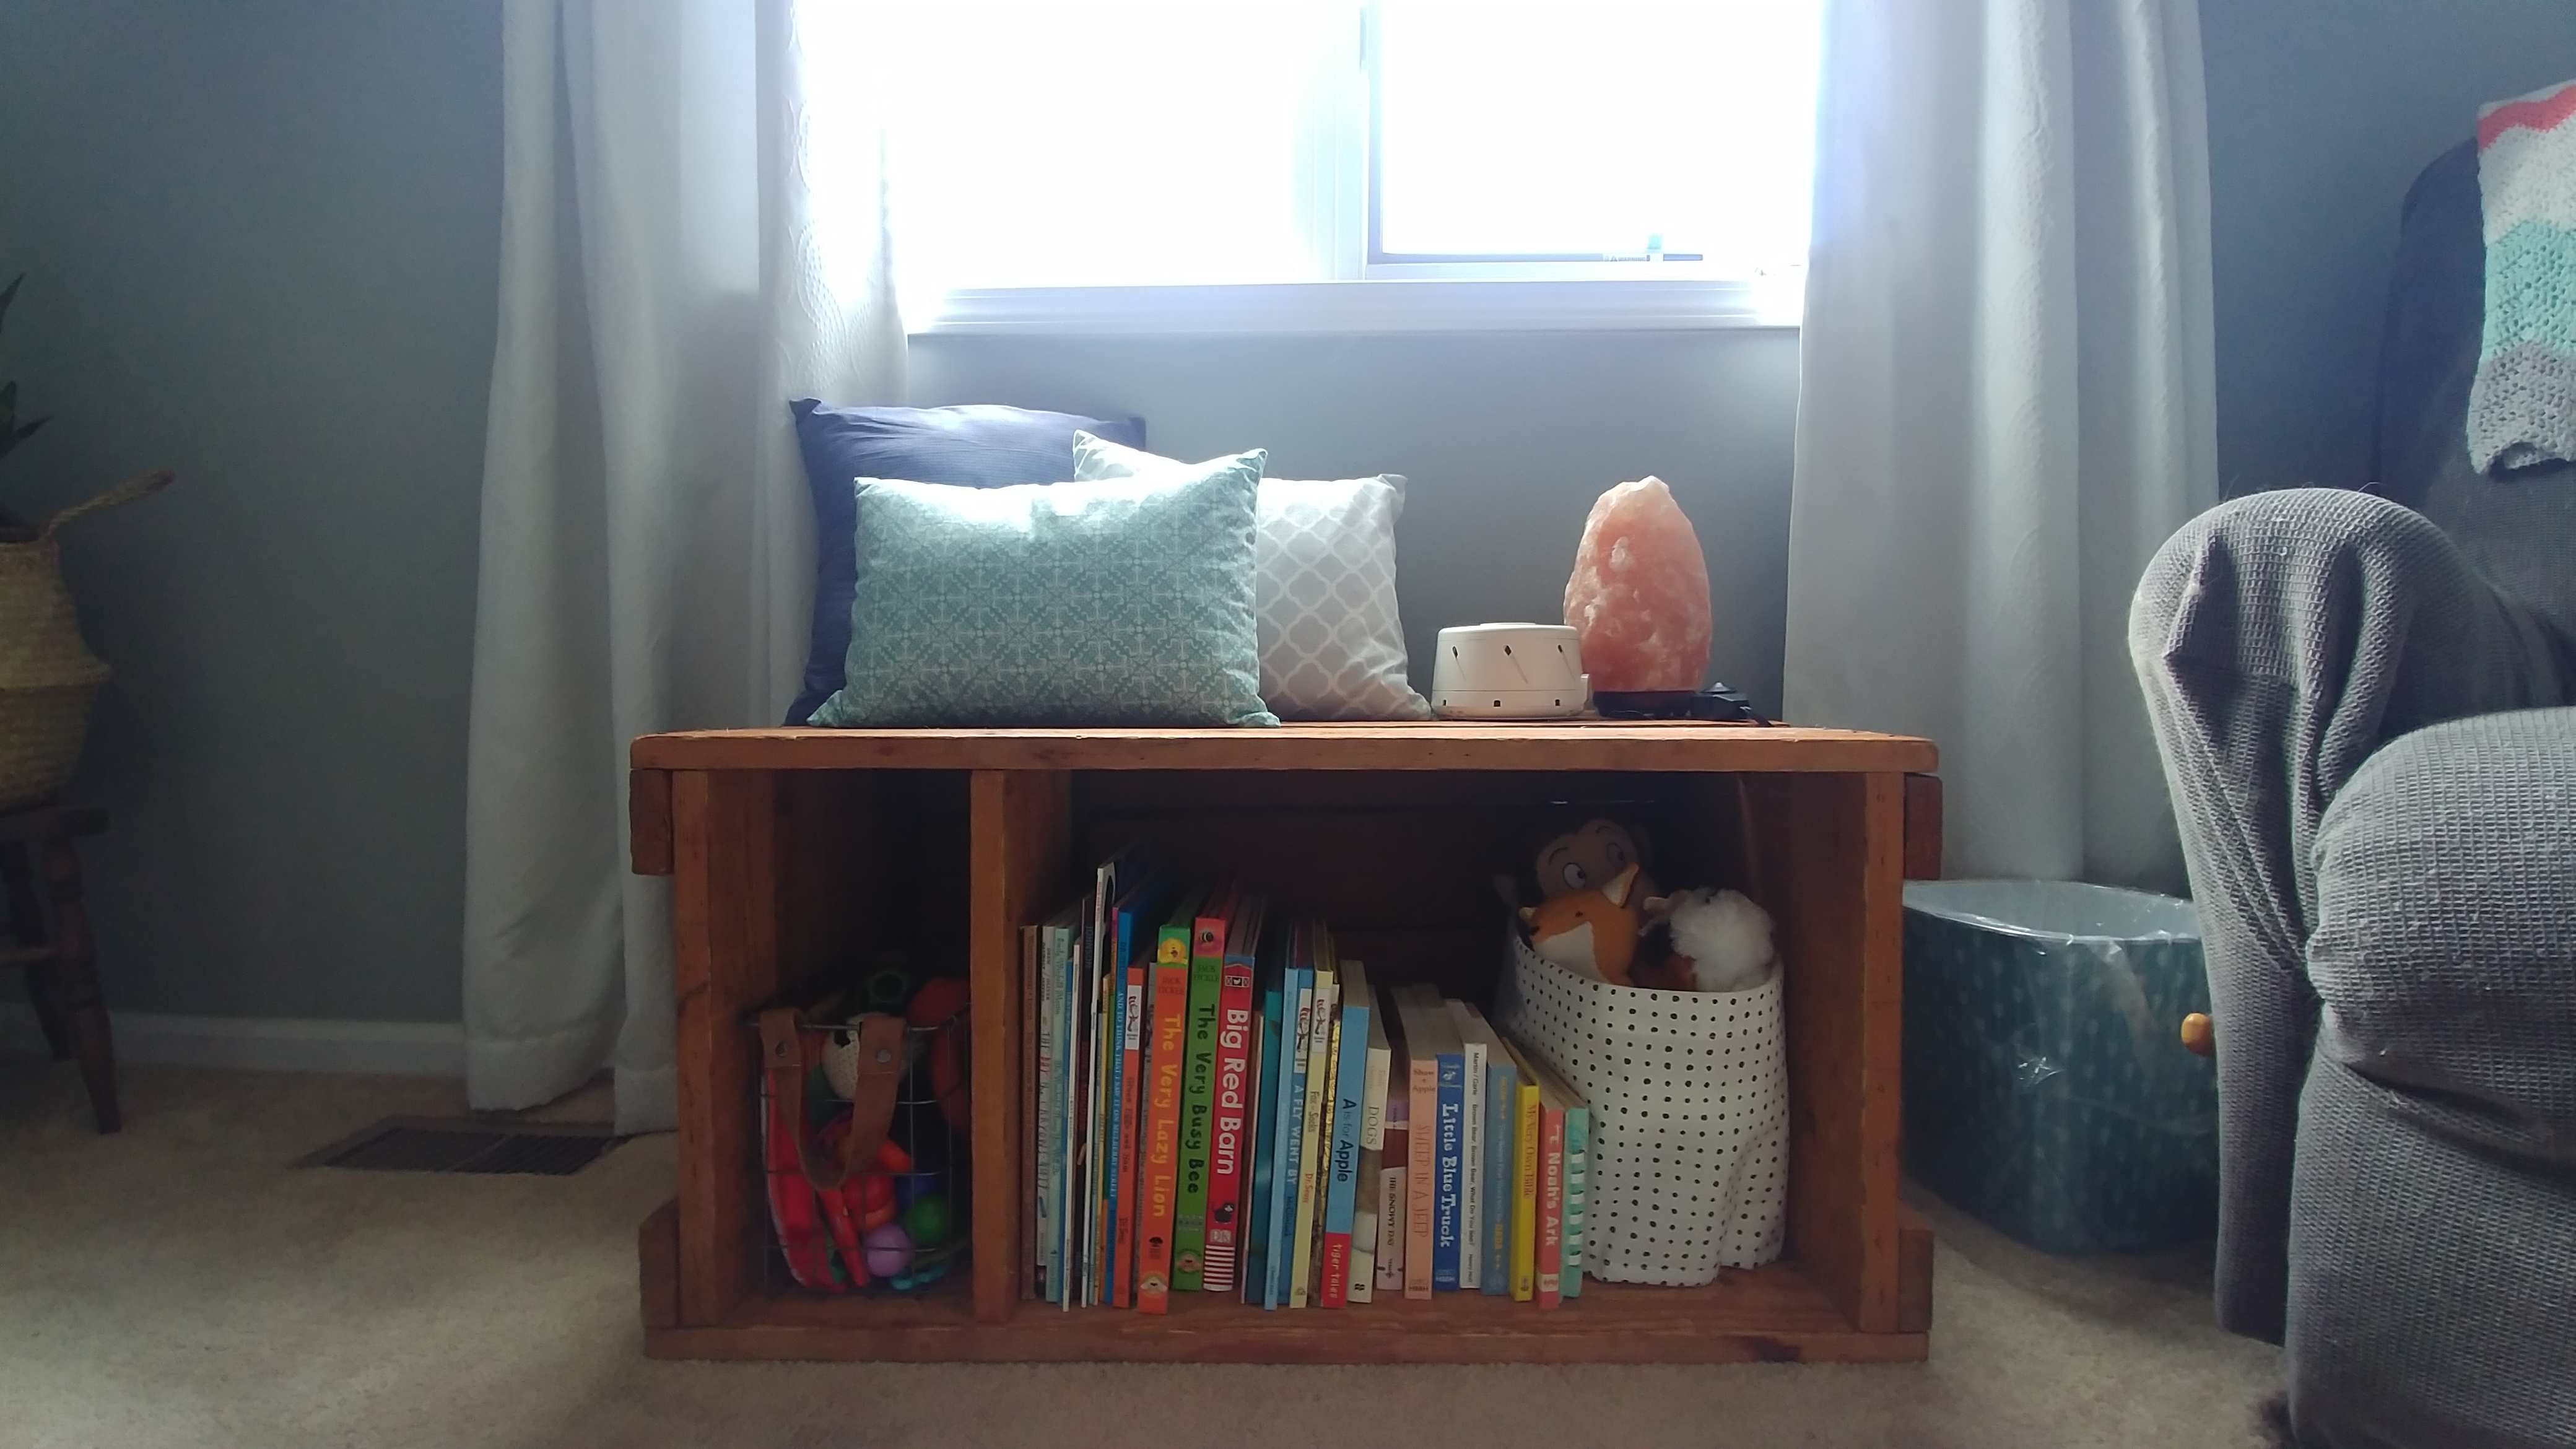
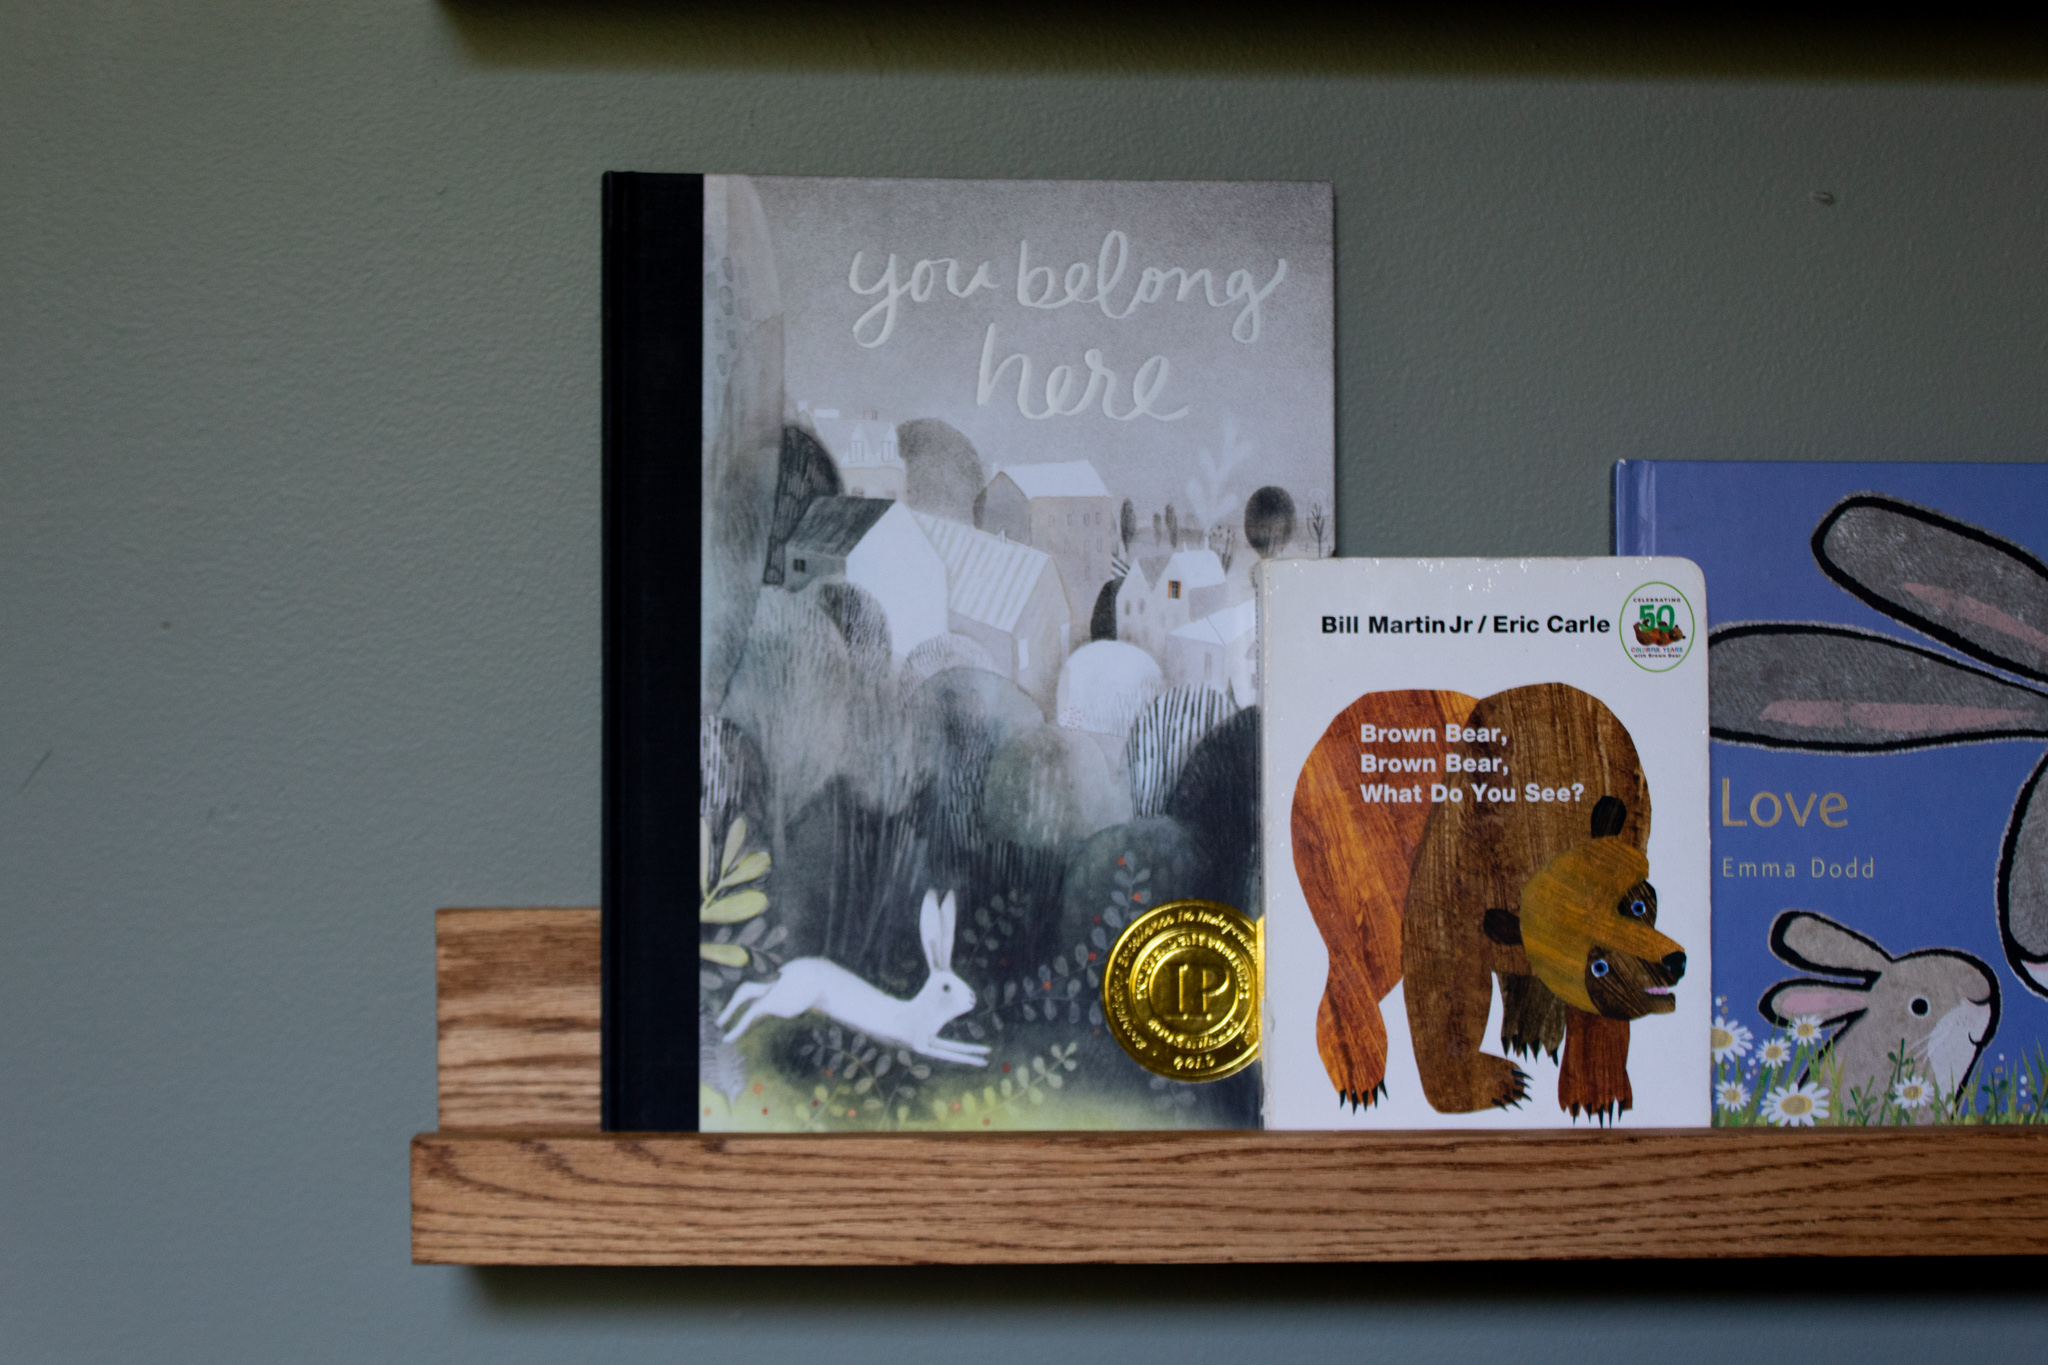
I asked Justin to create a few little book ledges for baby’s book collection and he made three for me following the same process as the ones we made in our secret nook. They turned out great and all of baby’s books fit!

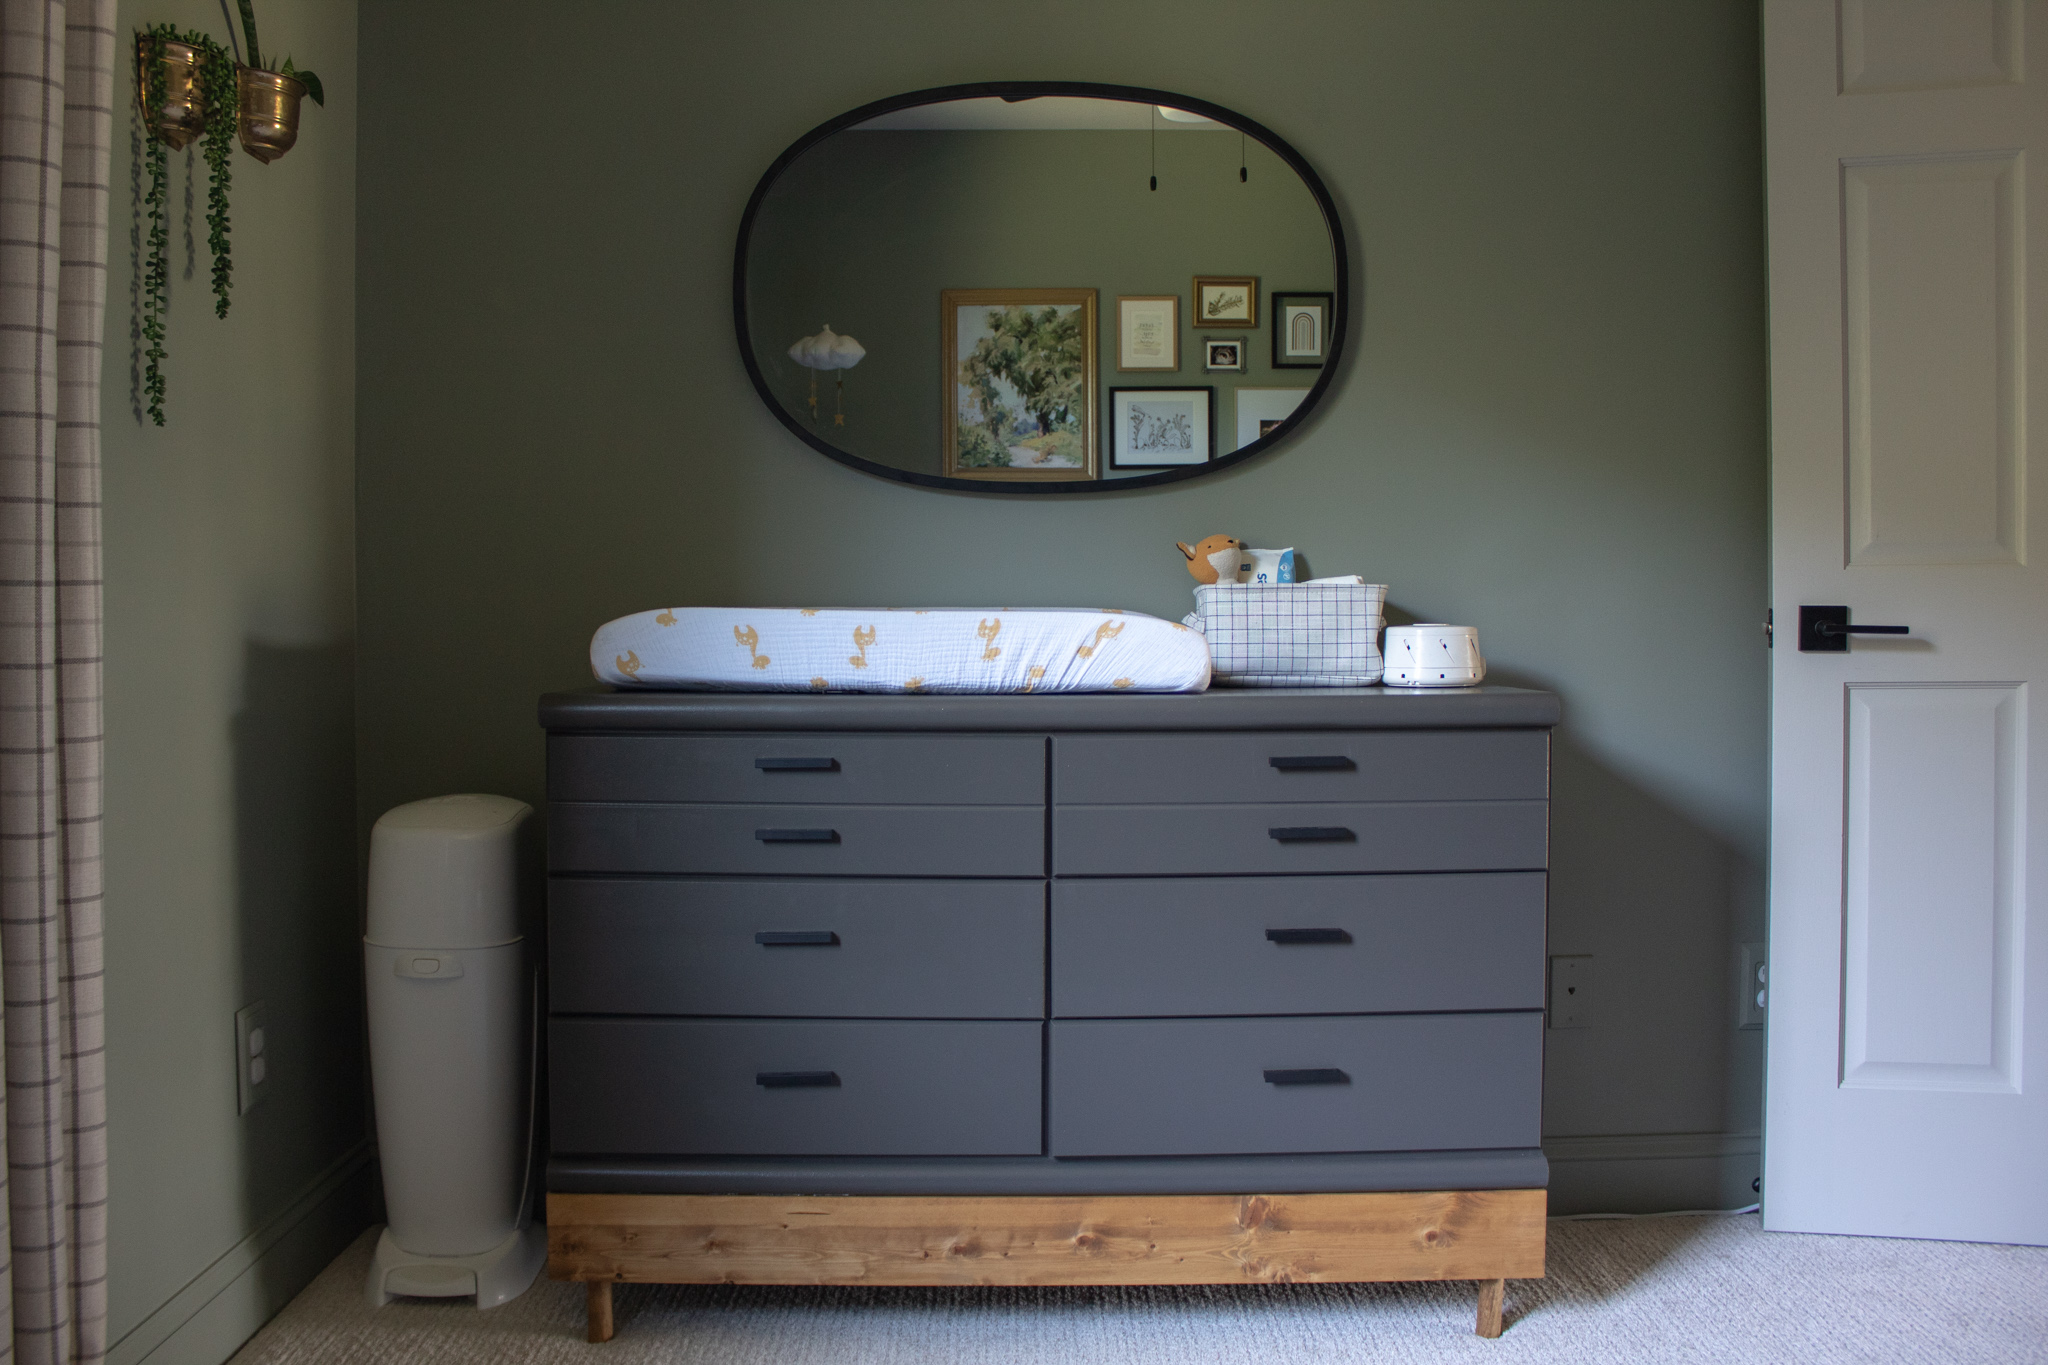
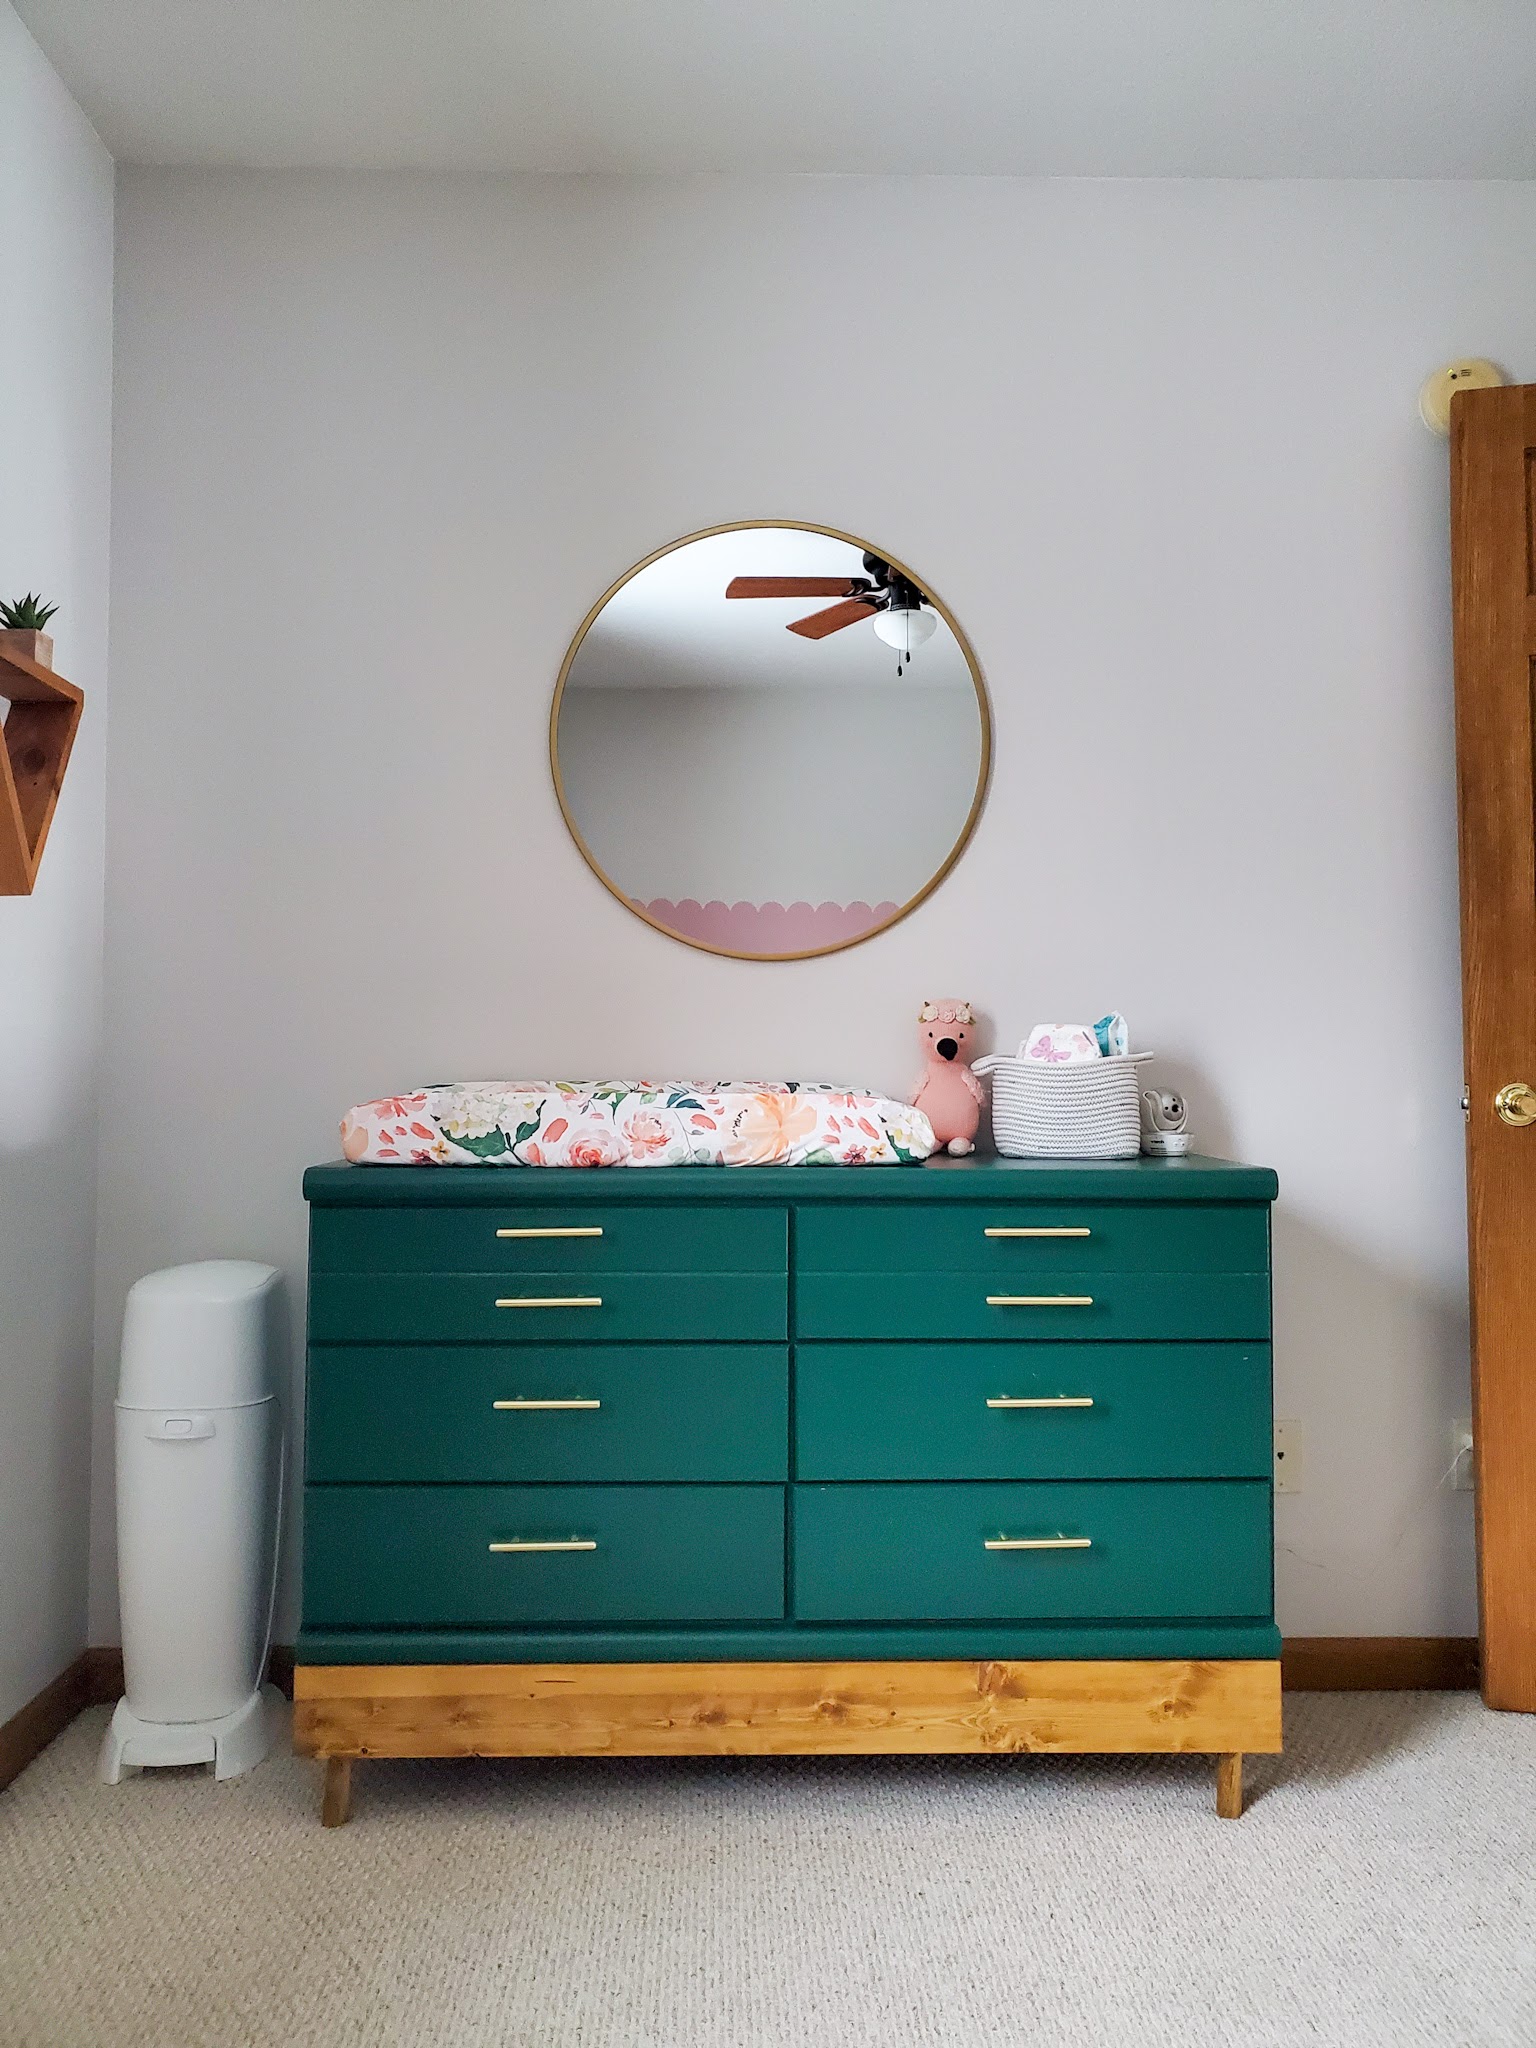
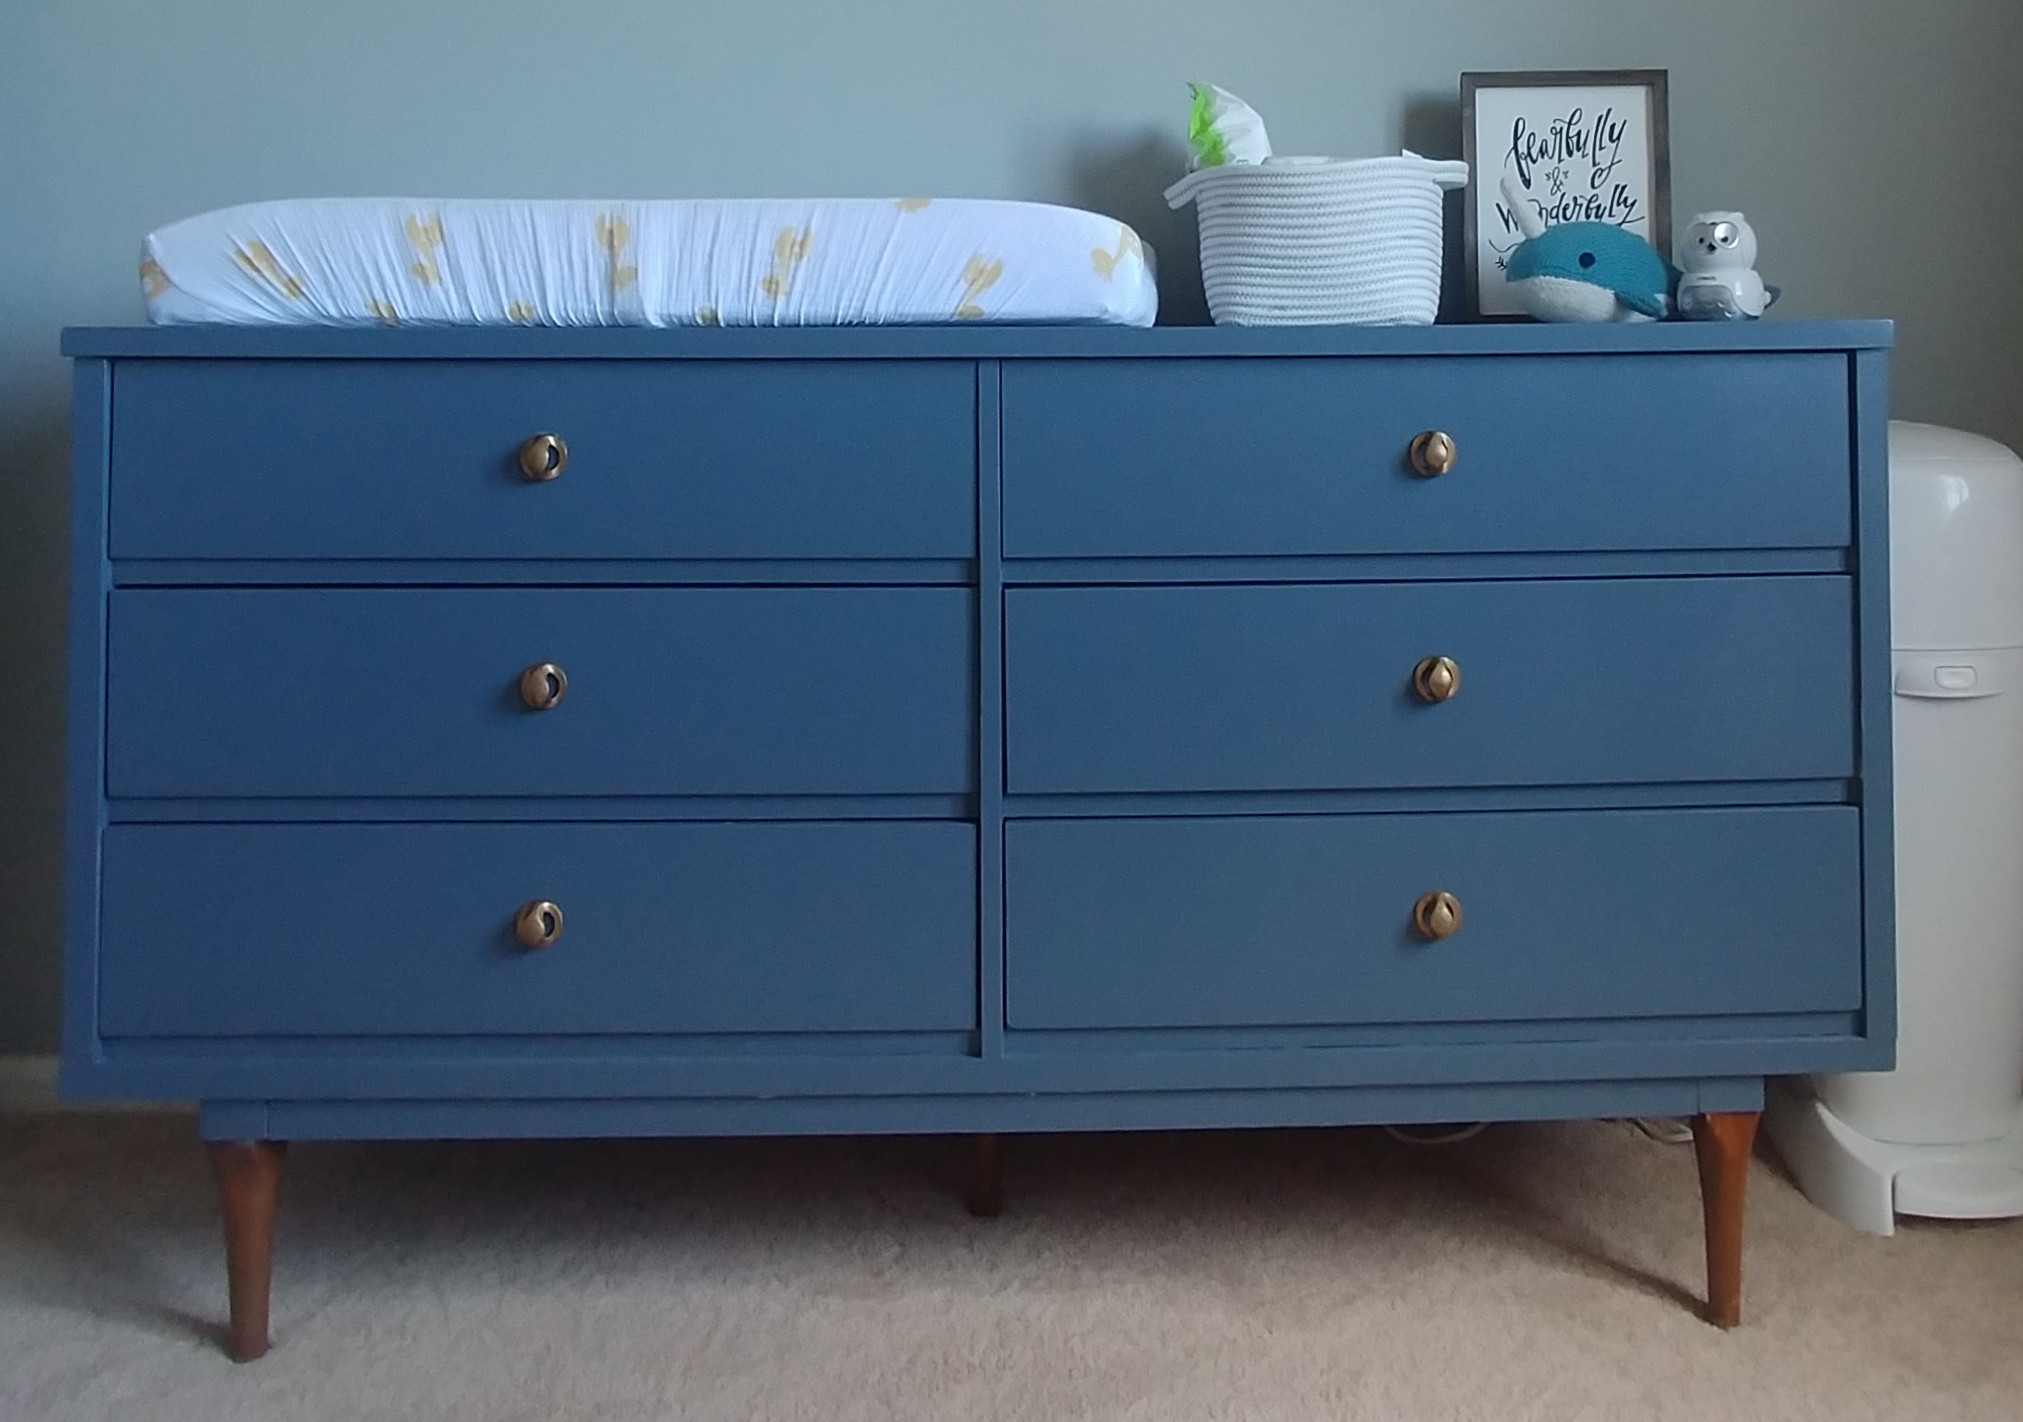
I kept the same dresser from Vi’s nursery, but decided to re-paint it in Sherwin Williams Iron Ore and swap out the gold drawer pulls for matte black ones. I did a little mirror switcheroo and moved the round gold one that used to hang here into the kids’ room and brought in the black oval one from the kids’ room.

I had the giraffe-patterned changing pad cover from LJ’s nursery and I think its colors and whimsical pattern translated well to this nursery. A little basket full of diapers, wipes, and ointments and we have ourselves a changing station!

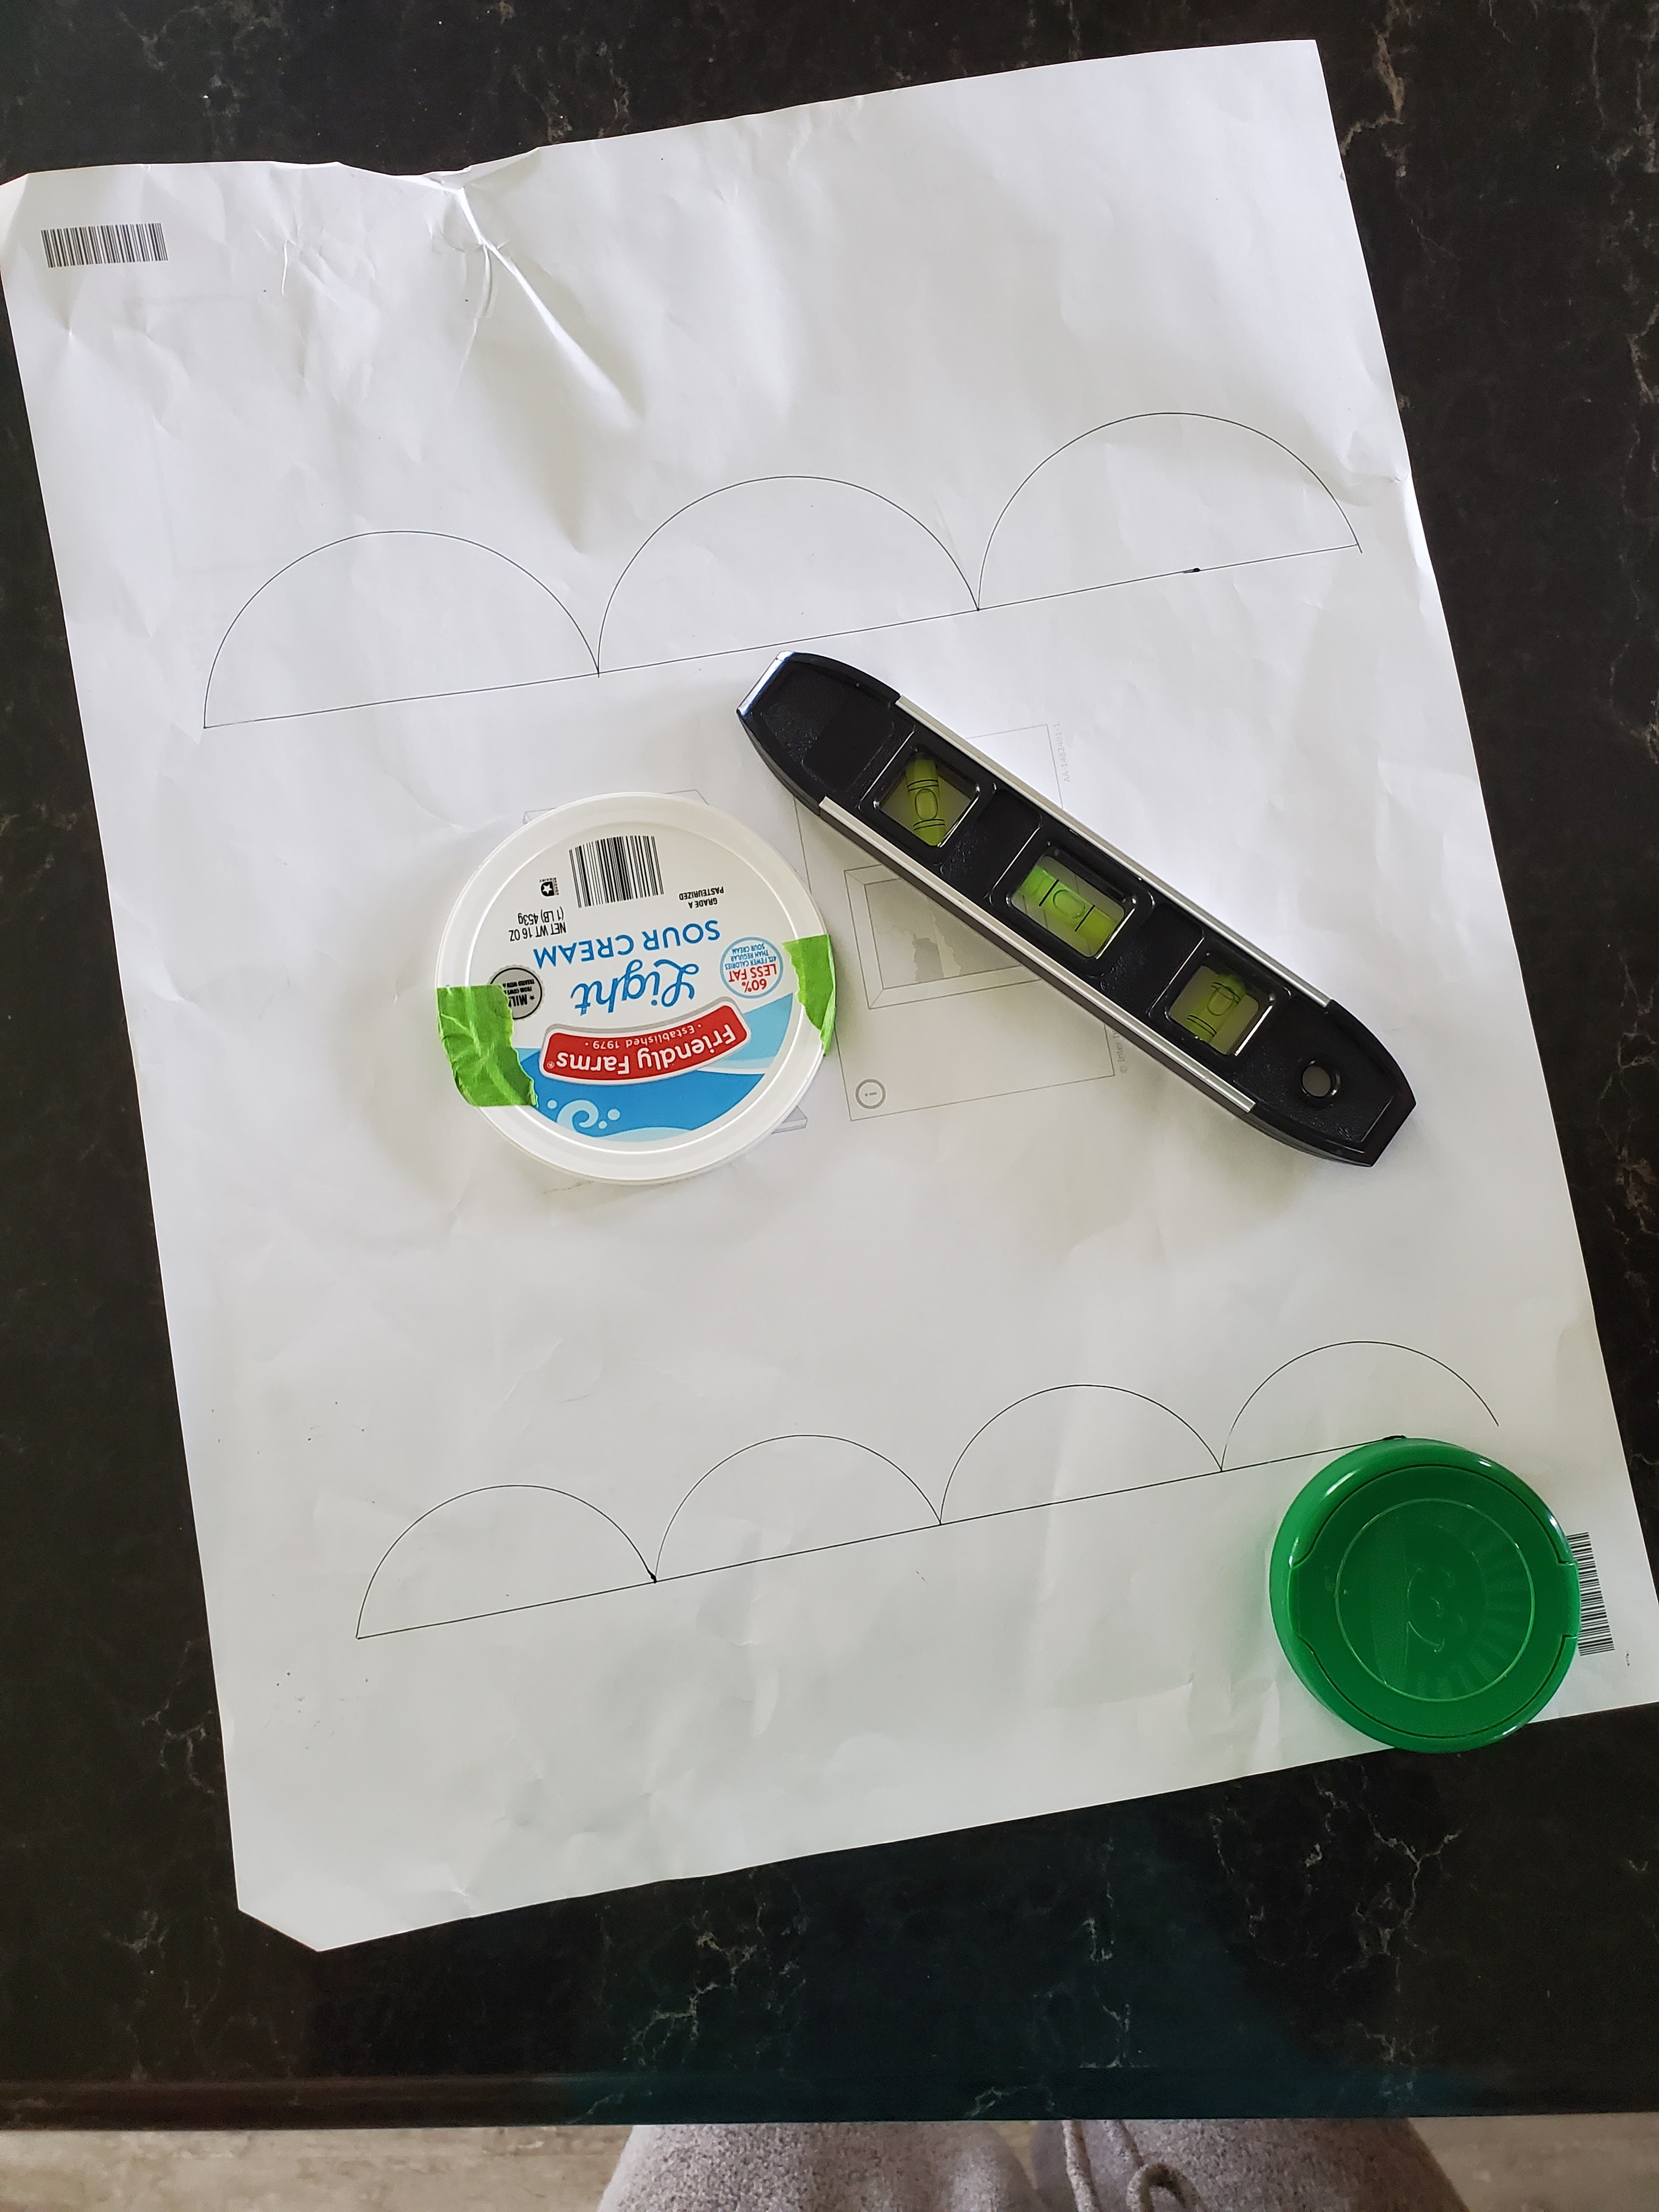
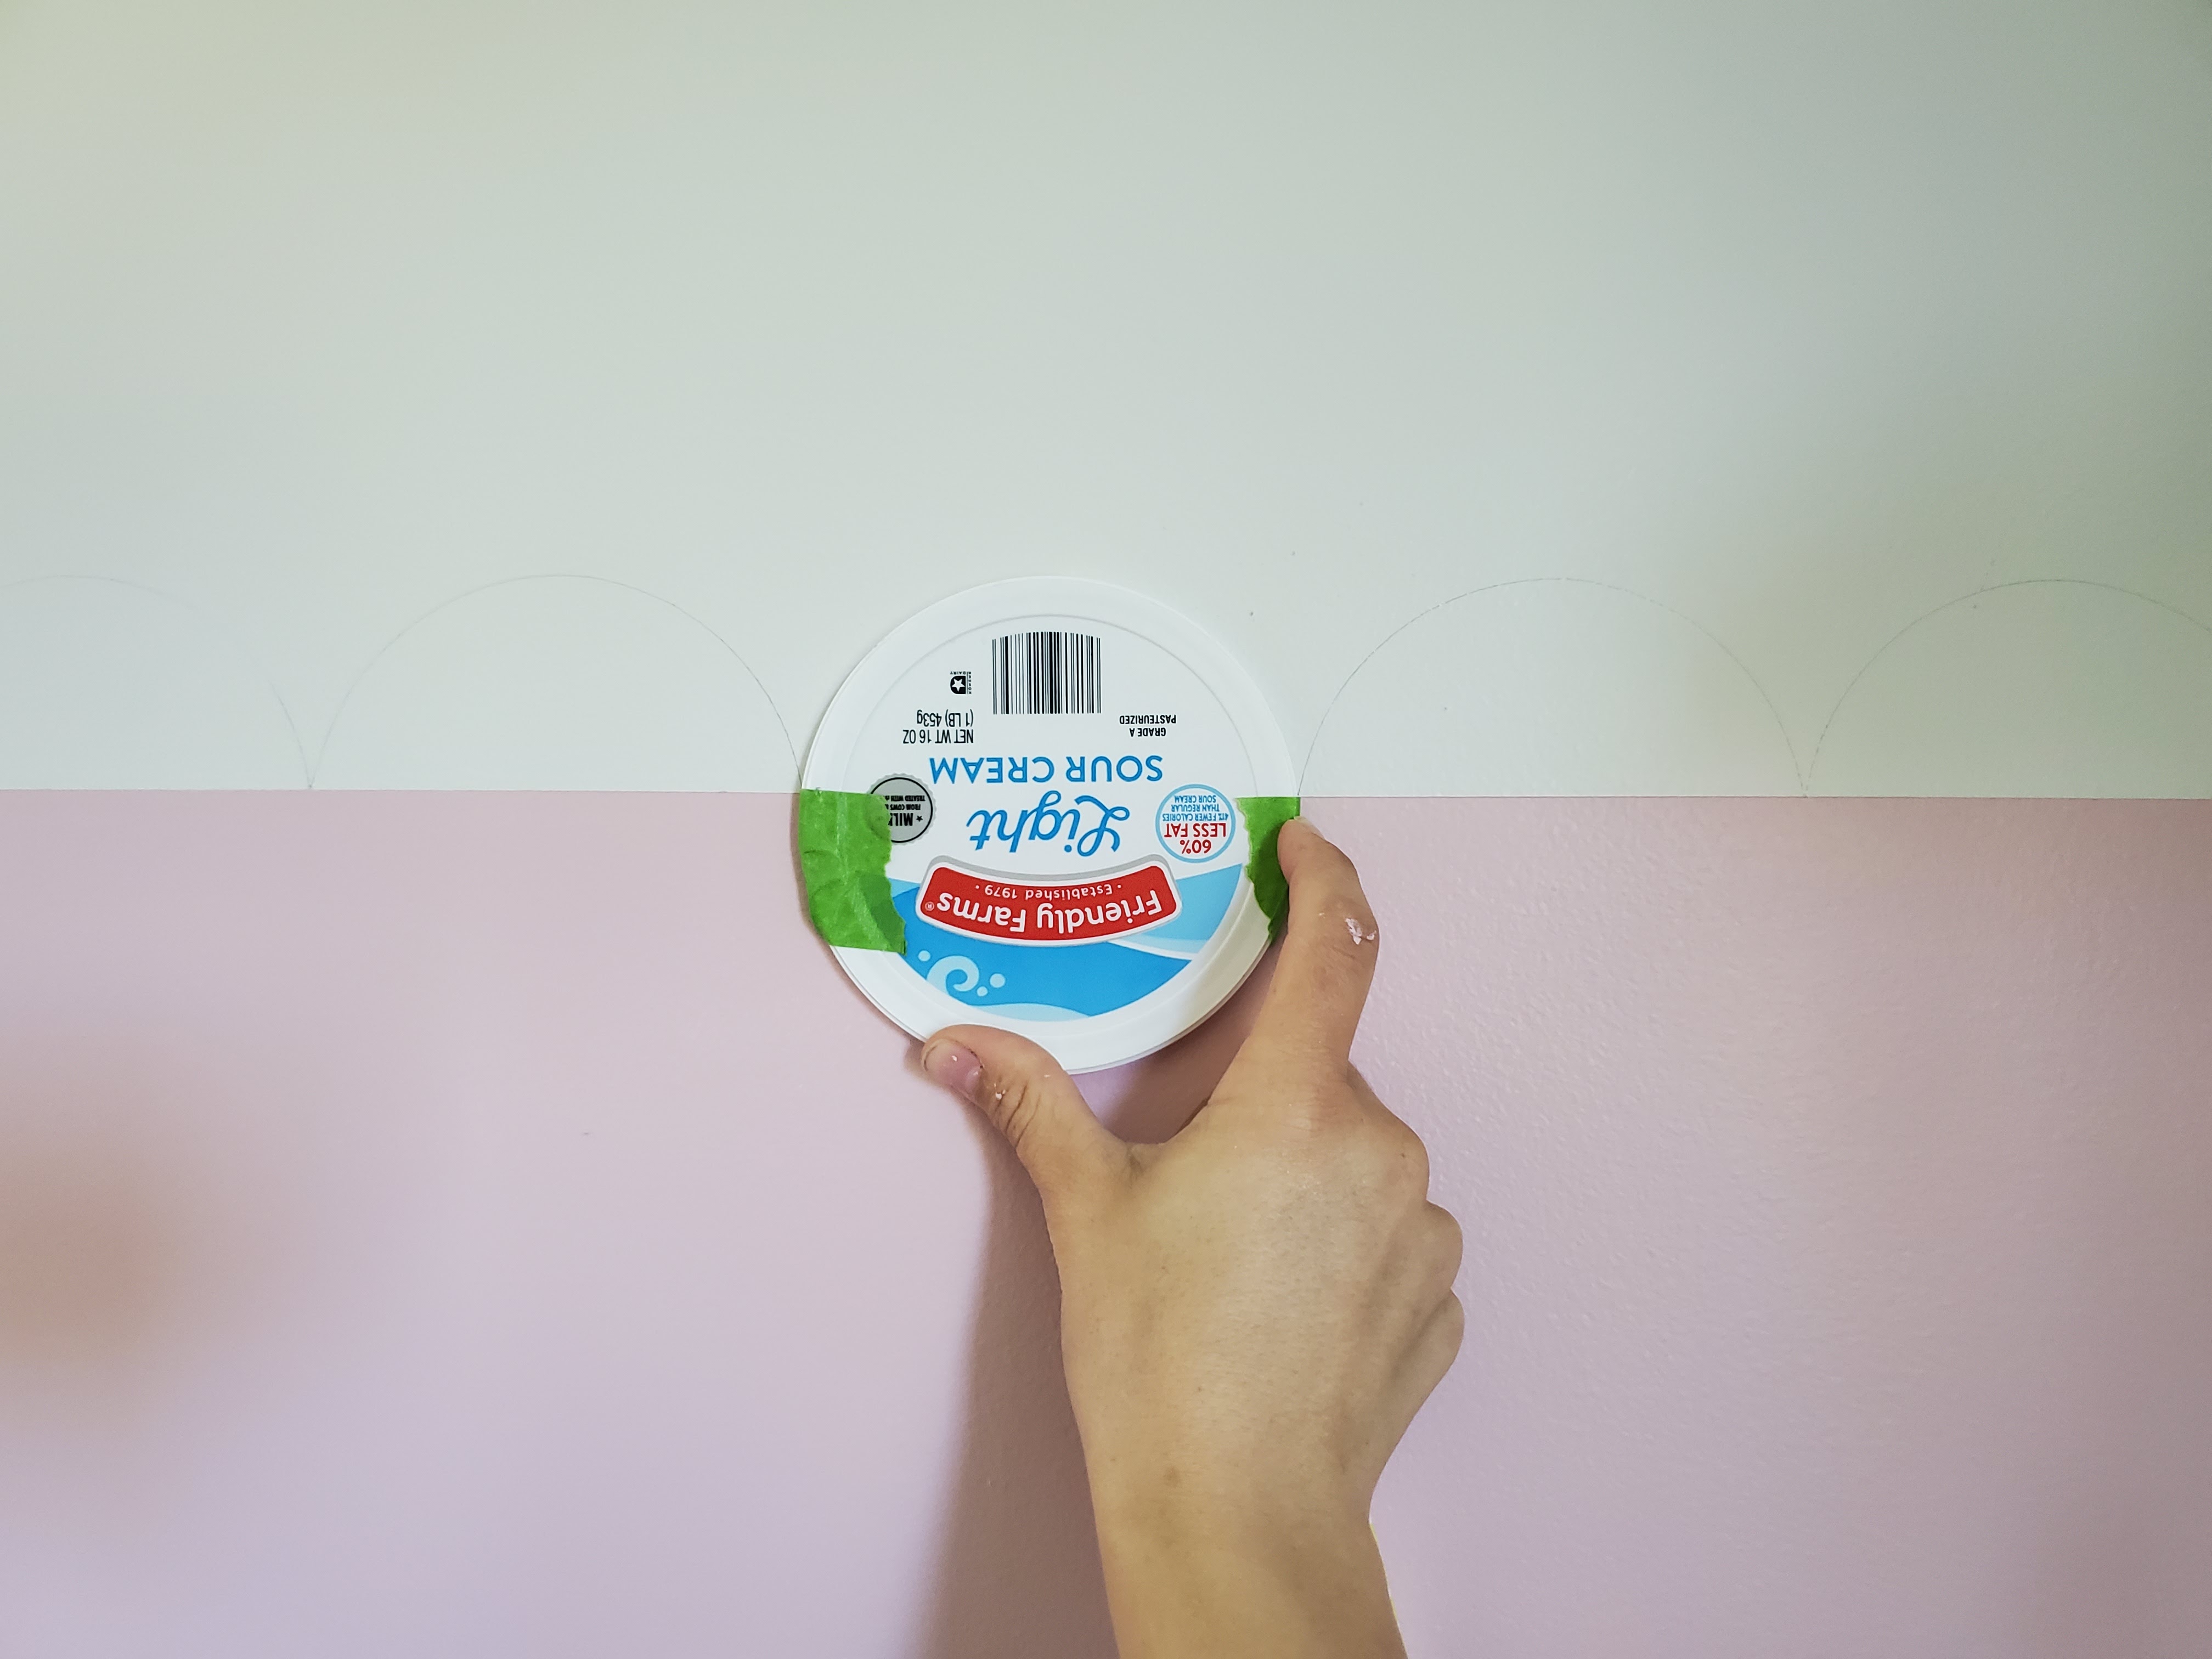
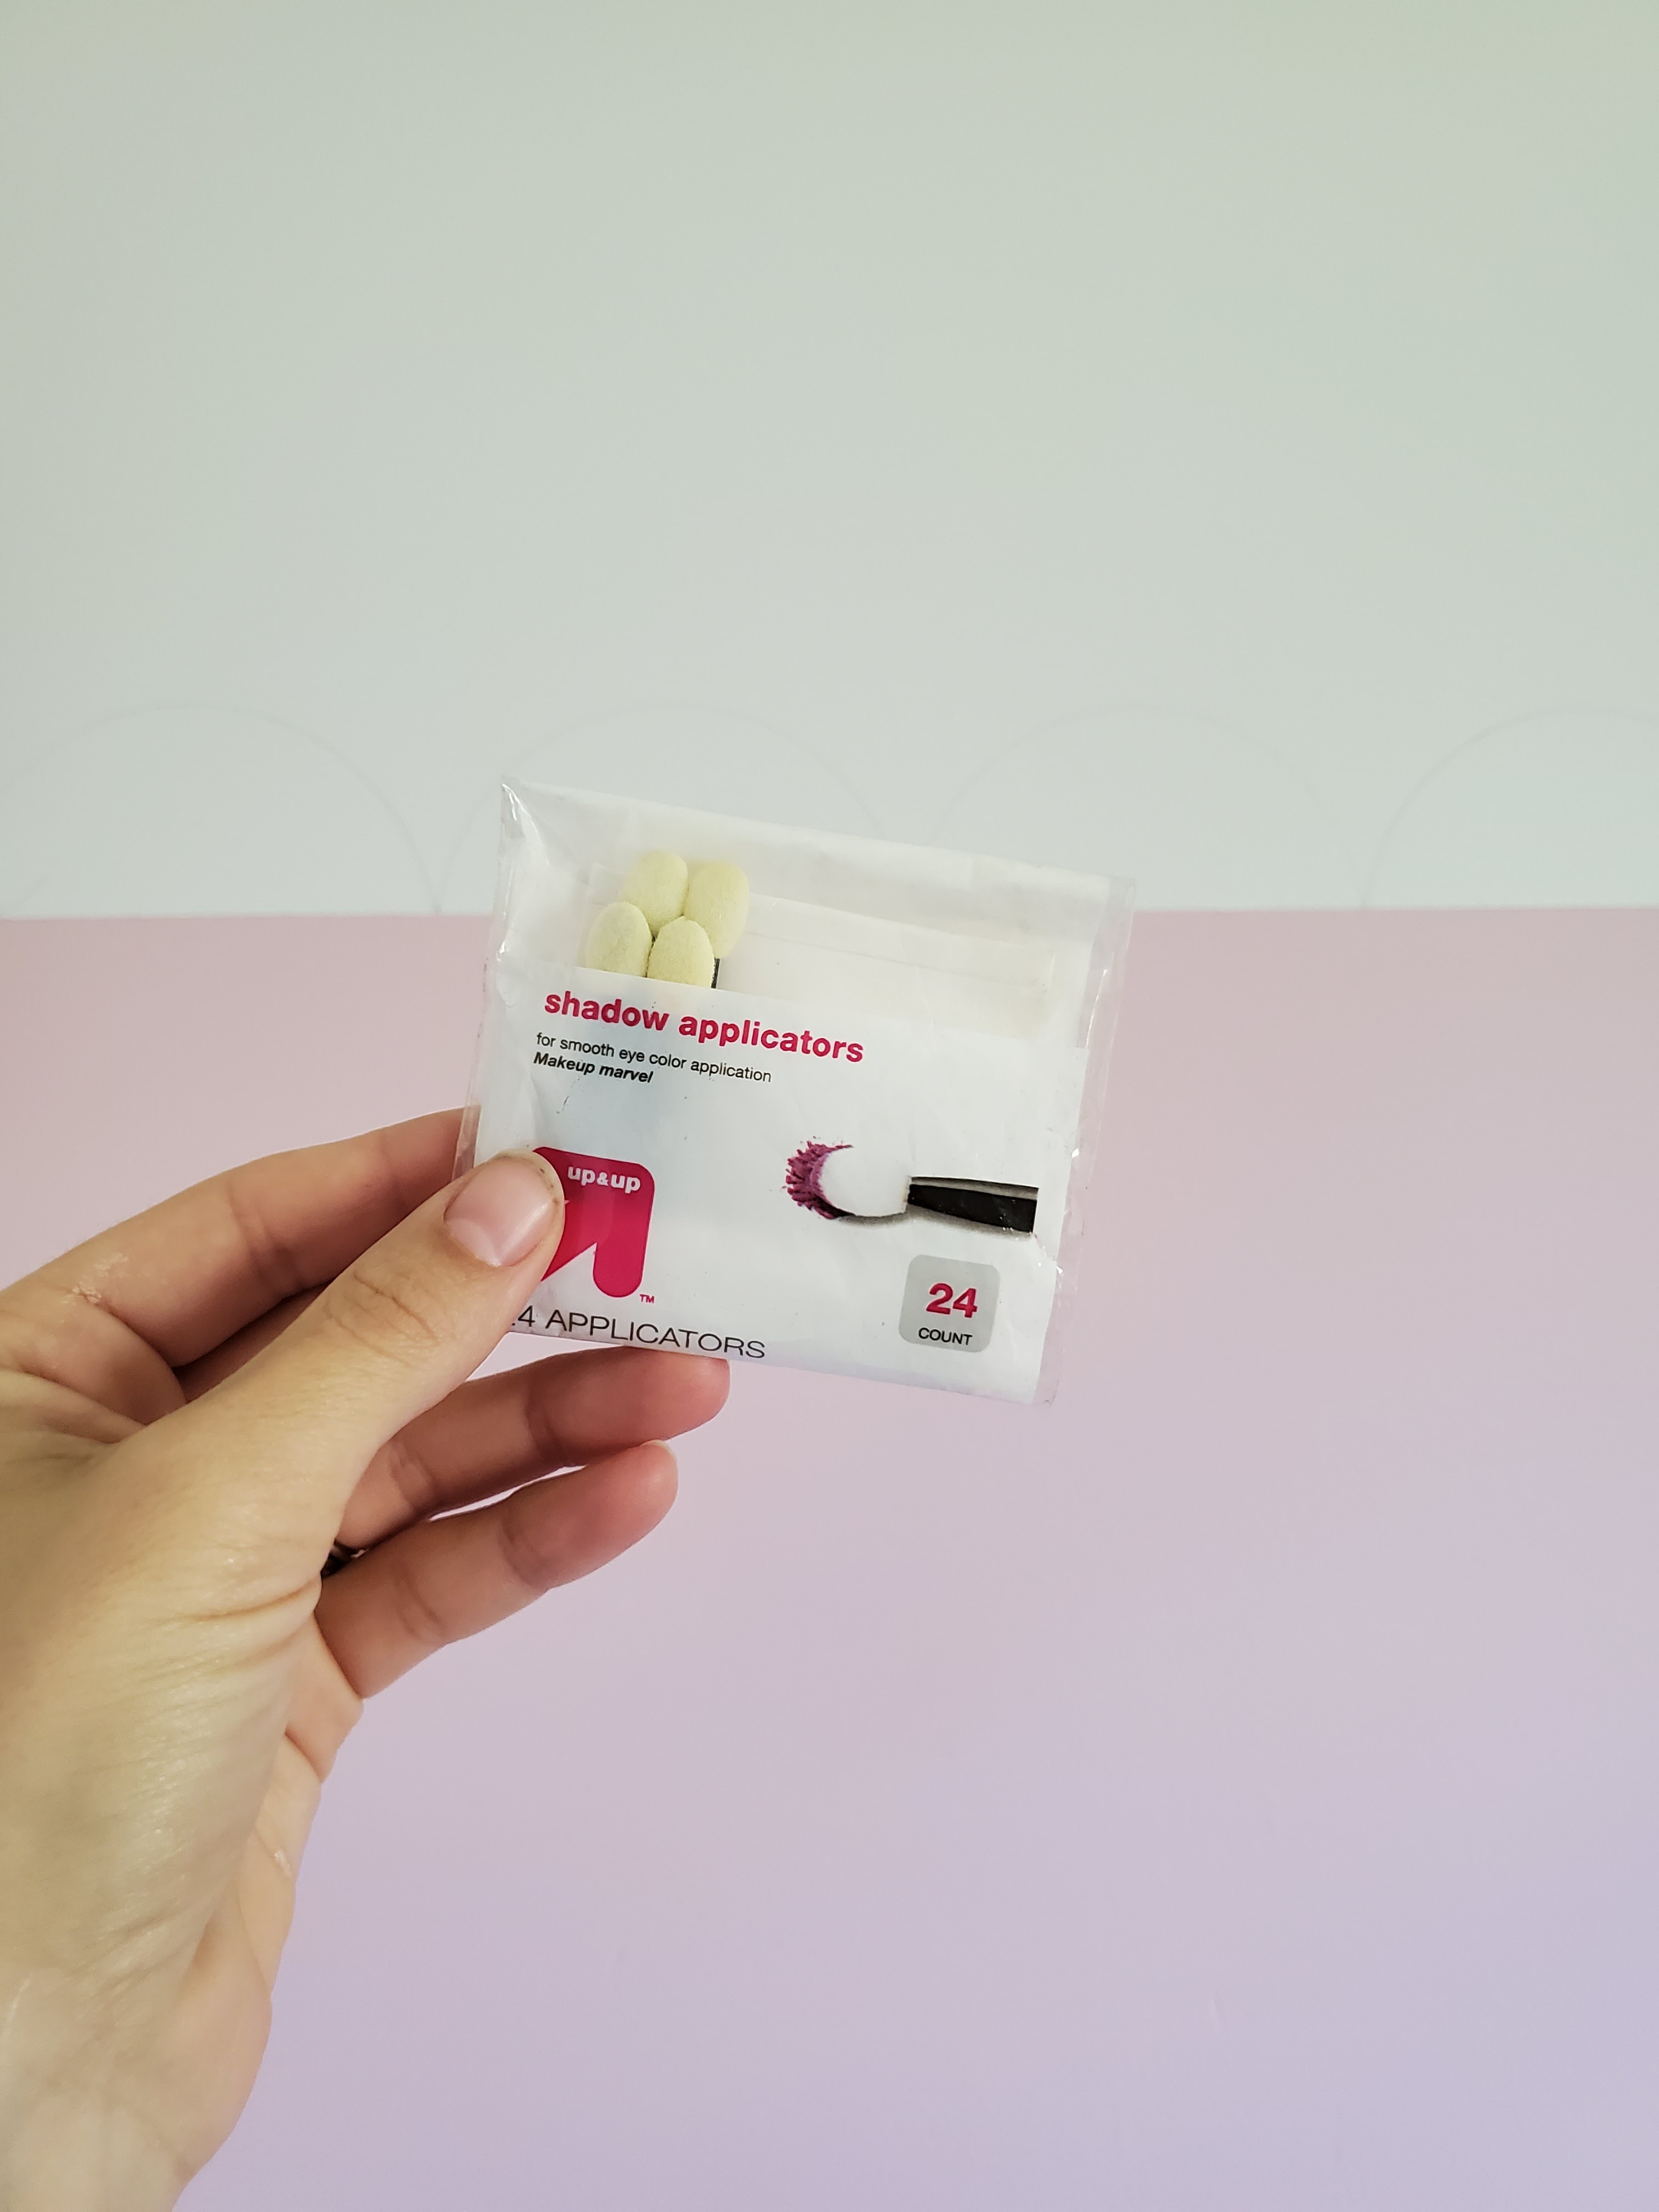
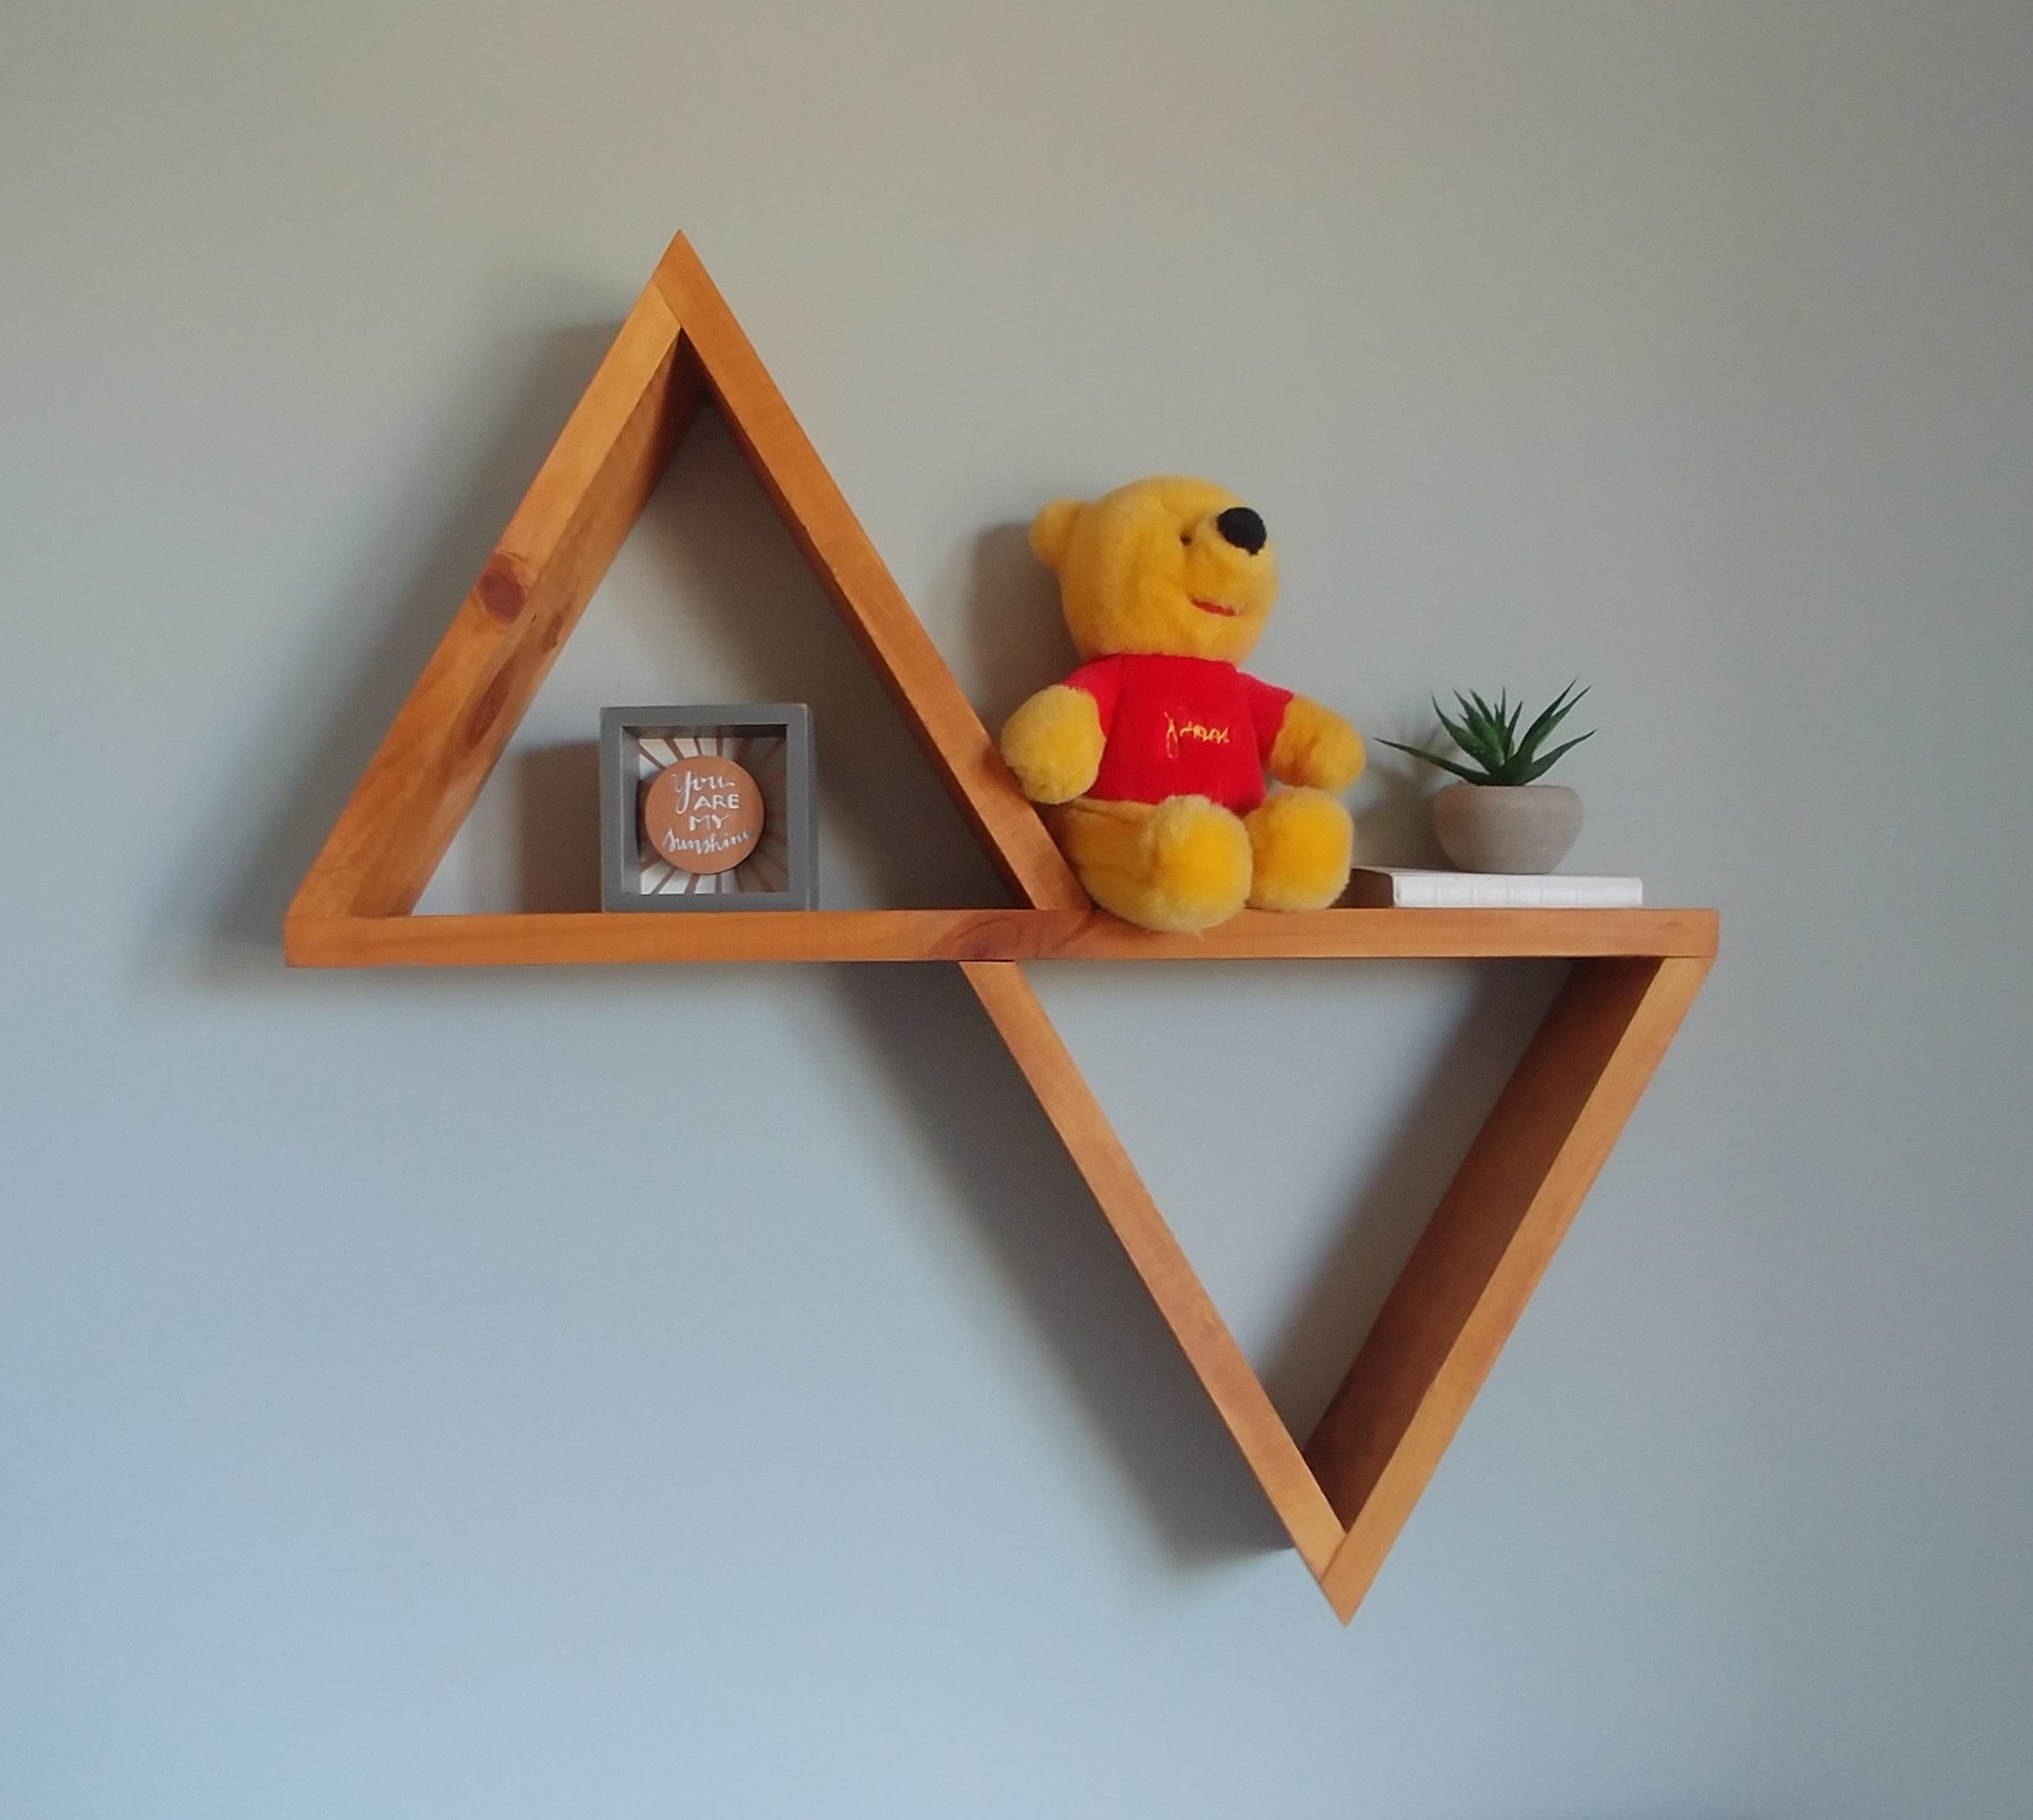
I enjoyed spending time on some of the little details throughout the room as well – repainting the little side table we thrifted a decade ago, hanging plaid blackout curtains high and wide, finding vintage brass wall planters on Etsy for a unique touch, filling a basket full of soft baby blankets. Throughout this room renovation, we’ve painted the window and updated trim, replaced the thin baseboards with a chunkier version, upgraded the old worn carpet with this soft greige, and installed a new matte black ceiling fan. I painted the doors and Justin re-installed them with new matte black hinges and handles. I painted the ceiling Sherwin Williams Shoji White and painted wooden outlet covers – it’s the little things that really finish off a room!

Now the only thing we need is one sweet baby boy to enjoy this room!

Sources

Wall Color: Sherwin Williams Evergreen Fog in Eggshell

Ceiling Color: Sherwin Williams Shoji White in Flat

Crib – no longer sold (similar here)

Crib Sheet

Cloud Mobile

Curtain Rod

Plaid Blackout Curtains

Faux String of Pearls

Diaper Pail

Changing Pad

Sound Machine

Black Oval Mirror

Ceiling Fan

Prints: Rainbow, Black and White Rabbits, Oak Tree

Gold Frame with Mat

Black Frame with Mat

Monitor

Door Hinges

Door Handles

Everything else is either vintage, thrifted, old, or was a DIY project!

A Scalloped Accent Wall for the Nursery

Today I have a fun project reveal to share! It was kind of a spur-of-the-moment project and got completed about 24 hours after I decided to do it – an accent wall in Vi’s nursery!

img_20200414_210142_577

I’ve been struggling with what to do in this room for a while now. Since we didn’t find out Vi’s gender during my pregnancy, we decided to keep the nursery simple by painting it white. We knew we could always add color later. Well, it’s later. She’s almost 8 months old and still has white walls, a white crib, white artwork, white sheets…it’s boring and sterile and doesn’t give off cozy feelings. I’ve been itching to update it for a while and would love to add wallpaper or a fun wall treatment, but there are just too many uncertainties with the room’s future to do a big project. We don’t know if we’ll have a third baby someday. If we do, and it’s a girl, the girls will move to LJ’s room since it’s bigger and he will move in here. So why put a ton of money into a room that could potentially need to be re-done in 2-3 years? But also…why keep a room white and boring for 2-3 years just because I don’t know the future?

After I took this picture of Vi in her nursery on Wednesday afternoon I realized something: I don’t know the future, but I know what’s happening right now. And right now, this is my baby girl’s room. I don’t want to invest in more permanent changes, but I could still make a big impact with a small cosmetic change that didn’t take much time or money. I’ve was inspired by the walls Bre painted in her daughter’s room, so I decided right then and there to just go for it and paint a cute scalloped accent wall!

Indiana’s current stay-at-orders call for people to only leave their homes for essential travel, so I was determined to complete this project using only the materials that I already had. I had about 2/3 quart of paint leftover from the dresser changing table I recently re-purposed for my sister in law, so I decided to use that (Sherwin Williams Fading Rose in Satin) for the accent wall. Truthfully, it’s not the shade or sheen I would have chosen had I been able to go to the store and pick something out. However, I liked it well enough and knowing it would just be something to tide the room over for a couple years (if it stays Vi’s room, I’d love to wallpaper!) made it an easy decision to say yes to.

Here’s one last look at where the room started:

20200415_144438

I wanted the painted section to cover roughly 2/3 of the wall. Since the room has 8 foot ceilings, I kept things nice and simple by marking 5 feet up the wall. Once I had marked it in a few places, I used a level to draw a thin, straight pencil line the length of the wall.

20200415_145355

I placed painter’s tape just above the marked line so that paint would cover it, and I used the level again to verify that the taped line was straight across. I also taped out the side walls and baseboard.

20200416_084901

We just painted the room 9 months ago, so the walls were in pretty good shape, but there were a few small dents that needed to be repaired. I used patching plaster and a joint knife to fill in the dents and let it dry overnight.

In the morning, I lightly ran a sanding block over the places I patched to make sure everything was smooth and ran a damp microfiber cloth over the wall to make sure it was clean and dust-free.

I had our pack n play and Slumperpod set up in our bedroom so Vi had a place to sleep during the day. As soon as I put her down for her morning nap, I turned on LJ’s favorite show (currently, Blippi on Amazon Prime) and got to work. I trimmed out the wall with a 2 inch angled paintbrush and then filled in with a roller. I rolled out a quick second coat after Vi’s nap and just let her play with a few toys in the nursery crib next to me for that <10 minute task.

20200416_113604

As you can see from the various shades of drying paint above, I pulled off the painter’s tape as soon as I finished the second coat. I find this is key to the tape coming off easily and not sticking extra hard to the wall under dried paint.

While both my kids were up and playing nearby, I worked on deciding what to use to trace my scallops. Get ready for some super technical instructions…

I used a ruler to draw two straight lines on the back of the large paper that came in an Ikea frame, and tested out two different plastic lids from our recycling bin to see what size scallop I liked best. Ha!

20200416_132116

I decided I liked the slightly bigger look, so the sour cream lid was the winner! I used a mini level and painter’s tape to mark where I wanted to line up the lid with the painted line on the wall.

I managed to get both my kids down for a dual nap after lunch and started tracing out the scallops, being careful to make sure to line up the tape marks with the painted line.

20200416_140135

It almost worked out perfectly, but the last one was just a little bit too big for the remaining space. I went back to my Ikea frame paper and cut out one of the scallops so I could bend it at the edge – I barely had to bend it but I’m glad I took the extra step to make sure the pattern was consistent.

20200416_140217

Ideally, I would have used a small stiff paint brush to paint over the outlines (something like this) but I didn’t have one so I improvised and used a sponge makeup applicator!

20200416_140254

This worked pretty well for tracing the scallops, but it was a very tedious process.

20200416_140621

Once the outlines were done, I went back to my 2 inch paint brush to fill in the rest. After getting two coats on, the wall was done!

20200417_083828

Even though it’s not the exact color I would’ve chosen on my own, it did coordinate well with the things I already had for the room, and I definitely think it made it much cozier.

20200417_09000220200417_084054


This also inspired me to finally have Justin hang a shelf that has just been propped against the wall for months. He made this triangle shelf several years ago and I think it brings warmth to the space.

20200417_093840

All in all, including the time it took me to gather materials, prep the wall, and paint, I would say this project took about 4 hours of active, hands-on work time. And the best part is – it cost me $0 since I exclusively used items I already had on hand.  Not bad for a spur-of-the-moment project!

20200417_085641-1

If there is one thing this project reminds me of, it’s don’t wait. Don’t wait years to know for sure exactly how a room might be used – rooms will always be evolving! Don’t wait until you have the exact perfect tools on hand – what you already have might do the job just fine! Don’t wait until you have a room perfect before you deem it worthy of sharing – celebrate the progress! There are still things I want to do here. We’ll eventually need to replace the carpet and trim. I’m waiting on a fun piece of artwork from my sister’s studio to put up a gallery wall next to the closet. The room will keep changing as Vi grows (or as our family changes) so I’m going to continue to just celebrate each step we take in making our house a home. I fall more and more in love with it in each change we make!

20200415_14443820200417_090501-3

Welcome to your new room, sweet Vi!

A Simplified Nursery

Good morning!

Now that I’m 16 weeks along with baby #2, I’ve begun to start thinking about how our living arrangement will soon change. We live in a 3 bedroom house and use the third bedroom as a guest room since we frequently host out of town guests. Right now I’m taking a “wait and see what works best for baby #2” approach. Perhaps he or she will need to stay in our bedroom longer (LJ transitioned to his crib at six weeks) or maybe we’ll figure out a way to have a combo guest room/nursery situation and just move baby back with us when we actually have guests. Or maybe we’ll transition LJ into the current guest room and move baby into his nursery. We’ll see what works best when the time comes!

Since I’m not planning out a nursery this go-round, I thought it would be fun today to share a peek into LJ’s nursery and how we planned and prepared for his arrival (before we knew his gender). Our goal was to create a sweet and simple (and inexpensive) little bedroom for him. I don’t have an exact number, but when I calculated up approximately what our nursery cost us, it was around $400 (some things we already had and others, like our crib mattress, diaper pail, changing pad, etc, were gifted to us at our baby shower and not counted towards that total).

Before I begin I want to clearly state: if you are all about trendy, matching furniture and decide to spend $2000 on a brand new crib/dresser/nightstand set from Pottery Barn, or you splurge on the gorgeous $1600 Tufted Wingback Upholstered Swivel Glider (and the matching $700 ottoman) from Restoration Hardware, OR you don’t have space or money for a nursery and keep your baby in a pack and play in your room (because when it really comes down to it, all babies need in a bedroom is a safe place to sleep), that’s your choice and you will get 0% judgement from meTruly. You do you, mama. You know your preferences, you know your finances. The decision is for you and your partner to make. Justin and I agreed that babies cost a lot after they are born (clothes, diapers, wipes, food) and we didn’t want to spend tons of money on stuff before the baby was even here but we did want to create a space for our baby in his or her own room. For us personally, we chose to find ways to keep the nursery simple and inexpensive. That’s what worked best for us, and so I’m sharing how we made that happen. If you choose to do things differently, you do you.

Creating our Simplified Nursery

We re-used or re-purposed a lot of what we already had.

When we registered for LJ, Justin and I both really loved a glider that we tested at Target. It was our style and the color went perfectly with our color scheme, but it was $400. We knew that there was a very small probability that it would be bought for us and we had other items in the pricier range that we needed to prioritize (like a stroller and car seat). So we said no to the glider and instead bought a $70 slipcover to go over an old, but still very comfy and functional, tan recliner that we inherited for free from Justin’s grandparents several years ago. It’s maybe not *exactly* the look we would have chosen, but for a $330 savings, we could absolutely live with it. 😉 I do want to say that while I’m so glad we could find an inexpensive alternative, I am thankful we had a comfortable chair in the nursery. We have spent a LOT of hours in this chair breastfeeding, rocking, reading books, comforting in the middle of the night, even sleeping on the nights LJ would.not.sleep. without being held – I strongly recommend a comfy place to sit in your baby’s room!

LJ Nursery2

We reused an old crate that Justin’s mom gave us several years ago. When we were first married, we needed a TV stand so she gave us this crate she had in storage. At the time all we did was sand the rough edges and stain it. We decided to use it as a combo bench/bookshelf/toy storage/nightstand in the nursery and I actually love how it looks there!

LJ Nursery3

My favorite re-vamped piece was this mid-century dresser we got off Craigslist a couple years ago for $30. We painted everything except the legs (I believe we used Slate Tile from Sherwin Williams and we just needed a quart of their Color to Go sample) and I spray painted the existing knobs gold and then roughed them up a little with sandpaper to look antiqued a bit. I absolutely love the way it turned out and the paint+spray paint supplies cost less than $15 total.

LJ Nursery9.jpg

We got crafty (or enlisted crafty people)

Justin made this shelf for me a few years ago based on a picture I found on Pinterest. He used reclaimed wood and it was the perfect fit for above the changing table dresser!

LJ Nursery6

My sister is super creative and talented so she made most of our nursery artwork (the Peter Rabbit print was a farmer’s market find but the rest are my sister’s handiwork).

LJ Nursery7

I was able to snag a few pillows and fabric from a JoAnn’s that was going out of business so I made some simple pillowcases to spruce up the little bench area for a very low cost.

Pillows.jpg

We prioritized where to spend money

There is SO. MUCH. INFORMATION. out there about baby gear. It’s overwhelming! Before registering, we read the latest version of Baby Bargains and this was one of our best decisions. This organization does use affiliate links but does not take money from the brands it reviews or participate in partnerships or sponsors or anything like that. I felt like we got good information from the book and it really helped Justin and I decide what items we wanted to splurge on (car seat, stroller) and what we could feel comfortable with a less expensive option (like a crib). We went with a simple Ikea crib for $100 (I couldn’t find our exact one but this one is similar) and love that we didn’t have to spend a ton of energy (or money) on the decision.

LJ Nursery 1

We kept a super simple “theme”

Again, if you are all about a coordinated nursery and dream of a woodland/nautical/Parisian/etc room for your baby, that is totally your choice.! Since we re-purposed many items and wanted a gender-neutral space, it was easier for us to select individual items that fit a general vibe instead of buy themed items. We chose a gender-neutral color palette (white, gray, and shades of blue that didn’t feel like too “boy”) and selected fabrics, paint colors, and decorative items that worked within that palette. I found I preferred simple, whimsical items so I picked up little things here and there that fit that vibe. I mixed in plants for a splash of color and included some items from Justin and my childhood for a touch of nostalgia (on the triangle shelf sits his Winnie the Pooh and my bible from my dedication at church). I think think the result was a simple, sweet space that we were really pleased with.

LJ Nursery4

I’m really happy with how this space turned out and have really enjoyed spending time here over the past 15 months. Talking about all this nursery prep is sure getting me excited for another baby to snuggle in a few more months! What are your nursery must-haves?

And in case you’re interested, here’s a general source list of where I picked things up. I included links if I could find the exact or similar item (I make $0 off this, just sharing what has worked for me!)

Crib: Ikea (similar here and here)

Crib mattress: Amazon

Art above crib: Hobby Lobby

Basket with blankets: TJ Maxx (similar here)

Lazyboy Slipcover: Target

Salt lamp: Amazon

Sound machine: Target

Light-blocking curtains: Target

Small iron basket: Hobby Lobby (similar here)

Fabric basket: Ikea

Hanging Shelf w/brackets: World Market

Letterboard: Walmart

Cement planter: Magnolia (similar here)

Basket holding plant: Ikea

Fake succulent: TJ Maxx (similar here)

Diaper Pail: Playtex

Diaper basket: Target

Monitor: VTech

Changing pad: Munchkin

Changing pad cover: Aden + Anais

Mobile: Baby Jives & Co

Wall paint color: Magnetic Gray

Trim Color: Alabaster