
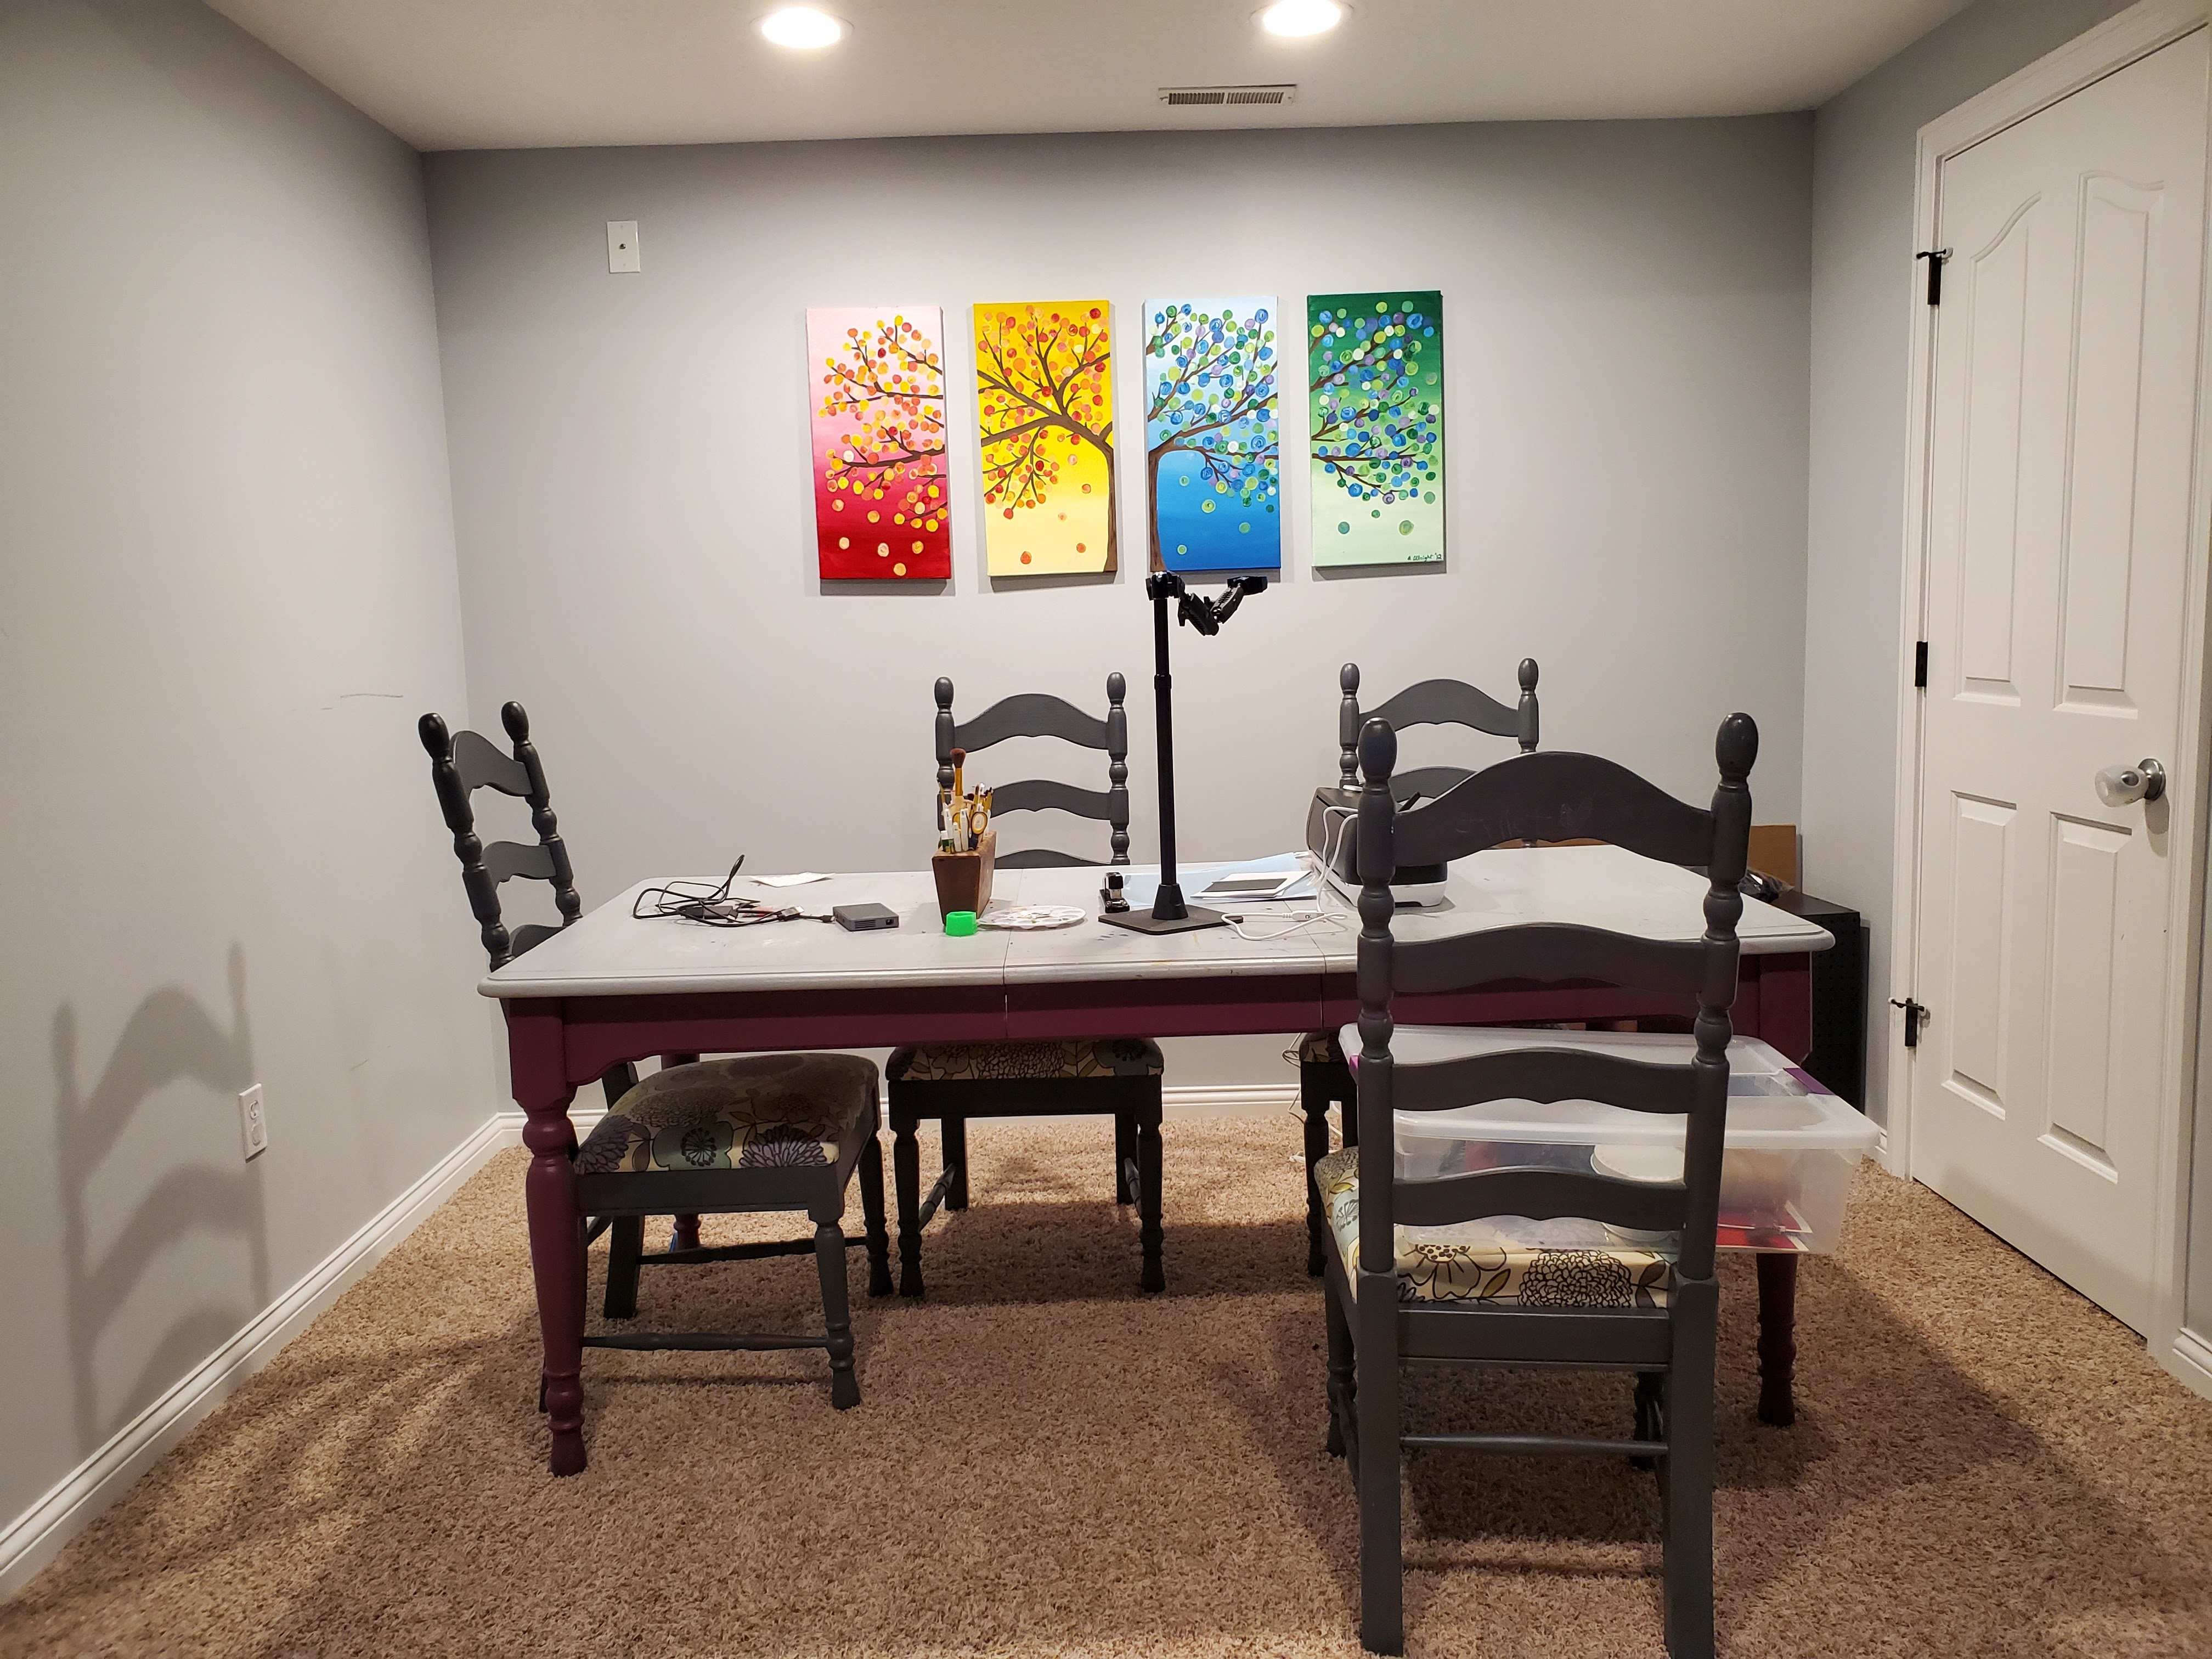
If you follow me on Instagram, you know that Justin and I have been helping our friend Amber with a very unique project: a cookie decorating space! We finally wrapped up the project yesterday and we are all thrilled with how it turned out!

Amber has a cookie business that she runs out of her house and as her business has grown, she has outgrown the ability to comfortably bake and decorate in her kitchen. She reached out to me a couple months ago for some help coming up with a layout in the little nook next to her kitchen that housed a table and chairs. Our goal was to create a large workspace for decorating cookies and also provide ample storage for all her decorating supplies.
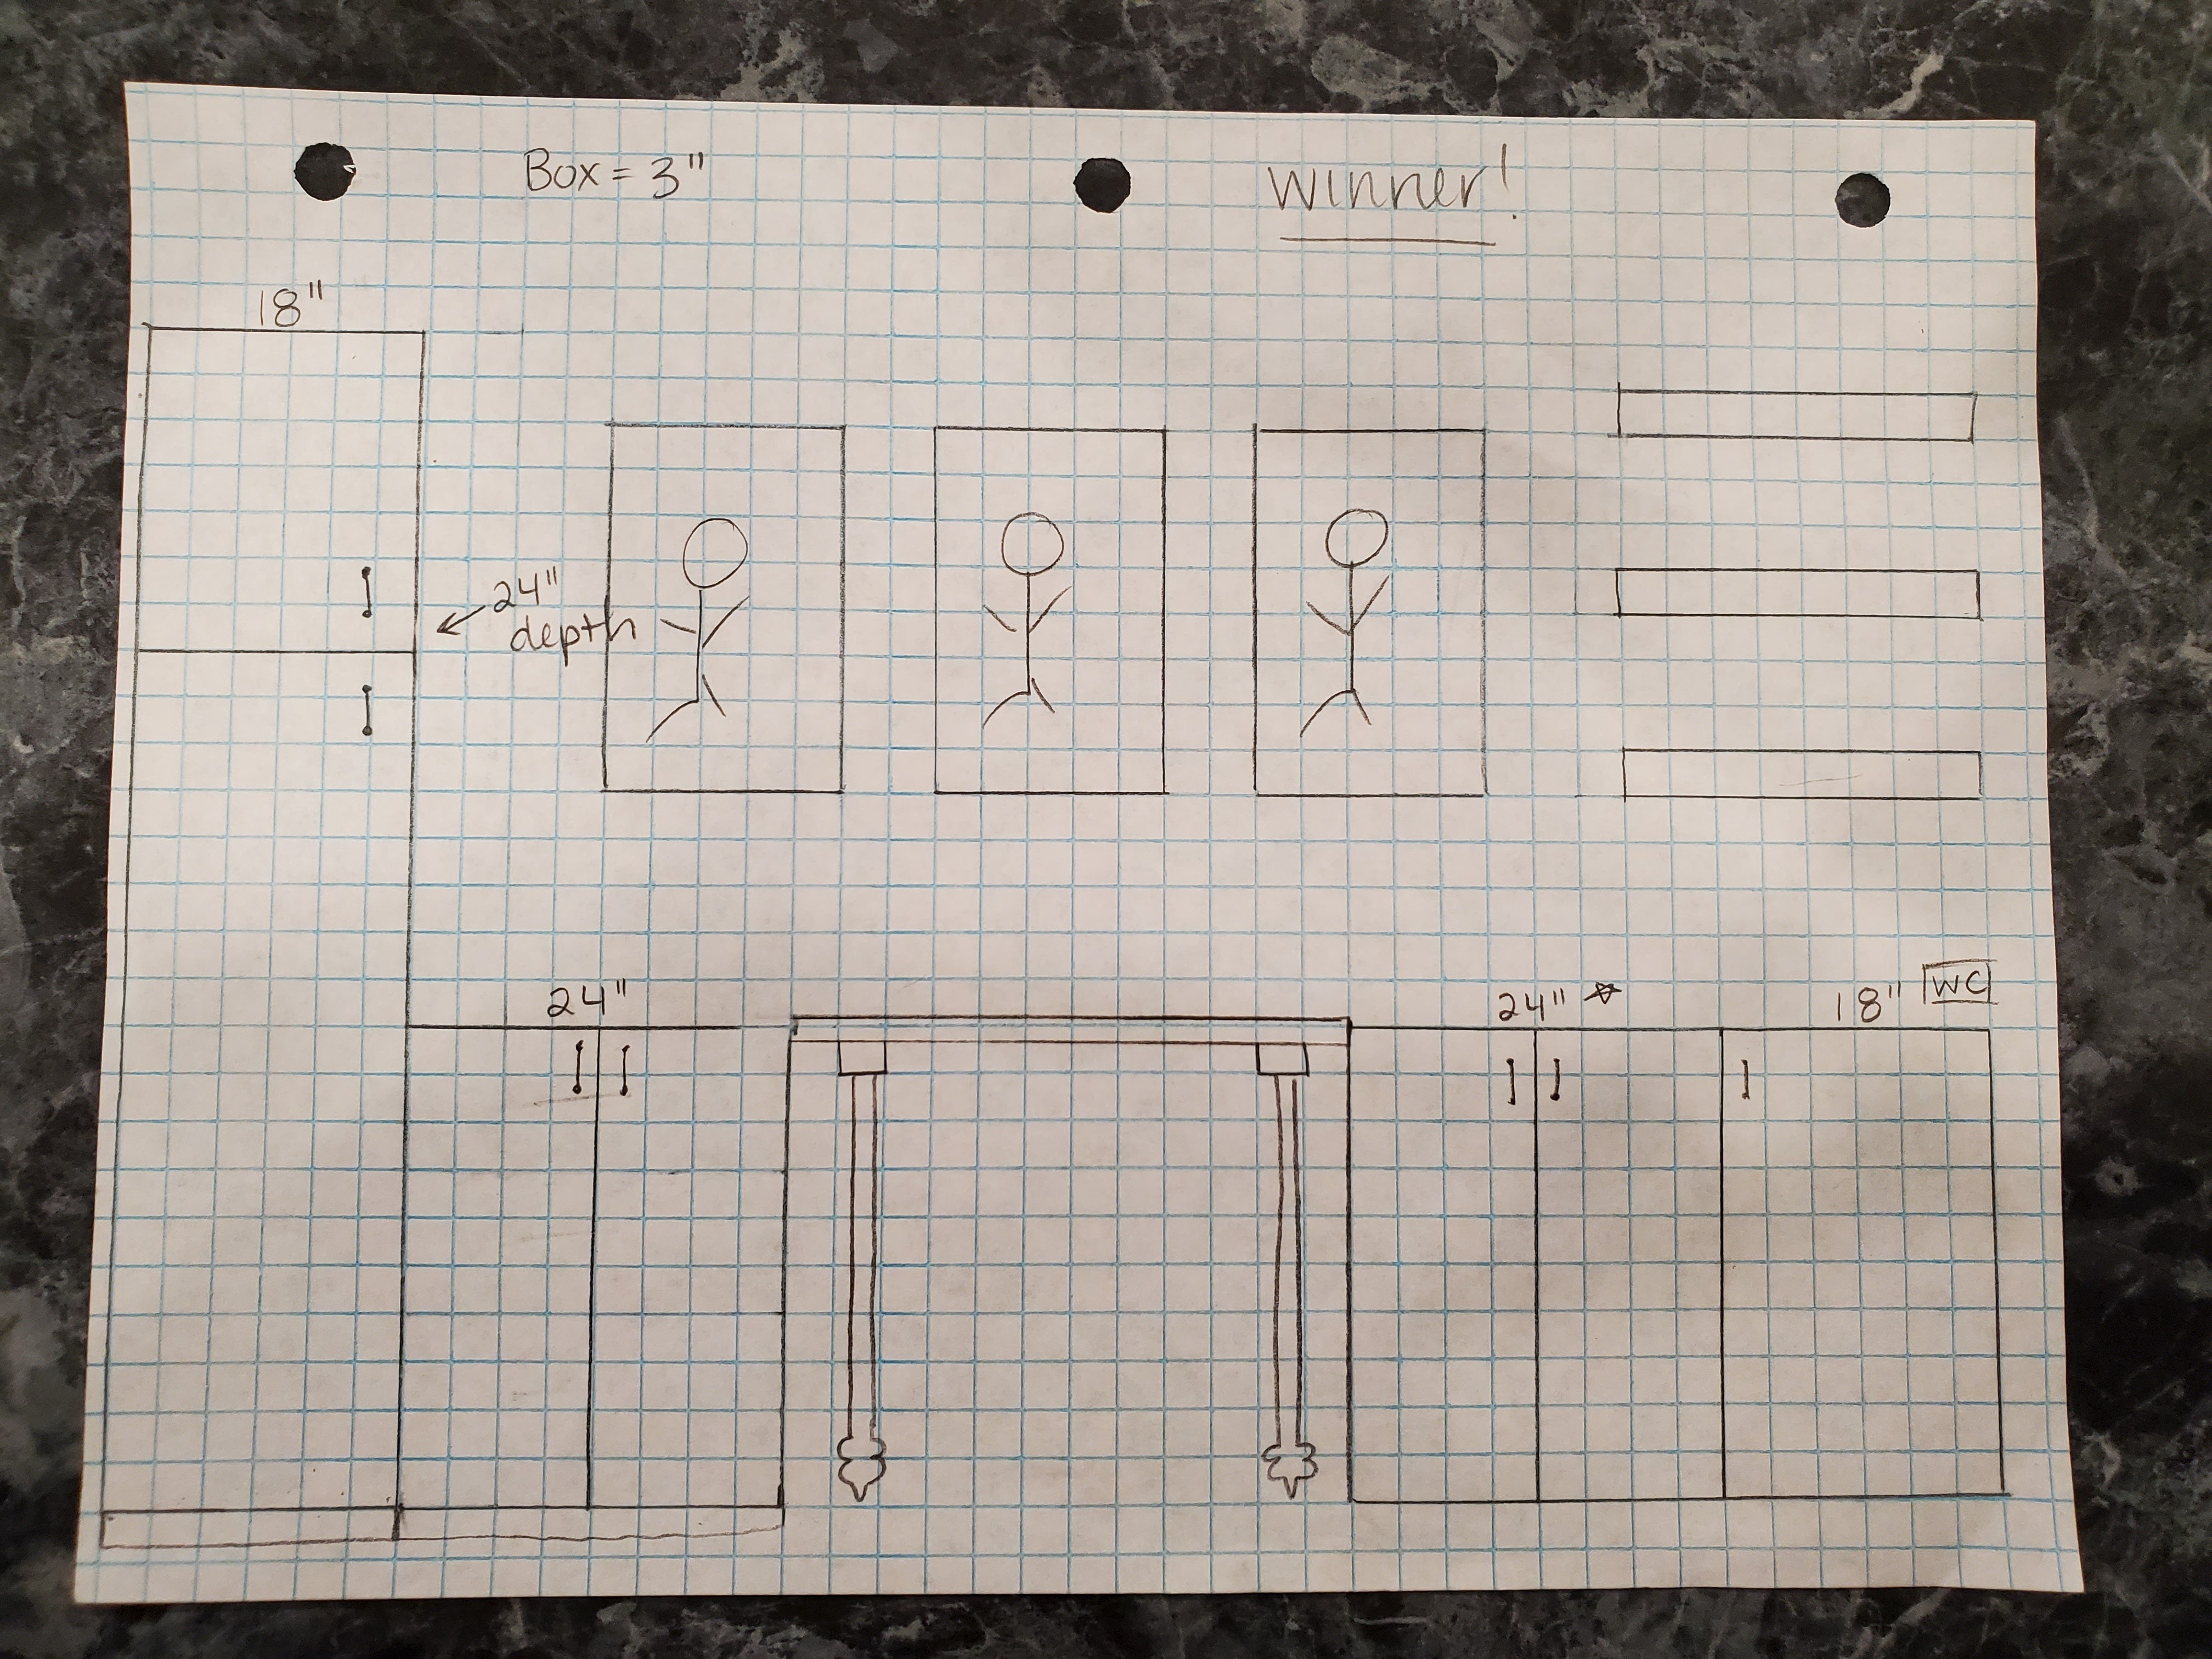
She knew she wanted to use Ikea cabinets and after talking through potential layouts, we settled on using the back wall for storage and with a perpendicular counter to maximize workspace for decorating. I drew up three different options for storage layout and while we ended up having to veer a little from the plan because some cabinets weren’t in stock, here’s what we settled on:
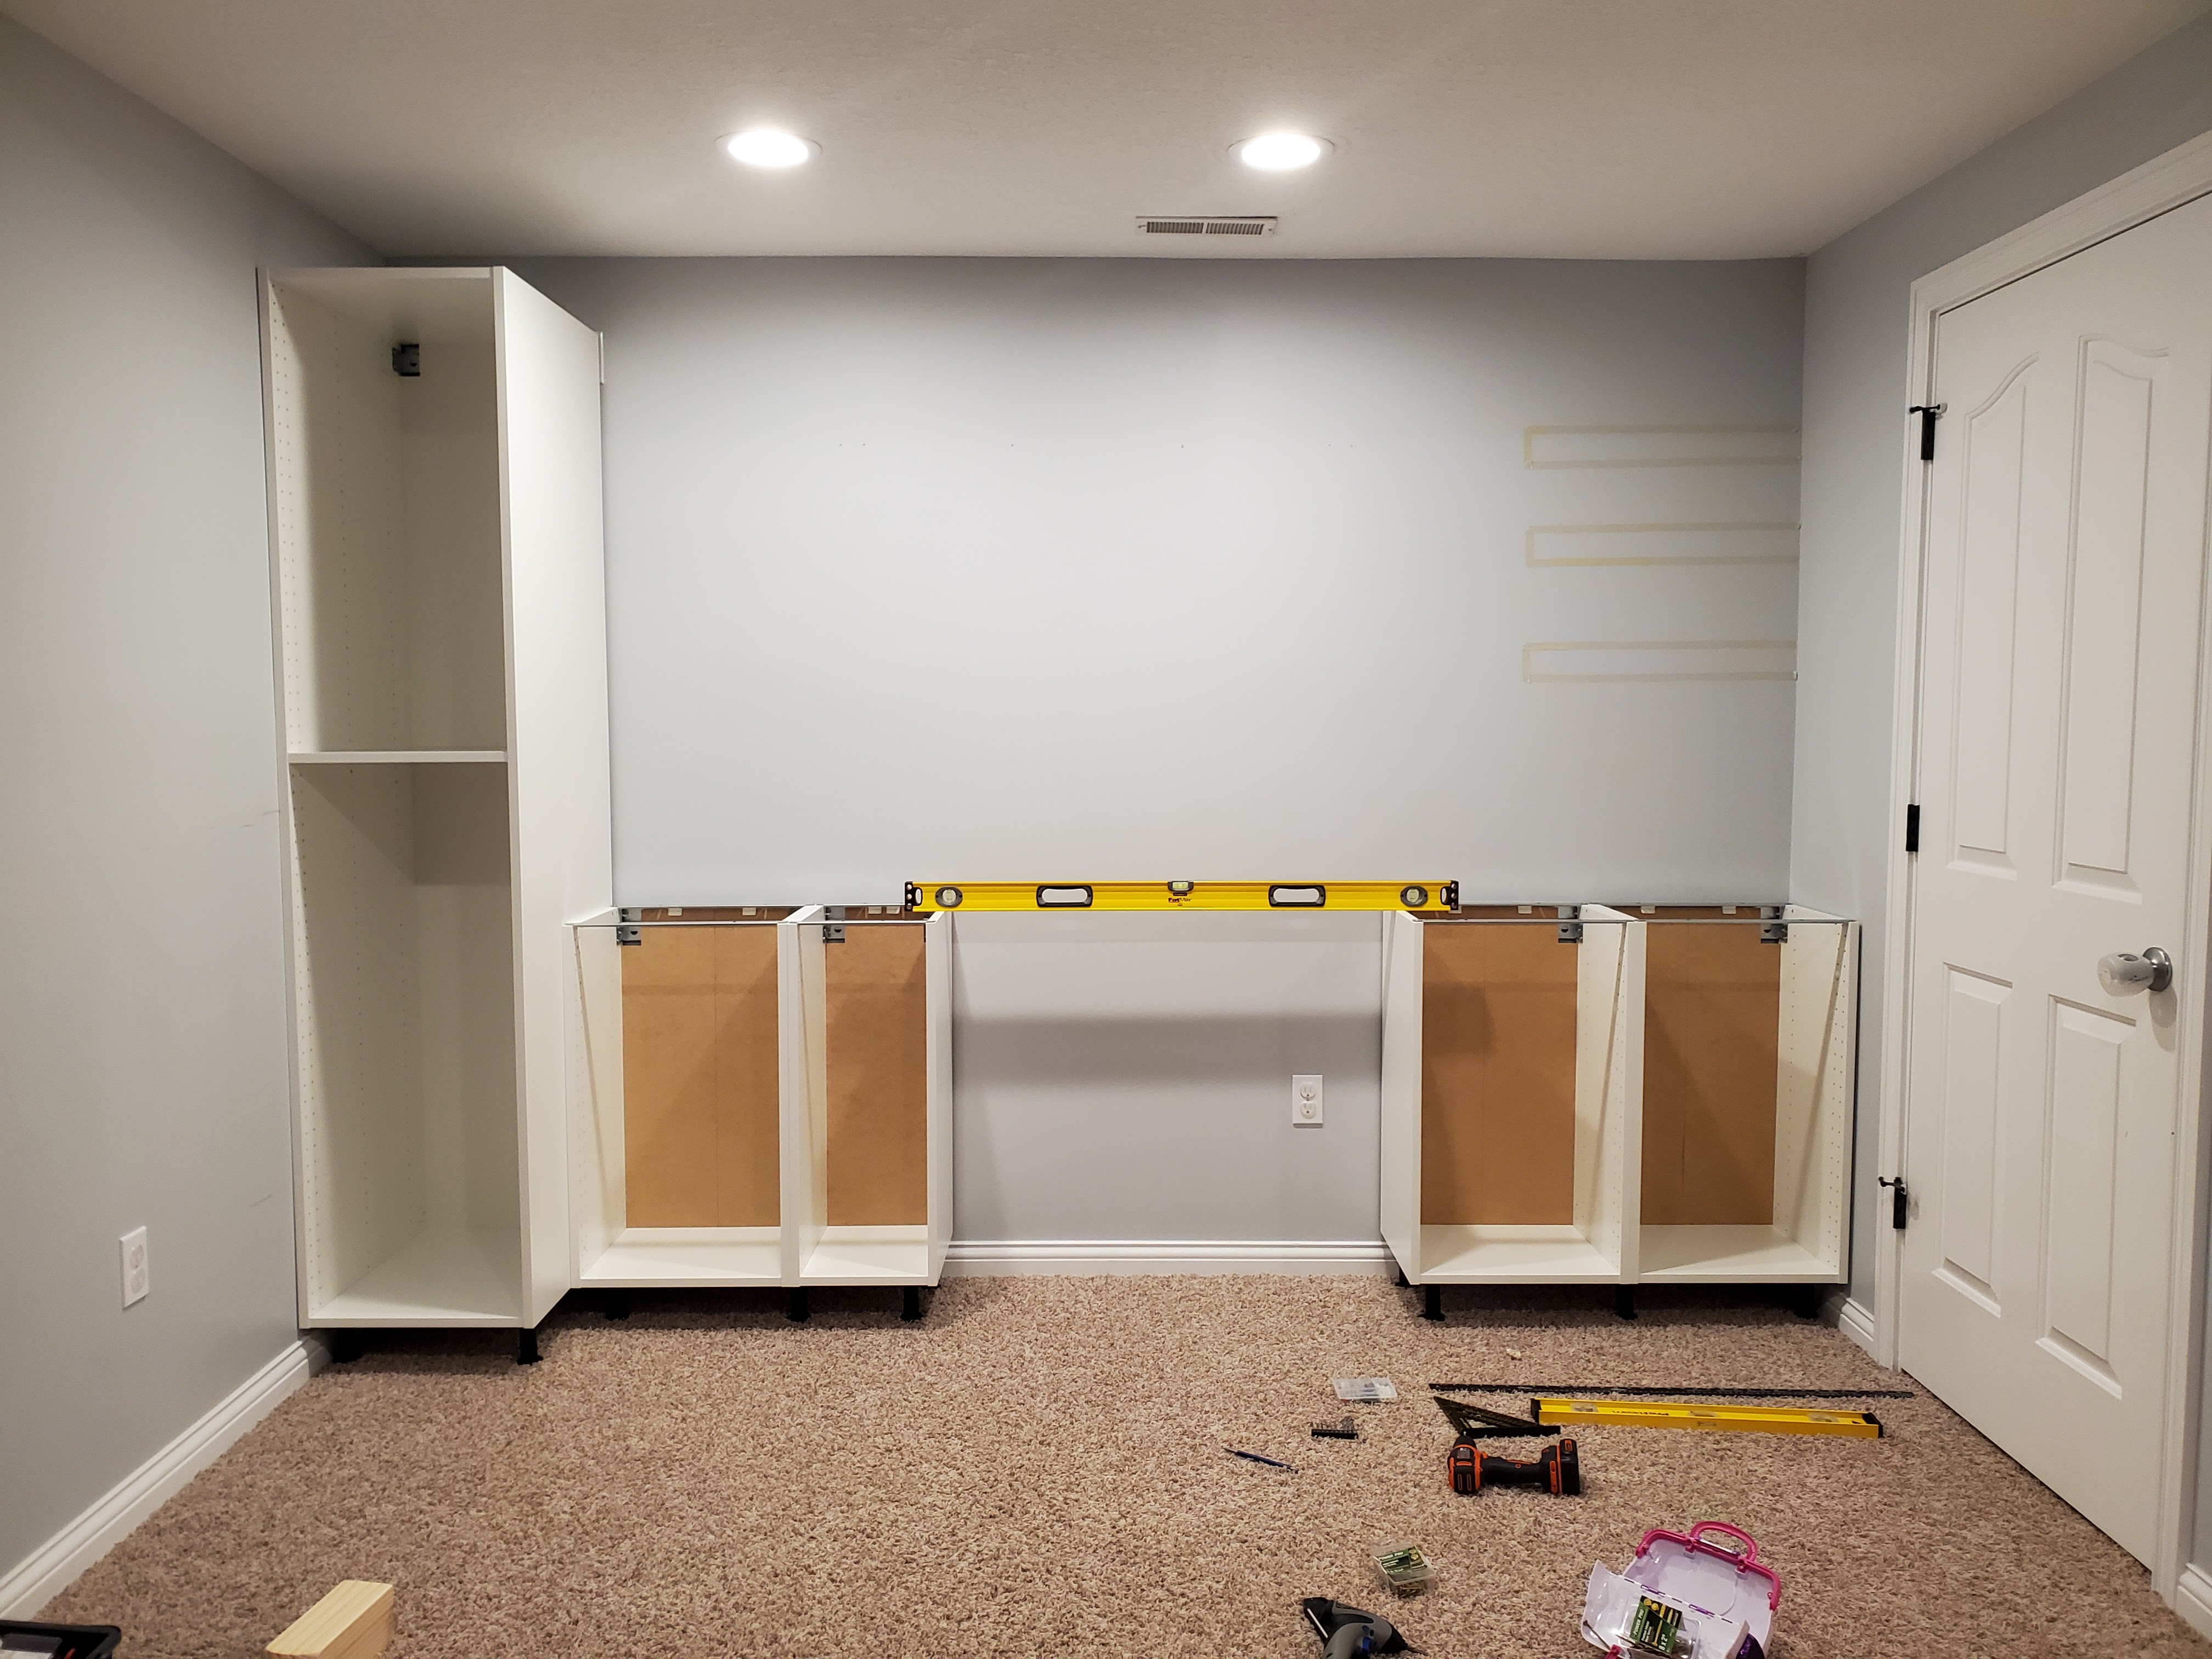
I suggested using Ikea Sektion because that’s what I was familiar with from using them in our office renovation. The process of cabinet assembly and installation was very similar to our office cabinets. One extra challenge with this project was the carpet, which is softer and has more give than a solid floor and had to factor into things like where to install the cabinet suspension rail.

Another challenge was the fact that we planned to put a table in the middle of the cabinets – it made it a little trickier to ensure the cabinets were level with one another all the way across the wall, but Justin nailed it!
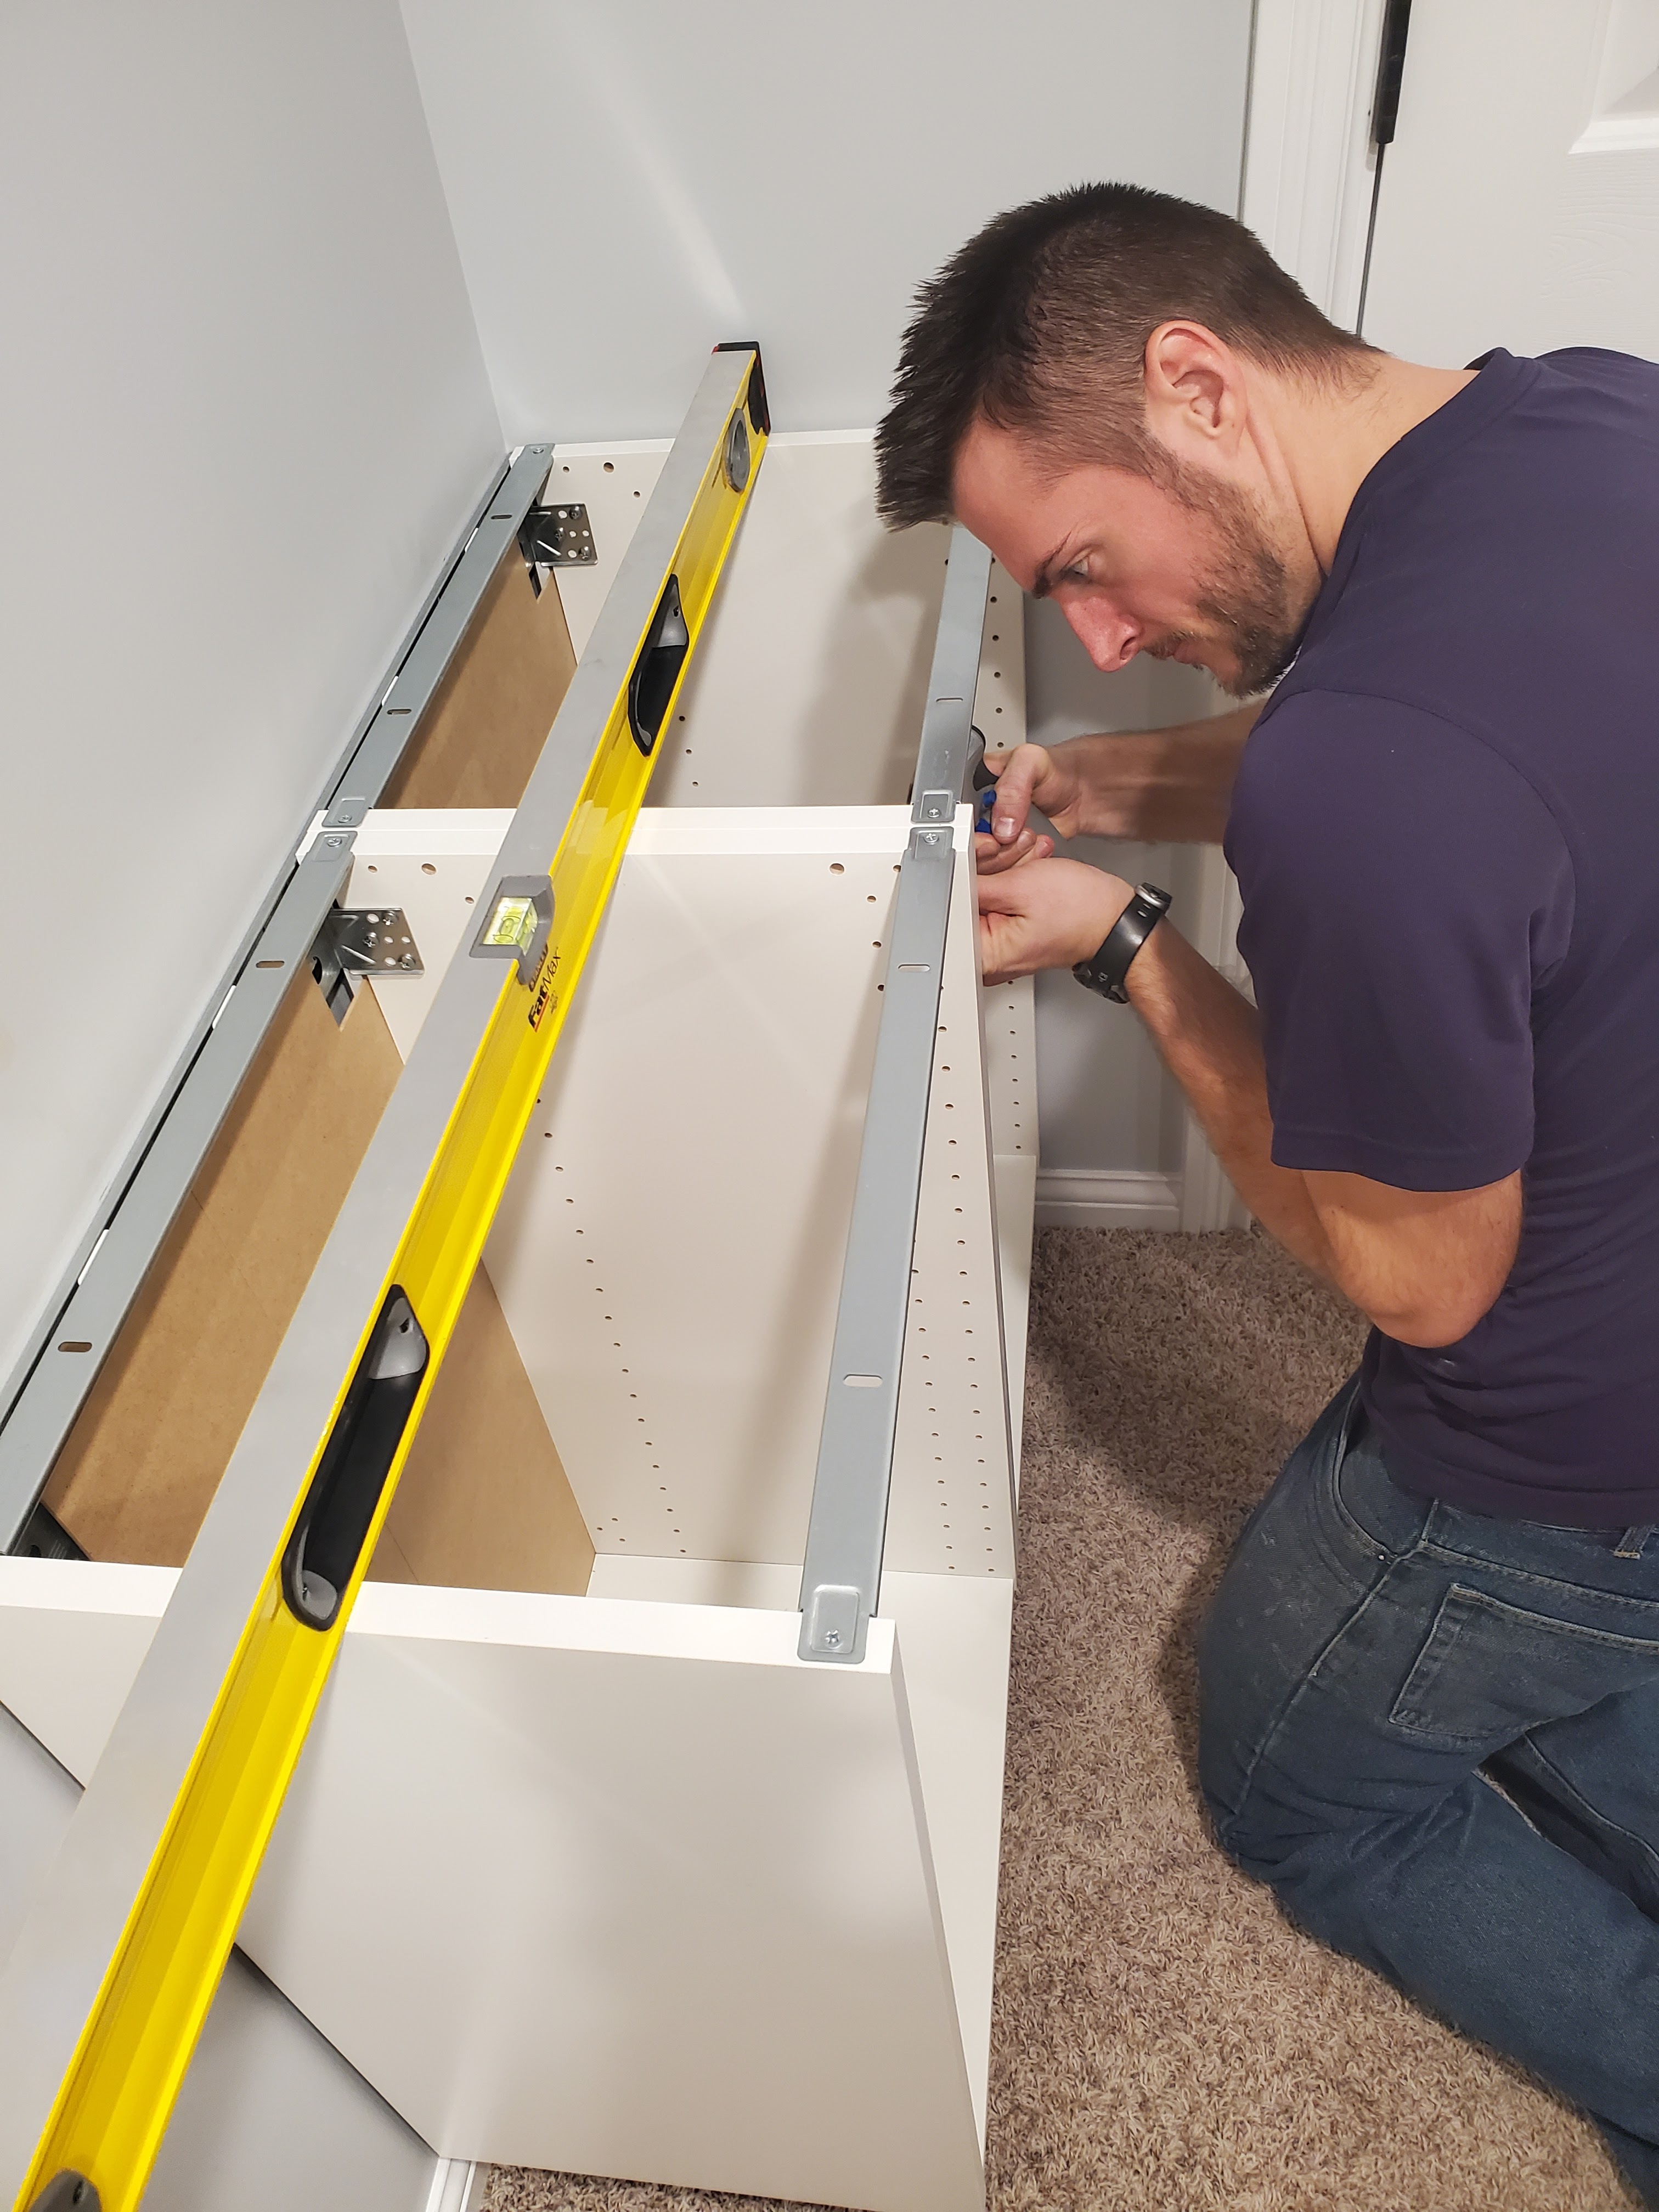
Once the rail was up and the cabinets were secured and level, Justin drove longer screws into the sides of the cabinets to attach them super securely to one another.
For the cabinet counter tops, we used an edge glued panel and Amber applied a couple coats of this black stain + polyurethane with a natural bristle brush.

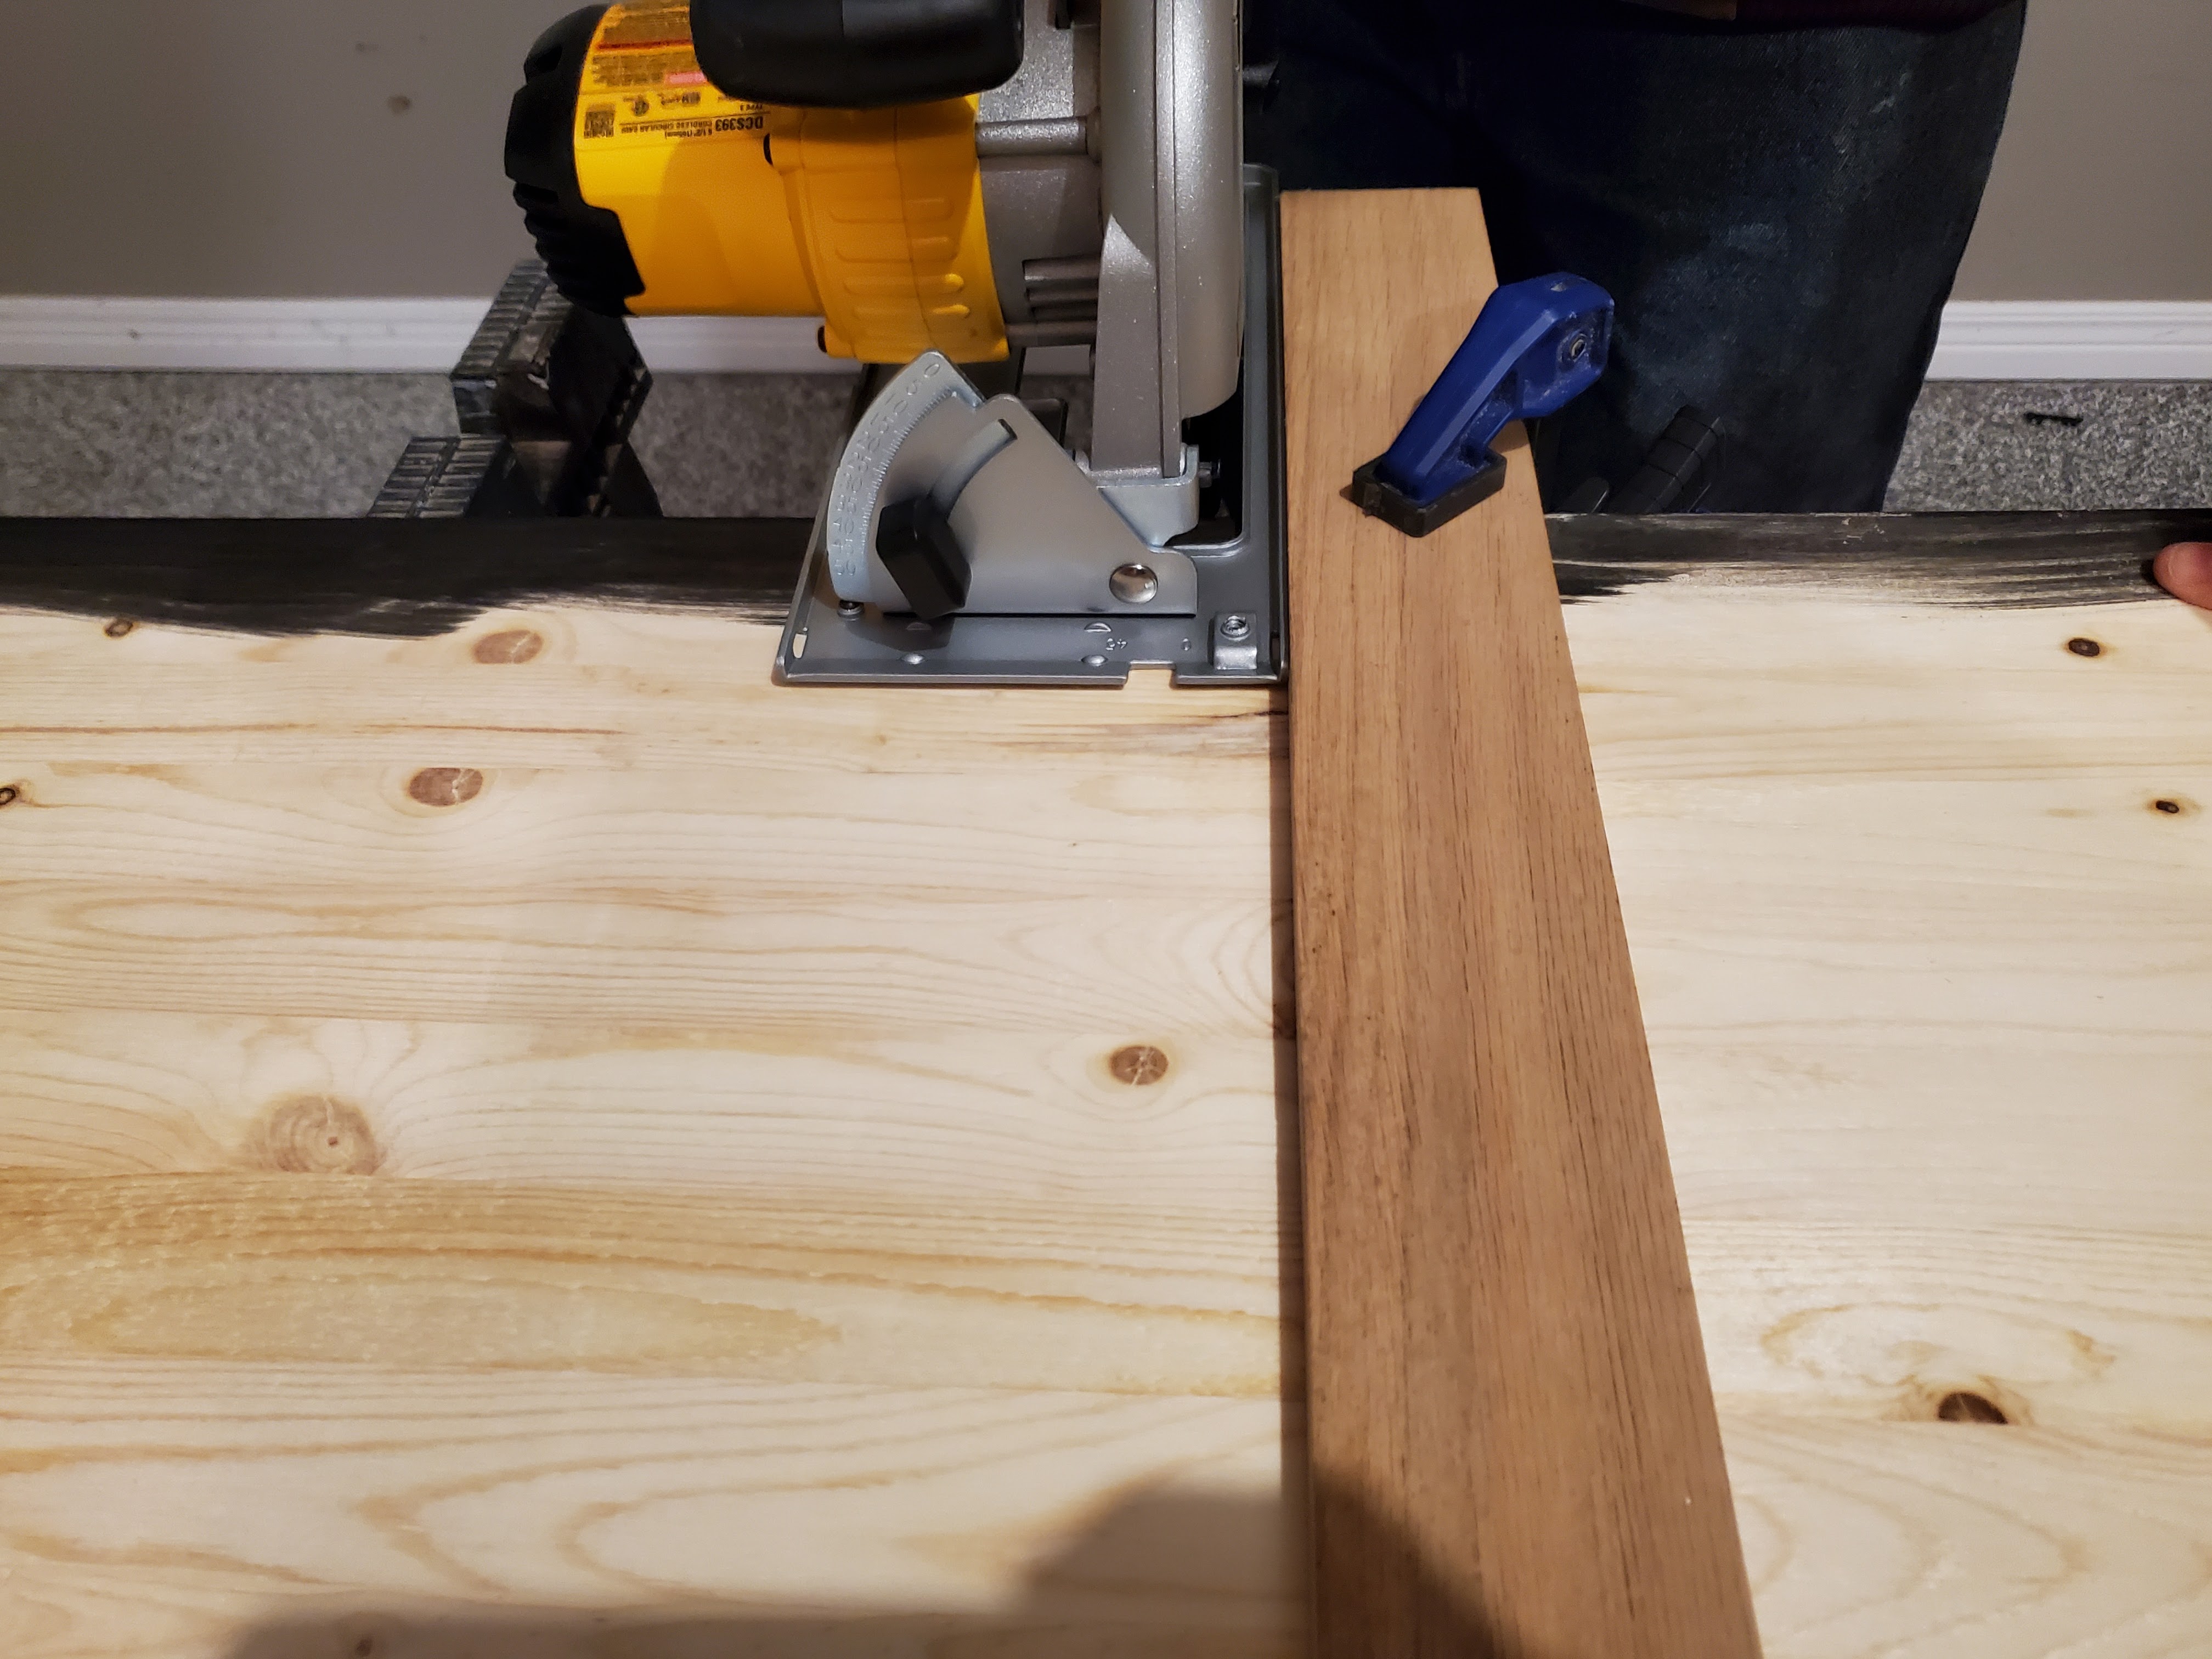
We wanted the snuggest fit possible, so we chose to do the left countertop, then the table, then the right countertop. While I worked on installing all the cabinet doors, Justin took the panel, flipped it over, and cut it to length with a circular saw. He clamped down a 1×4 to create a guide for a nice straight cut, then installed the panel by screwing it to the cabinet from the bottom up.
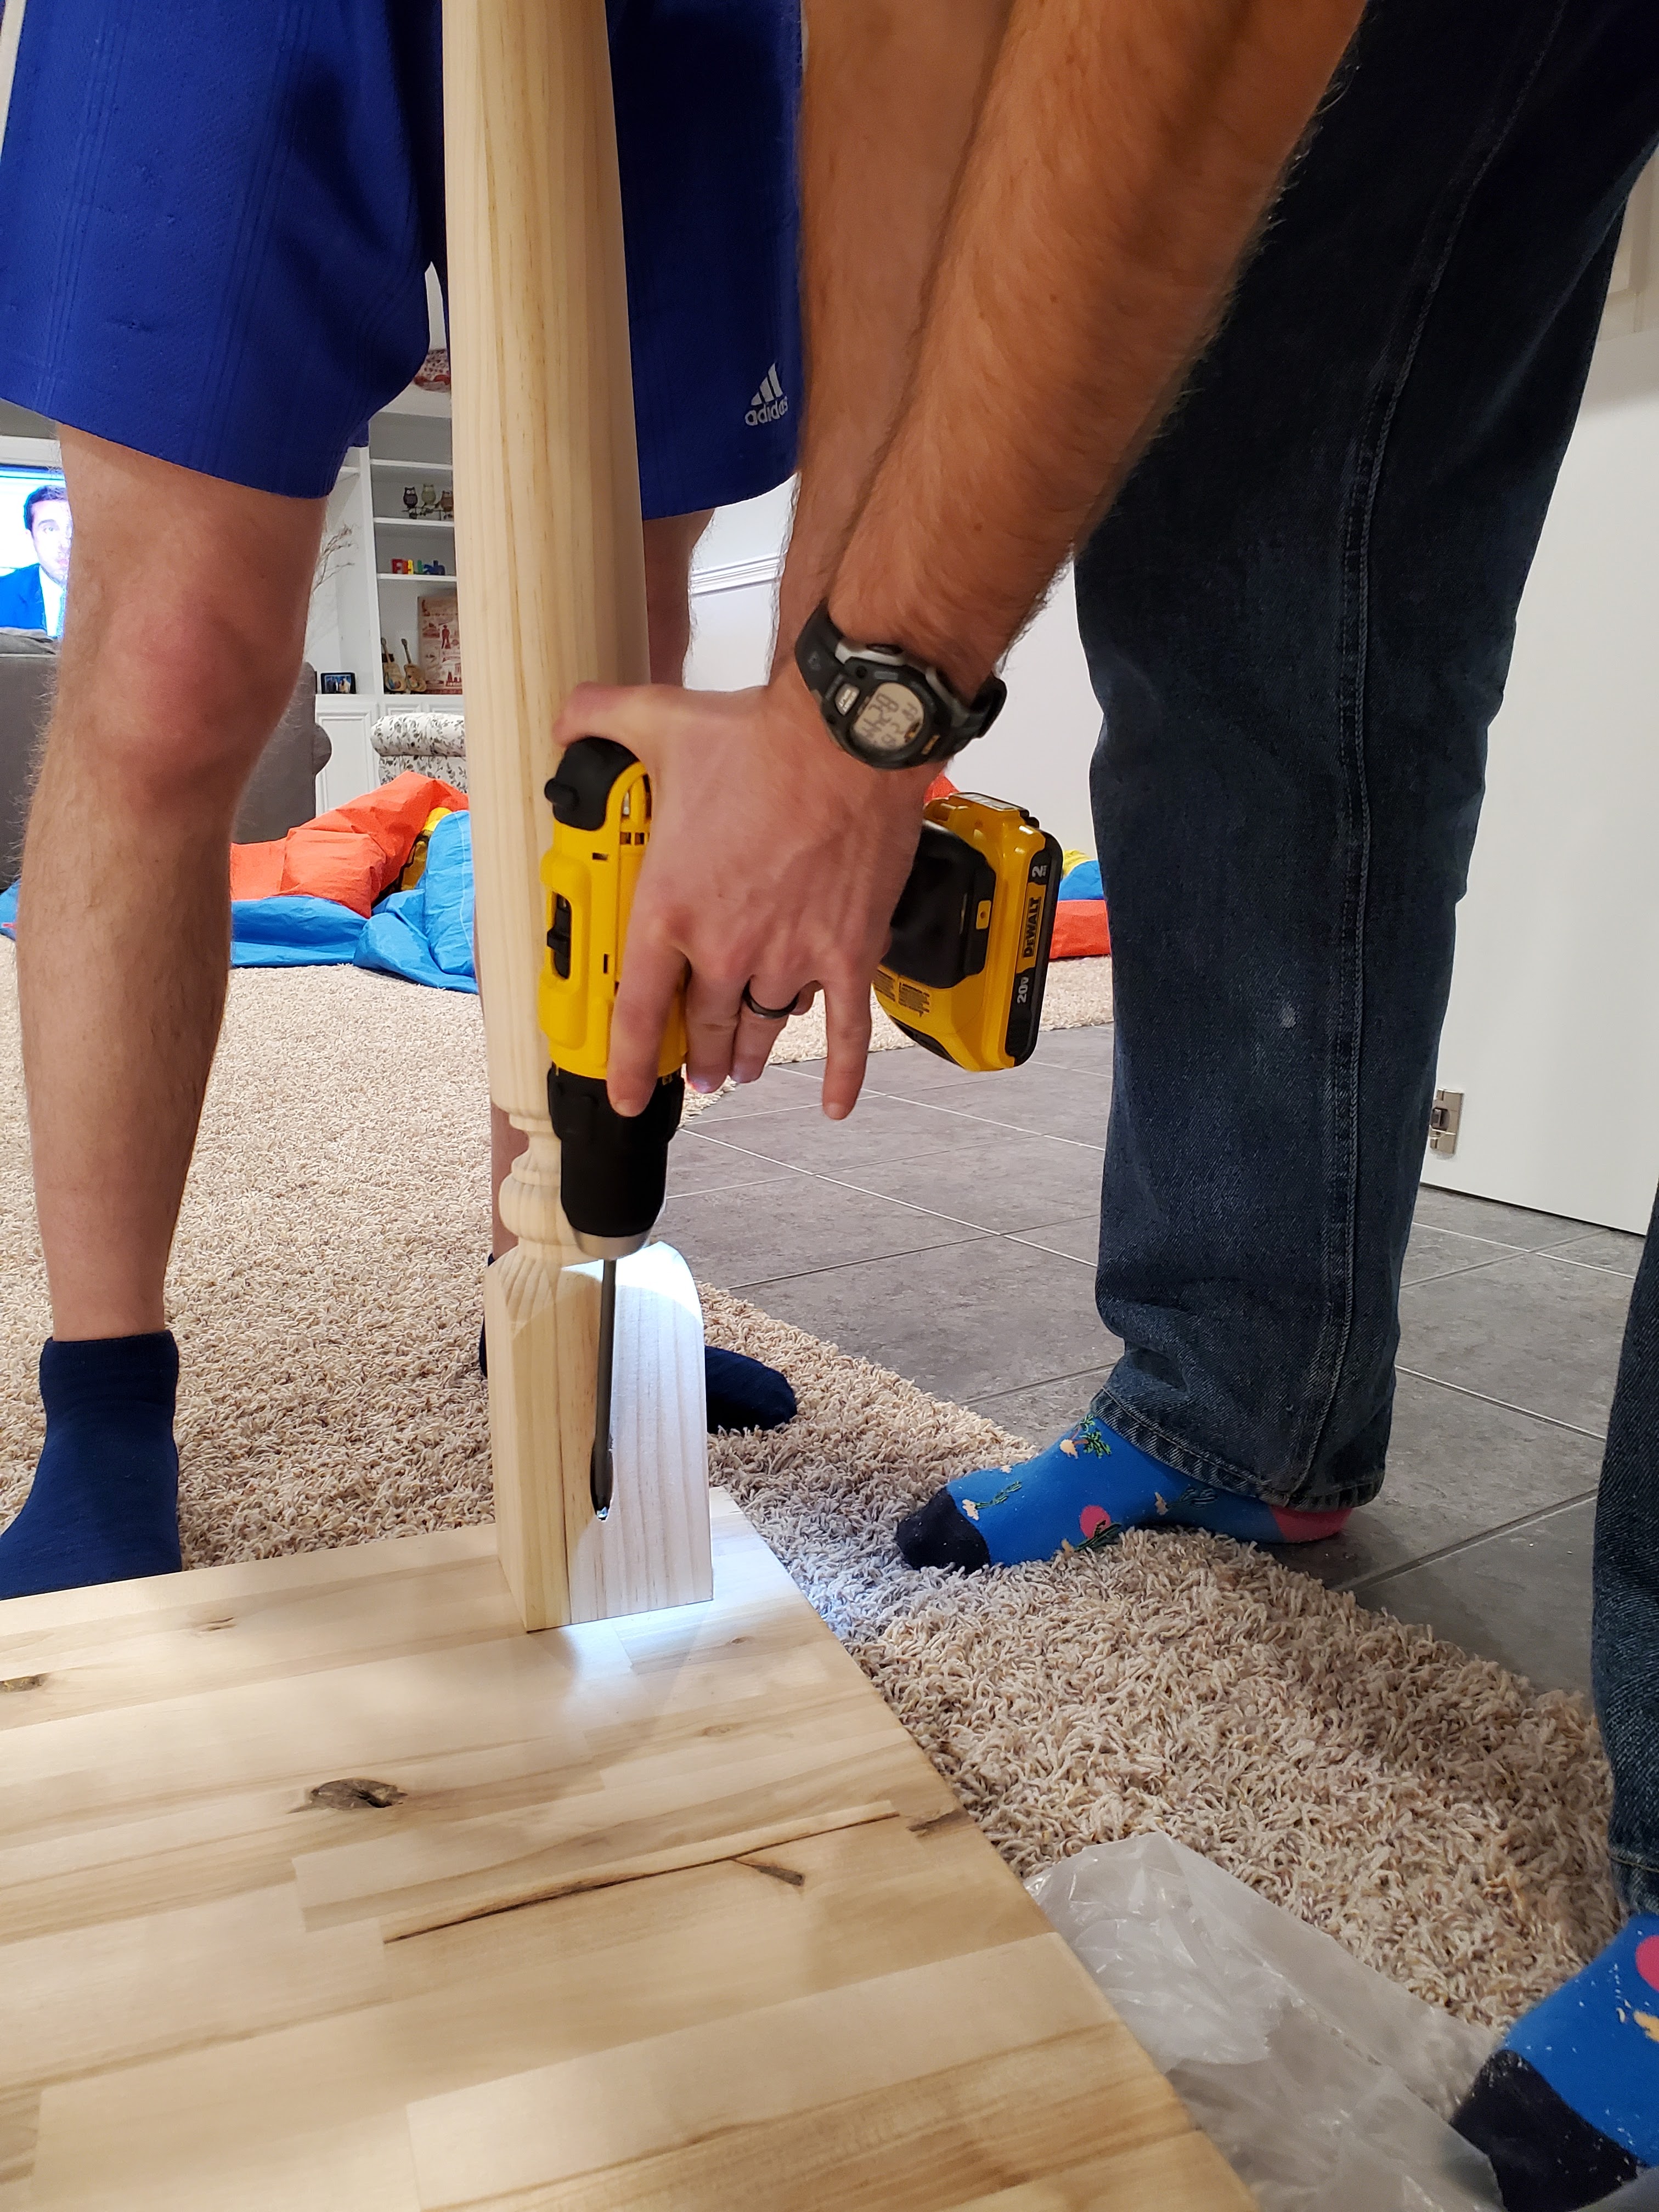
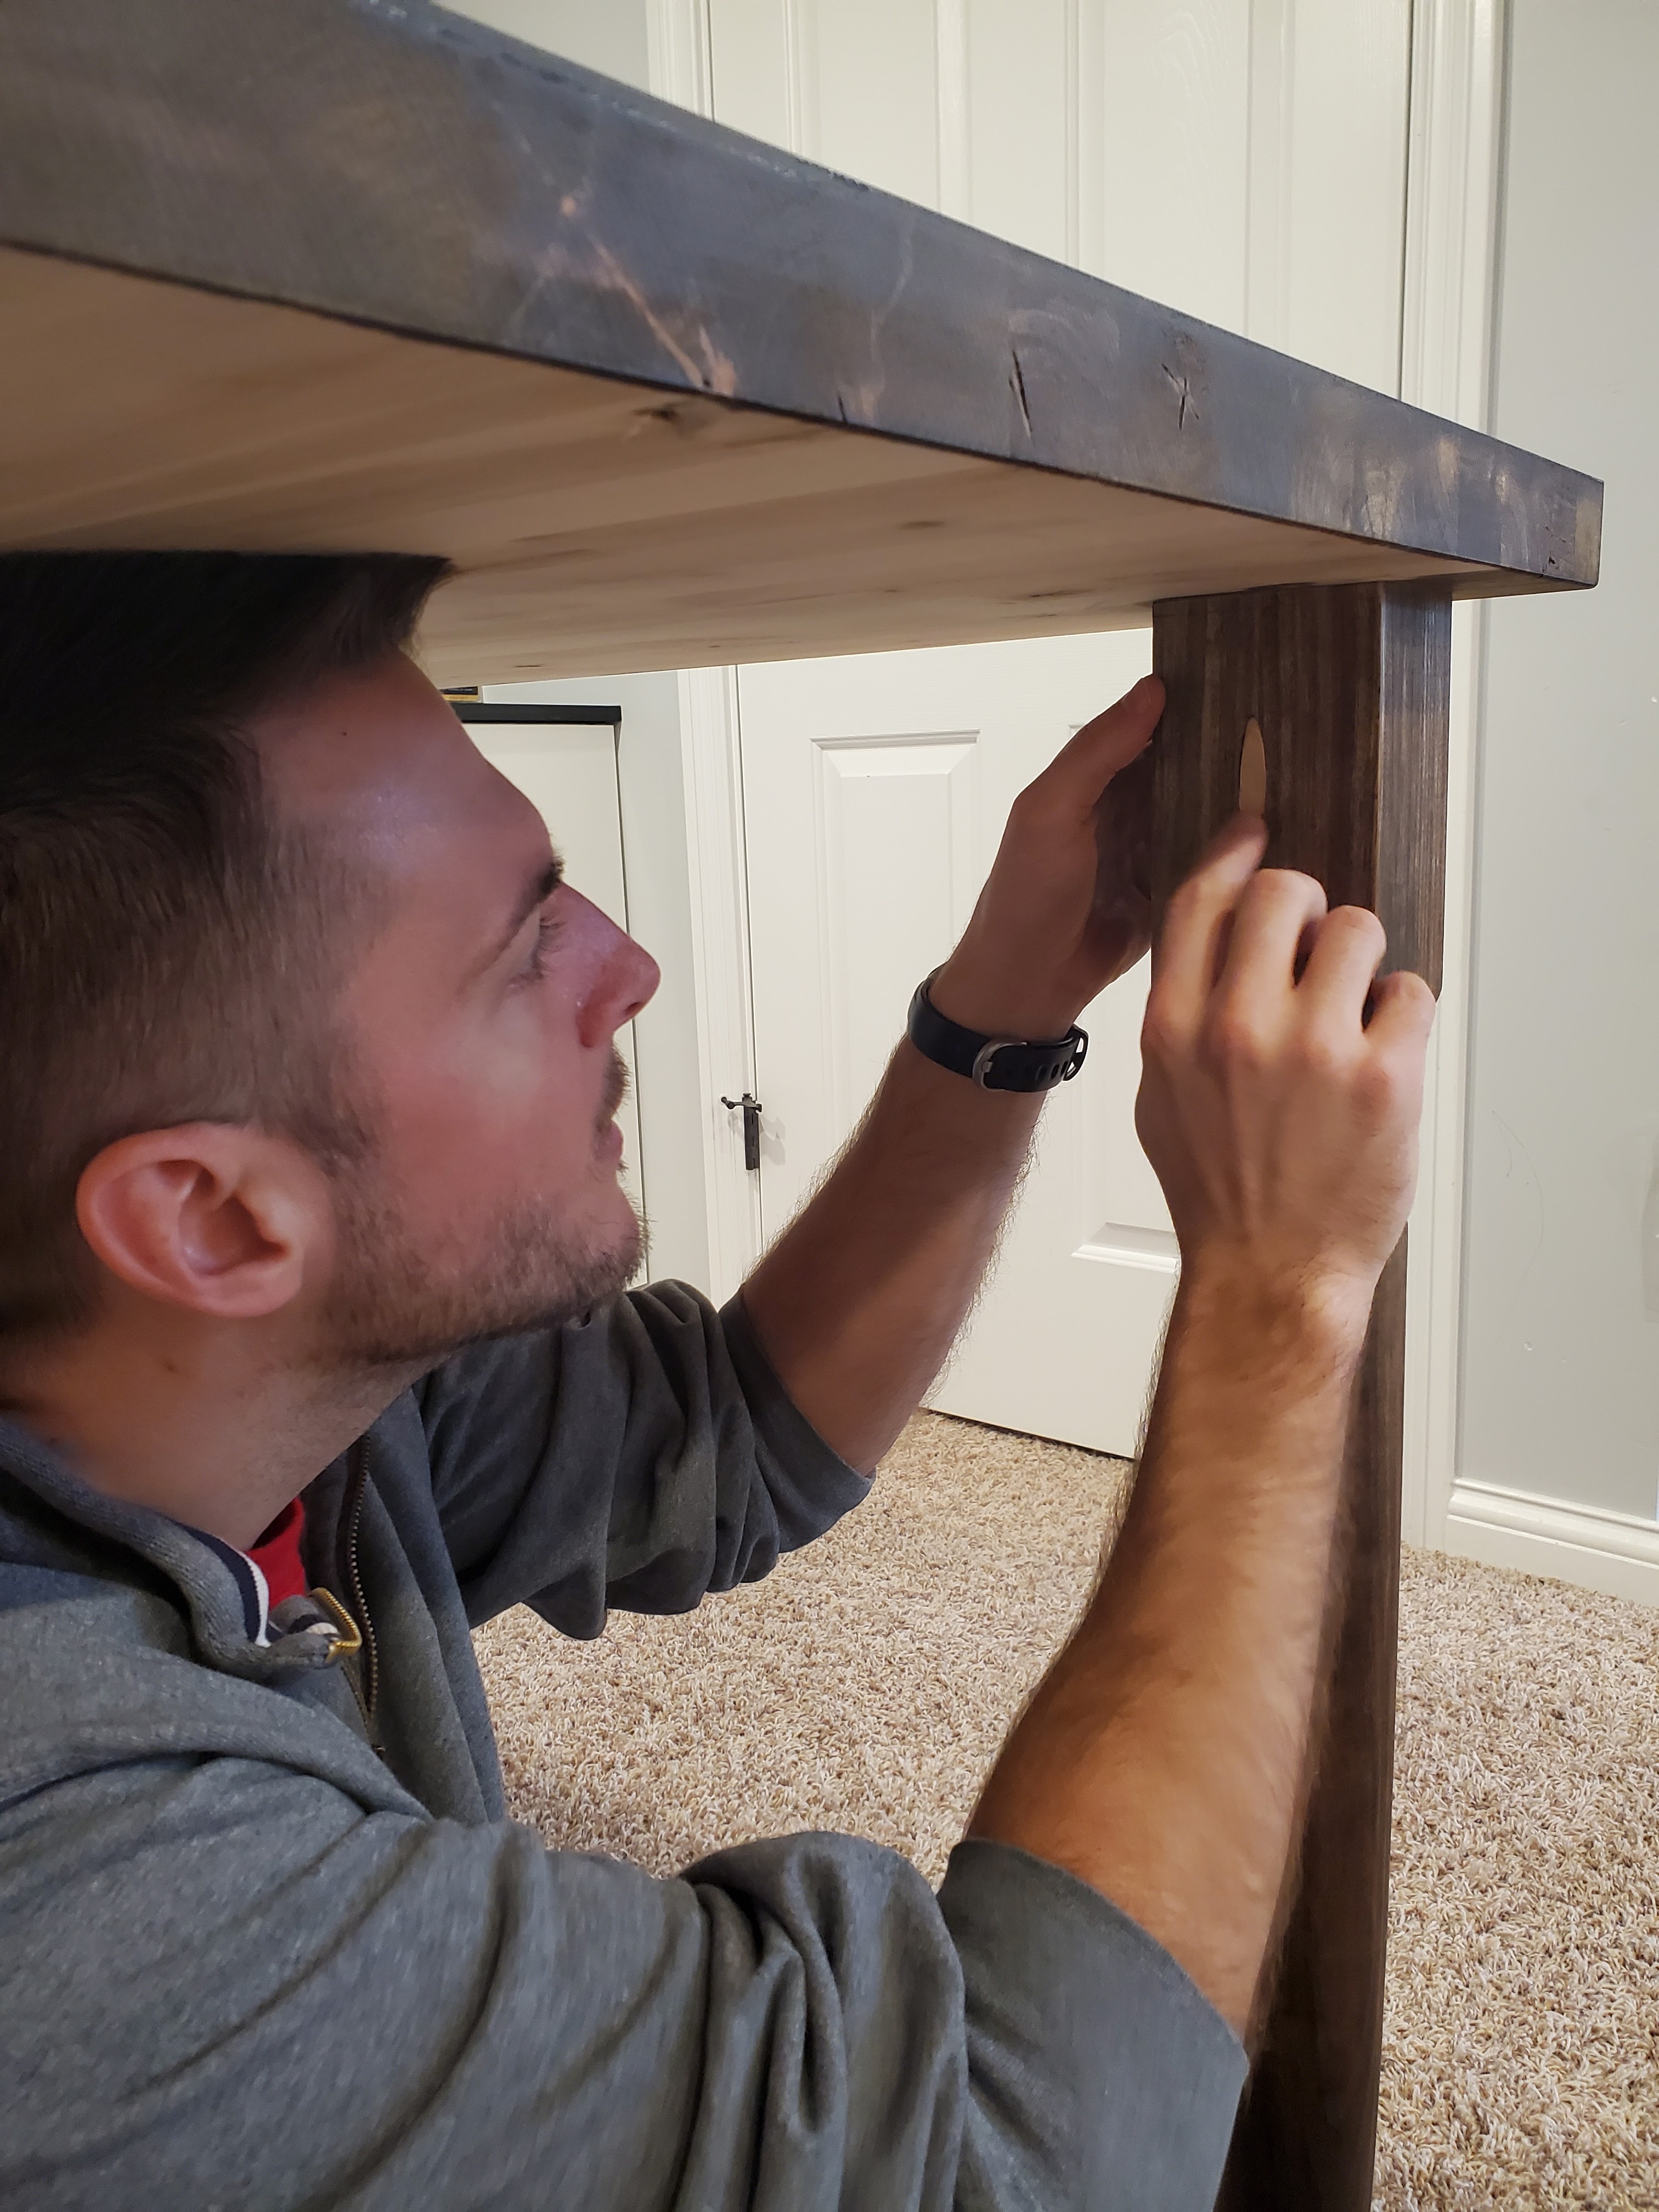
The table was pretty straightforward. We used the same butcherblock countertop that we used for our basement kitchen renovation last summer. Amber purchased four turned table legs and Justin cut them down to the correct length so that the table would end up being flush with the countertop.

He used a kreg jig to create two pocket holes on each leg.

I marked where we wanted each leg (1.5″ from each edge of the butcherblock) and Amber’s husband helped hold the legs in place while Justin screwed each one into the butcherblock.
Since we didn’t want to the table to move from the countertop, Justin used two L brackets to attach the table directly to the wall.

Once the table was securely installed, he cut down the countertop for the cabinets on the right side (with a little help from Amber’s son). I ran a bead of clear silicone caulk along the edge of the cabinets to seal the slight crack between the counter and the wall.

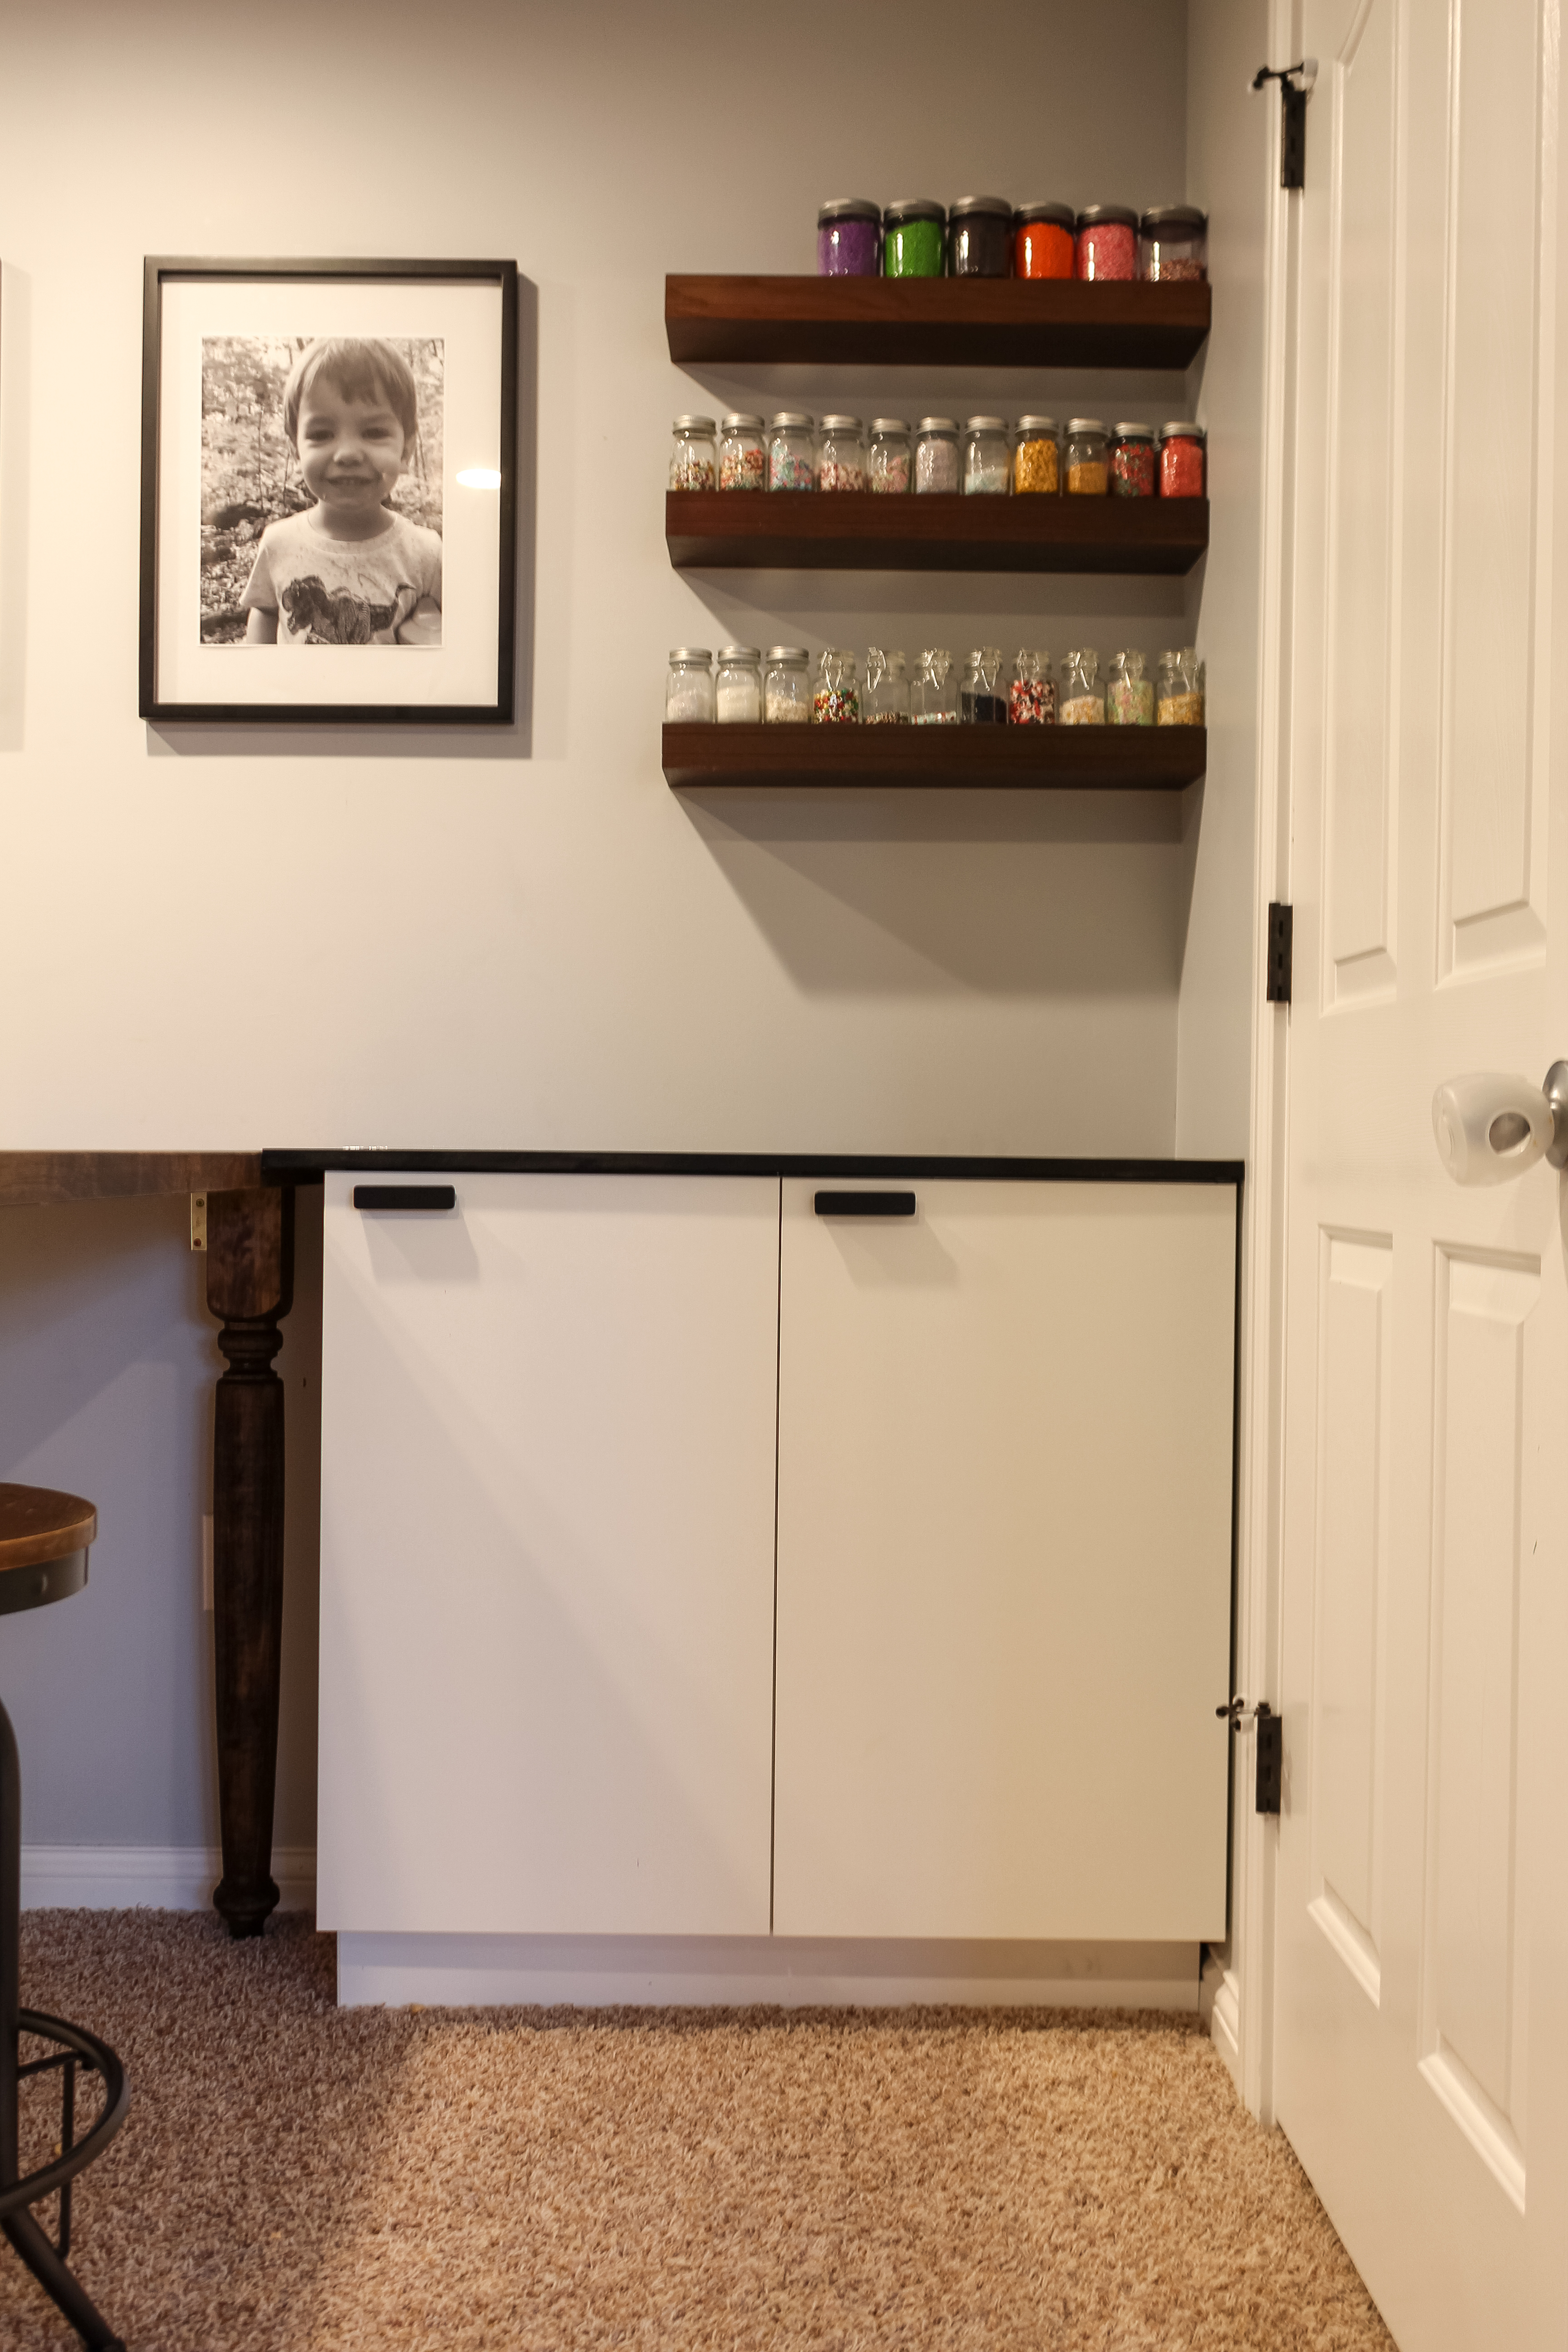
Amber also wanted three floating shelves on the wall to provide storage for sprinkles. To easily mark where we needed to place the screws to hang the shelves, Amber used leftover frosting to place a dot right above the hole on the back of the shelf.

I placed painters tape approximately where each screw would go, then pressed each shelf into place on the wall, using a level to ensure it was just right.
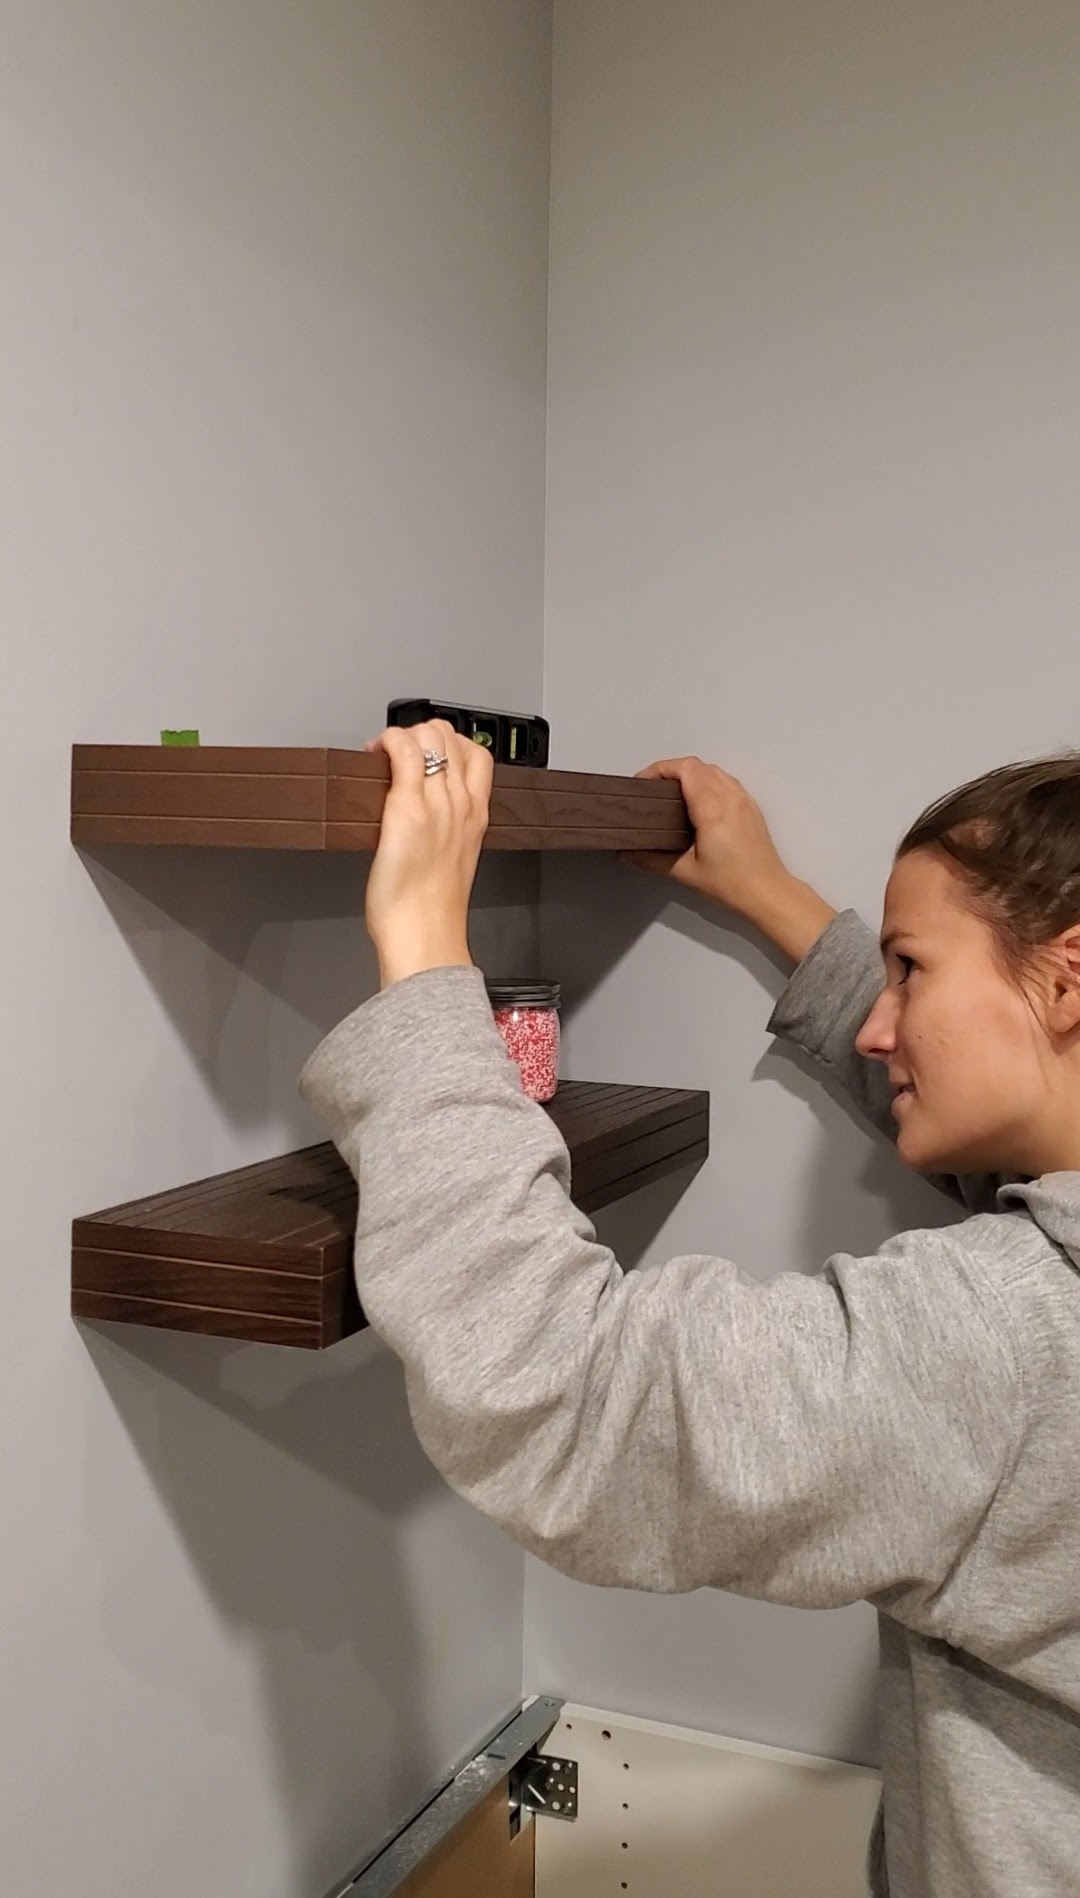
This left a perfect little dot right where we needed to drill a hole for the anchor and screw. Very fitting to use frosting as a tool for a cookie space, huh? 😉

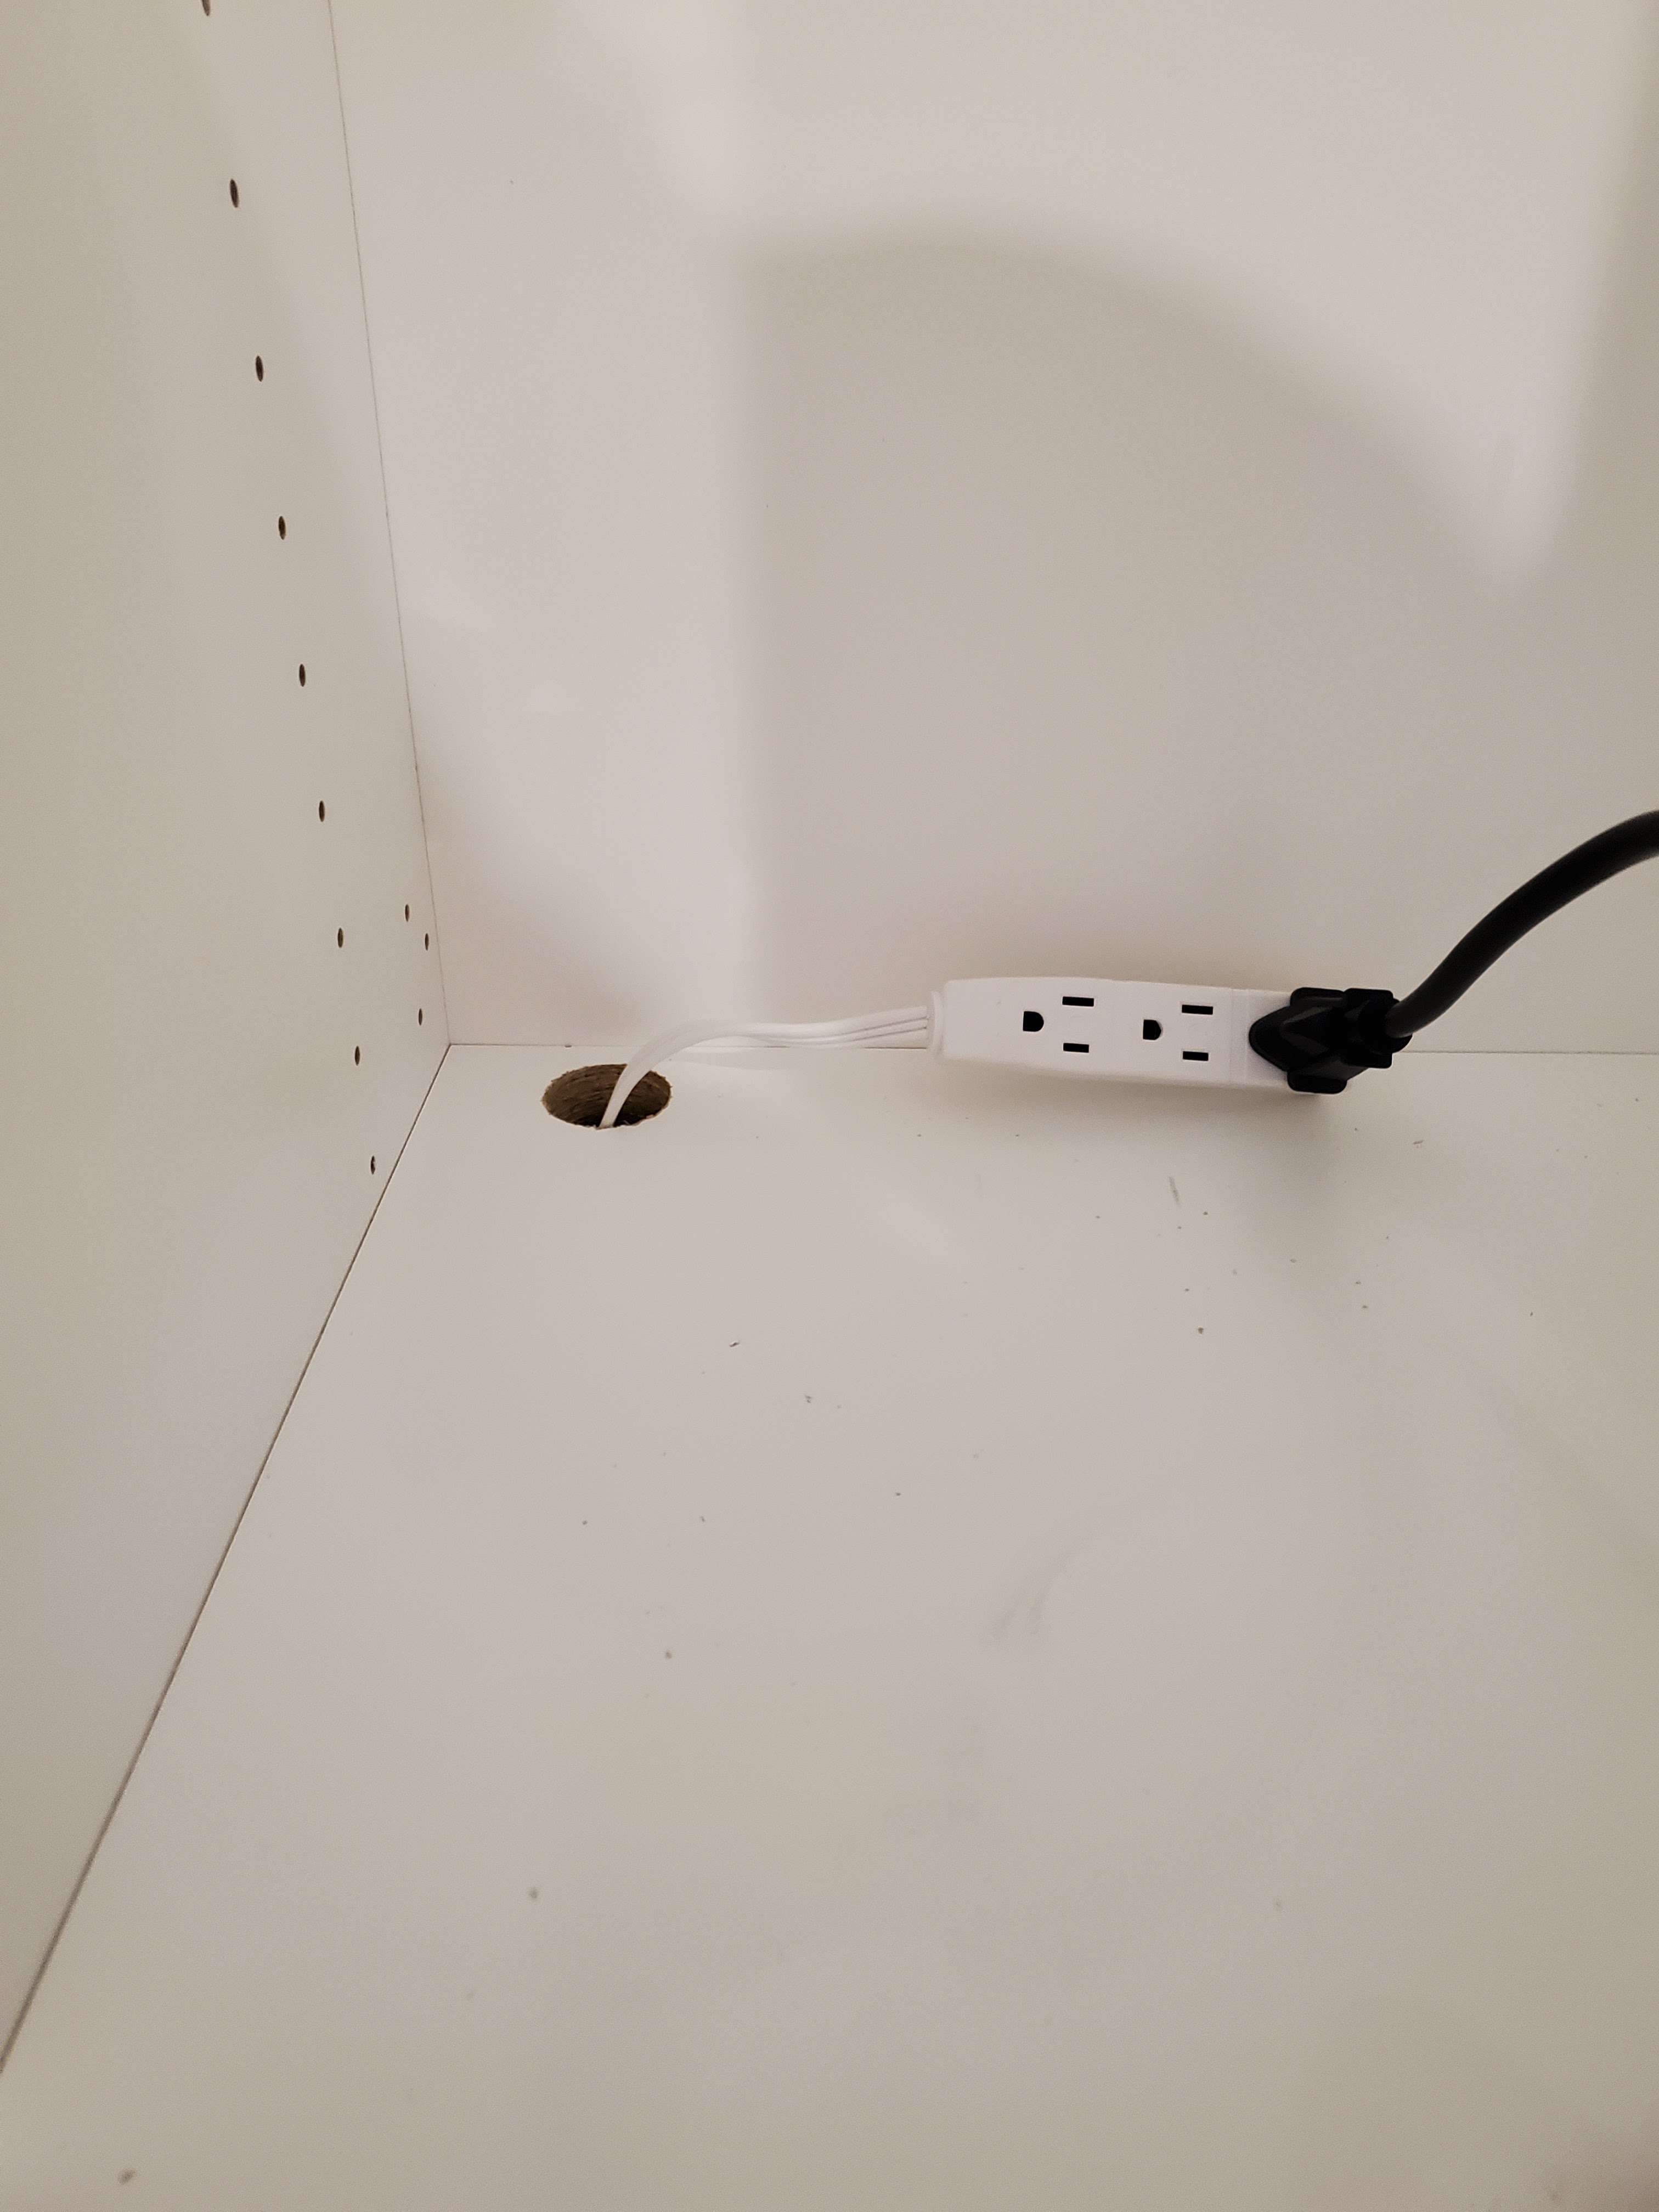
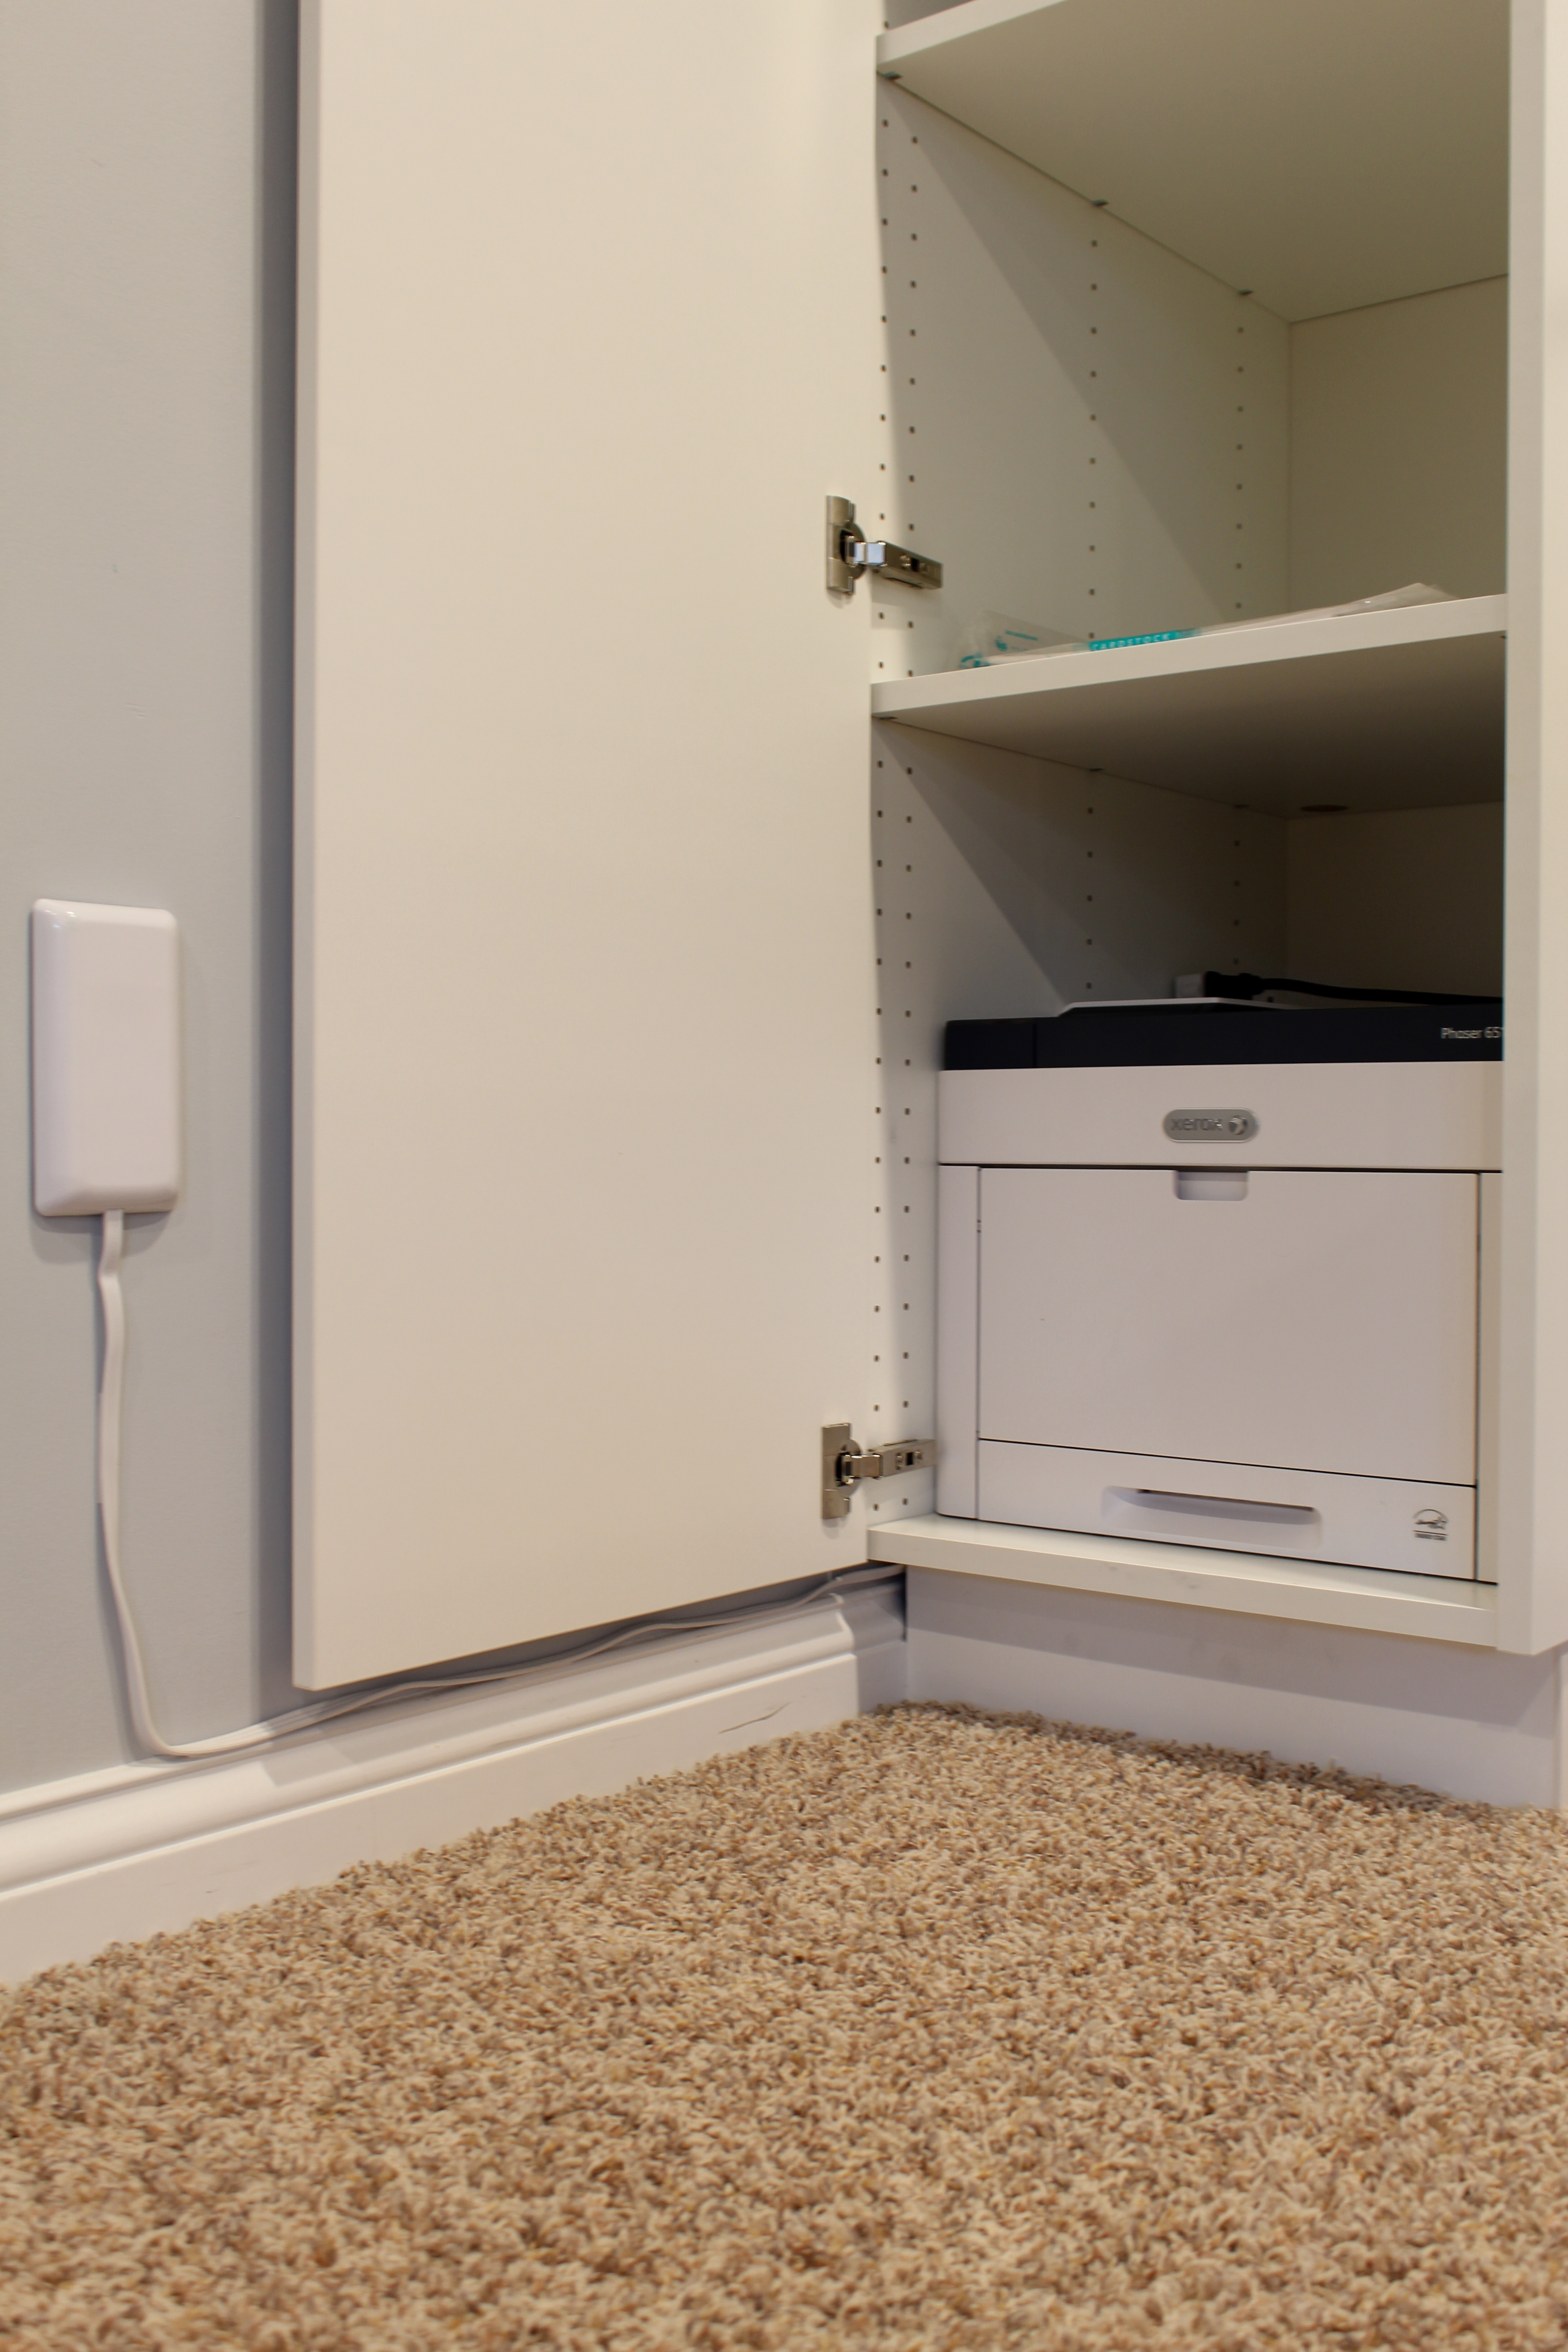
The far left cabinet was purposely deeper because Amber wanted a space to store her printer. To save money by not having to move the nearby outlet, I suggested using this extension cord (which we have and love) and Justin used a circular drill bit to drill a hole in the back corner of the cabinet. We then ran the extension cord along the baseboard, under the cabinet, and up through the hole so she could easily plug in her printer. We also drilled a hole in the next shelf up so she could run her dehydrator’s cord down and plug it in as well.
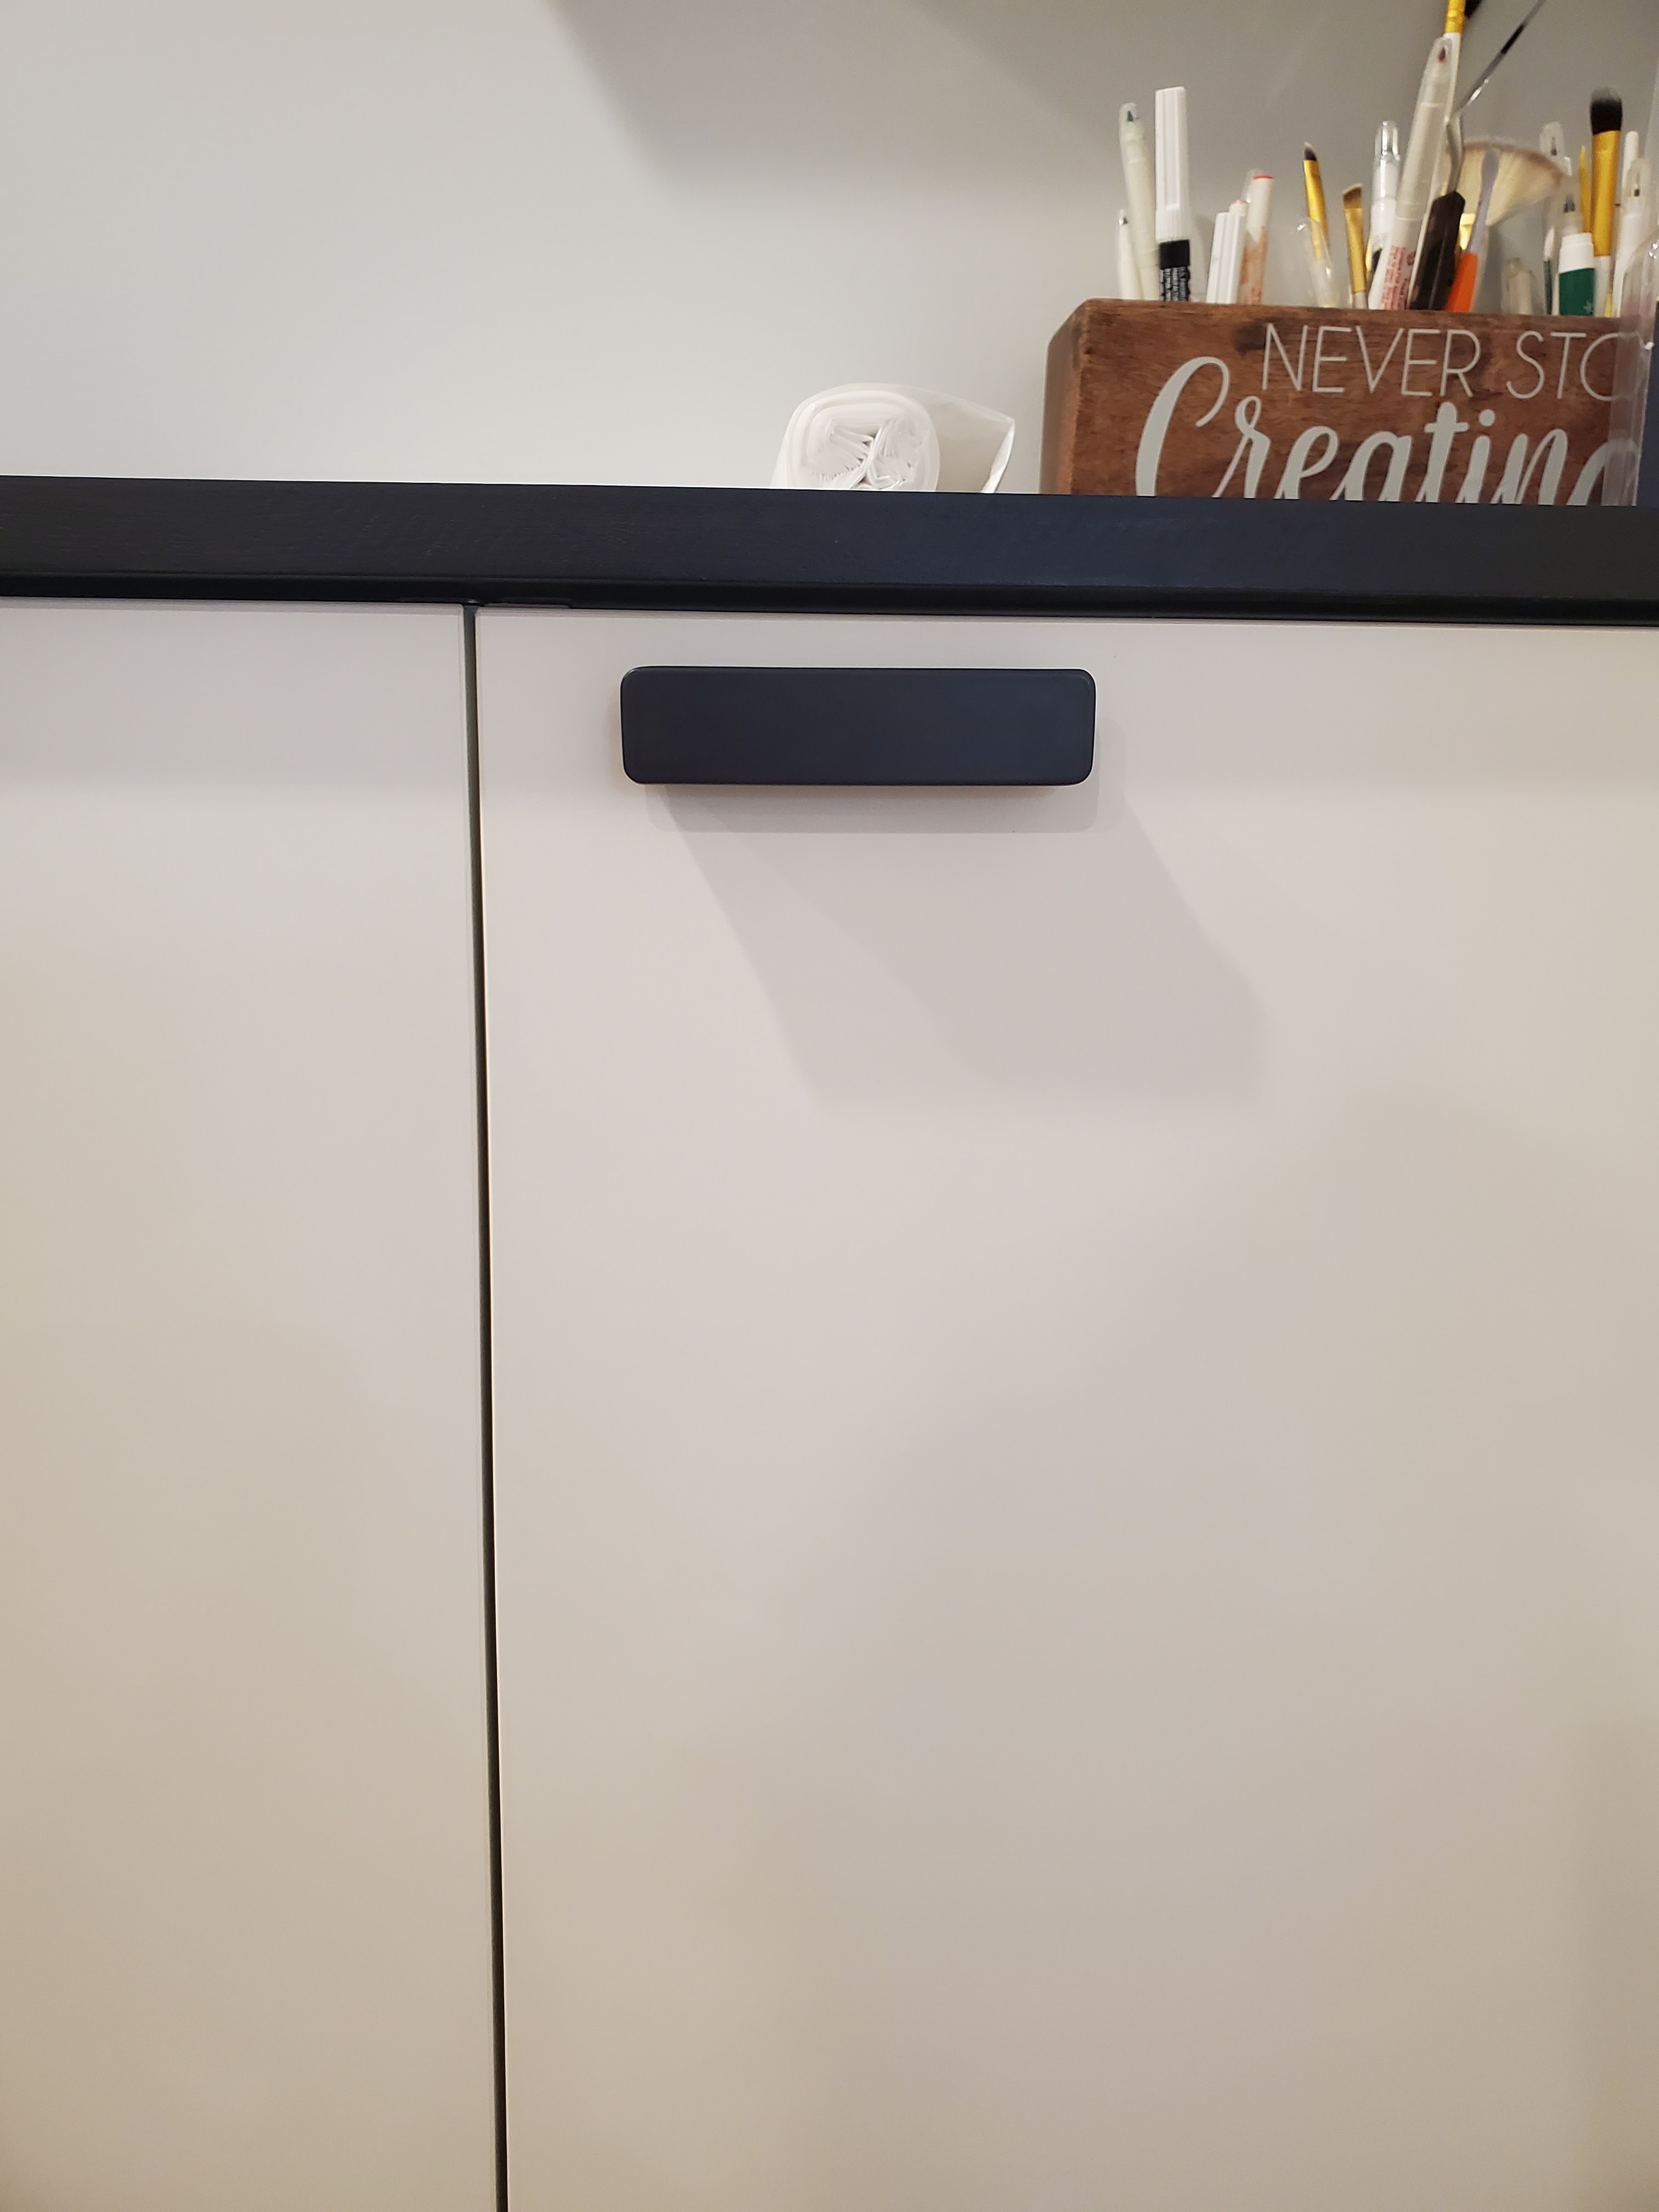
While Justin worked on cutting down the toekick, I started installing the handles. We purchased this little hardware template tool for this project and it was a game changer! Amber wanted the lower cabinet handles to be horizontal, so once I determined the width between the holes on the handles, I could use the template to quickly determine exact placement, then just mark the holes using a sharpie and drill each hole.

No tedious measuring required, and all the handles look uniform. This template was WELL worth the money!
Amber stained the table with this leftover stain we had from a previous project and I applied a matte polyurethane on top with a foam brush while Justin filled in the pocket holes on each table using wood glue and kreg pocket hole plugs (which Amber later stained).
The last thing was the Ikea toekick, which Justin cut and installed after a few headaches with figuring out how to properly install the exposed sides under the table (and Vi’s supervision).

Overall, this space now does exactly what she needs it to: provides tons of functional and attractive storage (how cute are the sprinkle shelves!?) and creates a nice large workspace for decorating cookies.

Amber has already used the space multiple times and reports that it has been working out so well! We are so glad we got to help create a space that works better for her business and are excited to try some cookies that get decorated in the new space. 😉


Sources:
Cabinets: Ikea Sektion
Toekick: Ikea

2 thoughts on “Creating a DIY Cookie Space!”