Today marks the start of another round of the One Room Challenge and I am excited to join in the fun once again! I’ll be honest, up until yesterday, I didn’t think I’d be participating this time around. But I have been feeling a growing nesting urge to start in on the nursery for baby boy and I decided this would give me a great opportunity to focus in on his room while I’m still in my second trimester sweet spot of having the energy and drive to tackle it!
I’m currently 21 weeks pregnant, and in this post a few weeks ago, I revealed that we’re having a boy and shared my initial thoughts of what to do with the nursery now that Vi has moved over to a shared room with LJ. At first, I just planned to do a few minimal updates, but the more I thought about it, the more I wanted to go a little bigger. Justin and I feel confident that this will be our final pregnancy, and it’s the first time we’ve found out the baby’s sex before birth. Since it’s the first (and only) time I’ve had the opportunity to plan out all the nursery details in advance, I decided why not have some fun with it?
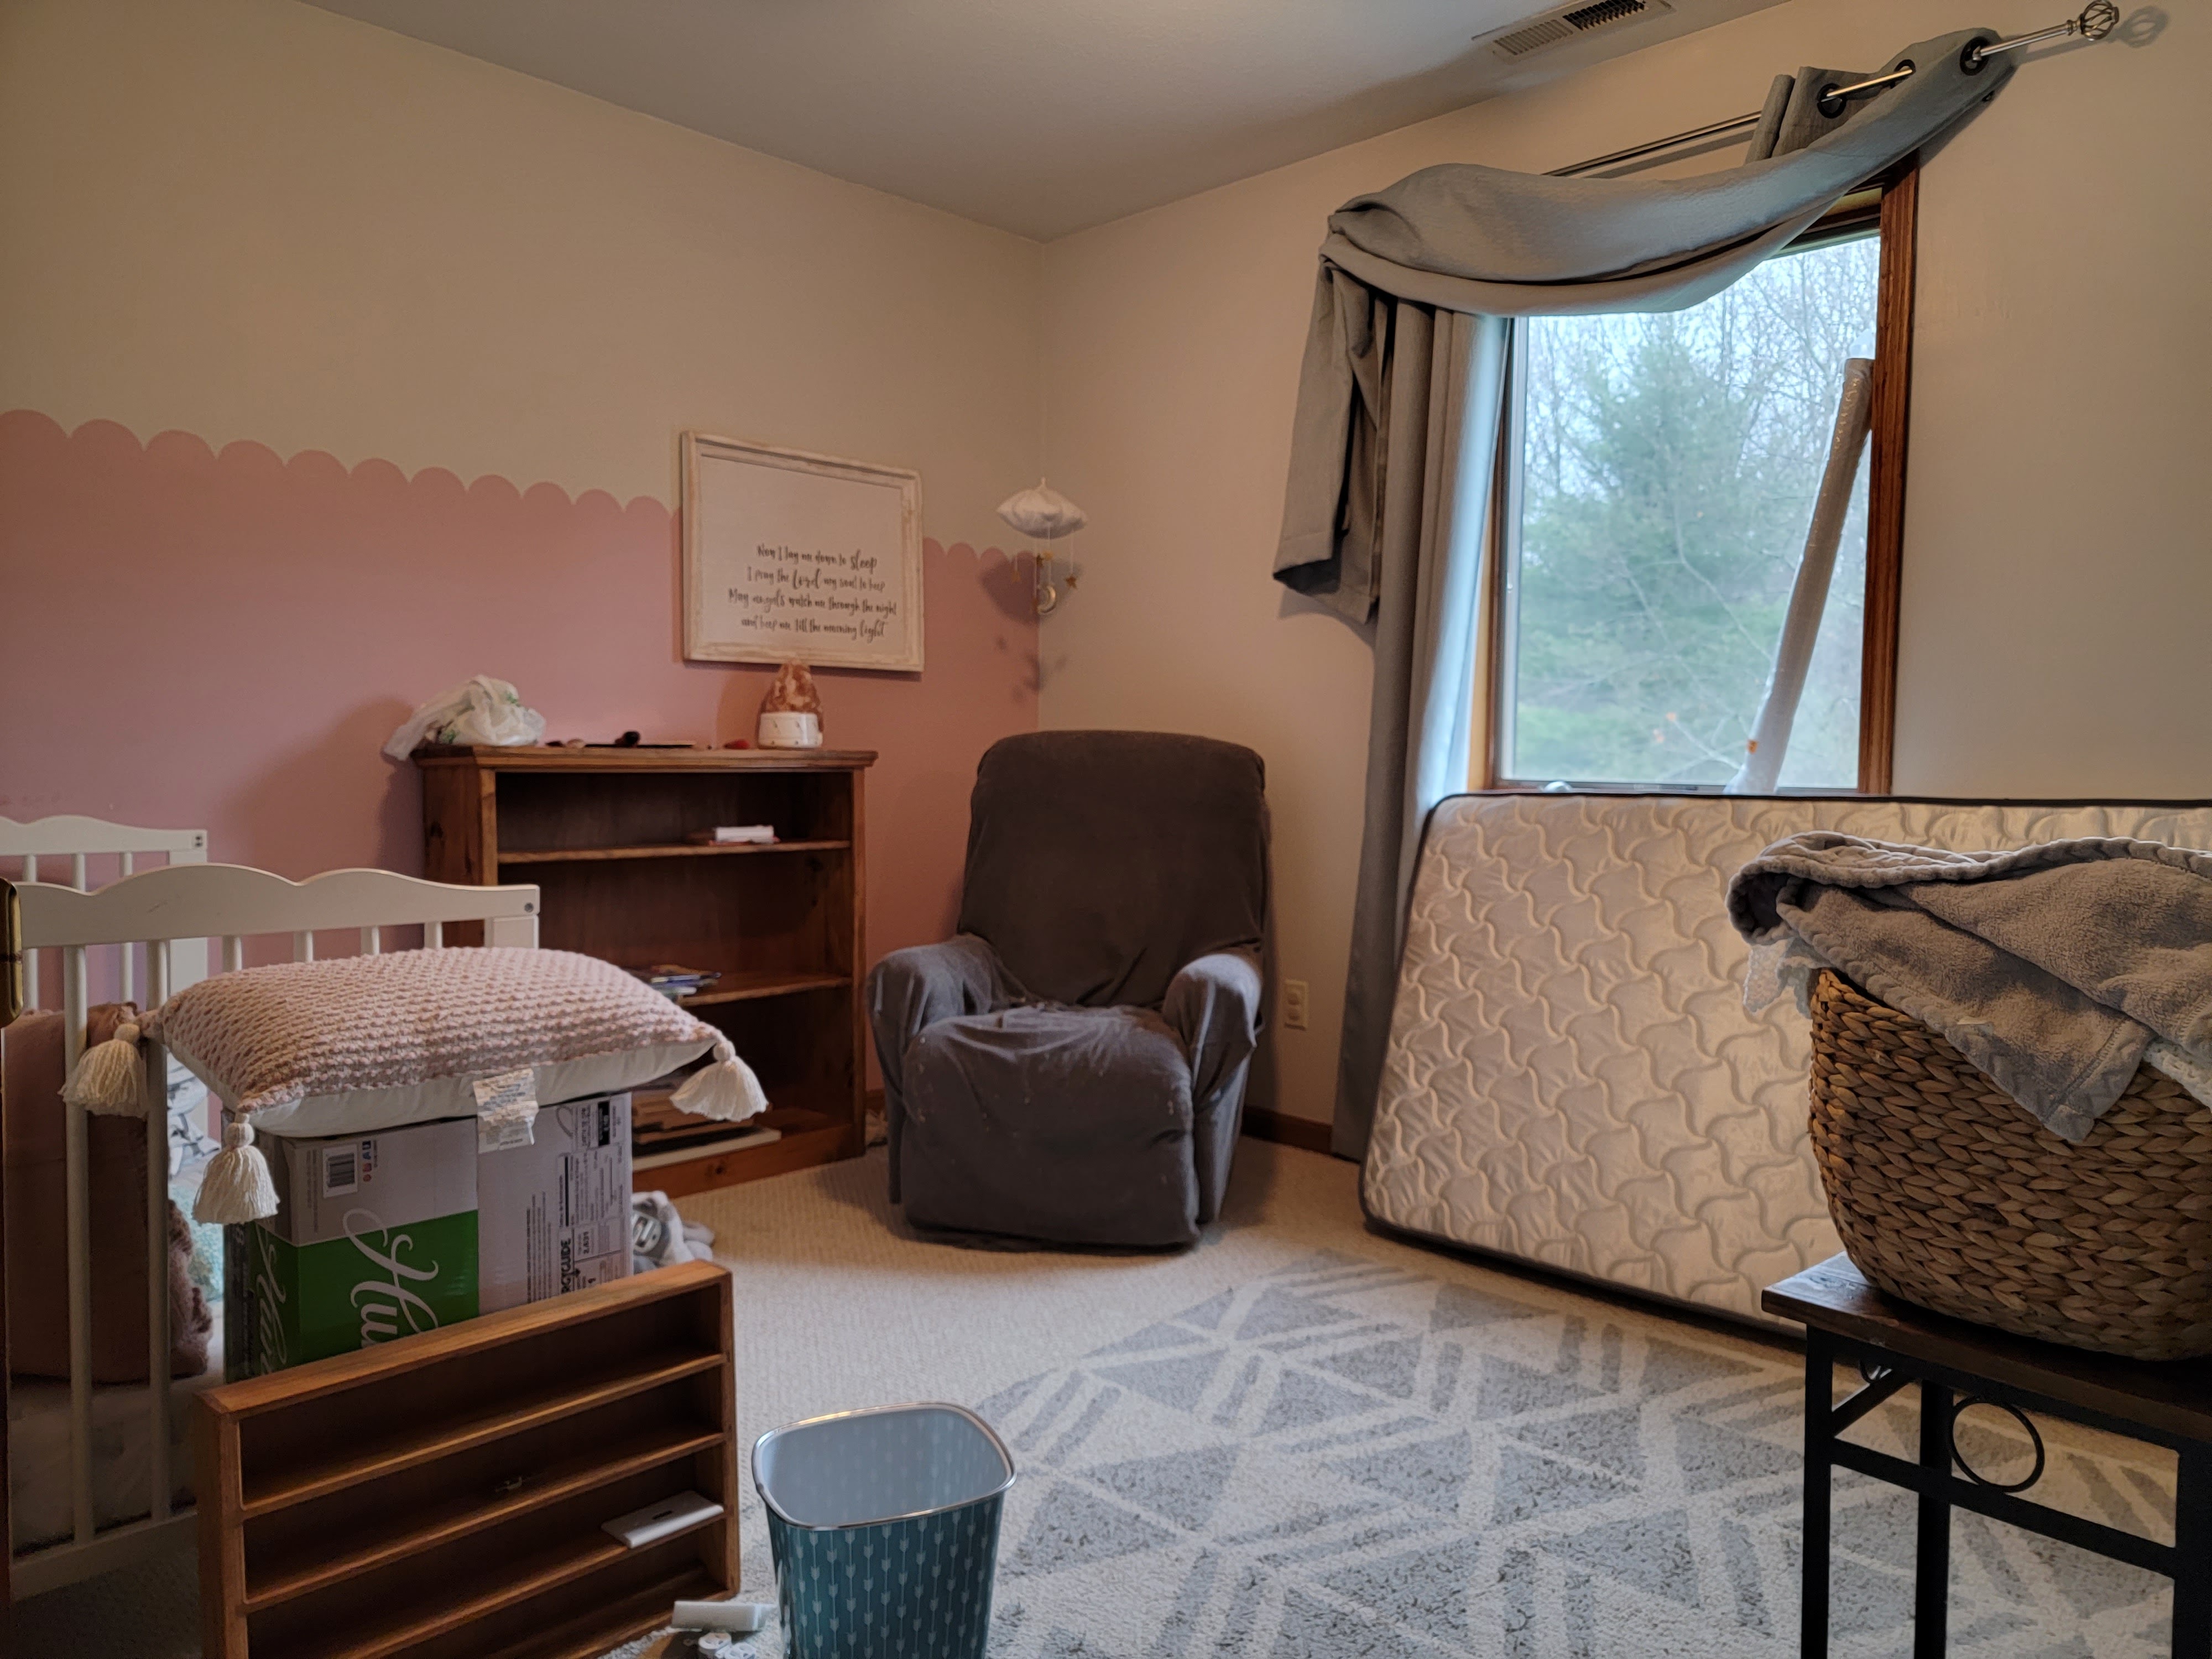
Here’s what the room looks like right at this very moment:
An absolute hot mess.
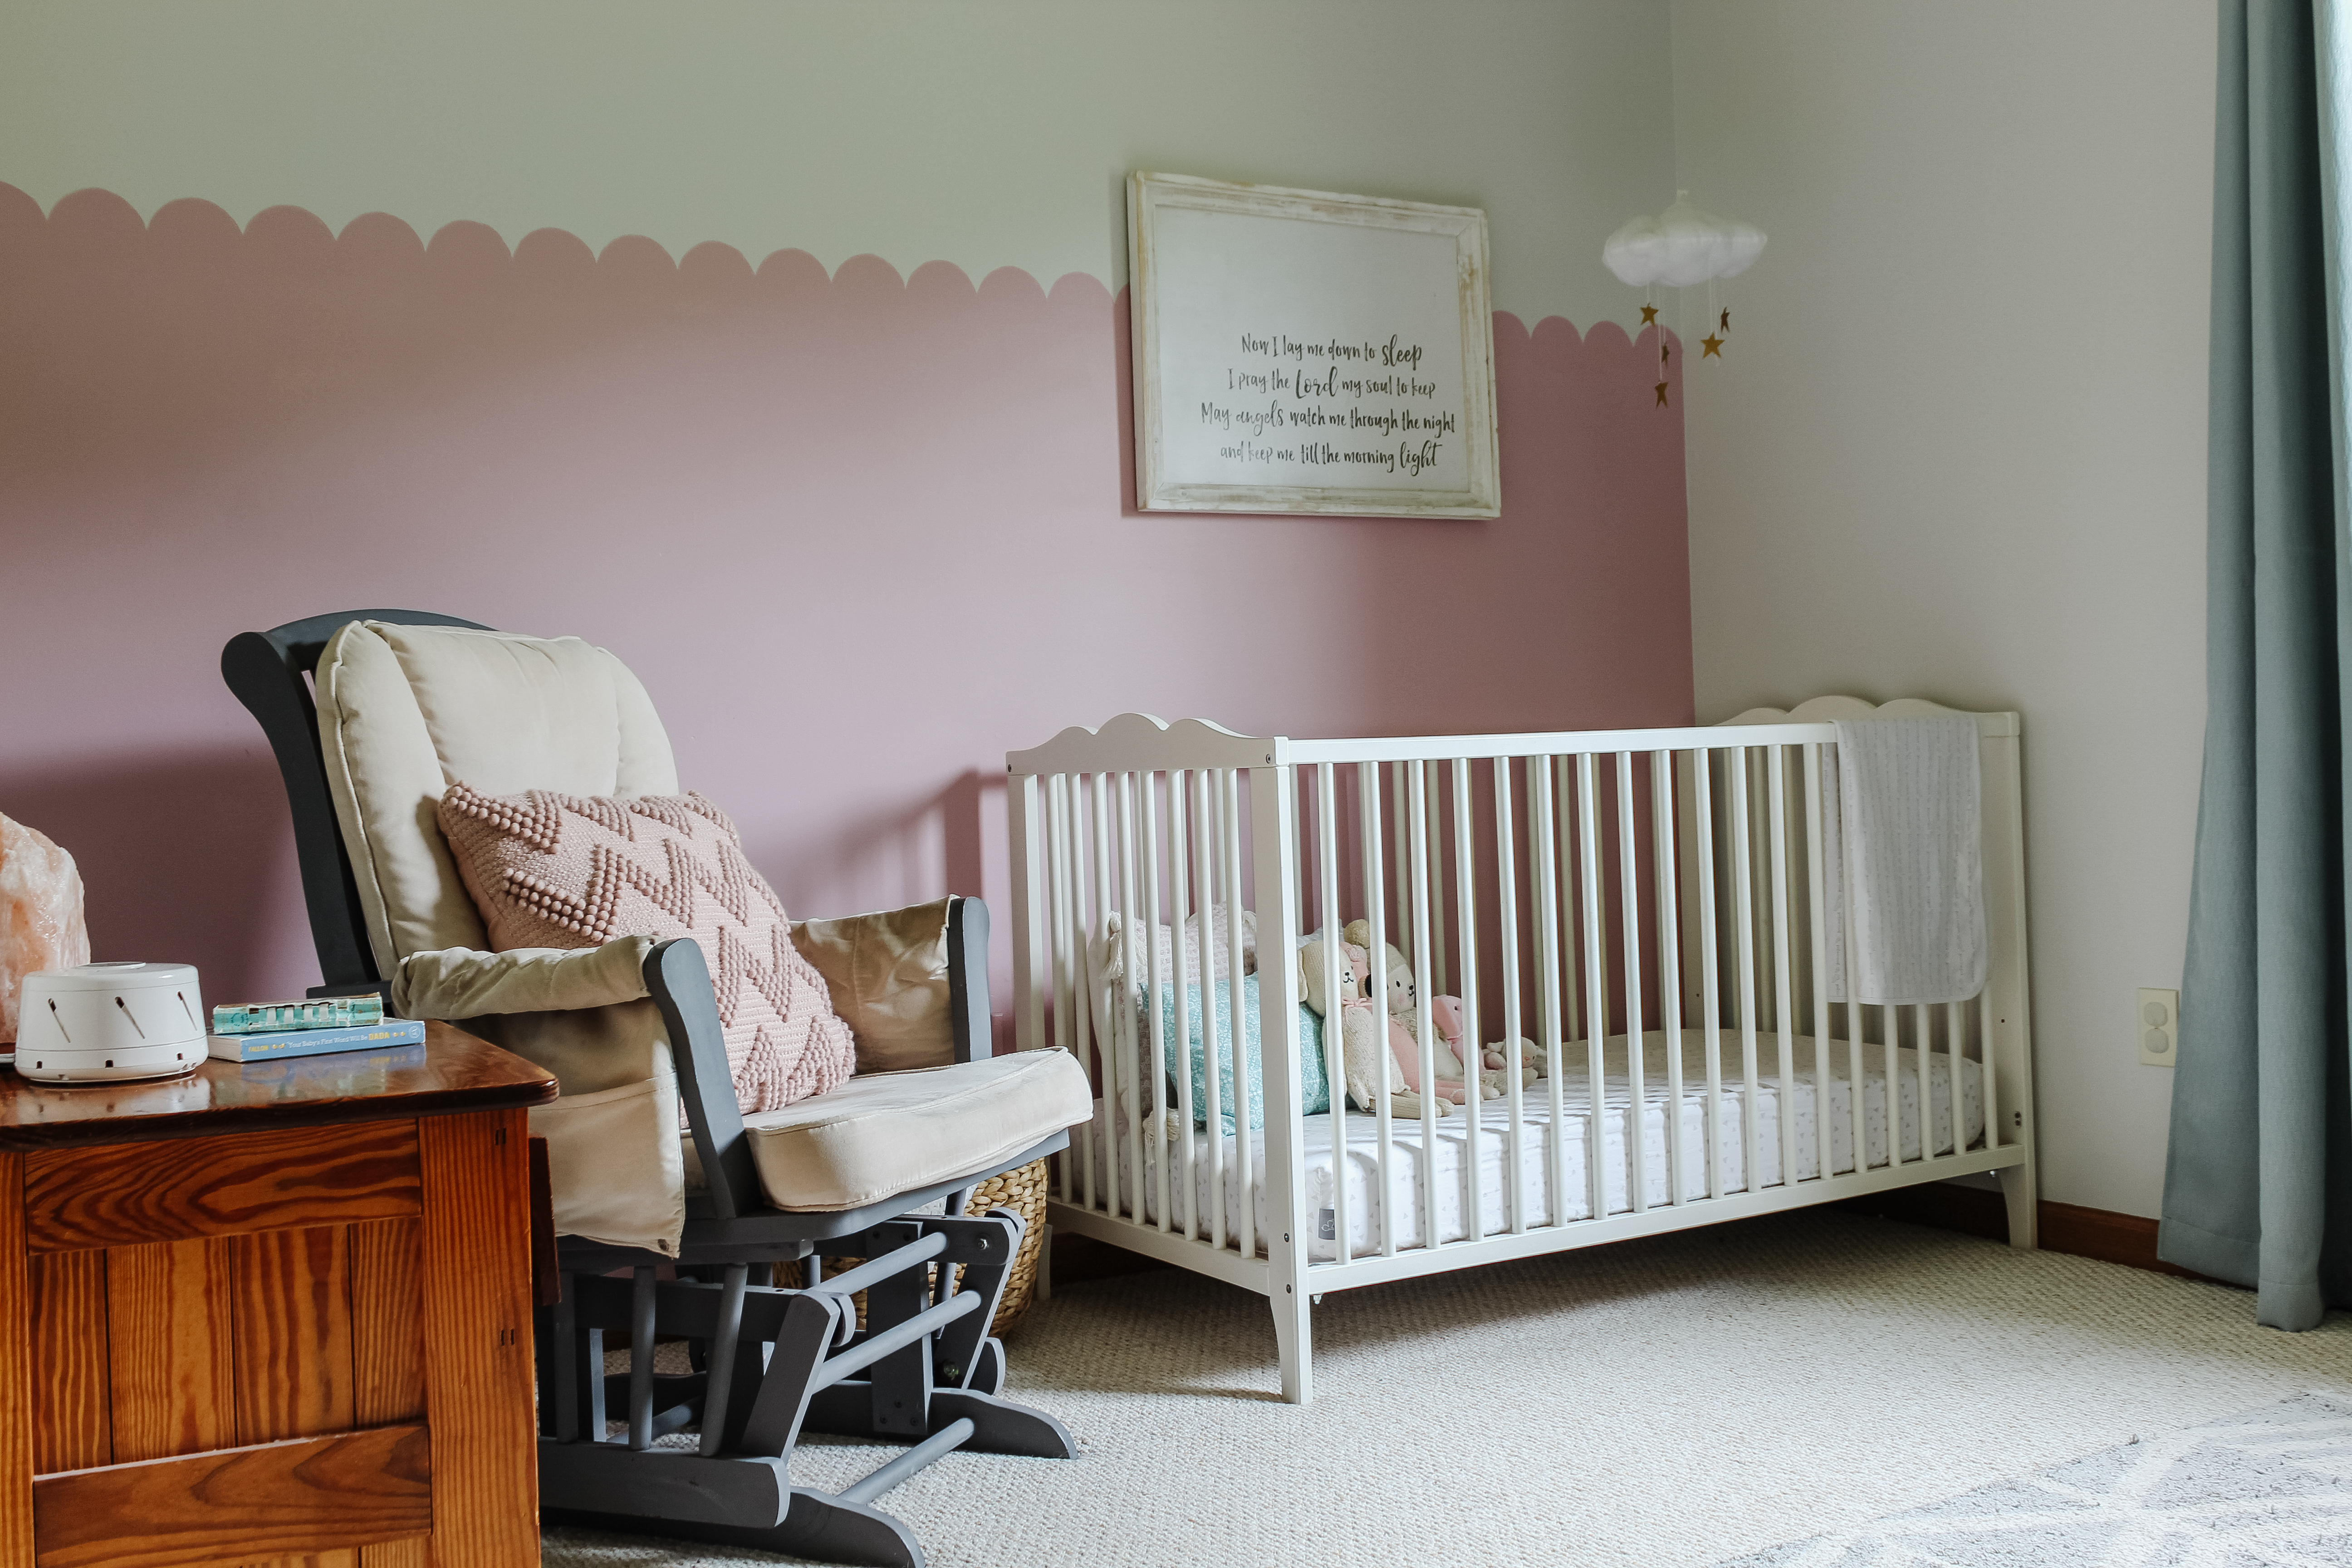
As Vi shifted over to LJ’s room, we had to move some furniture around and this room basically just became a catch-all storage spot until we can decide what we want to keep for the nursery and what we want to get rid of. Here’s what it looked like when it functioned as Vi’s nursery:
I have a feeling that this renovation is going to be one of those times where things slowly come together piece by piece, but I threw together a simple mood board with some of the initial ideas I have for the space. This just gives me an sense of the direction I want to head: lots of earth tones and graphic prints, with plants to bring in an organic feel and soften things up.
First things first, the pink scalloped wall needs to go. While it is super cute, it was really done as a simple solution to update the room and move it away from feeling like a sterile white box for Vi. This week, my plan is to prep and paint all the walls (99% sure I’m going to go with Sherwin Williams Evergreen Fog). I’m also strongly considering adding a ceiling treatment in the same color – perhaps something similar to the planking we did on the ceiling in the office? We’ll see!
I’ll be sharing my real time progress over on Instagram, so be sure to follow along there if you want more frequent updates. You can also check out all the other ORC participants here – lots of fun projects happening this time around!
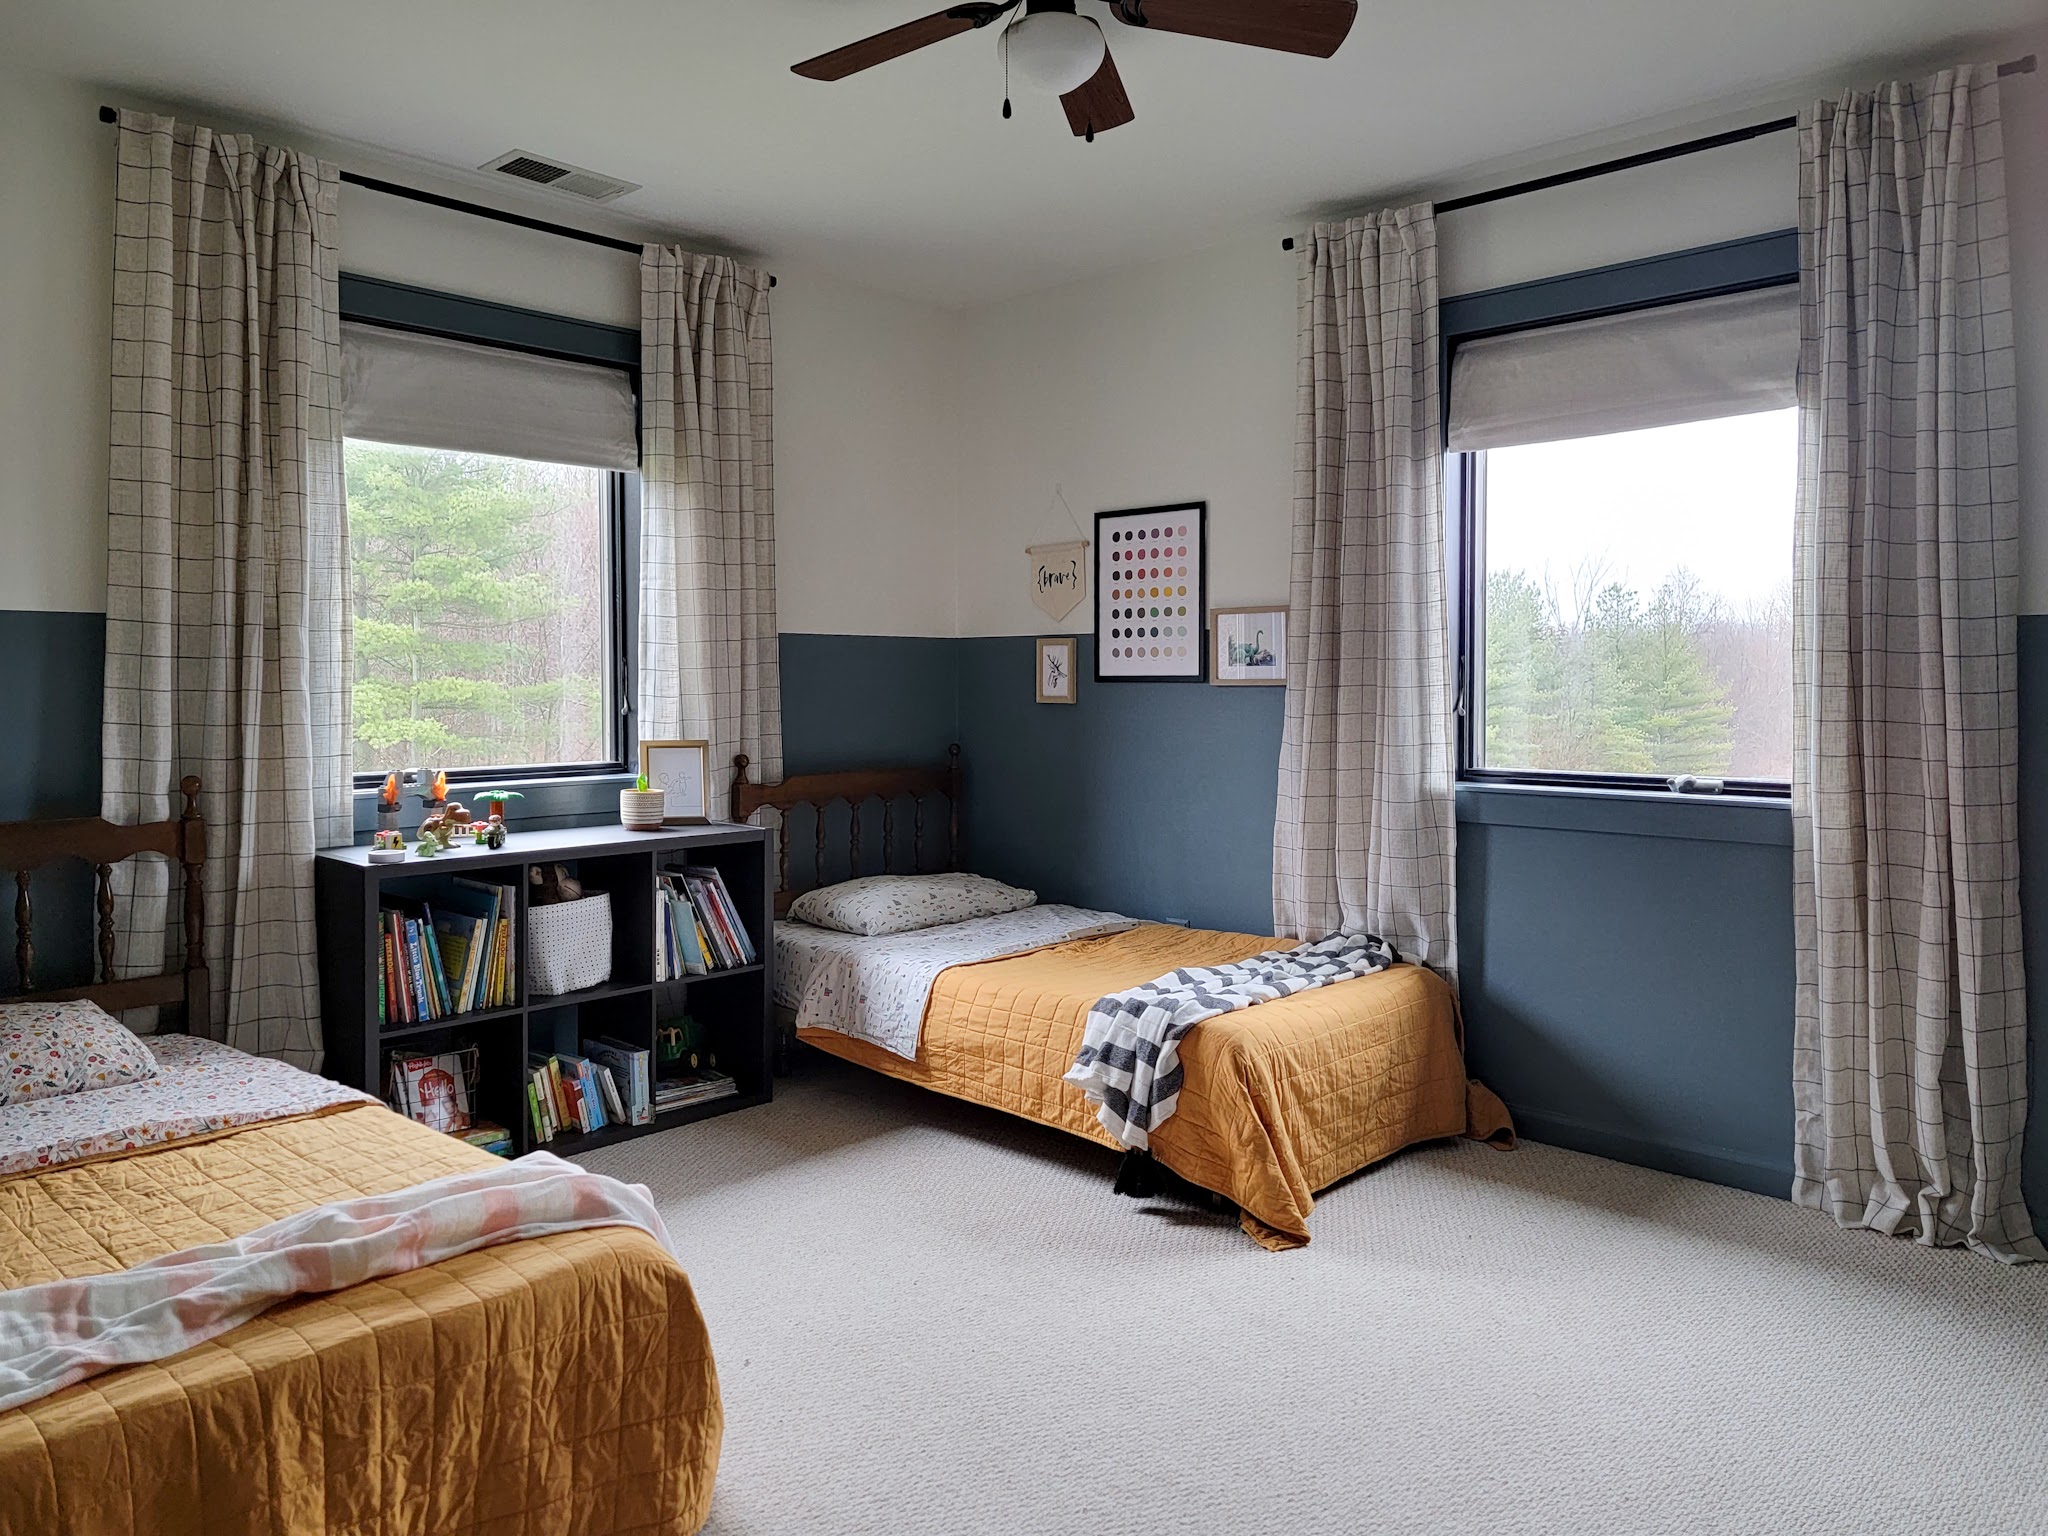
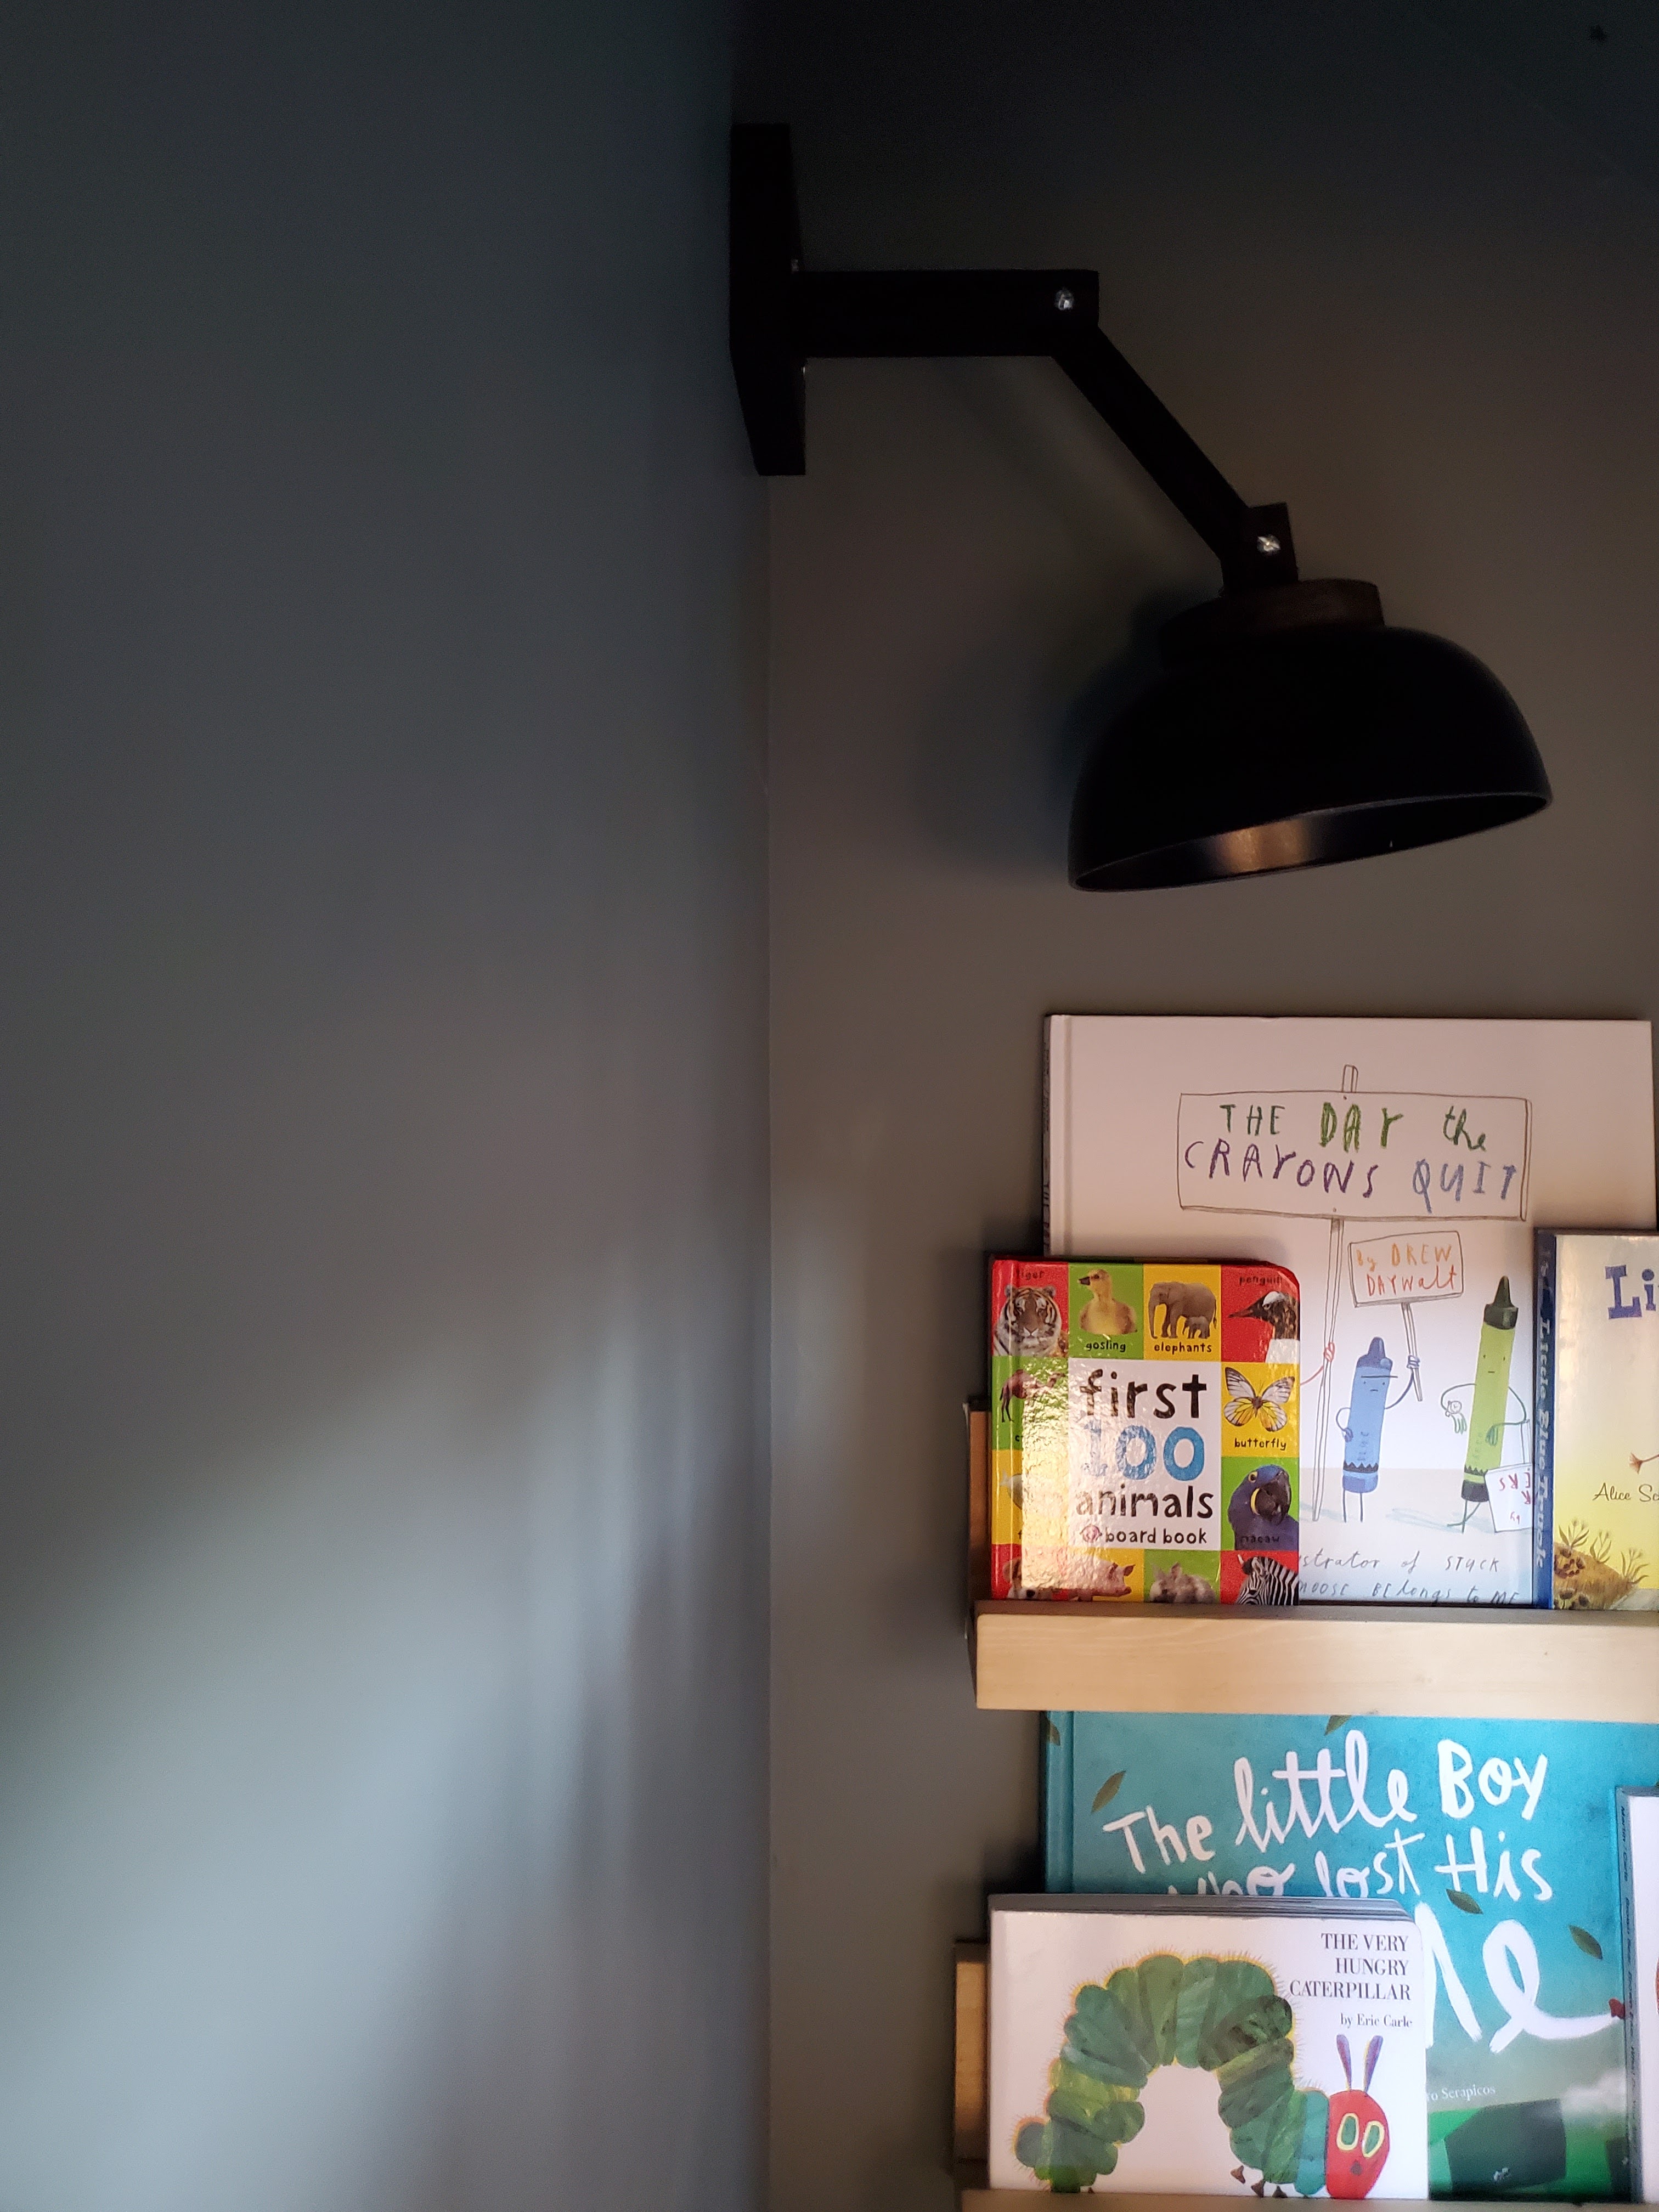
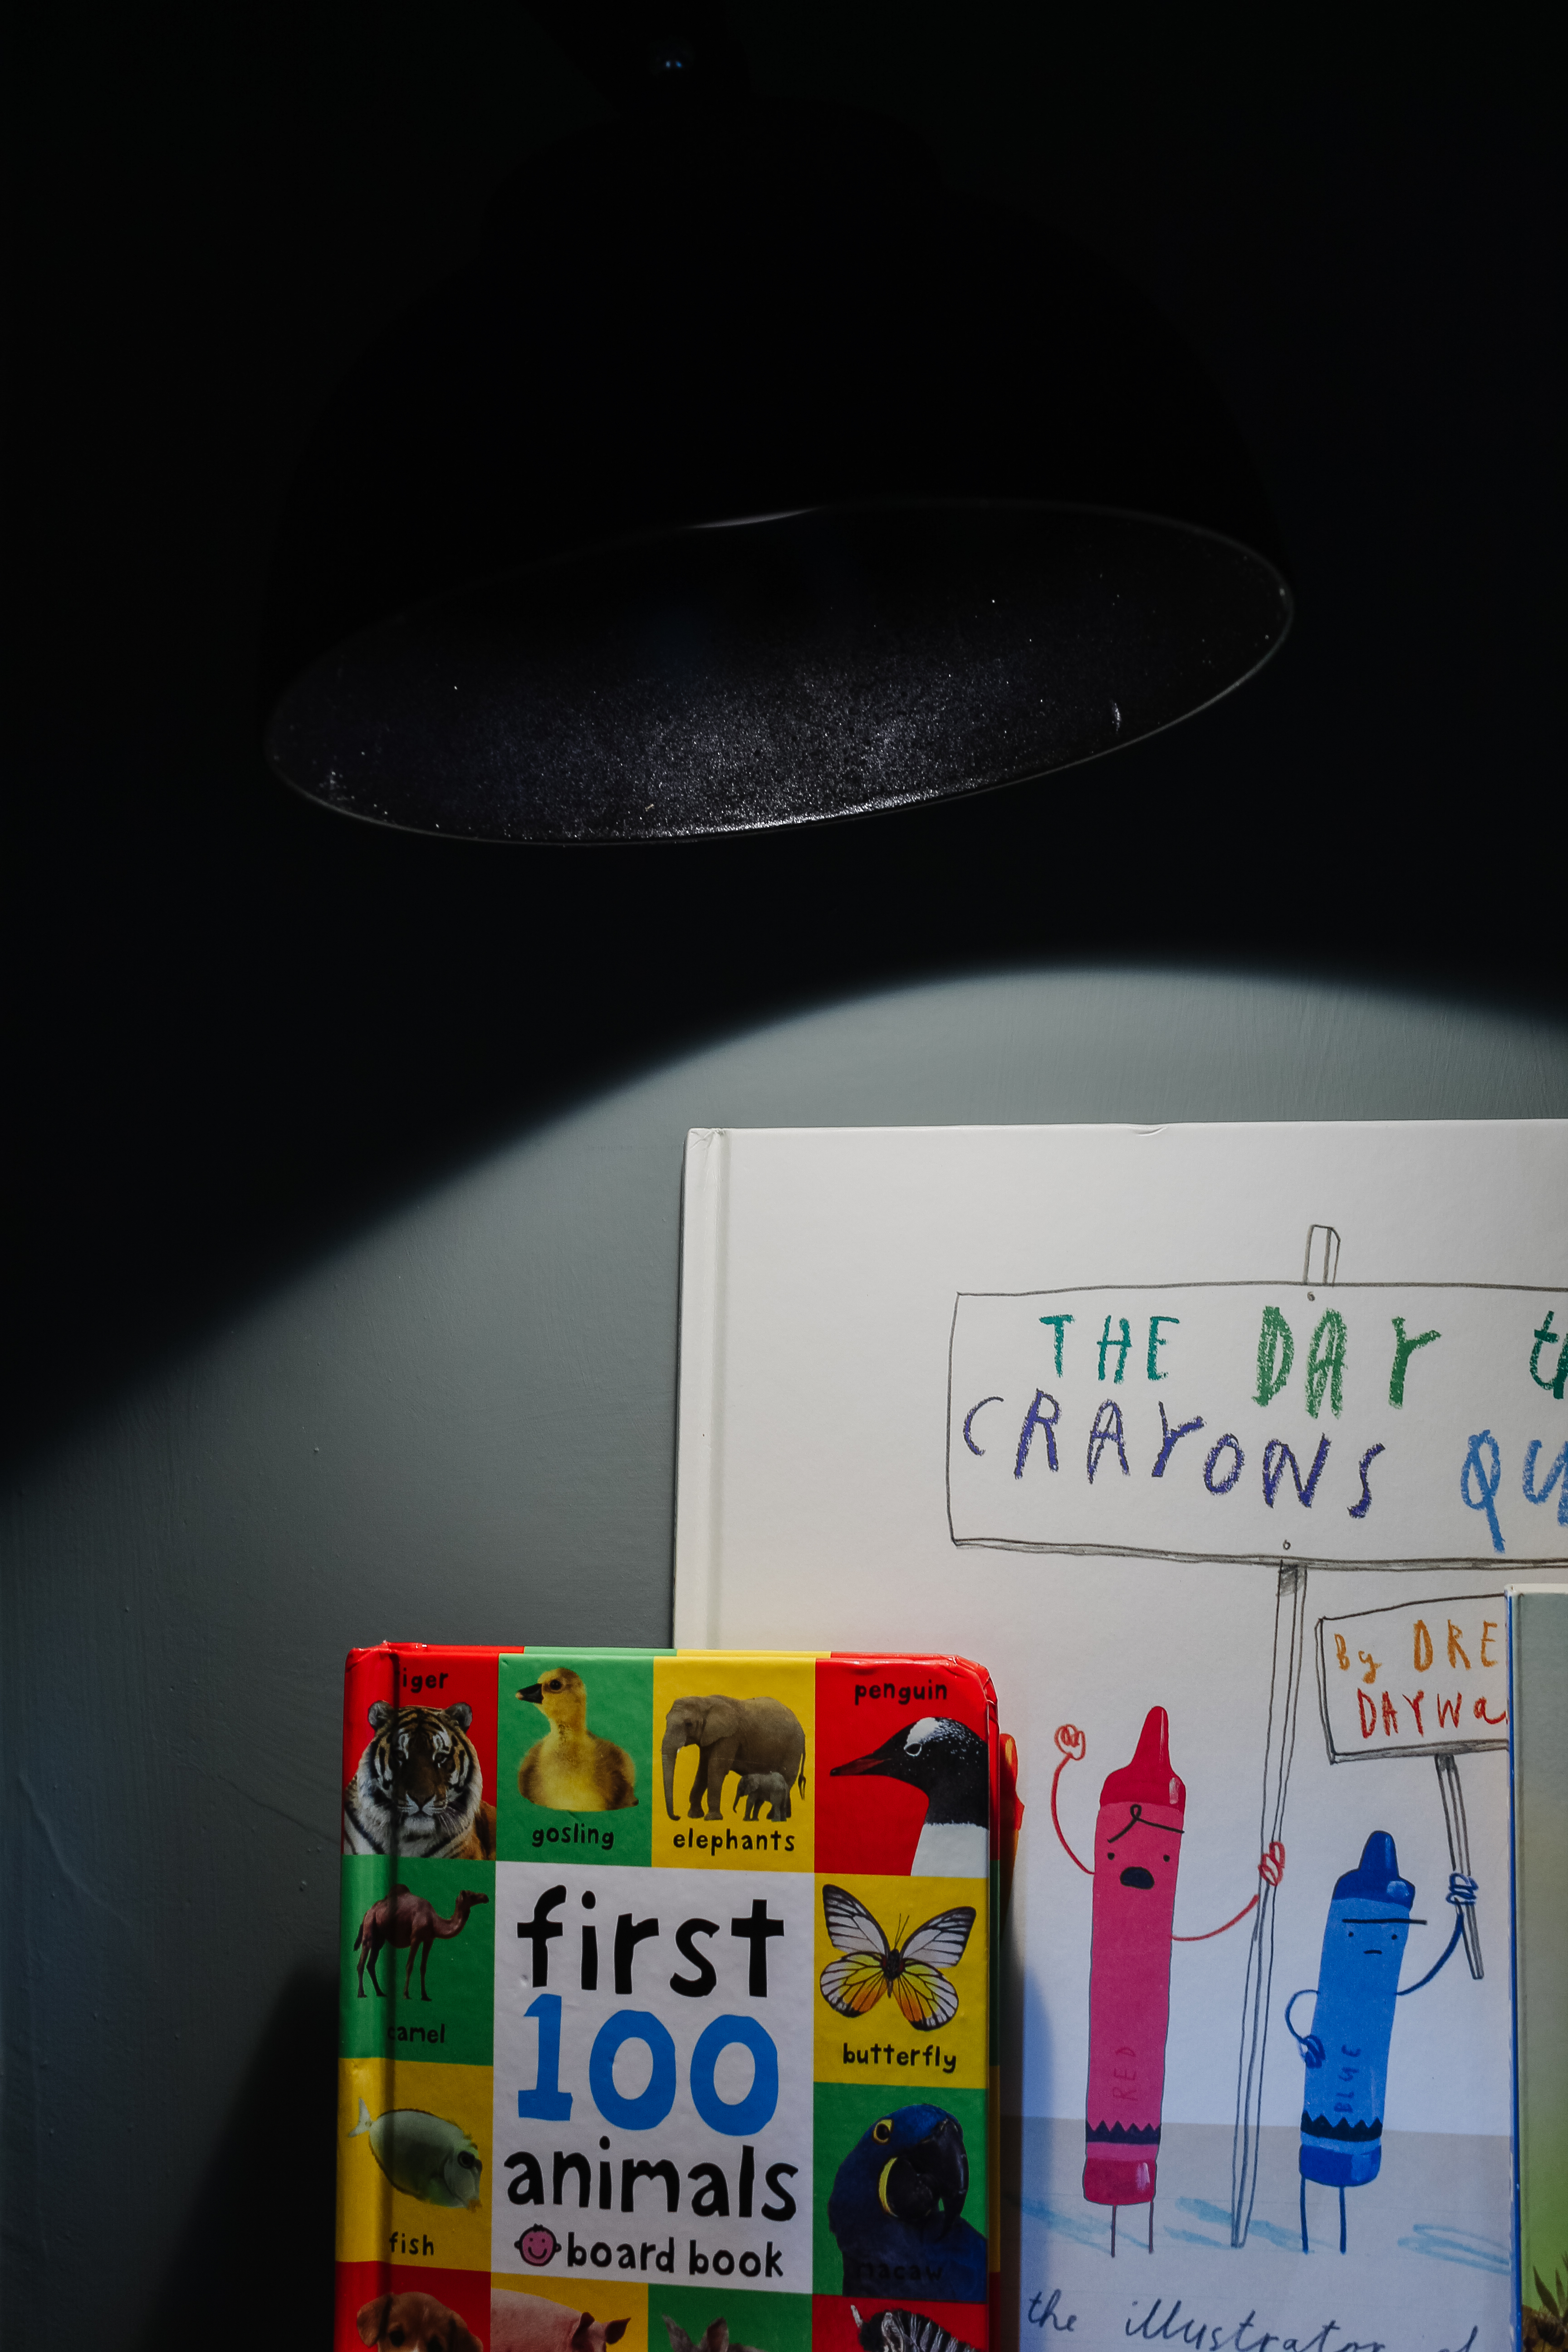
A couple weeks ago, I started a little mini renovation on the bedroom that LJ and Vi recently started sharing. It all started with thrifting matching headboards for their twin beds, which naturally led to upgrading bedding. I also put together a new shelving unit in between beds to double as a nightstand and bookshelf and switched up their artwork. I then installed some blackout blinds and new curtains, and this side of the room is feeling very different now!
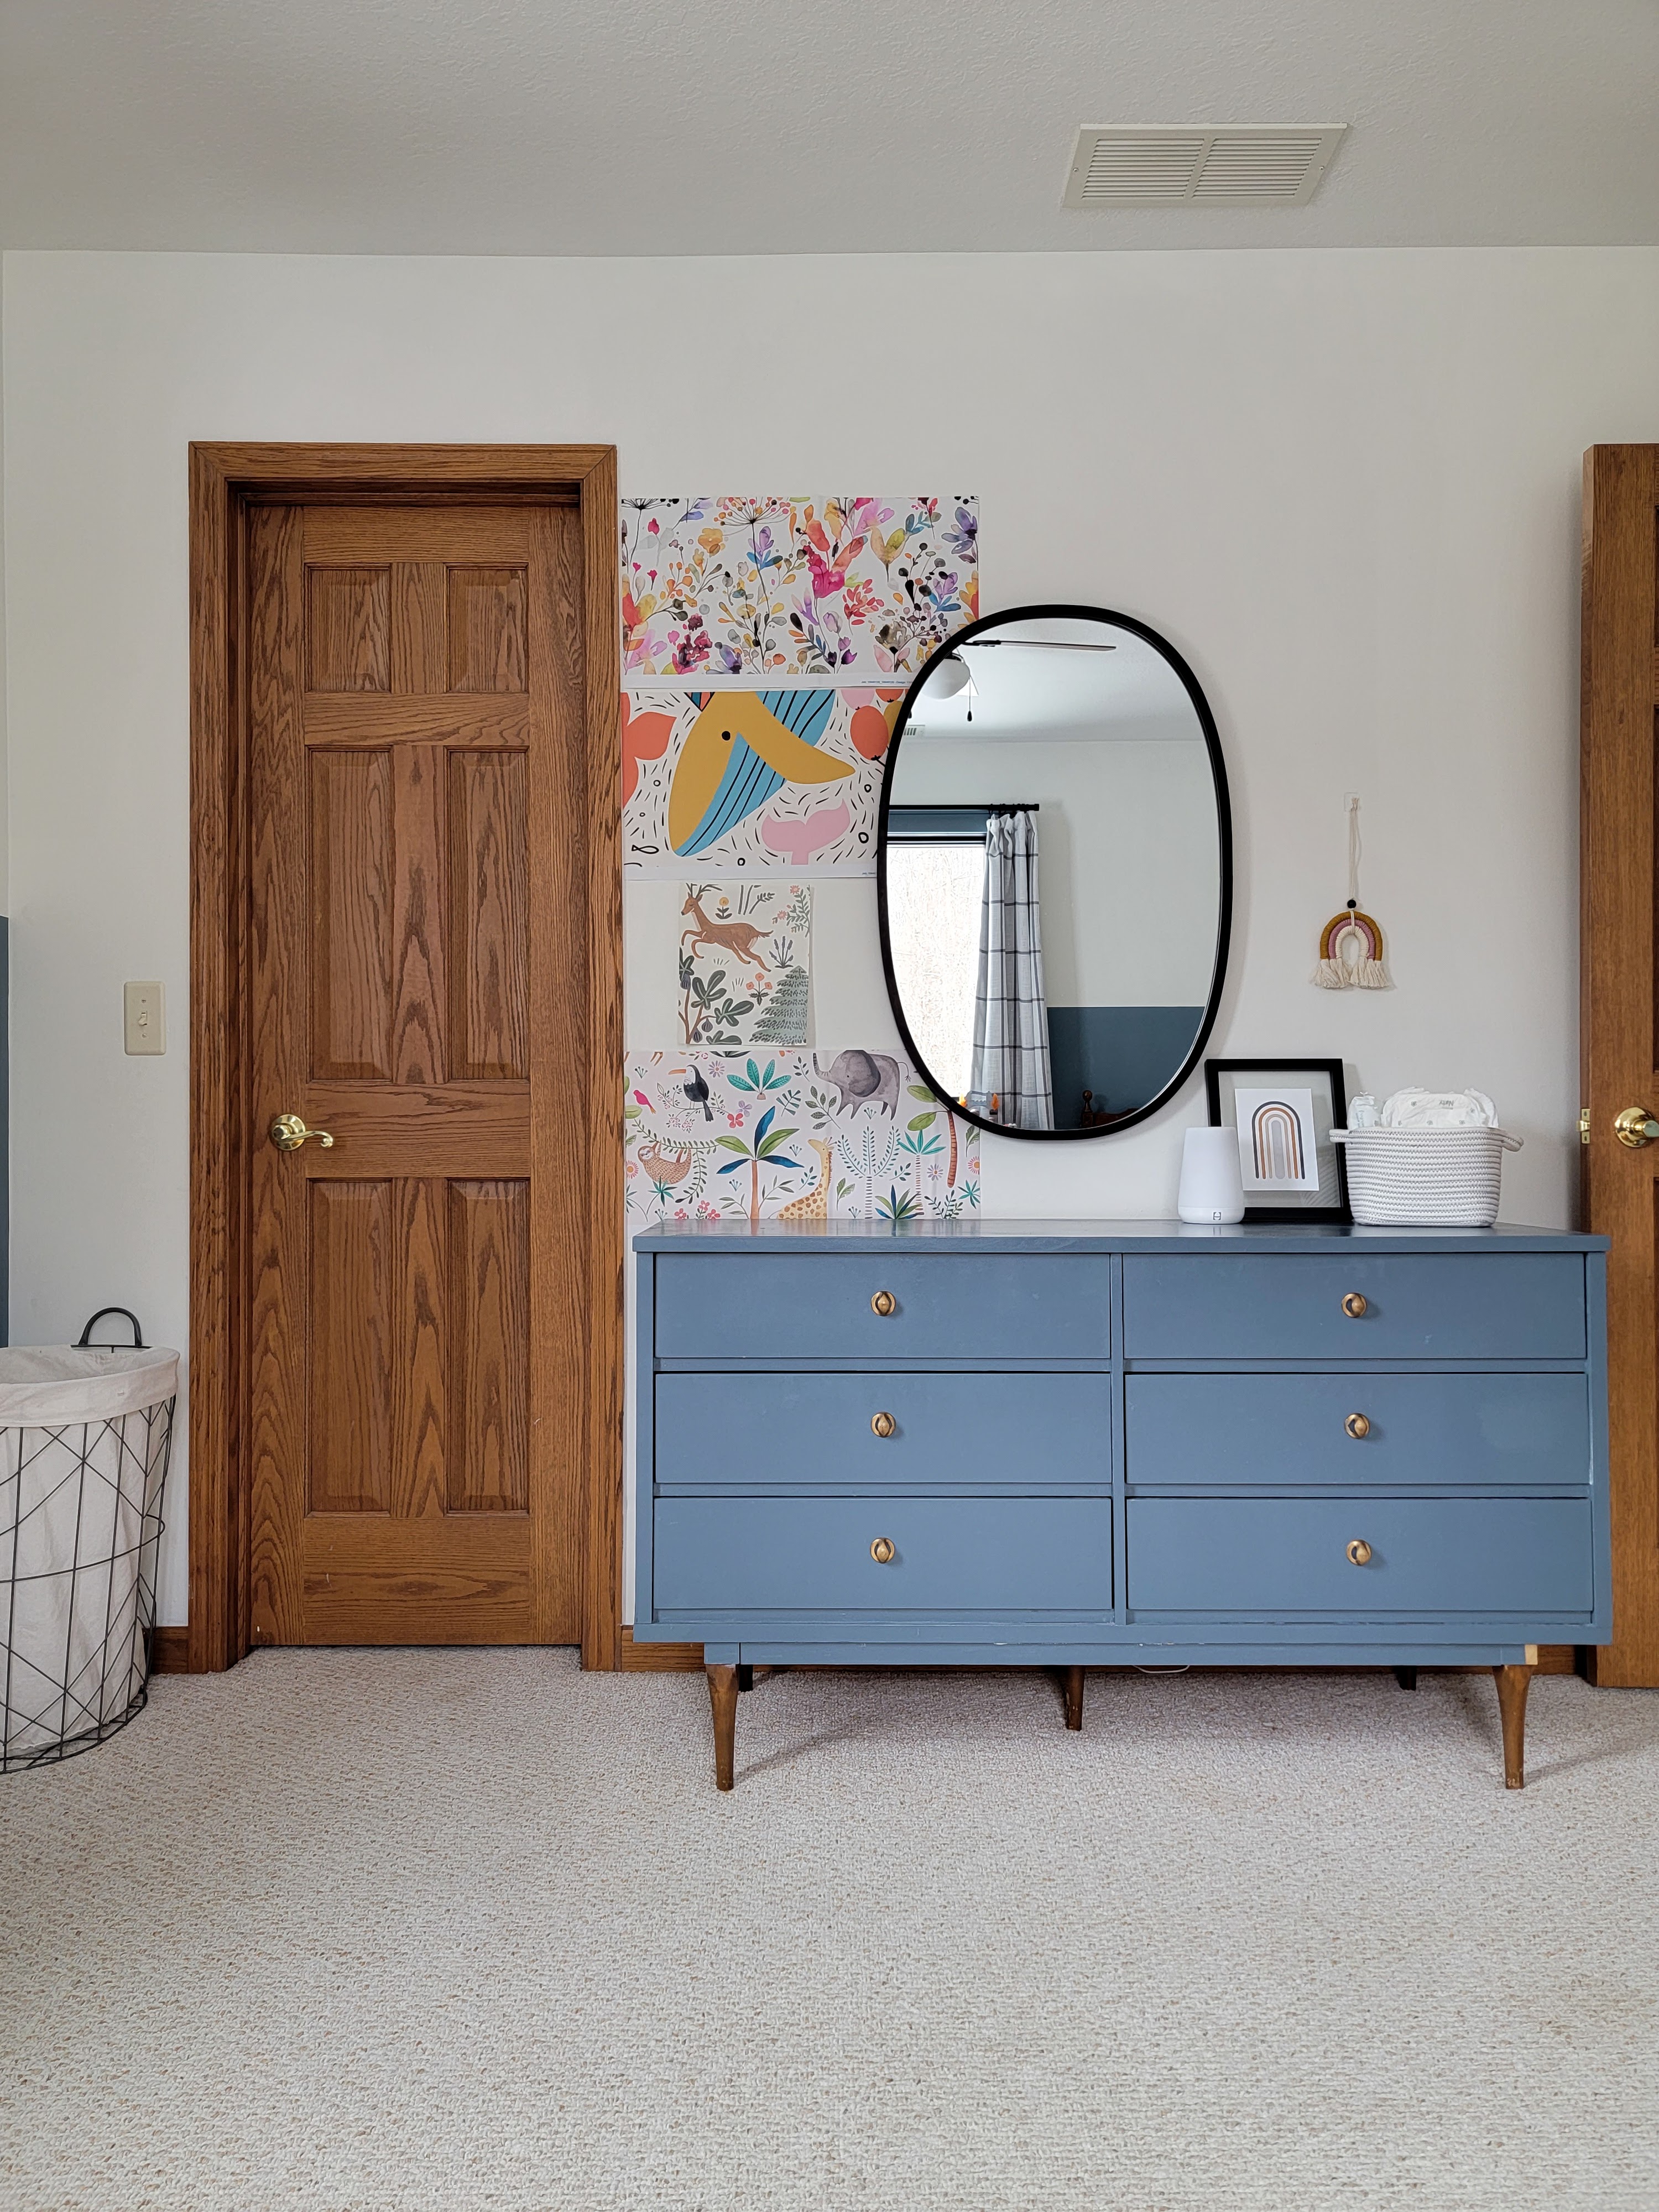
I’m ready to turn my attention to the other side of the room now. This side has the entrance to the room and the closet door, so it’s mostly a walkway area. It does have the dresser along the wall but I’ve wanted to add some more visual interest to this area.
I previously shared that I was wanting to put up wallpaper and after some internal debating back and forth, I decided to go with my gut and ordered a pattern. It just arrived this week! And I’ll be honest, my selection might surprise you. It was not an obvious yes for me, and at first it wasn’t even in my top three. But the more I thought about it, the more I loved the idea so I went for it!
I chose . . .
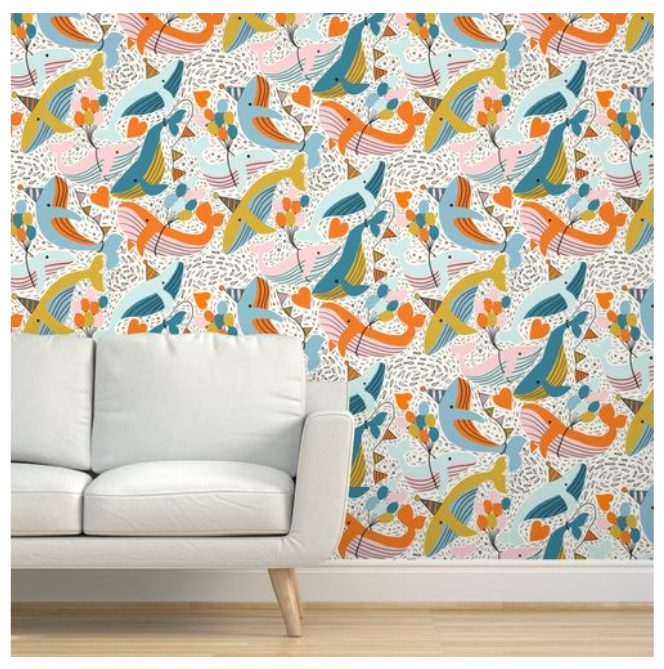
party whales!
Since we’re only doing one wall, which will essentially have two doors (the closet door and the entrance door when left open) and the dresser and mirror, it’s really not that much wall space. I think a large, bold pattern will bring much needed fun and whimsy without being too overwhelming and this pattern is just so unique and charming!
Here’s a peek at the large pattern on the wall as shown on the Spoonflower website. I will note that the colors, particularly the orange, feel more muted in person than they do on screen, which I expected based on the sample I received.
I know this is not a forever type of wallpaper pattern. LJ and Vi are going to share this room for at least three years, then when he’s ready, baby boy will transition over and Vi will go back to her own room. At some point my boys will more than likely want a change – I think of this phase that I’m creating now as their “kid” bedroom. It’ll last for maybe a 6-8 year period and then we’ll move the room into their tween/teen phase with their input and preferences. Kids rooms are always evolving because their needs are ever changing. For just one small accent wall, I still feel like it’s totally worth the investment of wallpaper for this phase!
When I was talking about my options on Instagram, I received a lot of input on the various options but one comment stuck out to me with regards to the whales: “…the design is so distinct that it will stick in their minds as they grow. When they are much older, they will still remember their whale room!” I love that idea and honestly, it’s what tipped me over the edge to team whales. To think that someday our kids will feel nostalgic for the little whale room of their childhood – the place where they got snuggles and bedtime stories from mom and dad, the place where they whispered the secrets of their young minds to one another long after the lights went out, the place where they laughed and played and felt safe from the worries of the world – well, that just makes my heart feel all sorts of soft and happy. May the whale room be a place of childhood memory making for many years!
I’ll be sharing real-time progress on my Instagram this weekend so be sure to follow along there for how the installation is going!
We’re another week in to the One Room Challenge and this week has seen a lot of changes in the laundry room.
For one, I chose a better shade of yellow paint for the walls (read about the Big Bird yellow mishap here). I still couldn’t get samples, but I used the small door to our little nook under the stairs as a starting point. I knew I liked that muted yellow (Sherwin Williams Mannered Gold), but it was too dark for the laundry room. I got out my Sherwin Williams swatch book, found Mannered Gold, and looked to the top of the swatch page for a similar, yet lighter shade. I was drawn to Blonde and decided to go for it in an eggshell finish. Thankfully, this time it worked out and it’s the perfect soft, muted yellow!
This room is small, so it felt like a good opportunity to add some fun details. I loved the idea of wallpaper, but didn’t want the expense since we’re likely going to completely gut and remodel this room and the adjacent bathroom in a couple years. A stencil was the perfect solution!
The laundry room is sandwiched between the office, which has planking on the walls and ceiling, and a full bathroom which has a two tone block print. Both rooms feel very linear and graphic, so I wanted to soften up the laundry room with a floral stencil. I found this one at Hobby Lobby and it was perfect!
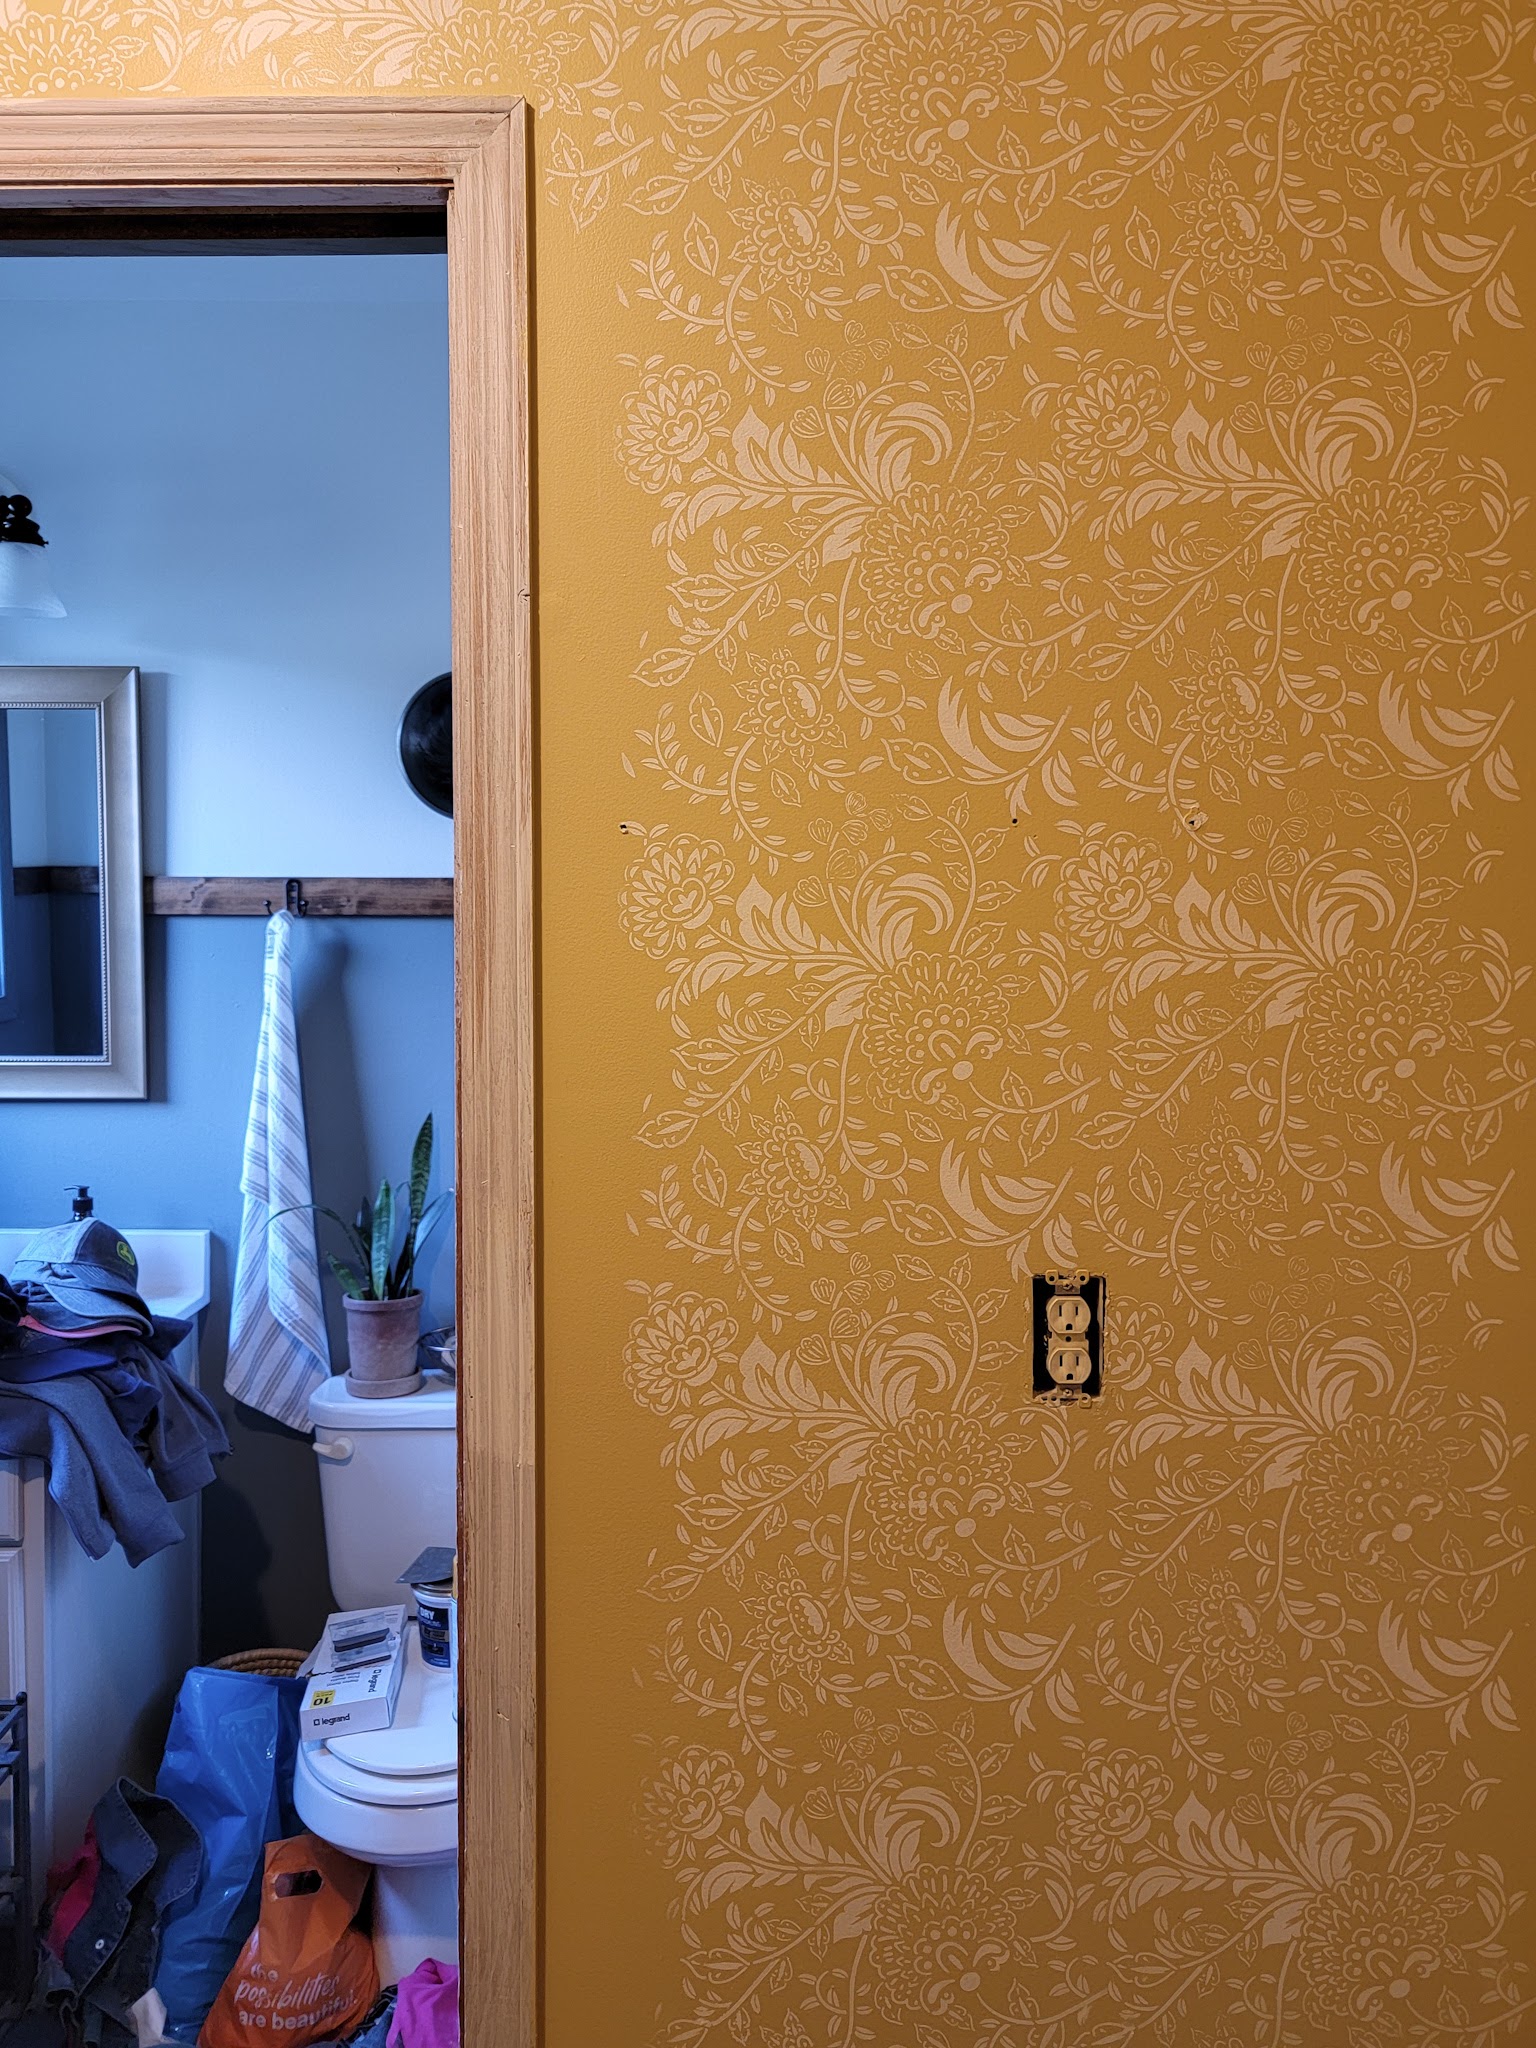
I decided to do the entire stencil in one color, Sherwin Williams Alabaster, because the adjacent bathroom and the majority of our main floor are all painted that color. It brings a nice cohesive feel to the main floor! I’m rolling it on with a foam roller and it’s going so quickly! I’ve only devoted about 3.5 hours to stenciling and I’m over halfway done with the room. Maybe that seems like a long time to you, but it’s nothing compared to the time it took me to stencil one wall of the guest room so I’m a happy camper!
I did mess up though. After the first day of painting, I didn’t wipe off all the paint from the stencils. It caked on and dried, and essentially ruined the stencils. I spent a lot of time and energy trying to clean off the dried paint, but it ended up being pointless because all the work to get off the paint caused tiny pieces to get bent and the stencil was no longer producing the same crisp pattern. I was so disappointed and frustrated with myself! I ended up having to go get more stencils, and you can bet I’ll be cleaning them off frequently!
Once I’m totally done with the room I’ll share a tutorial of the process but for now, I’m just so so happy with the progress. The stencil detail adds so much interest to the room and really does look like wallpaper – I’m thrilled with it!
So much left to d0 – finish the stencil, paint the baseboards, trim, and doors, replace those boob lights, and install shelving. I’ll worry about all that another day though; today I’m just happy to celebrate progress!
Sources
Wall Color: Sherwin Williams Blonde in eggshell
Stencil Color: Sherwin Williams Alabaster in eggshell
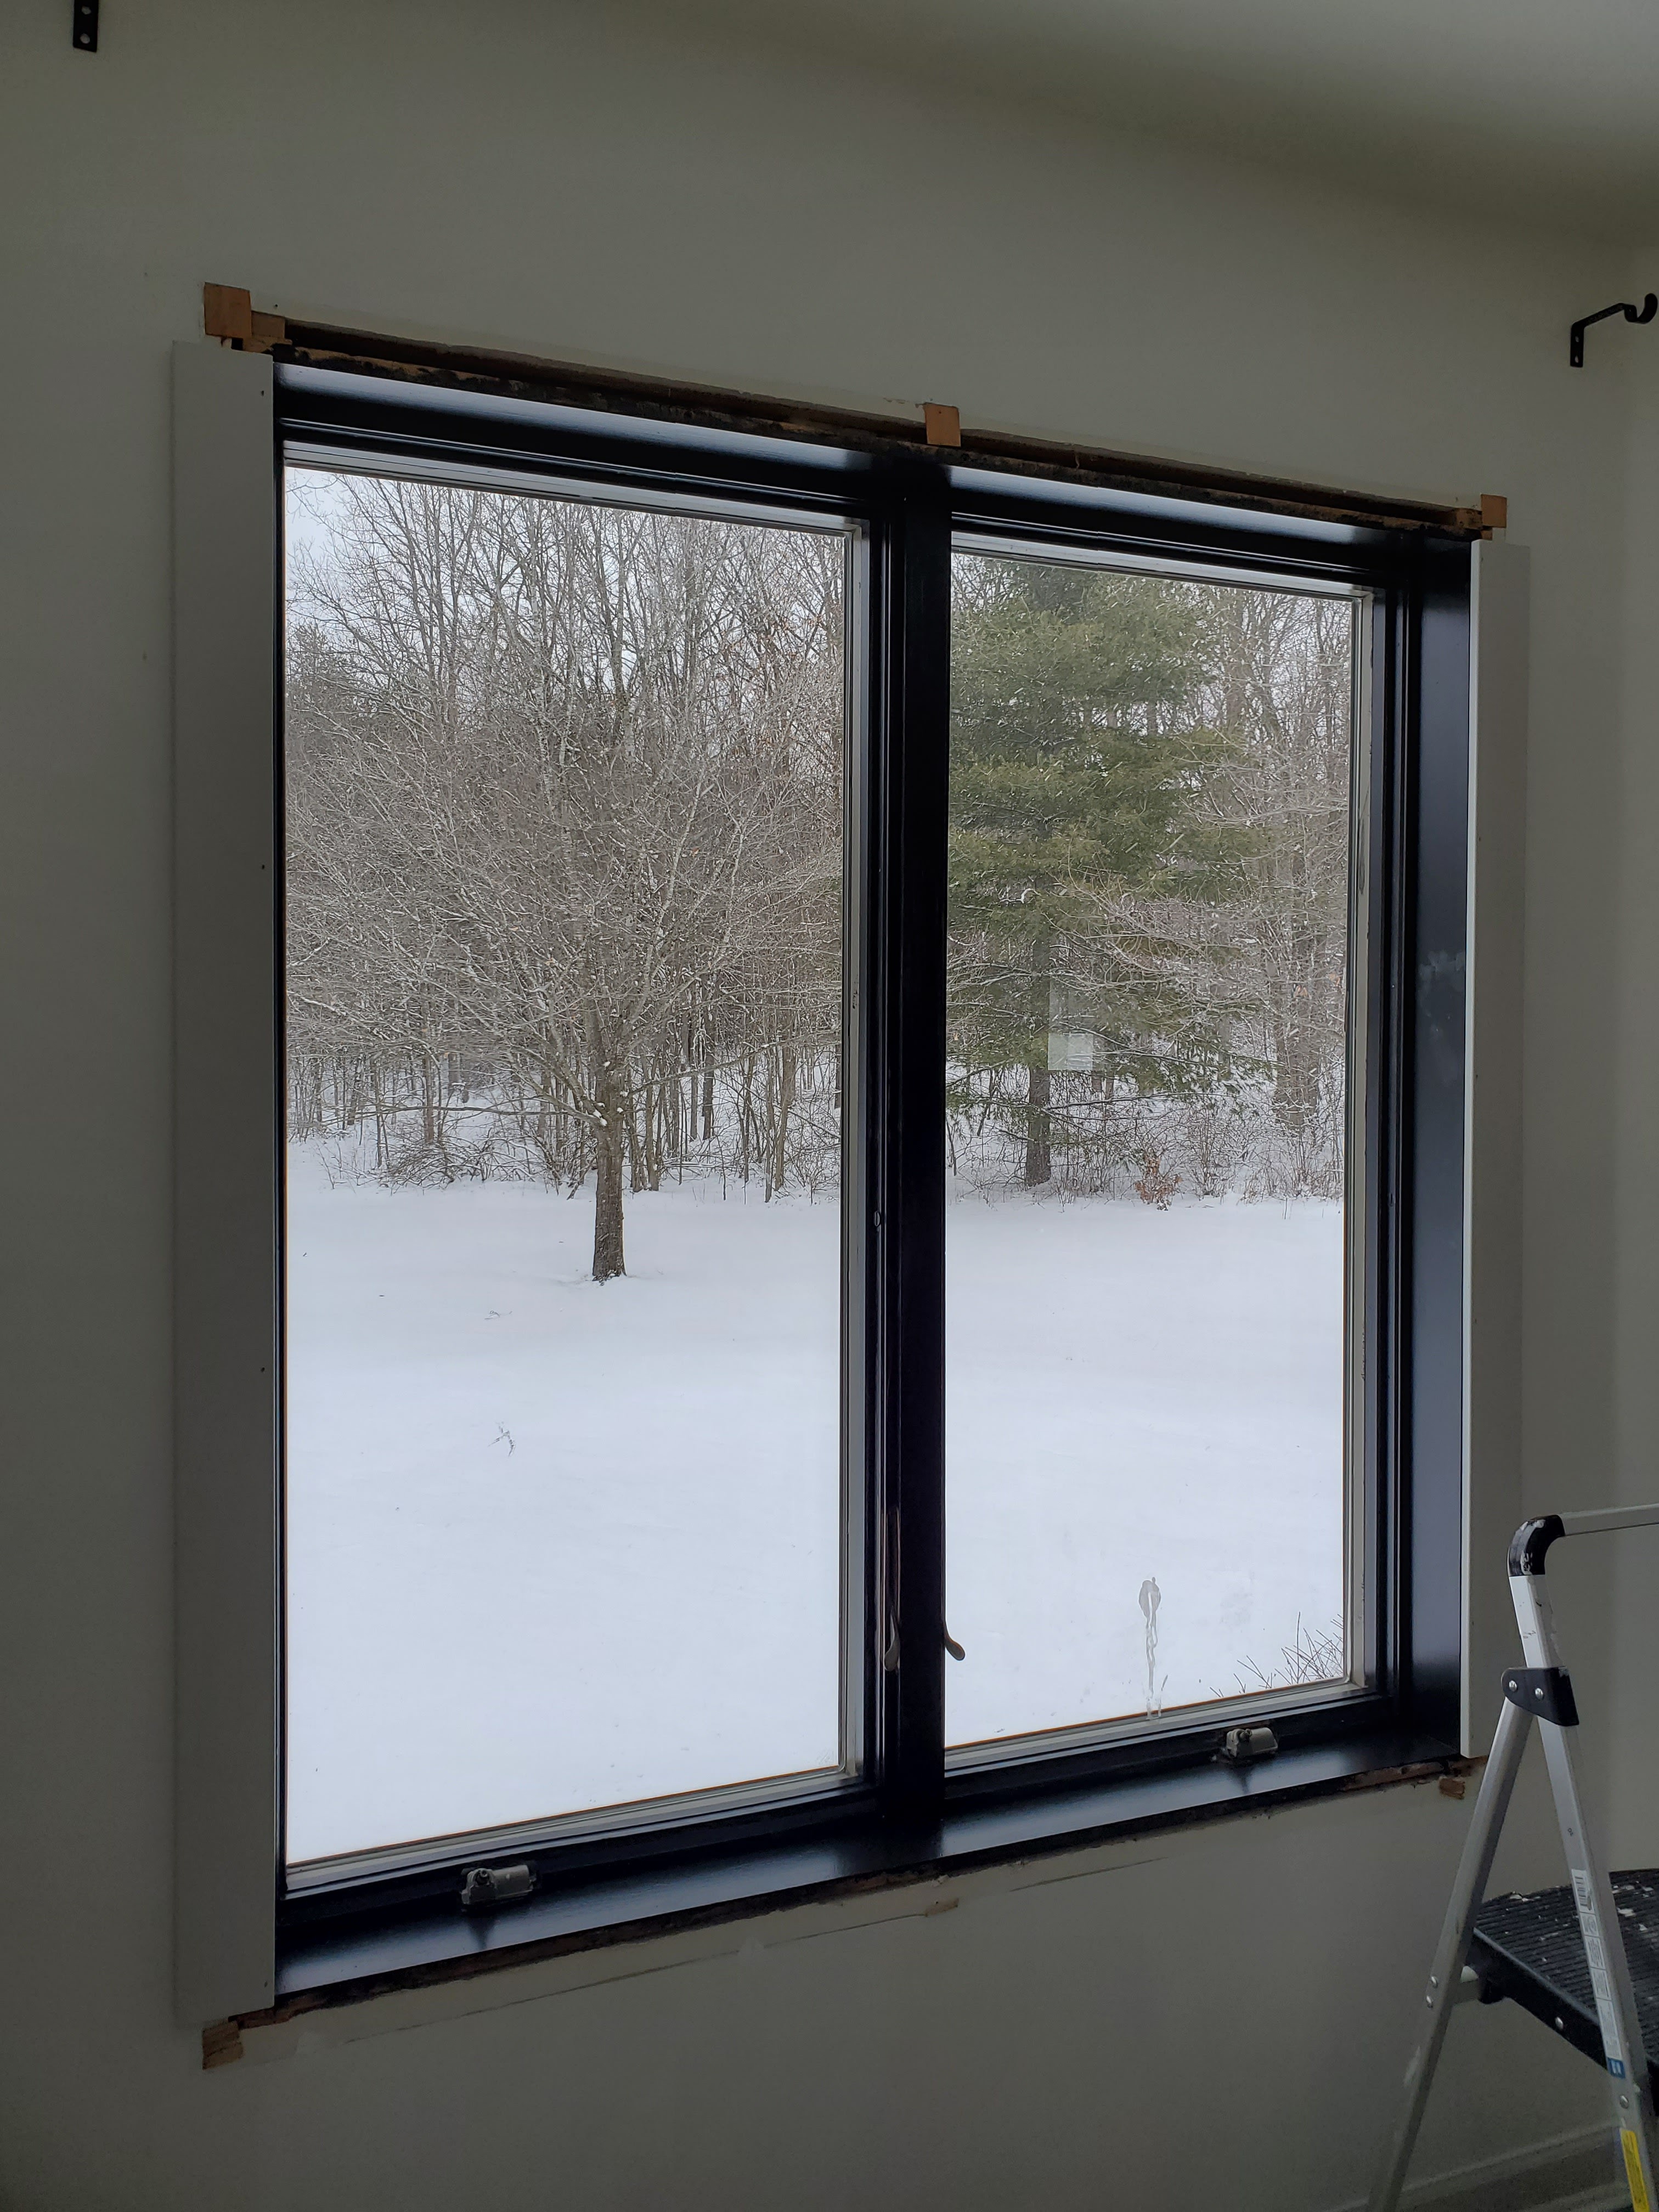
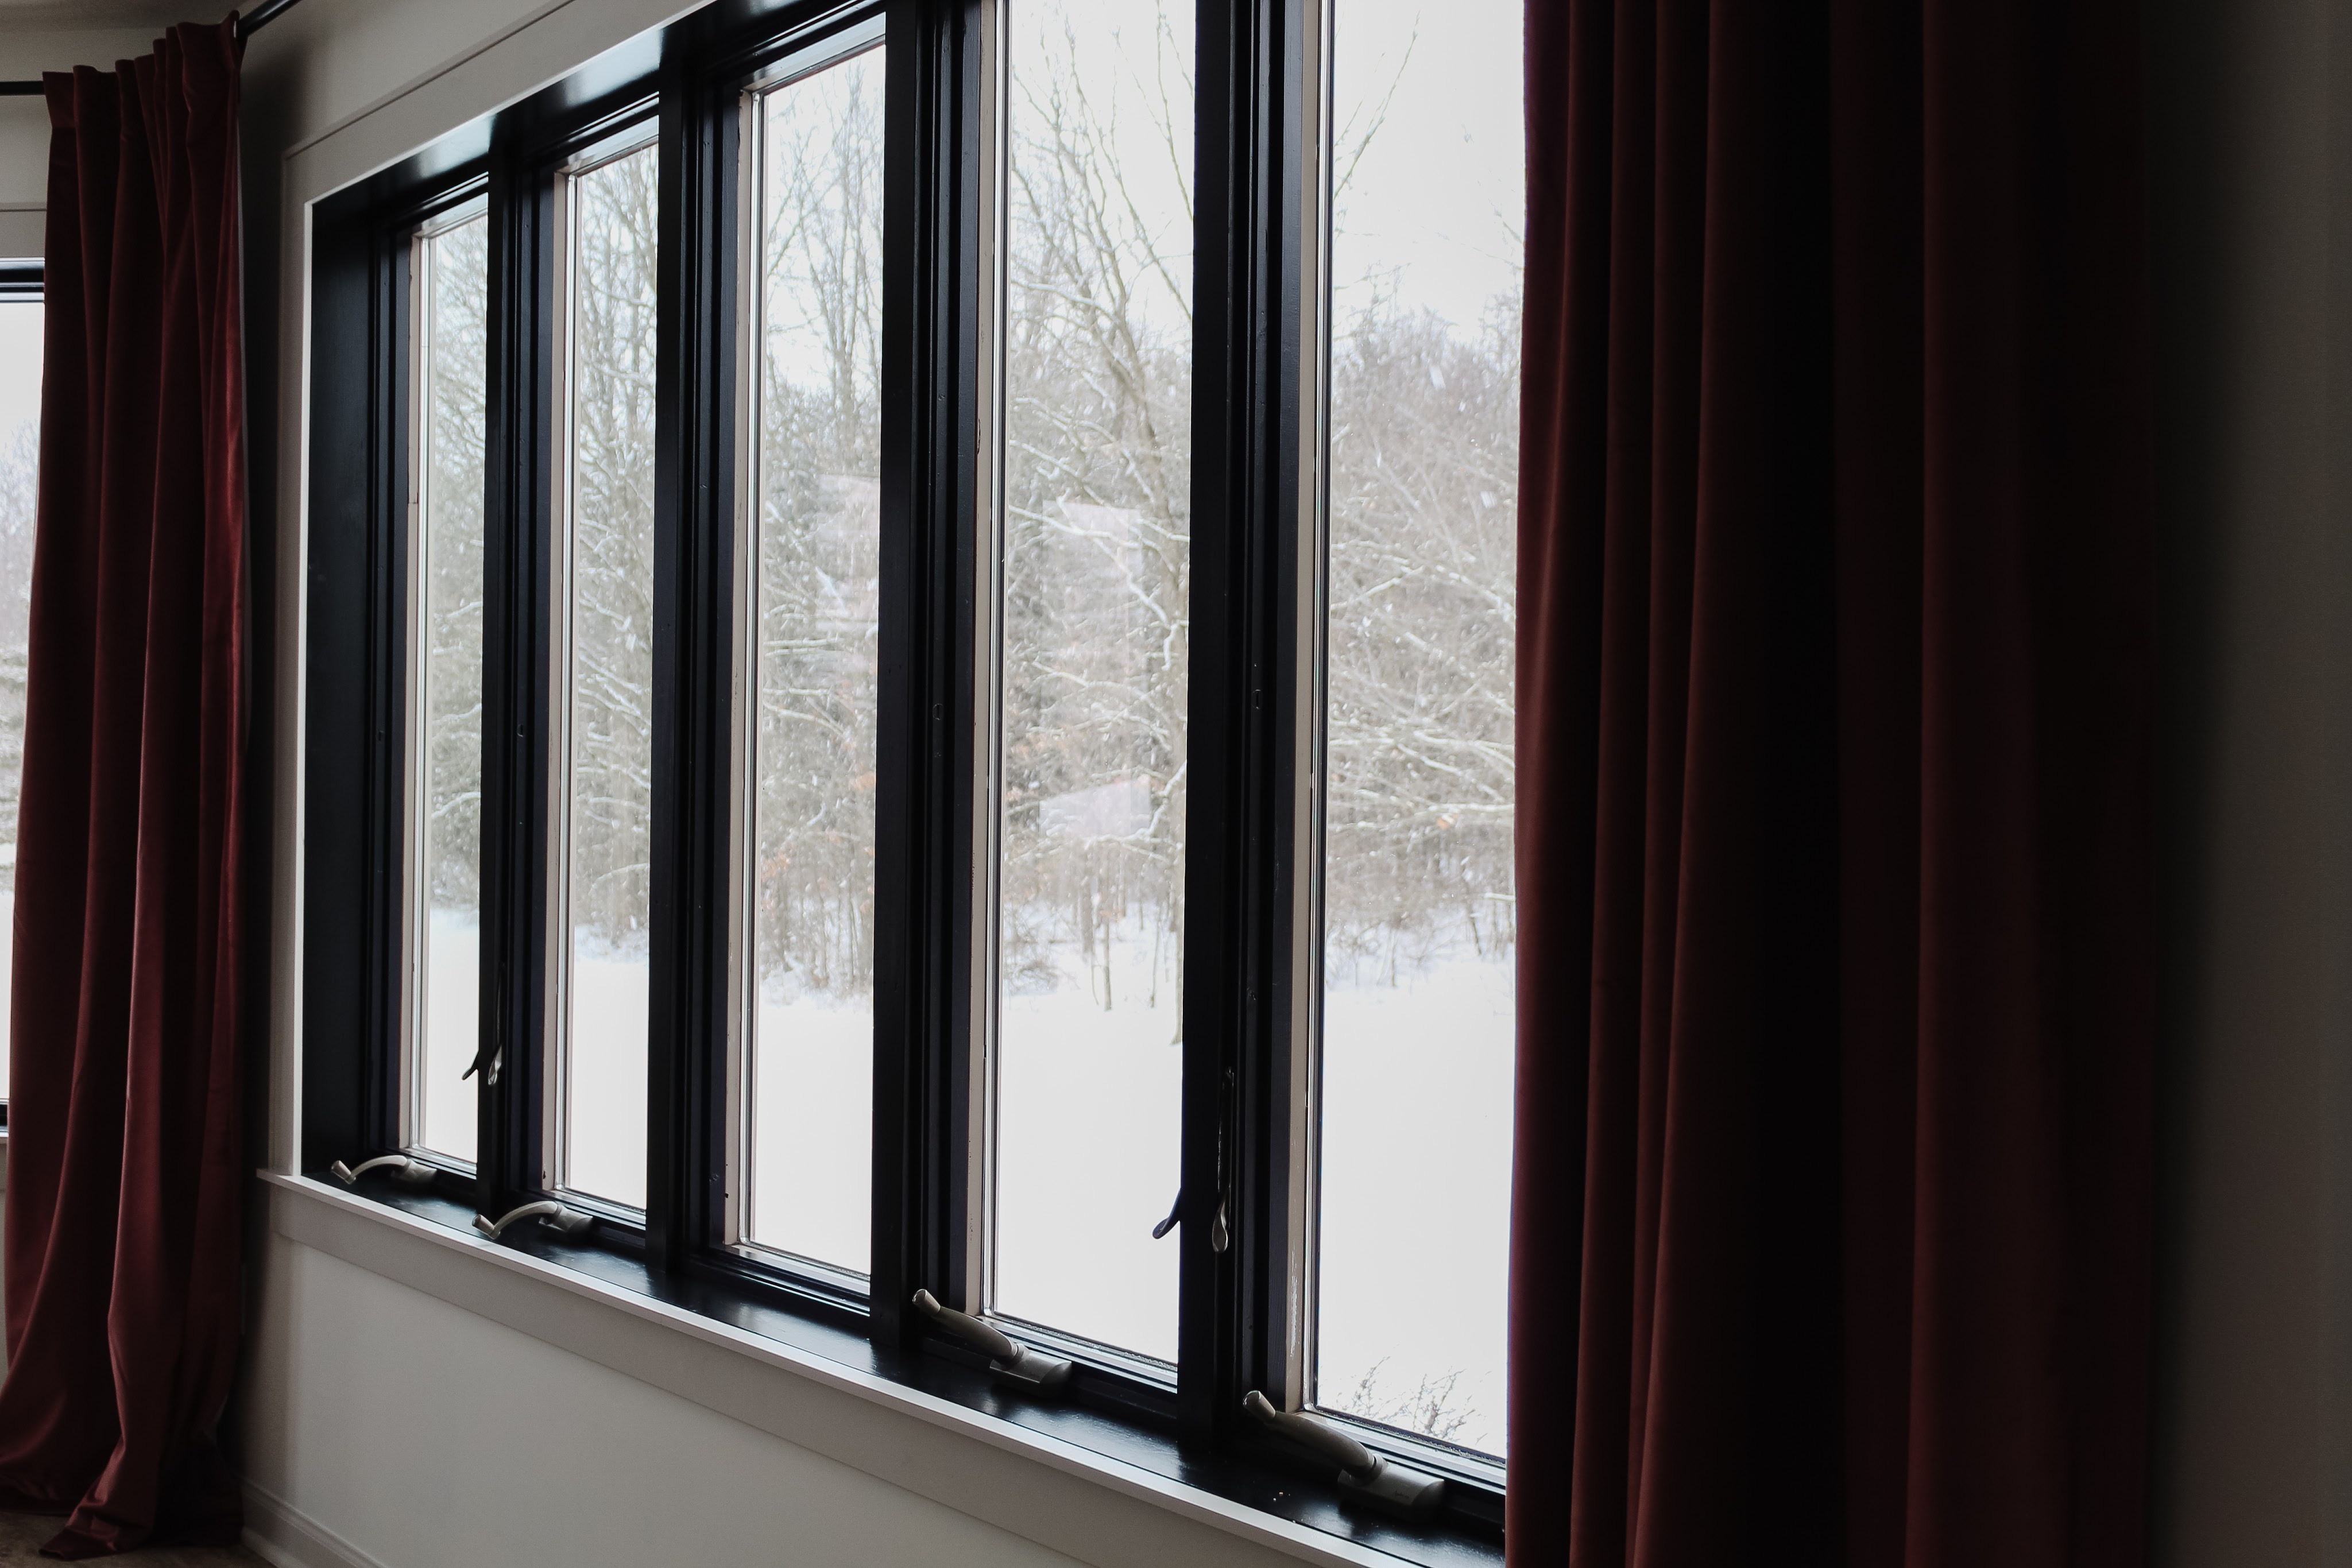
A few weeks ago, I shared the plans for some updates to our dining room and ever since then we’ve been slowly making progress. One of the things I was most excited to do was highlight the gorgeous view outside by updating the windows! I love the look of a nice chunky trim so we decided to take off the previous window casing and replace with thicker trim that would really draw your eyes to the outside. We finished this project last week and today I’m sharing all the details of exactly how we changed the window trim from this:
to this!
I mean, can you even!? In addition to new window trim, we also painted all the baseboards and finished painting the ceiling. All that contributes to this feeling like a brand new room and we’re not even finished yet!
DIY WINDOW TRIM
Materials
-pre-primed pine trim in the following sizes (we got ours at Menards):
3 1/4″ wide x 1/2″ thick
1 1/4″ wide x 1/2″ thick
7/8″ wide x 3/8″ thick
-nail gun and nails (we used 1.5″ nails)
-level
-measuring tape
-crowbar
-miter saw
-Drydex
-stud finder
-silicone caulk
This project is an example of a lot of prep work making the job itself go easier. Justin and I first measured all the windows and determined what type of board and lengths of each board we would need for all the sides. Then we calculated how we could buy lumber in the most effective way. For example, if we needed two pieces of the same width but different lengths, say 58″ and 62″, we could buy one piece of trim in a 10′ length and cut it in two rather than buy two smaller pieces. This prep work took some time but helped us get exactly what we needed in the quickest, most cost-effective (and least wasteful) way.
Once we got home with all our supplies, Justin used a small crowbar to carefully rip off all the previous casing from around the windows. We saved the casing as scrap wood in our barn – you never know when we’ll want it for a future project!
With the casing off, I took the time to first paint the edges of the window itself. Since the trim was going to be a different color than the window, it was easier to paint the window first without needing to tape anything off. I used one coat of my favorite primer and then two coats of Sherwin Williams Tricorn Black in Satin.
I also painted all the wood for the trim beforehand (again, easier to paint separately and avoid having to tape). I used a foam roller to apply two coats of Sherwin Williams Agreeable Gray to all the trim pieces and let them dry overnight.
We started with the 3 1/4″ wide trim to make the sides of each window. Justin measured from top corner to bottom corner of the window and used the miter saw to cut each board to length. (And yes, he definitely should have been wearing safety goggles!)
He then used a level to make sure each piece was framing the window straight and nailed it into place using a nail gun and 1.5″ nails.
He then repeated the same process for the trim on the other side of the window.
Next, he measured the distance from the left outside edge of the new trim to the right outside edge of the other side of the window and cut another piece of 3 1/4″ wide trim to length. He checked levelness again, then used his nail gun to install this piece on top of the window.
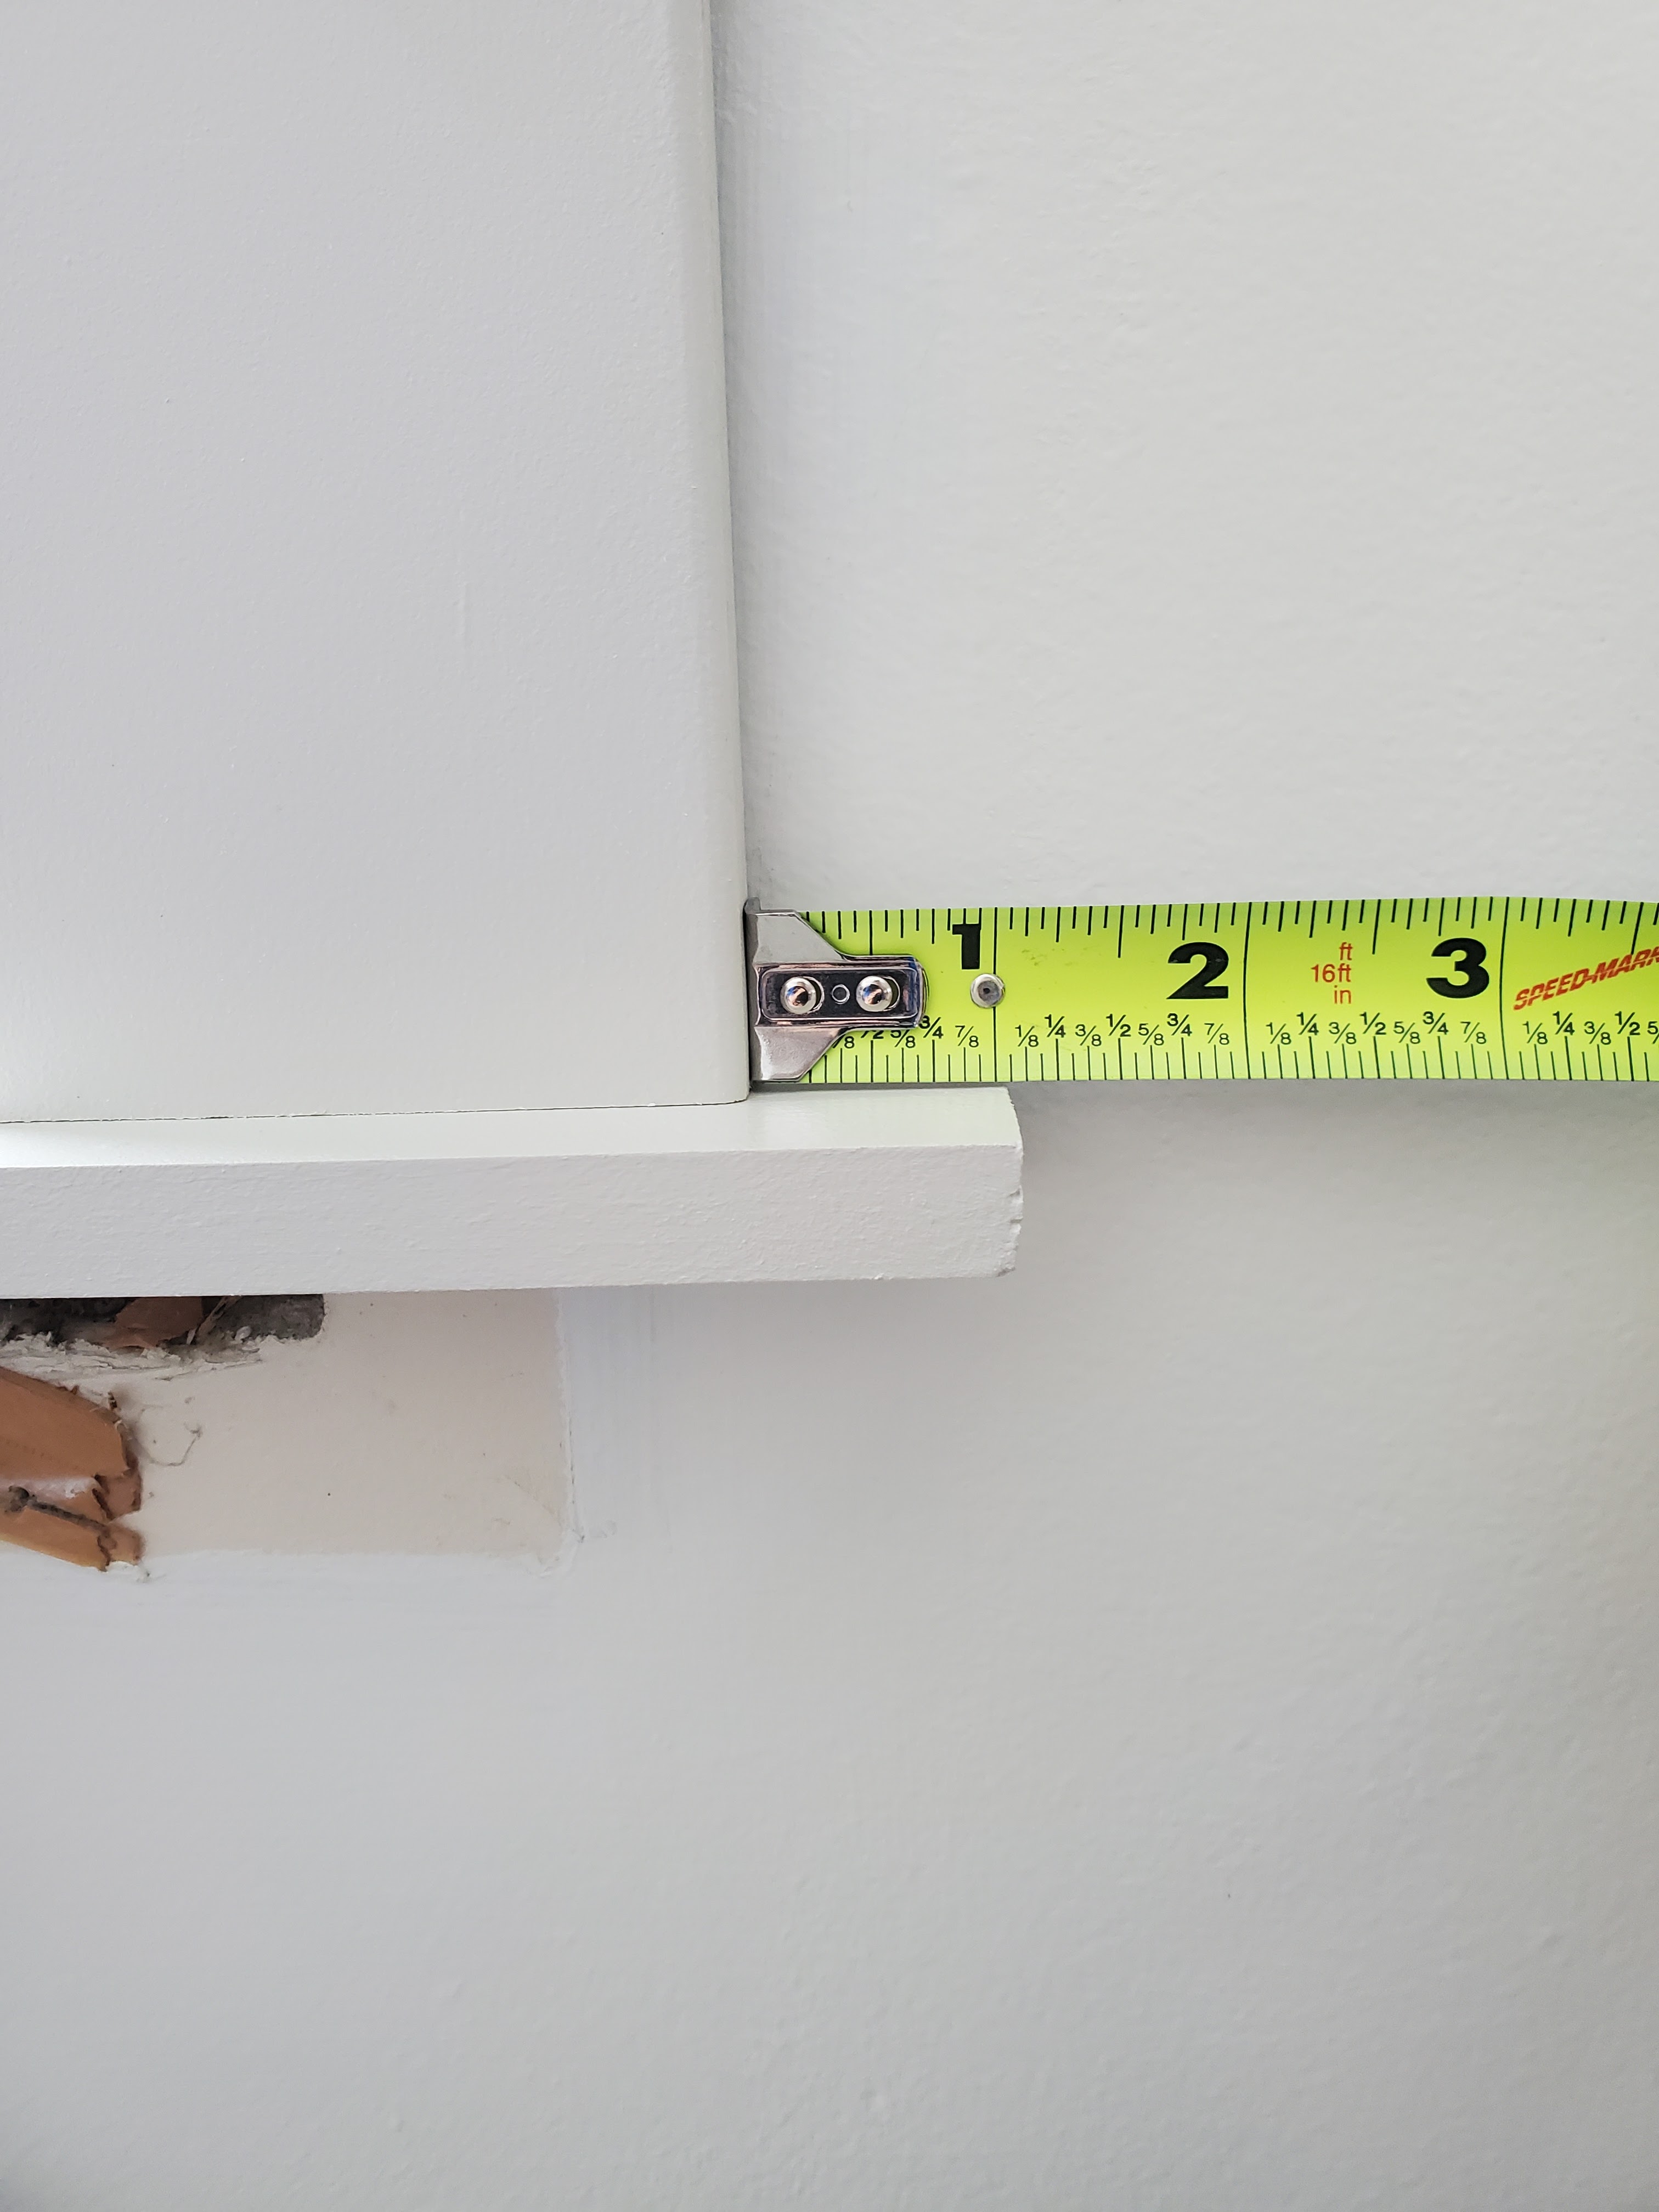
Next he measured from outside corner to outside corner on the bottom, added two inches for overhang (one extra inch to each side), and used his miter saw to cut a piece of the 1 1/4″ trim to length.
We used this piece to create a small windowsill ledge by installing the narrow side flush to the wall so it would stick out past the width of the other boards. We checked with a measuring tape to make sure it had the same amount of overhang on each side.
Justin positioned his nail gun on the bottom of the board to nail this piece up into the window side trim.
Next, we took the 7/8″ wide piece of trim and cut it to length for each side and the top. Justin repeated the same method he used for installing the wider pieces of trim: measuring top edge to bottom edge and cutting and installing each side piece, then measuring from outside edge to outside edge of the newest side trim and cutting and installing the top piece. As he did with the windowsill trim, these thin pieces were installed with the narrow side against the wall so the wider side would stick out perpendicular from the wall and create a little lip around the trim. He used his nail gun to nail each one from the outside edge into the already installed trim.
Here’s what everything looked after installation:
The last piece was another 3 1/4″ wide piece going underneath the windowsill. Justin measured the length of the windowsill trim, subtracted one inch (so it would be wider than the side trim pieces but shorter than the windowsill – just our preference for looks!) and cut it to length.
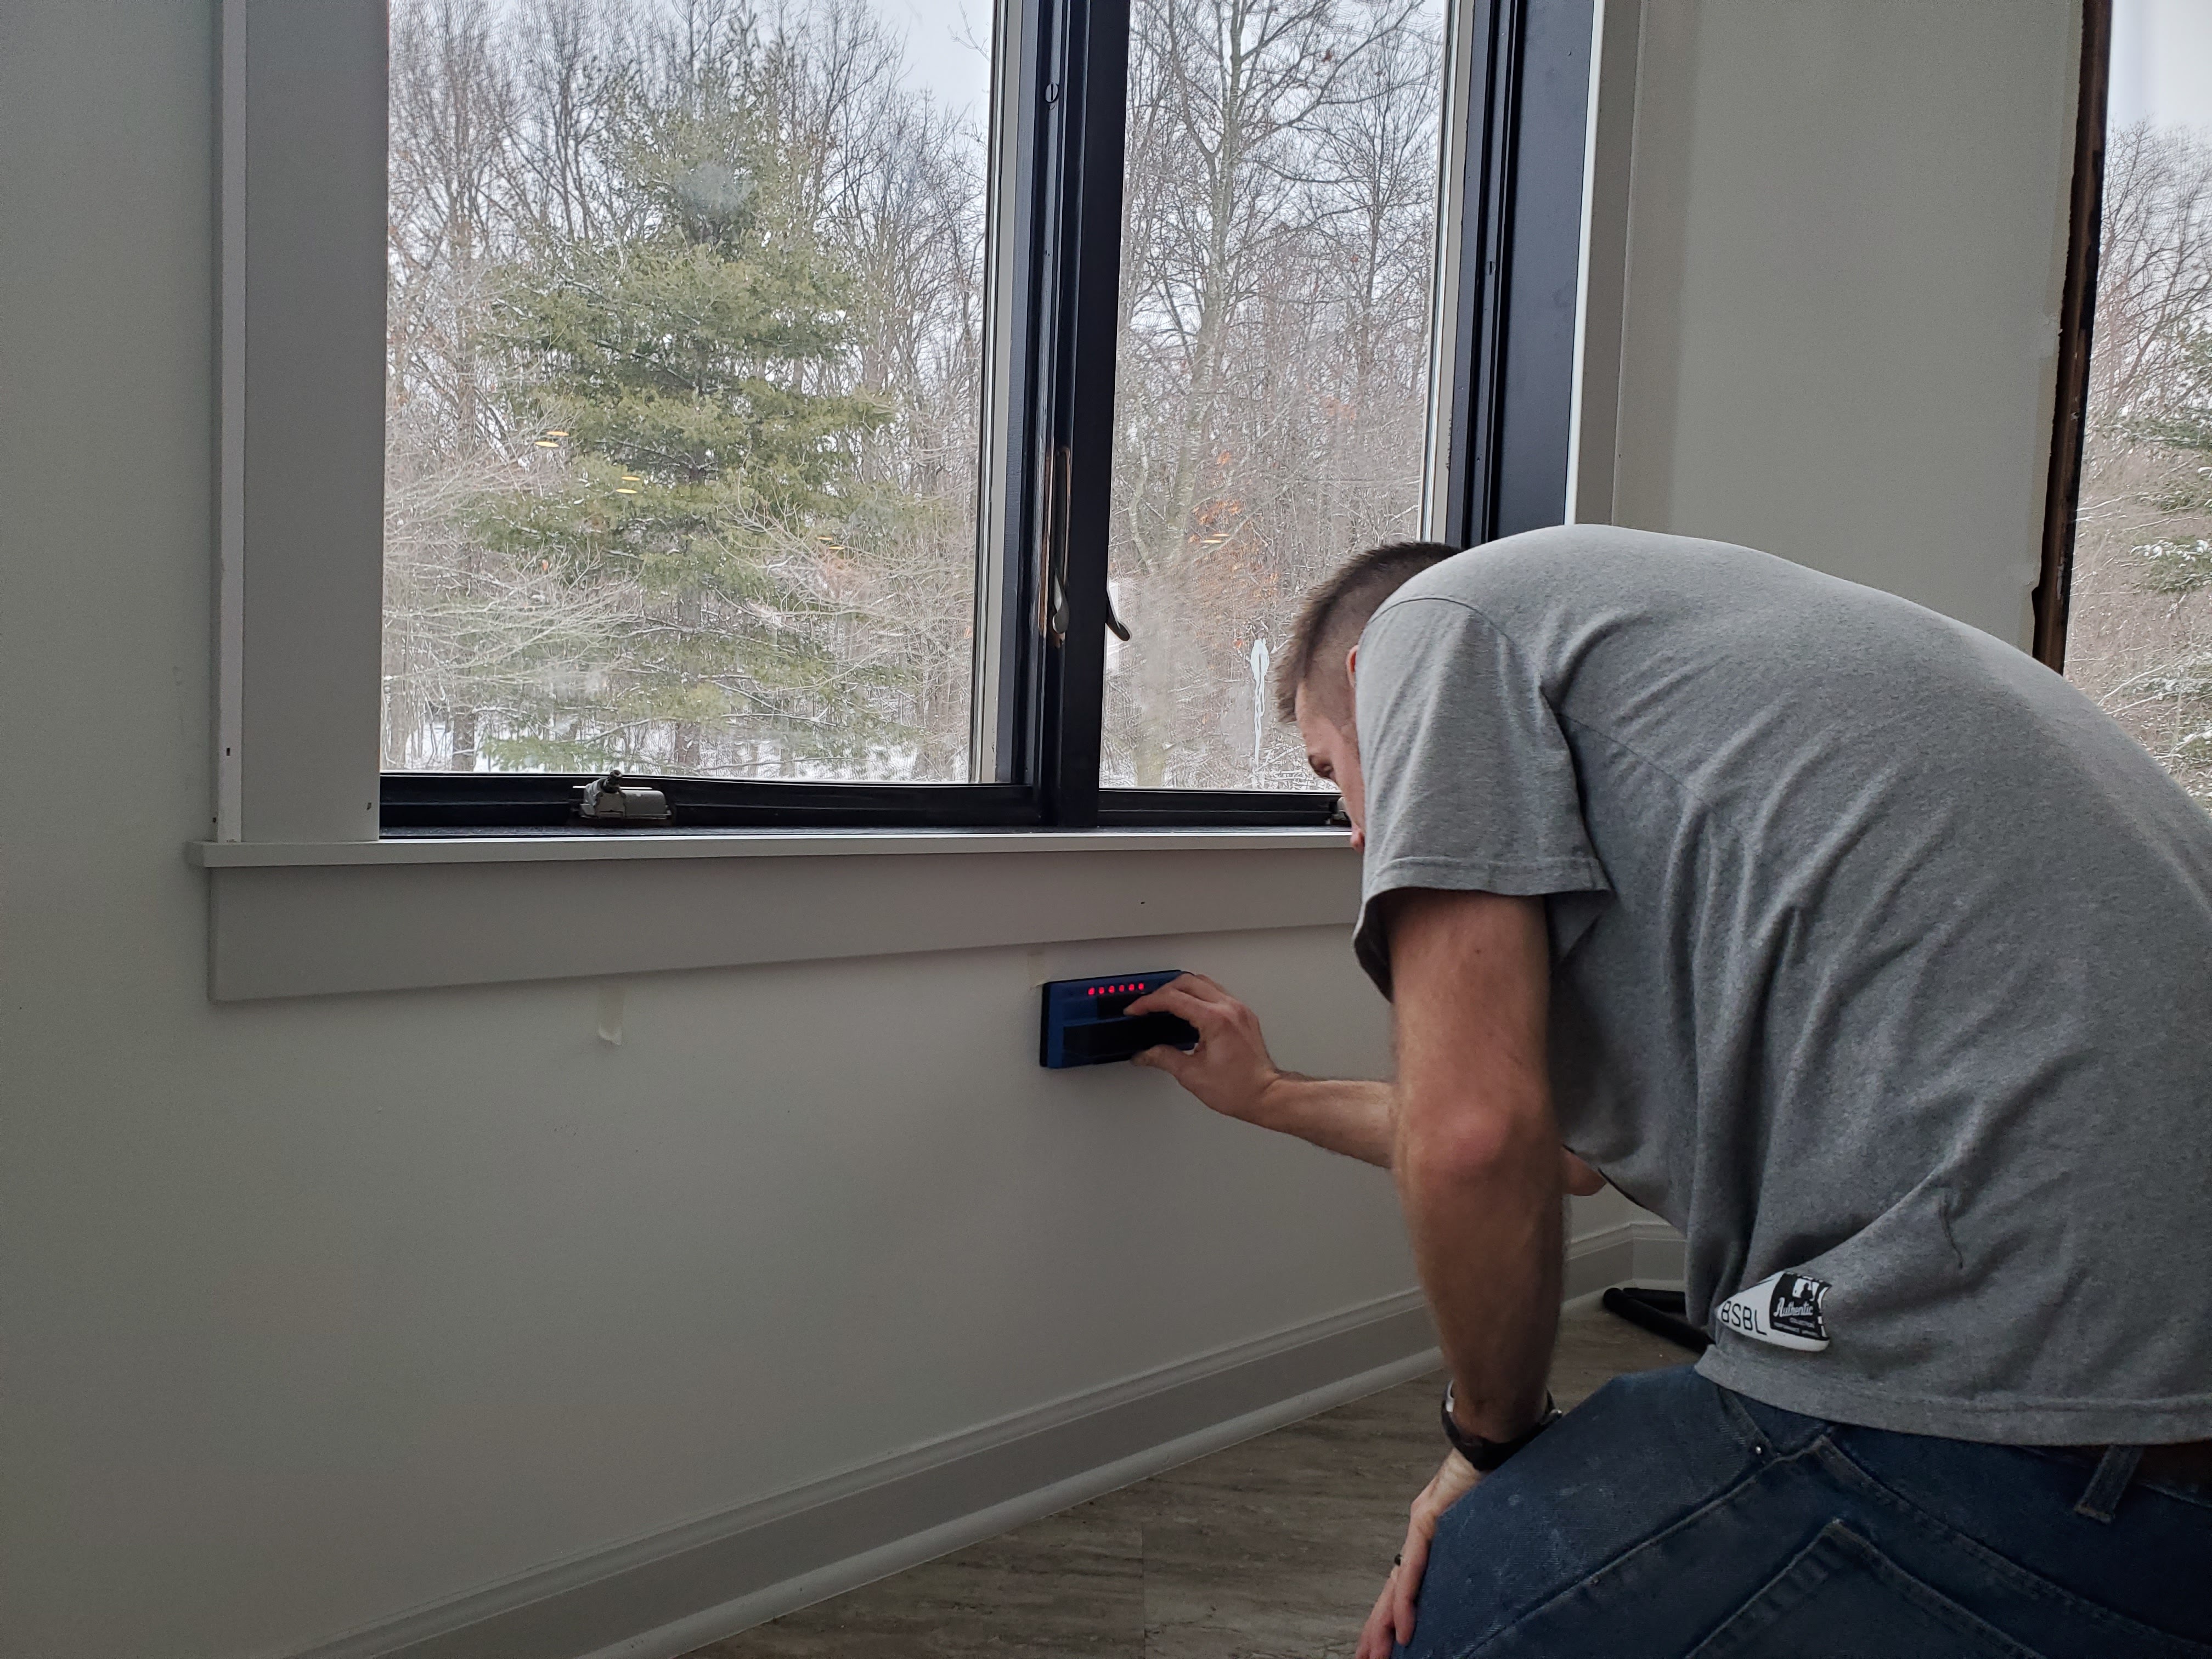
We have kids and dogs who hold and/or push down on the windowsill when looking out the window, so we wanted to make sure the bottom pieces were as secure as possible. Justin used a stud finder to locate studs in the wall so he could nail into them whenever possible.
Once the bottom board was installed, Justin also put a few nails from the top of the thinner windowsill piece down into the bottom board.
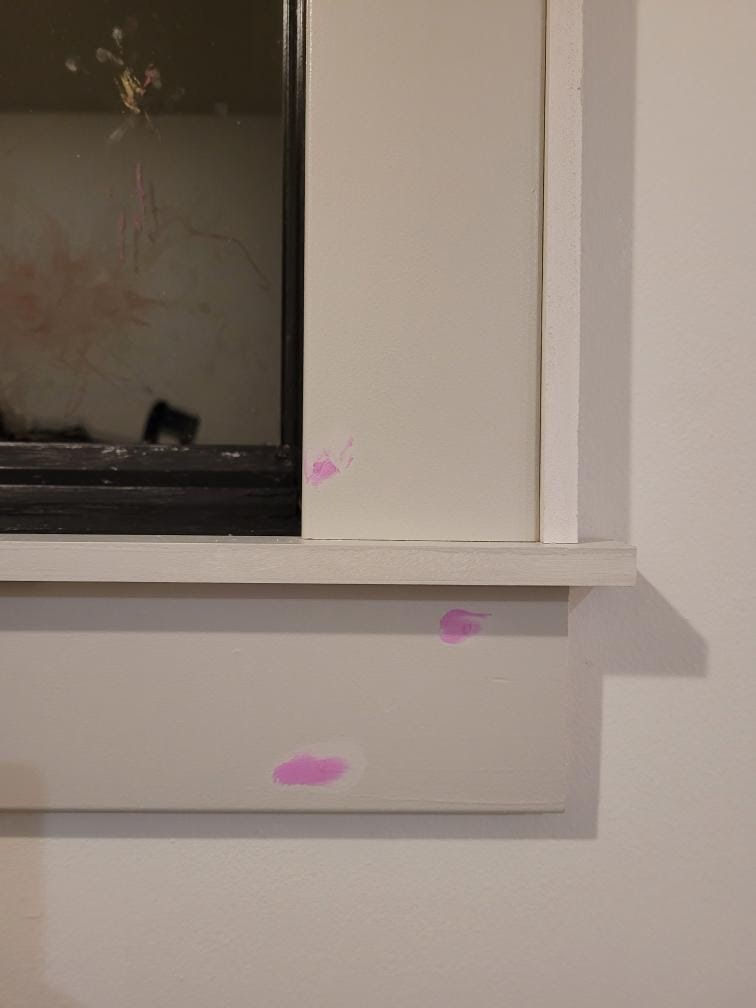
At this point, it was time to fill in all the nail holes. I applied a small amount of Drydex nail hole filler to each hole with my finger.
This product turns from pink to white as it dries. See how around the edges it’s already starting to change colors?
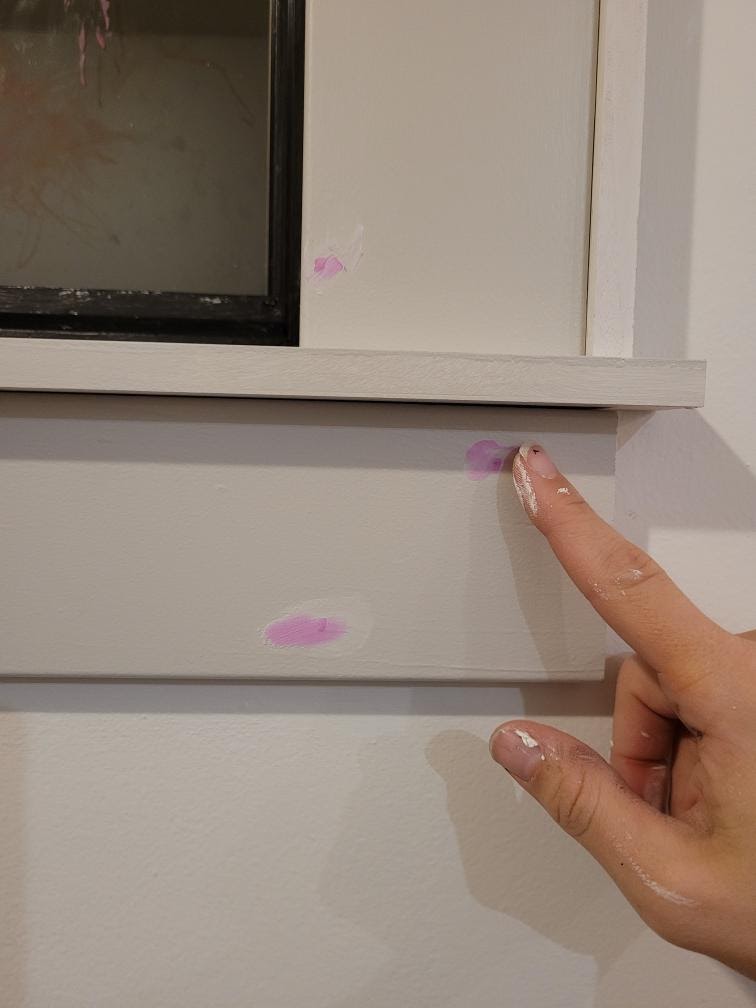
Once the edges had dried, but before the entire amount had dried, I gently took my finger and lightly sanded off the excess product. Then once it dried fully, I painted over it with the trim color.
There were a few places where the wall wasn’t quite flush and the trim had a gap between wall and trim. I ran a thin bead of caulk along those edges and smoothed it out with my finger. I then went over all the trim and touched up paint over all the dried Drydex and any other area that needed it. Then we were done!
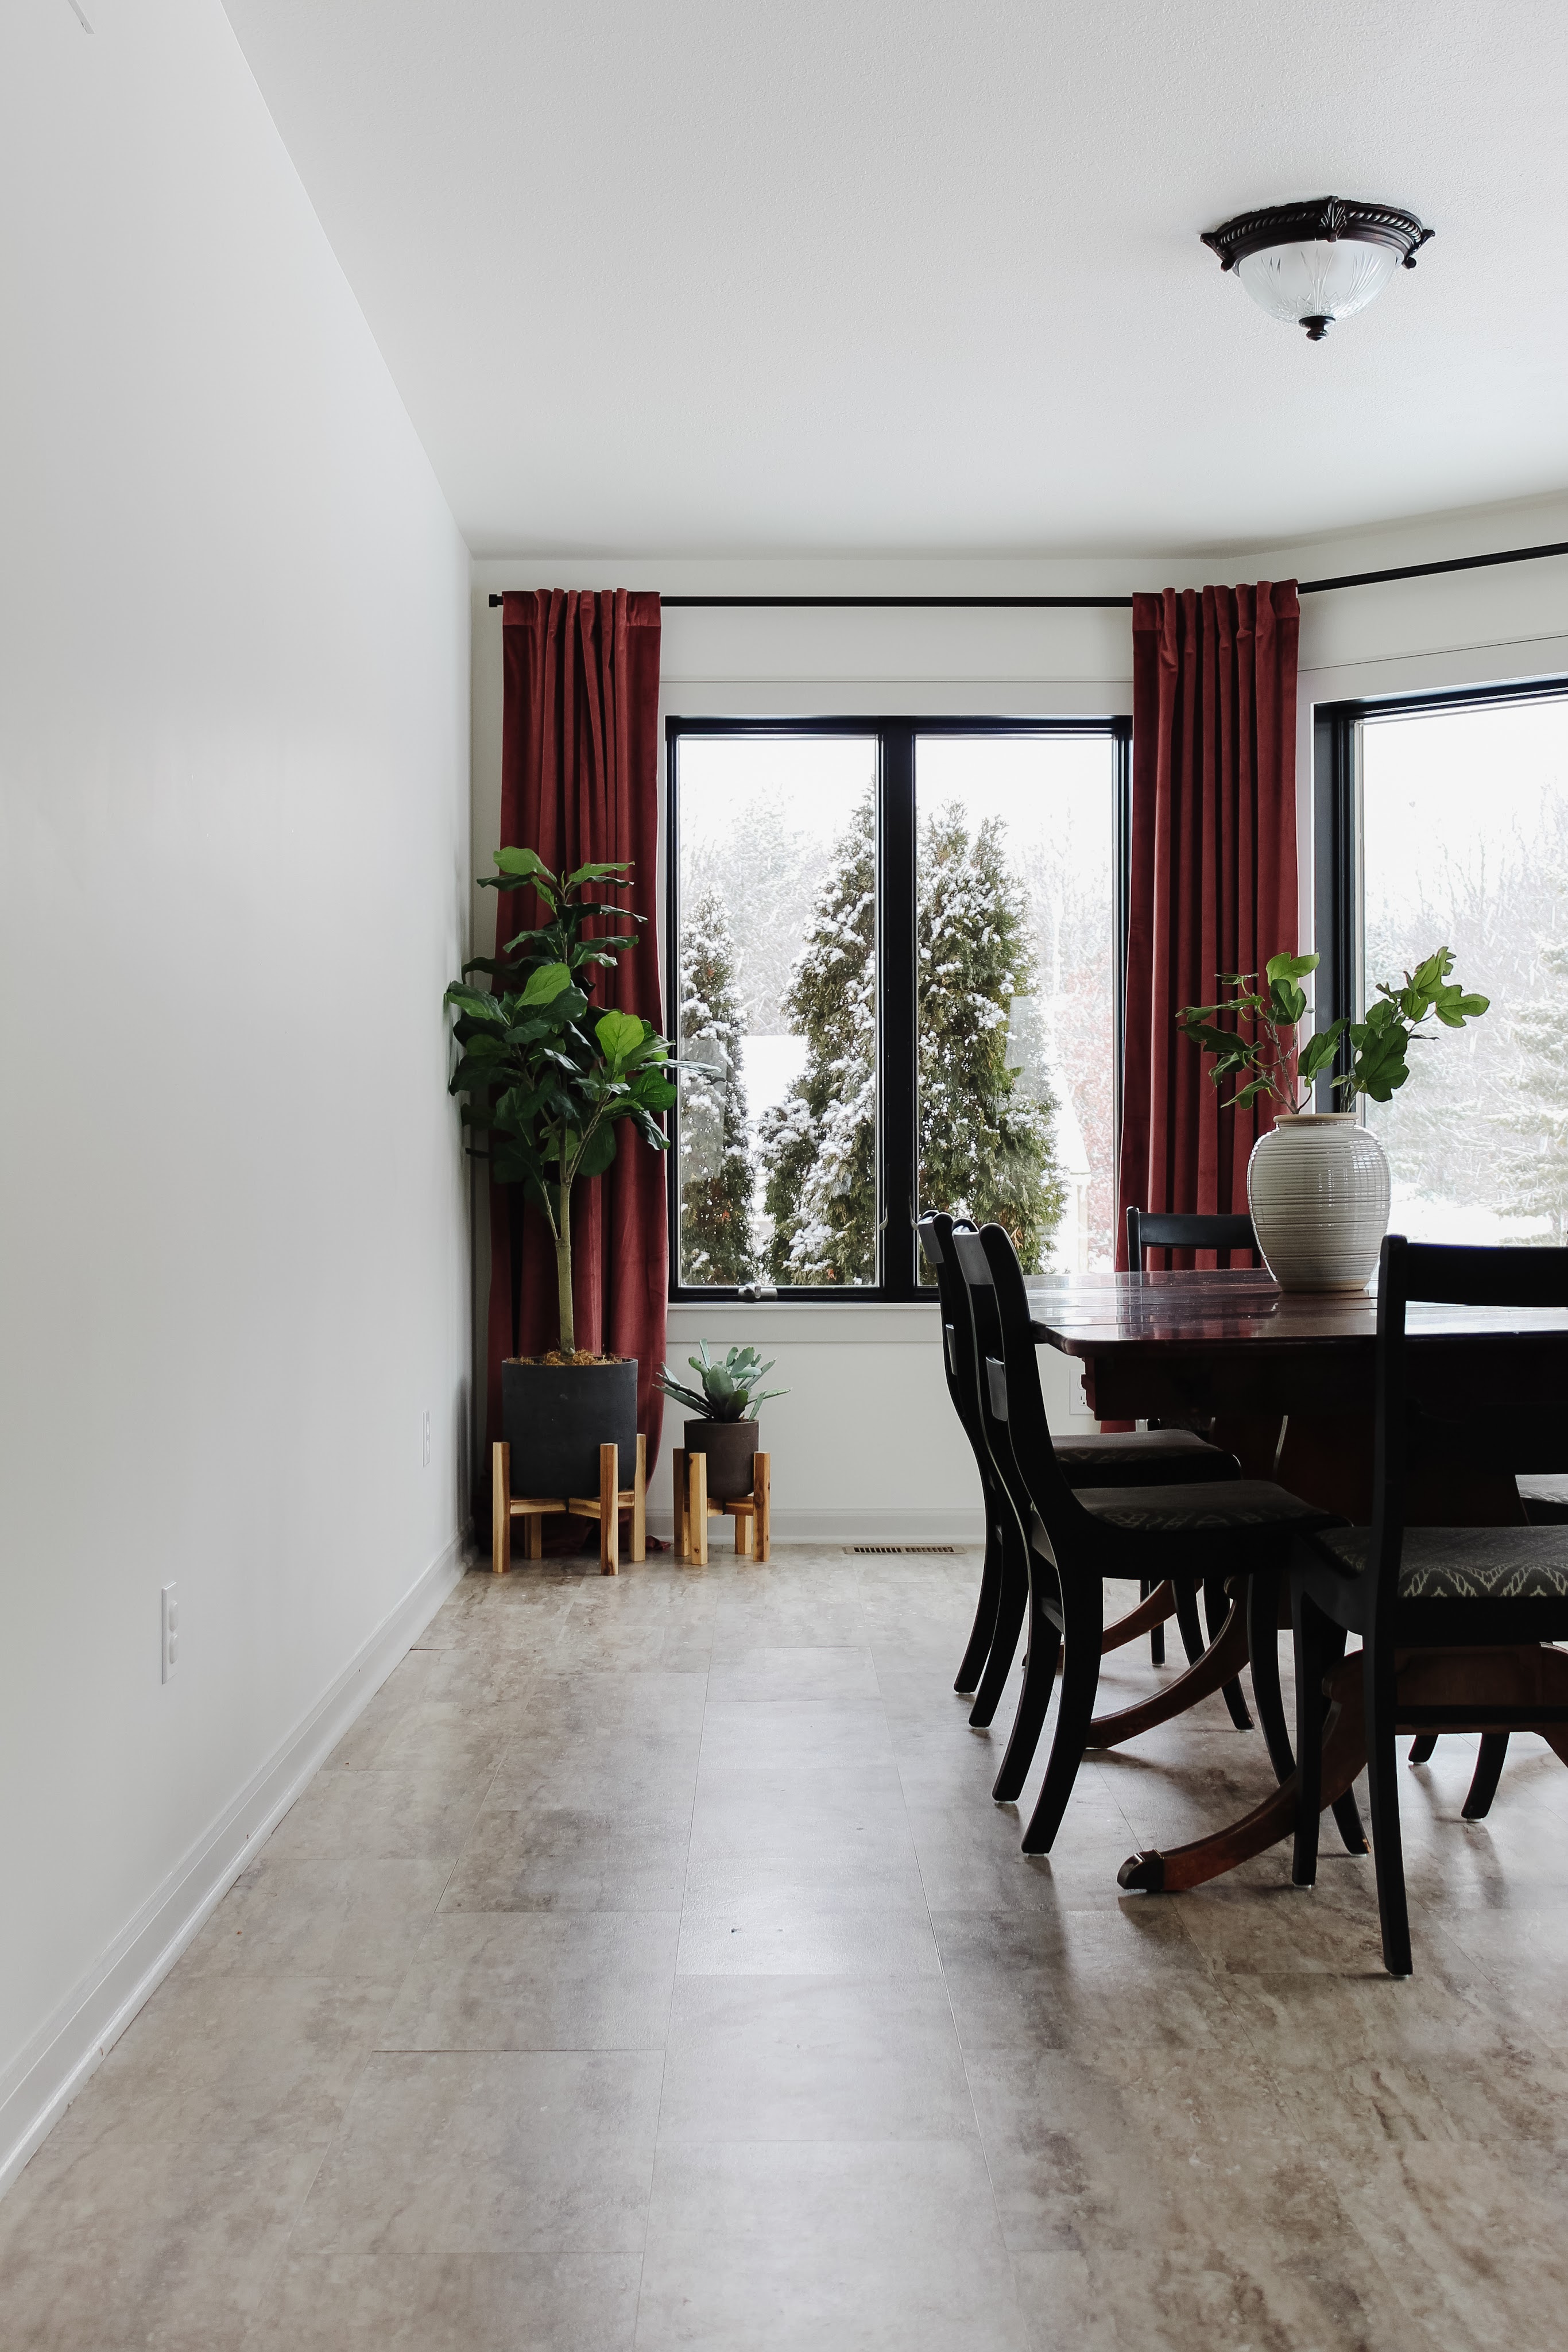
I’m absolutely thrilled with how the trim turned out. The windows look totally different than before and really do make the view the star of the show. It helps that right now outside we have a snowy winter wonderland!
After all the touch up paint had time to dry, we hung curtain rods and used hinged connectors to give the look of a bay window curtain rod, then hung these curtains in wild rose to finish them off. I just love the new look so much!
I was finally able to decide on a new light fixture and it should arrive later this week. Eventually I plan to have a credenza and some artwork on the windowless wall but for now, I’m so pleased with the transformation of this room!
Sources:
Wall Color: Sherwin Williams Alabaster (satin finish)
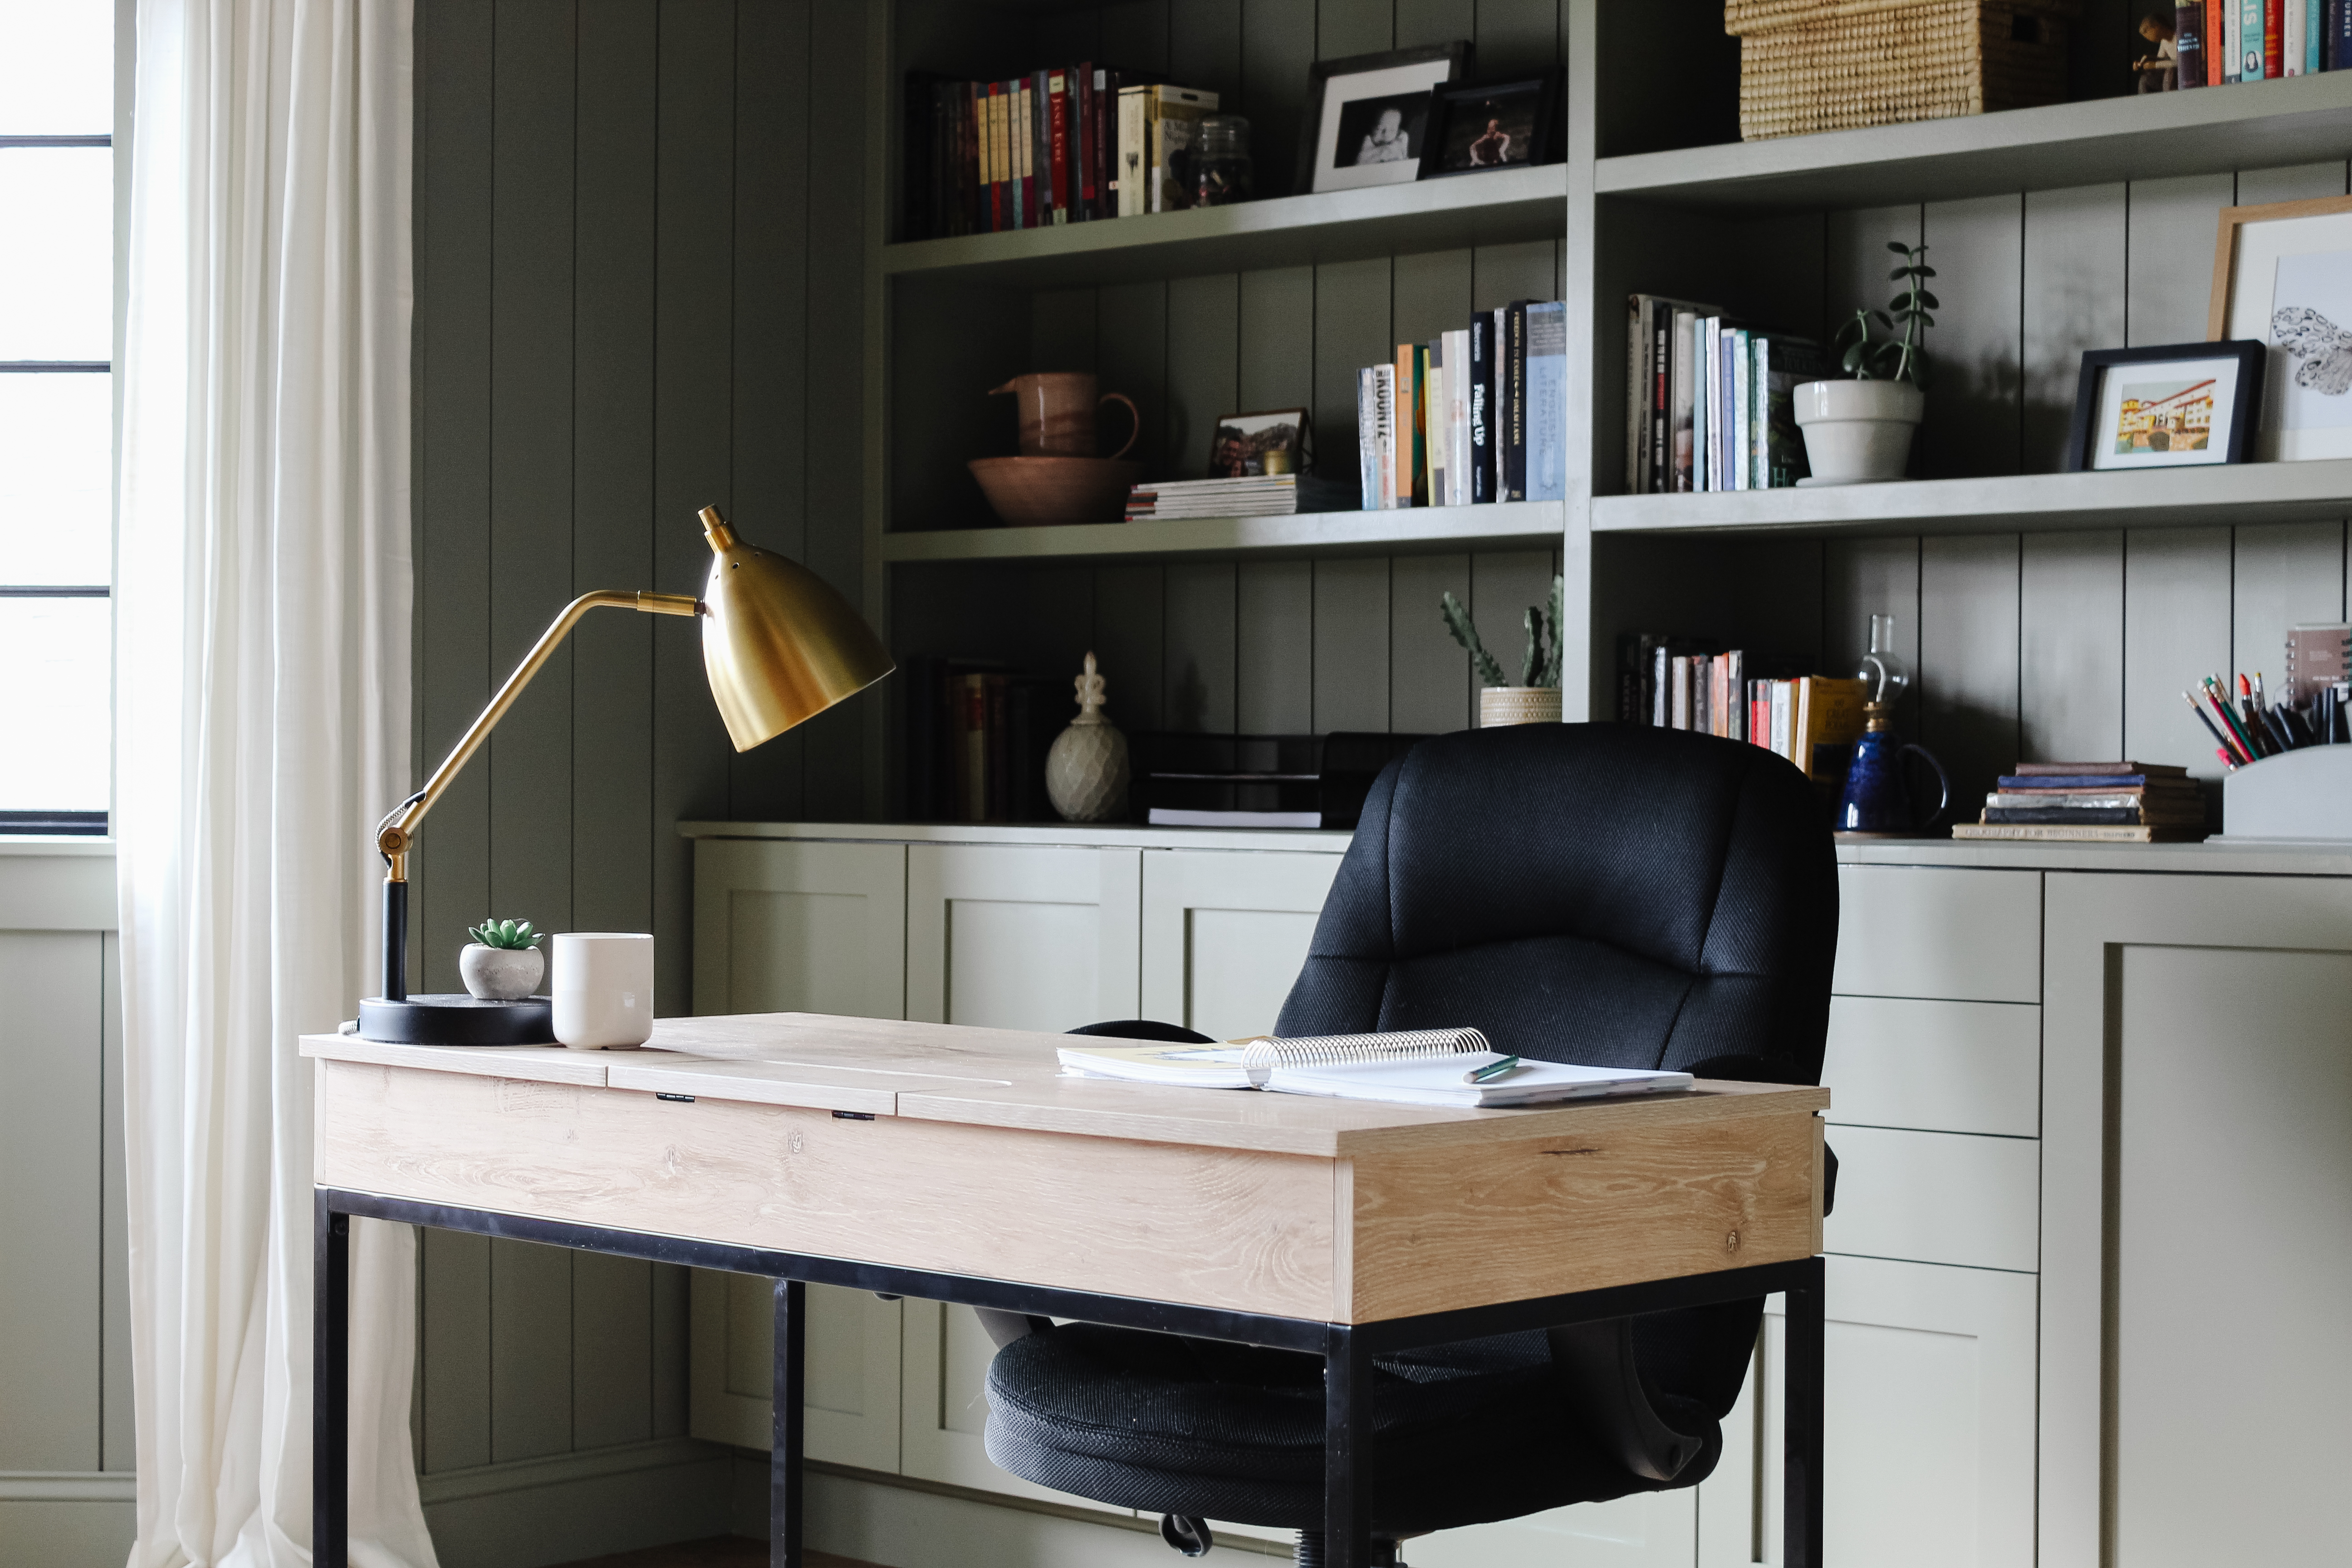
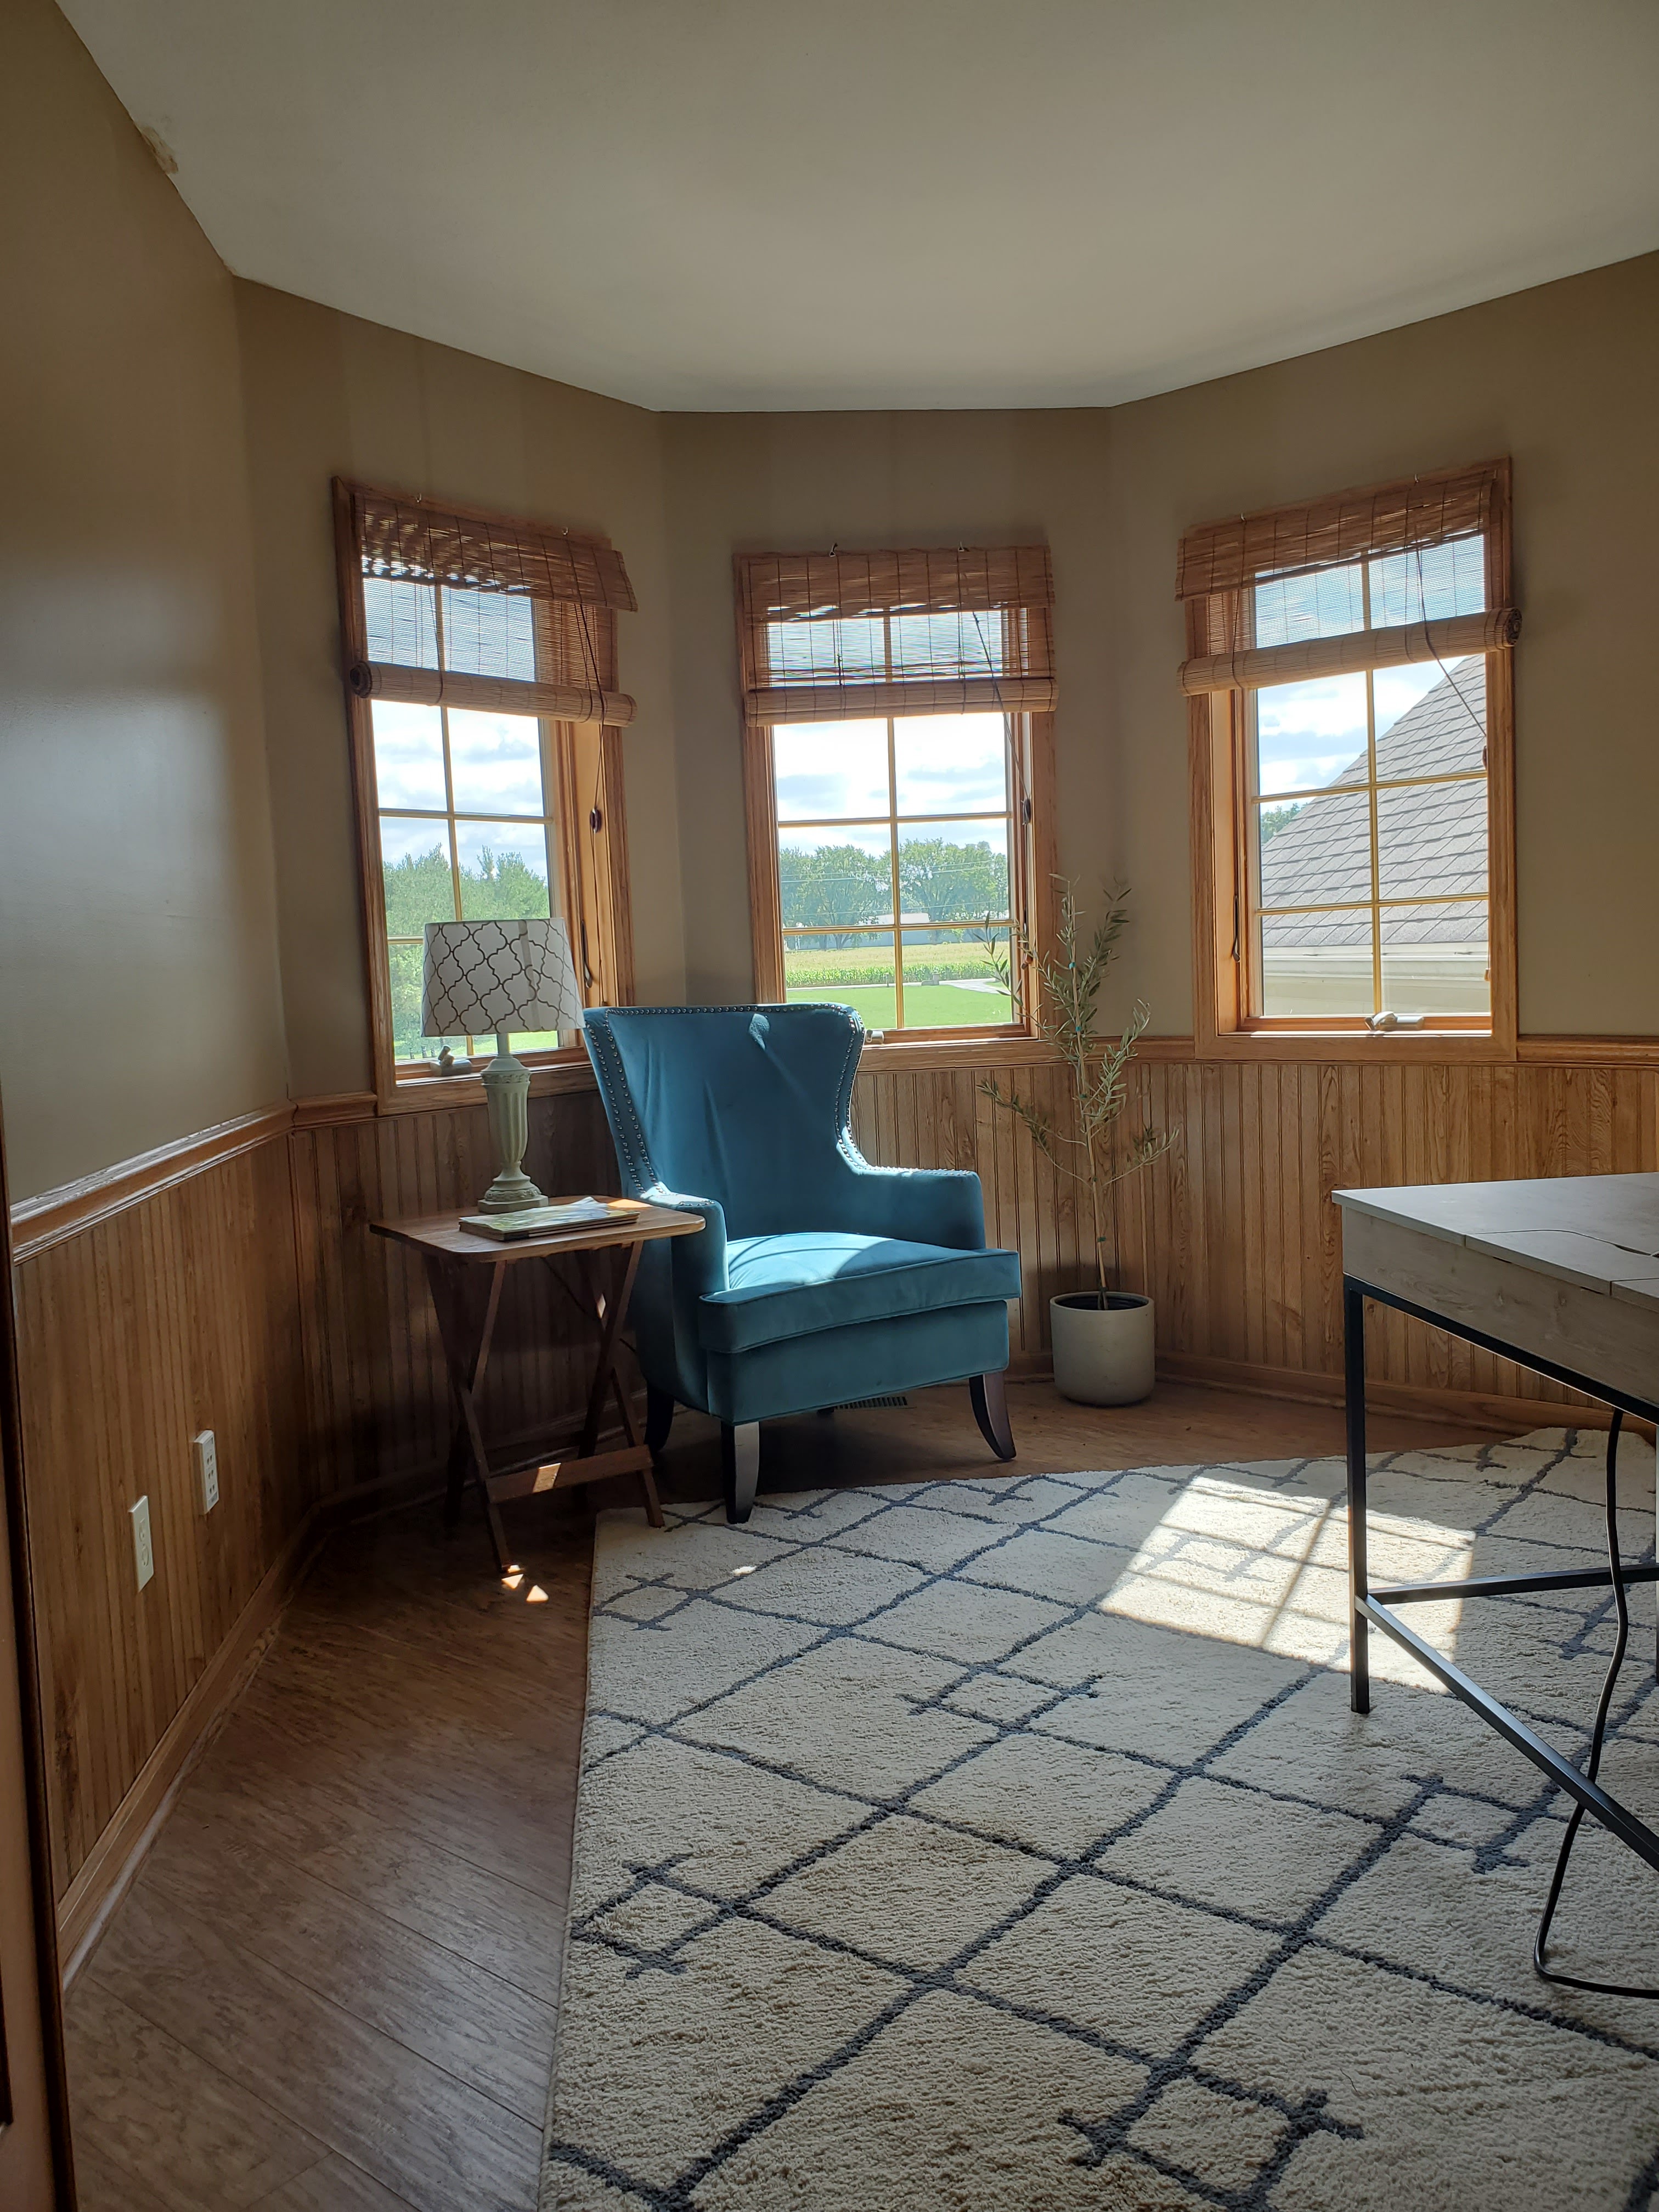
It’s the final week of the Fall 2020 One Room Challenge! We’ve been pouring our heart and soul into our home office and I’m so excited to show you how it turned out!
Let’s take a quick trip down memory lane, shall we? Two months ago, the room looked like this:
Fluorescent light, barely functional window shades, mismatched storage – yikes. It was a hot mess combination of storage/overflow/office/extra guest bedroom and unfortunately due to the French doors, we saw the room every. single. day. Since the day we moved in, I’ve been dreaming of this being a cozy home office + library and it makes me so happy to see this vision come to life!
After removing all the old trim and beadboard paneling, Justin and I took primed shiplap and ran the planks vertically all around the room and on the ceiling. We put extra effort into making sure the ceiling planks lined up with the wall planks, and I think that effort was definitely worth it! I chose the color Treron by Farrow and Ball and had it color-matched at Lowe’s for all the walls, ceiling, trim, and built-ins.
The olive green color strikes just the right balance for me – not too dark, not too light, not too brown, not too green. It’s a bit of a chameleon color and changes a little depending on the lighting but it’s just a nice warm that makes the room feel so cozy.
Without a doubt, the star of the room is the gorgeous built-in. This showstopper took the room from no storage to tons of storage. The bottom portion is Ikea cabinets with Semihandmade doors and I love them so much. They look custom-made but for a fraction of the price! If you’ve been following along in my Instagram stories, you know that I had two different options for hardware but didn’t feel like either was quite right so I ordered a third set. I’m still waiting on those cabinet pulls and knobs to arrive and I think they’ll be the perfect finishing touch. Stay tuned!
Back in the planning stages, I debated on whether to do a built-in desk or keep it freestanding, then whether to do all cabinet doors or have a section of drawers as well. I’m so happy with my decision to do a freestanding desk and include a section of drawers in the middle. It provides tons of easily accessible and functional storage and with the desk in the middle, the room actually feels perfectly proportioned.
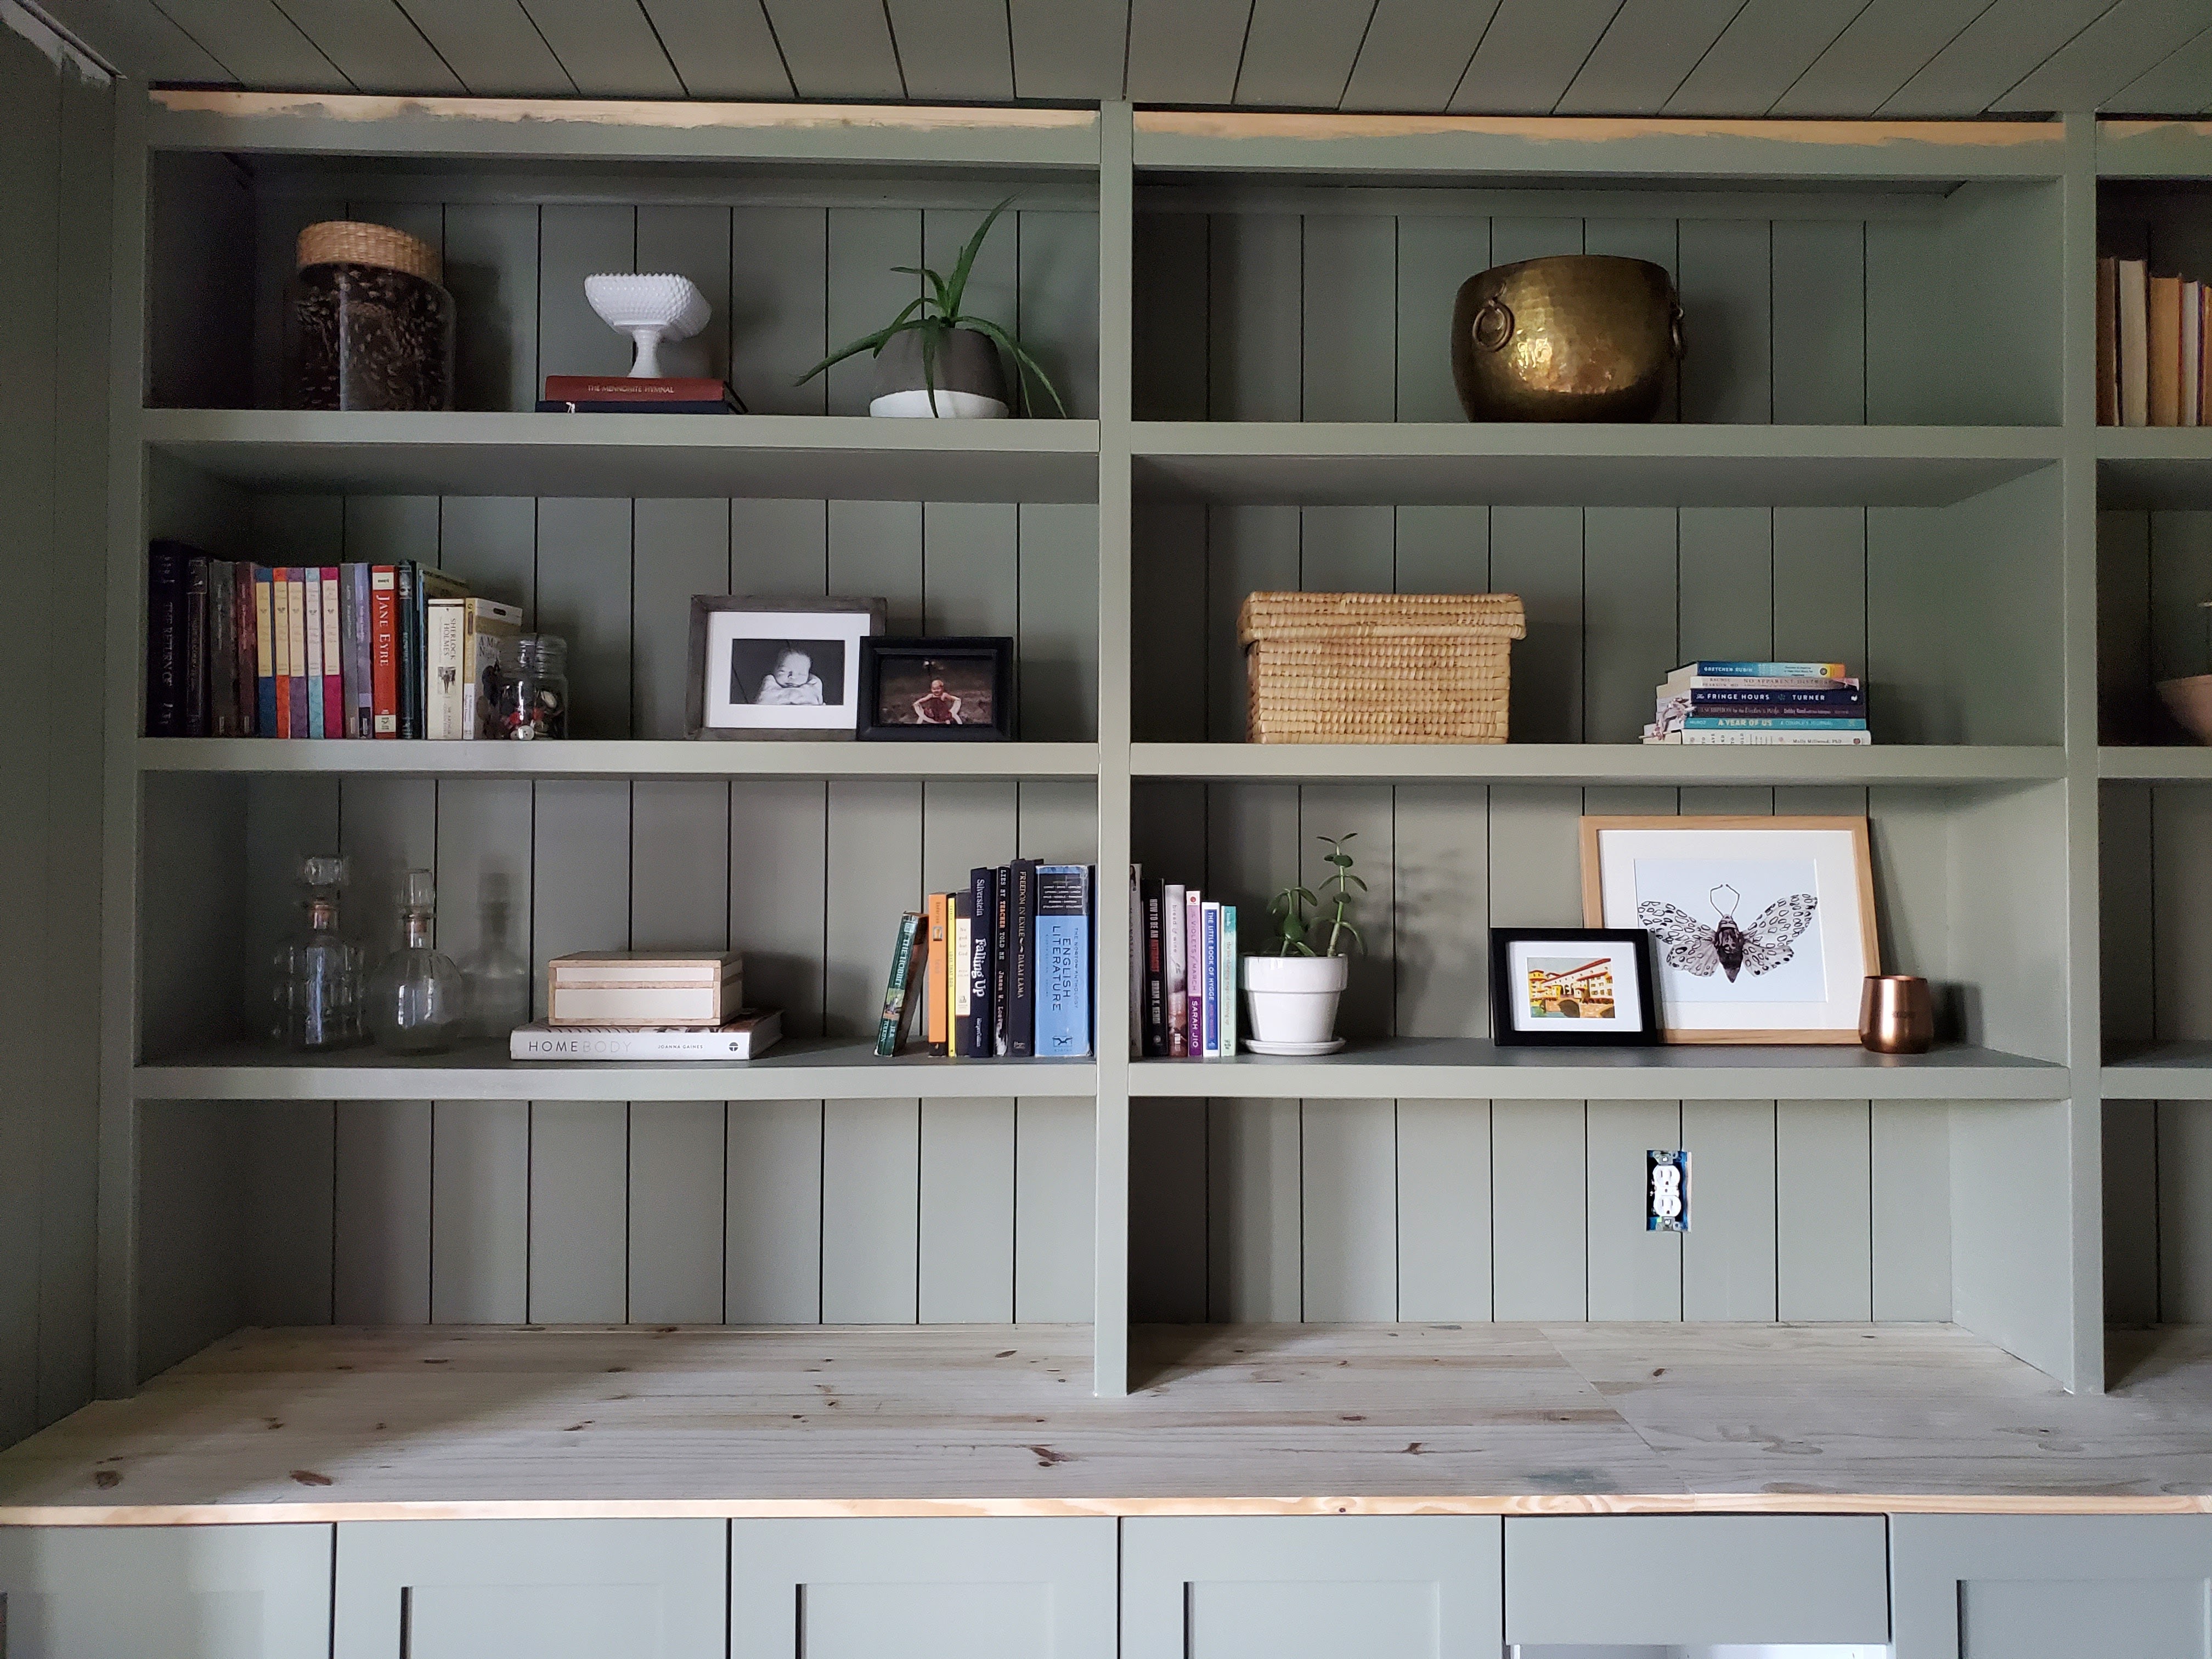
Justin and I worked together to build the bookshelves from scratch and we are both thrilled with how well they turned out. I intentionally tried to pull in other colors and textures throughout the bookshelves, especially with light colors and natural fibers to break up all the olive green throughout the room. In addition to all our books, the shelves are filled with special mementos, heirlooms, family pictures, and artwork from travels, so it very much feels like us.
I also have functional items throughout – closed storage boxes holding office supplies, decorative jars filled with pens and pencils, trays for papers, etc. The shelves strike the perfect blend of meaningful, beautiful, and functional for us.
I think of this room as a home office and library all in one. As I imagined shelves full of books, I also imagined a cozy area to read them in. The bay window area provided the ideal place to add a comfy reading chair. I had been on the hunt for a reading chair in either yellow/gold, rust, burgundy, or something along those lines but everything I found was super expensive. Then a few weeks ago, I saw someone share a post from the thrift store in my hometown. One of the items pictured was a set of vintage yellow chairs circa 1970s (sold separately for $50 each) and my heart immediately leapt. I sent my mom on a mission to the thrift store to see if the chairs were comfortable and in good shape. They were, and I convinced her to buy one for me for Christmas. Score! Here’s the chair when it first arrived – my parents thought I was crazy, but I knew it had potential.
If you follow me on Instagram, you know I performed a little cosmetic surgery on the chair to remove the flap of fabric at the bottom and this made a huge impact in making it seem more modern.
I brought down the little side table from Vi’s room, but I eventually plan to replace it with something else (I’m feeling a little round table?) and I’ll also add a floor lamp at some point. For now, I’m happy with this space!
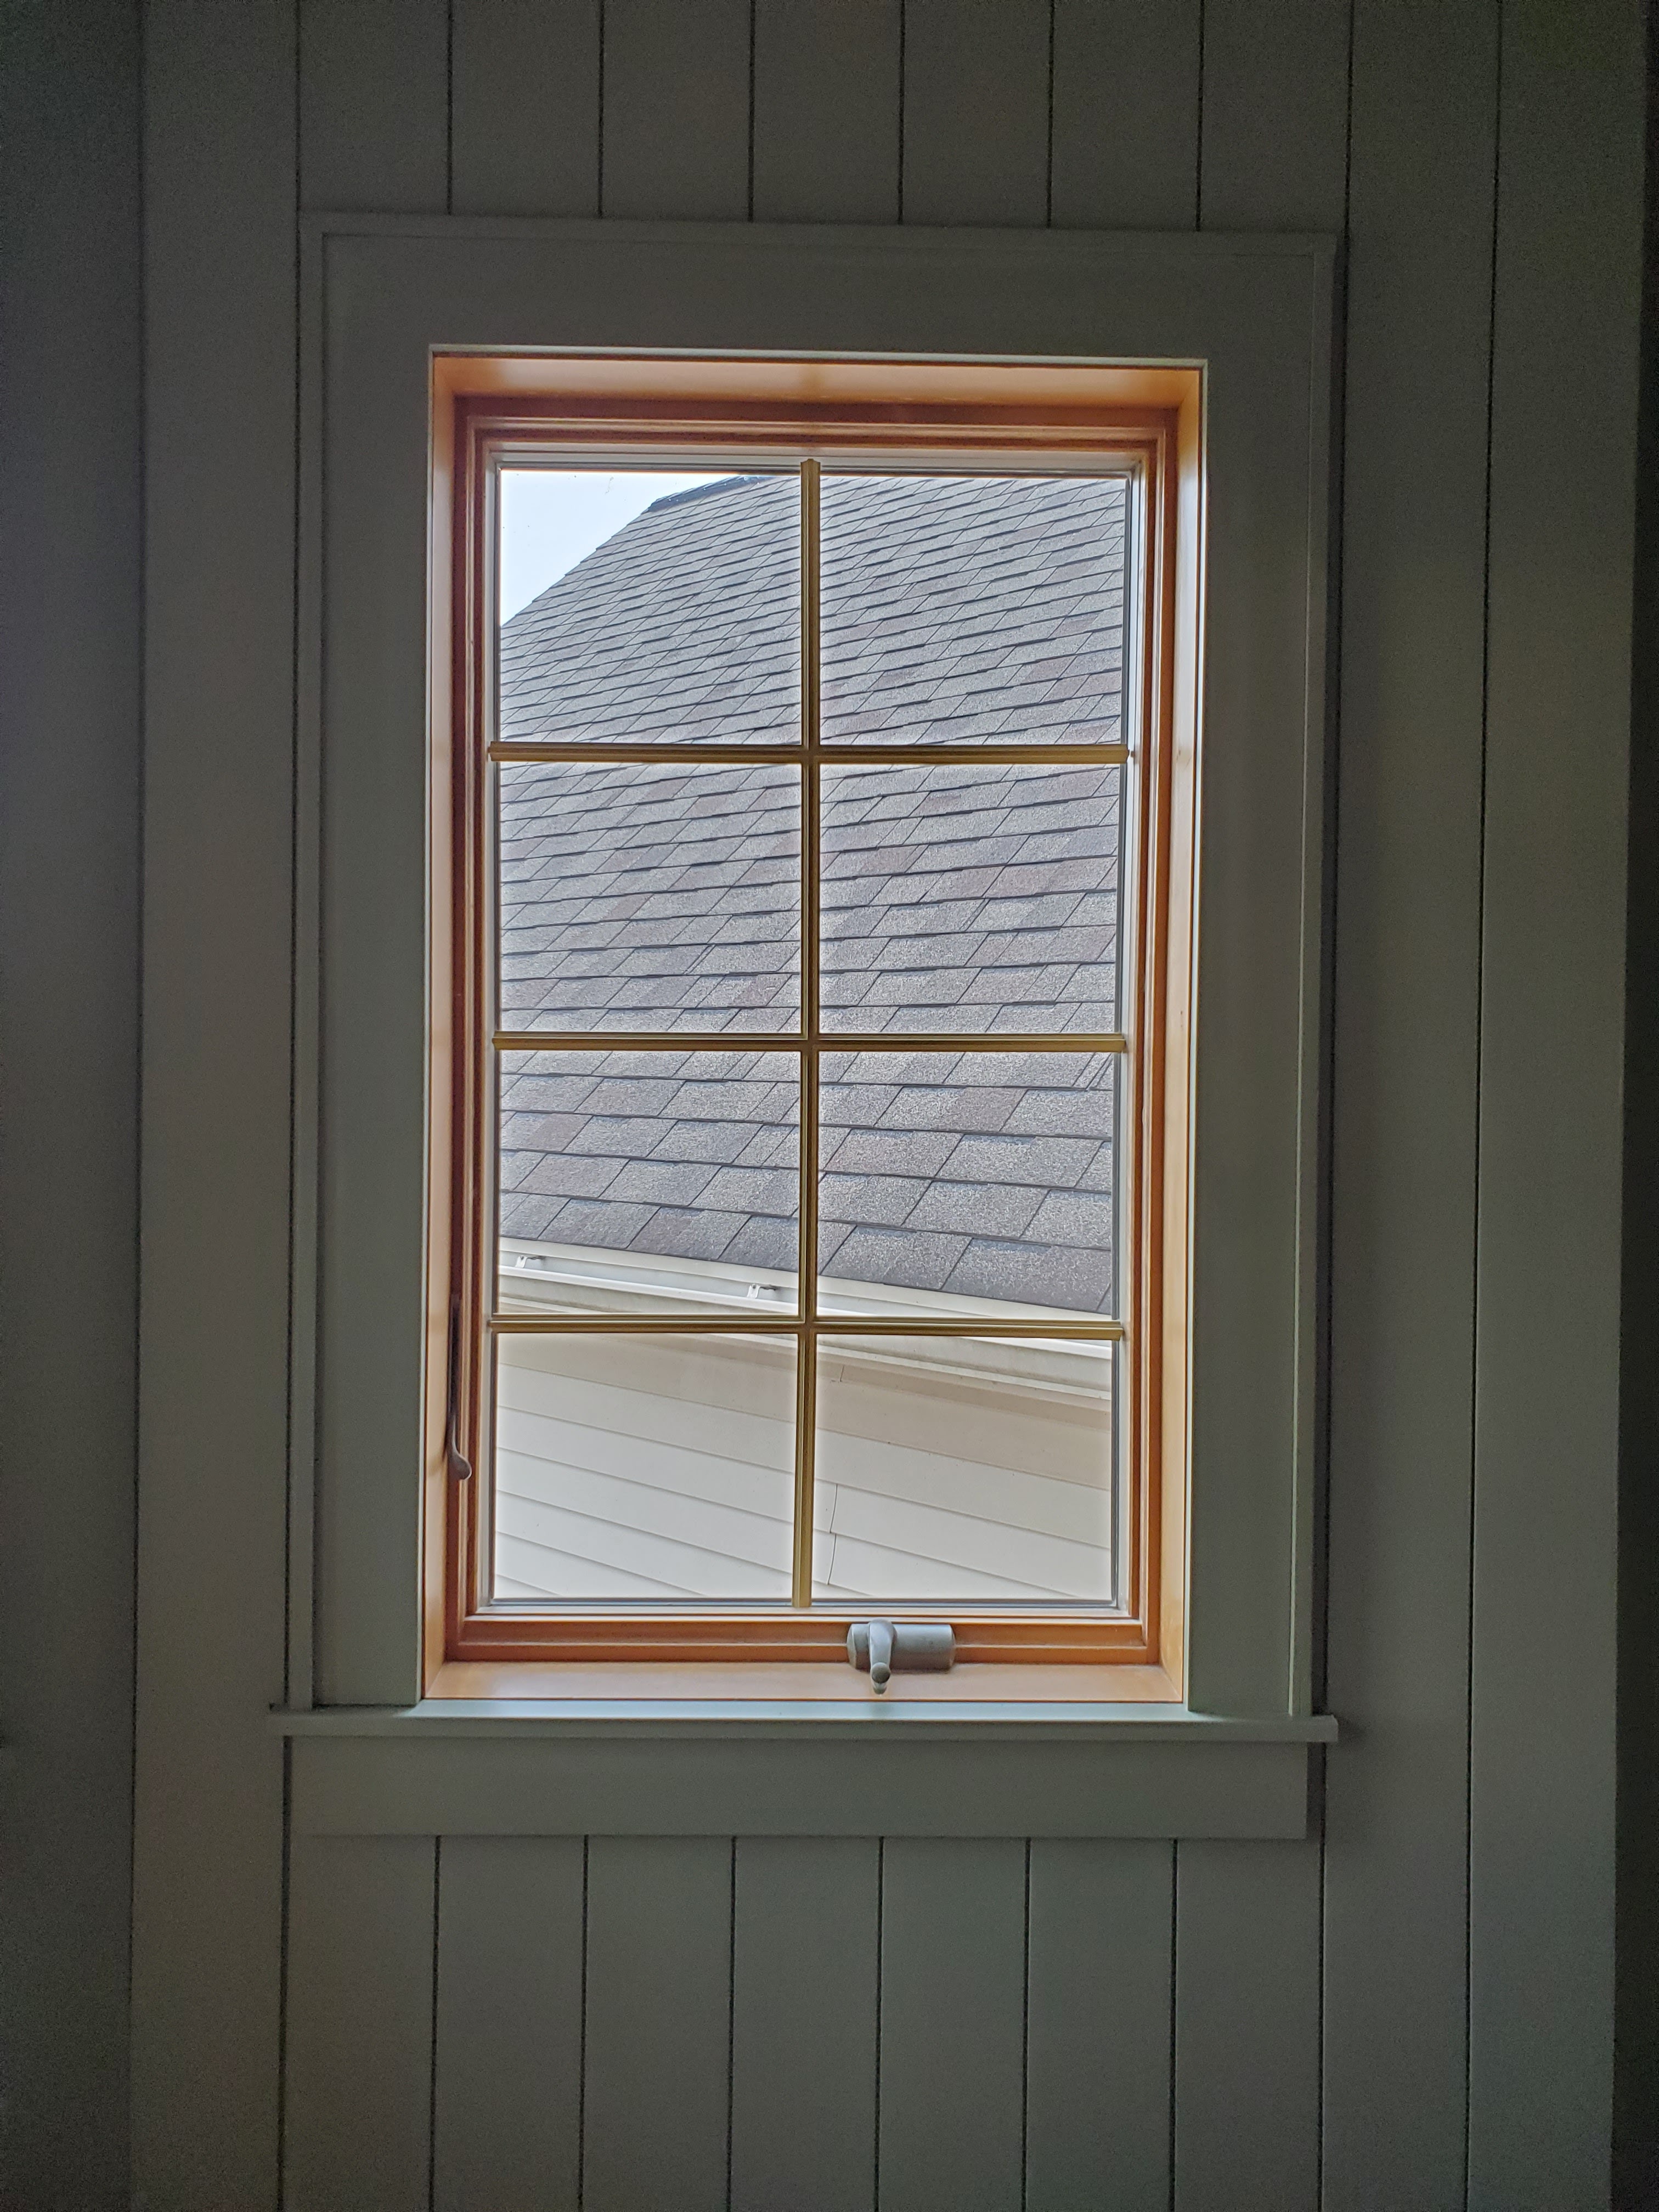
In addition to replacing the baseboards, we also tore off the old window casing and added new trim in a style inspired by Jenni Yolo at ISpyDIY. I also painted the existing window frames and grille inserts Tricorn Black by Sherwin Williams.
We had a slight fiasco with the bay window curtain rod because we didn’t realize that the side bars only extended 36″ max and we needed about 42″ but Justin came up with the brilliant idea to buy two cheap telescoping curtain rods and screw them into the angled attachment on the middle window’s curtain rod. This worked like a charm! The curtains are Ikea Ritva. I got them in 118″ length and then used hemming tape to shorten them a bit (I like a little pool at the bottom, but it was originally like 8″ too long). I hung them by attaching pleating hooks to the curtains and then hooking them through the eyelets of curtain rings. Rather than just putting the curtain rod through the loops of the curtain, this gave them a little extra oomph.
Another issue I ran into was rug size. Because of the bay window and angled doorway, the room is anything from square (don’t even get me started on how hard figuring out the crown molding was!). It left an awkward amount of floor space that I really needed a 6×9 rug for, but many of the rugs I loved only came in 5×7’6″ or 7’6″x9’6″. It was a frustrating search! Finally, I decided to try a layered rug look with a simple jute rug at the 6×9 size I needed and a patterned rug I loved in a 5×7’6″ size on top. This solution ended up working so well and I think it helps give the room a casual and cozy feel.
I am so so happy with how this room turned out! It is the room I was most excited about when we first moved in and it is now without question my favorite room in the house.
And it wouldn’t be a reveal without a few final before-and-afters, right?
I had so much fun participating in the Fall One Room Challenge! You can check out all the other fun projects that happened here.
And if you missed any of my previous posts on this challenge, you can check them out here:
Note: Some of these product links are to Amazon. As an Amazon Associate, I earn from qualifying purchases. This means if you purchase something through the Amazon link I provided, I may earn a small commission. None of my recommendations or decisions are based on any commission I might receive from your purchases, they are all things I actually bought for this renovation. The decision to buy something is yours, and whether or not you decide to buy one through the link I provide is completely up to you. Thank you!
Paint Color: Treron by Farrow and Ball (colormatched at Lowe’s) in Eggshell finish (walls + ceiling) and Satin finish (trim + built-ins).
Window Color: Tricorn Black by Sherwin Williams in Satin
It’s the second-to-last week of the One Room Challenge and now that all the shiplap is finished, things have really picked up!
One thing that got checked off the list this past week was the completion of the window trim. We had trimmed out each window with a 1×4 and Justin then ripped a board into 1/2 inch strips and nailed it around the edges. This helped hide any gaps left in between the shiplap and the 1×4 and gave everything a nice, finished look.
Other than that, the biggest change that has happened this week has been the addition of our cabinet doors!
When we first started planning out the built-ins, we contemplated DIYing cabinet doors. I’m so glad that we ultimately decided to outsource that project because these Semihandmade door and drawer fronts are perfect and were a breeze to paint and install!
Semihandmade is a company that makes different styles of door and drawer fronts that are fit to the same specifications as an Ikea cabinet door. This means you can purchase the Ikea base cabinet, which is a very inexpensive, and then add different doors to create a more custom look. I’m really impressed with how it elevates the look of the cabinets without breaking the bank!
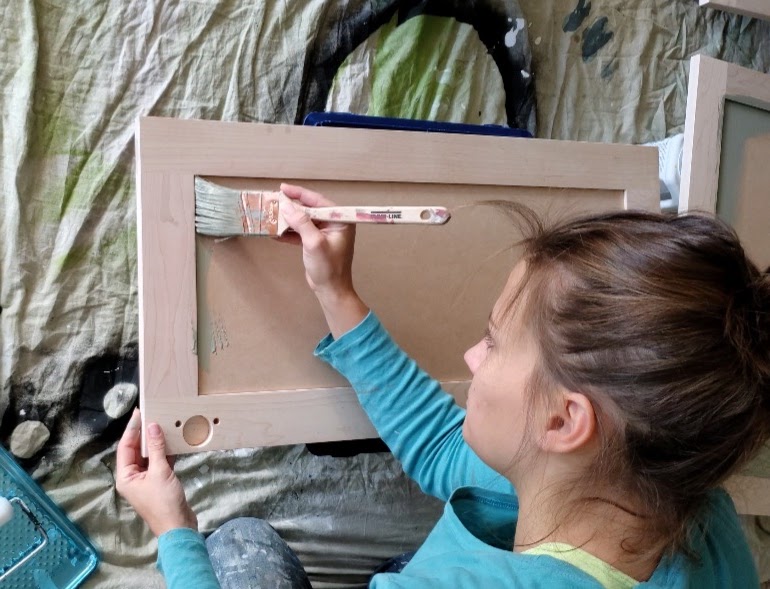
You can order doors in various colors but I went for the unpainted DIY version so I could paint them the exact same color as the rest of the built-in: Treron by Farrow and Ball that I color-matched at Lowe’s. Before painting, I did rub a fresh tack cloth over the fronts and backs of all the doors, because they shipped from the factory covered in a fine layer of sawdust.
I placed each door face down on top of paint cans (so they would be elevated off the ground) and started painting all the backs. I highly, highly recommend painting the backs first so that when you flip them to paint the other side, the back is the painted side that touches the paint cans – if one side is going to get nicked or scratched or stuck after painting, you definitely want it to be the side that rarely gets seen!
(Apologies for the quality and angles of these pictures – I didn’t take photos of this process so these are just screen grabs from the timelapse videos I posted on Instagram).
I used a paint + primer so I did not do a separate layer of primer. I used an angled brush to trim out the edges of each inset . . .
. . . and then I used this six inch foam roller on the rest of the doors to create a really smooth finish.
I painted all the backs of the doors, waited about 3 hours, and then painted a second coat. I let them dry overnight and then flipped them over to paint the fronts. I did the exact same process of two coats, this time also rolling the door sides, and let them dry again overnight. The next morning (probably about 18 hours later), we attached them to the cabinets using the hardware we bought from Ikea. They were very simple to install!
Yesterday, I spent time in the afternoon playing around with arranging the shelves. I’m definitely not done with them, but it was fun to get started with different placements. As you can see, we still need to finish assembling the drawers in the middle, but so far, I’m really pleased with the look!
Other things we need to accomplish this week:
-add the final trim pieces around the door frame
-add thin piece of trim between cabinets and the wall
-paint + install crown molding
-paint + install baseboards
-install cabinet hardware
-paint countertop (while I like the natural wood look, up close it looks silly because we had to use two boards to achieve the length and it’s just too obvious to leave natural)
-paint outlet covers and duct vent to match wall color
-paint the inside of the window frames
-install curtain rod + hang curtains
-move in the rugs, desk, chair, and finishing touches!
Can we get all this done in one week? We’ll see! In the meantime, you can check out all the other guest participants in the One Room Challenge here.
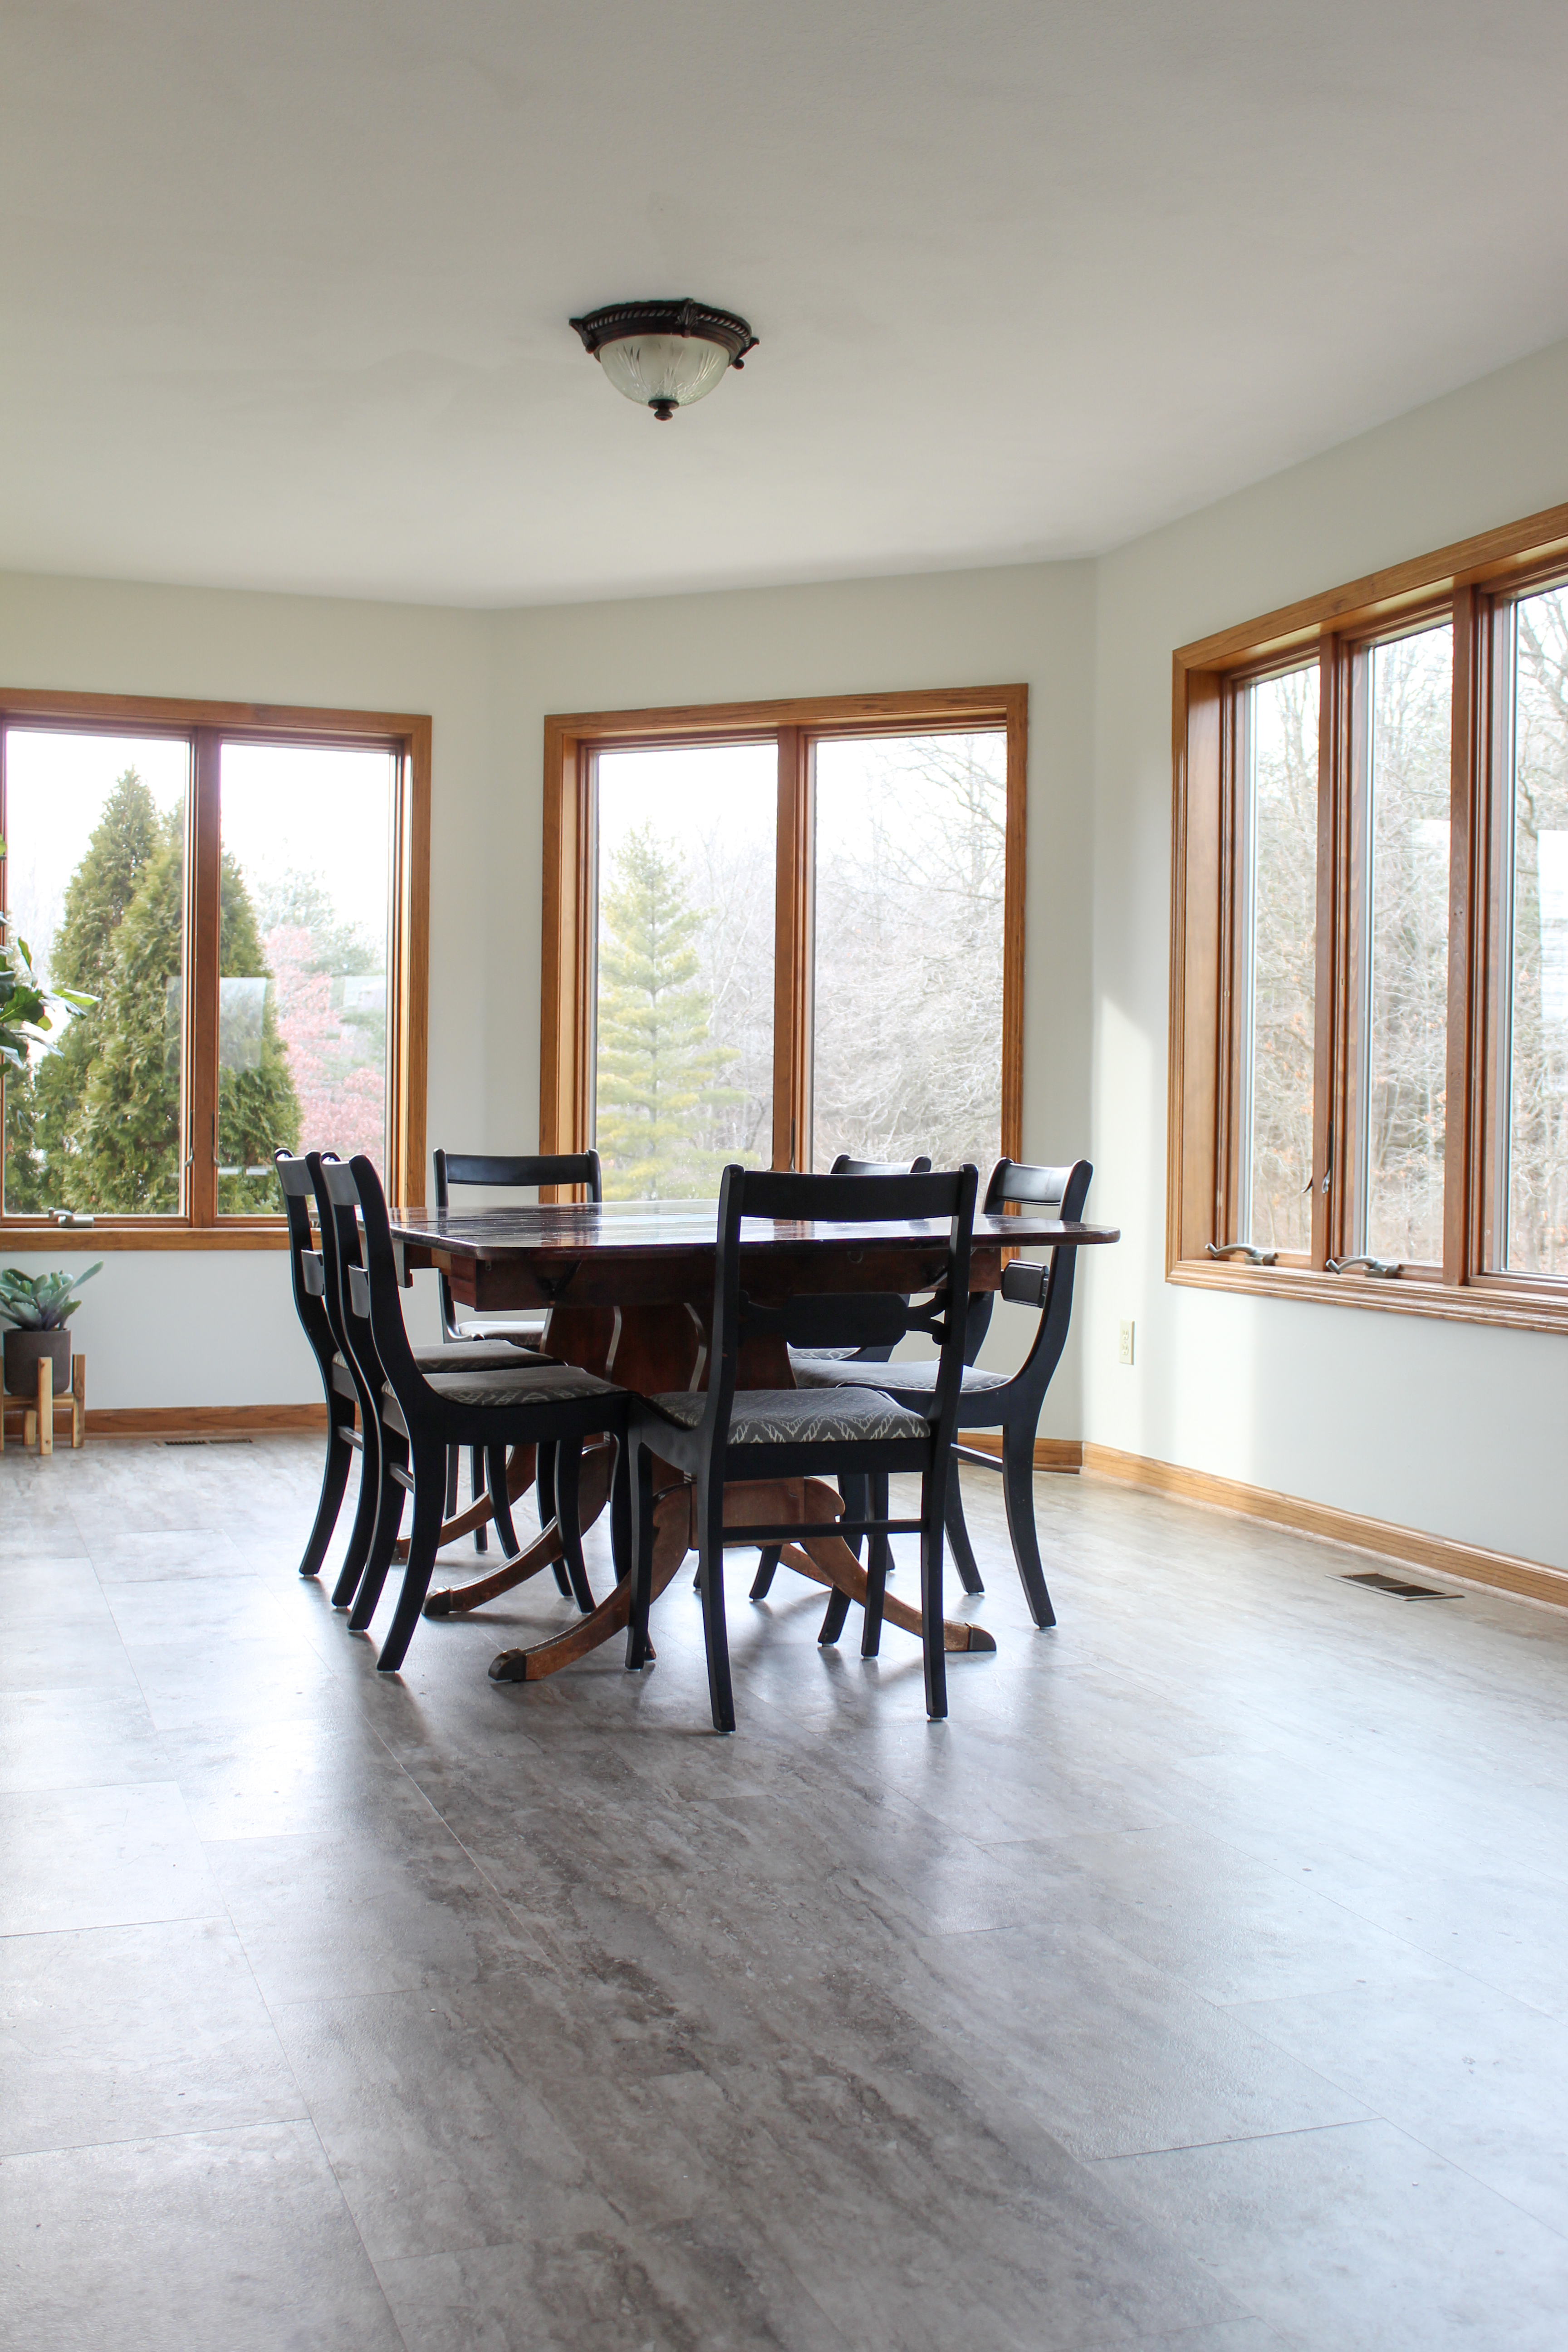
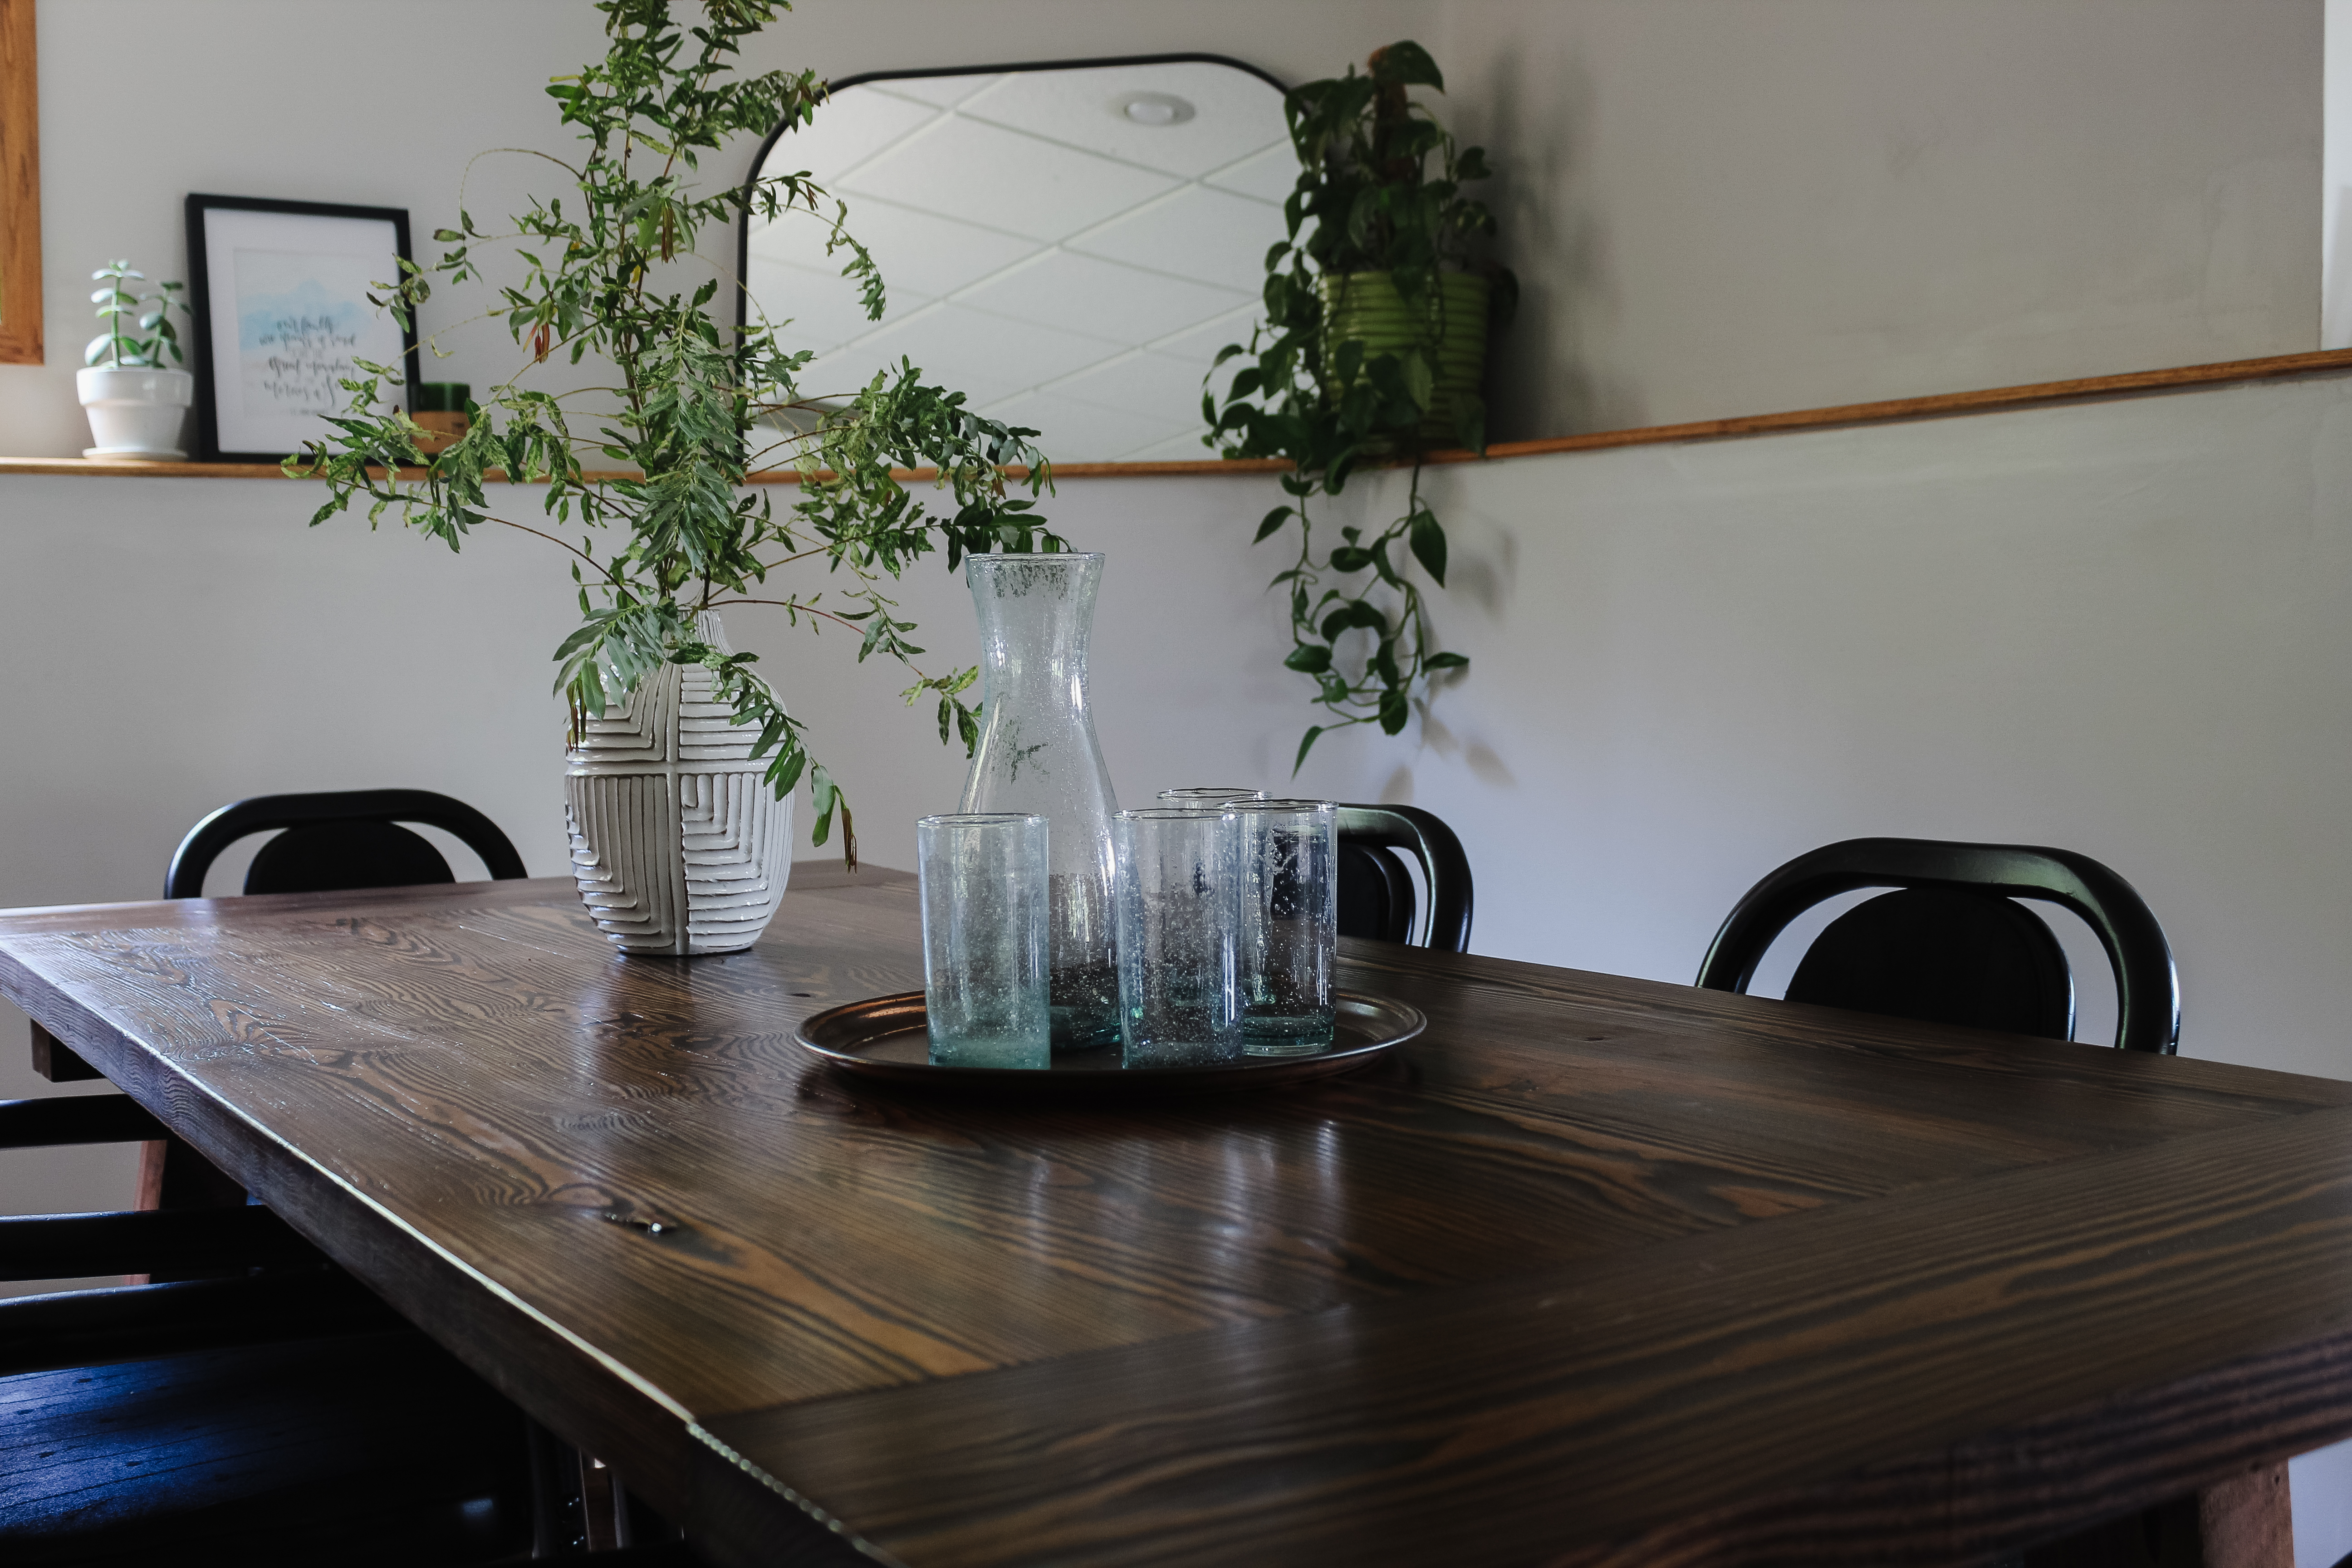
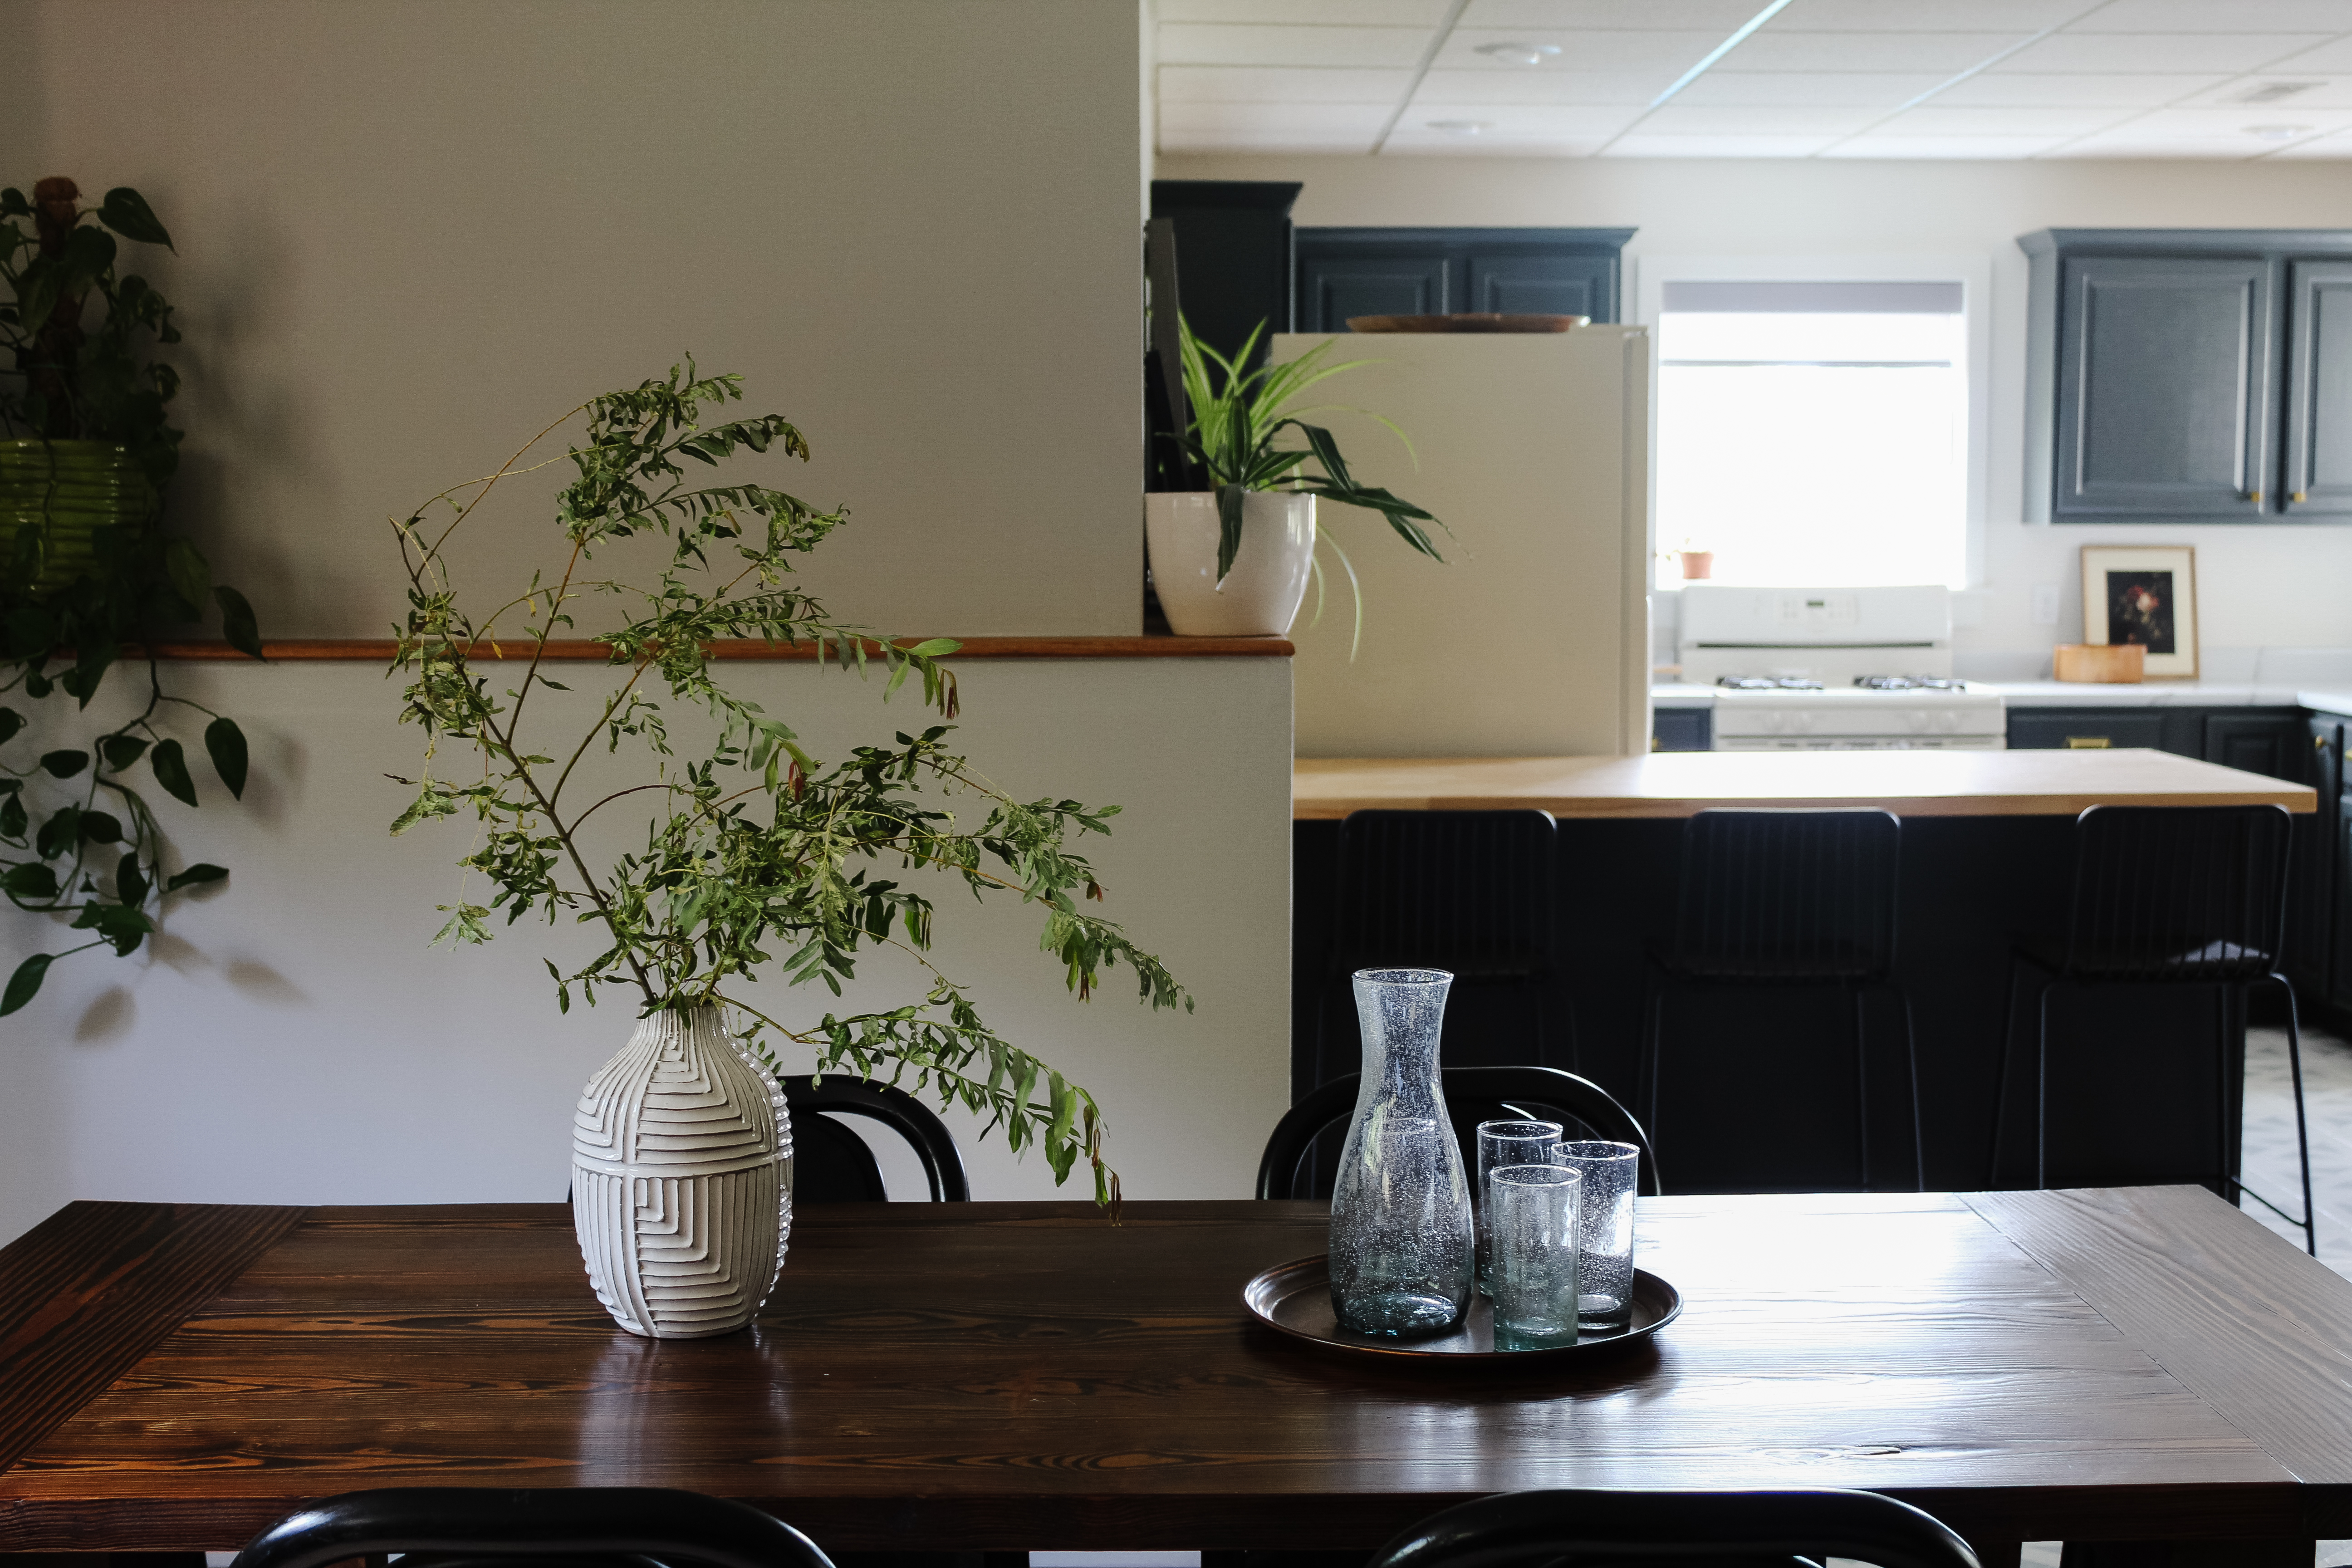
Justin and I have always envisioned our basement as a space for guests and entertaining. We’ve been slowly addressing various areas of the basement (like our guest bedroom and bathroom, living area, kitchen, and entryway) but the space in between the living space and the kitchen has been neglected . . . until now! We’ve both been putting in work to create a dining area for food + game nights and it’s finally finished!
As a refresher, up until a few weeks ago, it looked like this:
I still cringe looking at this combination workout + collection area for things to sell/donate right in the middle of the basement. It was time for a change!
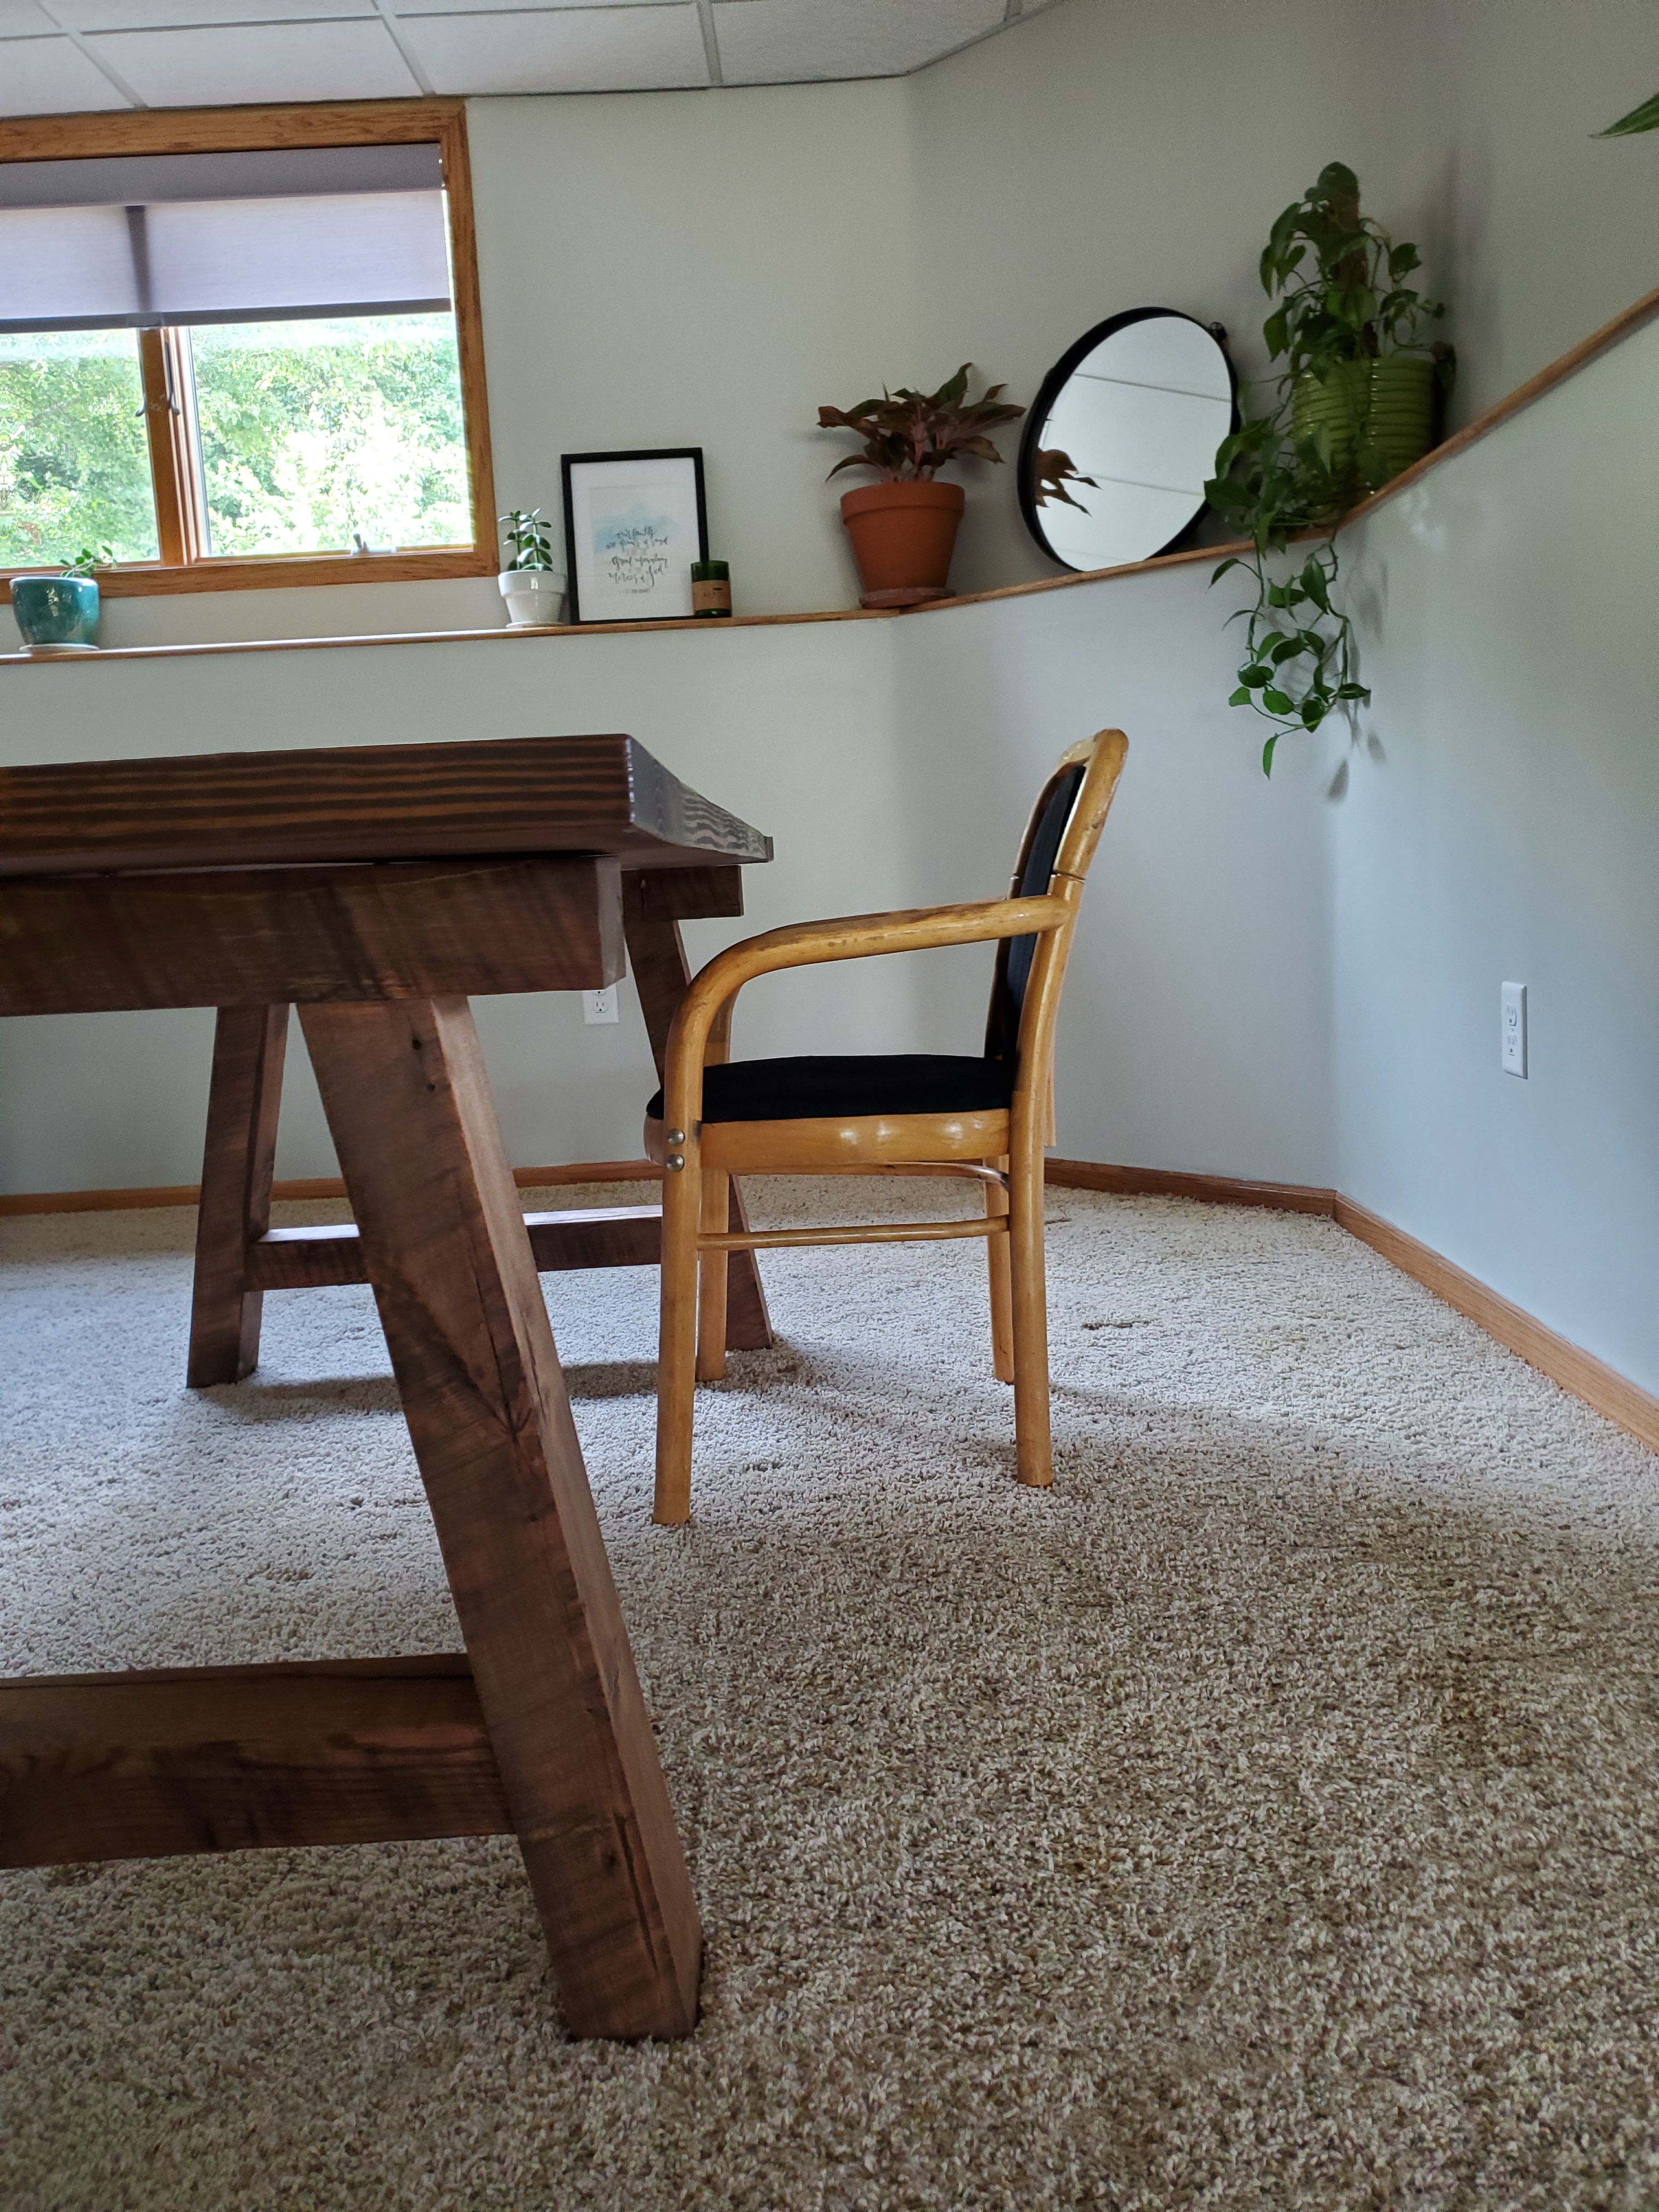
Justin actually made the table entirely out of old scrap wood that the previous owners of our home left behind when they moved out. He worked so hard on it and I’m so impressed – not only is it gorgeous and full of character but it perfectly fits our needs. I was able to give him the exact dimensions I wanted: large enough for 6-8 people to sit comfortably and linger over good food or a game night. It’s perfect!
The chairs were an absolute steal. I had been scouring websites for inexpensive dining chairs but I just couldn’t find anything under $60 per chair that fit our needs (not a barstool or folding chair) and I was not about to spend $300-400 on six chairs for a free table. I started browsing Facebook marketplace and one day I came across these chairs being sold for $2 a chair and I jumped on them! They obviously needed some TLC but I loved their size and shape and knew with a little work they could shine.
My preference would have been to reupholster them, and we could have reupholstered the seats no problem, but the backs were attached in a more complicated way that would have been really difficult to reupholster well. So I started looking at other options and discovered a fabric and vinyl spray paint that I decided to give a try. The nice thing about $2 chairs is that it makes you willing to try a few things that you maybe wouldn’t risk on a more expensive piece.
The fabric and vinyl spray paint worked…okay. It took 3 light coats to cover the fabric, and while it’s not perfect, it does look a lot better. I actually think the black over the old striped and floral print makes it look like a cool Victorian-y fabric now. But the spray paint did cause the fabric to have a scratchier feel, which is not ideal. I think I will eventually get some thin black seat covers to help improve the feel of the seat (even if the fabric wasn’t scratchy, I would want to do this because there is very little cushion in the seat’s upholstery and they’re not super comfortable to sit in for a long time).
After spray painting the seats, I decided I needed to also paint the wood black. I actually really liked the look of dark upholstery and lighter stain, but I did not like it for this particular space. It just didn’t work with all the other wood tones of the table, half wall ledge, and other wood tones throughout the open concept basement. I tried out two different methods for changing the wood look: spray paint and Polyshades. Polyshades is a product I hadn’t heard of before, but it’s essentially a stain that you can apply over another stain to achieve a different look without having to sand off all the previous stain. I tested both on an inconspicuous part of the chair and found that spray paint’s coverage was much better. Polyshades would be an excellent candidate over raw wood or stained wood that isn’t glossy, but these chairs were glossy and it just didn’t look that great. I could have sanded the chairs down to remove all the gloss, but since every surface of the chairs was rounded, it just felt like a lot of work ha. I’m all about keeping things simple!
I lightly sanded each chair with a piece of sandpaper, taped off the fabric seats, and then applied black spray paint in a satin finish using repetitive light strokes. It took just about 3 full cans of spray paint to cover all six chairs. Then all I needed to do was wait for them to dry and bring them inside!
The chairs are definitely not perfect, but I think they work really well in this space and I love their look. And the total cost for this project was under $50, meaning this set of 6 chairs cost less than just one brand new chair in all the places I was looking beforehand. Win win!
I finished out this little dining area by shopping my home for decor, although I did buy one new thing for it: that gorgeous arched mirror in the corner. It was another Facebook marketplace find – a brand new (still in the original packaging!) Project 62 arched black mirror for $30?? Definite score.
Overall I’m so happy with this space and how it makes the room flow from the lounge area to the dining space to the kitchen. It feels just right!
The tiniest room in our house just got a dramatic makeover! Welcome to our little secret nook under the staircase.
My goal was to make a big impact with a tiny budget, and I am absolutely thrilled with how it turned out.
As a refresher, here is where this room started. Seven square feet of potential!
Since it’s so small, it just made sense to go through paint that I already had to find something that would work rather than buy more. After trying out a few colors on the wall, I settled on the leftover paint from our guest bathroom renovation: Benjamin Moore Smoky Mountain (color matched at Lowe’s). I painted both the walls and the trim the same color and I love the effect that had.
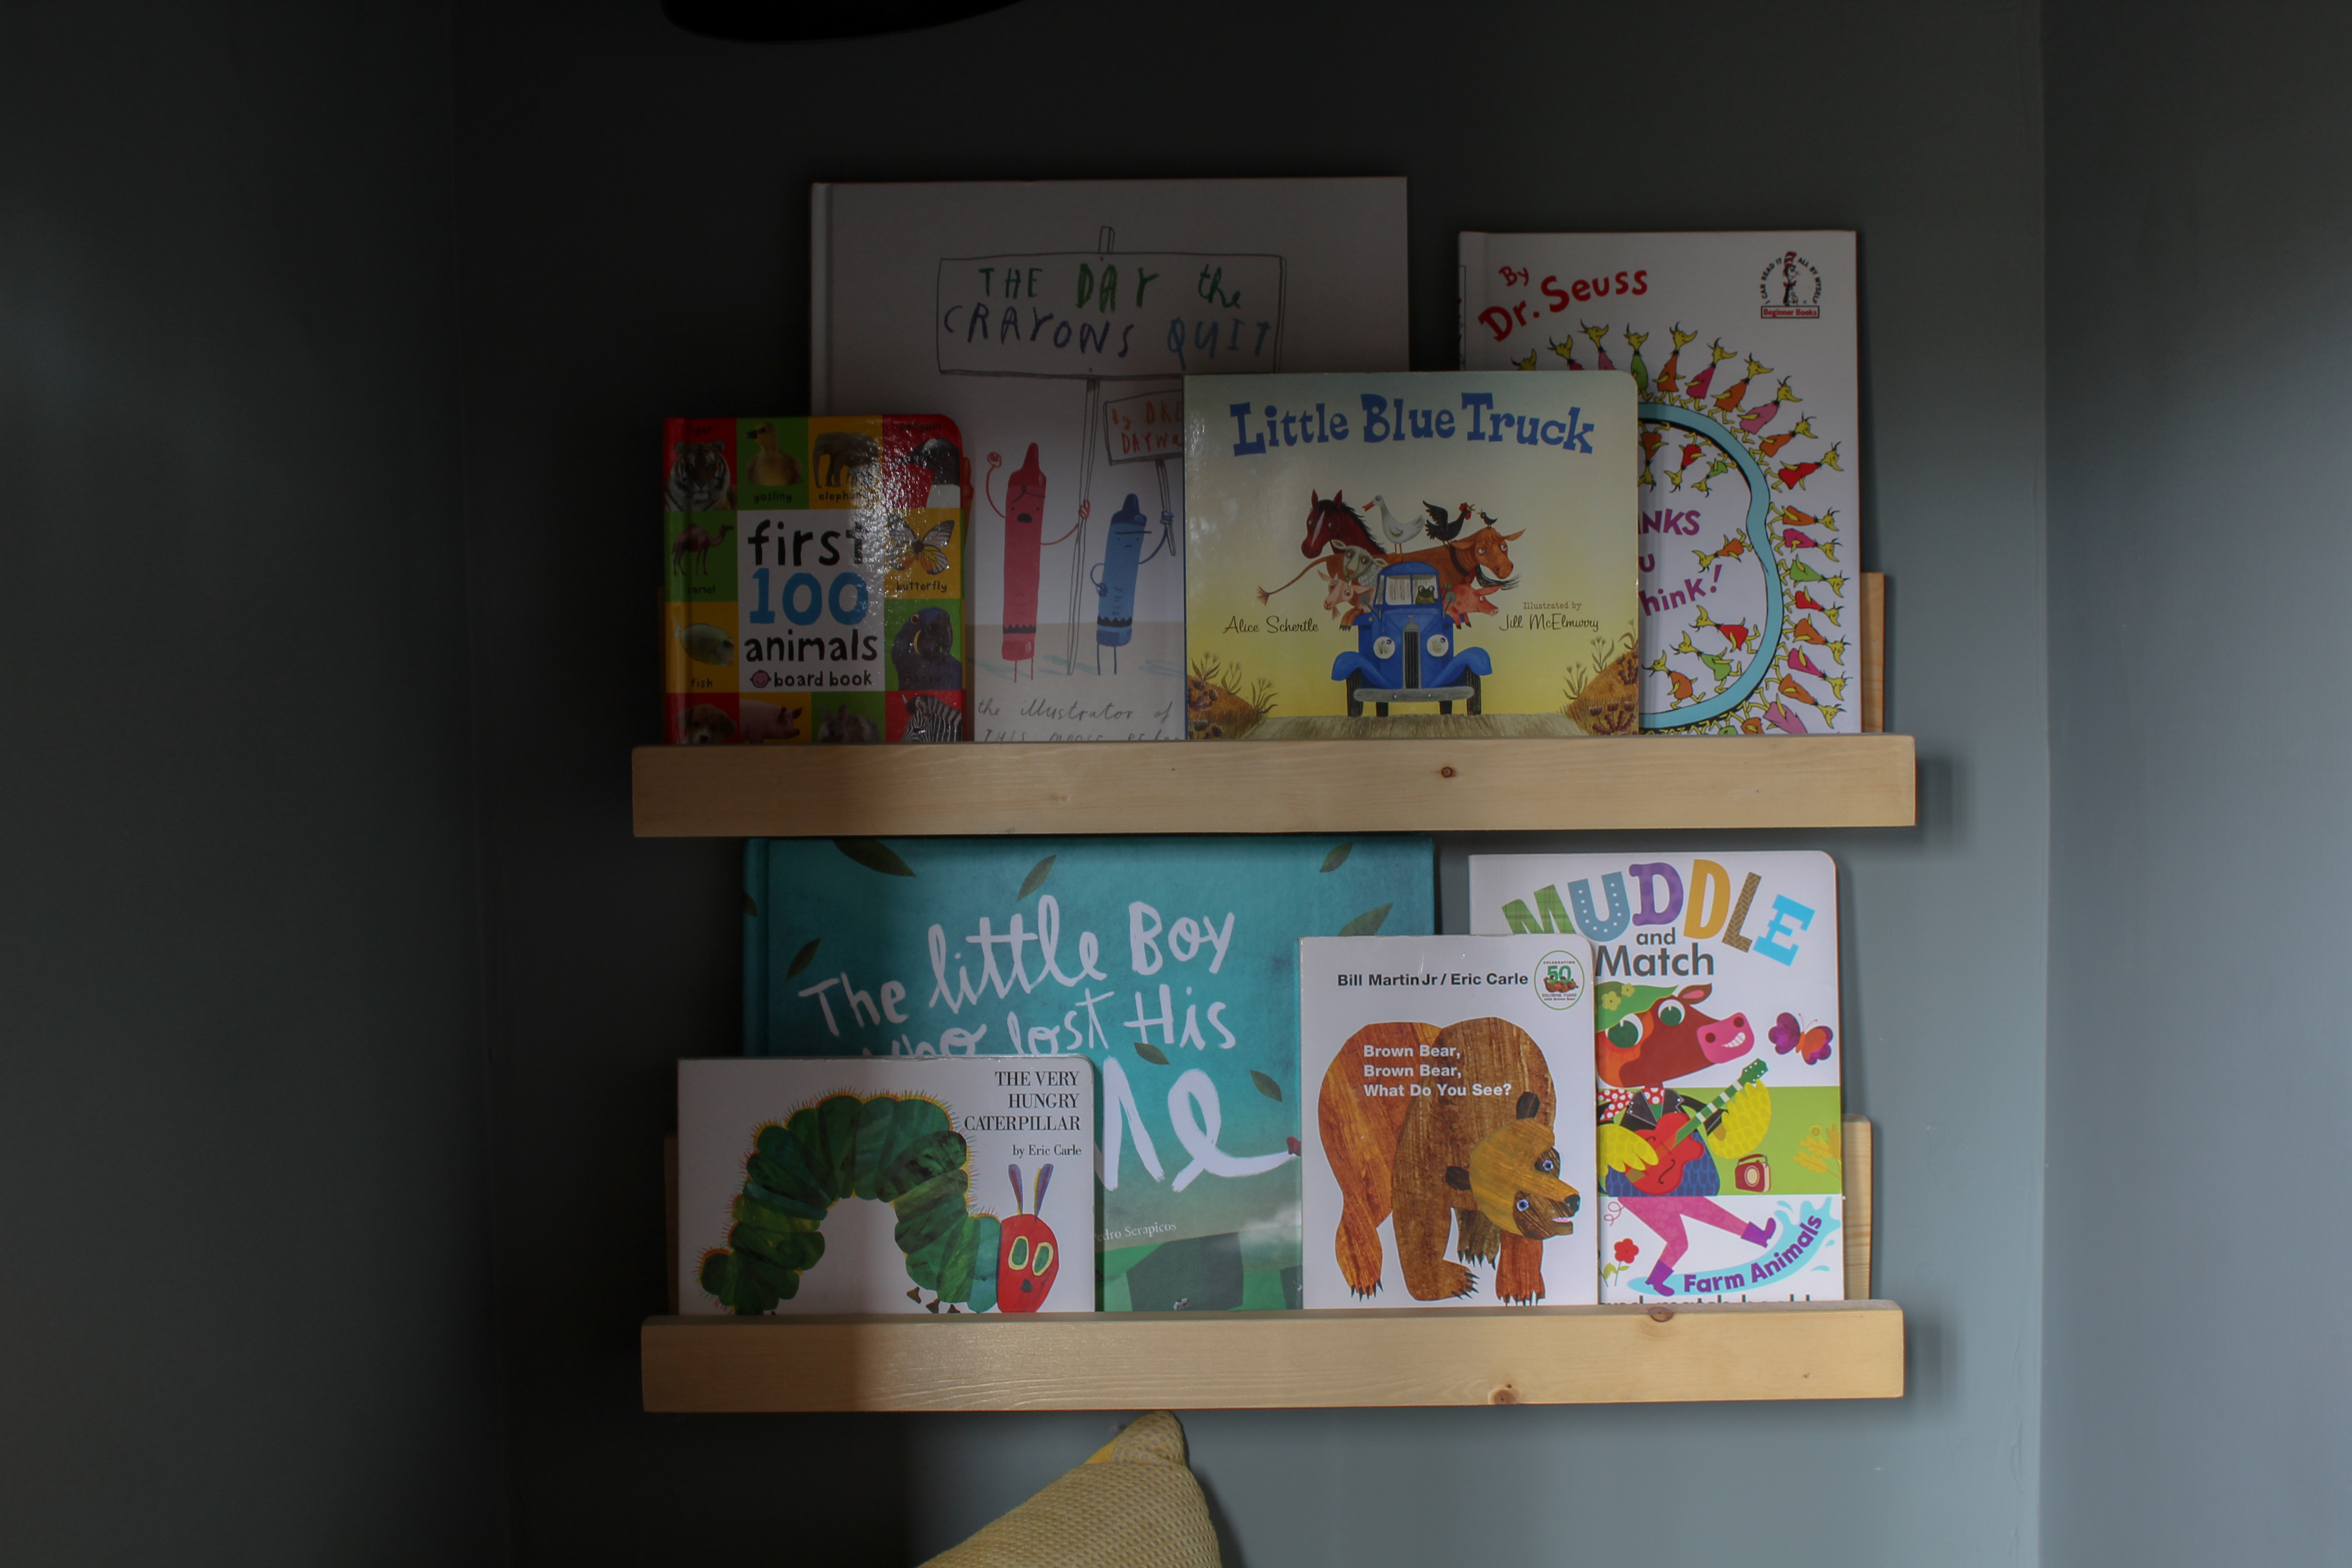
About a month ago, Justin and I had a DIY Date Night and built these cute little book ledges using scrap wood from our garage and stain we already had. This project was so fun (and free!) and I think they look great in this space!
I really wanted to trick out this space as best I could and have some little secret surprises that you can only see if you’re inside. I’ve always pictured it as a Harry-Potter-style cupboard under the stairs, so I wanted to make it seem a little magical without actually being Harry Potter themed. One thing that kept coming back to me was stars on the ceiling – when I found these metallic gold constellation decals on Etsy, they really stood out to me as the perfect option!
The set I bought came with nine constellations and then a bunch of extra stars. I may have gone full nerd and actually looked up online to see how each constellation should be oriented and where they appear in general relation to one another if you look outside in our specific geographic location…is my type-A showing? Once I figured out where I wanted everything, these decals were super quick and easy to apply!
Another thing I’ve always wanted to do in here is make a chalkboard wall – the triangular wall above the door was the perfect space for it. A friend of mine had some chalkboard paint she was willing to let me use so I didn’t have to buy another jar and I picked it up off her porch. I primed and painted 2 coats and voila!
Justin used a scrap piece of wood and a router to create a ledge for chalk to sit above the door frame and it worked perfectly. We initially thought we’d have to glue it to the frame but he made the wall-to-wall size so precise that we were able to just push it in and it’s very securely wedged.
The last thing this space really needed was a light source. There is no plug and we didn’t want to spend the money to hardwire lighting, so I came up with a plan for a DIY sconce using a 79 cent plastic bowl, scrap wood, black spray paint, and a puck light. Justin and I (ok, mostly Justin haha) created this in another DIY Date Night – it turned out so well and works perfectly for providing a little light to read or play.
Such a big difference just having a light source!
I wanted the space to feel cozy and comfortable, so I finished it off with a microfiber floor mat that had a little extra squishy padding and a cute textured pillow that was 30% off at Target.
Because of all the DIY projects using leftover materials from other rooms and projects, the total cost of this entire room makeover was right at $75. I’m so pleased with what a huge difference it makes and imagine our kids will spend many hours entertained in this space!
Sources
Wall Color: Benjamin Moore Smoky Mountain (color matched at Lowe’s)