It’s been four years since we first walked through our house and from the very first showing, I had a vision for our home office. The room had no permanent storage, but I envisioned built-in bookcases along one wall and was so glad to bring that vision to life back in 2020. We have SO much storage space now and today I wanted to take a look at all the ways I utilize different types of storage in this room.
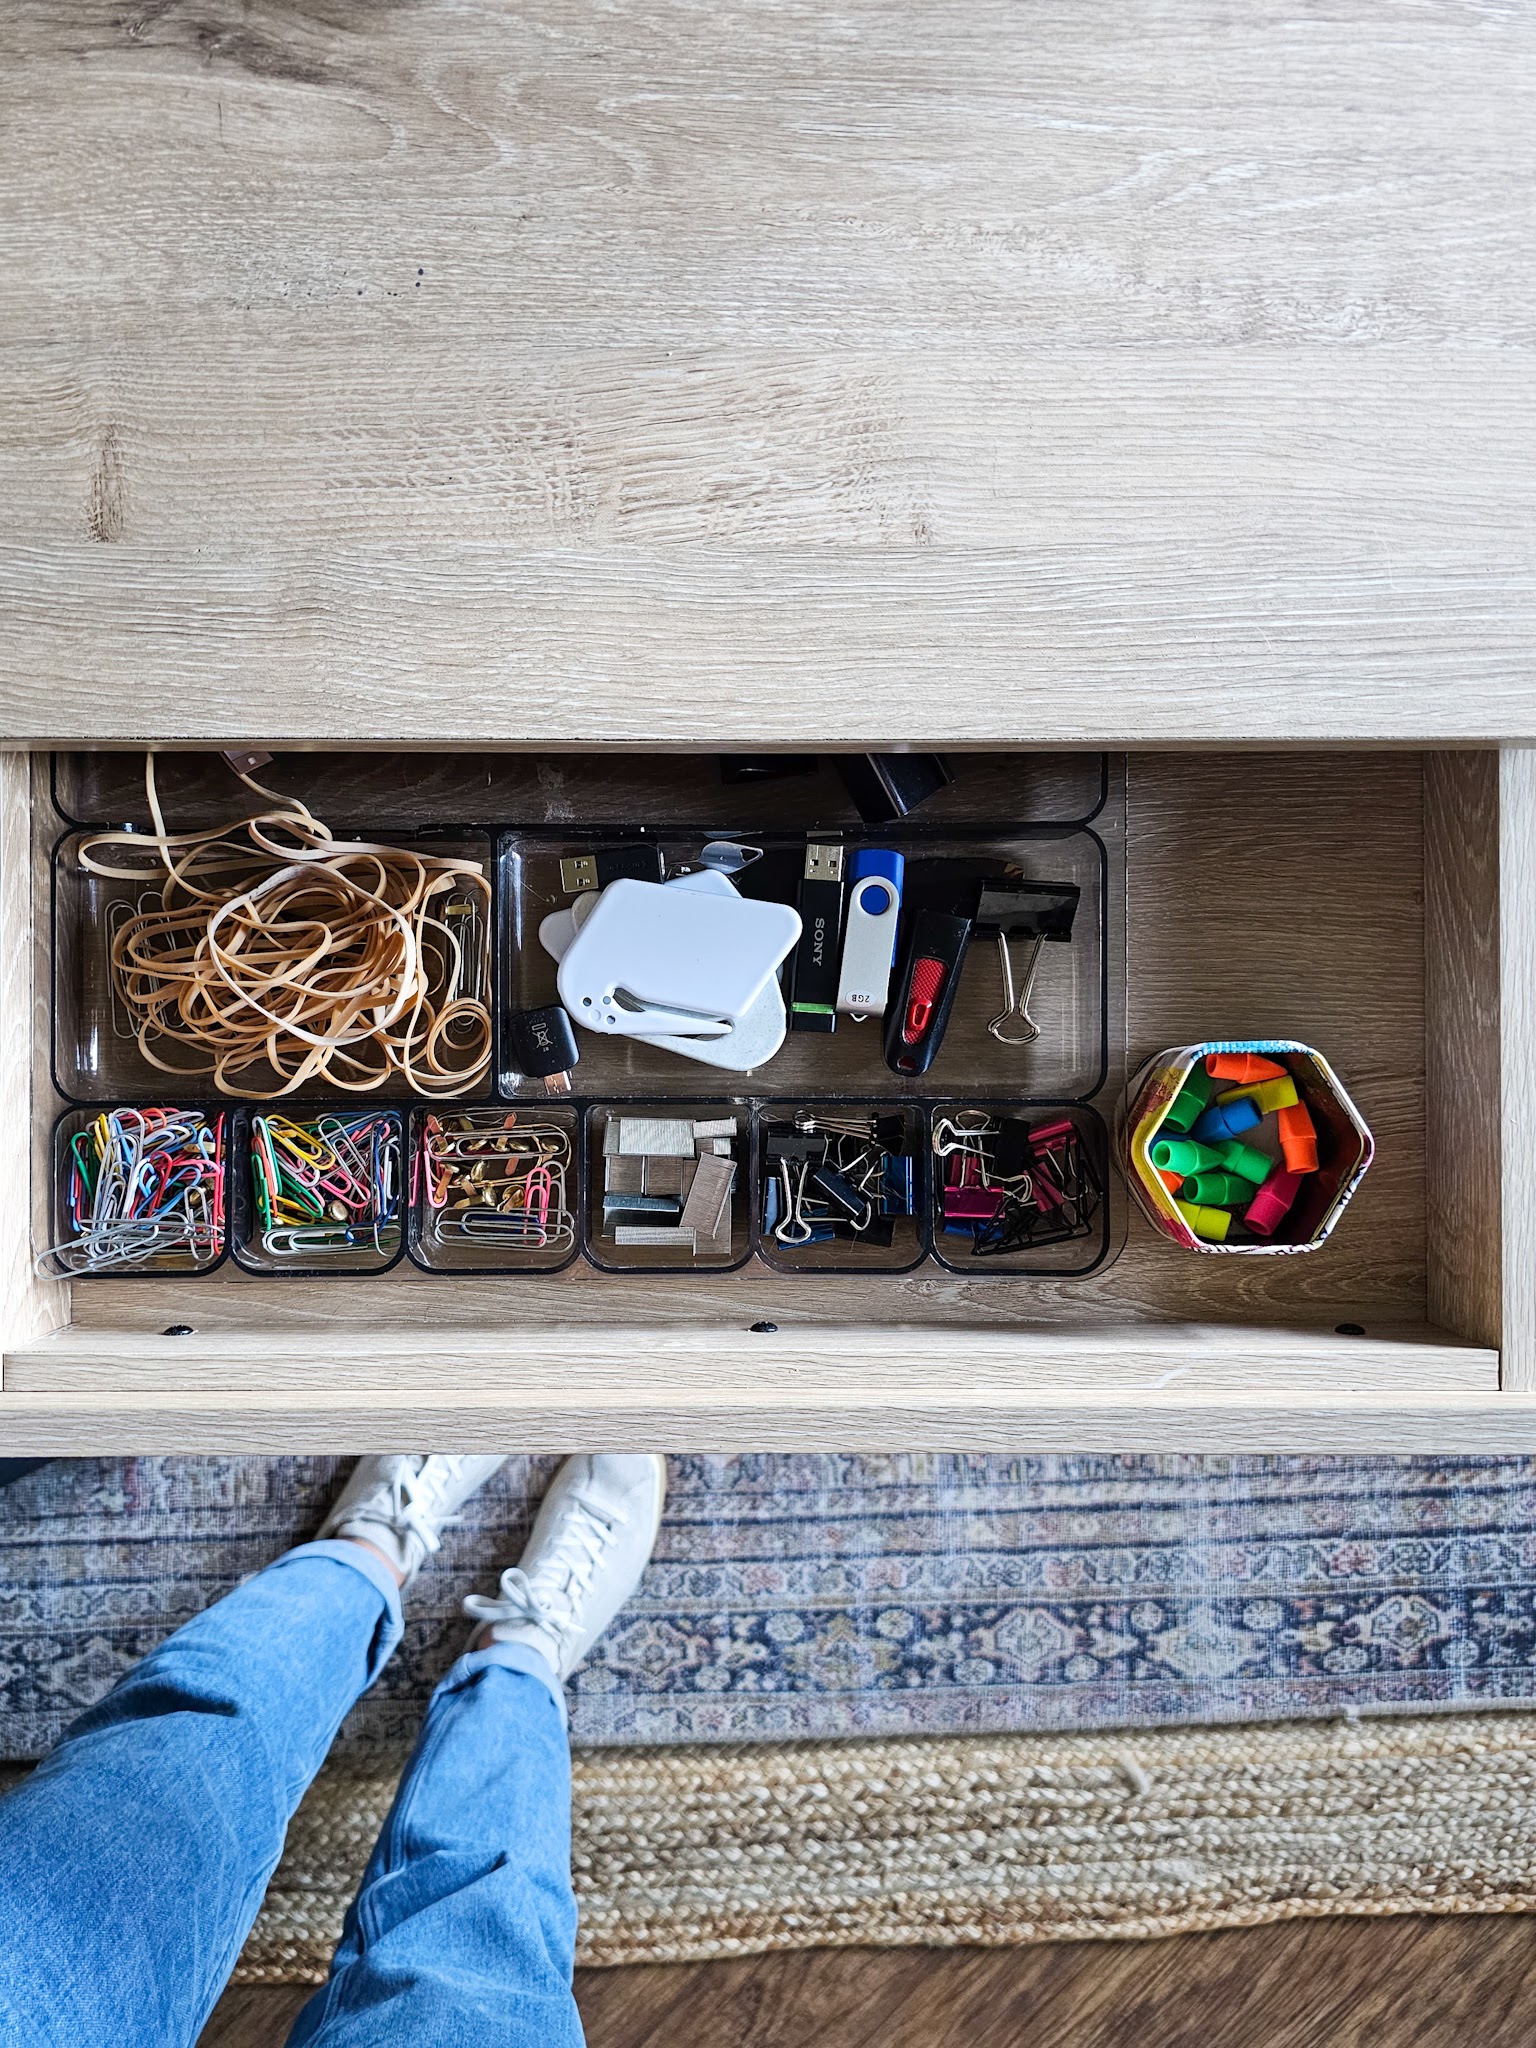
My desk has two small drawers that house basically what you would expect to find in a desk: notepads and sticky notes in one drawer and office-y bits and bobs (rubber bands, paper clips, binder clips, erasers, flash drives, etc) in the other. These are the things I’m often reaching for throughout the day as I work from home.
When designing the built-ins, I knew I had the option to do floor-to-ceiling bookshelves a la Beauty and the Beast, but I also knew that having some closed storage for my family was crucial. Utilizing cabinets on the bottom half was a game changer for our home’s organization!
I store typical office supplies like our printer, paper, notebooks, folders, and cords in the cabinets but they also house a lot of random things like construction paper and tubs of art supplies, my paint swatch decks and wallpaper samples, computer bags and tripods, and all of our family’s many, many games.
I originally wanted all the cabinets to have shelves and doors but we used Ikea cabinets and I couldn’t get a configuration to work in the allotted space. I had to pivot and include a set of drawers in the middle, which ultimately worked out better than all doors anyways! I love having a set of drawers to easily store things like my office backstock (rolls of tape, extra sticky notes and paperclips, etc), my stapler, all our batteries, command strips, envelopes, labels, etc. I’m so thankful for the drawers!
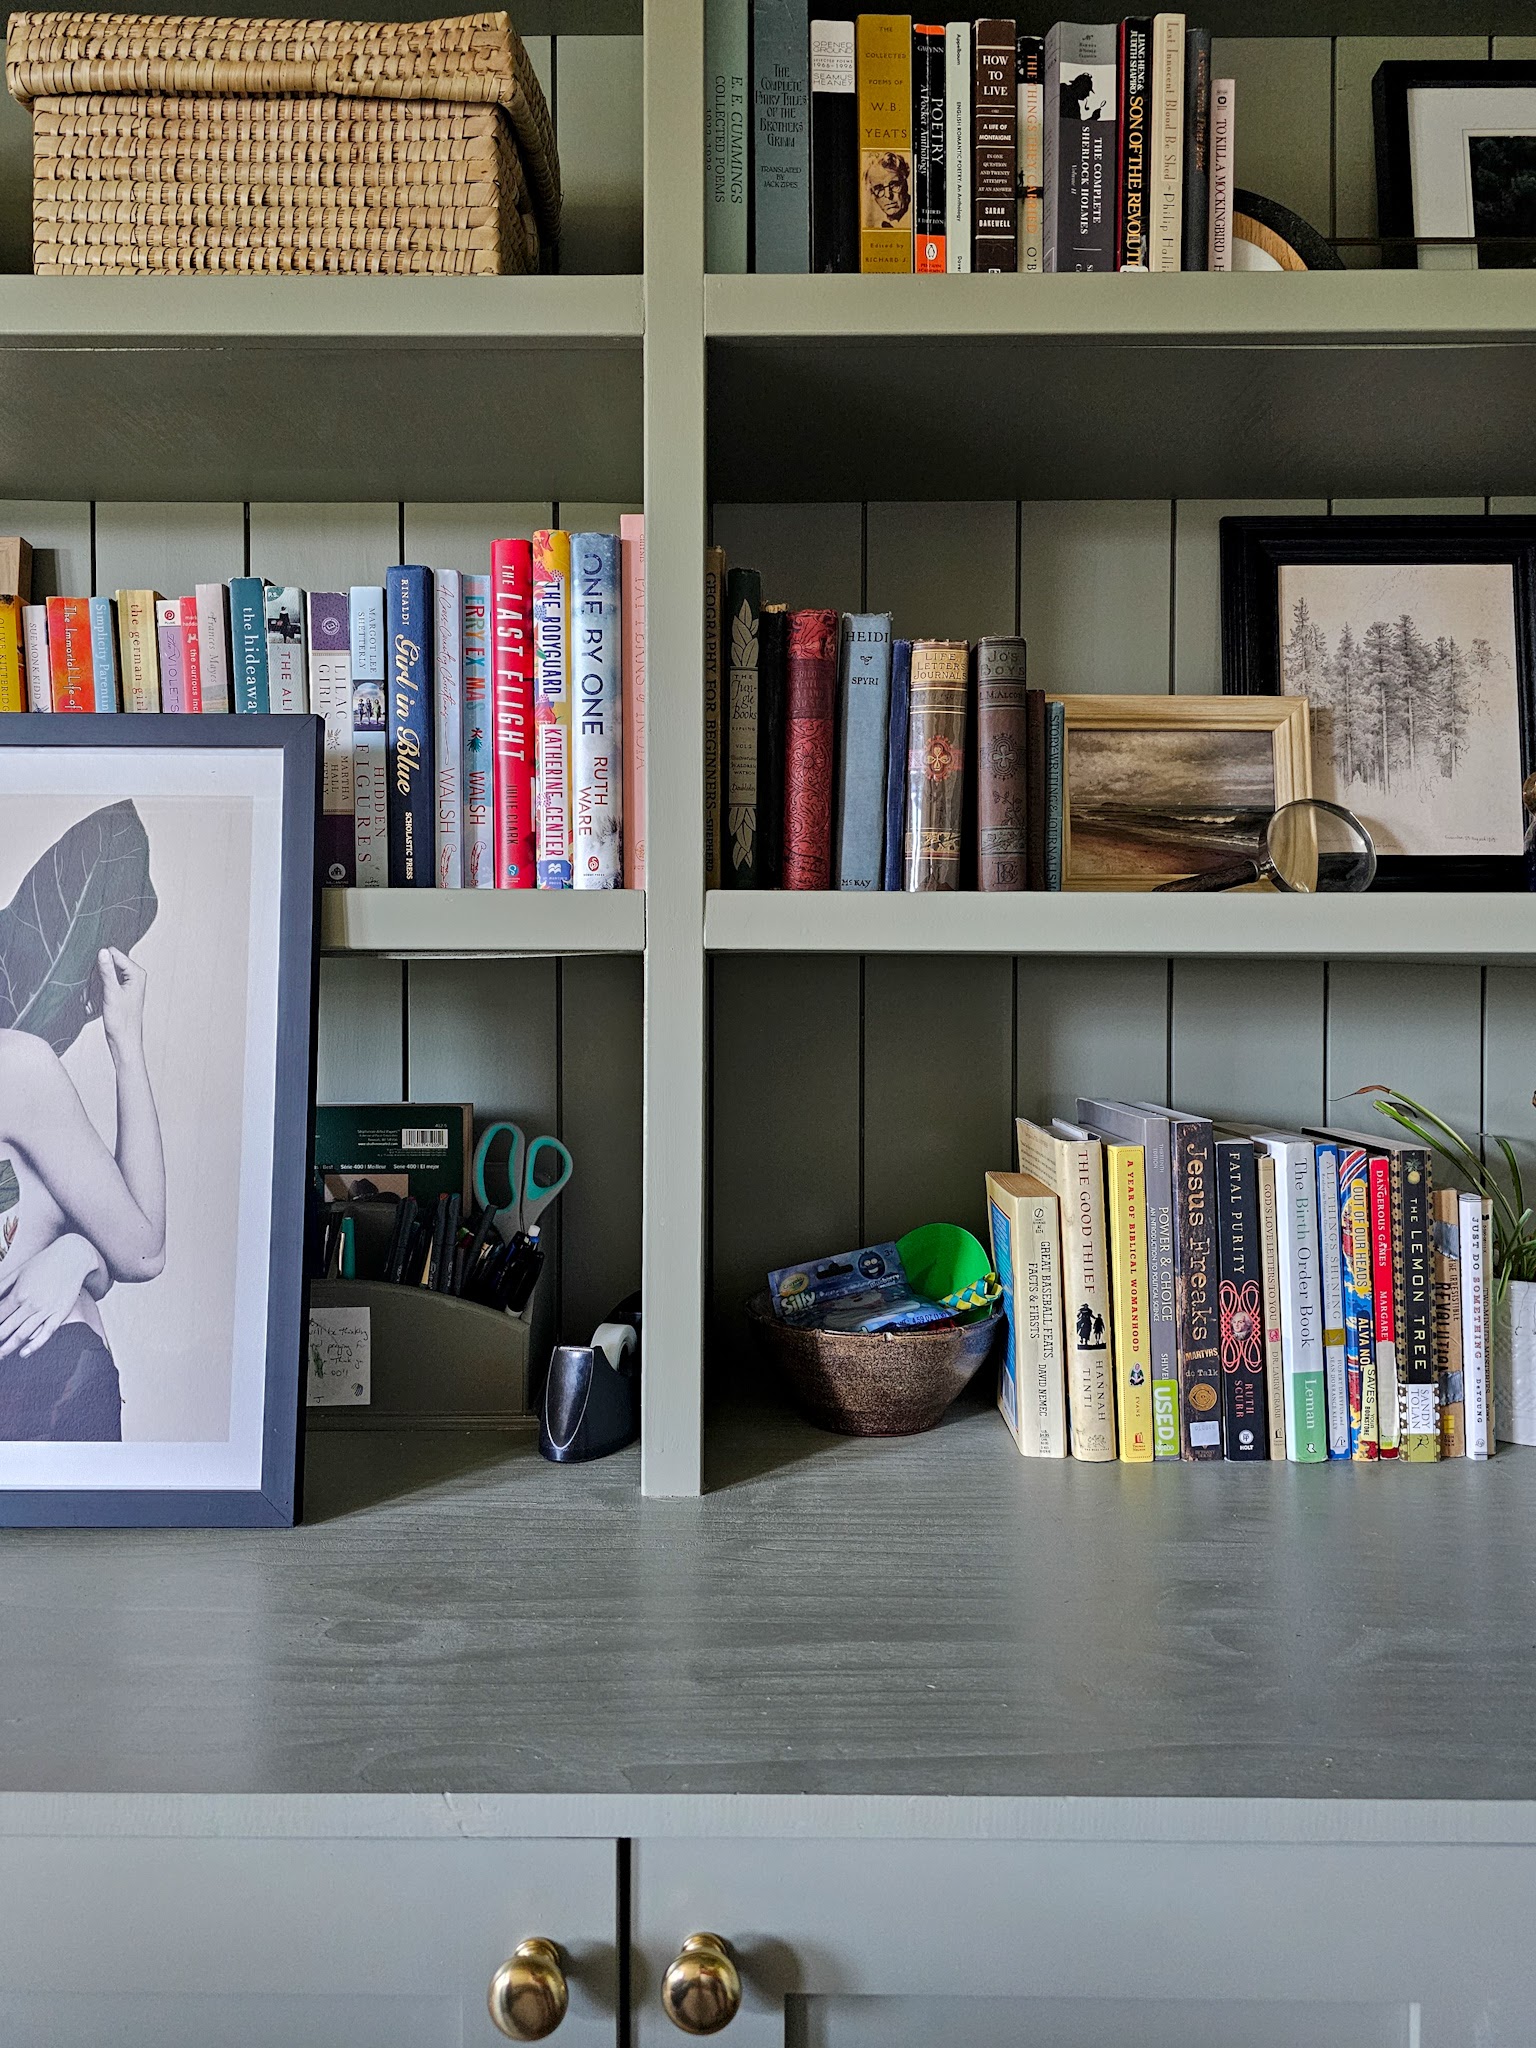
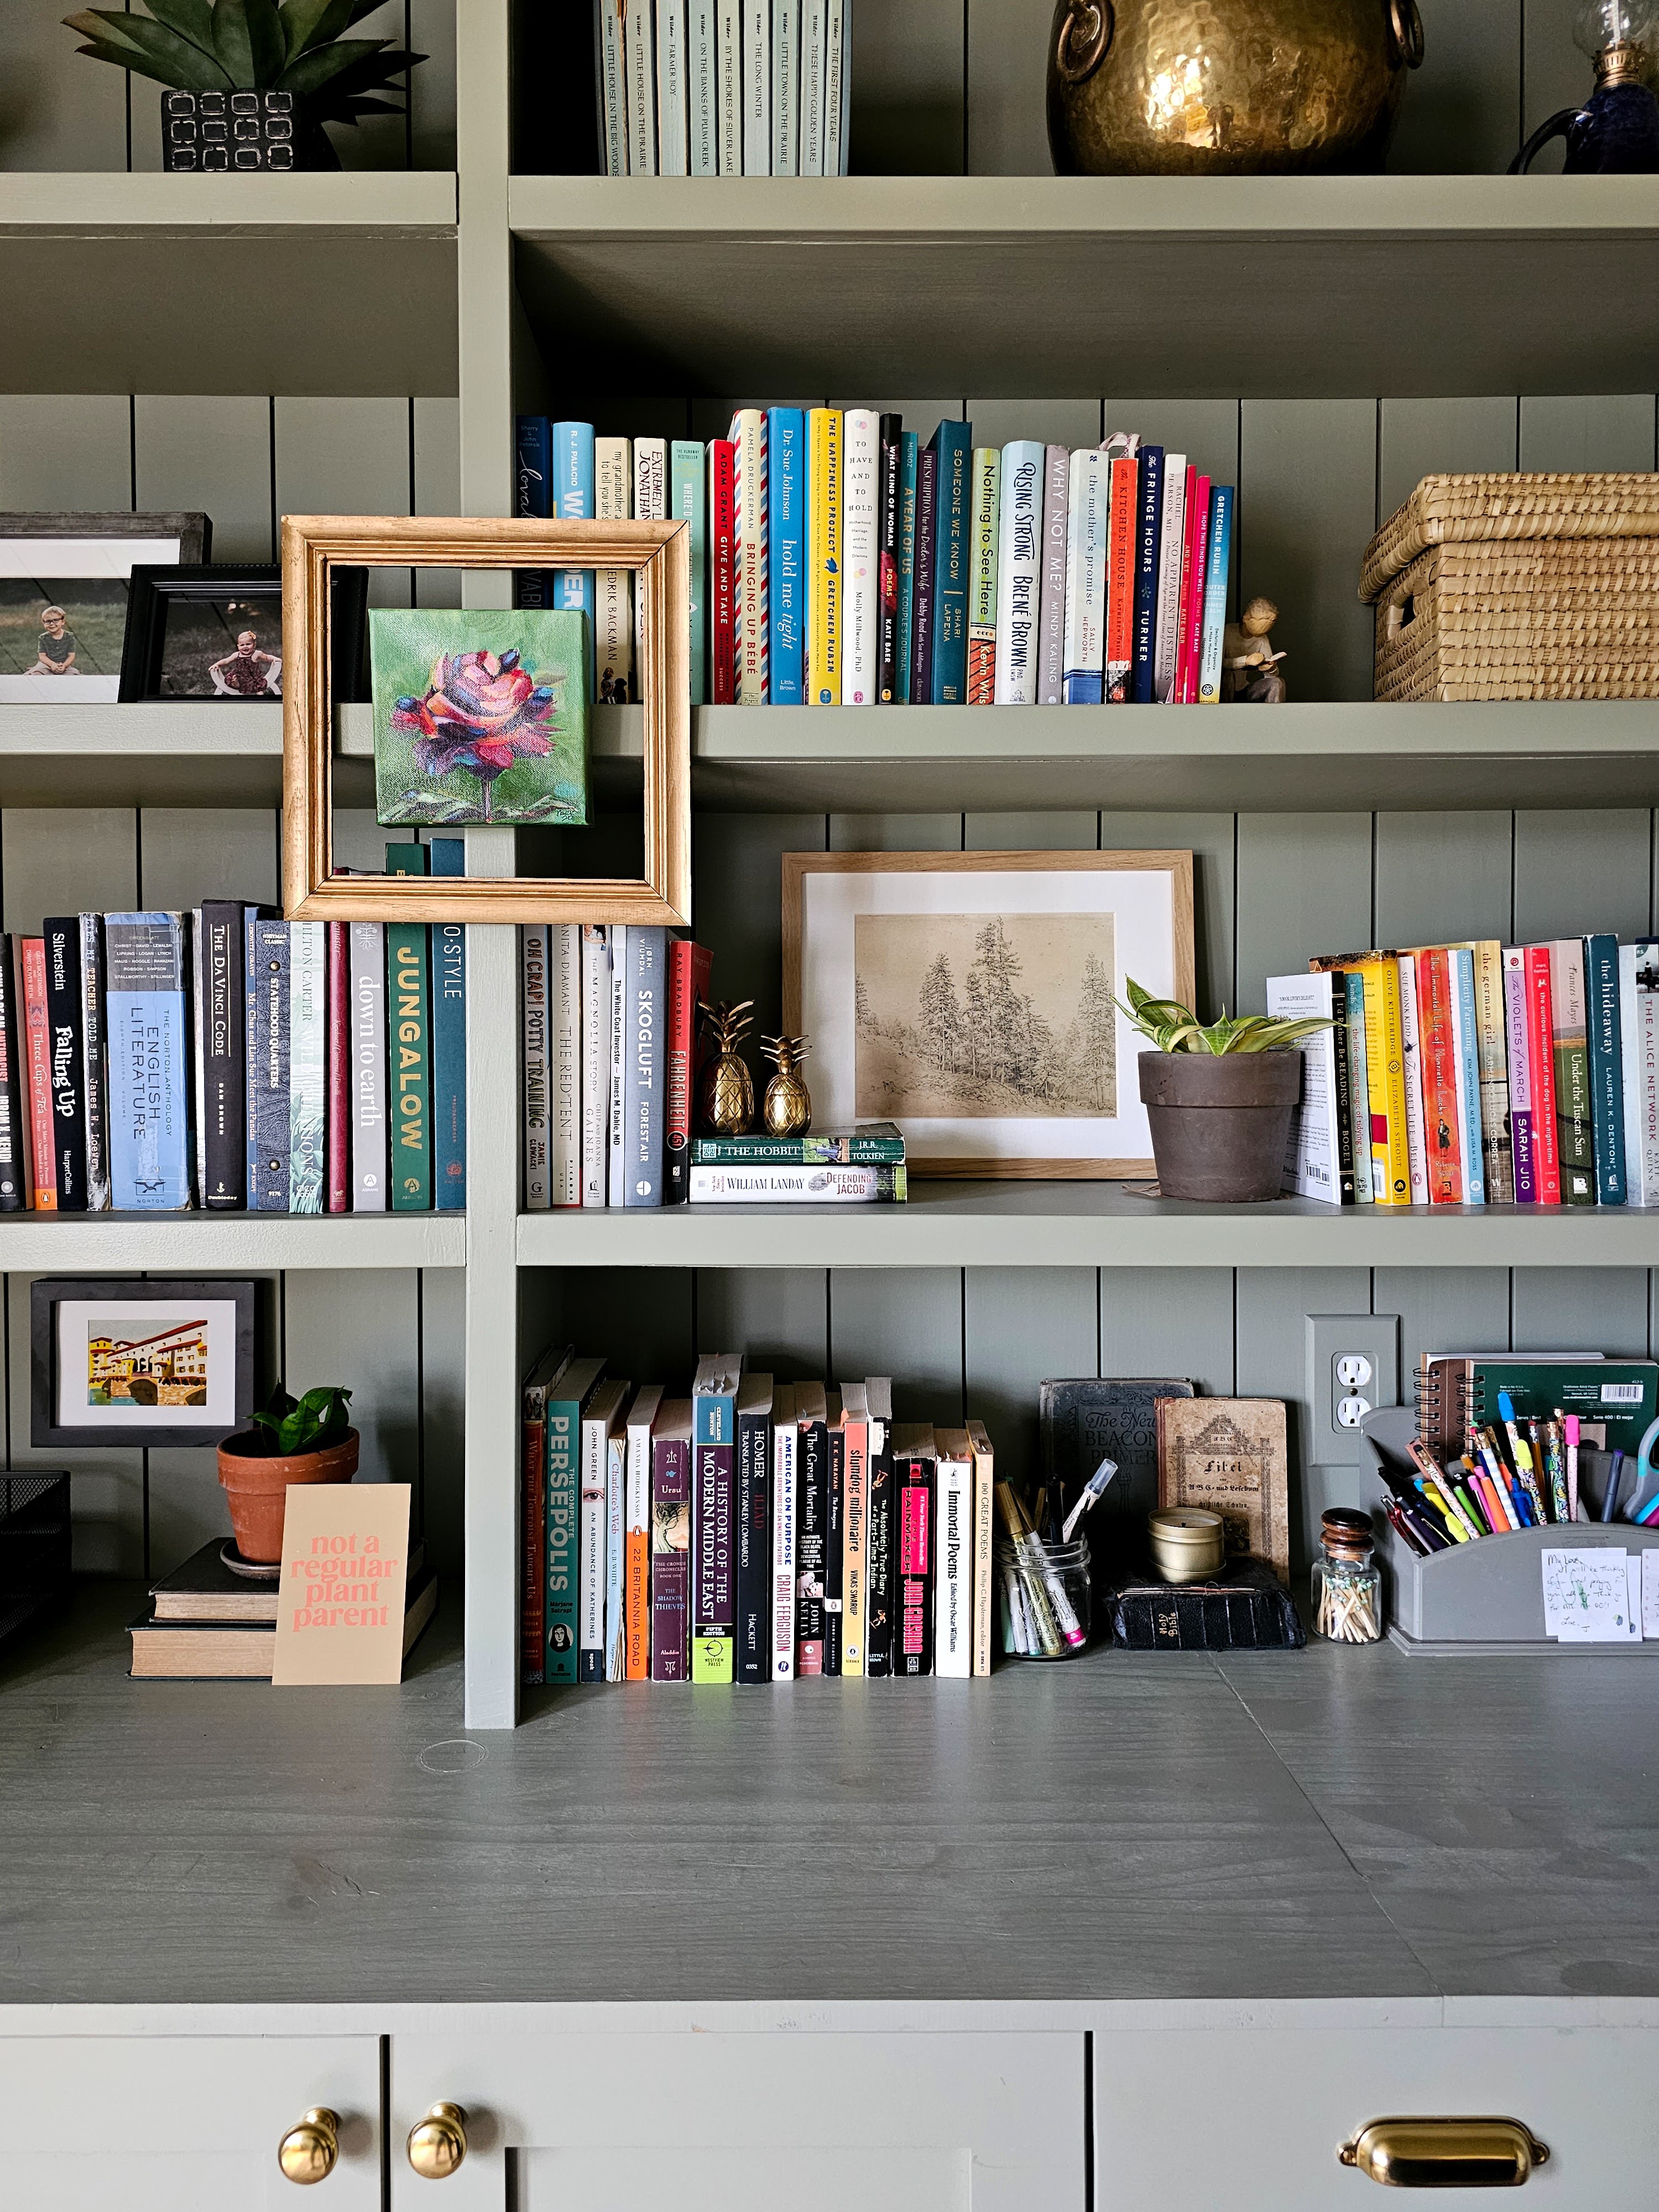
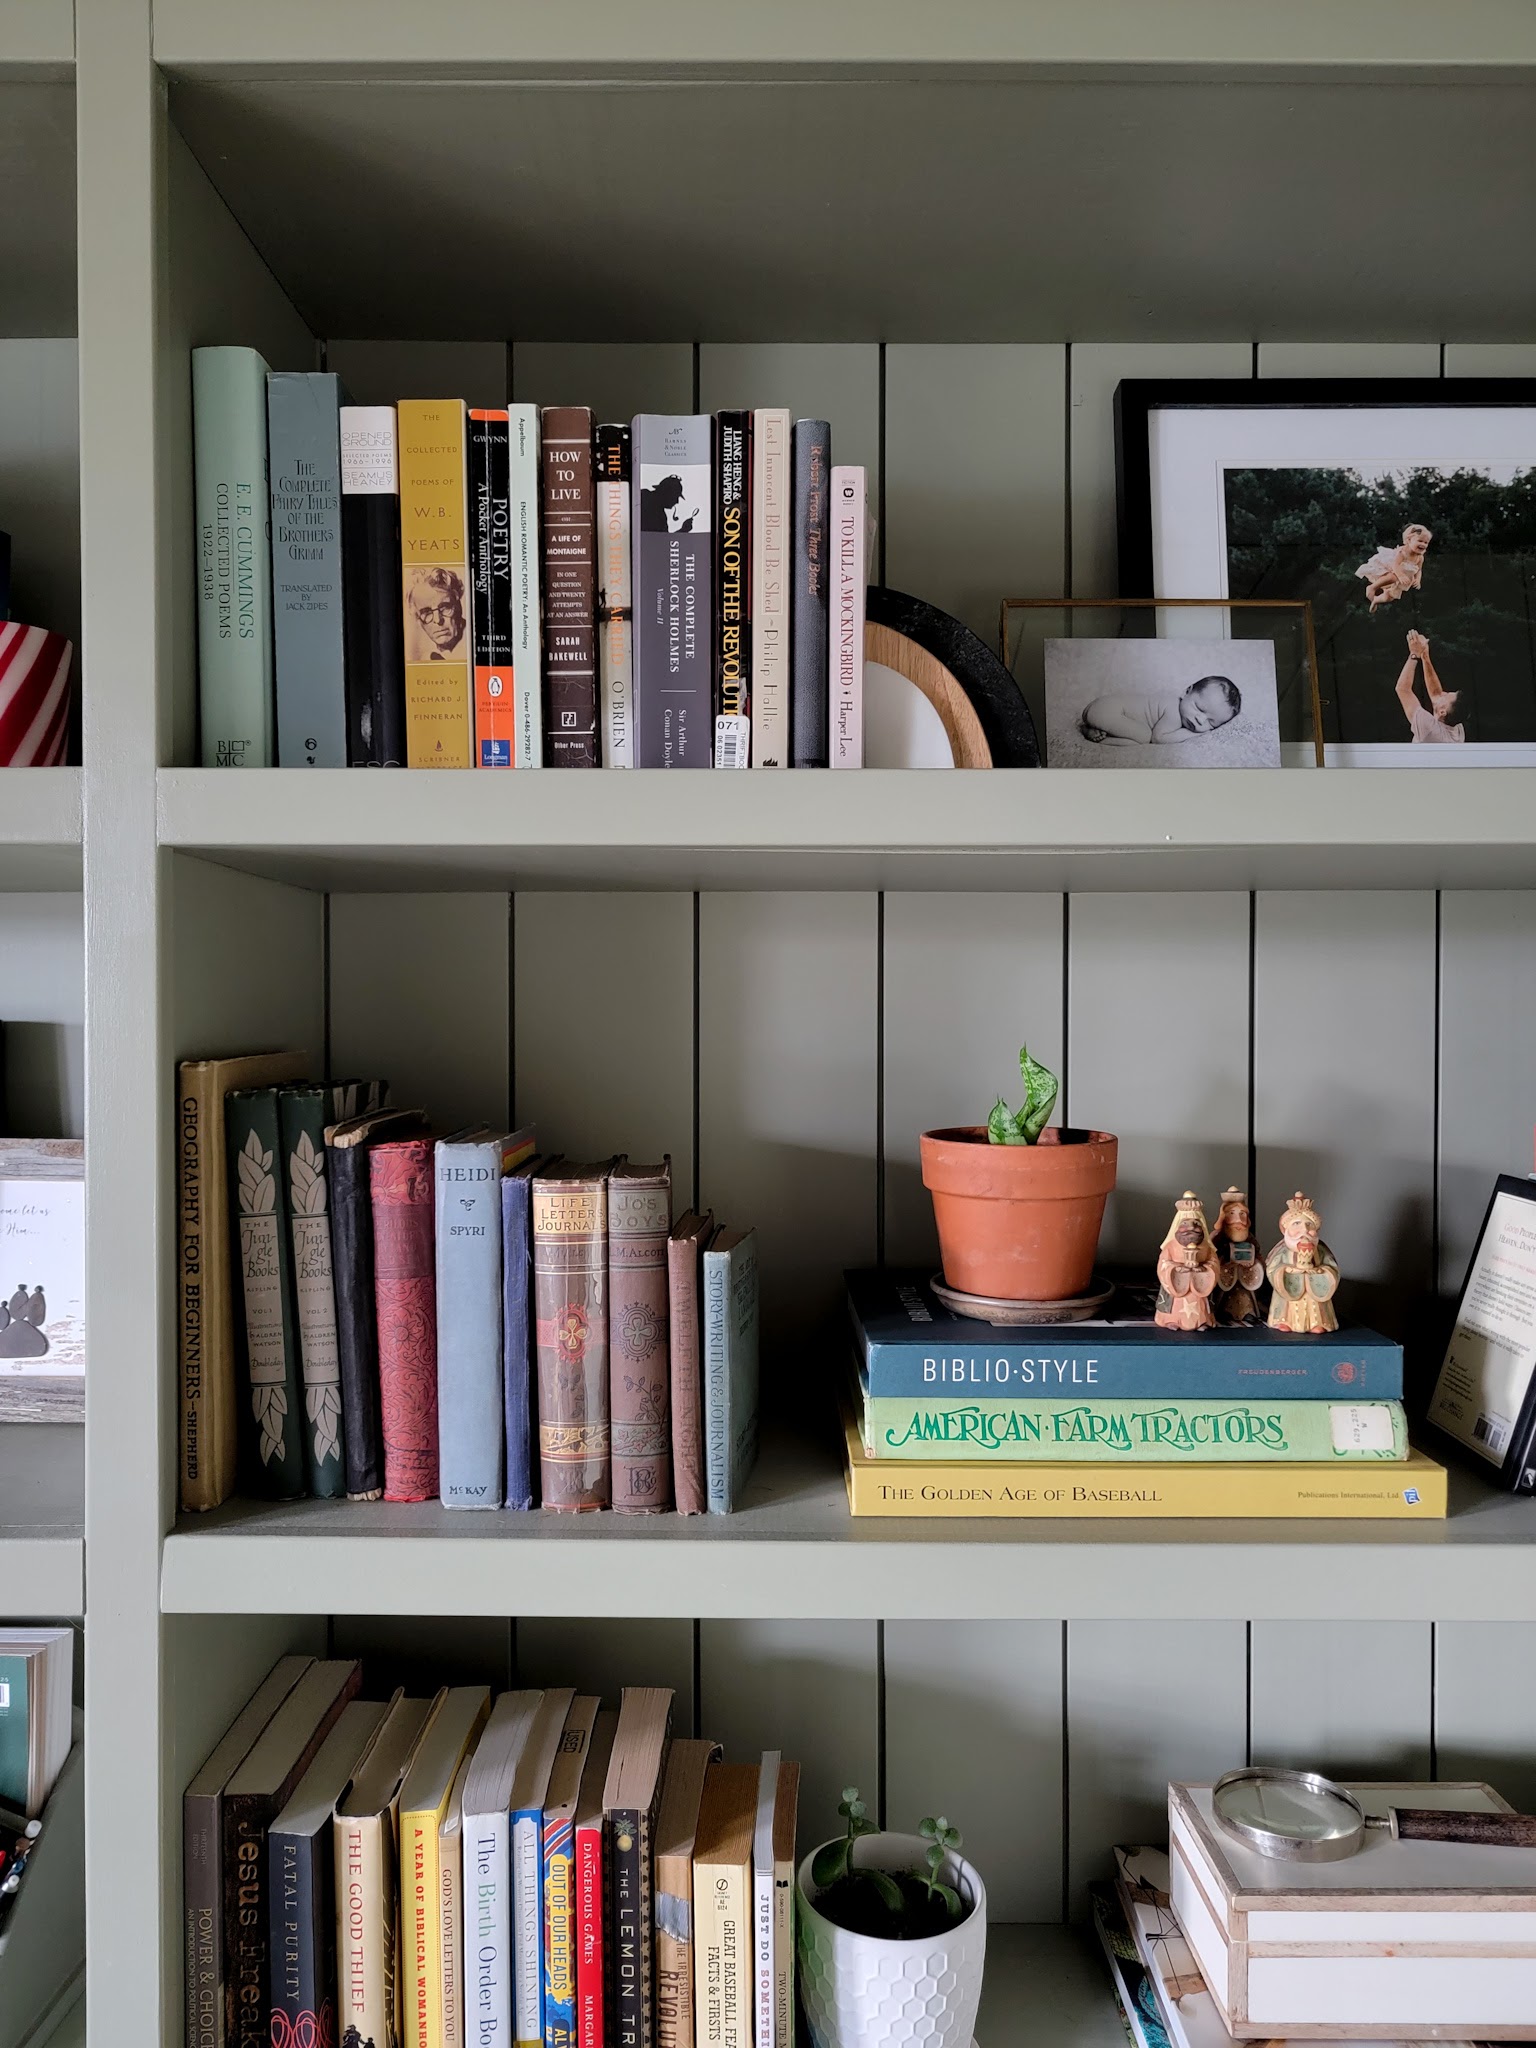
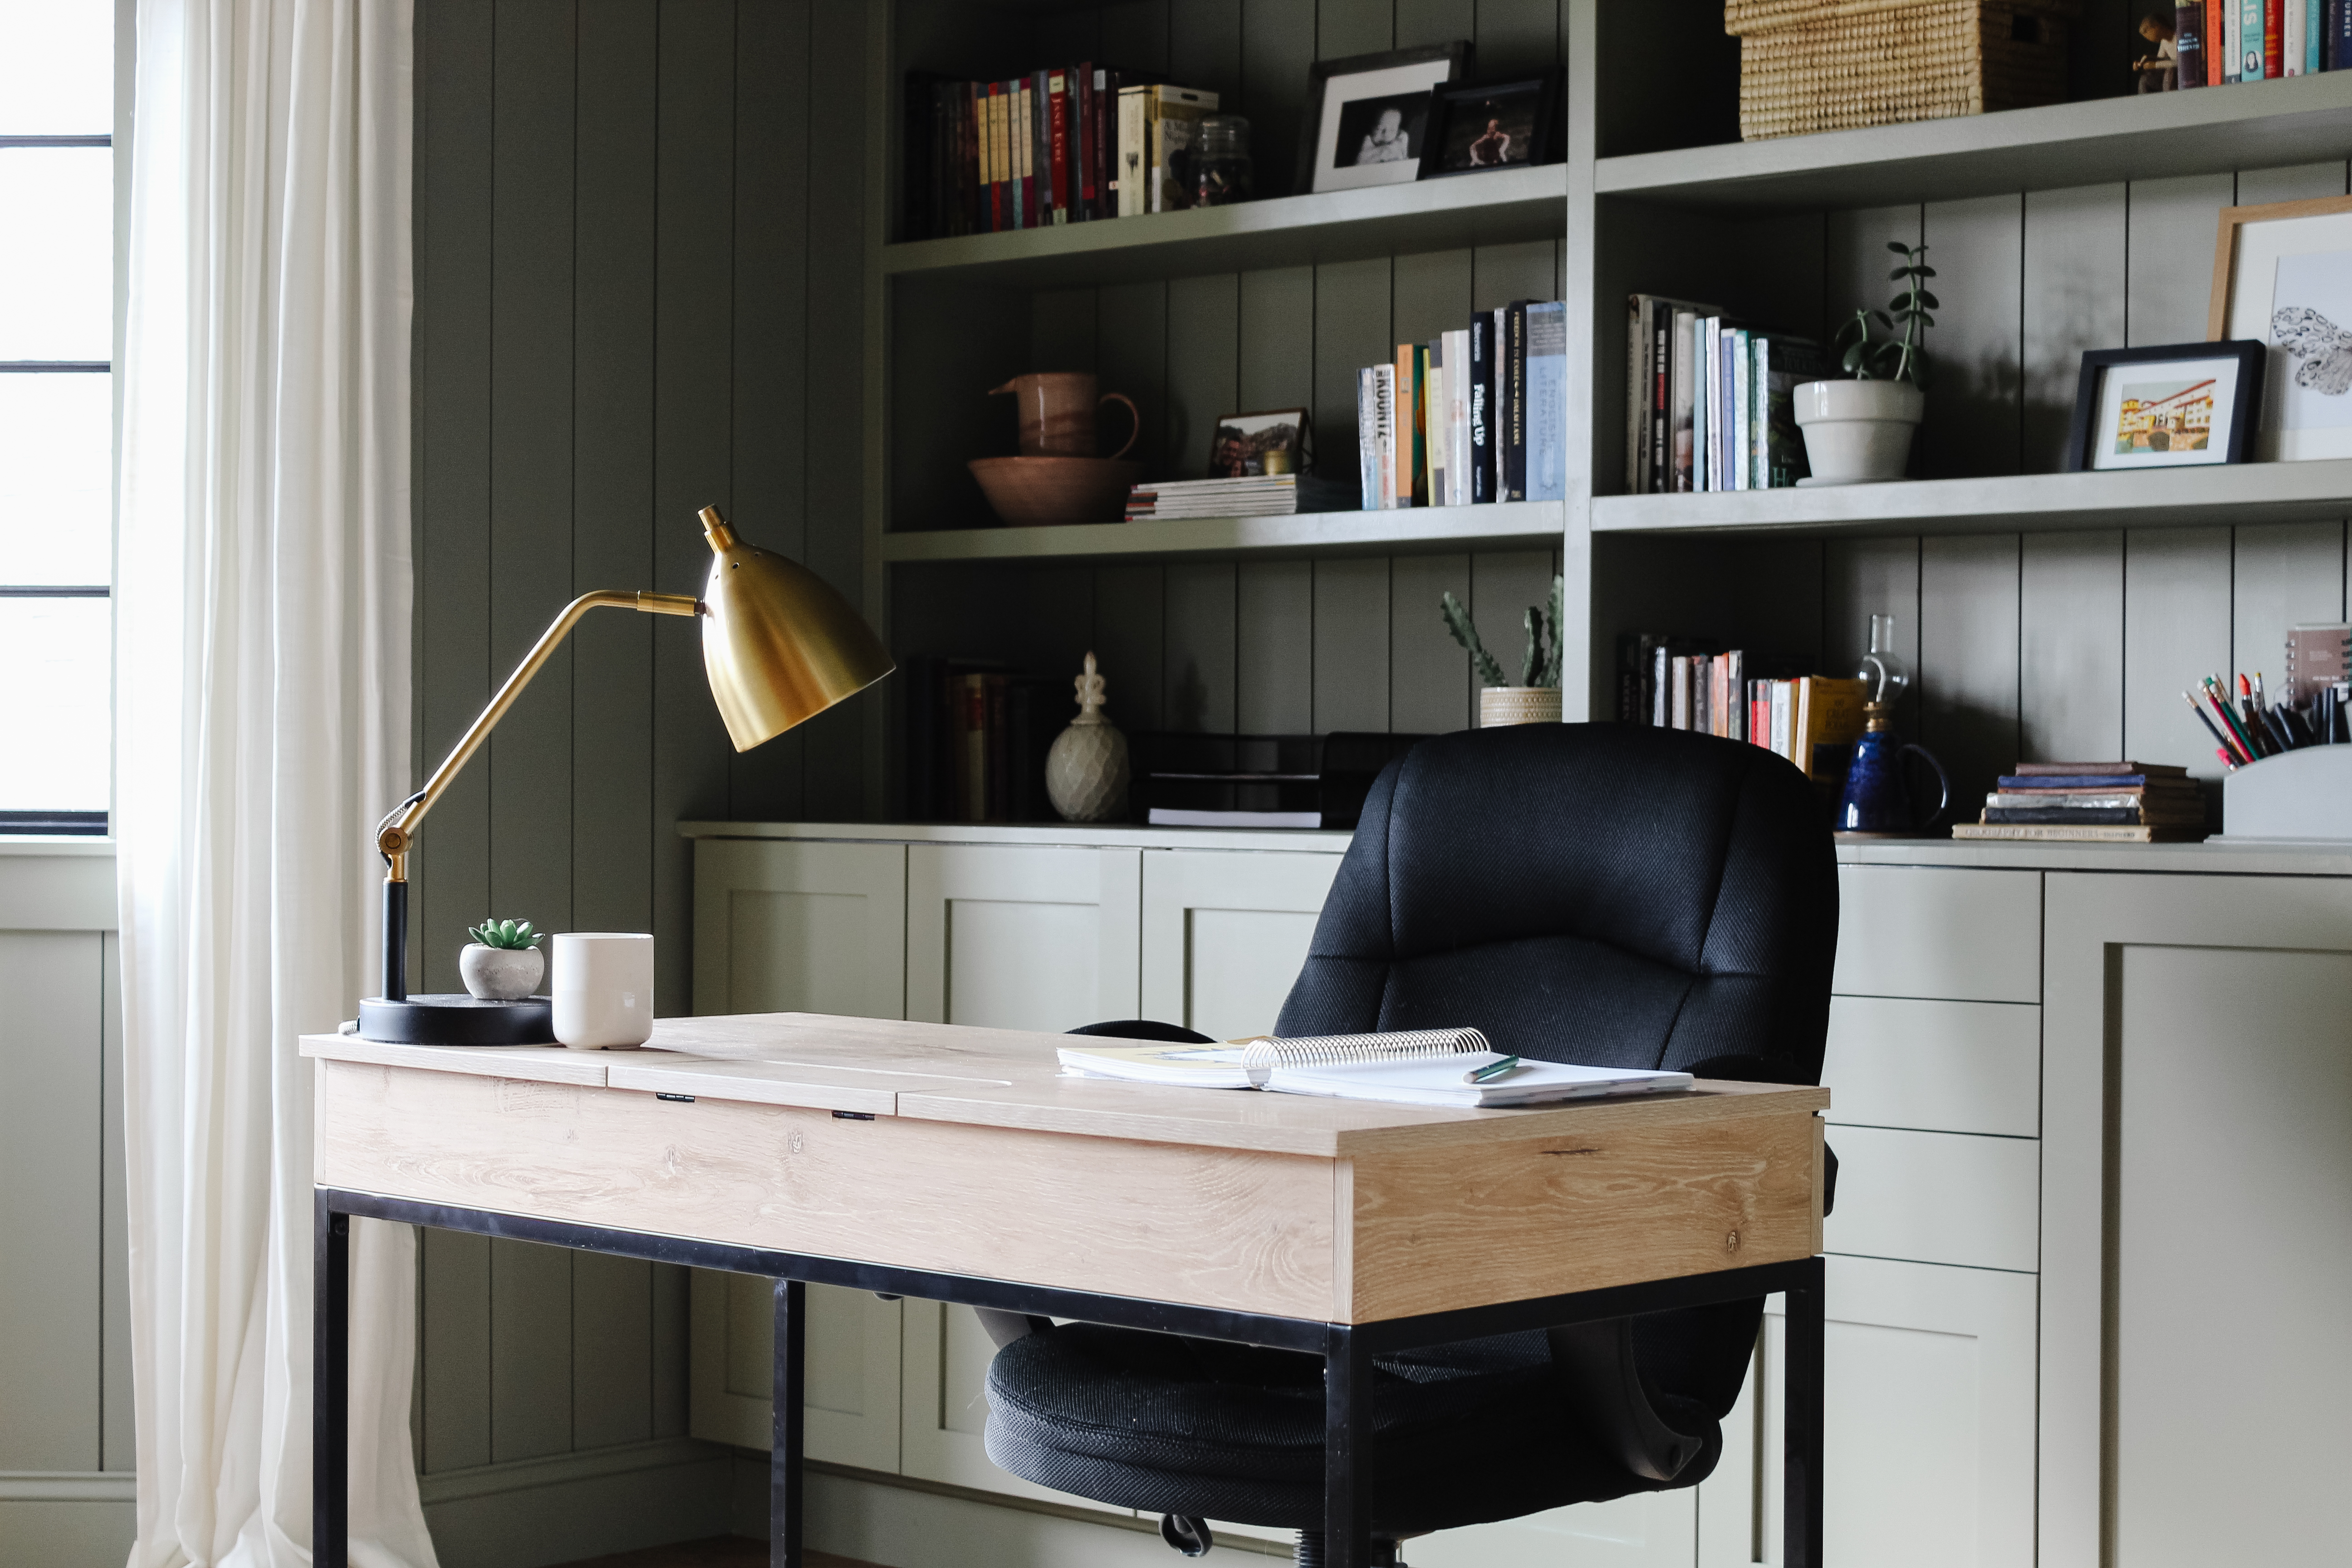
In addition to holding all my books, I also wanted to utilize the open shelves for beautiful and functional storage. Some items, like my spare buttons and calligraphy utensils, are stored in simple glass jars and are out on display. I have a little utensil holder for easy access to all my pens, pencils, and a few notebooks and also have black stacked paper holders to house school papers.
For not-so-display-worthy items, I rely on storage boxes.
I have all my permanent markers hidden in this pretty white box out of the reach of little hands. It’s stacked on top of another, larger box filled with all my sewing supplies.
This woven basket box houses all the greeting cards I have on hand. Several years ago I made some simple dividers to categorize the stash and they make it so easy to grab a card for the right occasion!
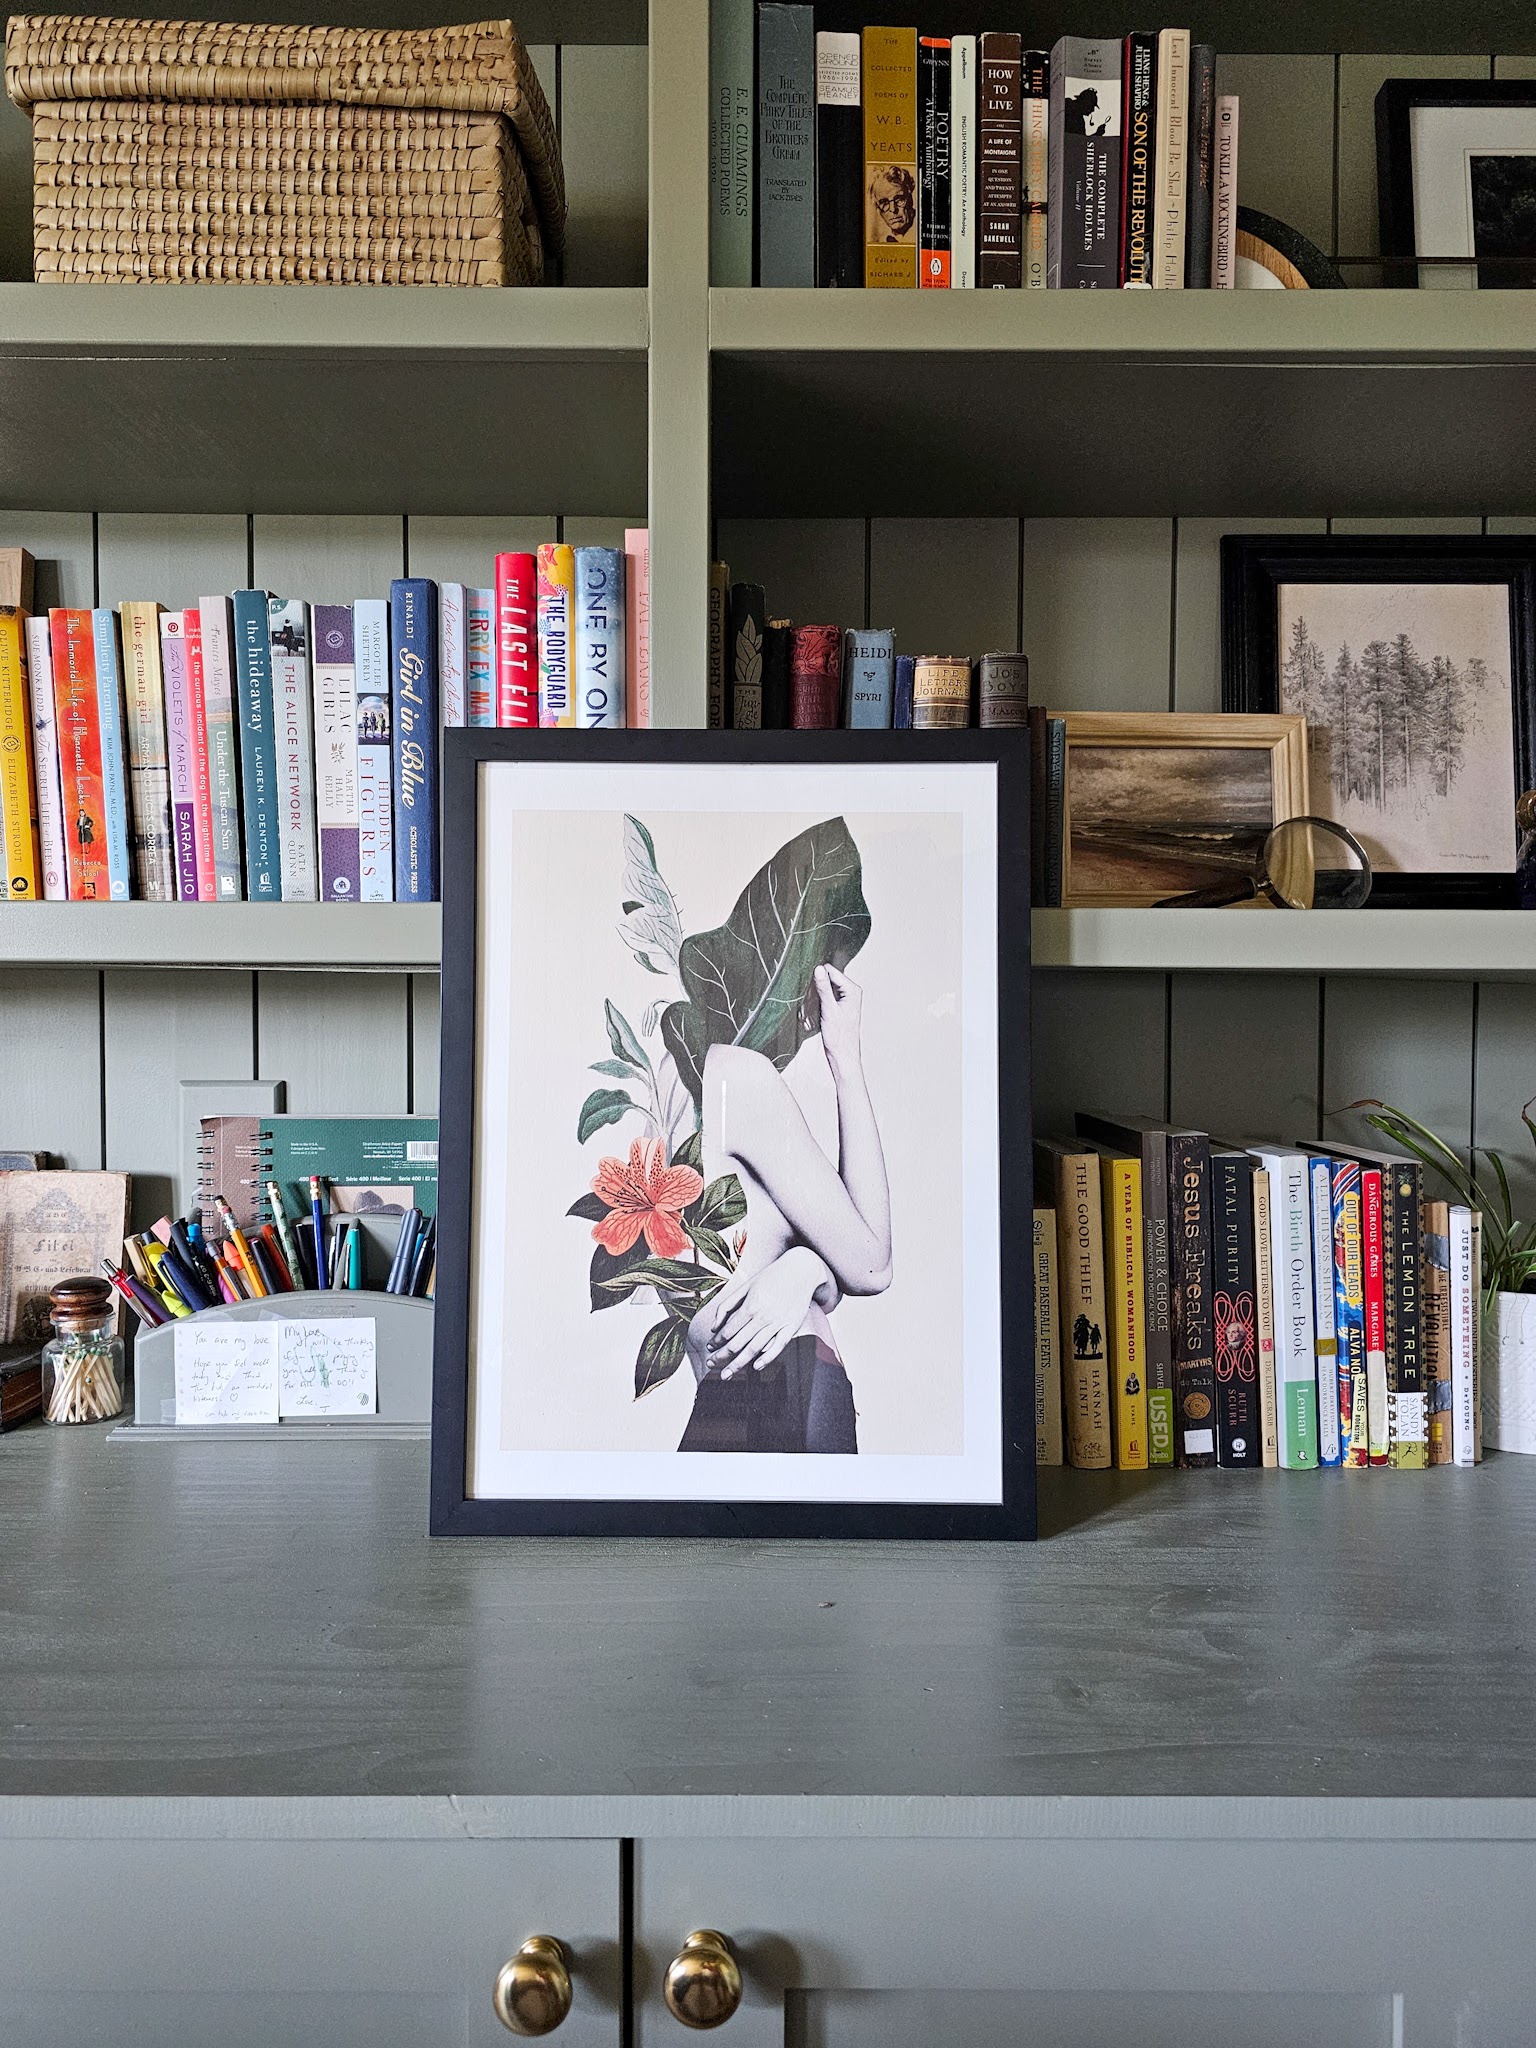
I also have some sneaky hidden storage. Tucked behind a large art print are utilitarian things like scissors and a tape dispenser, plus a pottery bowl filled with the little knick-knacks my kids pick up as birthday party favors, arcade game prizes, school holiday toys, etc.
These trinkets cause SO much clutter in my house; my kids bring them home and love playing with them for a few days, then lose interest and my house is littered with tiny toys. When that happens, I just quietly pick them up and dump them in this bowl. I can still “find” them if my kids ask or start to look for them, but they’re also out of sight, out of mind, and my kids usually end up forgetting about them.
Once the bowl gets full, I donate the trinkets to LJ’s previous preschool teacher to use in her prize box so they can have new life in someone else’s house. 😉 For the record, my kids almost never look for the toys after I put them in the bowl – easy come, easy go!
It’s hard to imagine our home without the office now. It’s such a great space for keeping our things stored and organized, which allows the rest of the house to stay streamlined with way less clutter around. It’s an all-star of a room for sure!
Every now and then, I like to take a look back on past home renovations and projects – kind of like the DIY version of a childhood celebrity “where are they now?” article. I usually love a project right when it’s finished, but the true test is how I feel with the benefit of more hindsight. Are things holding up well? Do I wish I had done something different in the project? Are there ways we could’ve improved on it? It’s fun to check back in and see how things have gone since the project wrapped up. Way back in February, I shared what I love, what I regret, and what I still hope to do in our guest suite (read that post here). Then in July, I shared how our basement kitchen renovation has held up so far (read that post here). Today, I wanted to look back on a project I finished in November 2020: our home office!
Justin and I renovated our home office for the Fall 2020 One Room Challenge and “challenge” was definitely the right word for it. This was the most complicated and extensive renovation we’ve ever attempted to do on our own. It really stretched both of our abilities and was difficult and exciting at the same time. You can read all about it in my ORC posts (Week One, Week Two, Week Three, Week Four, Week Five, Week Six: The Final Reveal).
The super cliff notes version of the renovation is, we went from this:
to this! And we did it ALL ourselves!
Don’t tell the other rooms in my house, but this one is without a doubt my favorite one. To say I’m proud of Justin and I for tackling this renovation is an understatement. There were so many complex things we needed to talk through and figure out, especially because the room had a bay window and lots of angles to work around. We did it though and it feels so rewarding even to this day.
A quick note before jumping in to my thoughts on the room today – I recently decorated for Christmas and decided to just keep those decorations up rather than take them down for the follow-up pictures. So there’s a little festive touch to this update!
What I Still LOVE!
Honestly, I still love and am so so happy with the majority of this room. I’m so glad we decided to go with Ikea Sektion cabinets for the base of the built-ins. They provide so much storage space and were relatively easy to install. I love that they came with soft close hinges too; it’s such a nice feature to not have slamming doors. I’m also SO glad with our decision to use Semihandmade door and drawer fronts on the cabinets. They are high quality and elevate the look of the cabinets so much!
I’m also glad I splurged on aged brass knobs and drawer pulls from Rejuvenation. It feels like the finishing touch, the jewelry of the built-in, and it also gives a higher-end feel to the overall unit. Between the Semihandmade fronts and Rejuvenation hardware, the cabinets definitely feel like they were custom and not ready-to-assemble.
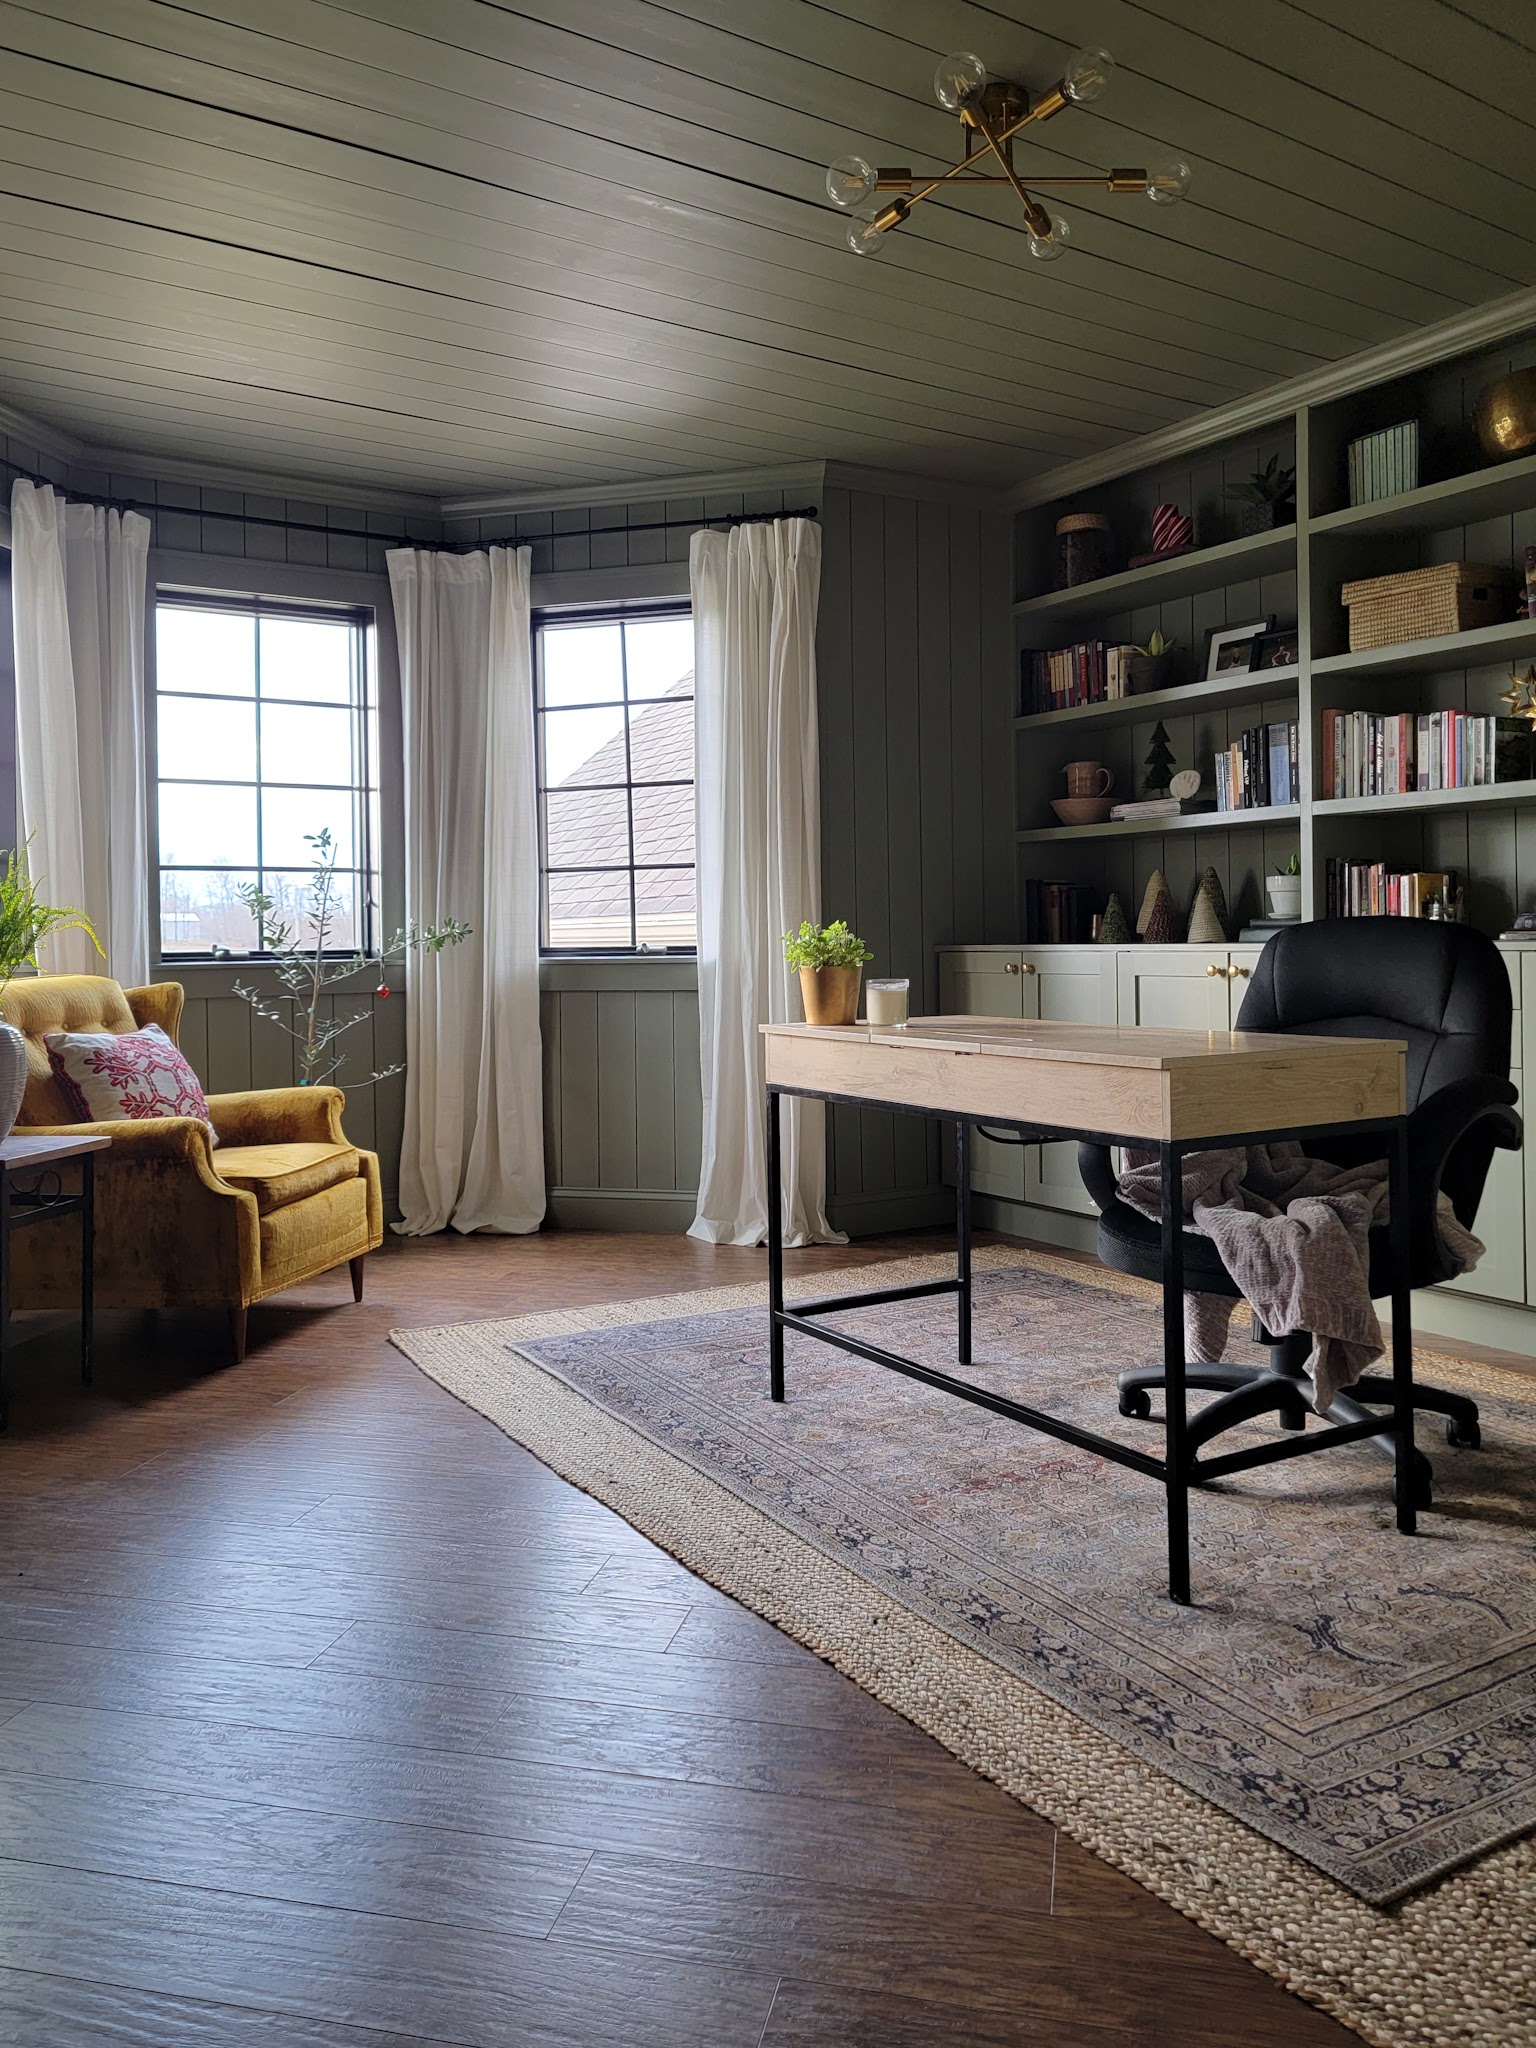
I love that I decided to do planking on all the walls and ceiling. It gives the space so much character, like it’s been around for 100 years instead of just 20. I have zero regrets on deciding to go with a monochromatic look and paint the entire room, ceiling and built-in included, Treron by Farrow and Ball (and I’m still so obsessed with that color).
I also still love my vintage yellow chair, bought secondhand from a thrift store, tucked in the bay window area, just waiting for me to curl up with a good book! I love the modern desk mixed in, the double layer of rugs, the bookshelves full of books and mementos, the crown molding and wide baseboards, and the black painted windows framed by tall linen curtains. Honestly, every time I walk into this room, my heart still does a little swoon.
What I Would Change (if I had a time machine)
As much as I adore this room, there are a few things I wish we had done differently. We struggled to find a board that was the right size for the top of the cabinets, and we ended up piecing together some edge-glued pine boards from Lowe’s. It was thinner than I wanted, but much cheaper than butcherblock so we decided to go for it. After we finished, we realized Menard’s had edge-glued boards that were wider and thicker – these would’ve given a more substantial look to the top of the cabinets/base of the bookshelves. I wish we had known it sooner; I definitely would’ve preferred to use the Menard’s boards! I also made a mistake and wiped down the boards we used with a damp cloth before painting, which gives the wood a rough feel now. I should’ve sanded it down (or used a dry tack cloth instead!) so it stayed nice and smooth.
We also should have included more small pieces of scrap wood to the underside of each shelf prior to attaching the thin plywood base underneath. In a few spots, the plywood has bowed a bit and is visible now; I wish we had placed more spots to attach the plywood with the nail gun to prevent future dipping!
I also wish we had included a small piece of trim on the very ends of the cabinets. There is a small gap between the wall and the cabinet and we should’ve closed it. It would’ve been easiest to do before we added the top and bookshelves, but I still think we can do it if we take off the door front. That might be a quick 2022 project!
Lastly, I wish I had taken more time with filling nail holes. There were hundreds and hundreds of nail holes in all the planking and it became tedious; I just wanted to get through it and start painting! The price to going too quickly or lowering the level of diligence is many of the nail holes have a little dip you can still see. Even though it was so so tedious, I wish I had taken a little more time to make sure the nail holes became truly invisible.
Even though there are a few things I wish we did differently, overall I am still so THRILLED with this room! When we update the main level flooring we will be updating this flooring as well, but other than that, this room still feels so good and I truly believe I will love it for years and years to come.
It’s the final week of the Fall 2020 One Room Challenge! We’ve been pouring our heart and soul into our home office and I’m so excited to show you how it turned out!
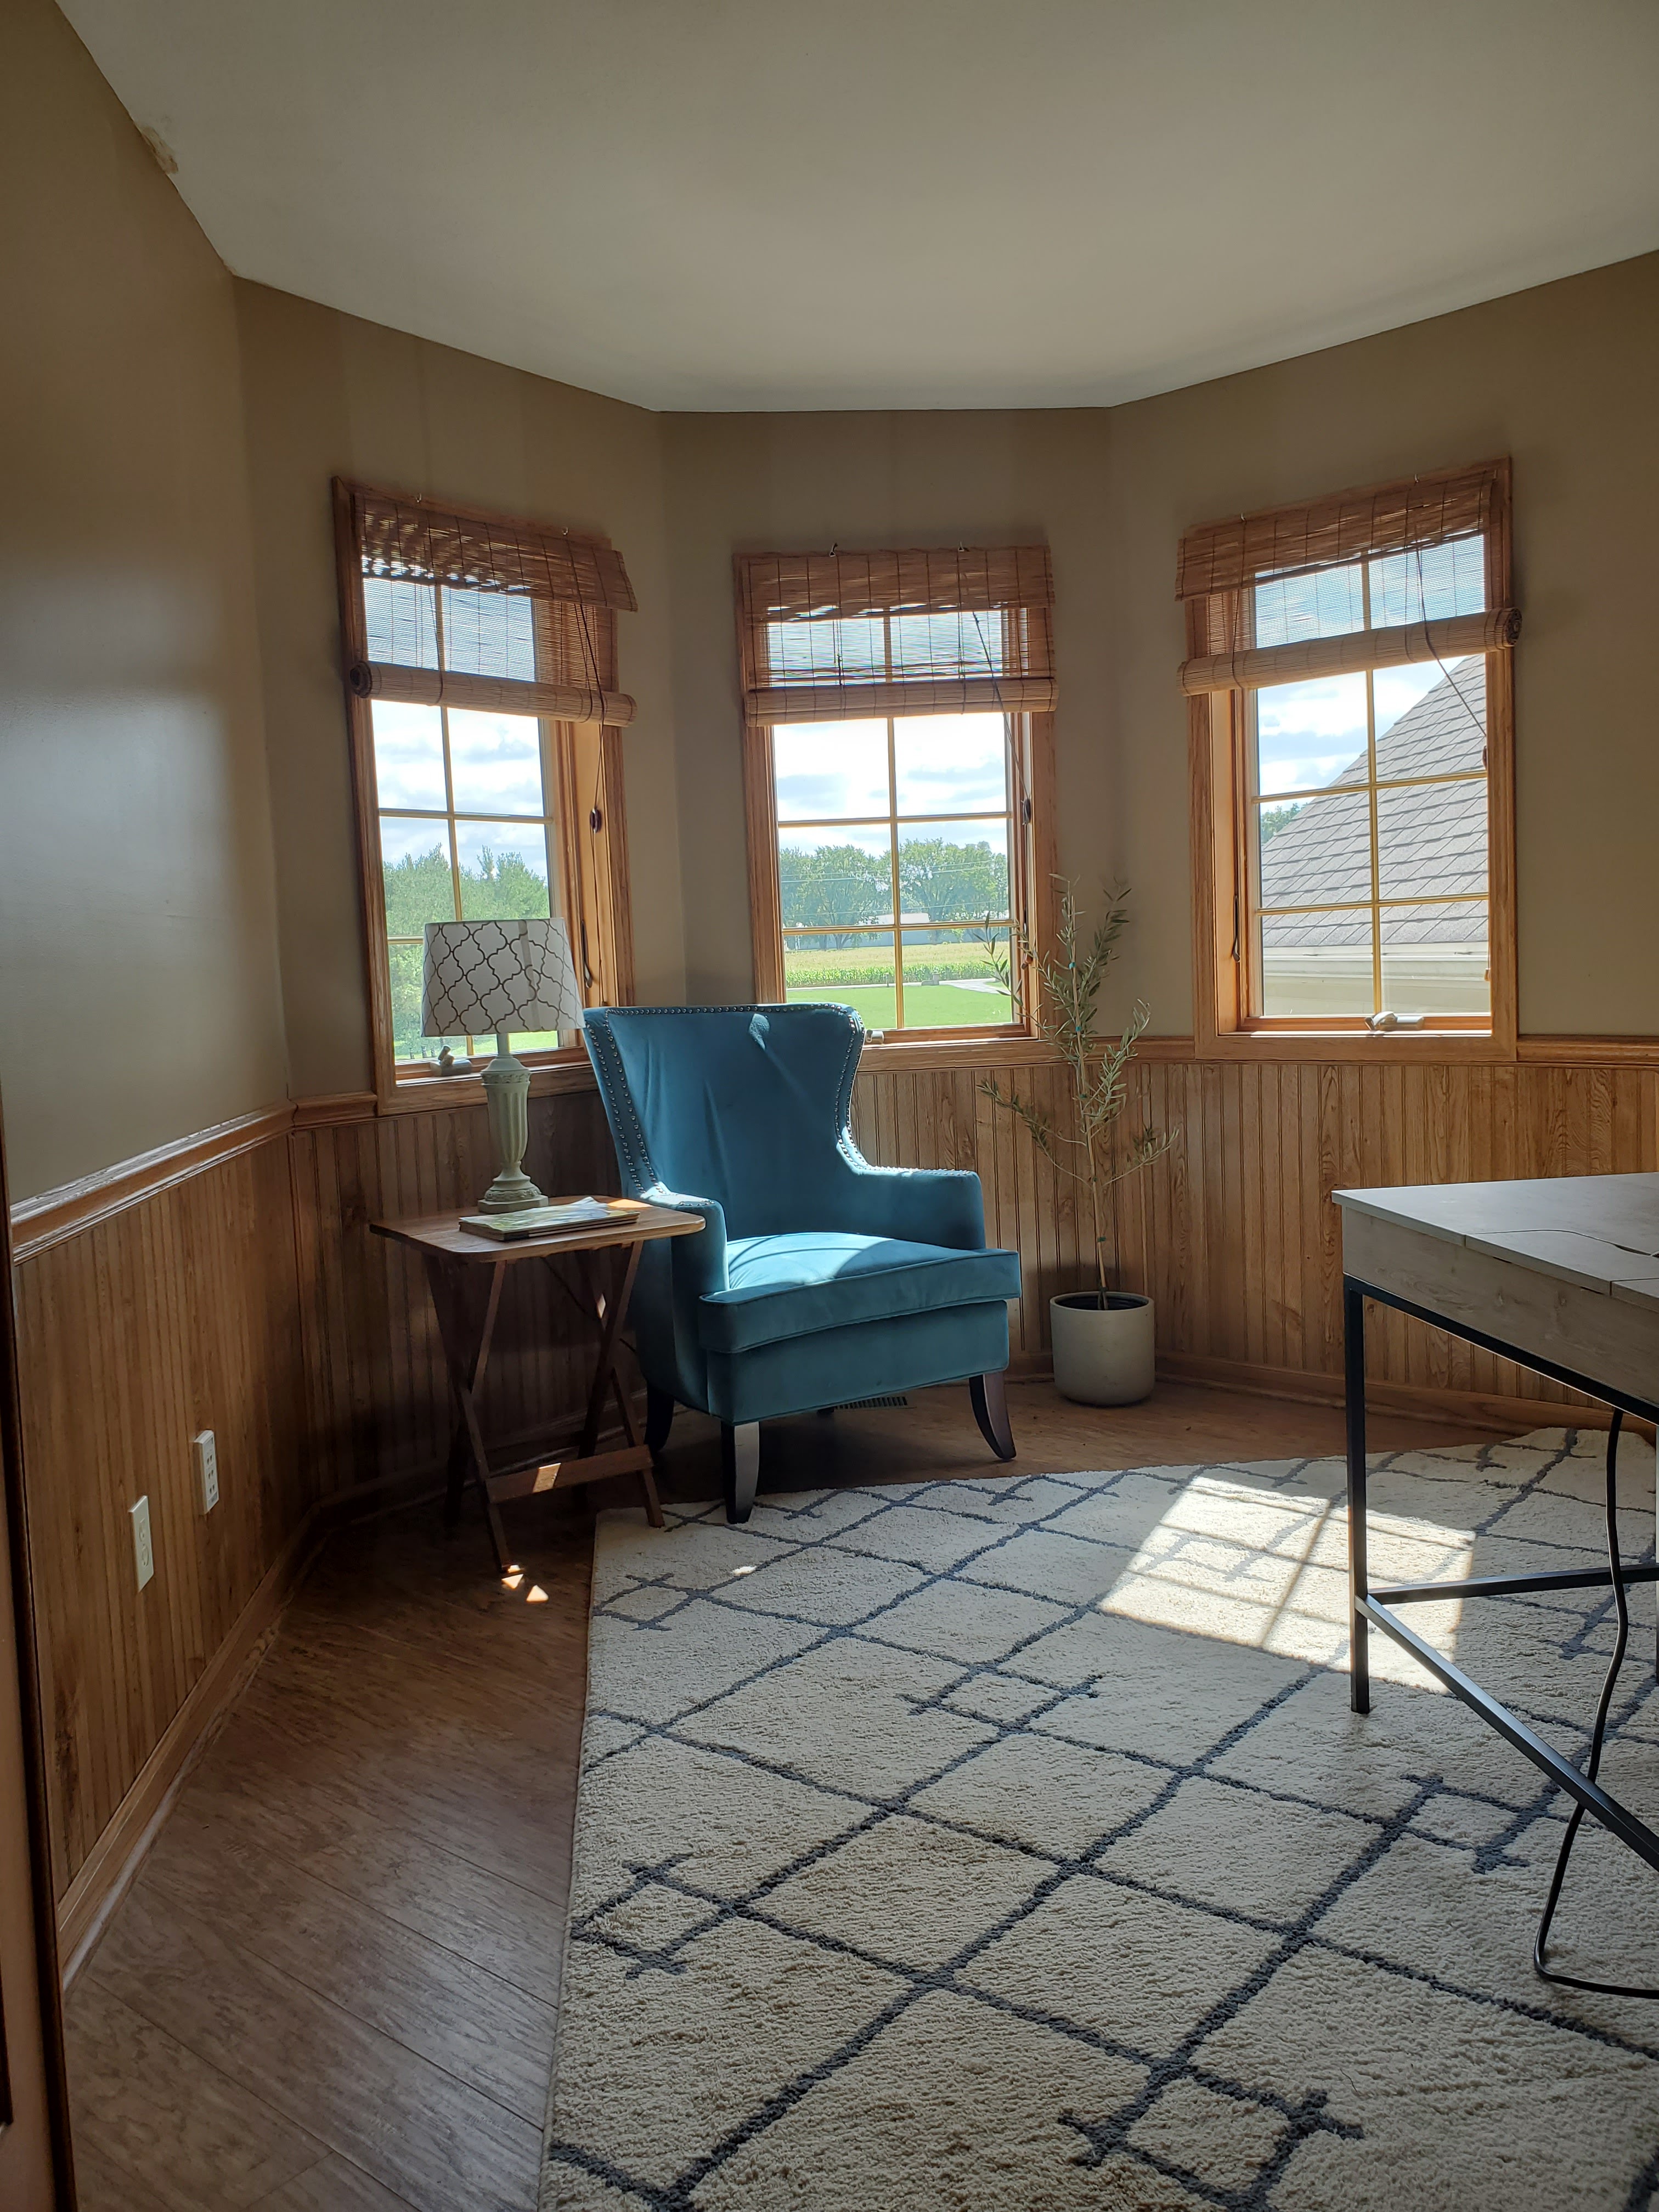
Let’s take a quick trip down memory lane, shall we? Two months ago, the room looked like this:
Fluorescent light, barely functional window shades, mismatched storage – yikes. It was a hot mess combination of storage/overflow/office/extra guest bedroom and unfortunately due to the French doors, we saw the room every. single. day. Since the day we moved in, I’ve been dreaming of this being a cozy home office + library and it makes me so happy to see this vision come to life!
After removing all the old trim and beadboard paneling, Justin and I took primed shiplap and ran the planks vertically all around the room and on the ceiling. We put extra effort into making sure the ceiling planks lined up with the wall planks, and I think that effort was definitely worth it! I chose the color Treron by Farrow and Ball and had it color-matched at Lowe’s for all the walls, ceiling, trim, and built-ins.
The olive green color strikes just the right balance for me – not too dark, not too light, not too brown, not too green. It’s a bit of a chameleon color and changes a little depending on the lighting but it’s just a nice warm that makes the room feel so cozy.
Without a doubt, the star of the room is the gorgeous built-in. This showstopper took the room from no storage to tons of storage. The bottom portion is Ikea cabinets with Semihandmade doors and I love them so much. They look custom-made but for a fraction of the price! If you’ve been following along in my Instagram stories, you know that I had two different options for hardware but didn’t feel like either was quite right so I ordered a third set. I’m still waiting on those cabinet pulls and knobs to arrive and I think they’ll be the perfect finishing touch. Stay tuned!
Back in the planning stages, I debated on whether to do a built-in desk or keep it freestanding, then whether to do all cabinet doors or have a section of drawers as well. I’m so happy with my decision to do a freestanding desk and include a section of drawers in the middle. It provides tons of easily accessible and functional storage and with the desk in the middle, the room actually feels perfectly proportioned.
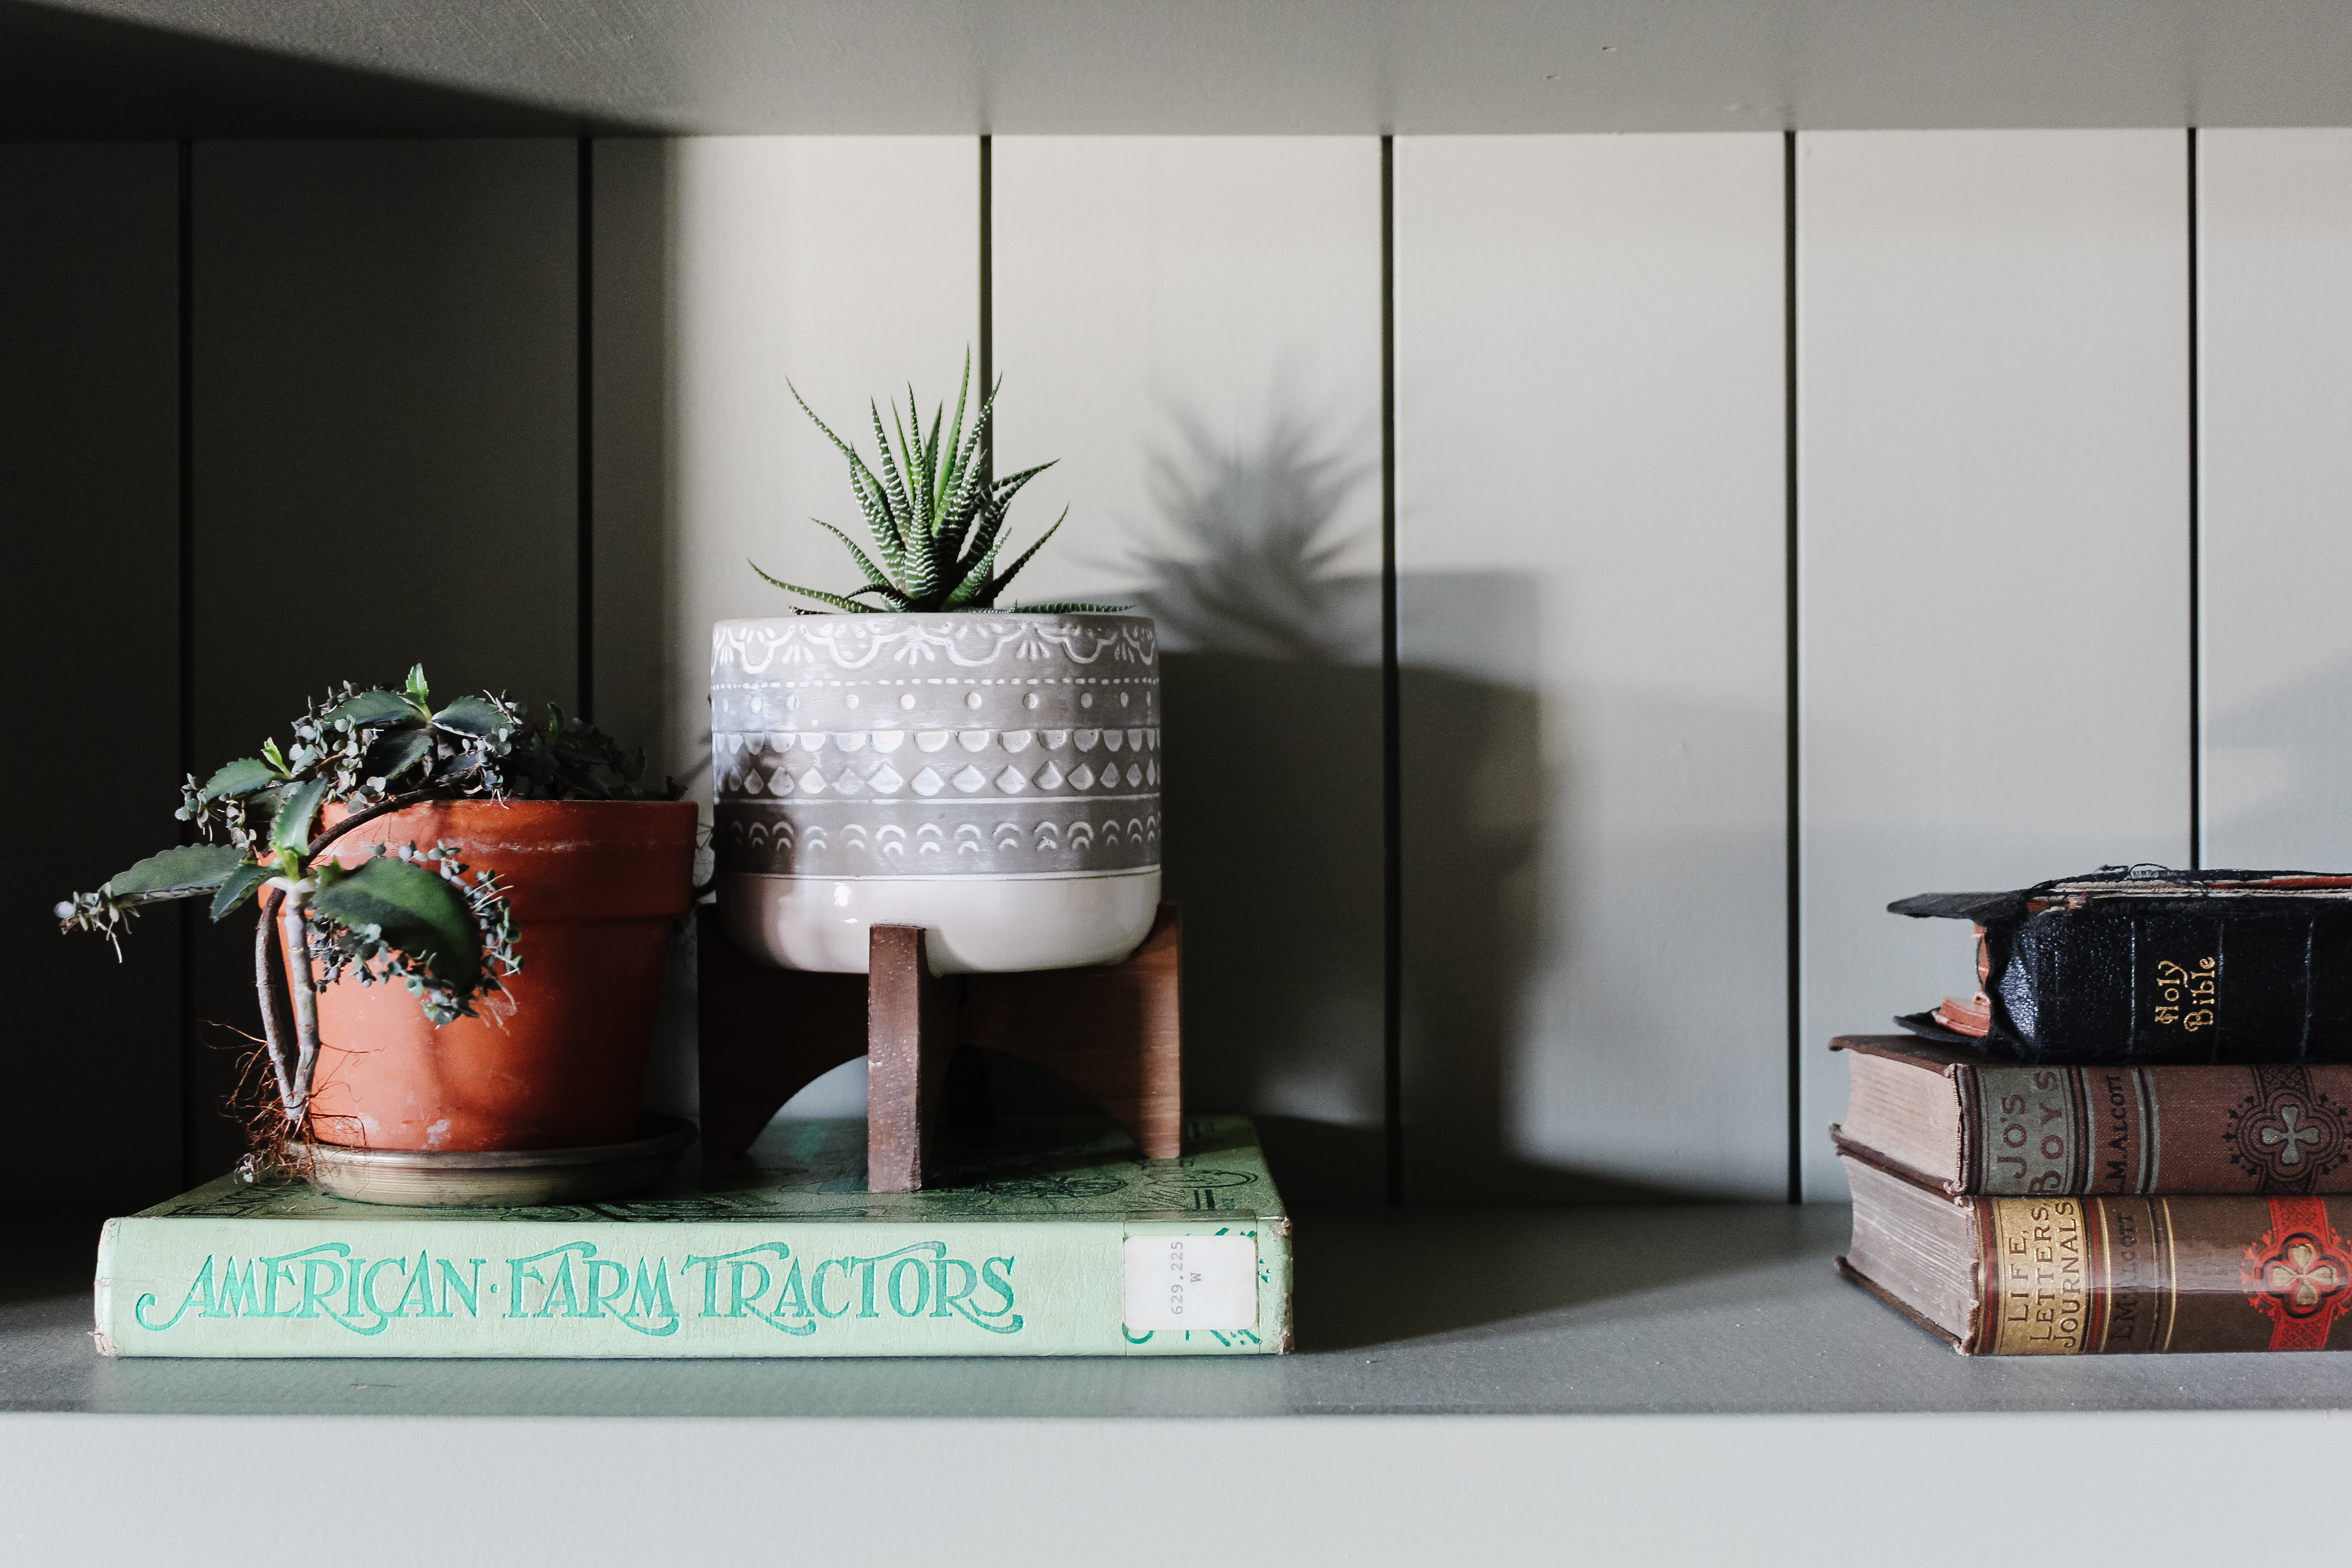
Justin and I worked together to build the bookshelves from scratch and we are both thrilled with how well they turned out. I intentionally tried to pull in other colors and textures throughout the bookshelves, especially with light colors and natural fibers to break up all the olive green throughout the room. In addition to all our books, the shelves are filled with special mementos, heirlooms, family pictures, and artwork from travels, so it very much feels like us.
I also have functional items throughout – closed storage boxes holding office supplies, decorative jars filled with pens and pencils, trays for papers, etc. The shelves strike the perfect blend of meaningful, beautiful, and functional for us.
I think of this room as a home office and library all in one. As I imagined shelves full of books, I also imagined a cozy area to read them in. The bay window area provided the ideal place to add a comfy reading chair. I had been on the hunt for a reading chair in either yellow/gold, rust, burgundy, or something along those lines but everything I found was super expensive. Then a few weeks ago, I saw someone share a post from the thrift store in my hometown. One of the items pictured was a set of vintage yellow chairs circa 1970s (sold separately for $50 each) and my heart immediately leapt. I sent my mom on a mission to the thrift store to see if the chairs were comfortable and in good shape. They were, and I convinced her to buy one for me for Christmas. Score! Here’s the chair when it first arrived – my parents thought I was crazy, but I knew it had potential.
If you follow me on Instagram, you know I performed a little cosmetic surgery on the chair to remove the flap of fabric at the bottom and this made a huge impact in making it seem more modern.
I brought down the little side table from Vi’s room, but I eventually plan to replace it with something else (I’m feeling a little round table?) and I’ll also add a floor lamp at some point. For now, I’m happy with this space!
In addition to replacing the baseboards, we also tore off the old window casing and added new trim in a style inspired by Jenni Yolo at ISpyDIY. I also painted the existing window frames and grille inserts Tricorn Black by Sherwin Williams.
We had a slight fiasco with the bay window curtain rod because we didn’t realize that the side bars only extended 36″ max and we needed about 42″ but Justin came up with the brilliant idea to buy two cheap telescoping curtain rods and screw them into the angled attachment on the middle window’s curtain rod. This worked like a charm! The curtains are Ikea Ritva. I got them in 118″ length and then used hemming tape to shorten them a bit (I like a little pool at the bottom, but it was originally like 8″ too long). I hung them by attaching pleating hooks to the curtains and then hooking them through the eyelets of curtain rings. Rather than just putting the curtain rod through the loops of the curtain, this gave them a little extra oomph.
Another issue I ran into was rug size. Because of the bay window and angled doorway, the room is anything from square (don’t even get me started on how hard figuring out the crown molding was!). It left an awkward amount of floor space that I really needed a 6×9 rug for, but many of the rugs I loved only came in 5×7’6″ or 7’6″x9’6″. It was a frustrating search! Finally, I decided to try a layered rug look with a simple jute rug at the 6×9 size I needed and a patterned rug I loved in a 5×7’6″ size on top. This solution ended up working so well and I think it helps give the room a casual and cozy feel.
I am so so happy with how this room turned out! It is the room I was most excited about when we first moved in and it is now without question my favorite room in the house.
And it wouldn’t be a reveal without a few final before-and-afters, right?
I had so much fun participating in the Fall One Room Challenge! You can check out all the other fun projects that happened here.
And if you missed any of my previous posts on this challenge, you can check them out here:
Note: Some of these product links are to Amazon. As an Amazon Associate, I earn from qualifying purchases. This means if you purchase something through the Amazon link I provided, I may earn a small commission. None of my recommendations or decisions are based on any commission I might receive from your purchases, they are all things I actually bought for this renovation. The decision to buy something is yours, and whether or not you decide to buy one through the link I provide is completely up to you. Thank you!
Paint Color: Treron by Farrow and Ball (colormatched at Lowe’s) in Eggshell finish (walls + ceiling) and Satin finish (trim + built-ins).
Window Color: Tricorn Black by Sherwin Williams in Satin