Linen Closet Reveal

The guest suite renovation is so close to being finished! We have an installation date for our vanity top and a few other odds and ends to put in place but it should all be wrapped up by the end of next week – I can’t believe the countdown is in single digits!

While the entire project isn’t quite done, I couldn’t resist revealing one aspect that is finished: the transformation of our built-in linen closet!

20200130_153306

I never thought I would be so excited about a place to store blankets, but here we are.

Let’s take a quick walk down memory lane and look where this all started.

20191028_125841

This was originally meant to be a TV cabinet; however, the house is 20 years old now and this built-in was made with big and boxy TVs in mind. Remember these?

Image result for sony tv from 2000
Source

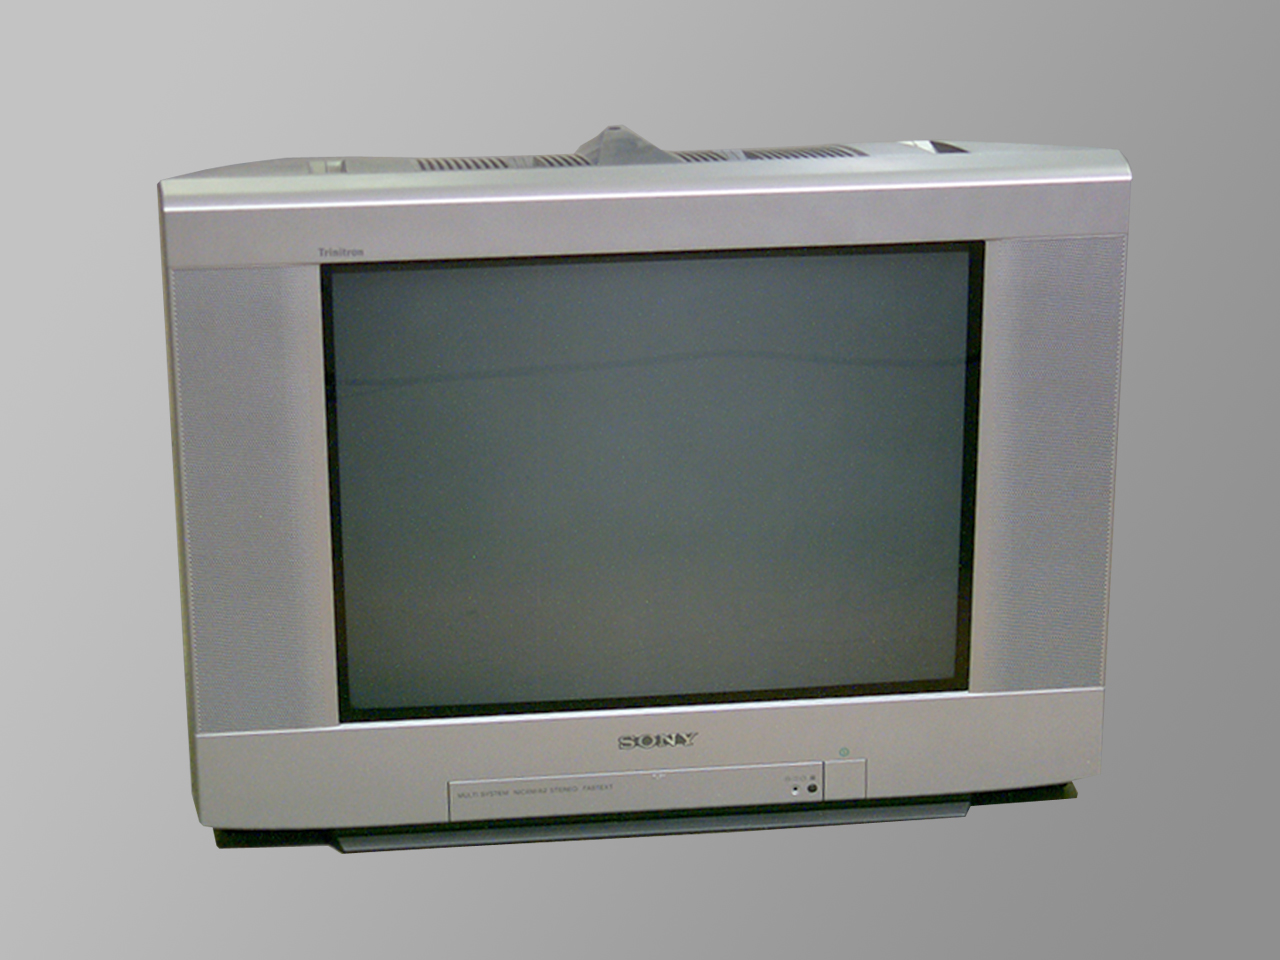
What a flashback! Truthfully, even if we could have fit a modern TV, I doubt we would have. Since the room is our guest room, I wanted to make the built-in more functional and aesthetically pleasing. A closed linen closet was the perfect solution!

Since there is also a closet door on this wall and not much space for artwork, making the cabinet a focal point by painting it a different color was a no-brainer. After testing out multiple colors, I settled on Sherwin Williams Oyster Bay. I also knew I wanted to incorporate black accents into the guest room since I’m using a lot of matte black fixtures in the adjoining bathroom. I found these bin pulls and offset handles during Rejuvenation’s sale and fell in love.

20191219_152243

We had to replace several of the drawer slides and LJ enjoyed throwing toys in the openings before all the drawers were put back in. 😉

I knew we’d be storing extra blankets, pillows, towels, etc in the top cabinet and the large opening wasn’t very practical for storing all that so Justin made a simple shelf to match the one already in there.

20200112_213547

Our contractor built two doors to cover up the opening and installed them when they were primed but not painted. (Hi Vi!)

20200111_142354

We hit a slight hiccup here. When I first tested out colors for the built-in, I got those little sample sizes you see in the above picture. Unfortunately, what I had bought covered everything except the doors, so I had to go back and get another little jar to finish the doors and it wasn’t the same shade! I went to the same place and asked for the exact same color and product, but the shade was ever so slightly off. It probably wouldn’t have been super noticeable to a casual observer, but I could tell the doors were different than the rest of it and it was going to bother me to no end. I ended up going back to the store and getting the shade a THIRD time, hoping that the third one would match the first and I’d only have to repaint the doors, but the third shade matched the second. I ended up having to repaint the entire front of the built-in and the drawer fronts. Super annoying, but I was happier knowing everything matched perfectly.

Lastly, Justin drilled holes and attached the door handles and the cabinet was finished!

20200130_20333020200130_20355420200130_15480620200130_154949

The closet is stocked with extra pillows, blankets, towels, washcloths, and a variety of toiletry items that our guests may need. I keep things like travel-sized shampoo & conditioner, lotion, bar soap, toothpaste, dry shampoo, contact solution, q-tips, extra toothbrushes, extra razors, feminine products, cotton balls, extra toothbrushes . . . anything I can think of that a guest may have forgotten that they can use without having to ask. The drawers are empty and available for guests to use if they want.

I’m so happy with how this piece turned out – I can hardly believe it is the same TV cabinet from just a couple months ago! It’s so gratifying to see a vision come to life and this one turned out just like I had hoped.

20200130_153726

Now on to the next project!

First Home Project in 2020!

Our first home improvement project of 2020 is underway! (Even though we’re still working on it, I’m not talking about our guest suite since that actually started in 2019).

Our first project of 2020 is . . .

20200101_150119

this wall at the top of our garage stairs. Bet you didn’t see that one coming, huh?

I’ve always wanted to have a designated place in our home to measure the heights of our growing family. I love the idea of watching our children grow over time and documenting it in a permanent place that we’ll frequently see. Once we moved in May and decided this is the house we want to raise our family in, it was high on my list of things to do. The only problem was figuring out where to do it.

I’ve frequently seen it done in homes on a door frame or on the back of a door. This wouldn’t really work for us because we plan to eventually paint the doors and replace all the trim; I don’t want our marks to get removed or painted over! We had the same problem with interior walls – our laundry room wall would have been an ideal place, but we eventually plan to gut that space and change around the layout, and this would include painting. Plus, paint trends change over time and I would be nervous to commit to a wall color knowing I could never change it in the next 40+ years or it would cover the marks. Justin suggested marking our heights in an interior space like a closet or the pantry, but it just doesn’t have the same effect when it’s hidden and hardly ever seen.

This wall in our garage provided the perfect solution. Our home has a unique layout where the garage is actually on the level of our basement, so you need to walk up stairs to get to the main floor. The landing space right outside the entrance into the main floor was the perfect place for documenting our heights: it’s a discreet space (not in the middle of our living room) that we see every day, and since it’s more of a utilitarian space not subject to trends, I don’t have to worry about changing styles or decor. Hooray!

Now, I don’t love the color that was already on the walls, but we weren’t really up for painting the entire garage at this time. So we decided to just patch and paint the landing area for now. Since the garage is a bit of a workhorse space, there was a lot of patching to do! (Also, if you’re curious, that little extra stairway to the little door is our attic storage space).

20200114_082849

The wall is now dry so we need to sand down all those patches, wash the walls, prime, and paint. It’s a simple project, but I’m so excited about it!


Guest Suite: The final touches!

The guest room is getting so close to being finished!

20200108_064956-1

Truthfully, I had expected that we would be totally done with the project by now. We started the project in the last week of October and the estimated project length was roughly 4-5 weeks.

When the old shower was ripped out during the demolition stage, we realized there was plenty of unusable space behind the wall and decided to expand the shower and add a bench. This addition made our project timeline more like 6 weeks. So we hoped to be finished right around mid-December.

By December 20, almost everything was completed. But then the remaining projects unfortunately stalled. Right now we have three remaining projects that need to be finished:

1 – Add a shelf board to the top of the half walls in each room.

20200106_101230

Since these are basement rooms, we have a half wall of concrete foundation that juts into them. I’ve made this into a kind of accent piece by adding board and batten to the front of each wall, but we still need to finish it off with a stained board on top. It’ll create a nice shelf for guests to use when finished! We planned to use the same boards that were originally there to save some money, but we realized that the board and batten made the wall wider than the original shelf. Justin just picked up new boards this week, so our weekend goal is to get them cut, sanded, stained, and ready to install!

2 – Close off the former TV nook built-in with doors to make it a linen closet.

20200110_093429

The previous homeowners had a TV in their built-in cabinet, but since the space is boxy and doesn’t fit modern TV screen sizes well, we are closing it off with new doors and turning it into storage for extra blankets, pillows, towels, etc. for guest use. Our contractor is finishing up our doors this week (the only reason this got delayed was because of the holidays) and will be installing them Saturday!

3 – Order and Install a new vanity counter top

20200106_101216

This vanity has been a source of frustration for a while. We originally hoped to replace the entire thing. I really wanted a floating vanity, but in order to do that we would’ve had to totally rework the plumbing and dig out a bunch of concrete. It would’ve added a lot of cost to the project and we decided we would rather put the money towards making the shower bigger and more functional than just getting a different style vanity with essentially the same function. Now that the shower is finished, I think that decision was definitely the right one! Here’s a sneak peek:

20200106_101314

Unfortunately, the nook for the vanity space is a little awkward. It’s 39″ wide in the front and 38 1/2″ wide in the back. Standard vanities either leave too much of a gap on the sides for things to fall down or are too big for the space. A fully custom vanity wasn’t in the budget, so we decided to add a piece of wood on the sides of the old vanity to make it flush with the wall, paint it and add new hardware, and order a custom counter top. I contacted a company with great reviews to help us out. They came out and did measurements and were going to get back to me within 2 weeks. After hearing nothing for 3 weeks, I reached out and the woman explained that she had a death in the family and wasn’t expecting to have so much time out of the office around Thanksgiving but should have the estimates soon. Totally understandable. So I waited. And waited. And reached out 2 weeks later . . . and have heard nothing since. It’s been seven weeks since they came out to measure but they’ve essentially ghosted me. I’ve had to start over at square one which is extremely frustrating. I just went to another company’s showroom yesterday, and have another one to reach out to today. Hopefully we’ll be able to make some decisions and get a pretty quick turnaround because that’s really the last thing needed to make the bathroom fully functional!

20200109_103412

Other than that, I’m just figuring out final details like hanging artwork and installing towel hooks. Our window treatments get installed next Wednesday and we have guests coming Thursday (they’ll have to use the sink in the basement kitchen outside the guest room since that won’t be finished yet). I cannot wait to share the finished space soon!

Phase One Master Bathroom Reveal

Today I’m finally revealing our master bathroom “Phase One” update!

I wrote about the start of our plans and progress in this blog post but in case you missed it, the goal wasn’t to make this space the bathroom of our dreams. Eventually, we plan to gut the bathroom and change the layout but we are waiting to tackle that until all Justin’s student loans are paid off and we save up to do exactly what we’d like. We’re probably at least 5 years out being able to do a full renovation, so in the meantime, we wanted to do some very budget-friendly updates to freshen up the space and make us fall in love with what we already had.

A reminder on where we started:

Phase 1 Bath 2

The first thing to go was the carpet and I was more than ready to say goodbye. We ripped up the carpet, carpet pad, tack strip, and alllll the staples (tedious, but rewarding!). After painting the floor with a primer, we set down these peel and stick vinyl tiles. Honestly, I was intimidated by the thought of these but they were SO easy to work with! They are super sticky but once they were down on the floor, you could slide them around a bit if needed and even peel them back up if you needed to rearrange.

20191019_120200

LJ learned firsthand just how sticky the bottom of the tiles are – haha!

Master Bath 7

There are a lot of different angles in the room but the tiles could be cut with a regular scissors which was great! We were able to cut down on a lot of waste by using the same tile to cut multiple smaller pieces to fill in when we just needed a little bit to reach the wall. To cut unique pieces, I first took a piece of cardboard that I had cut to be the same size as the original tile, then I cut the cardboard to the needed size through trial and error and used it to trace the correct shape on the back of the tile. Then all I needed to do was cut the tile, peel the sticker back (where I had trace lines) and place it down!

Originally we thought we’d have to put down quarter round but the tiles slid right underneath the existing trim and we were happy enough with how it looked that we just decided it was good enough for phase one!

20191106_145328

The one thing that was frustrating with the tiles is that the edge patterns didn’t always match up. I often had to rotate it around several times or try different tile combinations to find the best fit. There are a lot of tiles that don’t exactly match up pattern-wise, but the overall pattern is busy enough that I don’t notice it unless I’m looking for it.

I was glad to see the brown go, but I’m still not totally satisfied with the color of the walls. I was shooting for a light gray and even tested out a few different colors. I chose Sherwin Williams Gray Strand and it looked gray in the can, looked gray in the paint tray, looked gray when tested on the wall (surrounded by white primer), but now that it’s fully covering the wall, it often tends to look blue. Argh! I think there are multiple factors here: the brown trim brings out warm tones and there is a lot of natural light that does the same thing. At night or on a cloudy day when there is less natural light, the walls do look grayer, and that’s what I was shooting for.

20191107_083010

I considered re-painting a different color but honestly, for a phase one, I think I’m just going to deal with it. Plus we already painted a LOT – one coat of primer and two coats of paint on the wall, then two coats of paint on the ceiling. We hadn’t originally planned on painting the ceiling, but the ceiling color was a creamy, almost yellow looking offwhite and I wanted a true white to help bring out the cool tones of paint on the wall. I do think it helped make a difference, plus it just looks nice and crisp now.

When we eventually redo the bathroom we will replace the vanities, but in the meantime I wanted to give them a fresh face lift. I had some paint leftover from our previous house (Sherwin Williams Urbane Bronze) and I love how it totally changed the look of the vanities for no additional cost. I picked up some new drawer pulls at Lowe’s to complete the facelift. We also ended up re-doing the caulk around the vanity top and sink since the old caulk was peeling and discolored.

Master Bath 1

We hadn’t planned on replacing the faucets, but while painting, the faucet on Justin’s head was knocked into and broke – you could no longer shut off by lifting the handle up and down but had to slide it to the right and we had to shut off the cold water valve because it never stopped flowing. Honestly, the old faucets were both not super functional and you had to push down the handle in a particular way to keep it from continuing to drip, so even though it put us over budget we decided to take this opportunity to swap them out for some new ones. I love the clean and simple look of these matte black ones and love the way it gives the vanity a cool mixed metals look with the brushed nickel drawer pulls.

Painted walls, refreshed vanities, new floors, some simple decor from things we already had (amazing what you can put together when you “shop” your own house) . . . I smile every time I walk into the bathroom now! It may still not be the bathroom of my dreams, but this little phase one update made me SO much happier with the space in the meantime. I’m loving the transformation!

Phase 1 Bath 220191106_143536

Phase 1 Bath 3Master Bath 2

Master Bath 420191106_143517

I love it so much!

Master Bath 3

Rough budget breakdown (we bought paint supplies like brushes trays, etc for multiple rooms of the house so I didn’t include them in this list):

New Vanity Handles: $19.07

Faucets: $189.57 ($89 each)

Toilet Wax Ring: $6.90

Paint: $30.87

Misc (chalk line, plumbing lines): $54.18

Vinyl: $332.21

Total: $632.80

We had hoped to spend $500 or less but once we decided to change out the faucets we knew we’d be going over. Justin and I are both still happy with the transformation and would definitely do it all over again. It was definitely worth spending a little now to love the space we’re in for the next 5 or more years. Honestly, even if we were never able to do more than this update, we would be content with the changes. It just goes to show you that you don’t need to spend thousands of dollars to love a space!


Phase One Master Bathroom Progress

A little while ago, I shared in my Instagram stories that we are doing a “Phase One” master bathroom update. It’s consumed most of my free time over the past week so today I thought I’d share our progress so far.

First of all, what do I mean by “phase one?” I was inspired by Chris Loves Julia and their Phase One kitchen update. After moving into their house, they weren’t ready for a full kitchen renovation but they did not like the look, feel, and function of their kitchen. So they set up to update it for under $1000 and make it work for the short term.  It’s still not their ideal kitchen, but the goal was to “fall in love with what they already had” with a few simple updates. I thought this was such a good idea, and it made me think of our bathroom.

When we first moved into our house, I knew I wanted to do major work in the master bathroom. Ideally, I’d like to completely gut it and re-work the layout (particularly the shower area, which is off to the right of the large vanity). We have a plan to do that someday, but we need to pay down Justin’s student loans first. It will likely be at least 5+ years until we can make it the bathroom of our dreams, so we decided in the meantime to just do a “phase one” refresh. My goal was to spend under $500 and do some simple updates to fall in love and be content with the layout as is, but make it feel fresh and clean.

Here’s what the bathroom looked like to begin with:

Phase 1 Bath 2Phase 1 Bath 3

The room is definitely dated, but the dark walls and carpet were my two biggest complaints. I am not a fan of carpet in the bathroom and this one had stains (mostly rust stains from the previous owners’ antique vanity) and other signs of wear and tear. That combined with dark colors just made it feel dingy.

The first thing we did was rip up the carpet. My dad came over last week and we spent an afternoon pulling it up and removing all the staples from the subfloor.

Phase 1 Bath 4

The nice thing about no flooring was it made painting easier – no worries about drips! I primed and trimmed out the walls quickly. You’ll notice I even painted a little love note in the space behind where my mirror will go on the wall. ❤

Phase 1 Bath 5

We’re going to lay down an inexpensive peel-and-stick vinyl and the directions called for the wood floor to be primed first. We used a shop vac to remove all debris and then primed the floors.

Phase 1 Bath 6

I finished painting the walls and then was inspired to also paint the vanities. I had plenty of paint in Sherwin Williams Urbane Bronze leftover from our previous house so this didn’t cost anything extra. Score!

Phase 1 Bath 1

Now my plan from here was just to paint the ceilings a fresh white, lay down the flooring, touch up some caulk, and be finished BUT . . . I can’t decide if I like the wall color! I chose Sherwin Williams Gray Screen and tested it in multiple places around the room before painting. It always looked gray when I tested, but now that it’s fully on the walls, it looks blue! I think the issue is the wood trim. When I tested the paint, it was surrounded by white primer and looked gray, but now that it’s outlined by wood, it brings out the brown undertones and looks blue. Depending on the amount of natural light, it does vary a little (you can see in the above picture that the walls around the tub even look different than other walls) but it never really looks like the gray I envisioned. So I can either repaint the walls a different color, paint the trim white to help it look gray, or leave it as is and deal with the blue. Sigh. None of those options are particularly appealing so I need to spend some time thinking about this.

I’ll be sure to report back once the room is totally finished in a week or two – I’m so excited to have an updated bathroom soon!

A Look Back on our Home

It’s moving week!

Justin and I officially close on our new home on Friday afternoon and Saturday is moving day! I can’t believe that it’s finally here. I shared in a previous post that we were not initially planning to look for another house until the fall, but we found our dream property and we jumped on it. We did a 60 day closing since it was a sudden-ish decision and this gave us some extra time to prepare (and the sellers extra time to move out) so it’s been a bit of a long process. Now that we’re down to the final few days, both Justin and I are getting super excited!

While we’re thrilled for this new adventure and truly looking forward to settling in to our new home and starting the next chapter of our family’s life there, it is bittersweet to be leaving our current home. We bought this home when we moved to Indiana 3 years ago and we put a ton of hard work into it. Justin ripped up old carpeting and tile by himself. We recruited family to come help us tear down old wallpaper, repair holes in the walls, and repaint every single wall. I painted all the trim and doors. We replaced some light fixtures and we had new laminate flooring and carpet installed. Our friends Jeremy and Bethany came for a weekend to help us install a new subway tile backsplash in our kitchen. Cabinets got painted, flowers got planted, a house became our home. We love this place and truly made it our own over these past 3 years. We love our neighbors, we love our location. We love the memories we’ve made here. We are going to miss this place.

I thought it would be fitting to share some before-and-after pictures today as a little tribute to this sweet little home of ours. It’s the first home Justin and I bought. It’s where we mourned the loss of our first baby and joyfully brought LJ home a little over a year later. It’s where we hosted fun backyard parties, where we shared our dreams for our family’s future. We’ll always remember it fondly and I am thankful we’ll take the pictures and memories with us.

Entryway

Foyer After

I love that Scout made a cameo in the “after” shot because that little landing has been his favorite spot in this house. He spends most of his day perched there. We think he likes it because he can see out the front door and windows and also keep track of us in the living room and TV/playroom. As you can see, we changed out all flooring, painted the walls, and also painted the railing. We also changed the light fixture although it’s not visible in the picture.

Living Room

Living Room Before

Living Room After

Living Room After2.jpg

The most dramatic changes in this room was paint and flooring. This was really the first room we tackled when we moved in. Justin ripped up all that old carpet and we had new laminate flooring installed.

TV Room/Playroom

Den Before.jpg

TV Playroom After 1TV Playroom After 2

The previous owners used this space off the front door as an office. We initially thought we’d use this space as a dining room, but then we decided we’d get way more use out of it as a cozy den and it became a TV room (and then also a playroom when LJ came along – check out pics of this space on a typical day here). This became our favorite place to hang out as a family! Justin ripped up the hallway tile and laminate flooring here too and we had the same laminate installed as in the living room to make the first floor feel less broken up.

Den looking out.jpg

Half Bath

Half Bath Before

Half Bath After

The first floor half bath was the only room in the house that had floor-to-ceiling wallpaper (and toilet humor-themed wallpaper at that) and I was all too happy to see it go. I chose a dark color for the walls of this small space and I love how it turned out!

Dining Room/Kitchen

Dining Room Before

Dining Room After.jpg

In my opinion, this space was the most dramatic transformation. The tile was in good shape so we left it but pretty much everything else changed. New paint on the walls, painted cabinets, new dining light fixture, new backsplash, new appliances – we loved how this room turned out!

Kitchen 2.jpg

Laundry Room

Rounding out the first floor is the little laundry room off the kitchen. This wasn’t a big space, but painted walls and cabinets with a little bit of decor made a big difference!

Hallway Nook

20160328_163501

0426191413a

Our home is 3 bedrooms but when we moved in we knew we wanted to keep a guest room available for family and hoped to soon convert the other room to a nursery so I needed to get creative with finding space for a little home office. At the top of our staircase there is a fairly large landing with just enough space for a small bookcase and desk and it worked out perfectly for an office! The bookcase faced the stairway and the desk fit perfectly in the little nook – it was such a cozy place to light a candle and get some work done.

Master Bedroom

We rearranged the layout from how the previous owners had done things and I think it helped open up the room and make it seem much larger. Painted trim and walls gave it a fresh, relaxing facelift!

Master Bathroom

The “before” picture on the left isn’t great, but it gives you a small idea of our little updates. We didn’t do much in this room – took down the wallpaper border, fresh cost of paint, painted trim, and hung new towel rods.

Guest Room

Guest Room BeforeGuest Room After

We took down that border wall paper and those shelves, which were a HUGE pain because they were all anchored into the wall. There was a ton of patchwork involved but after a fresh coat of paint the room was refreshed! We kept it pretty simple in here, just enough to make a cozy space for guests to stay.

Hallway/Guest Bathroom

Guest Bath After

The hallway bath was mostly used as a guest bathroom since we just bathed LJ in ours. We painted the walls and cabinet (I actually love how the dark cabinet turned out!), added vanity fixtures, and took down the old shower door and exchanged it for a curtain rod.

Nursery

Nursery Before.jpg

Nursery After

My favorite room in the whole house! It was used by the previous owners as an office and we didn’t do much with it for a while. Then, when I found out I was pregnant, we started dreaming of a nursery. I would spend time praying in the room for the baby we would soon welcome into our home. Sadly, that pregnancy was ectopic and we did not get to meet that baby (read more of the story here). I shut the door and stopped dreaming to deal with my grief. Then slowly, I started going in there again. I painted the room before I was pregnant again, believing that someday a baby would need this room. I got this sign off Etsy as the first piece of nursery decor and when I got the glorious positive pregnancy test a few months later, I immediately hung it up by the door. This room has seen tears, rejoicing, preparations, and so many snuggles. I’m so thankful for this room!

And that’s our home. It’s been so good to us and we’re so thankful to have called this place home for 3 years. Now on to the next adventure!