One Year Later: What We Love, Regret, and Still Plan to Do in our Guest Suite

When we first moved in to this house, one of our top priorities was to update the guest suite in our basement. We love to host and frequently have overnight guests so we wanted to have a nice, comfortable space for them to stay. This coming Sunday will mark one year since I revealed our completed guest bathroom renovation (you can find that reveal post, along with all the sources, here), and two weeks after that I revealed the adjoining guest bedroom renovation (reveal post with sources here).

This was the first major renovation we’ve ever done, and it was the first, and still only, time we’ve worked with a contractor. We learned so much through this project and while we haven’t had nearly as many guests as we thought we would (definitely did not predict a global pandemic coming less than one month after we finished the room!), I thought it would be fun to look back on that project and talk about what we still love, what we wish we had done differently, and what we want to do!

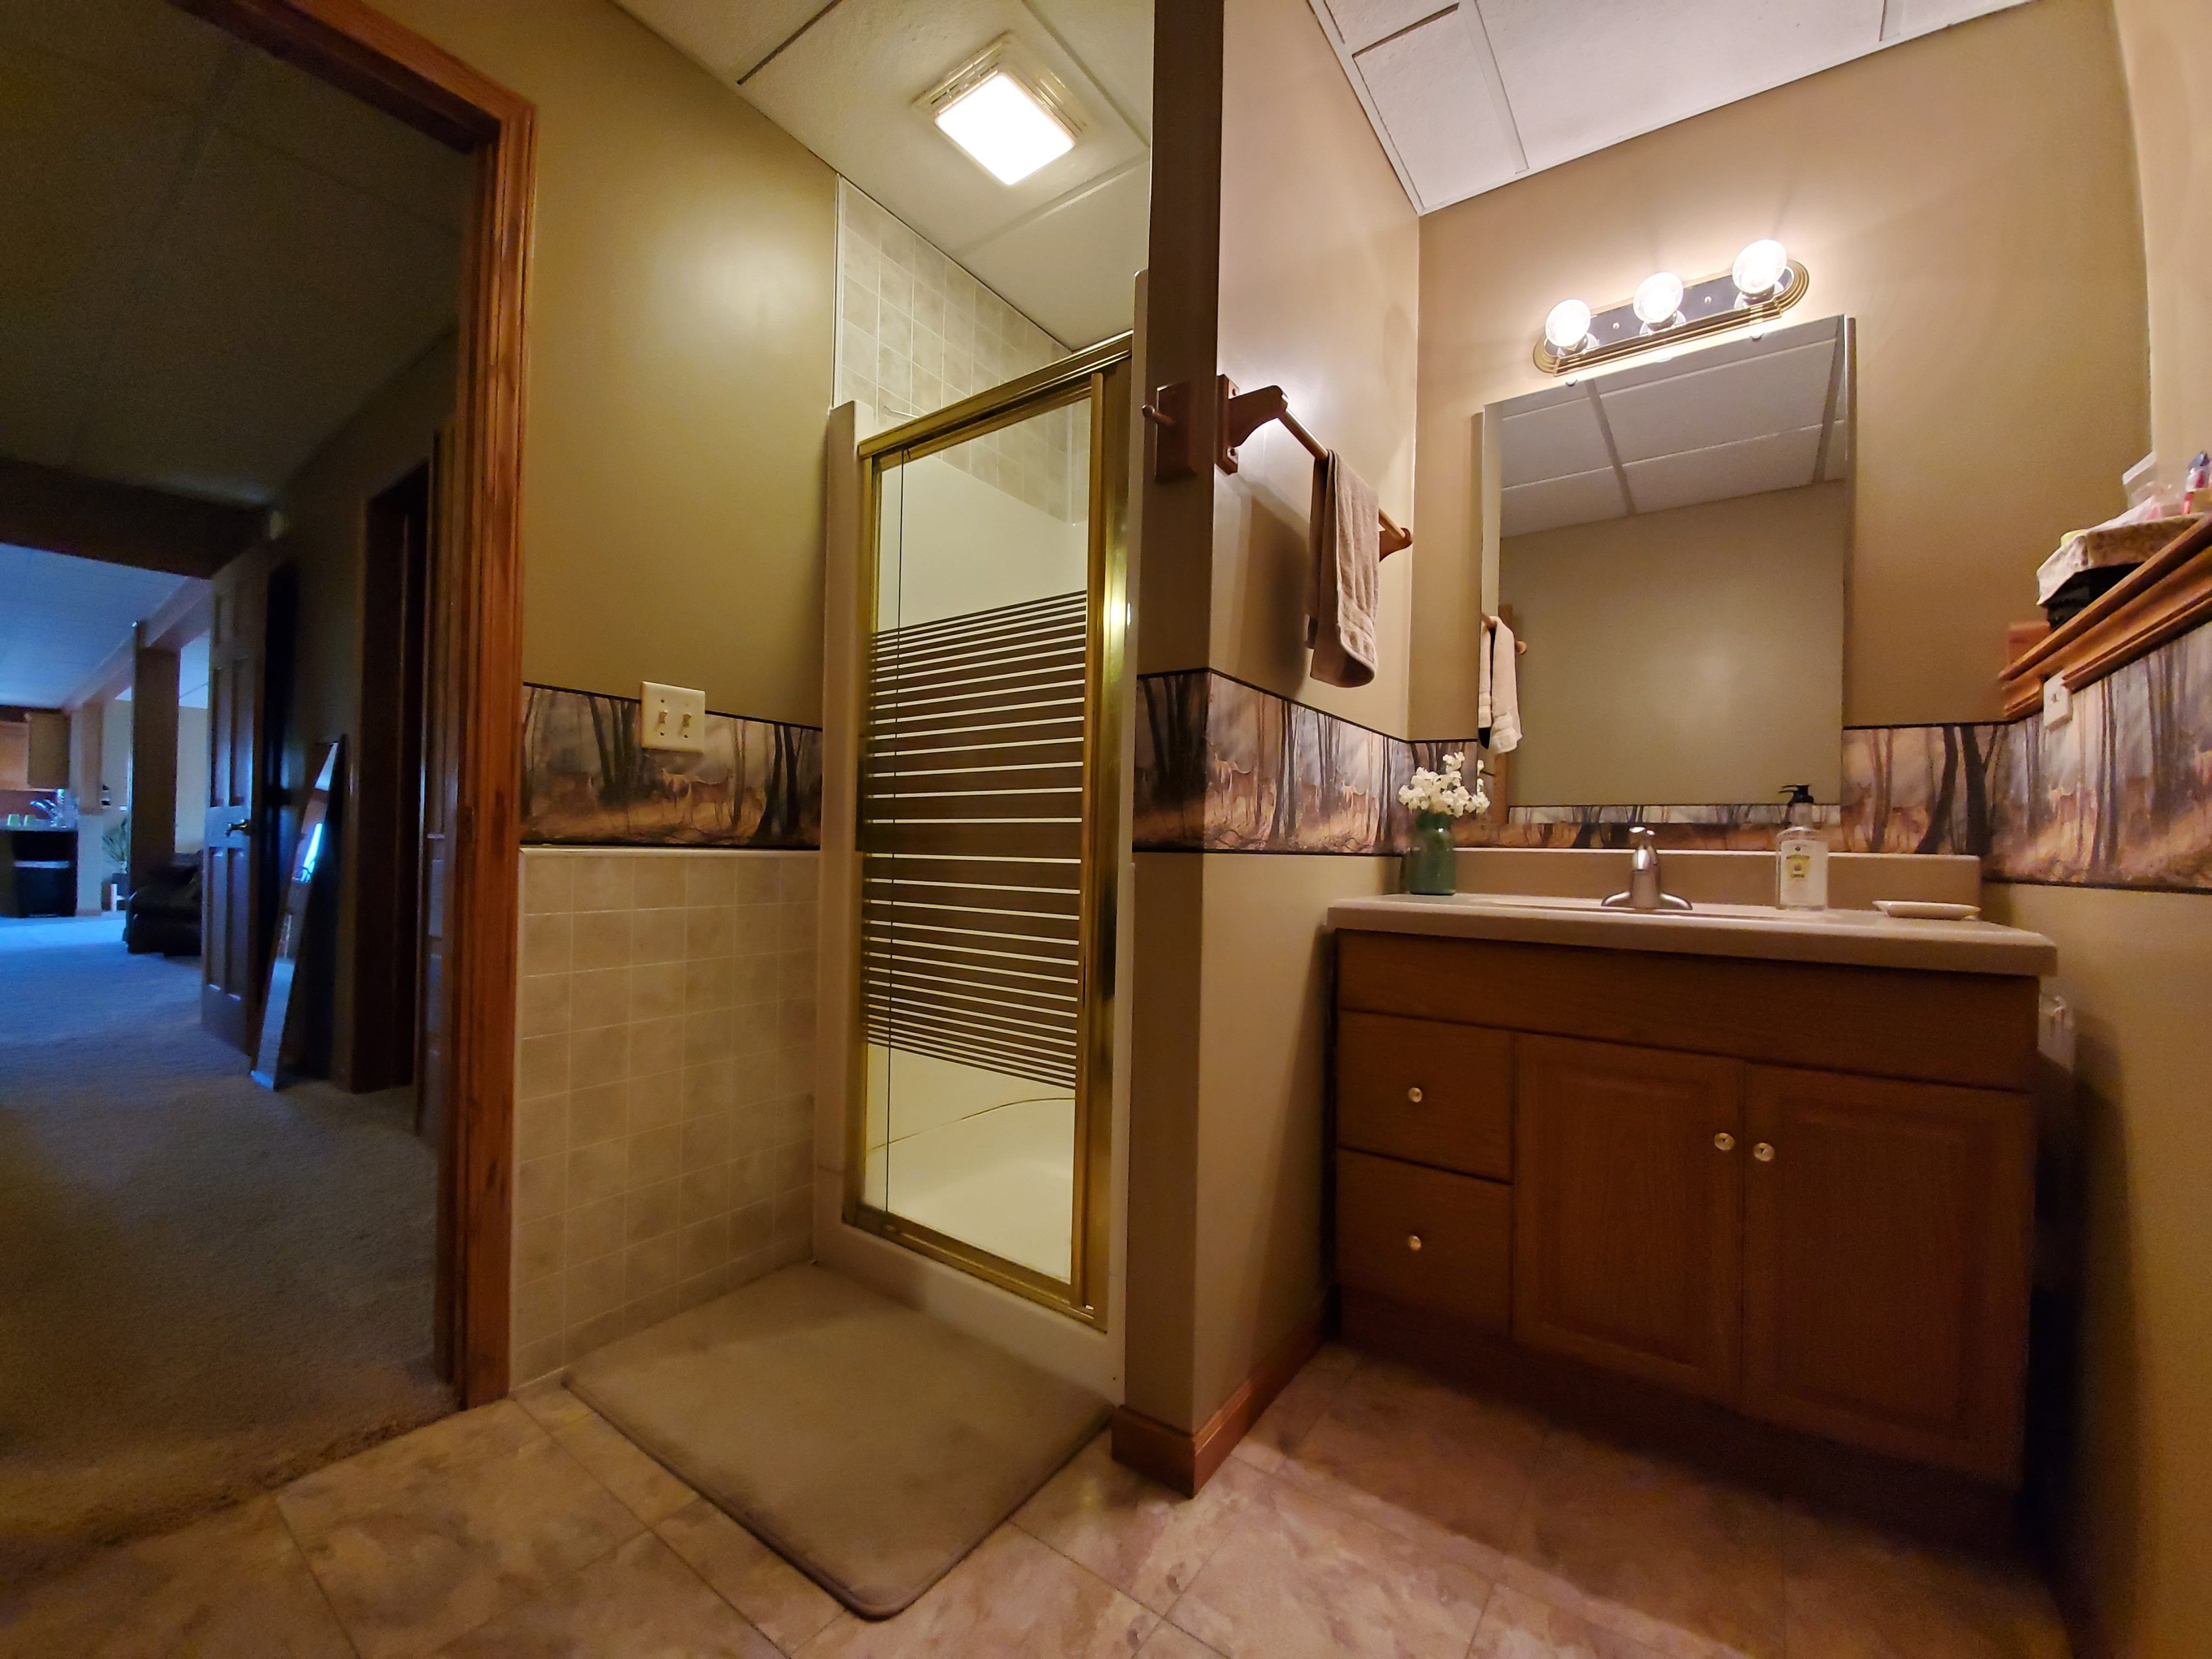
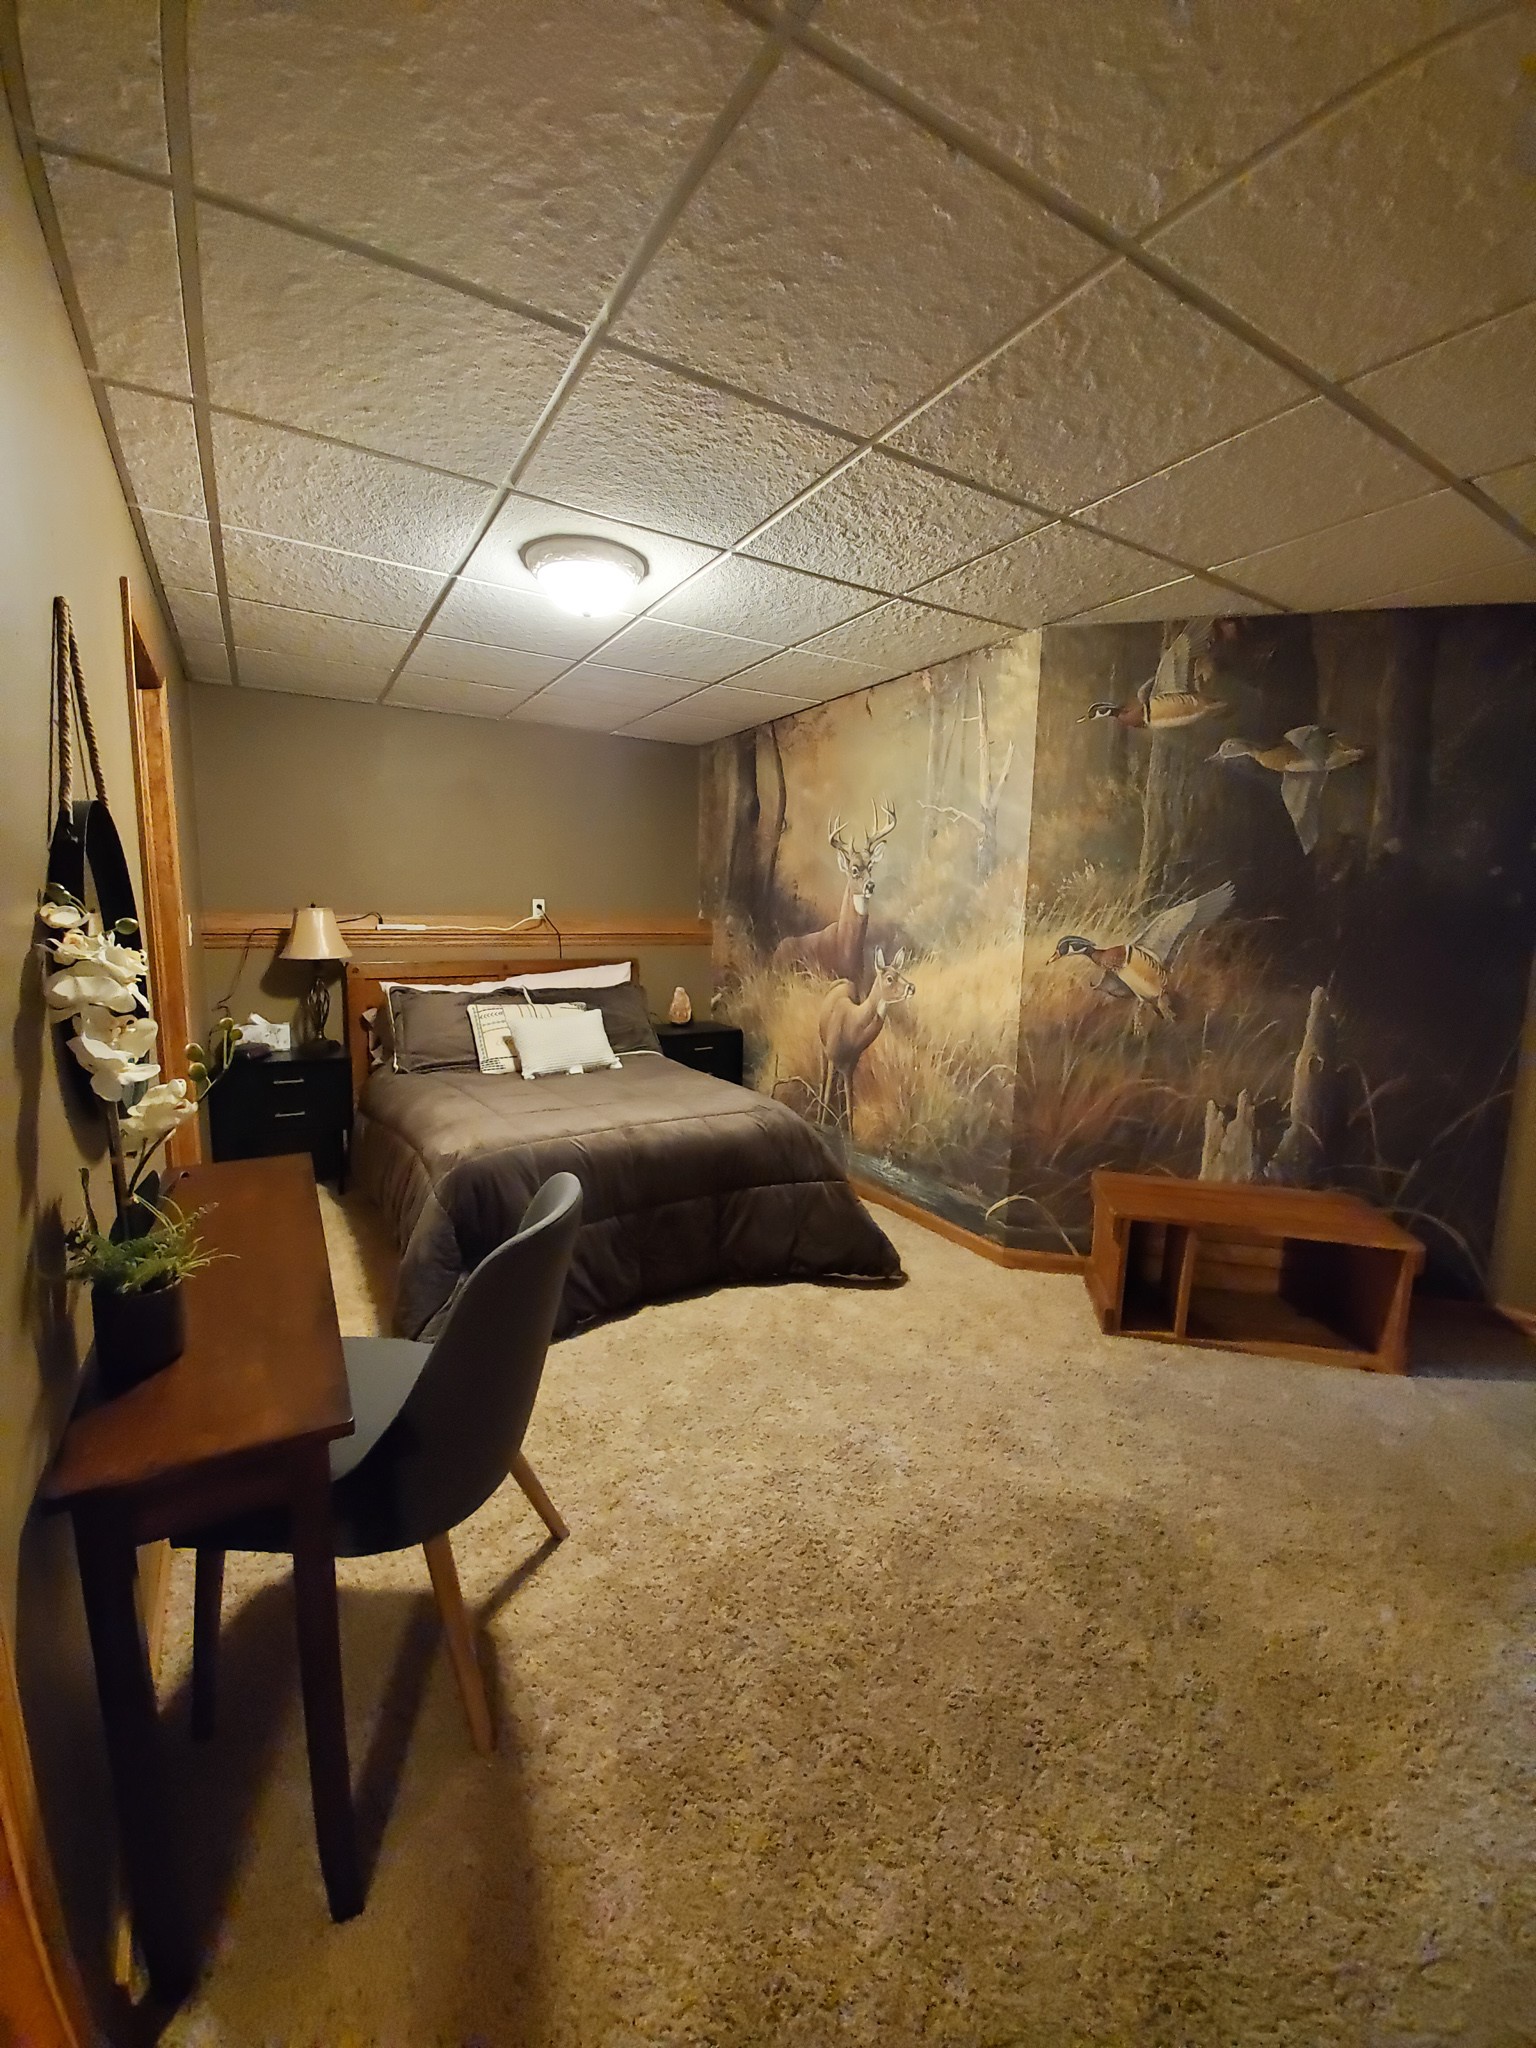
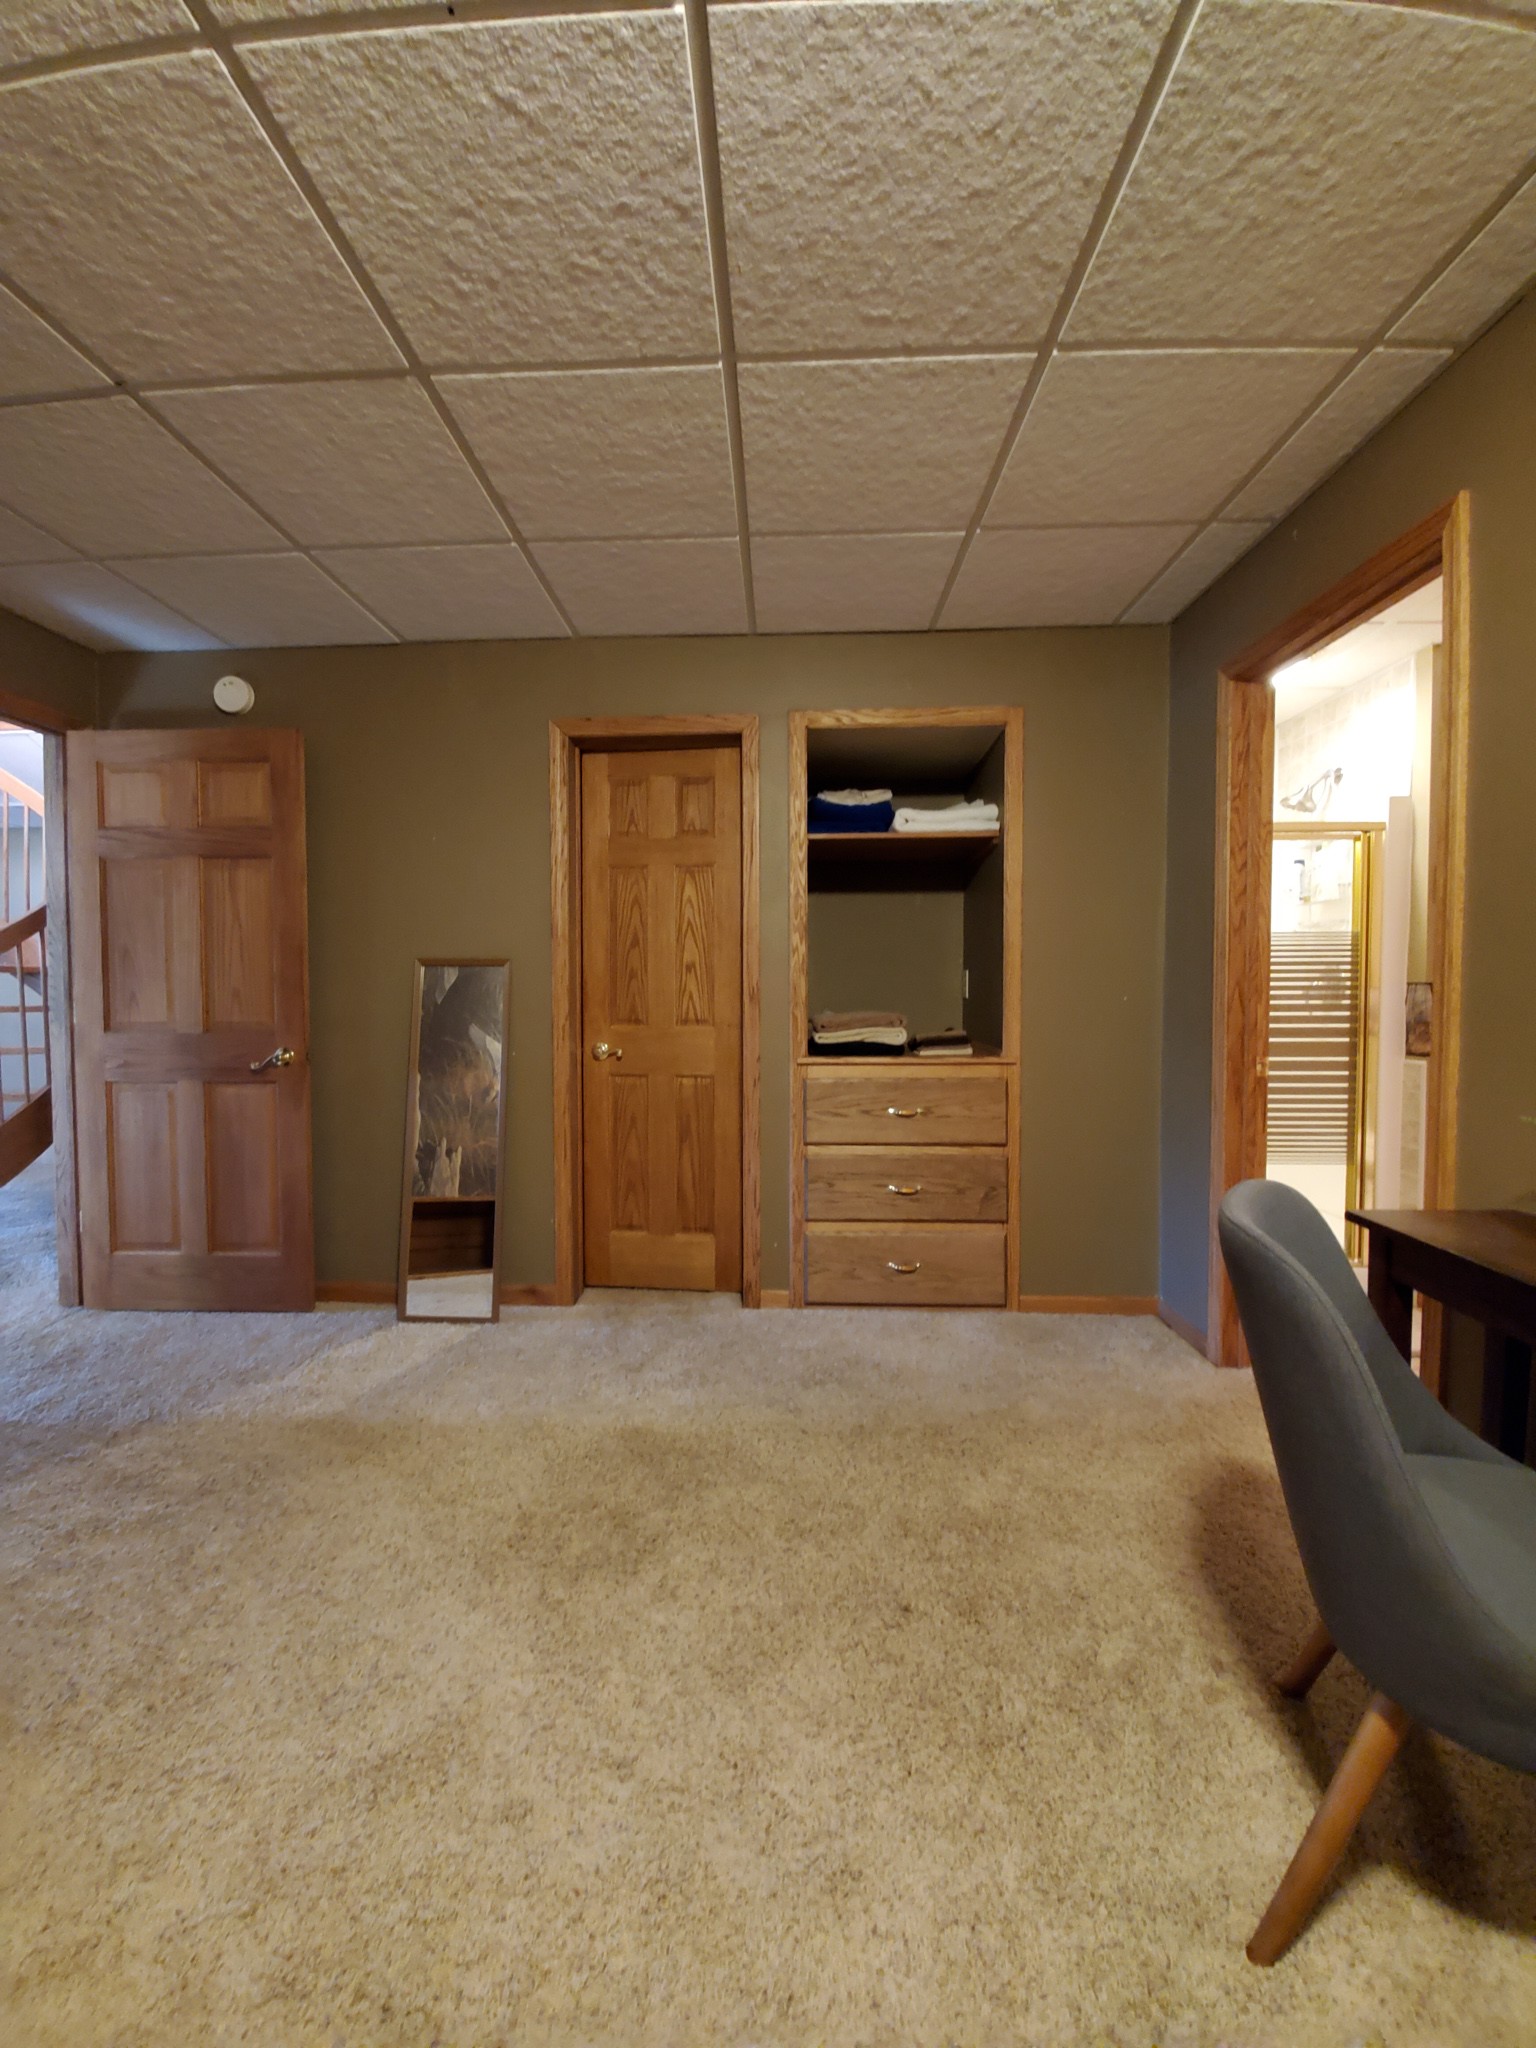
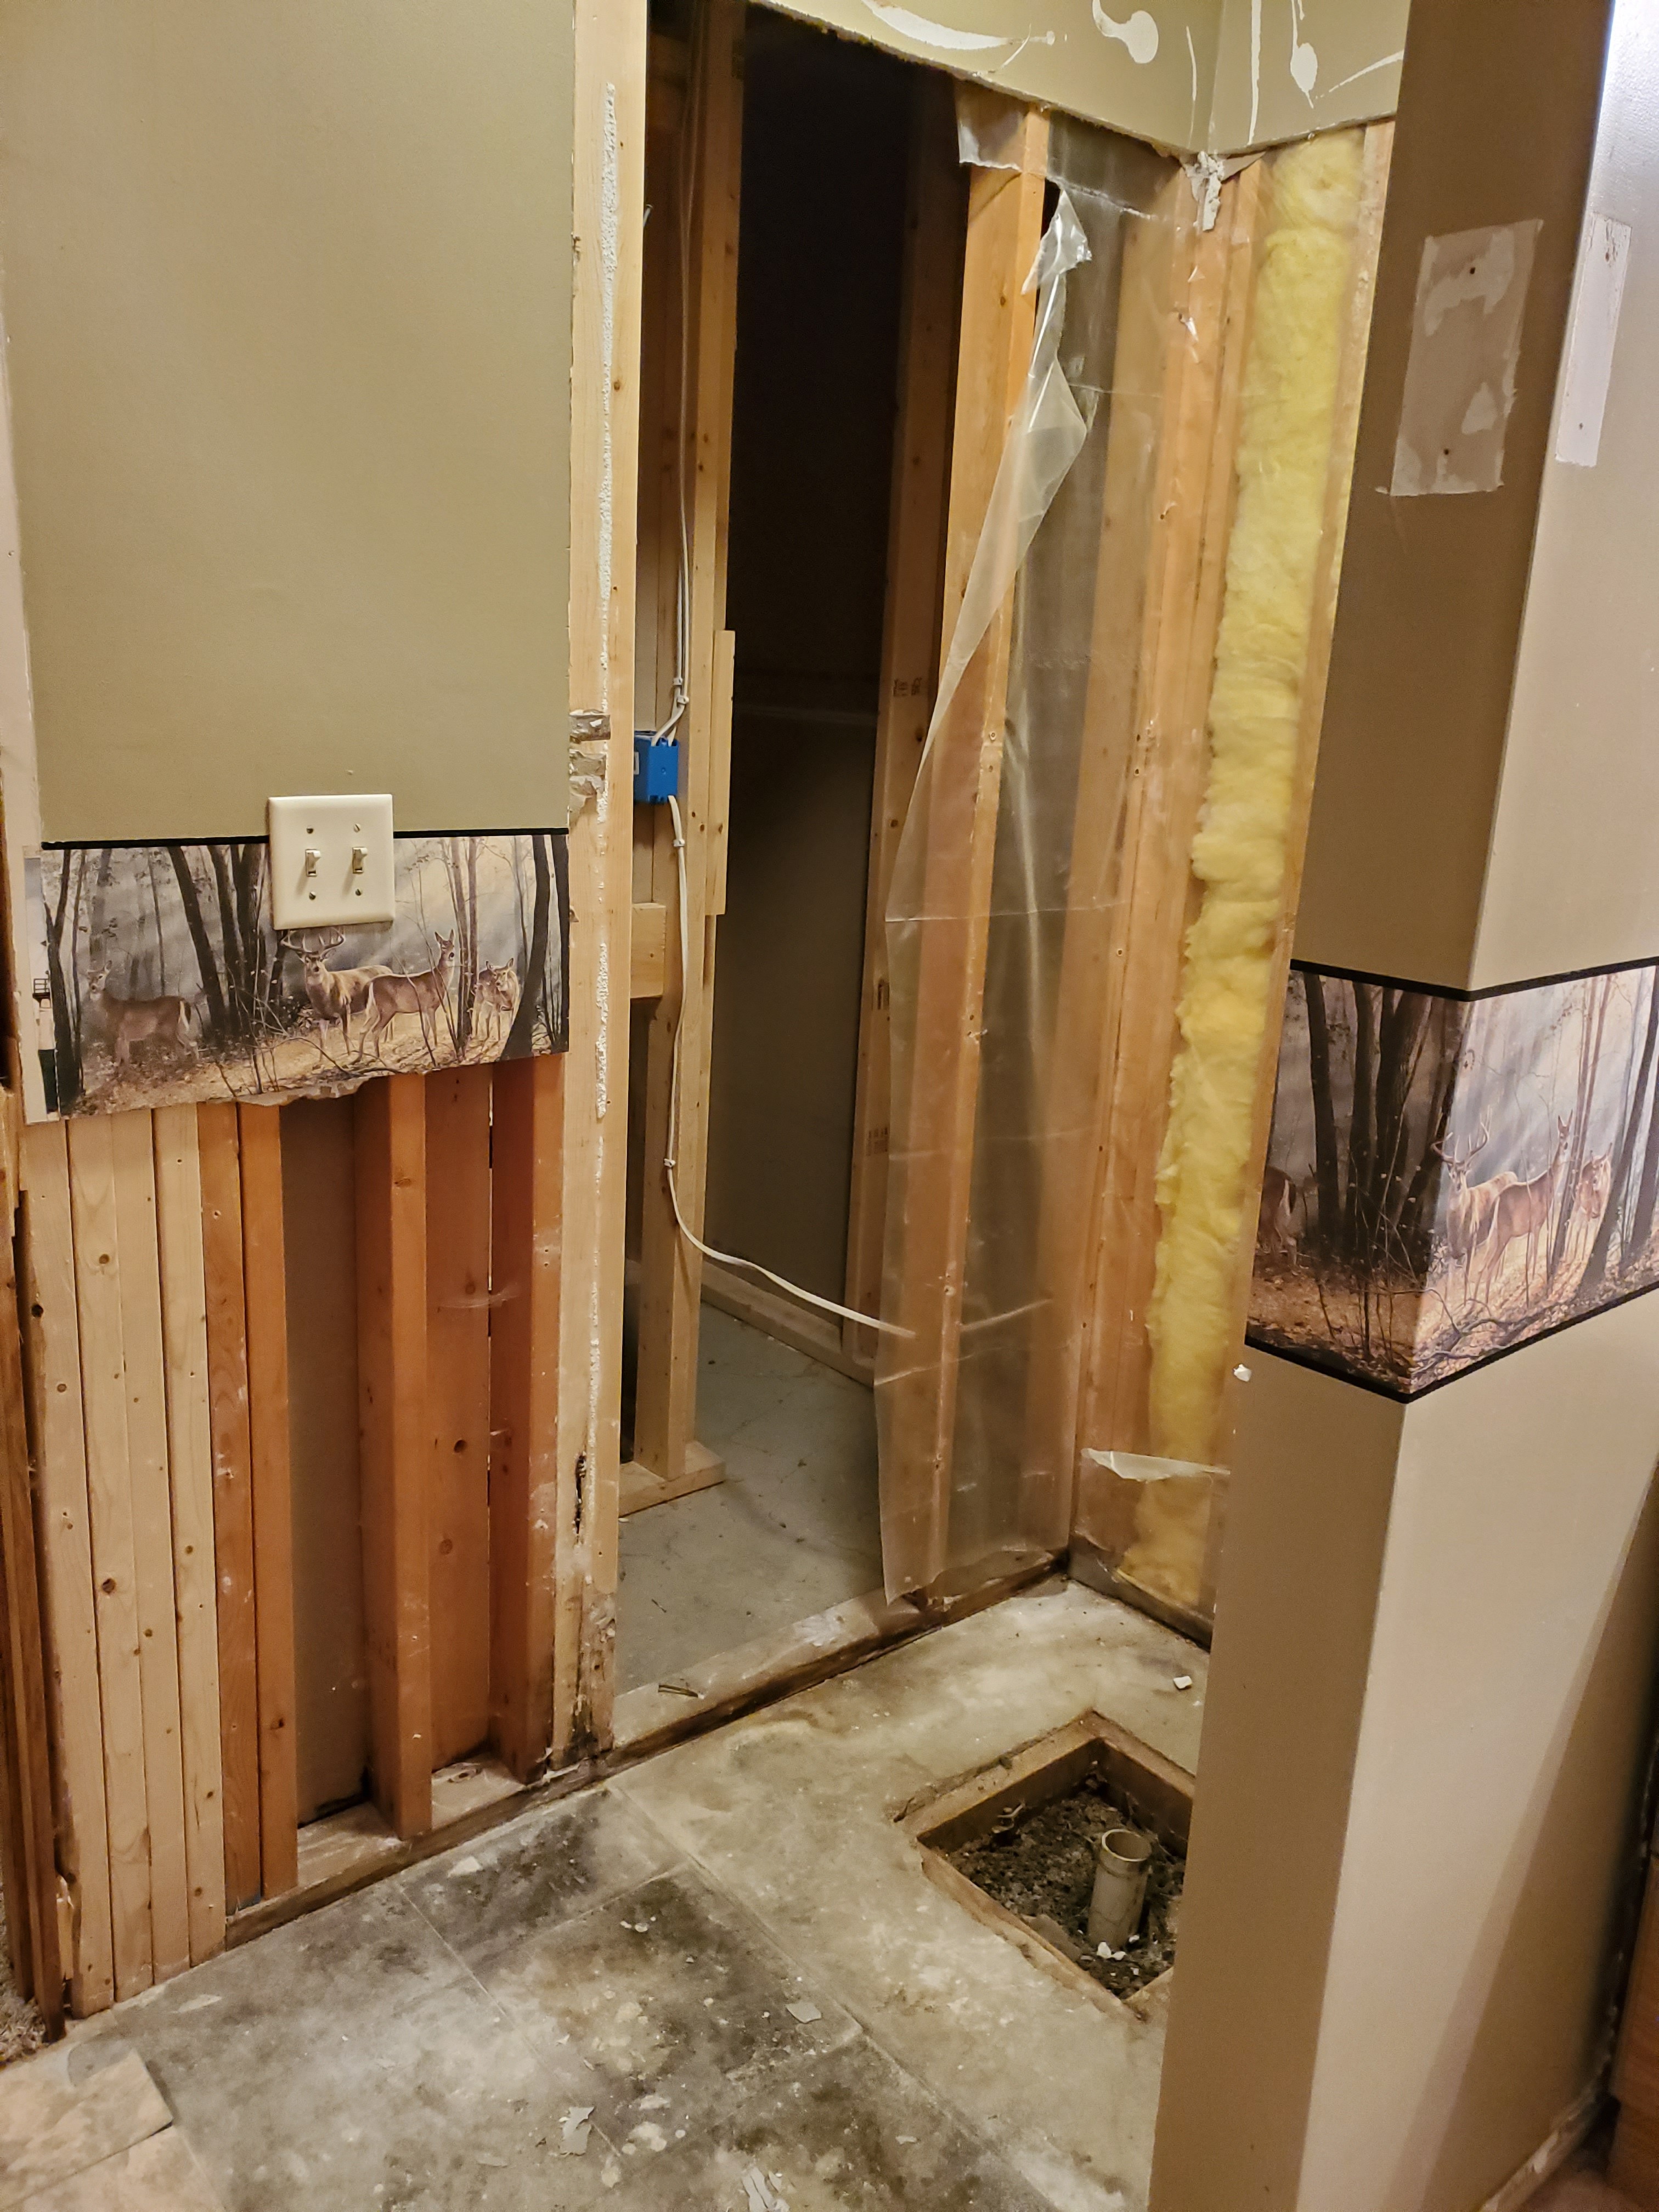
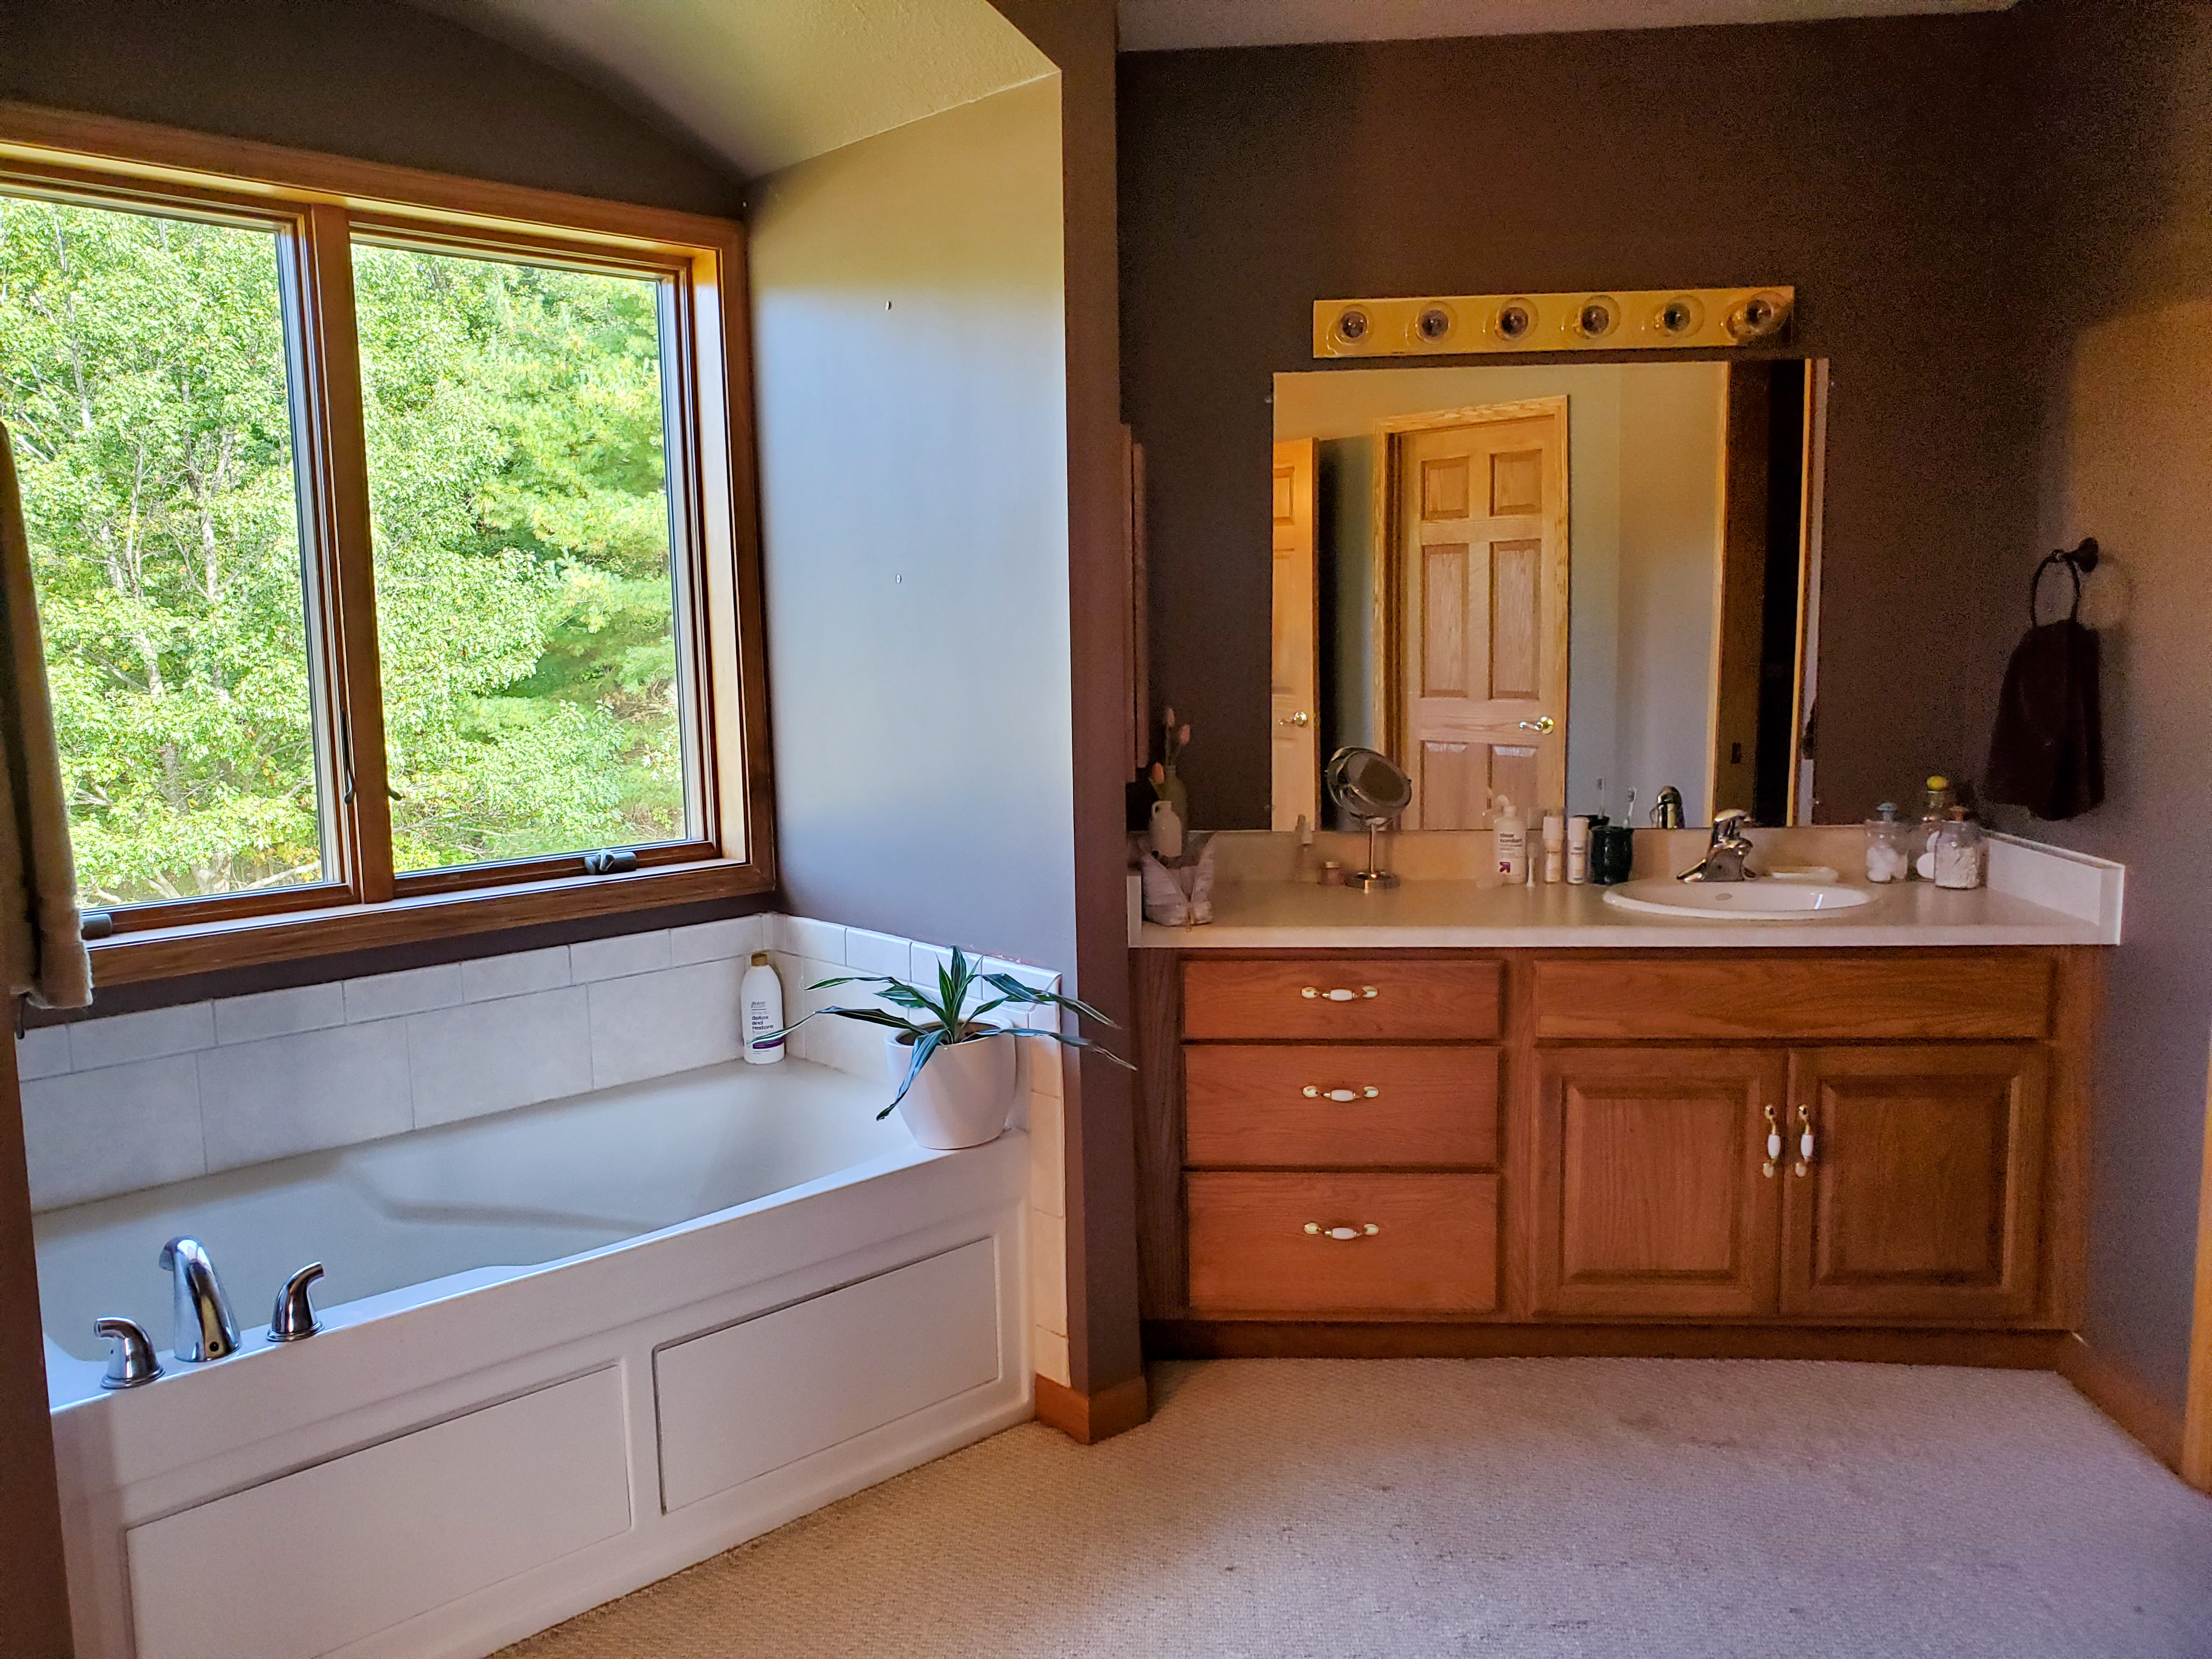
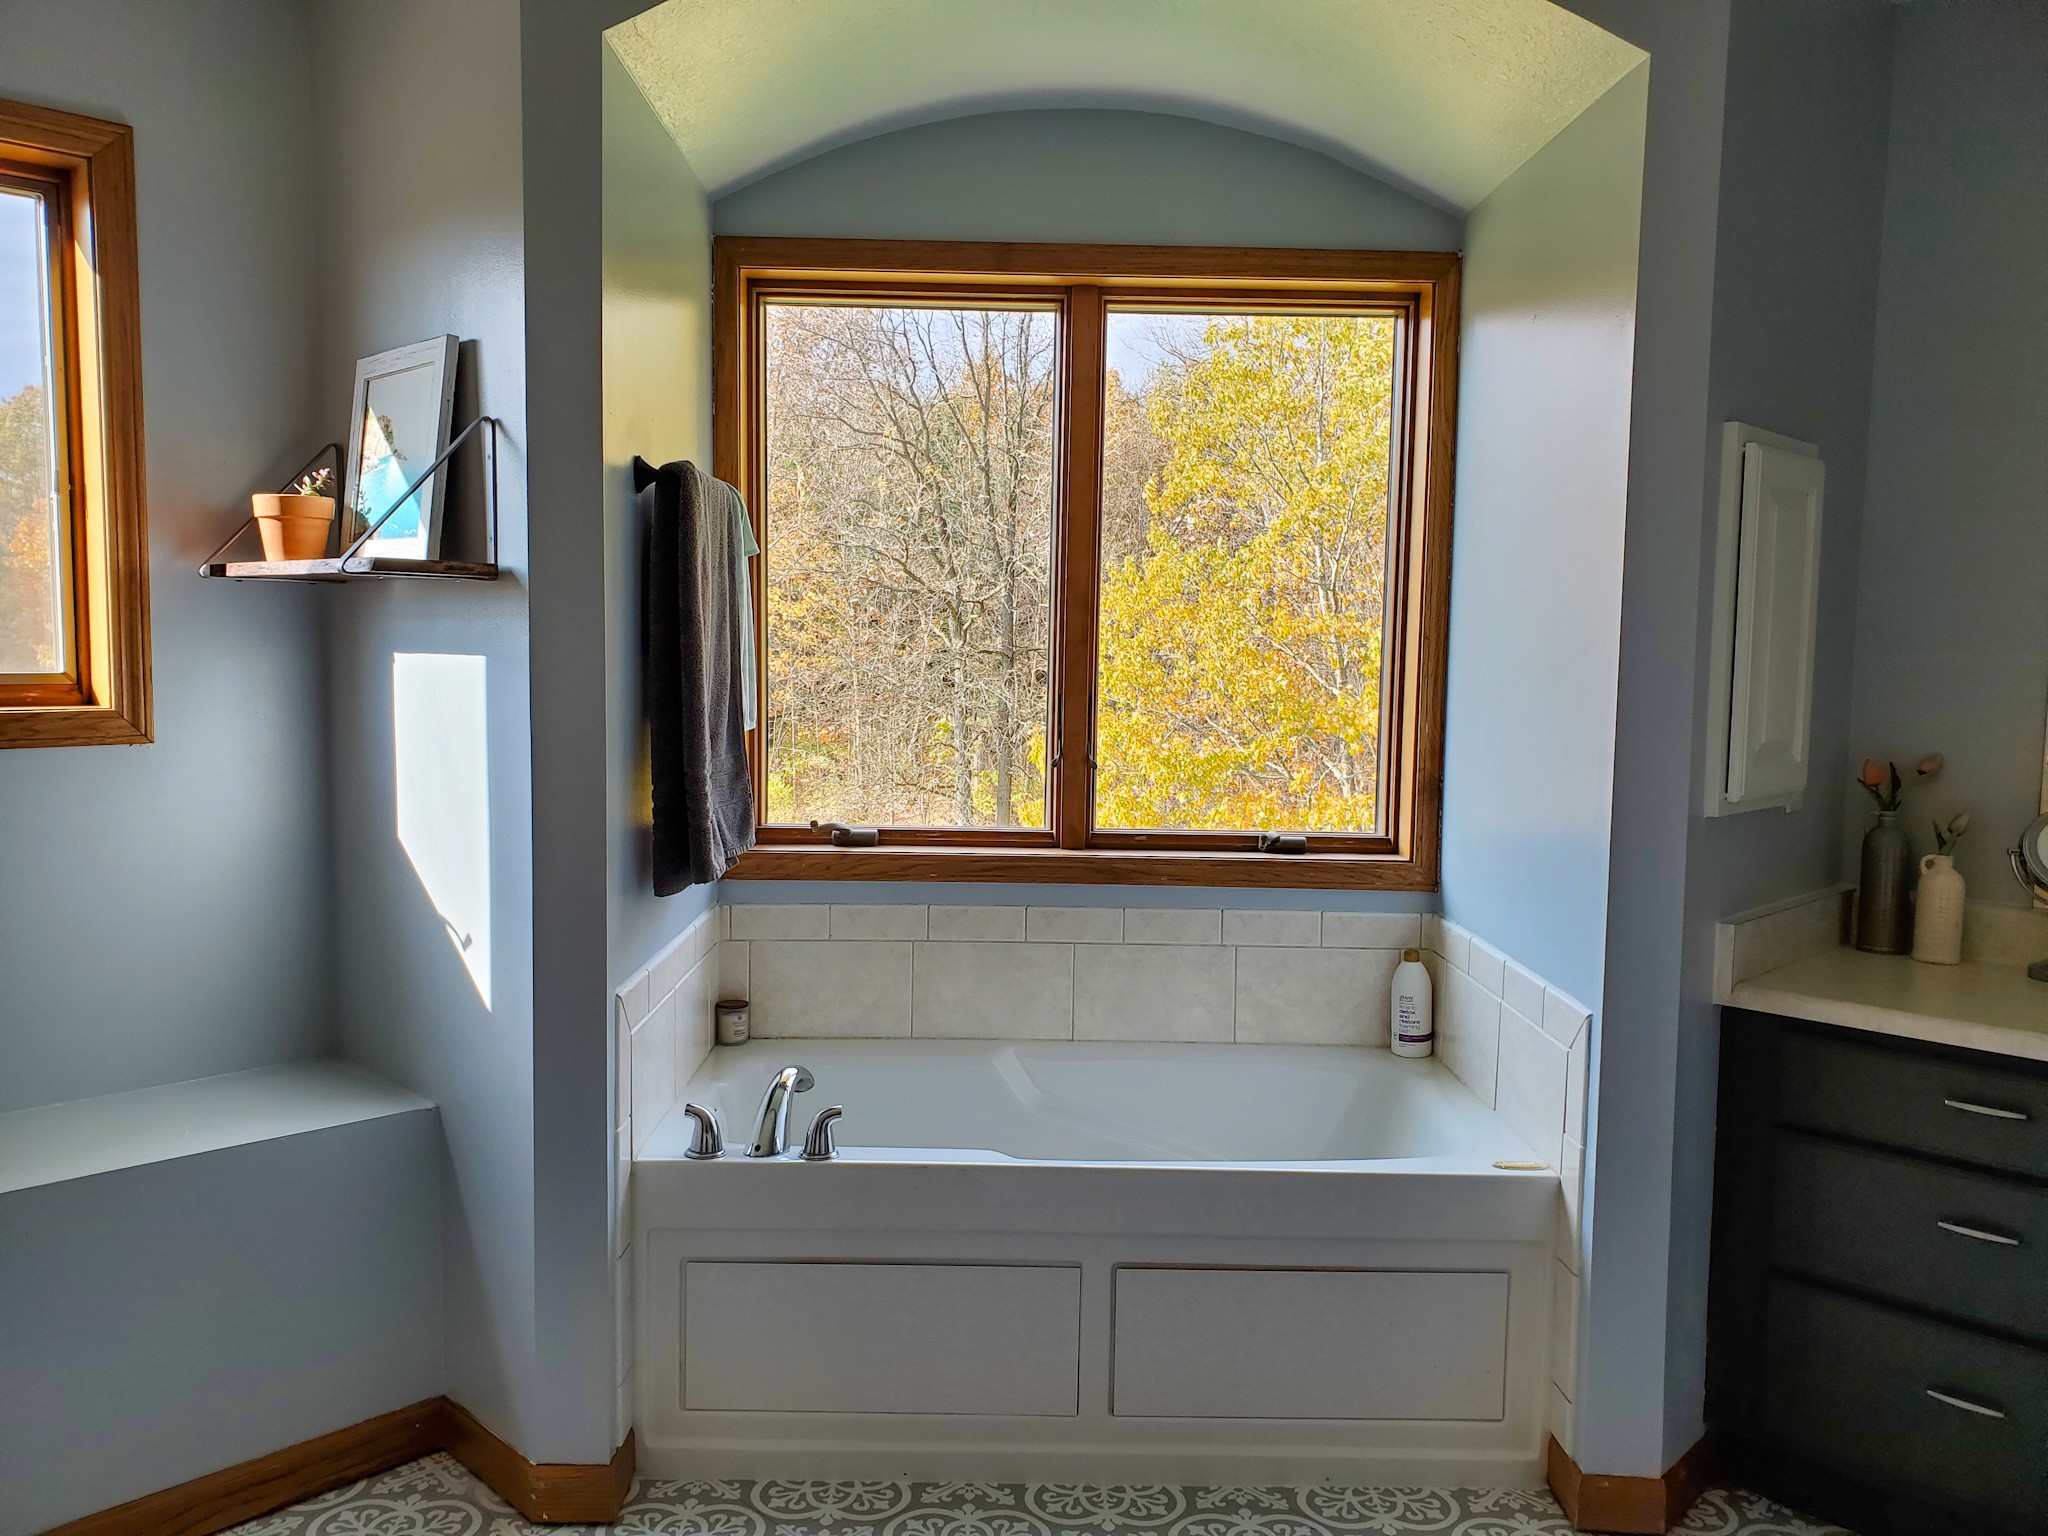
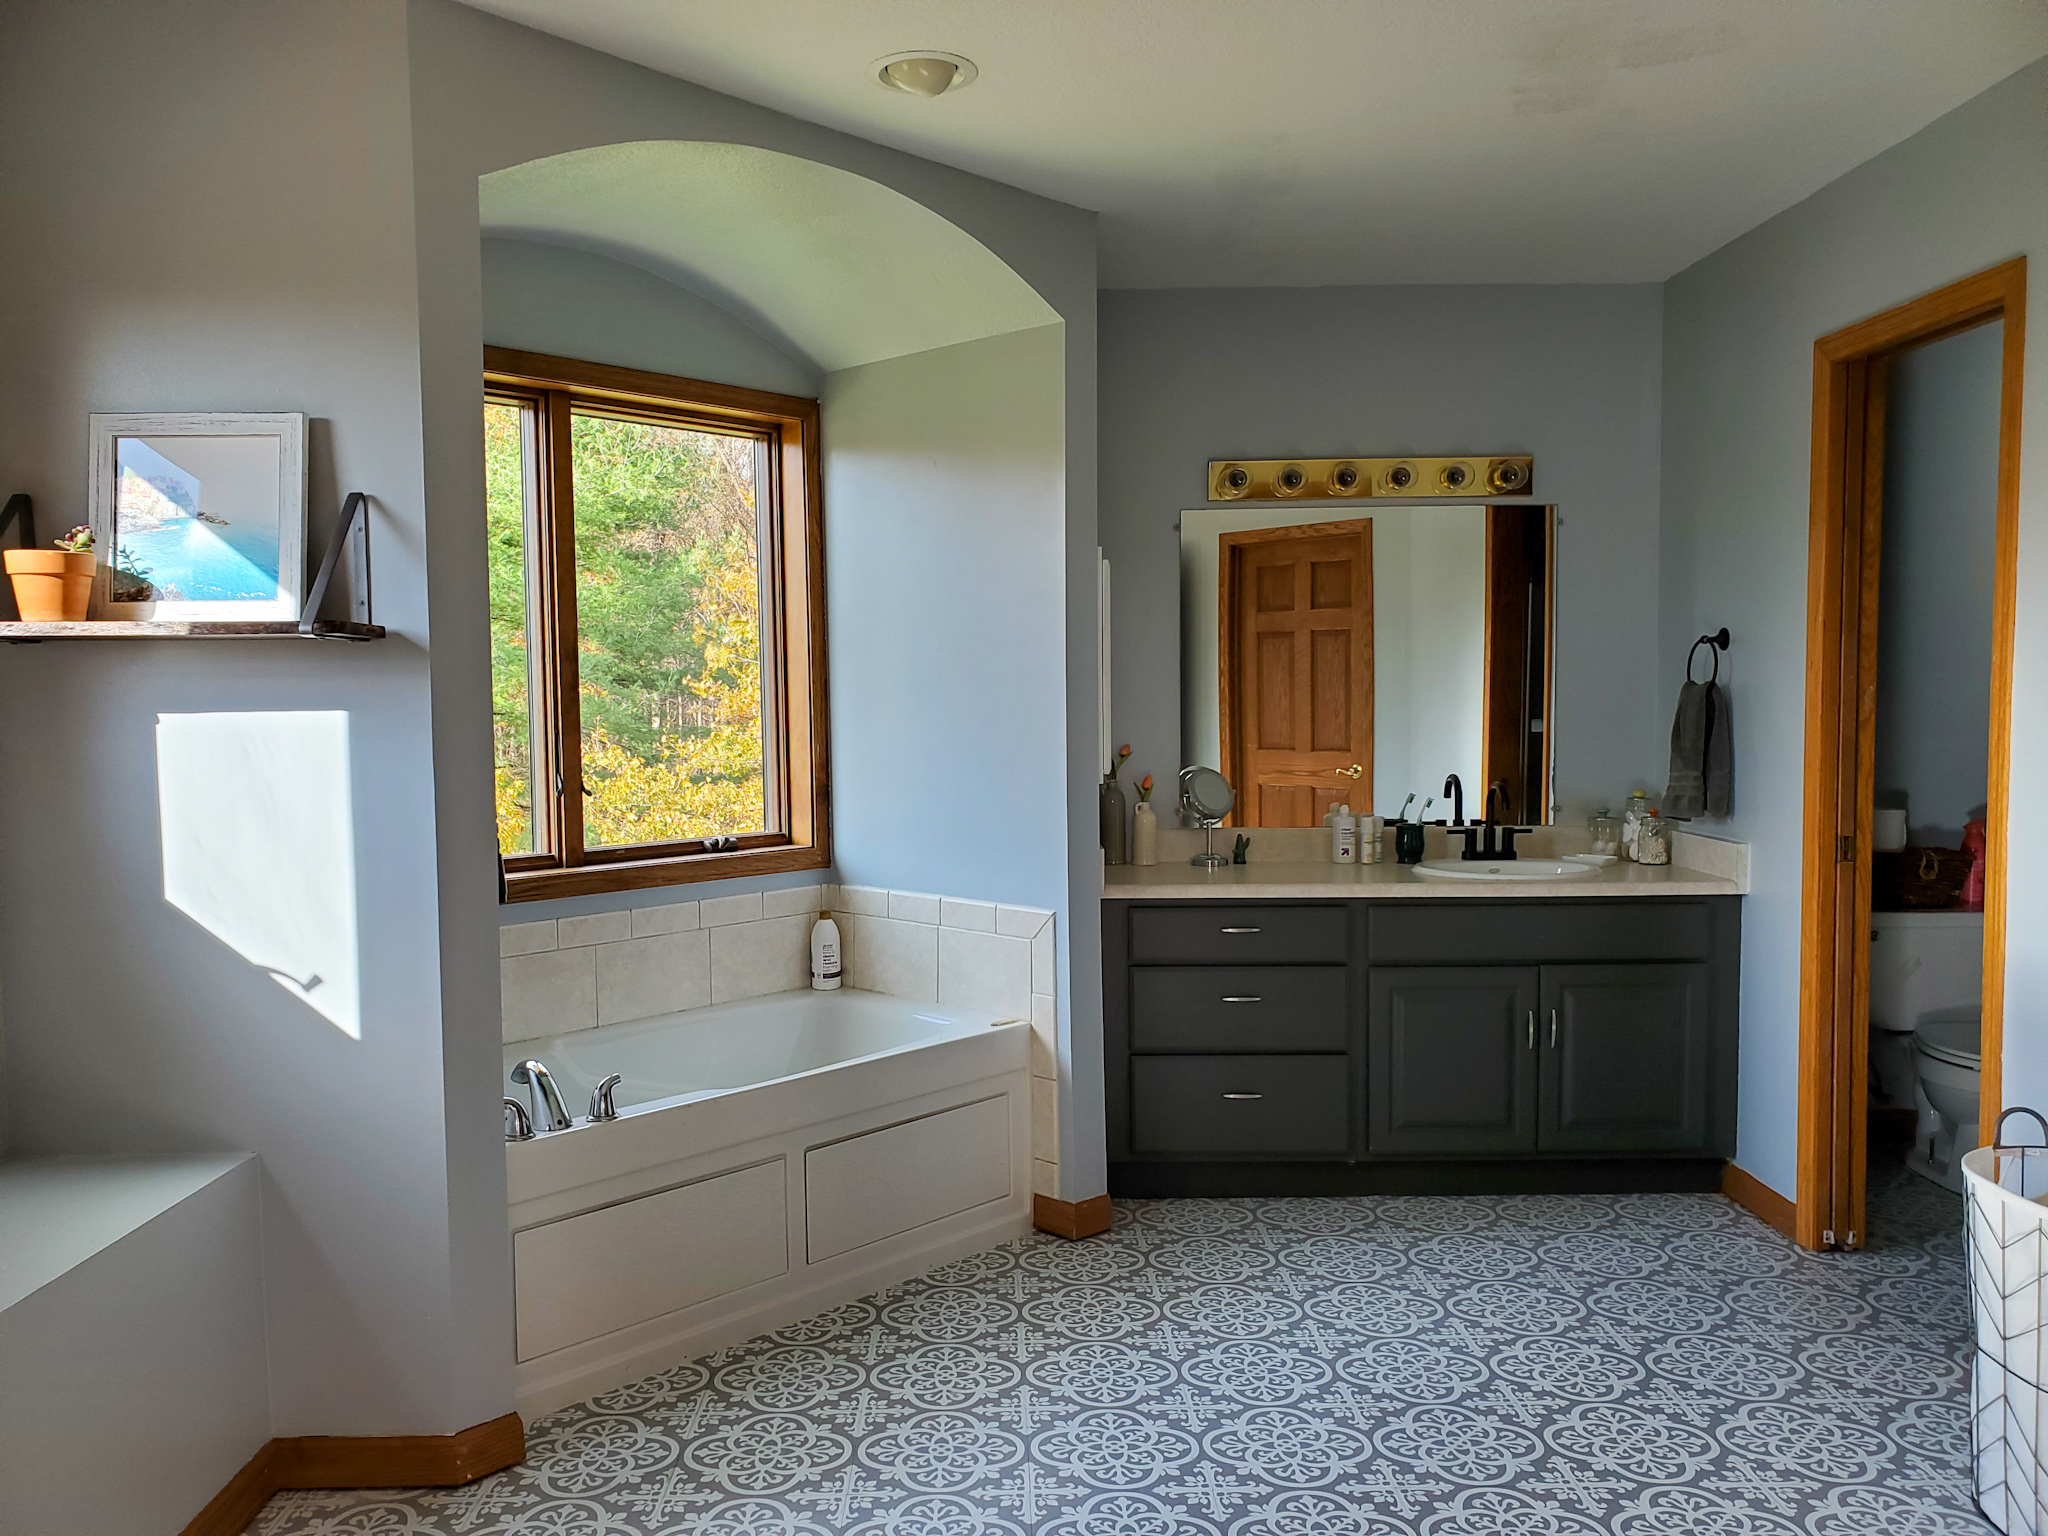
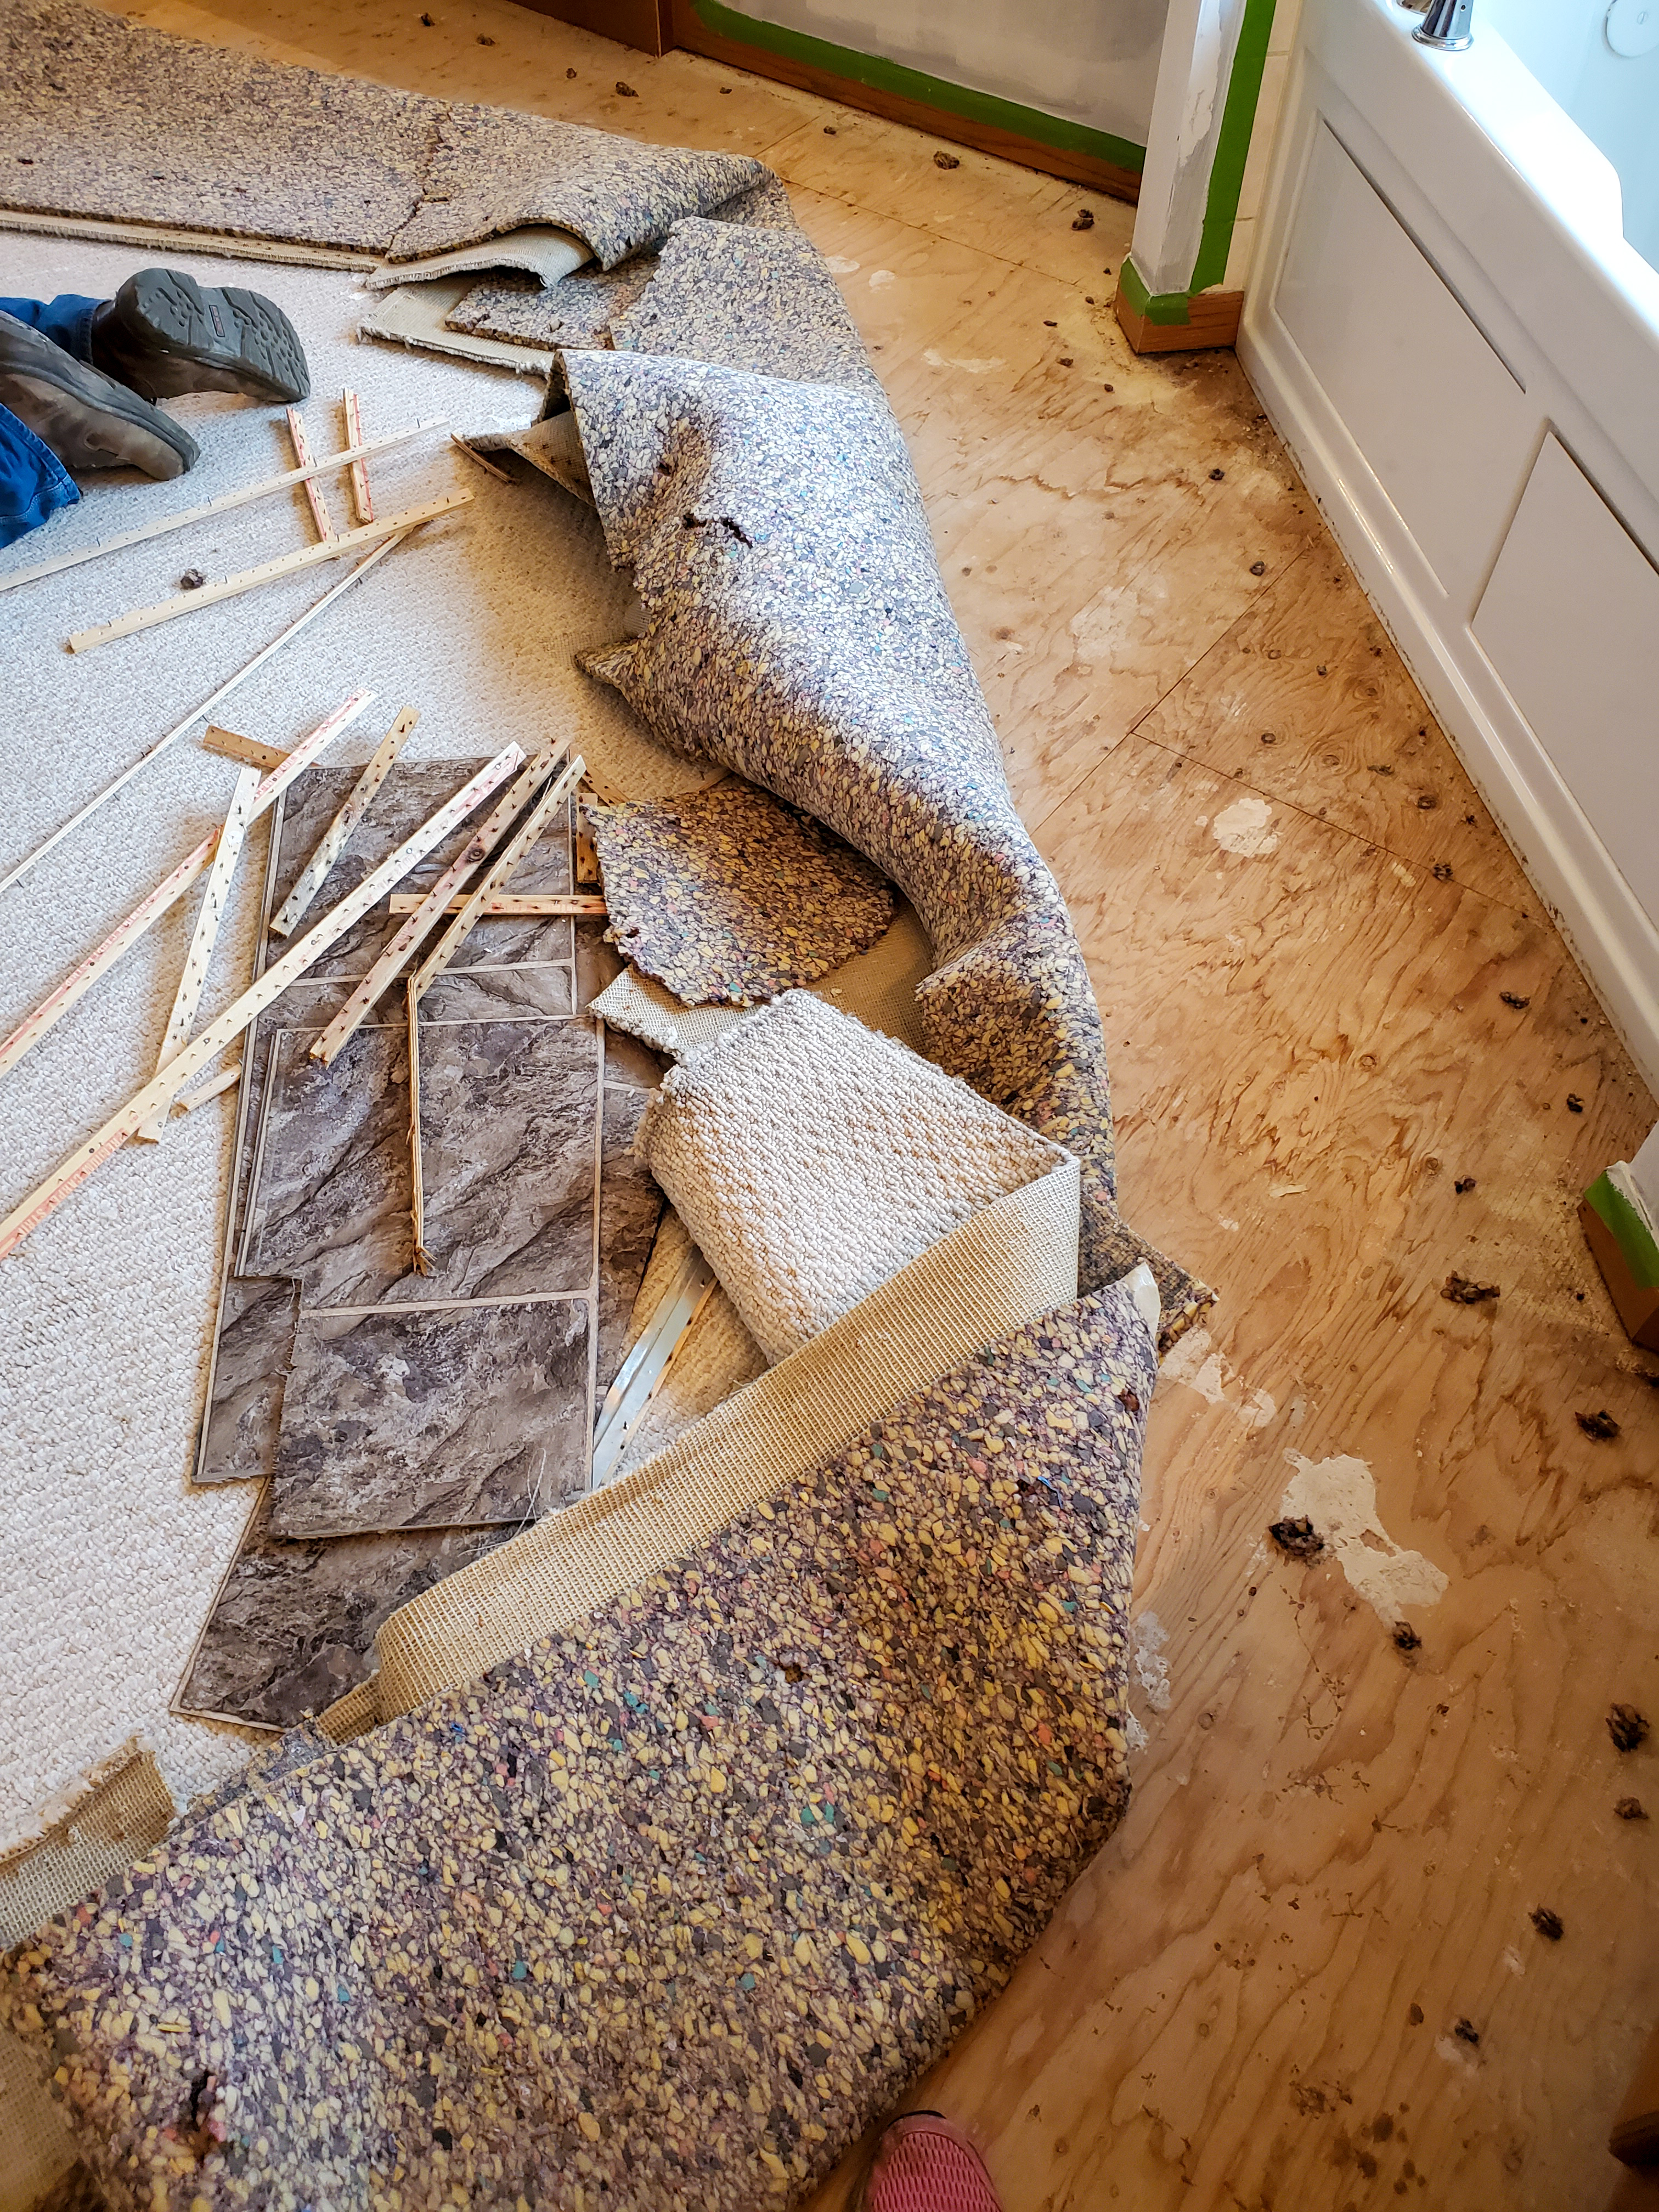
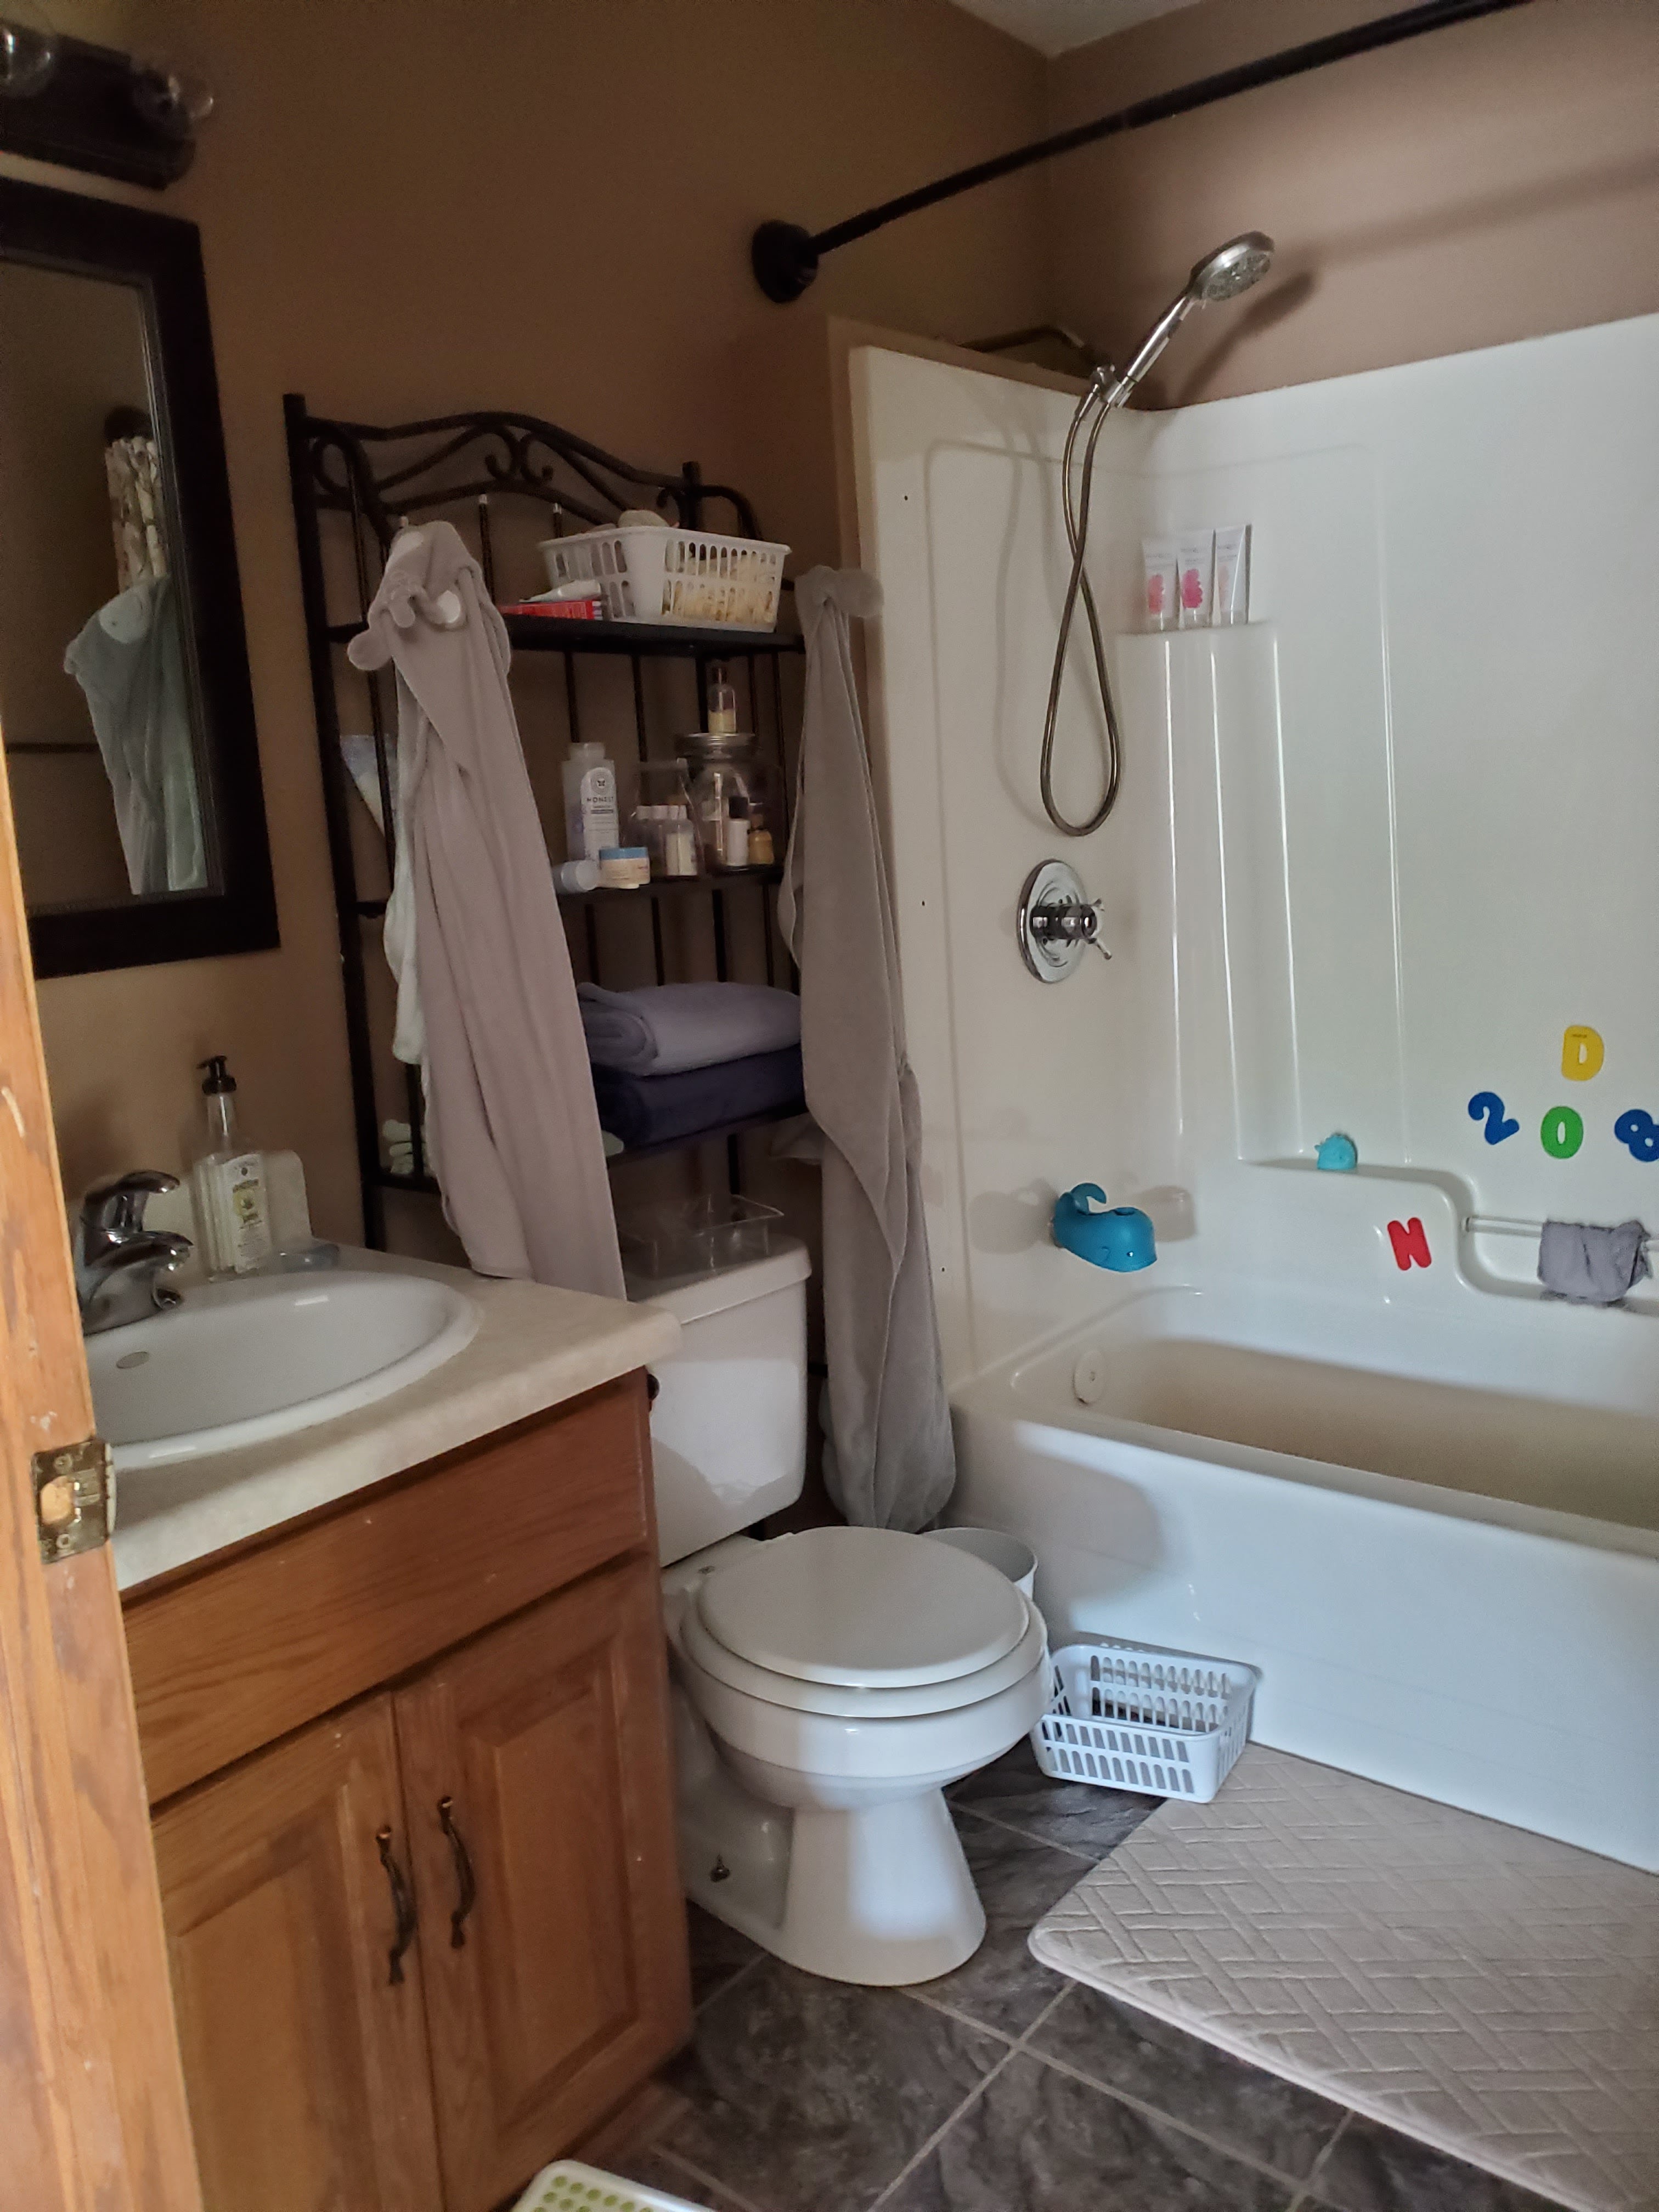
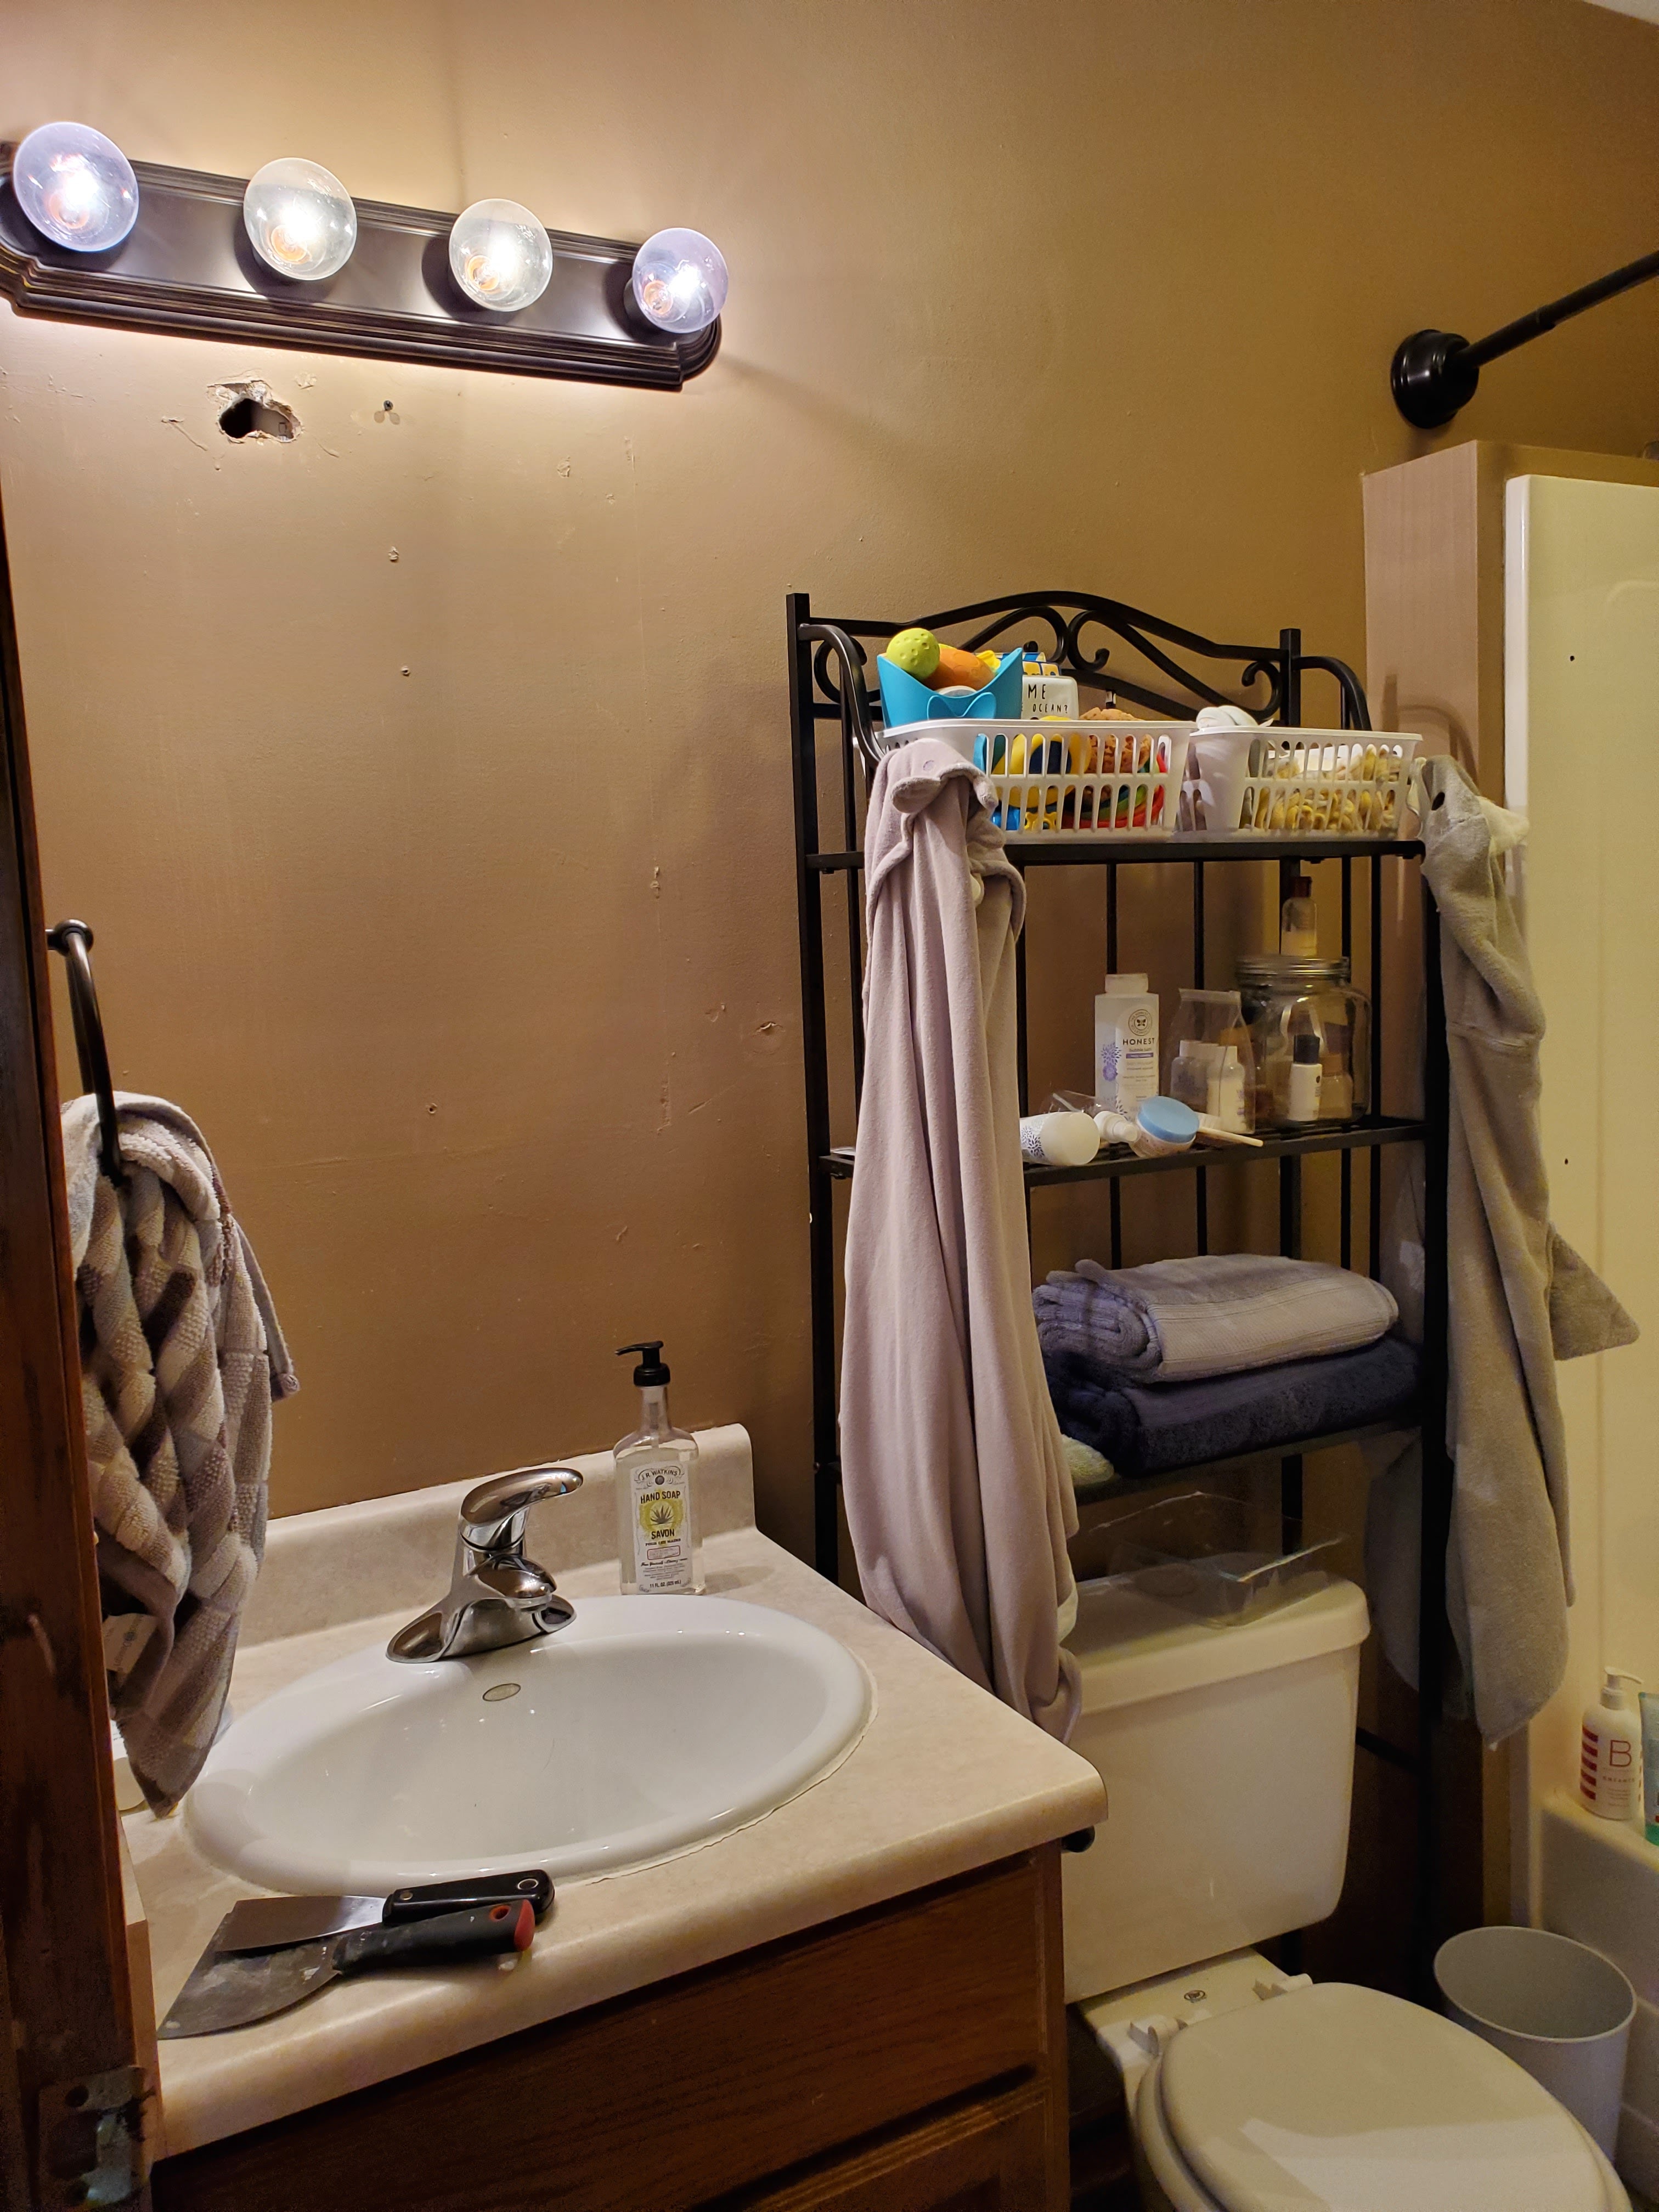
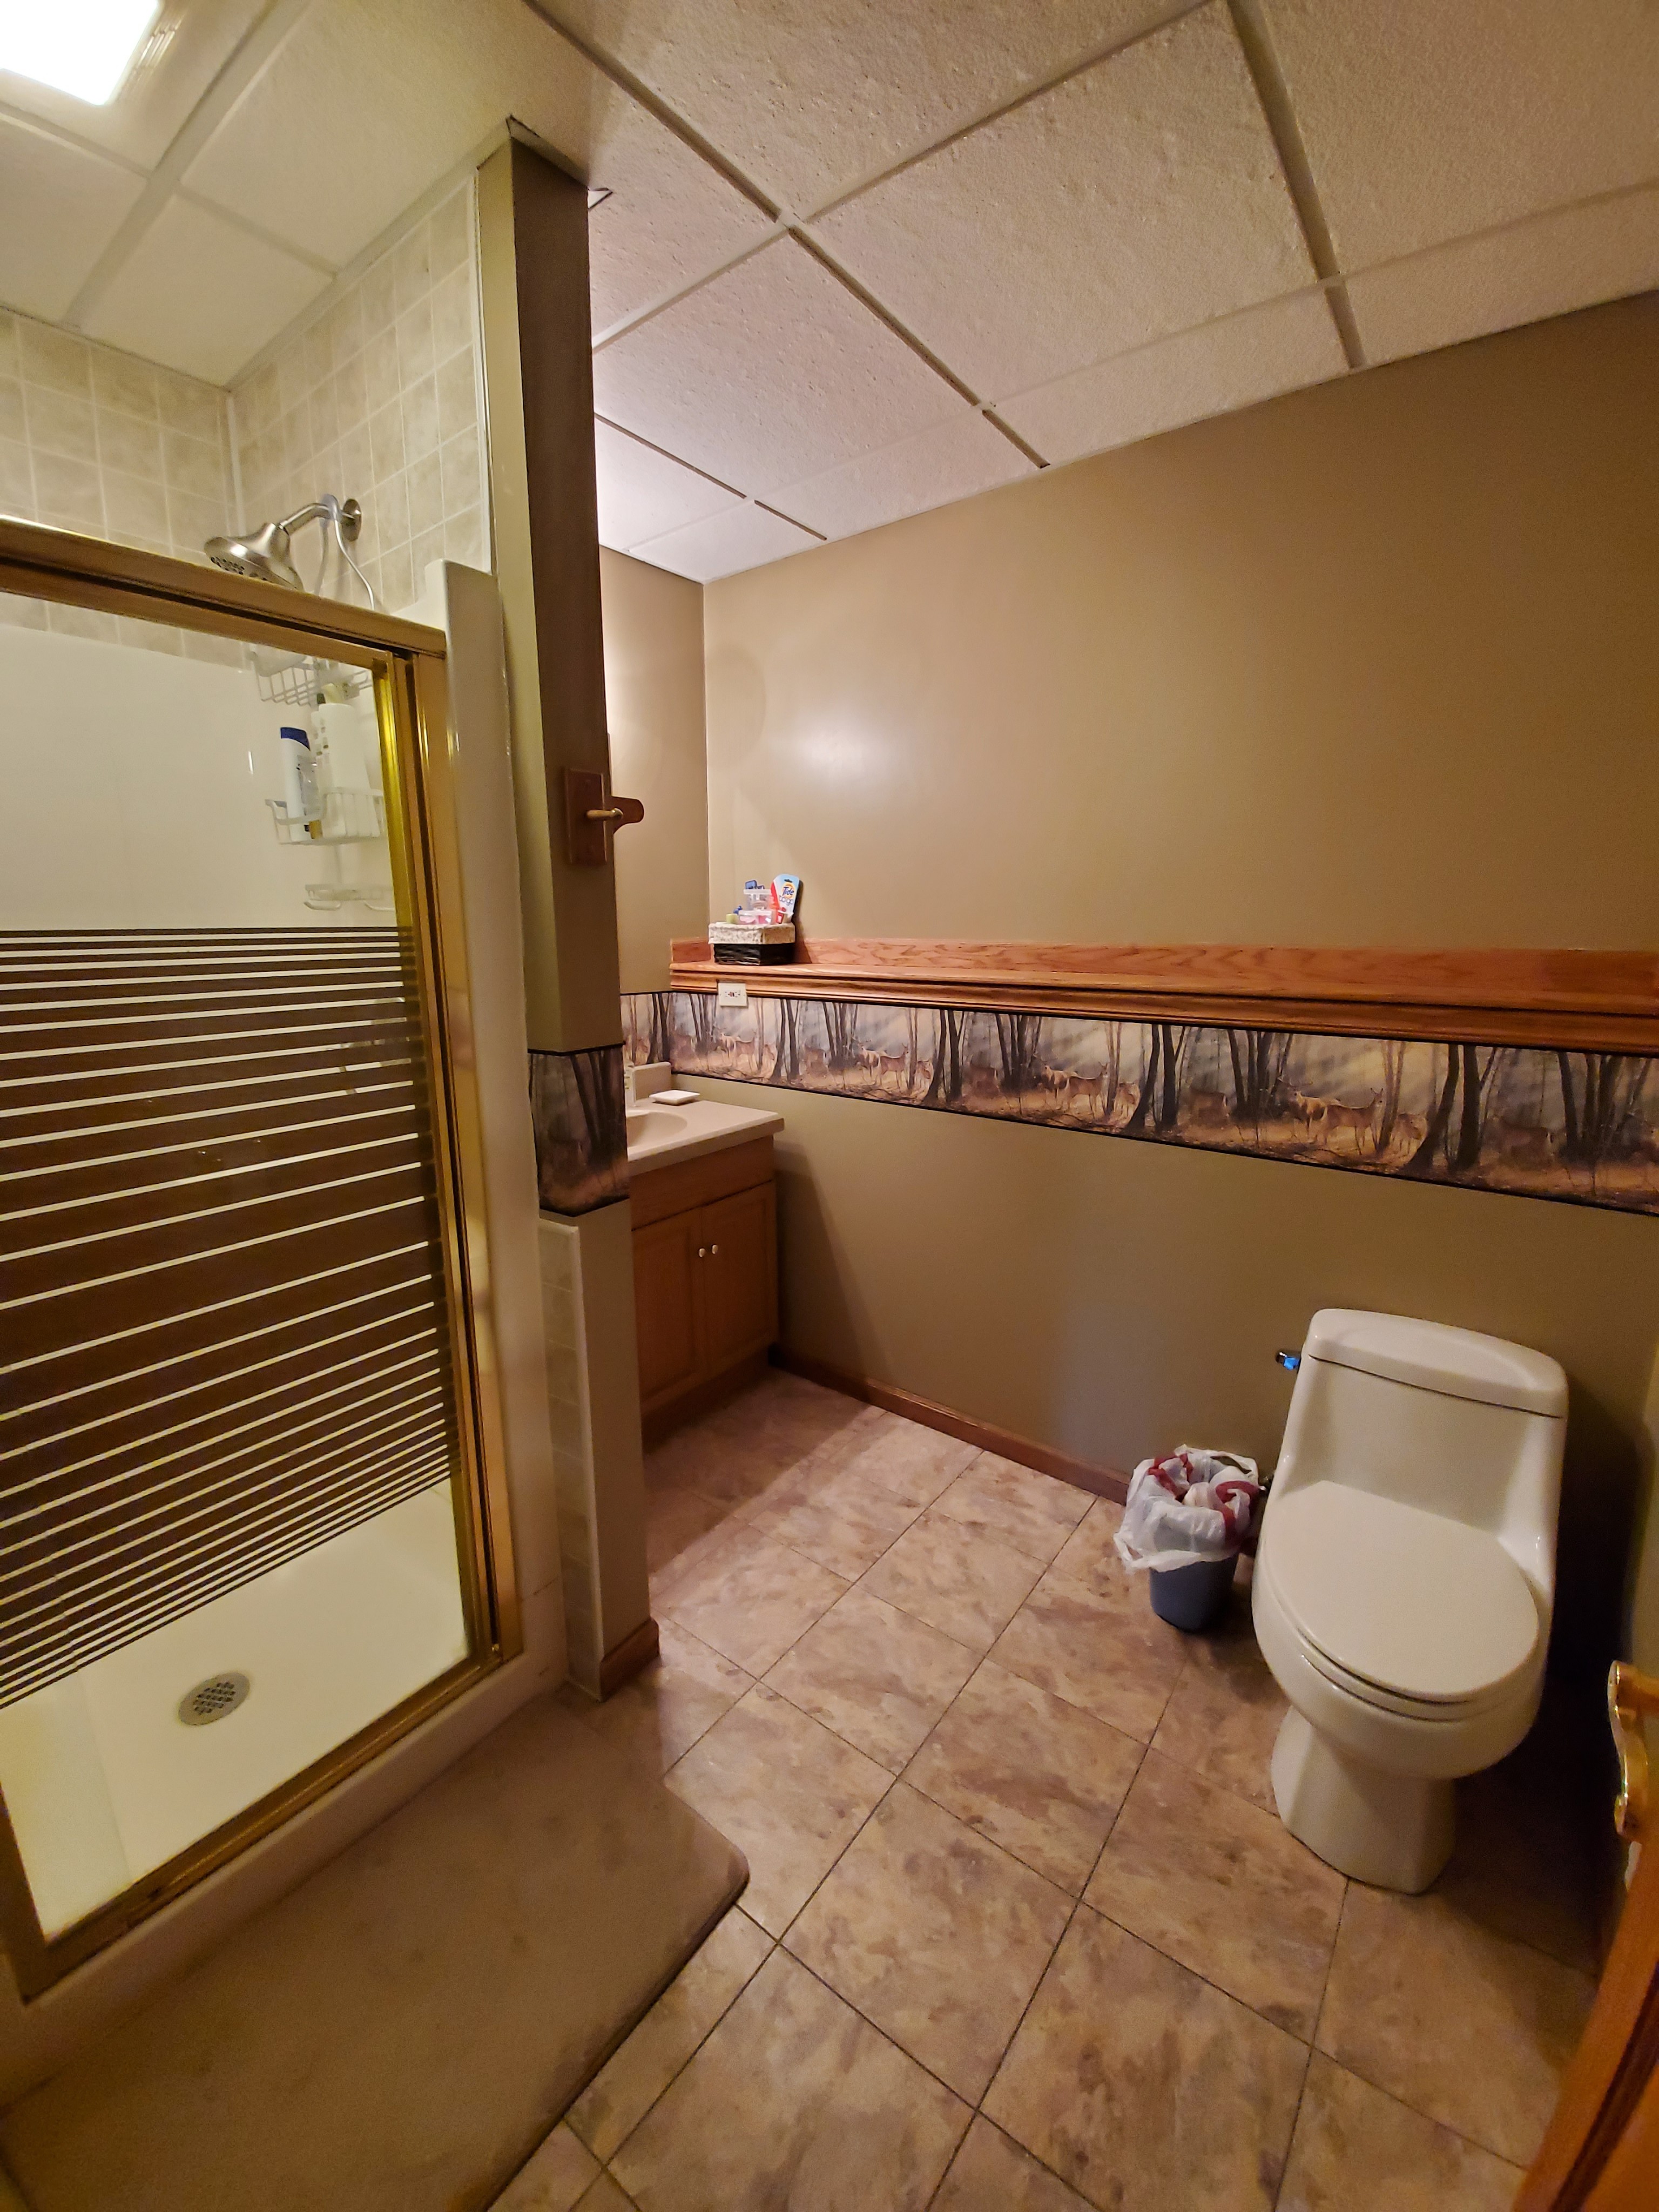
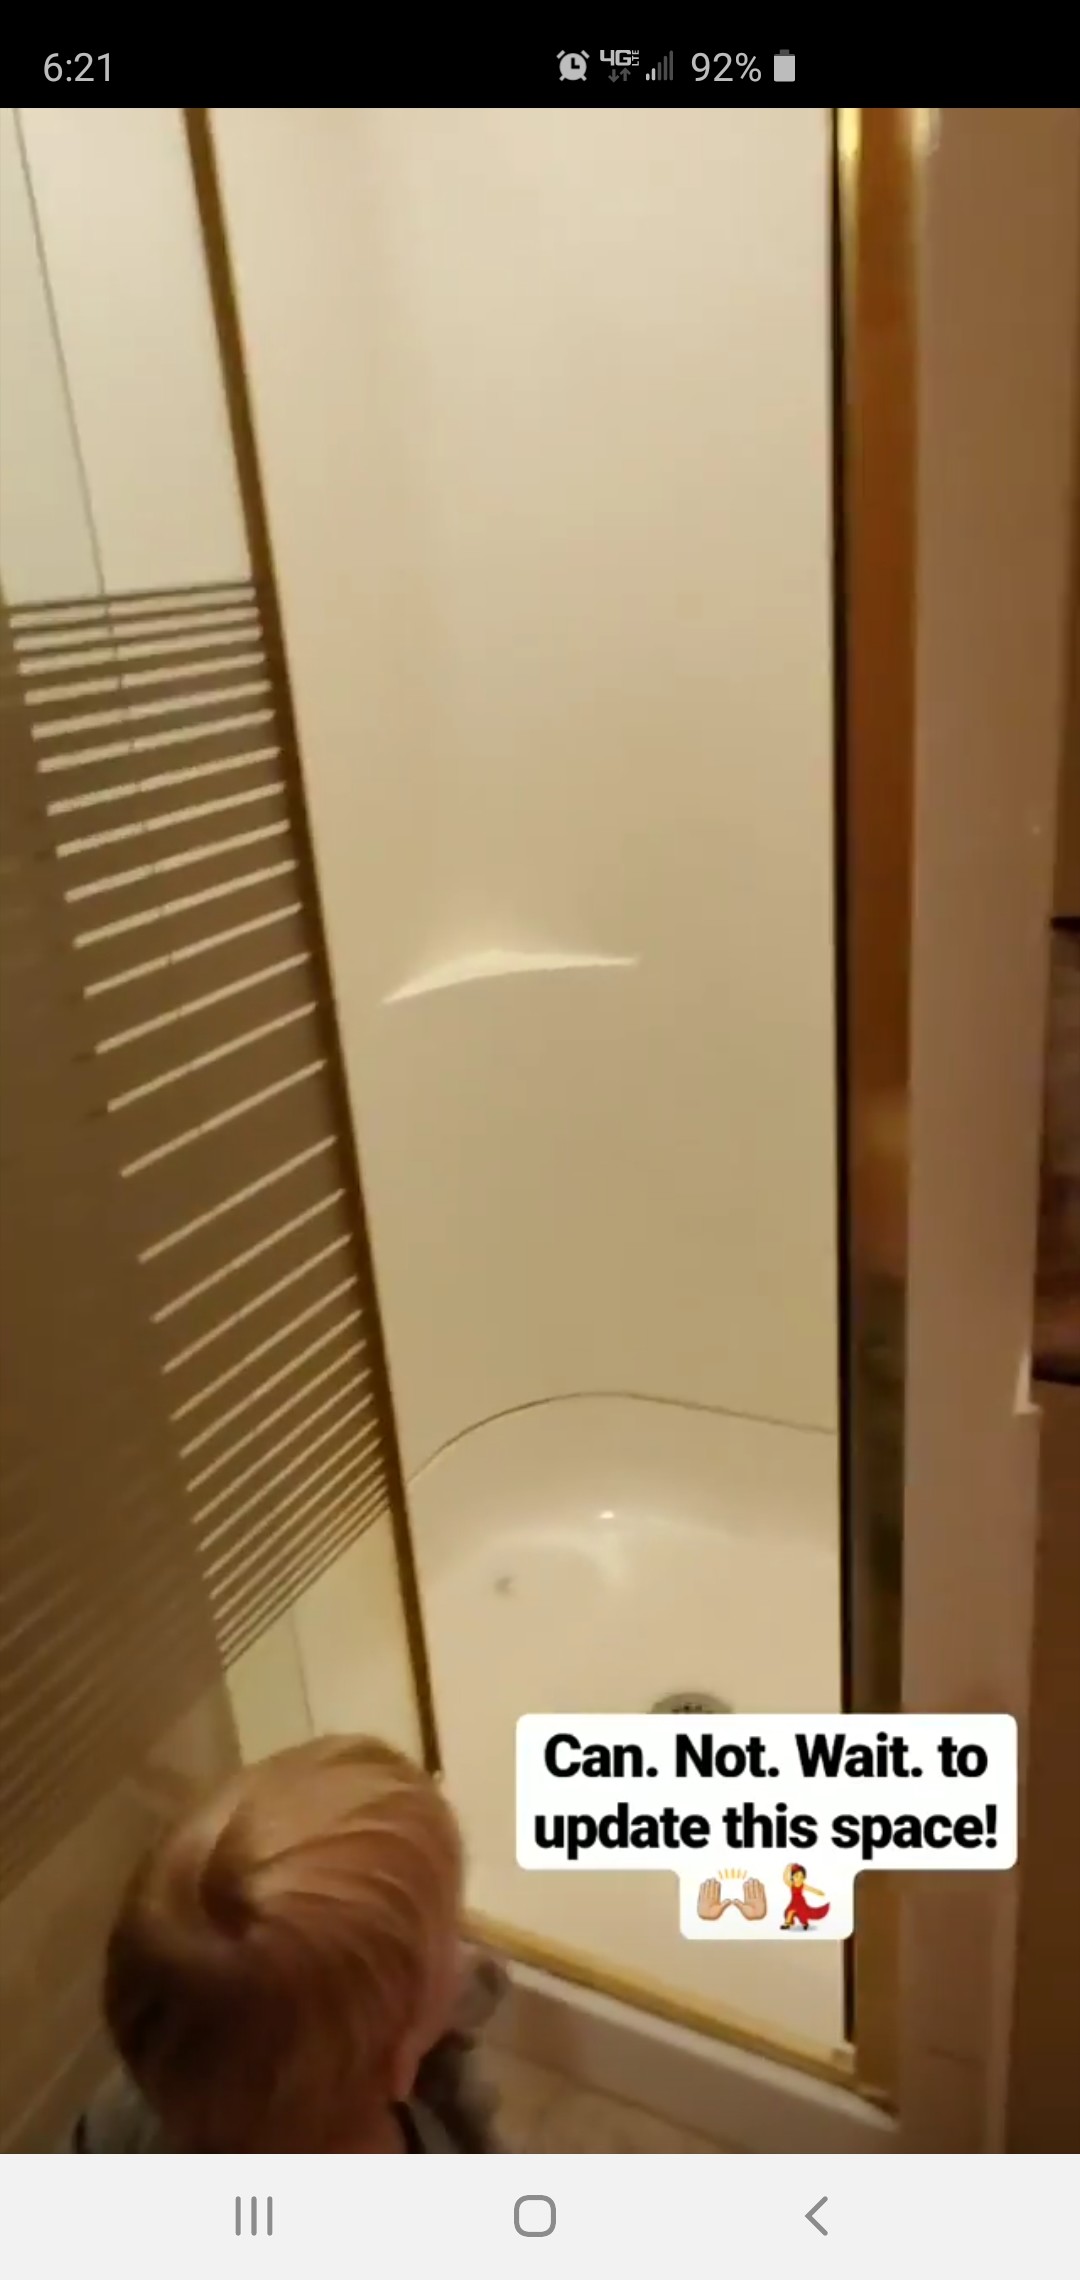
As a reminder, here’s what both rooms looked like pre-renovation!

20191028_125657-1
20191028_125741-1

What We Love

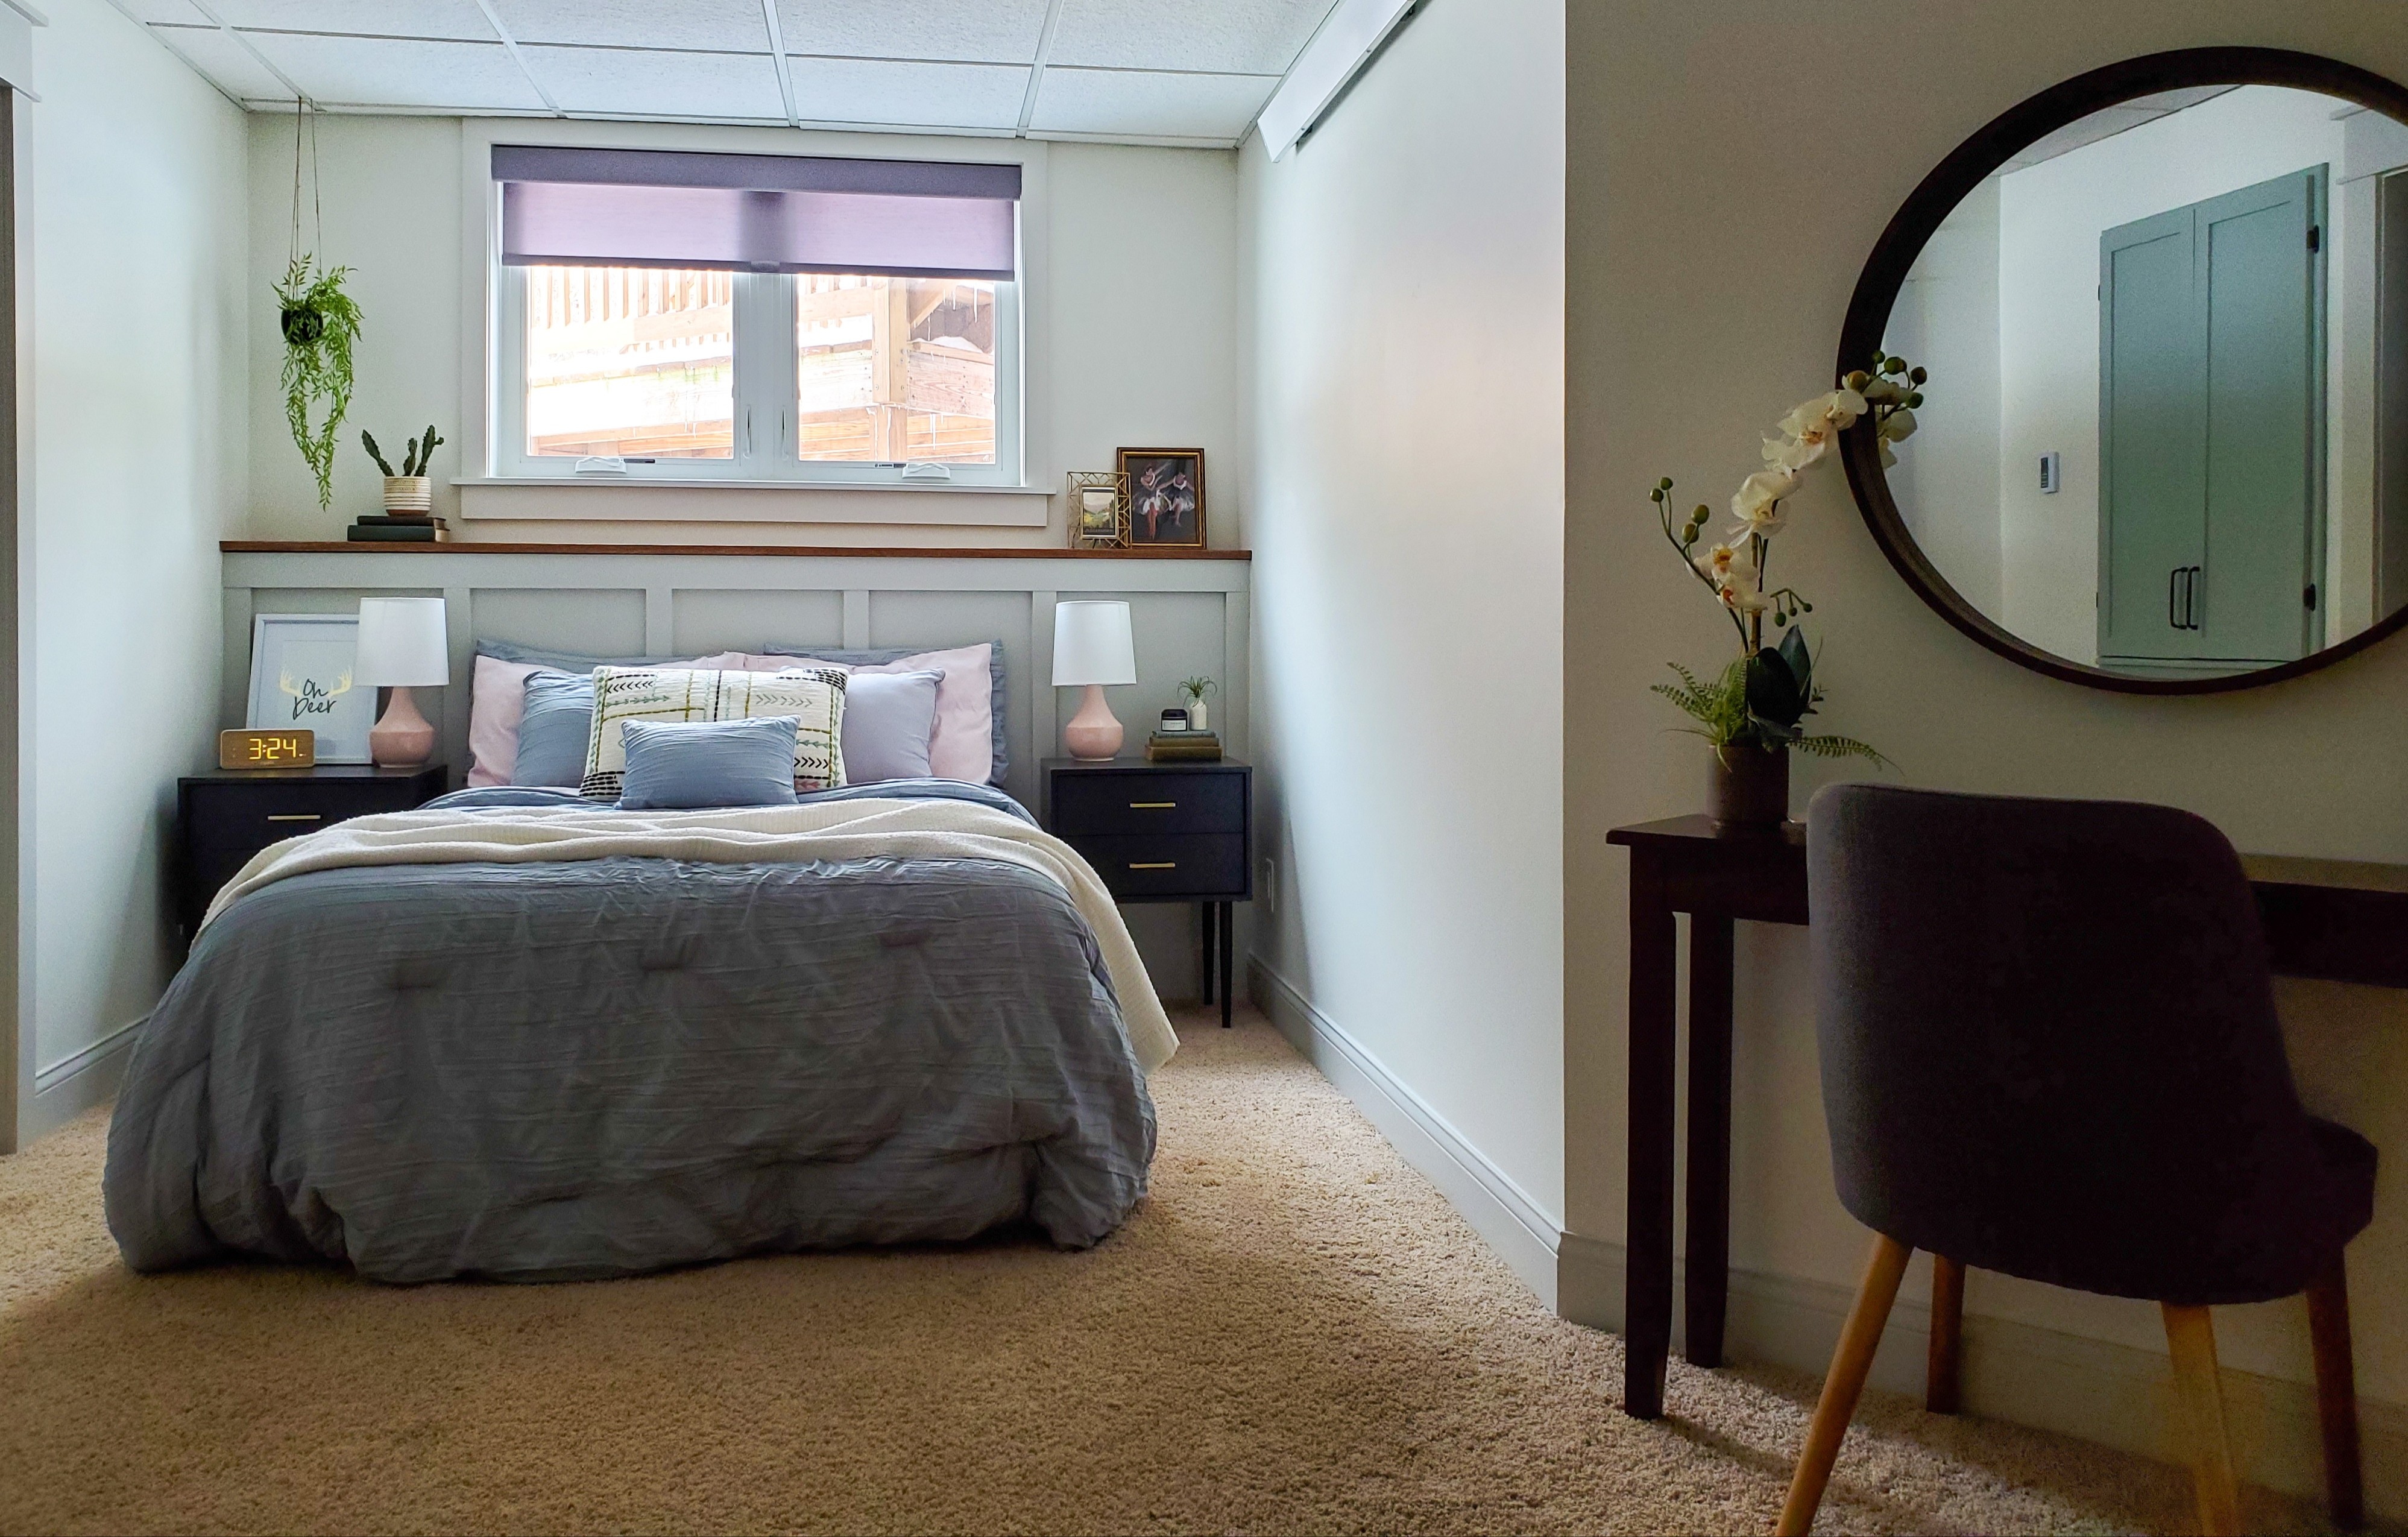
Honestly, I love 98% of the decisions we made with these two rooms! The biggest change we made was adding a window to make a legal bedroom and that was a no-brainer that we are so happy with. The addition of natural light makes a huge difference!

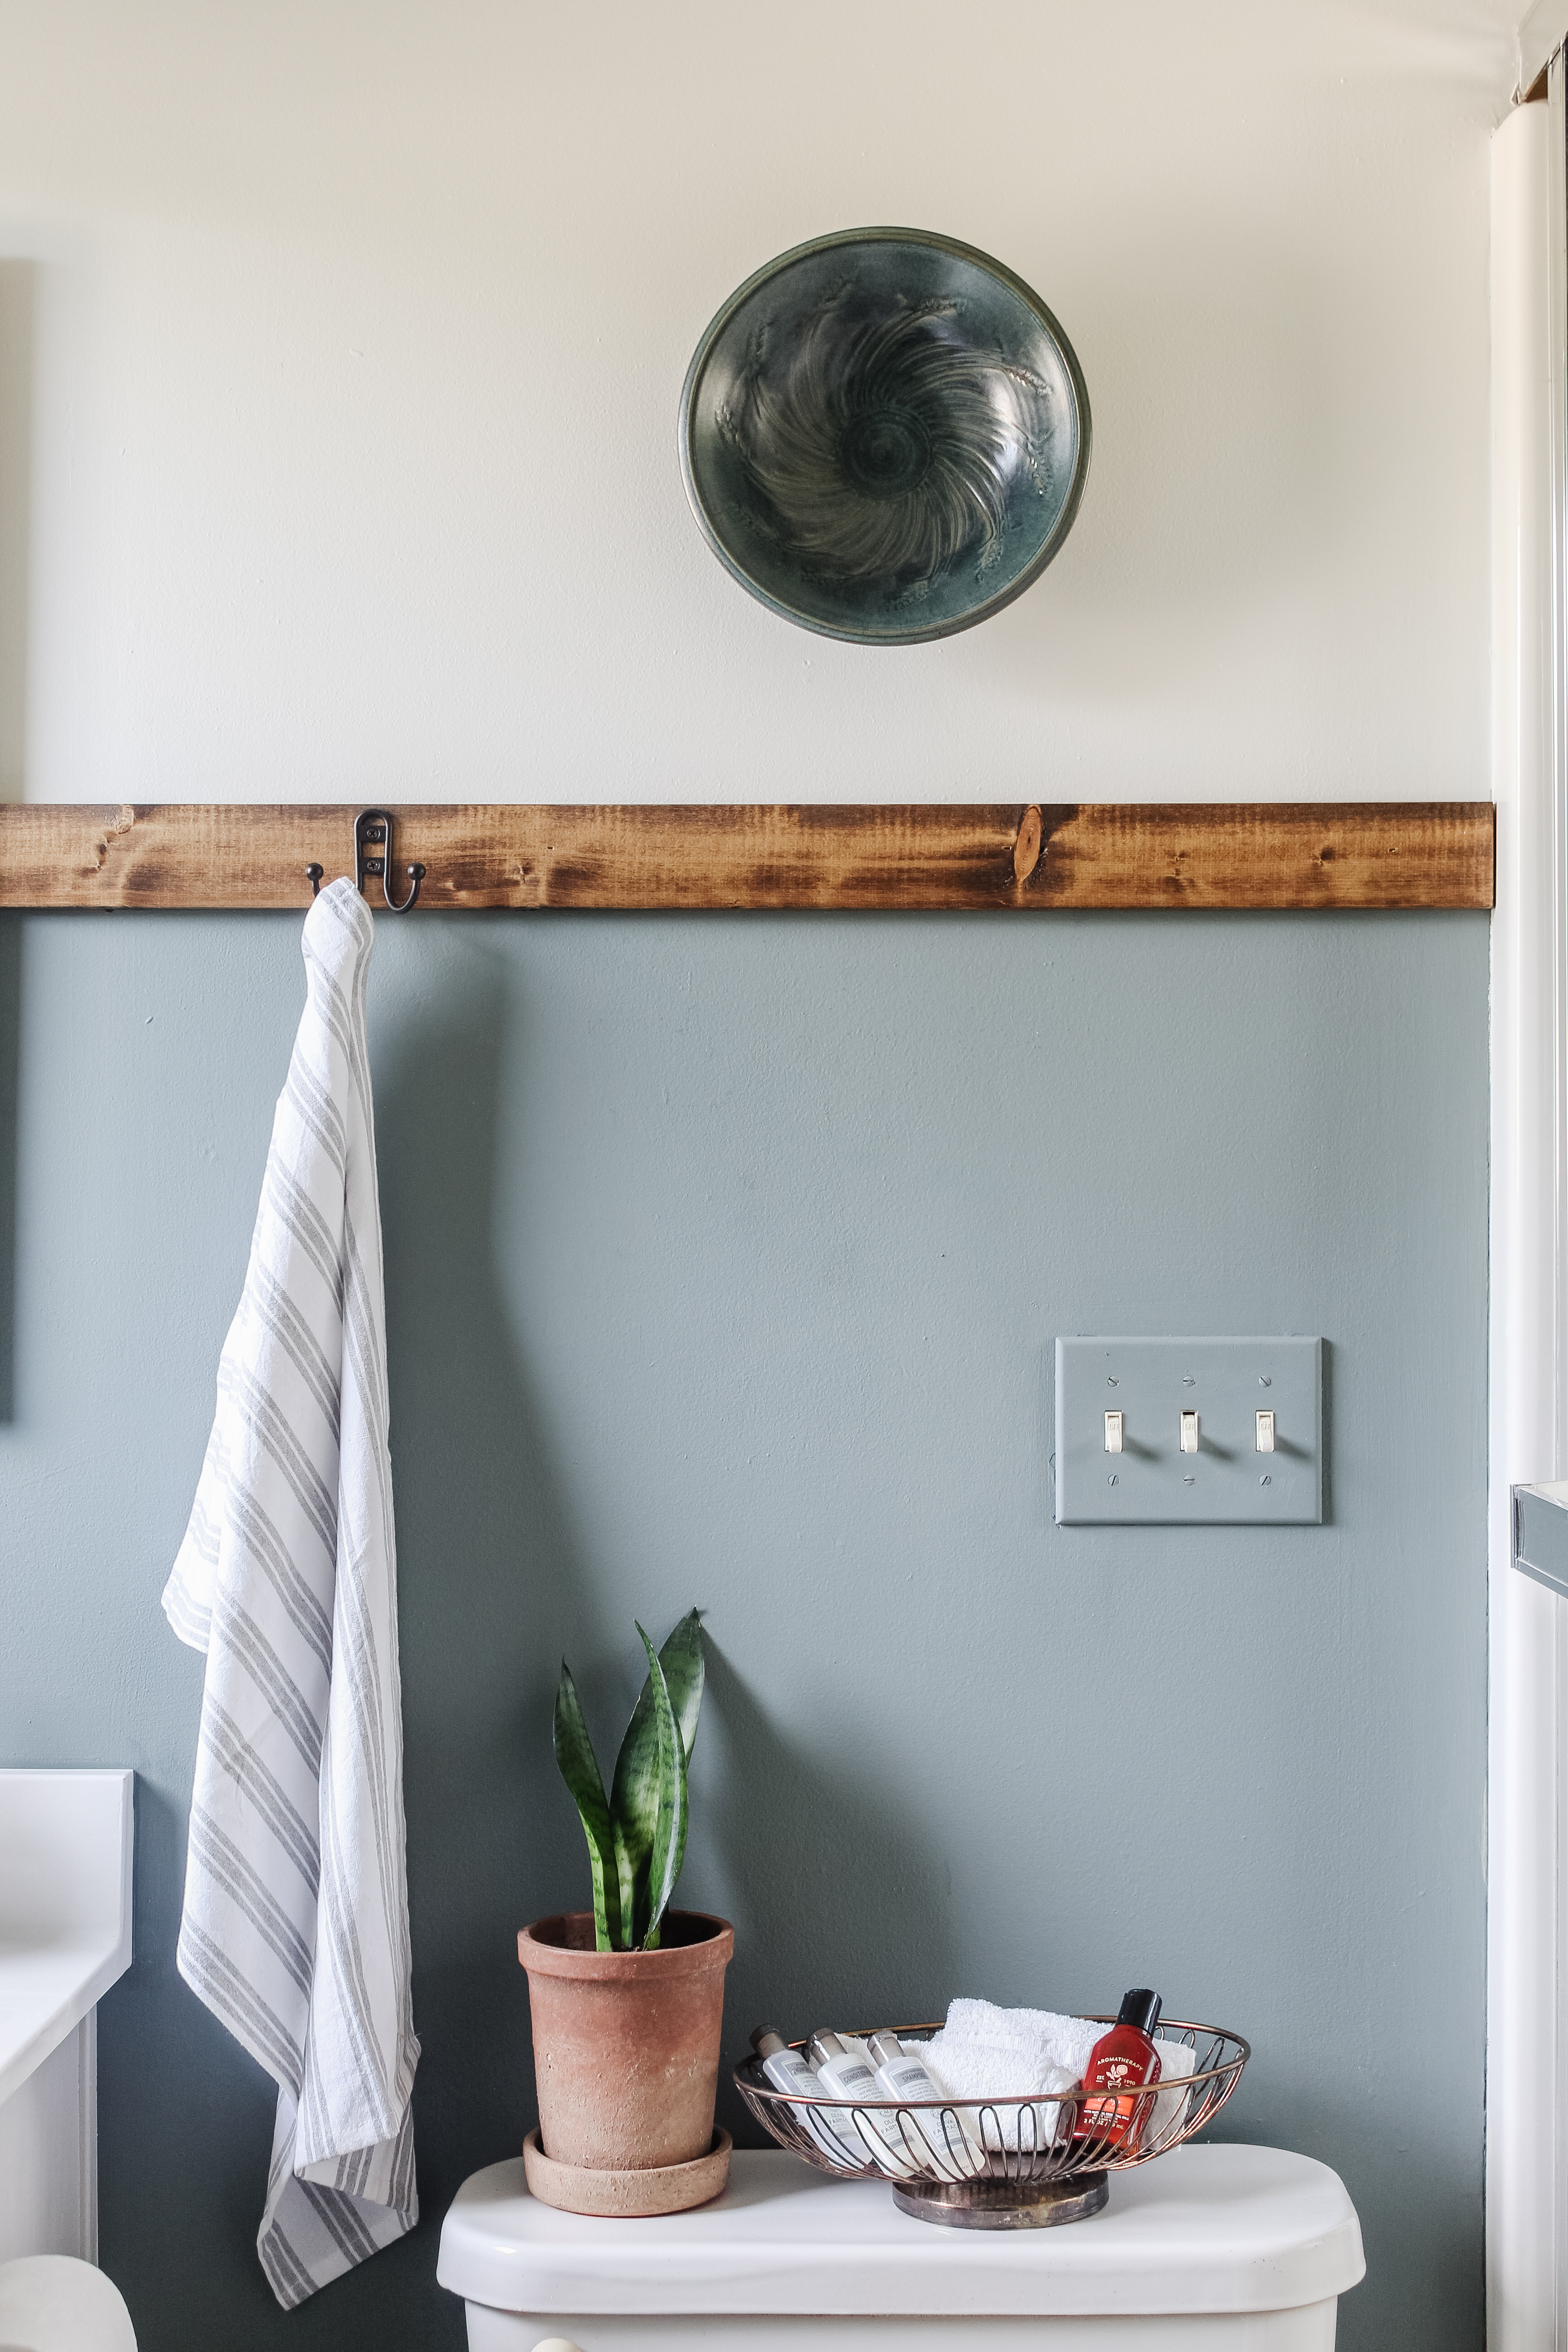
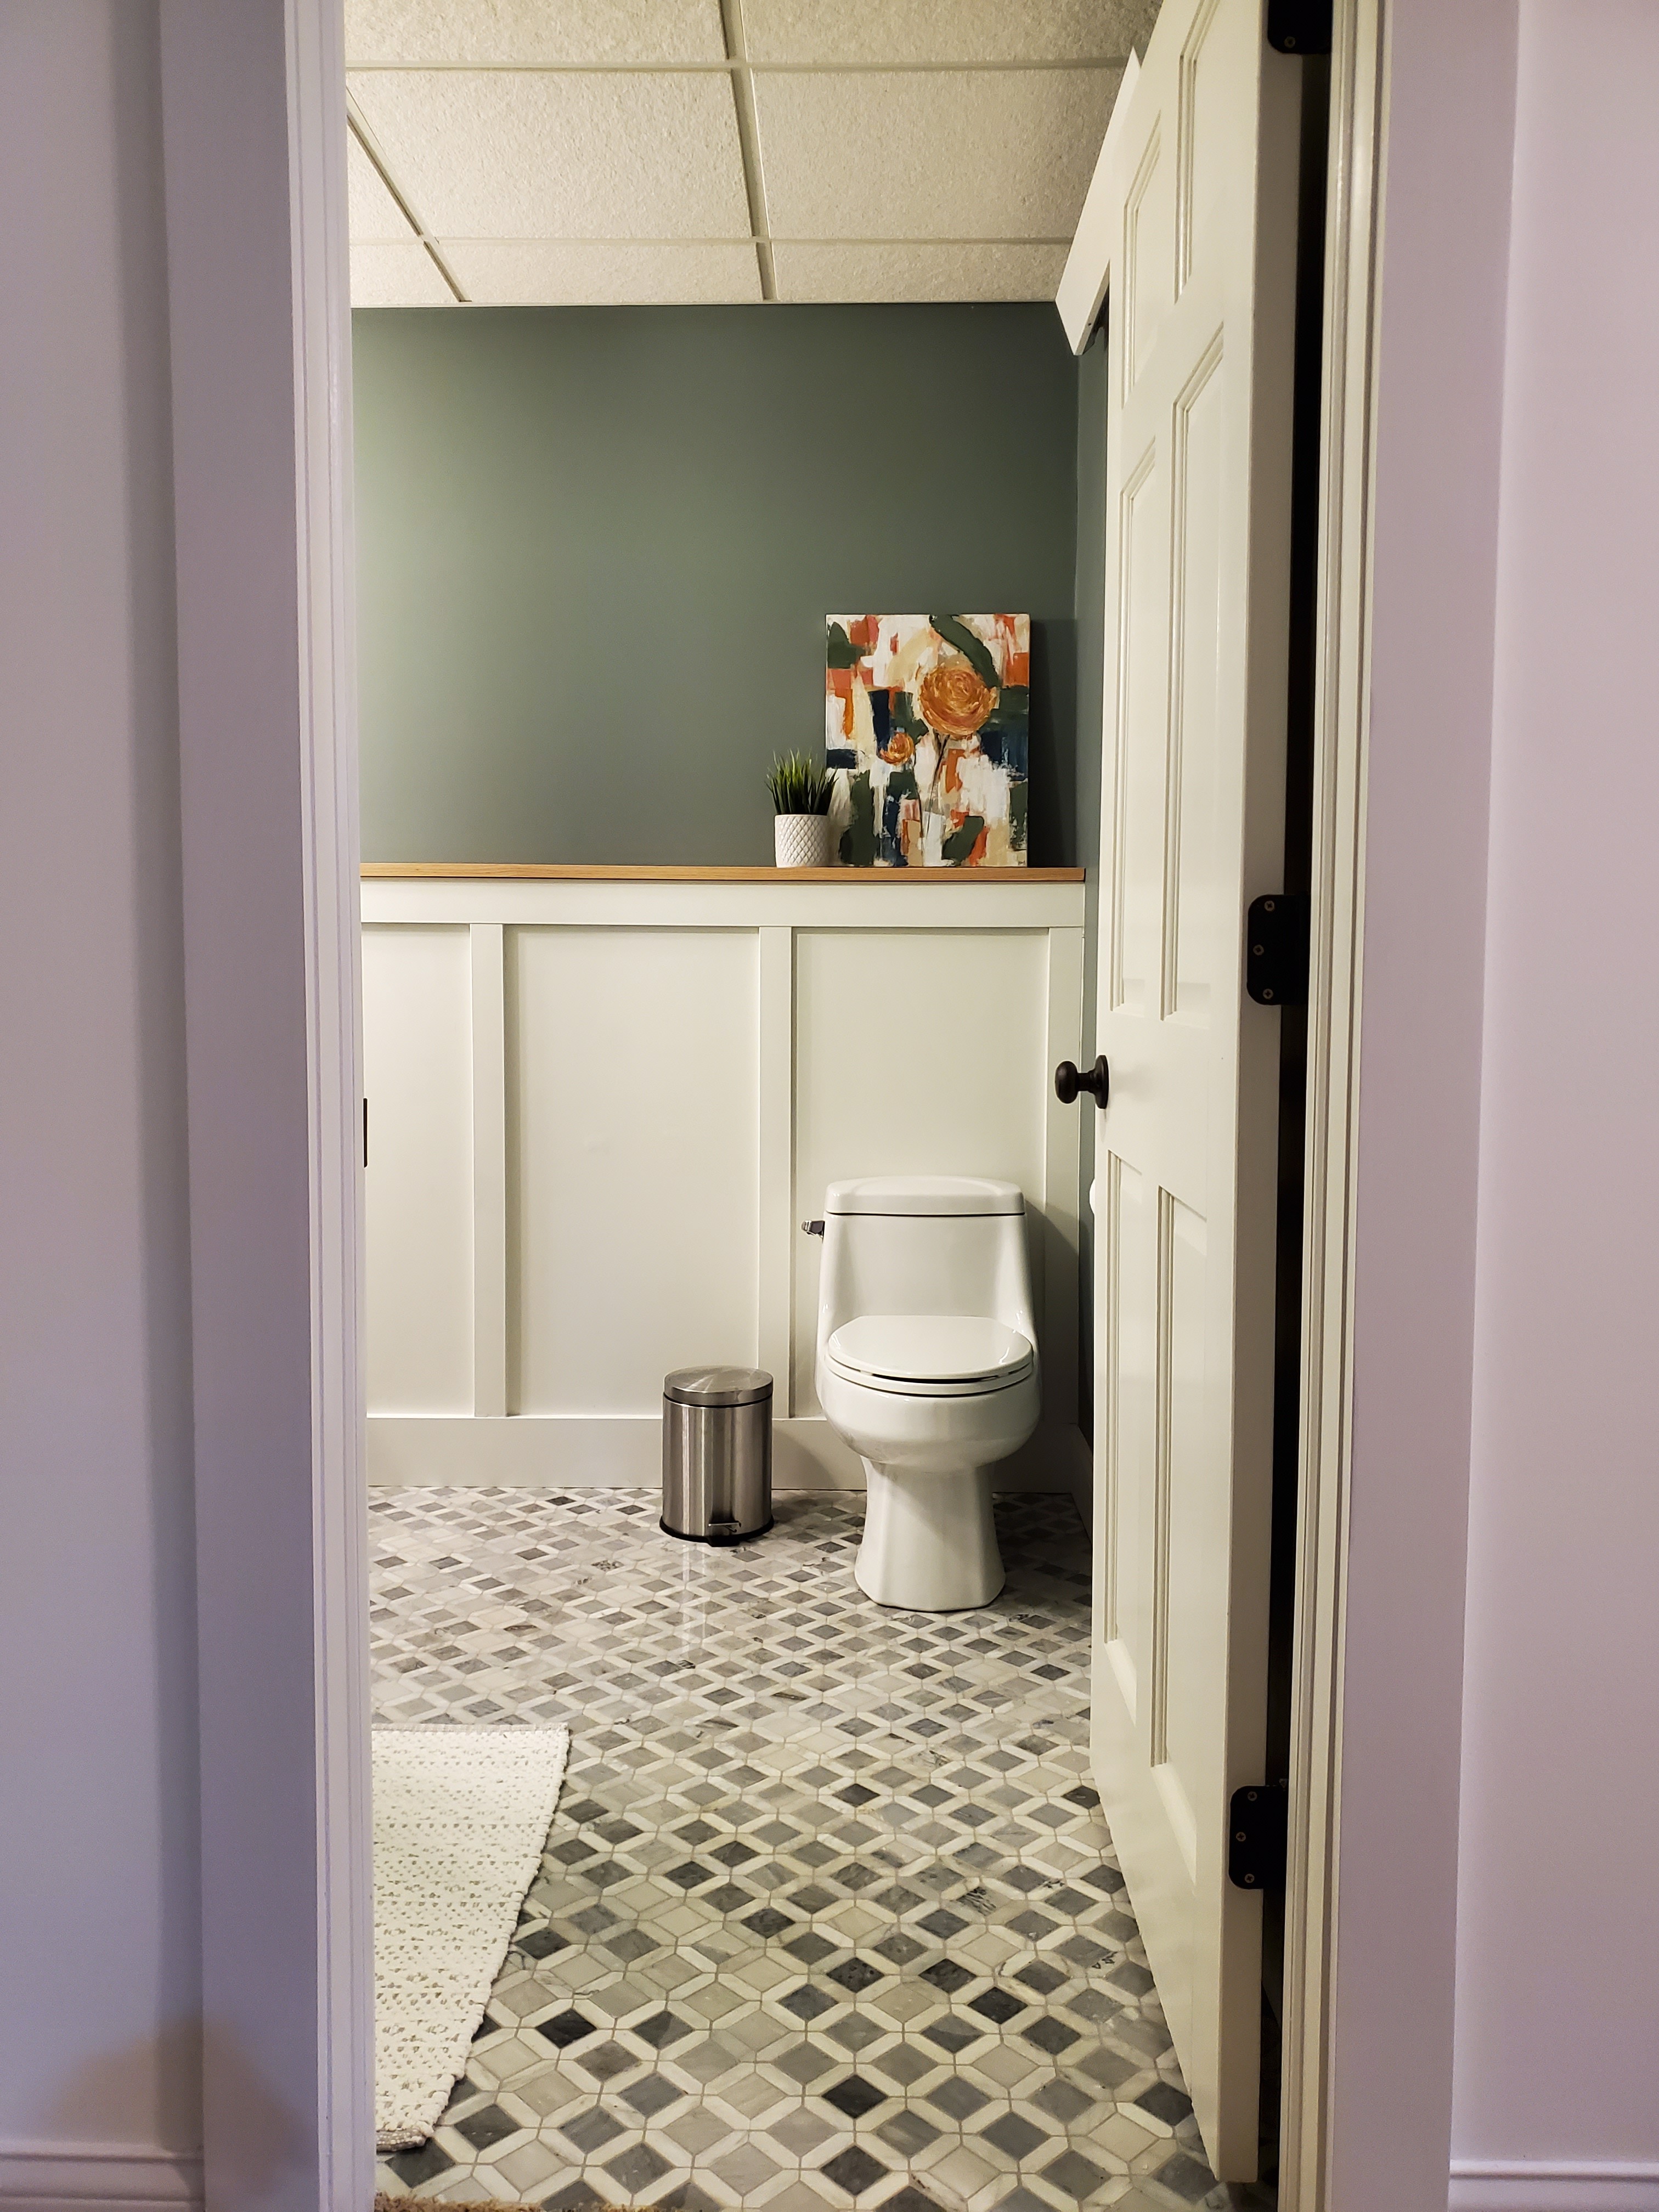
The updated baseboards, chunky door trim, and board and batten on the foundation walls in both rooms all bring some much needed interest and character and I still adore all those added details.

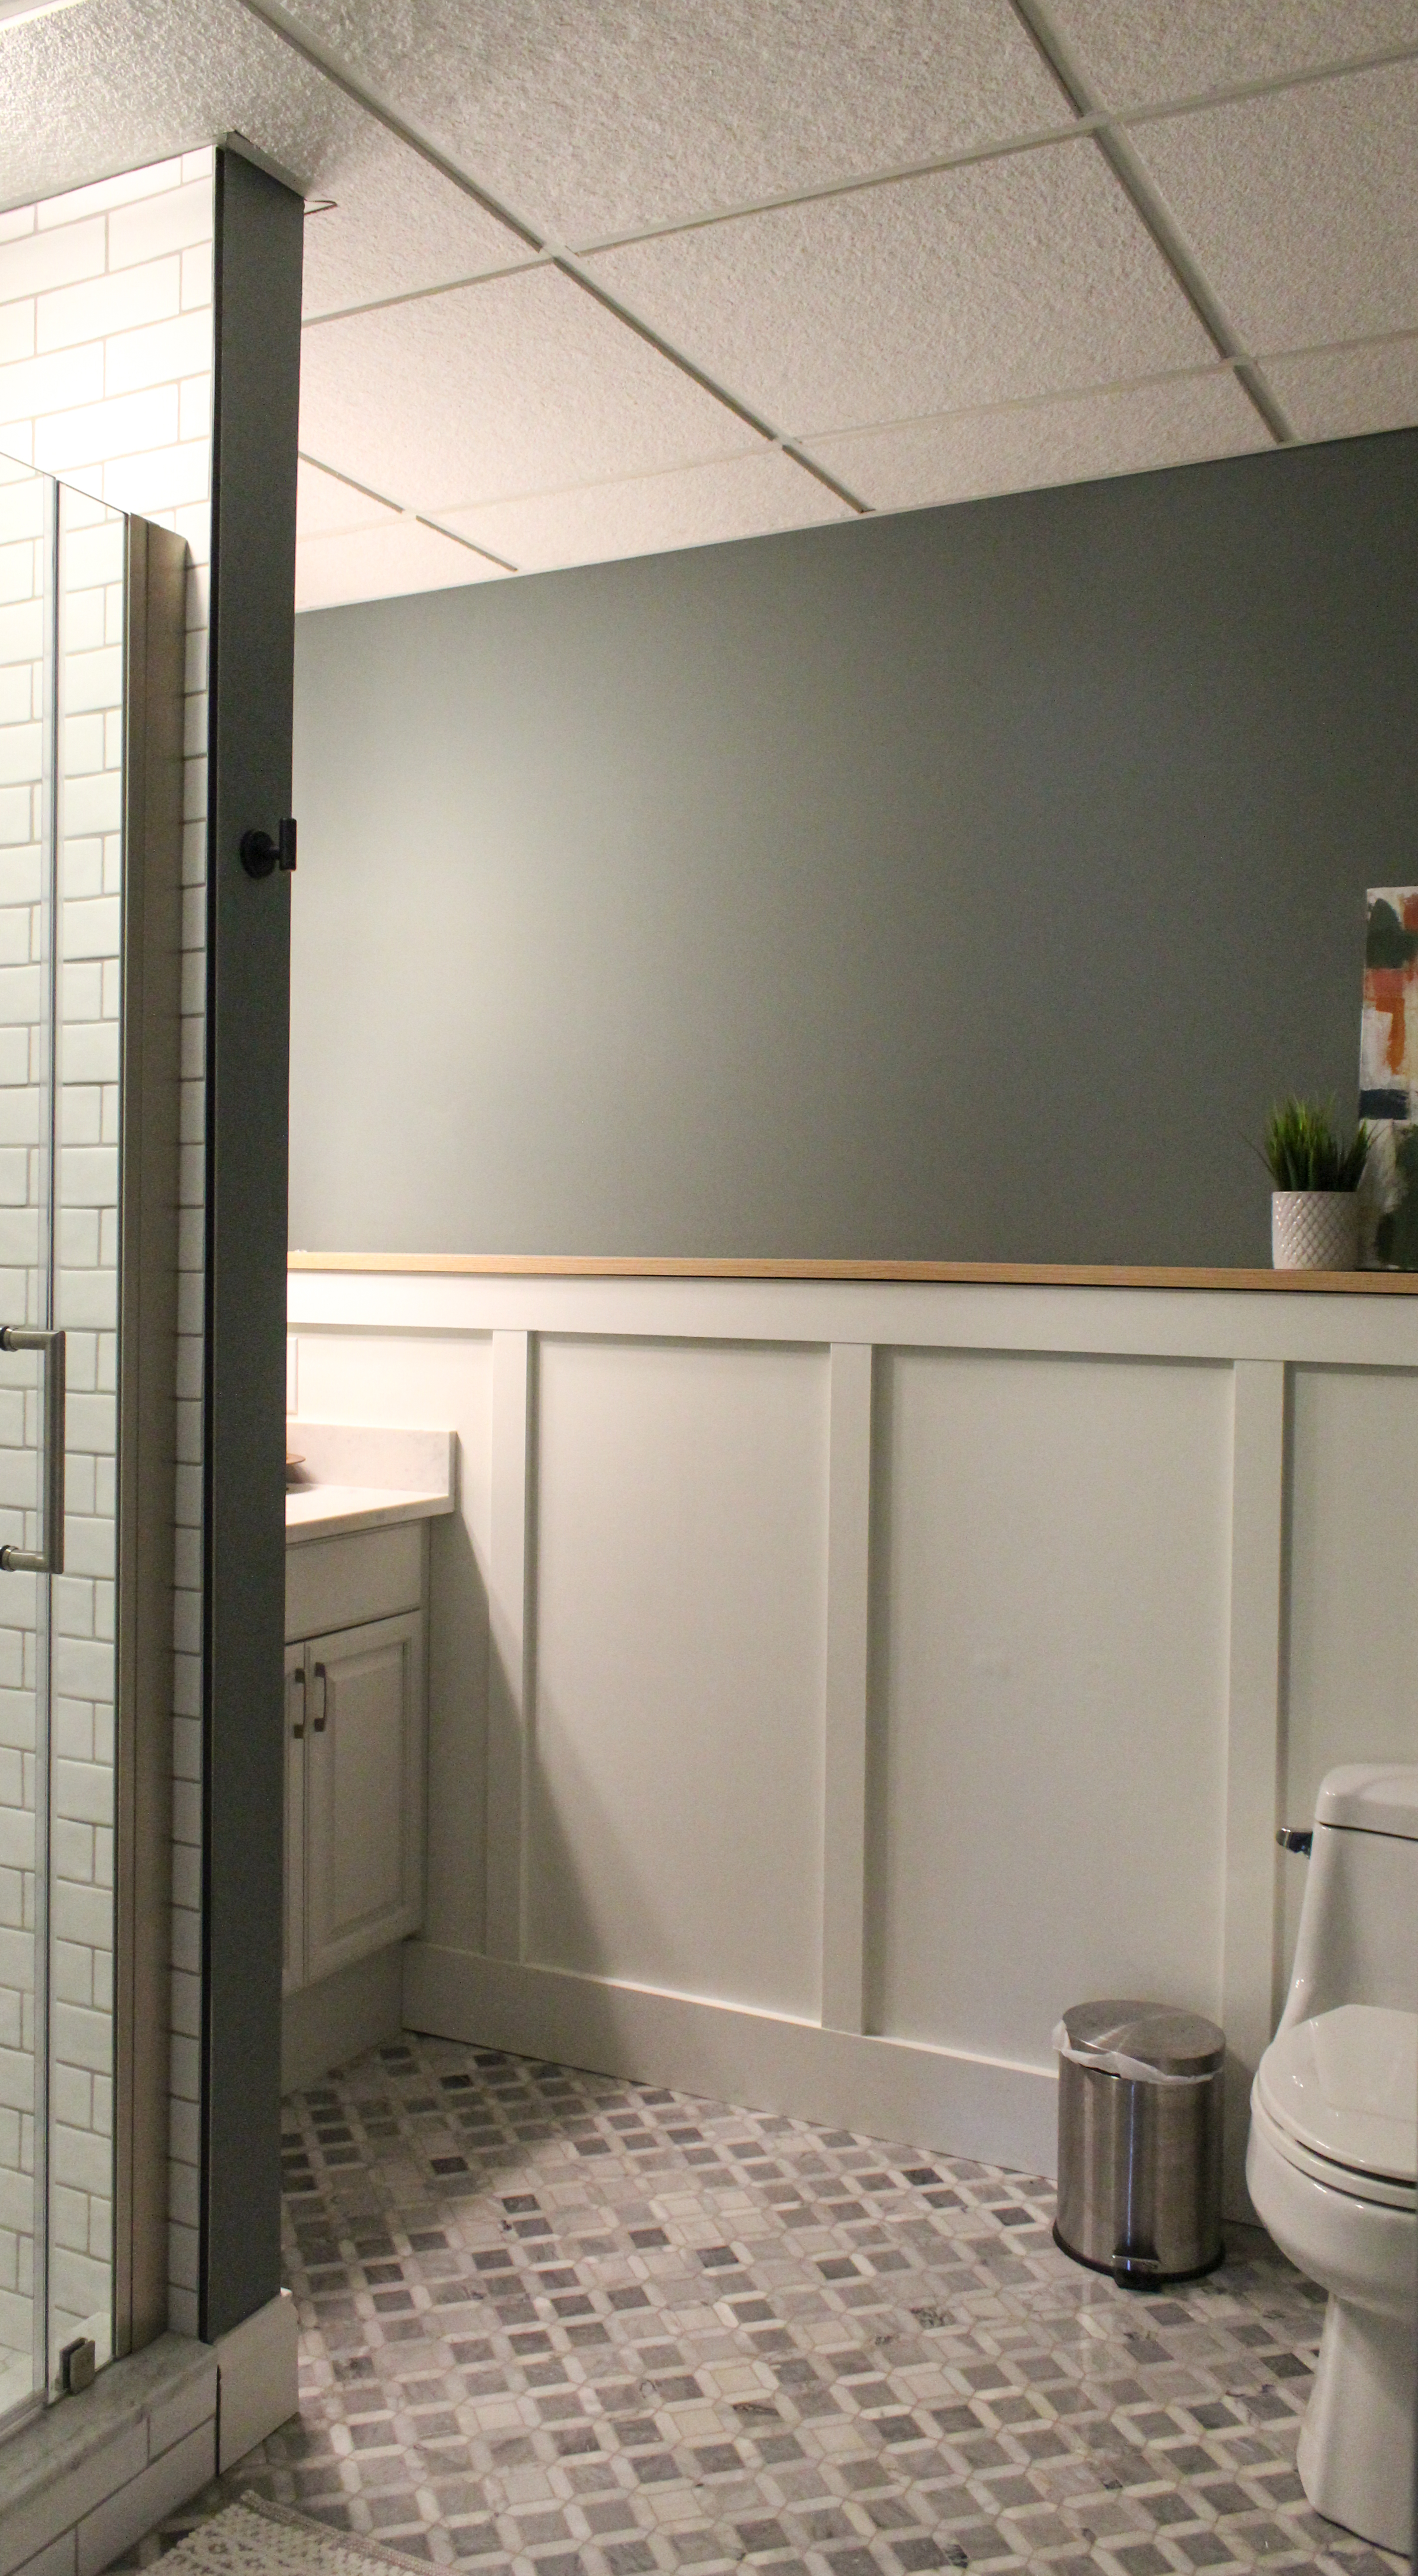
I’m thrilled that we turned the built-in TV nook into a linen cabinet with doors (see more of that process here). It added so much functional storage and I love that the accent color (Sherwin Williams Oyster Bay) makes it a special feature.

The choice to forgo a dresser and instead use a narrow console table as a vanity was also the right decision – guests don’t need all the storage in a dresser and this provides a functional use for what was otherwise a pretty awkward slanted wall.

We also added heaters to both the bathroom and bedroom (there was previously no heat source in either!) My mother-in-law suggested just adding radiant cove heaters to a few of the walls and this was a good choice. They provide a nice heat for our guests and are tucked up near the ceiling and blend in fairly discreetly.

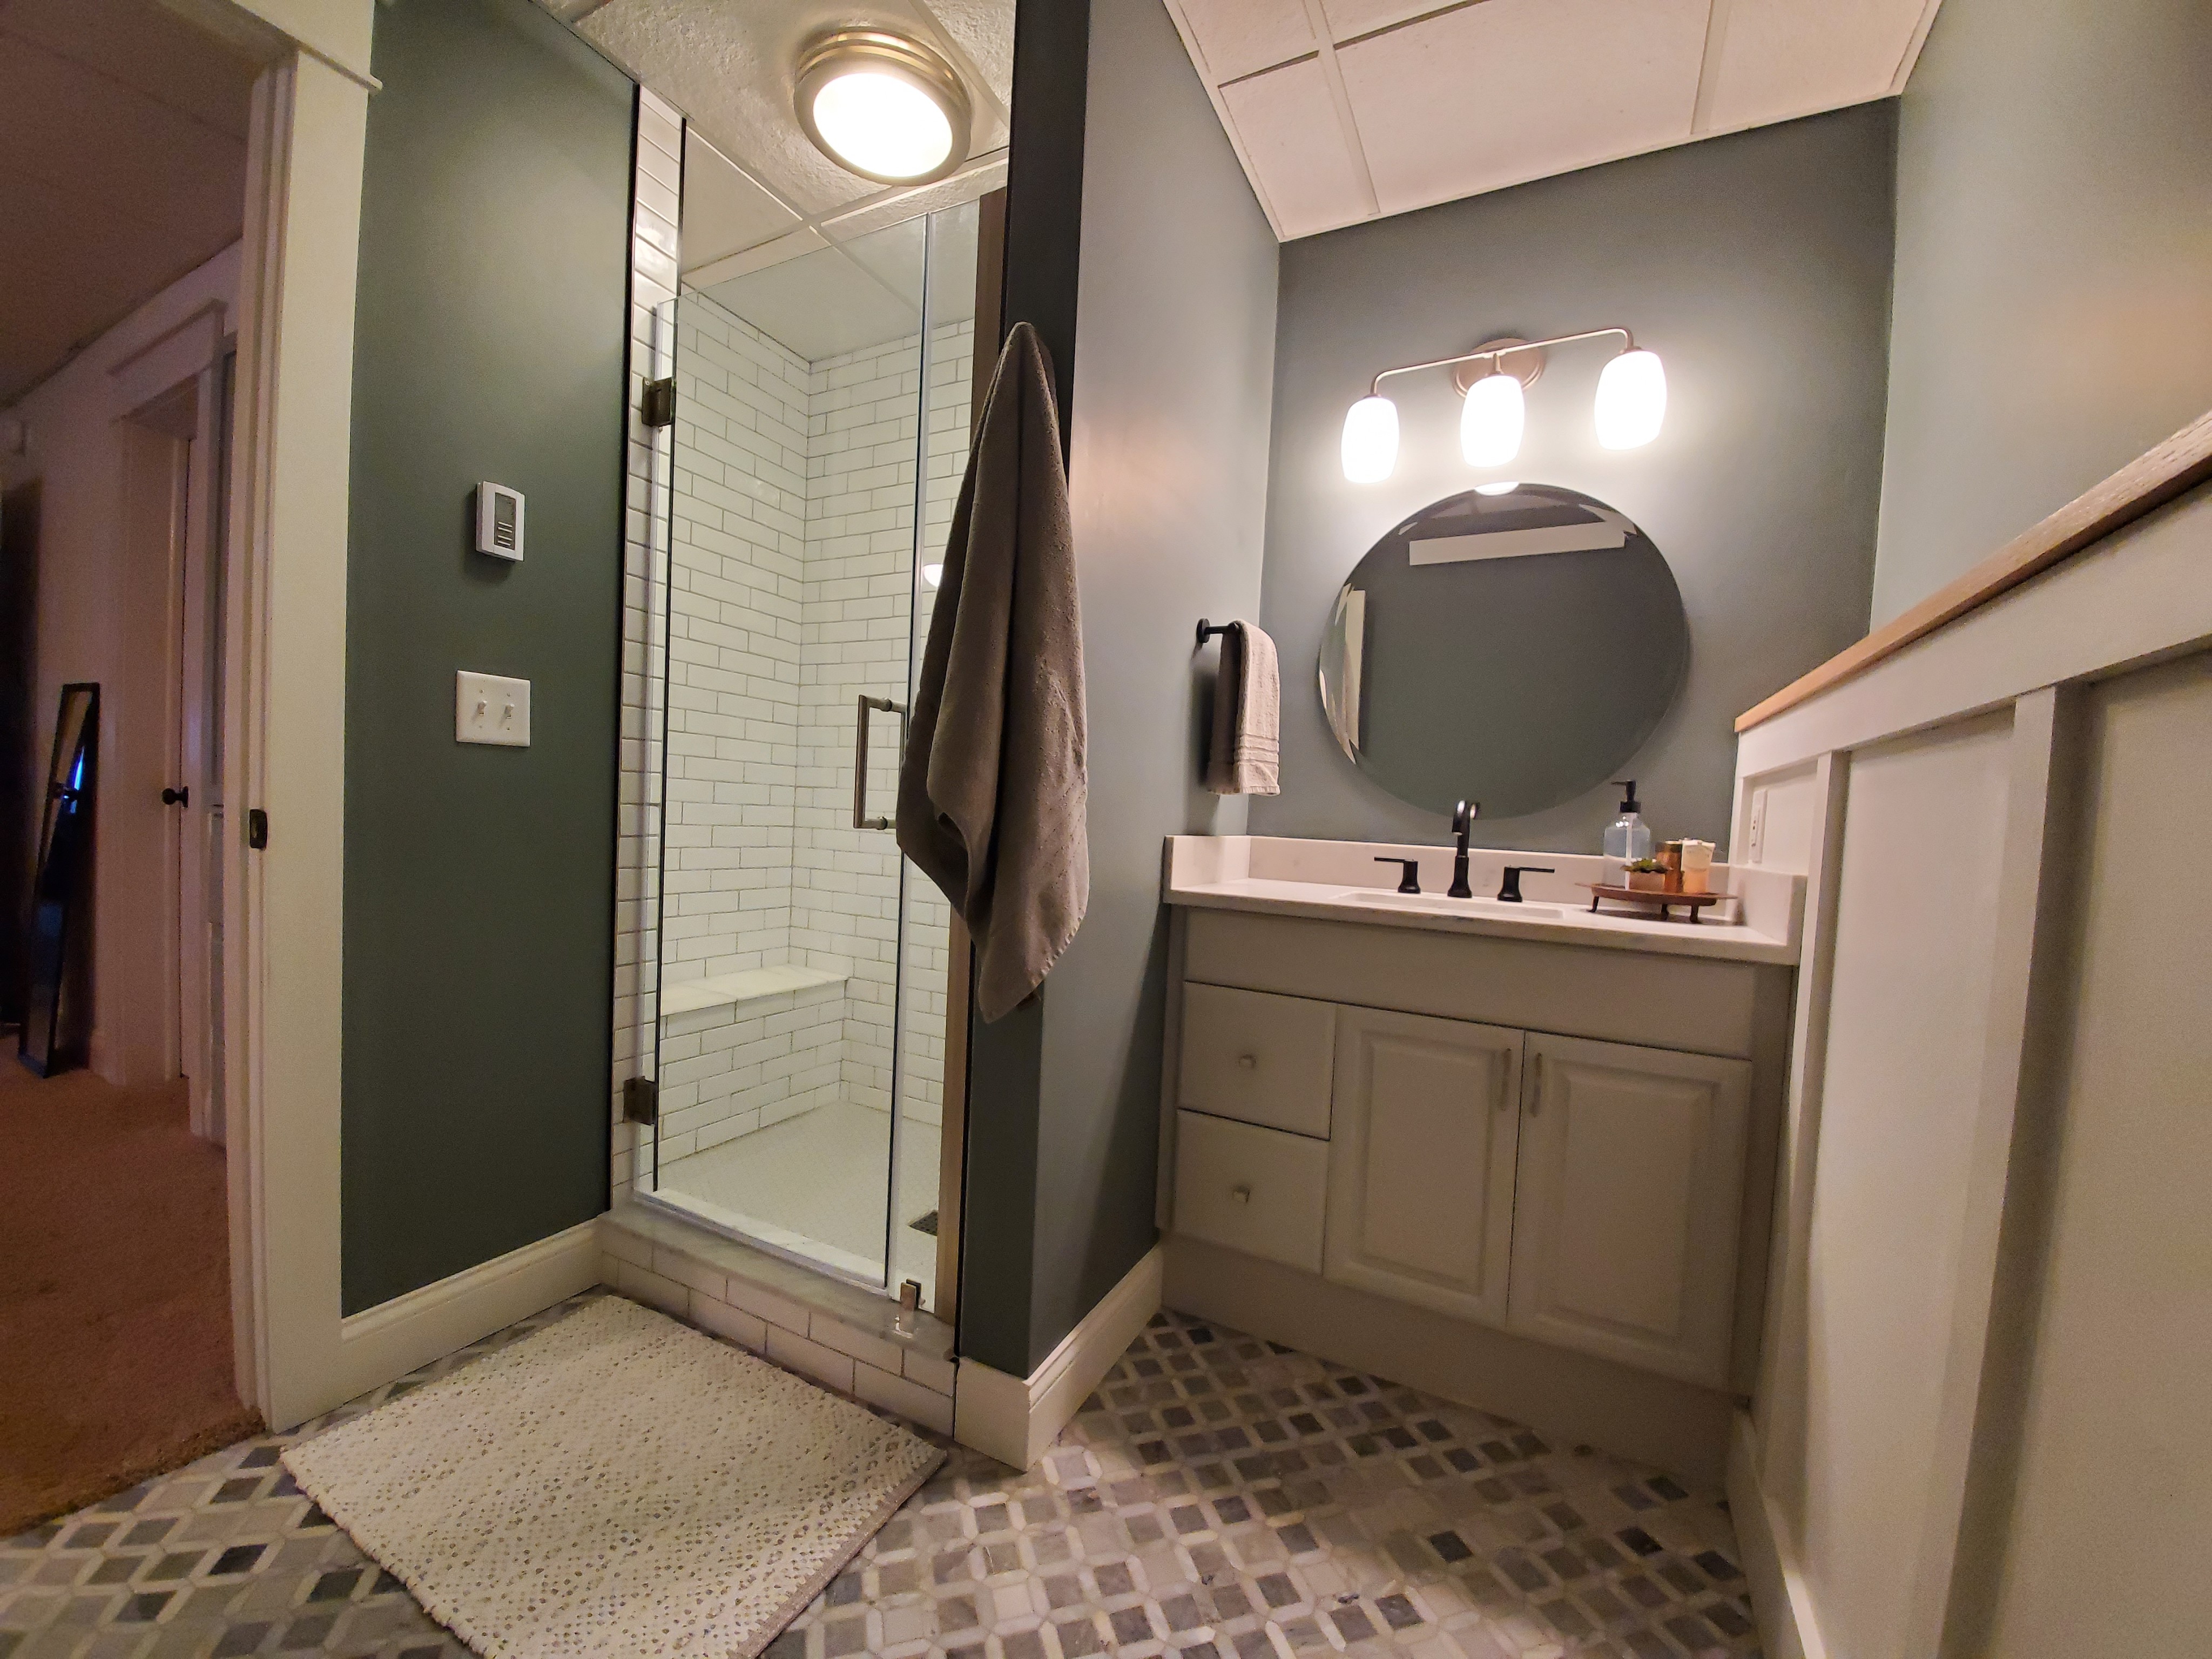
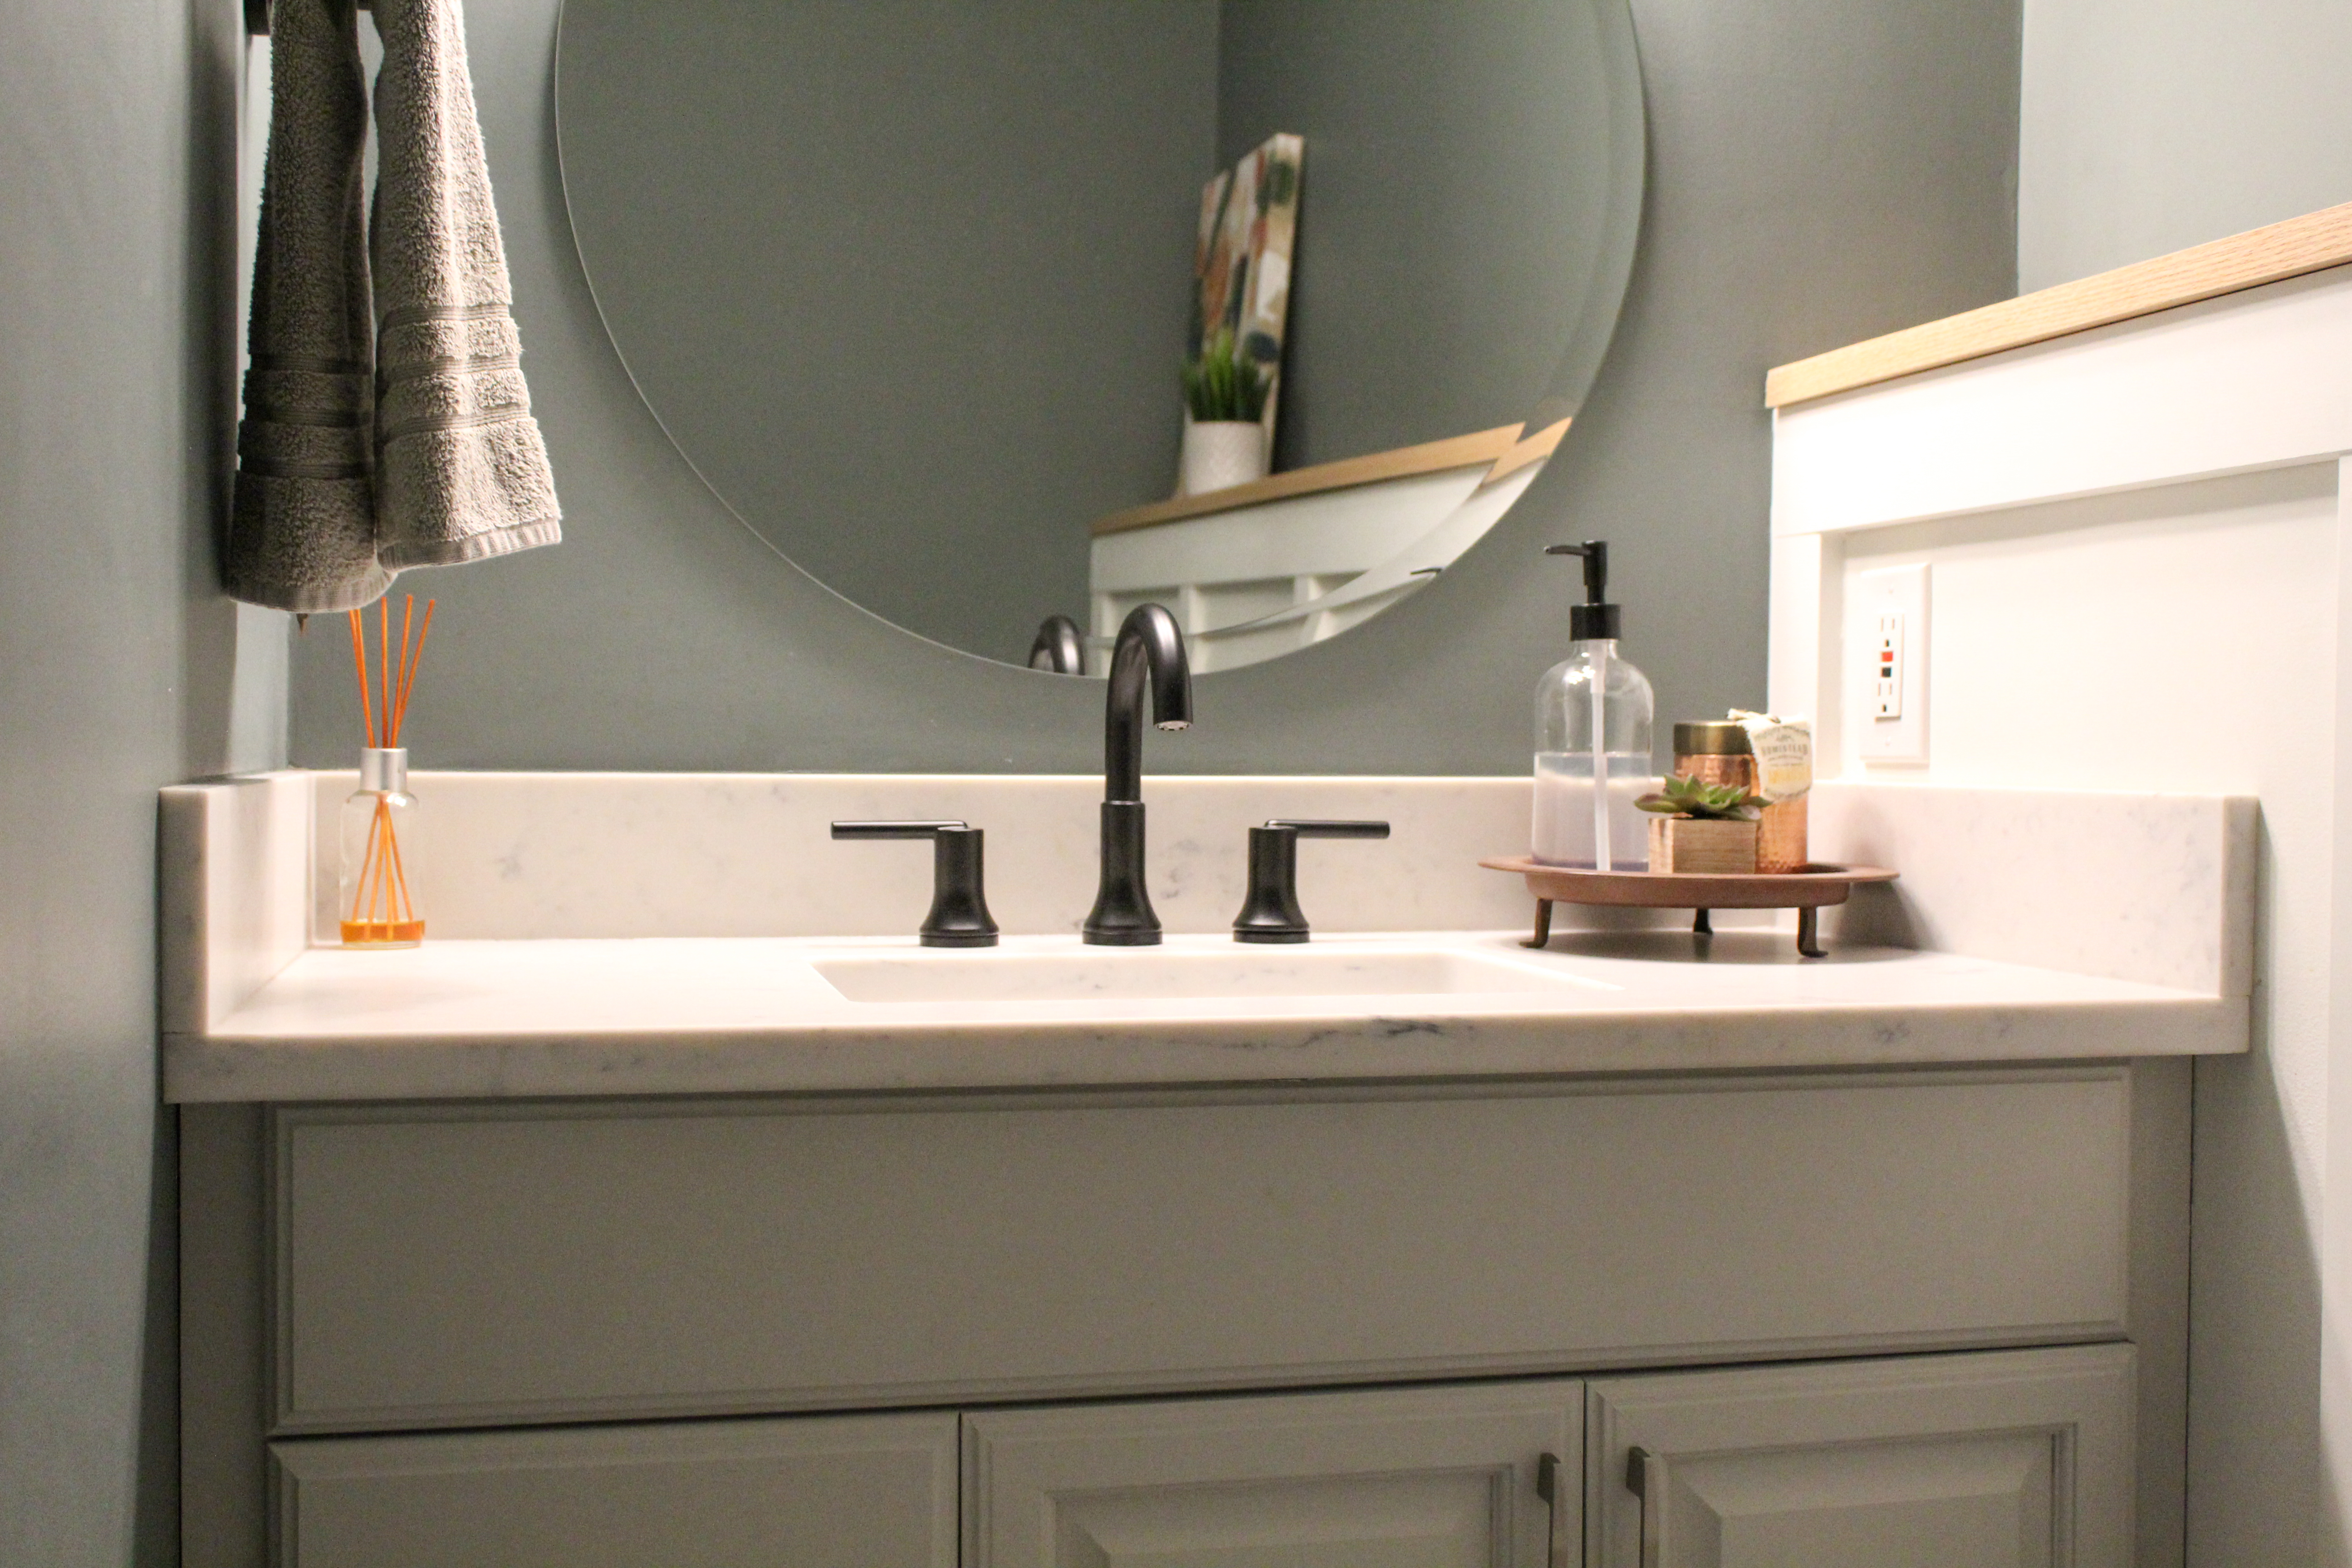
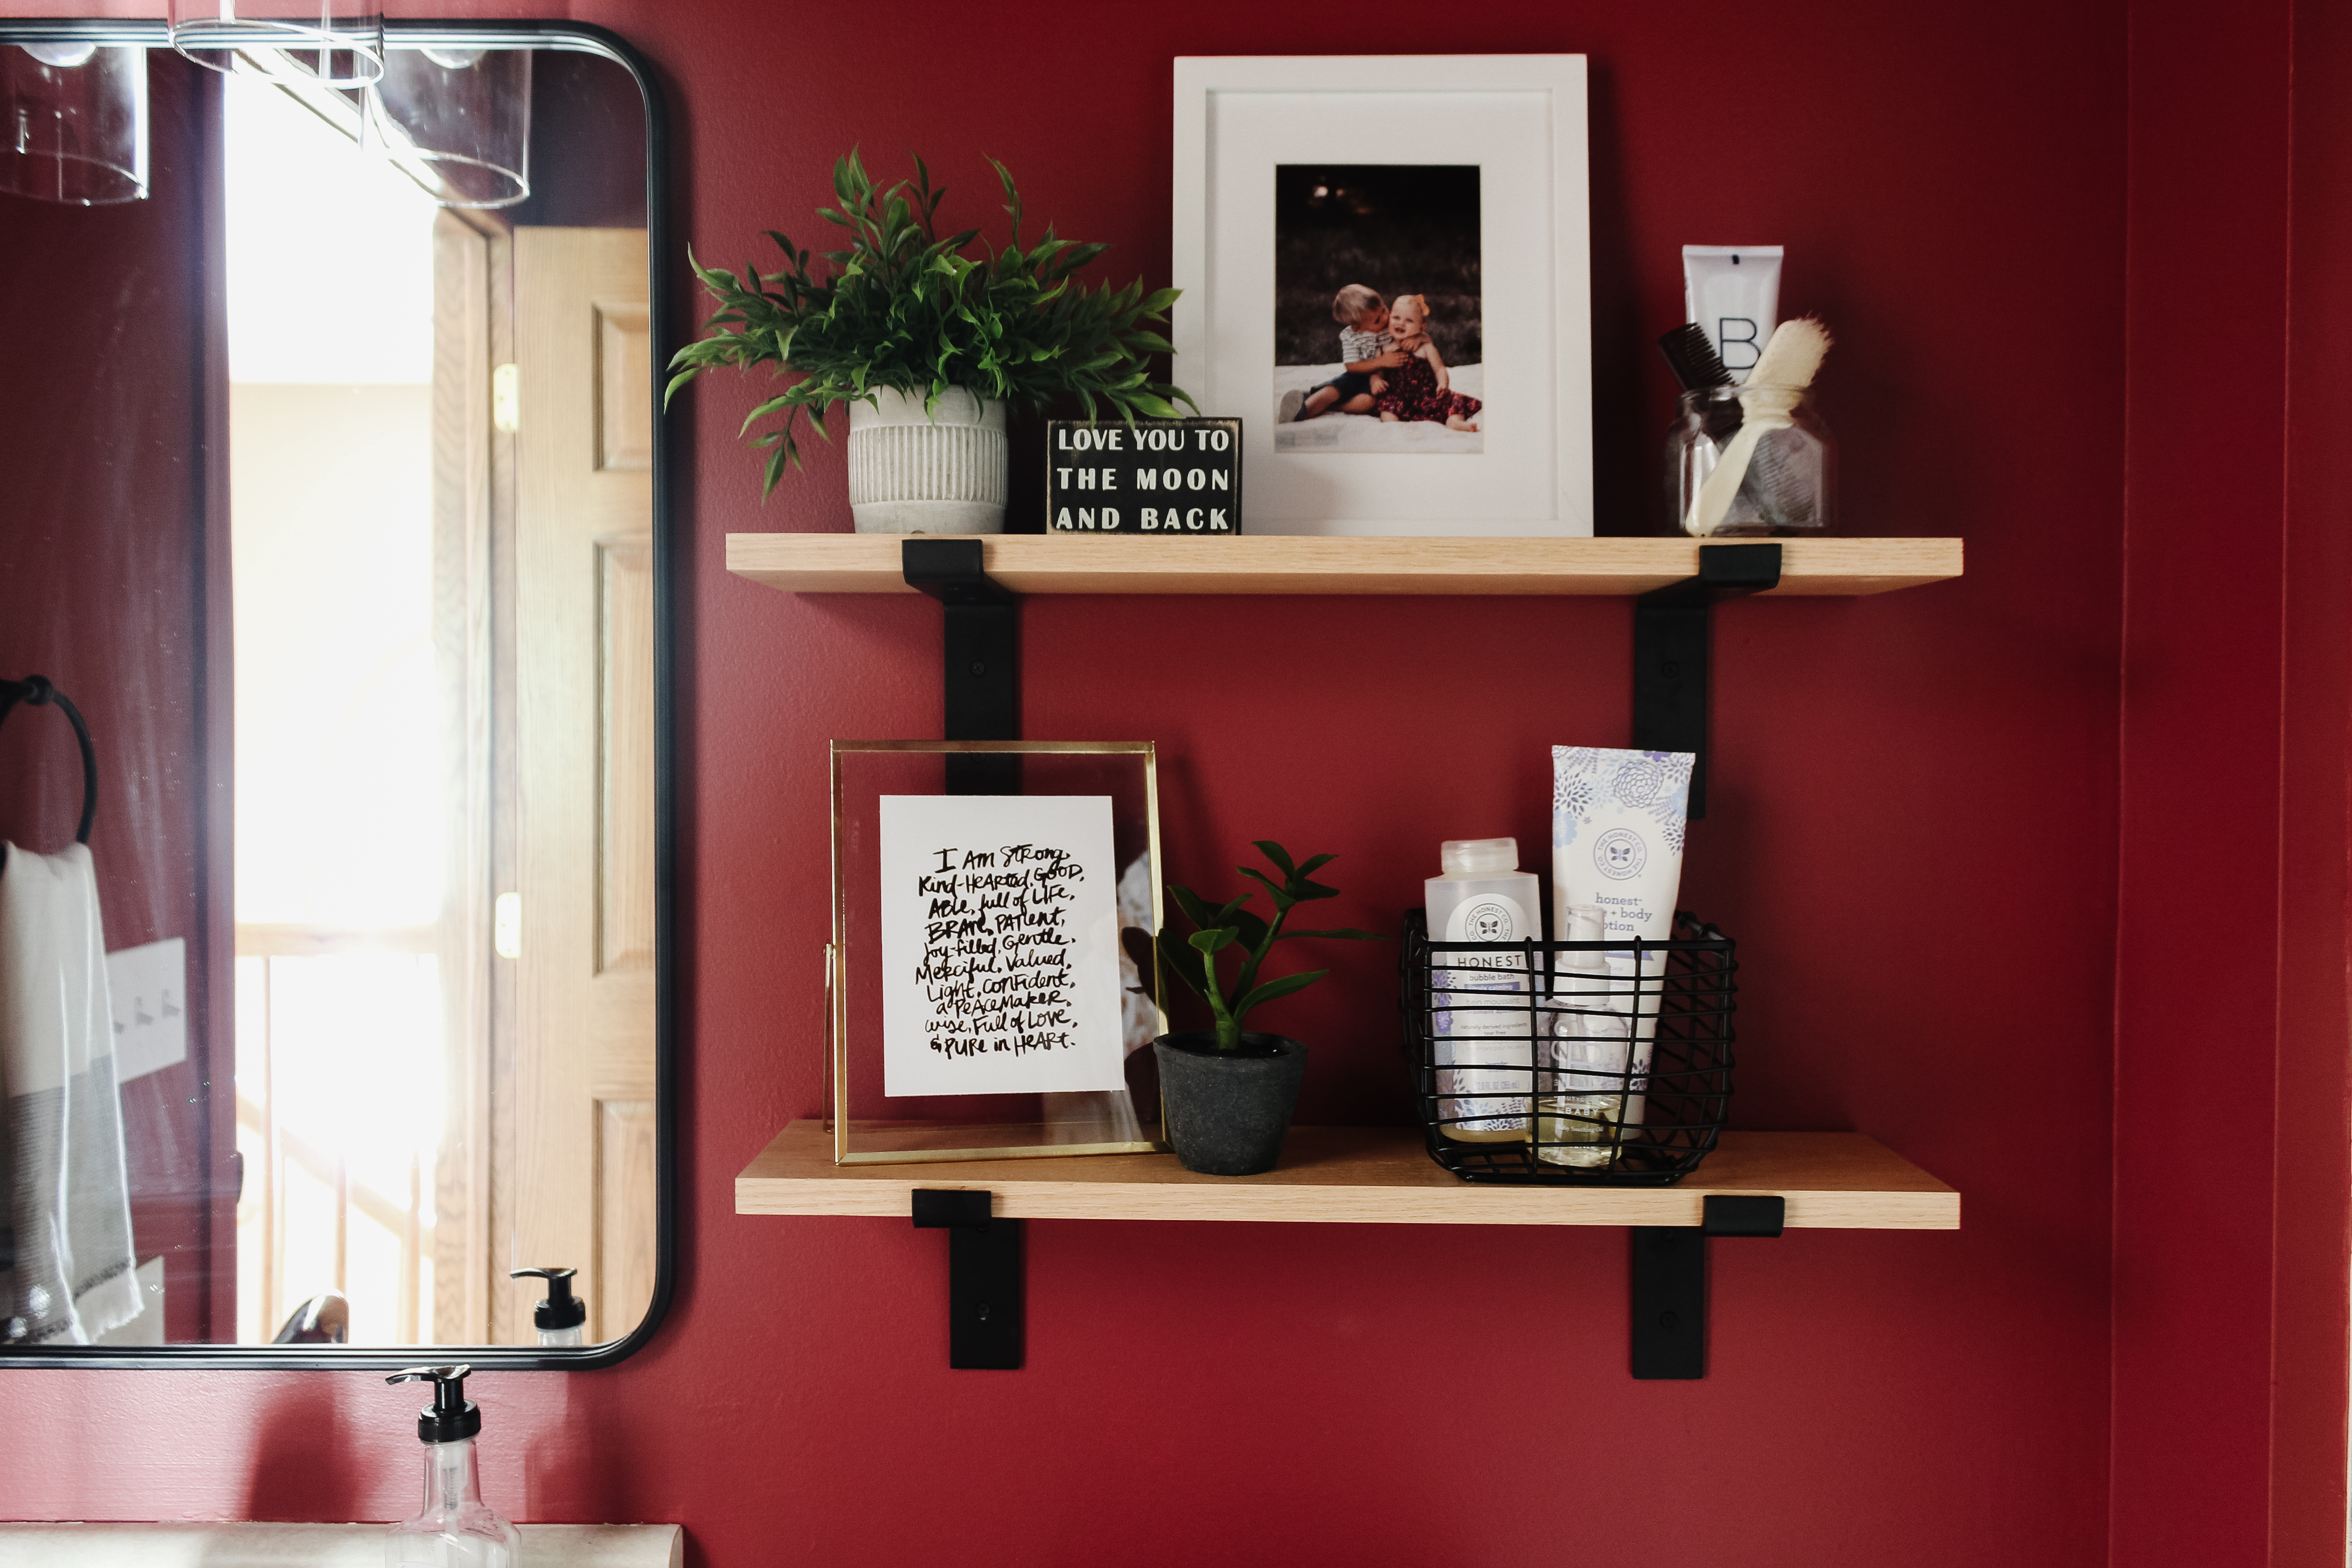
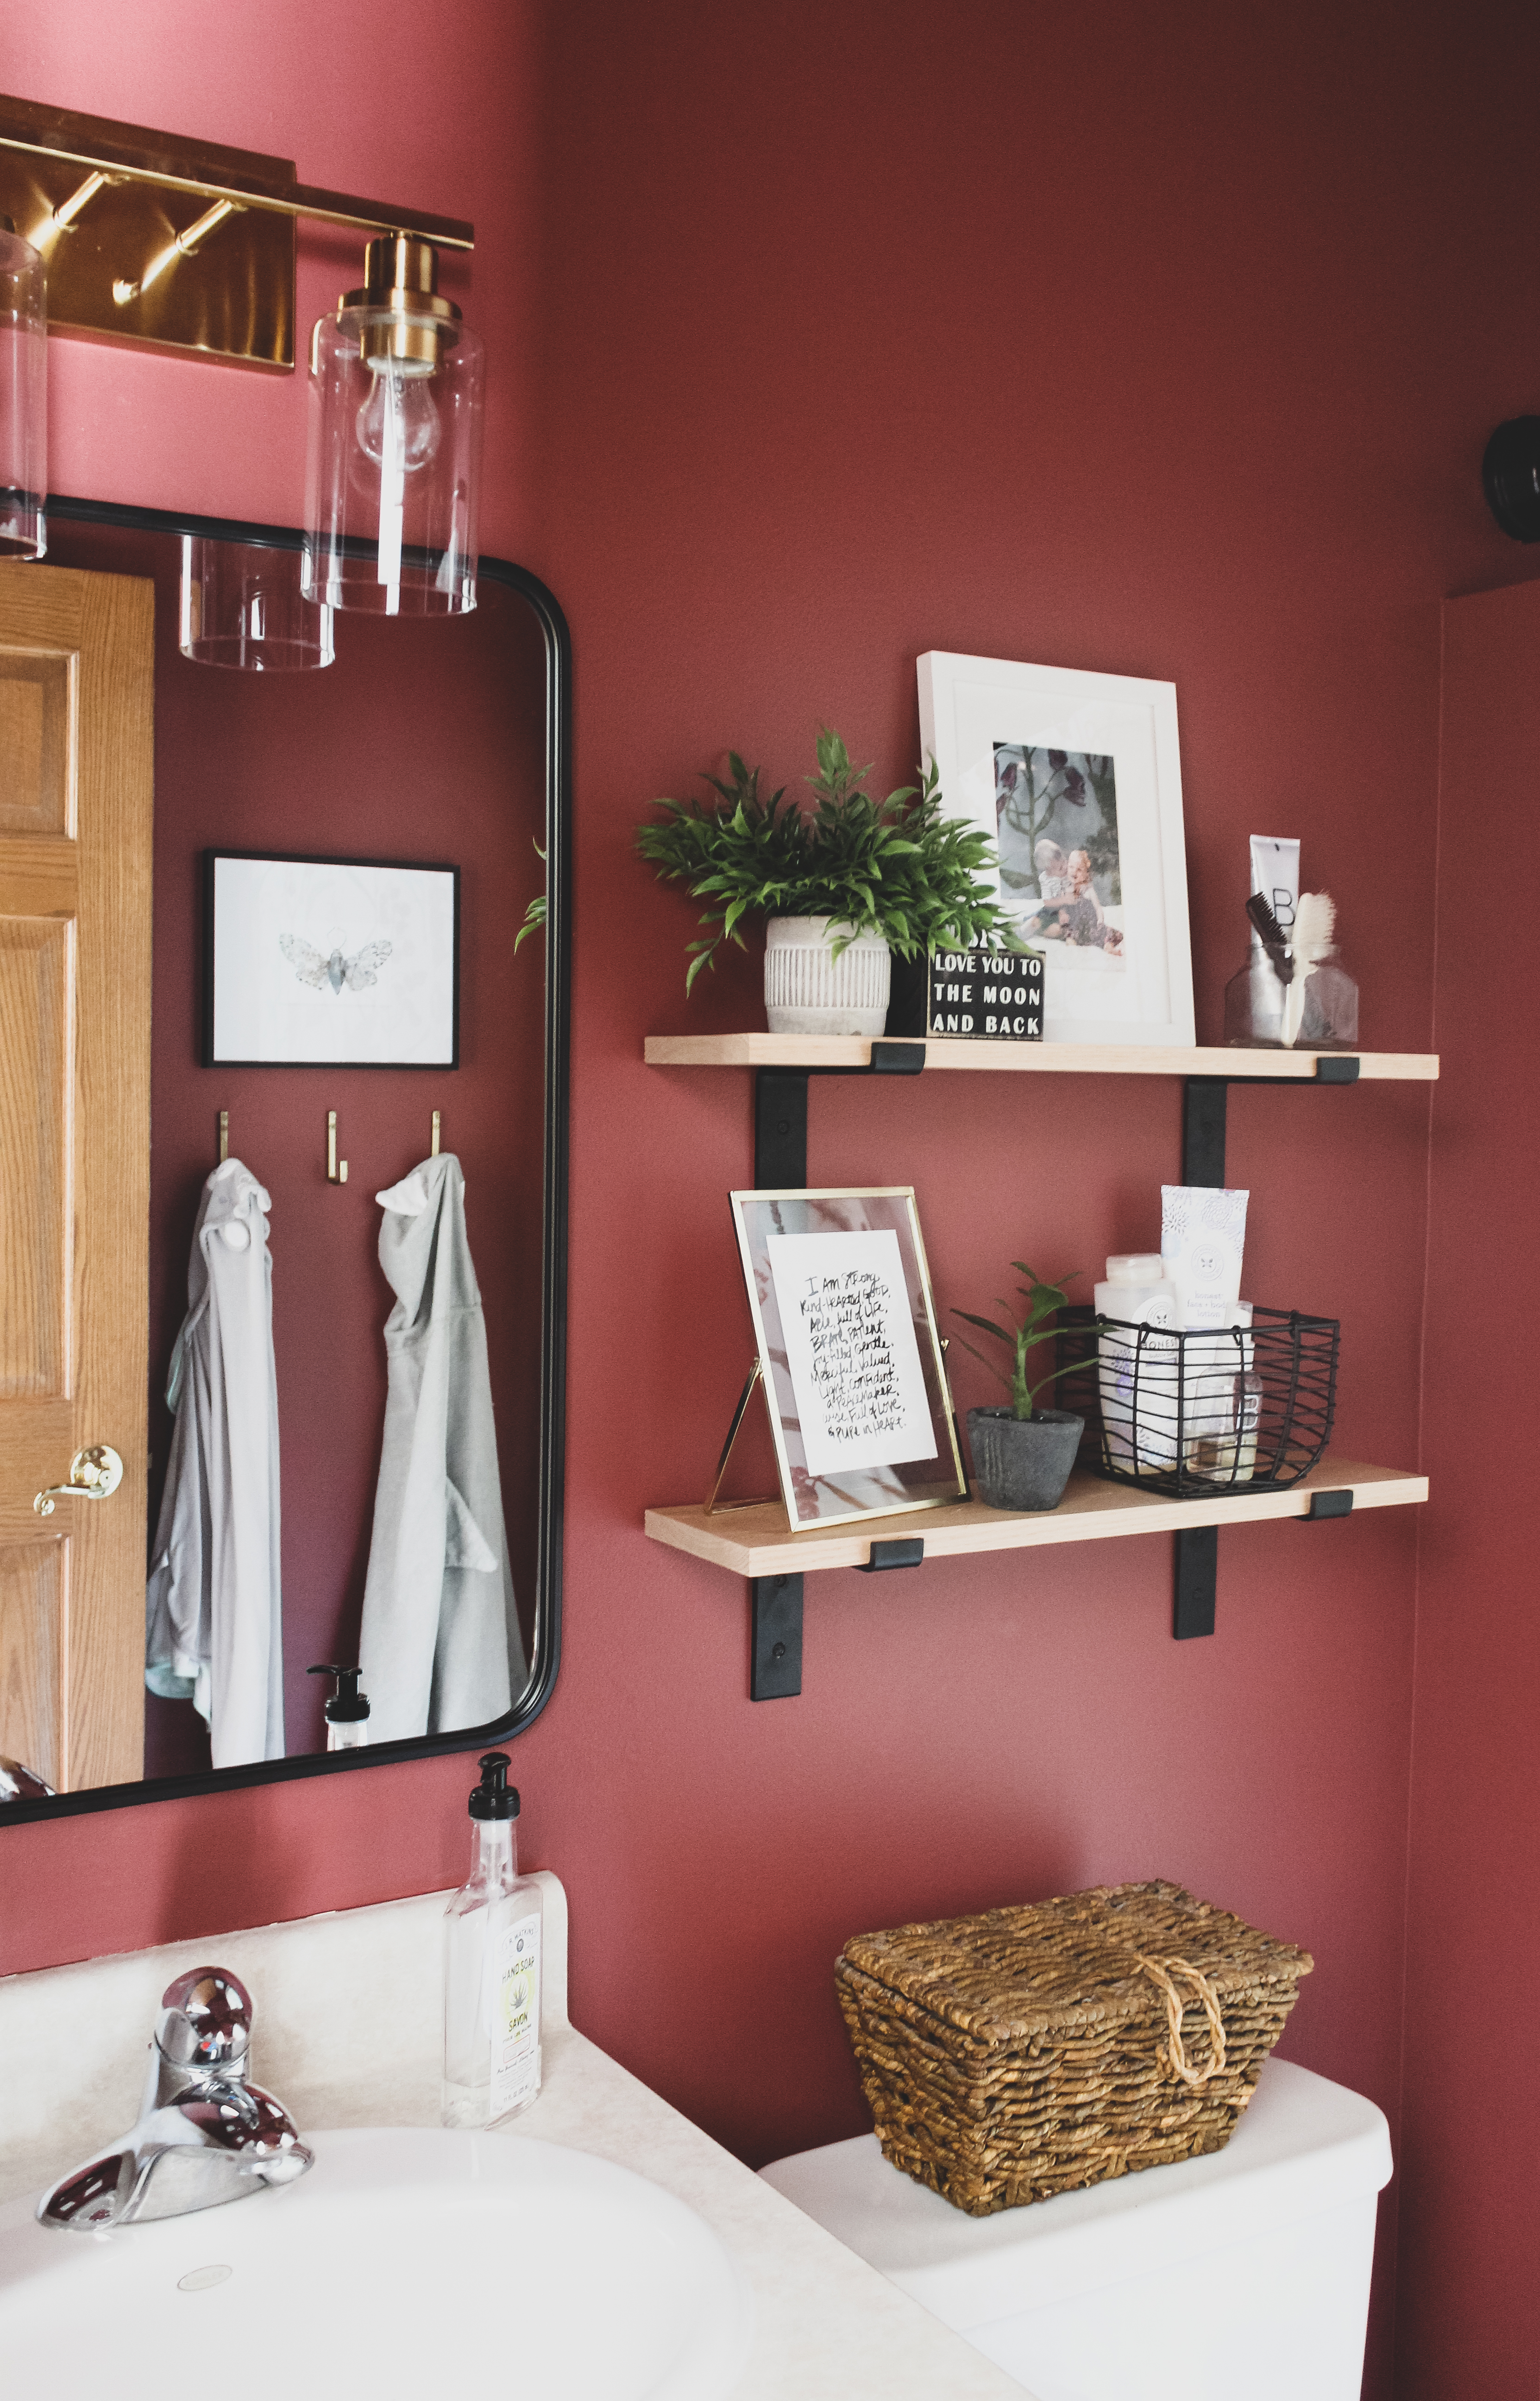
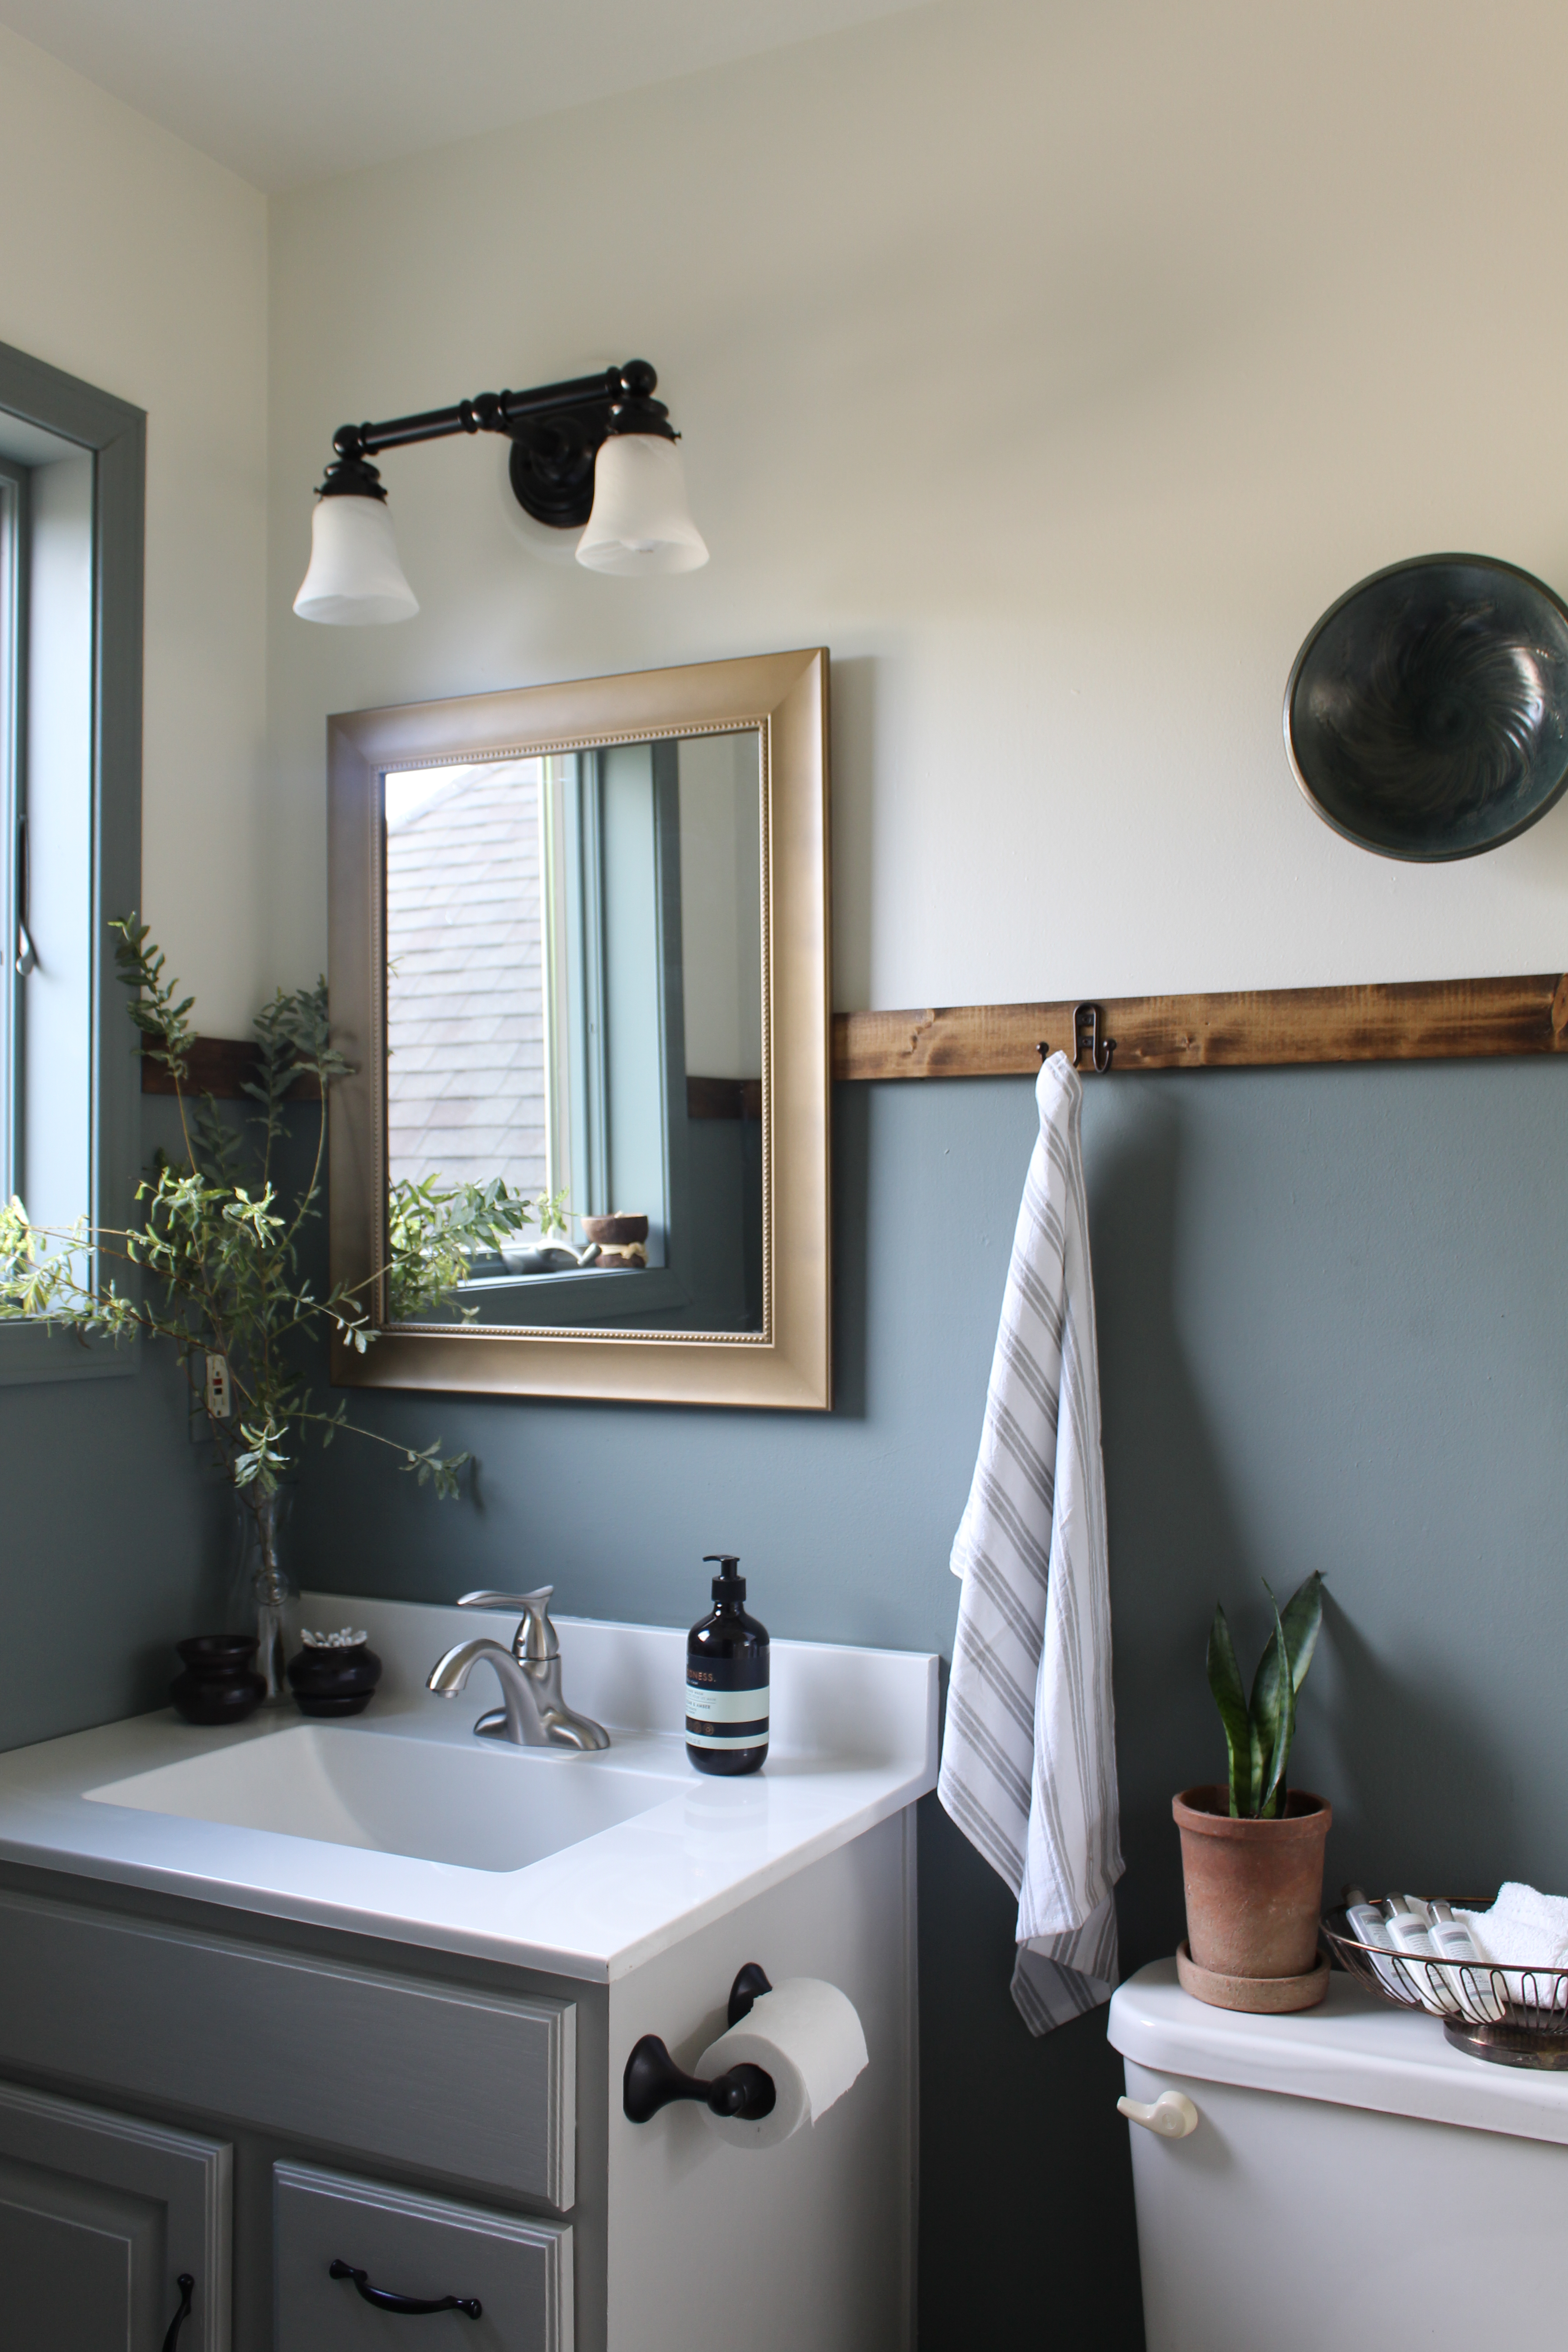
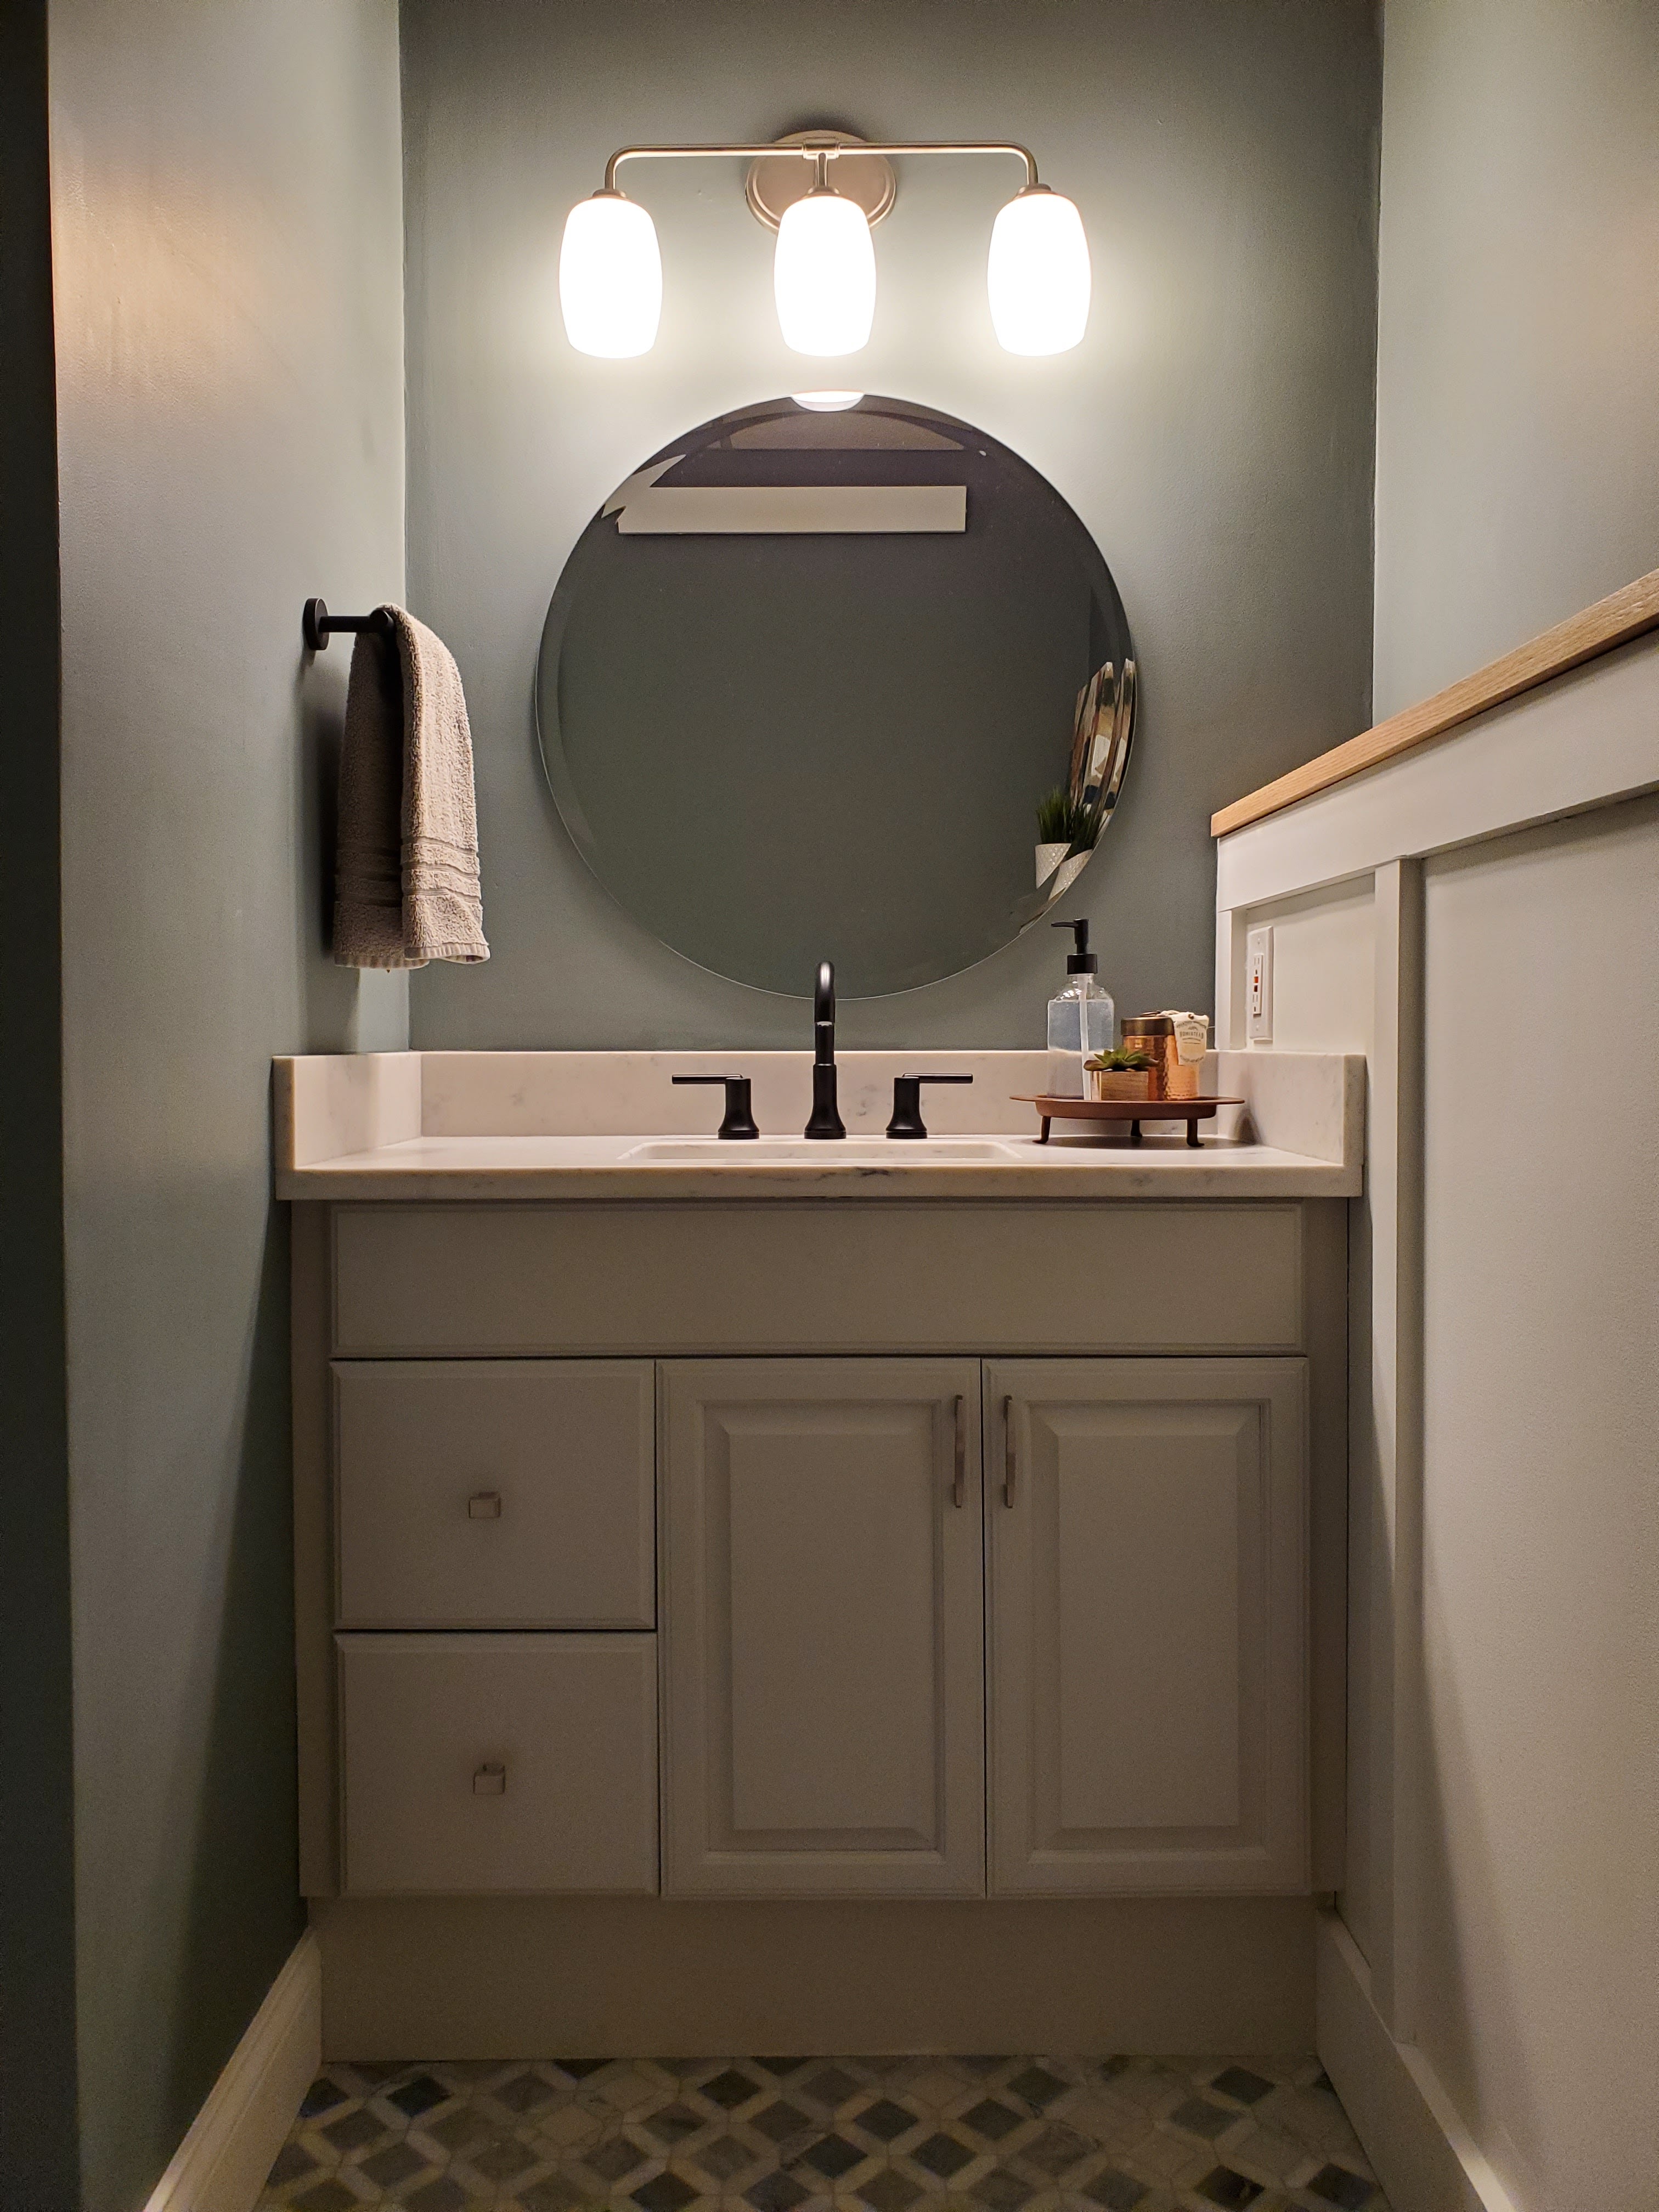
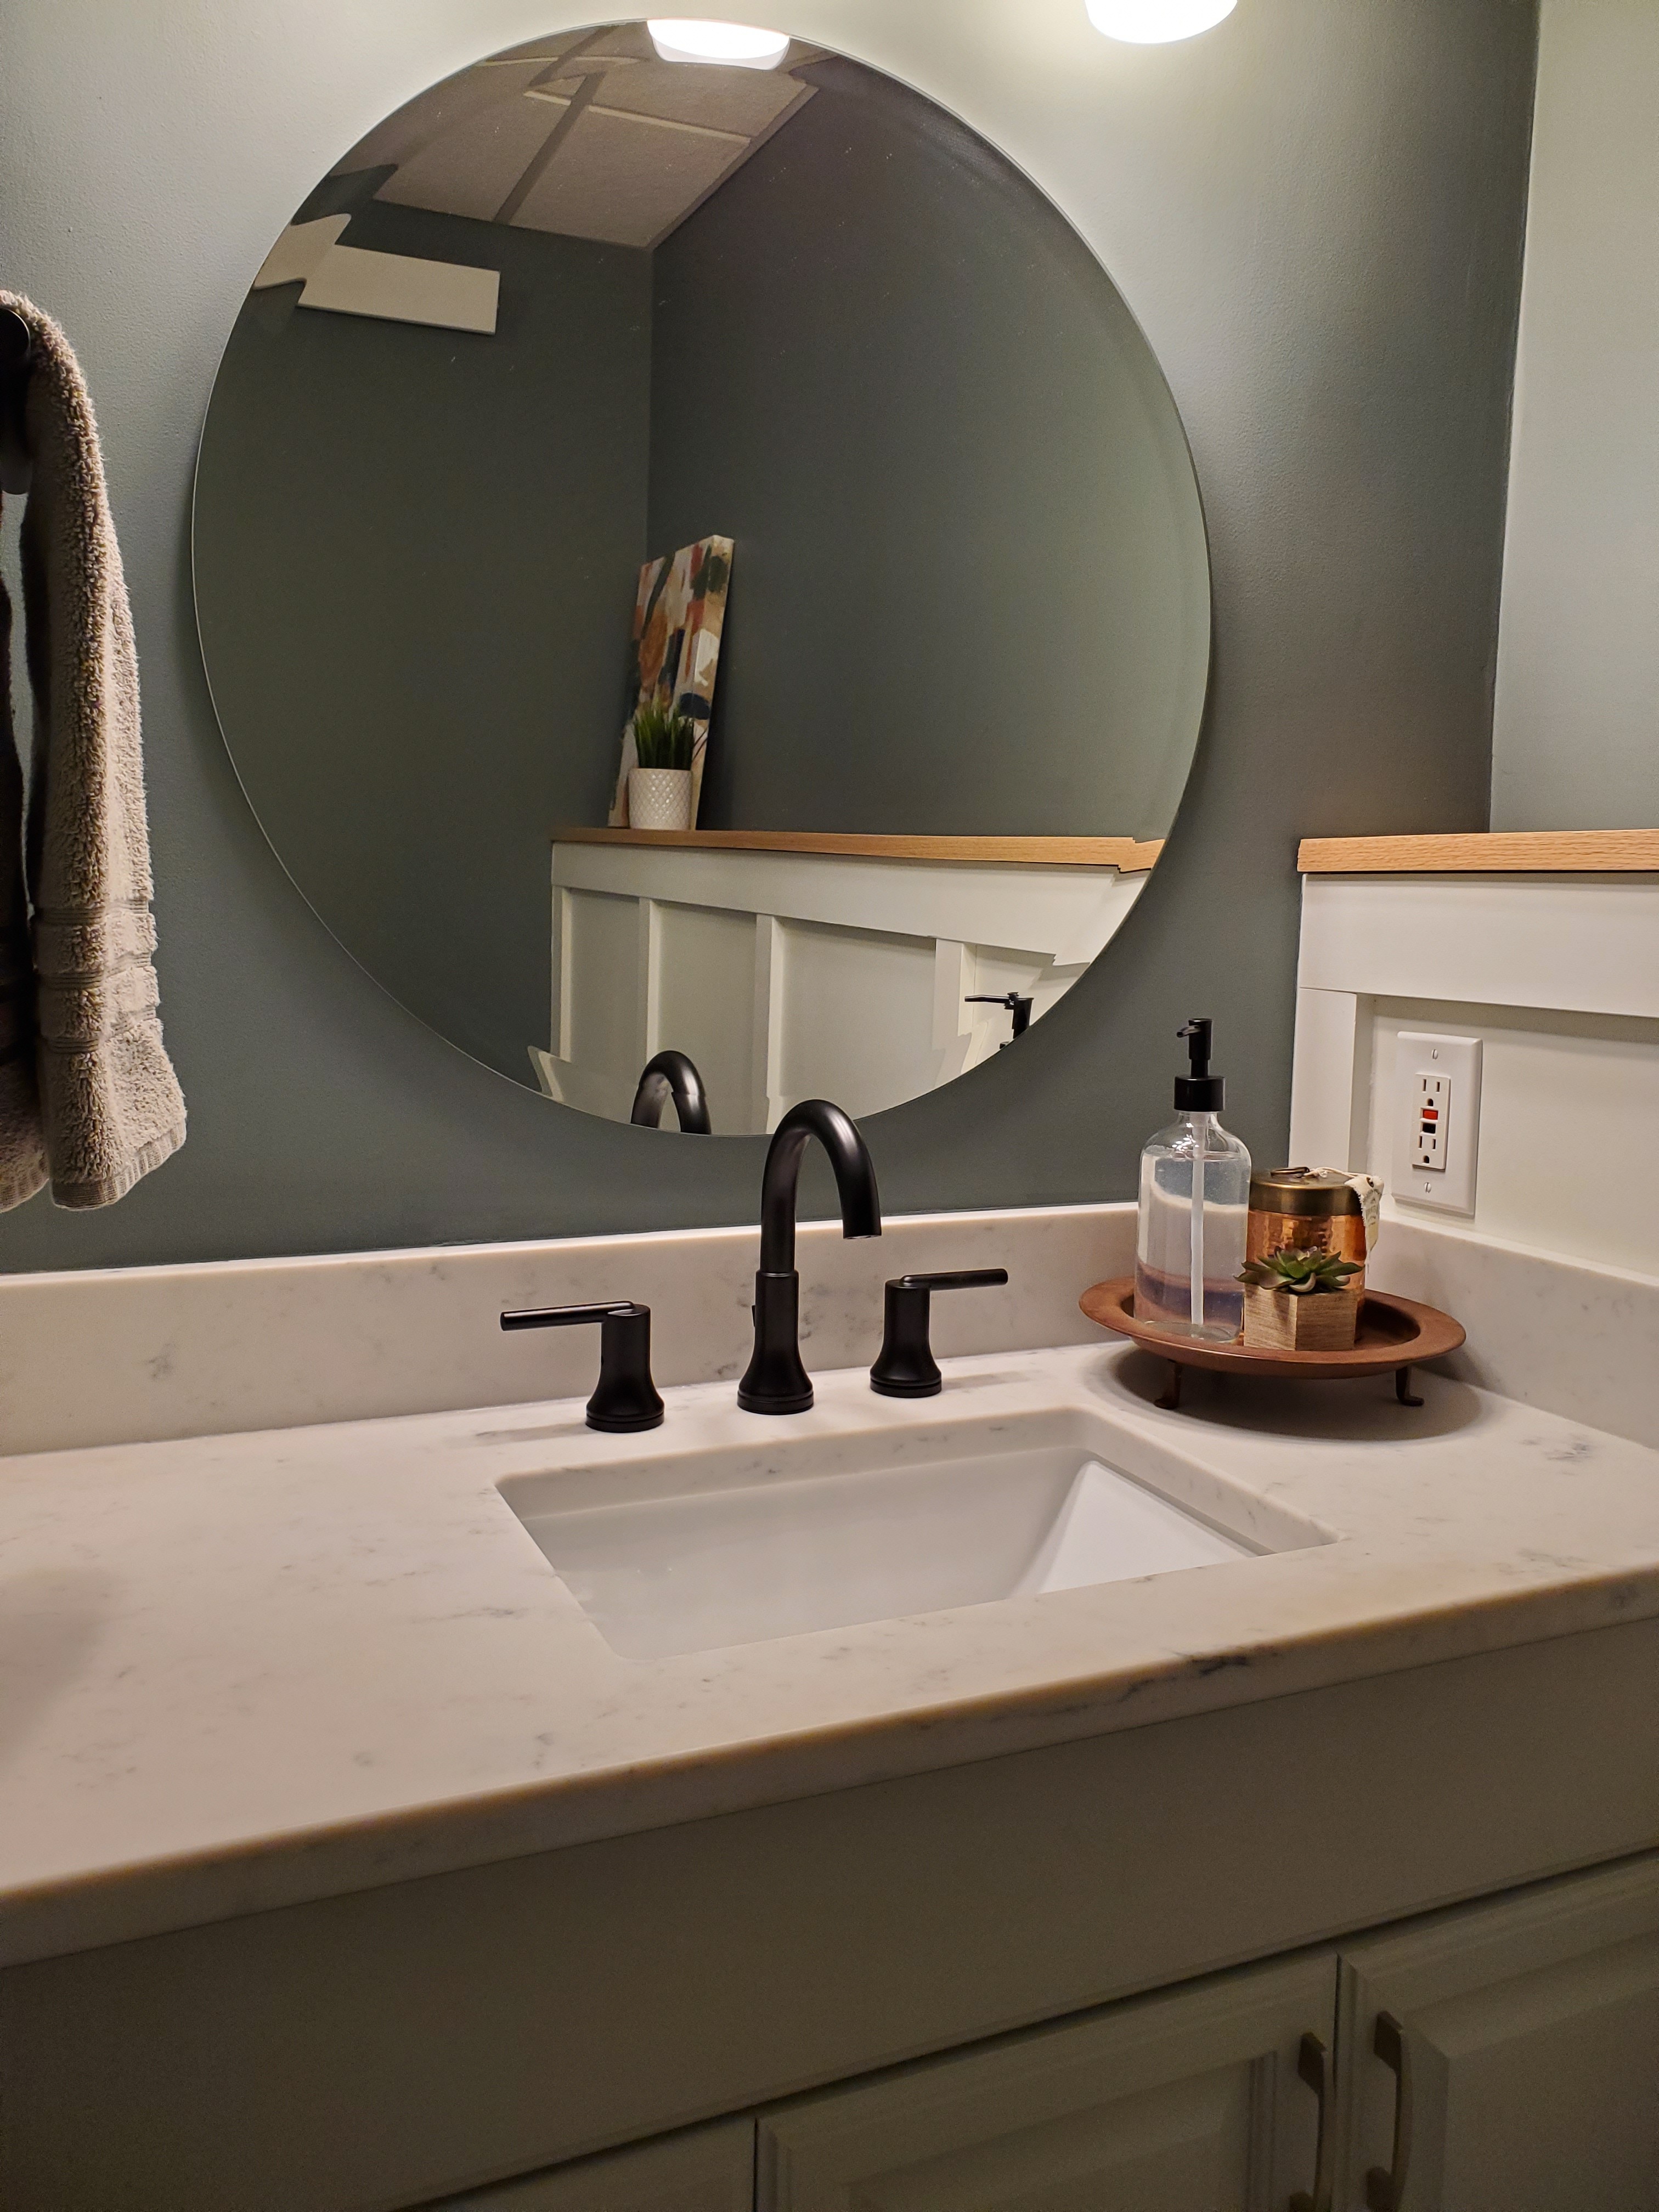
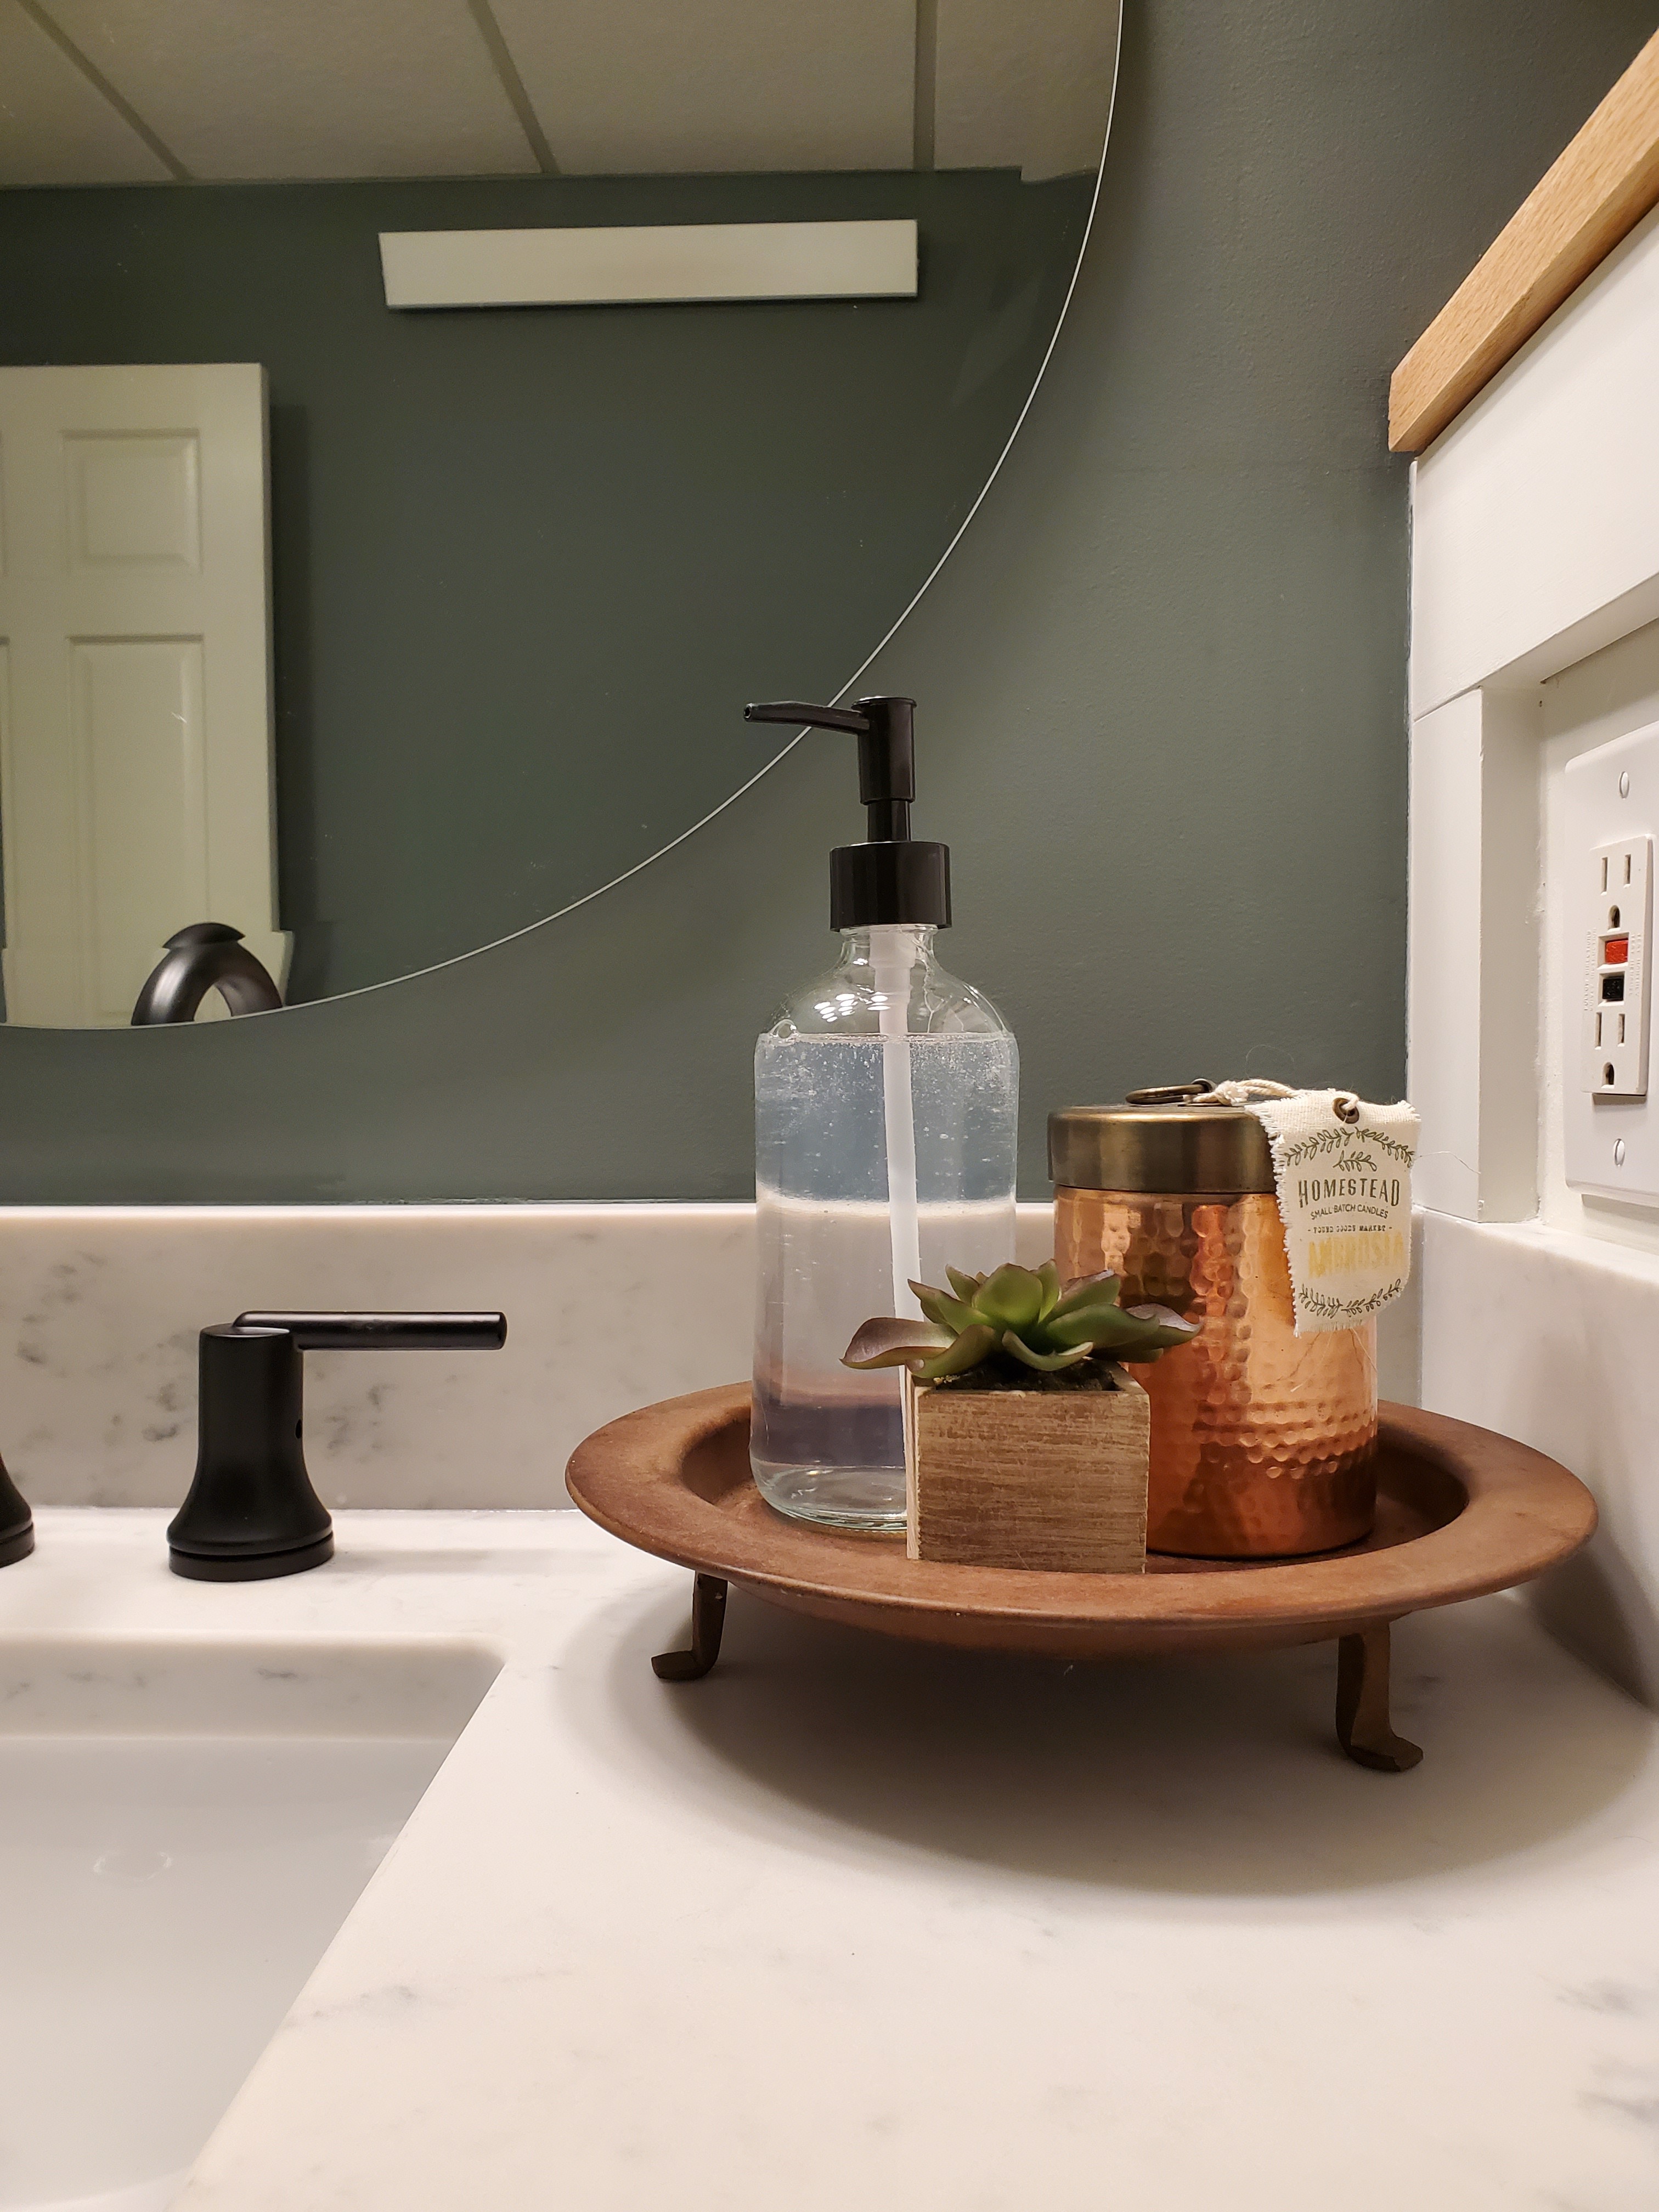
In the bathroom, I love almost everything we did. I love all the fixtures, the color choices, the different tiles, and the mixing of matte black and nickel finishes. I’m glad we saved money by reusing the same vanity with additional trim on the bottom and sides to make it fit the space perfectly.

I especially love the custom vanity top and undermount sink!

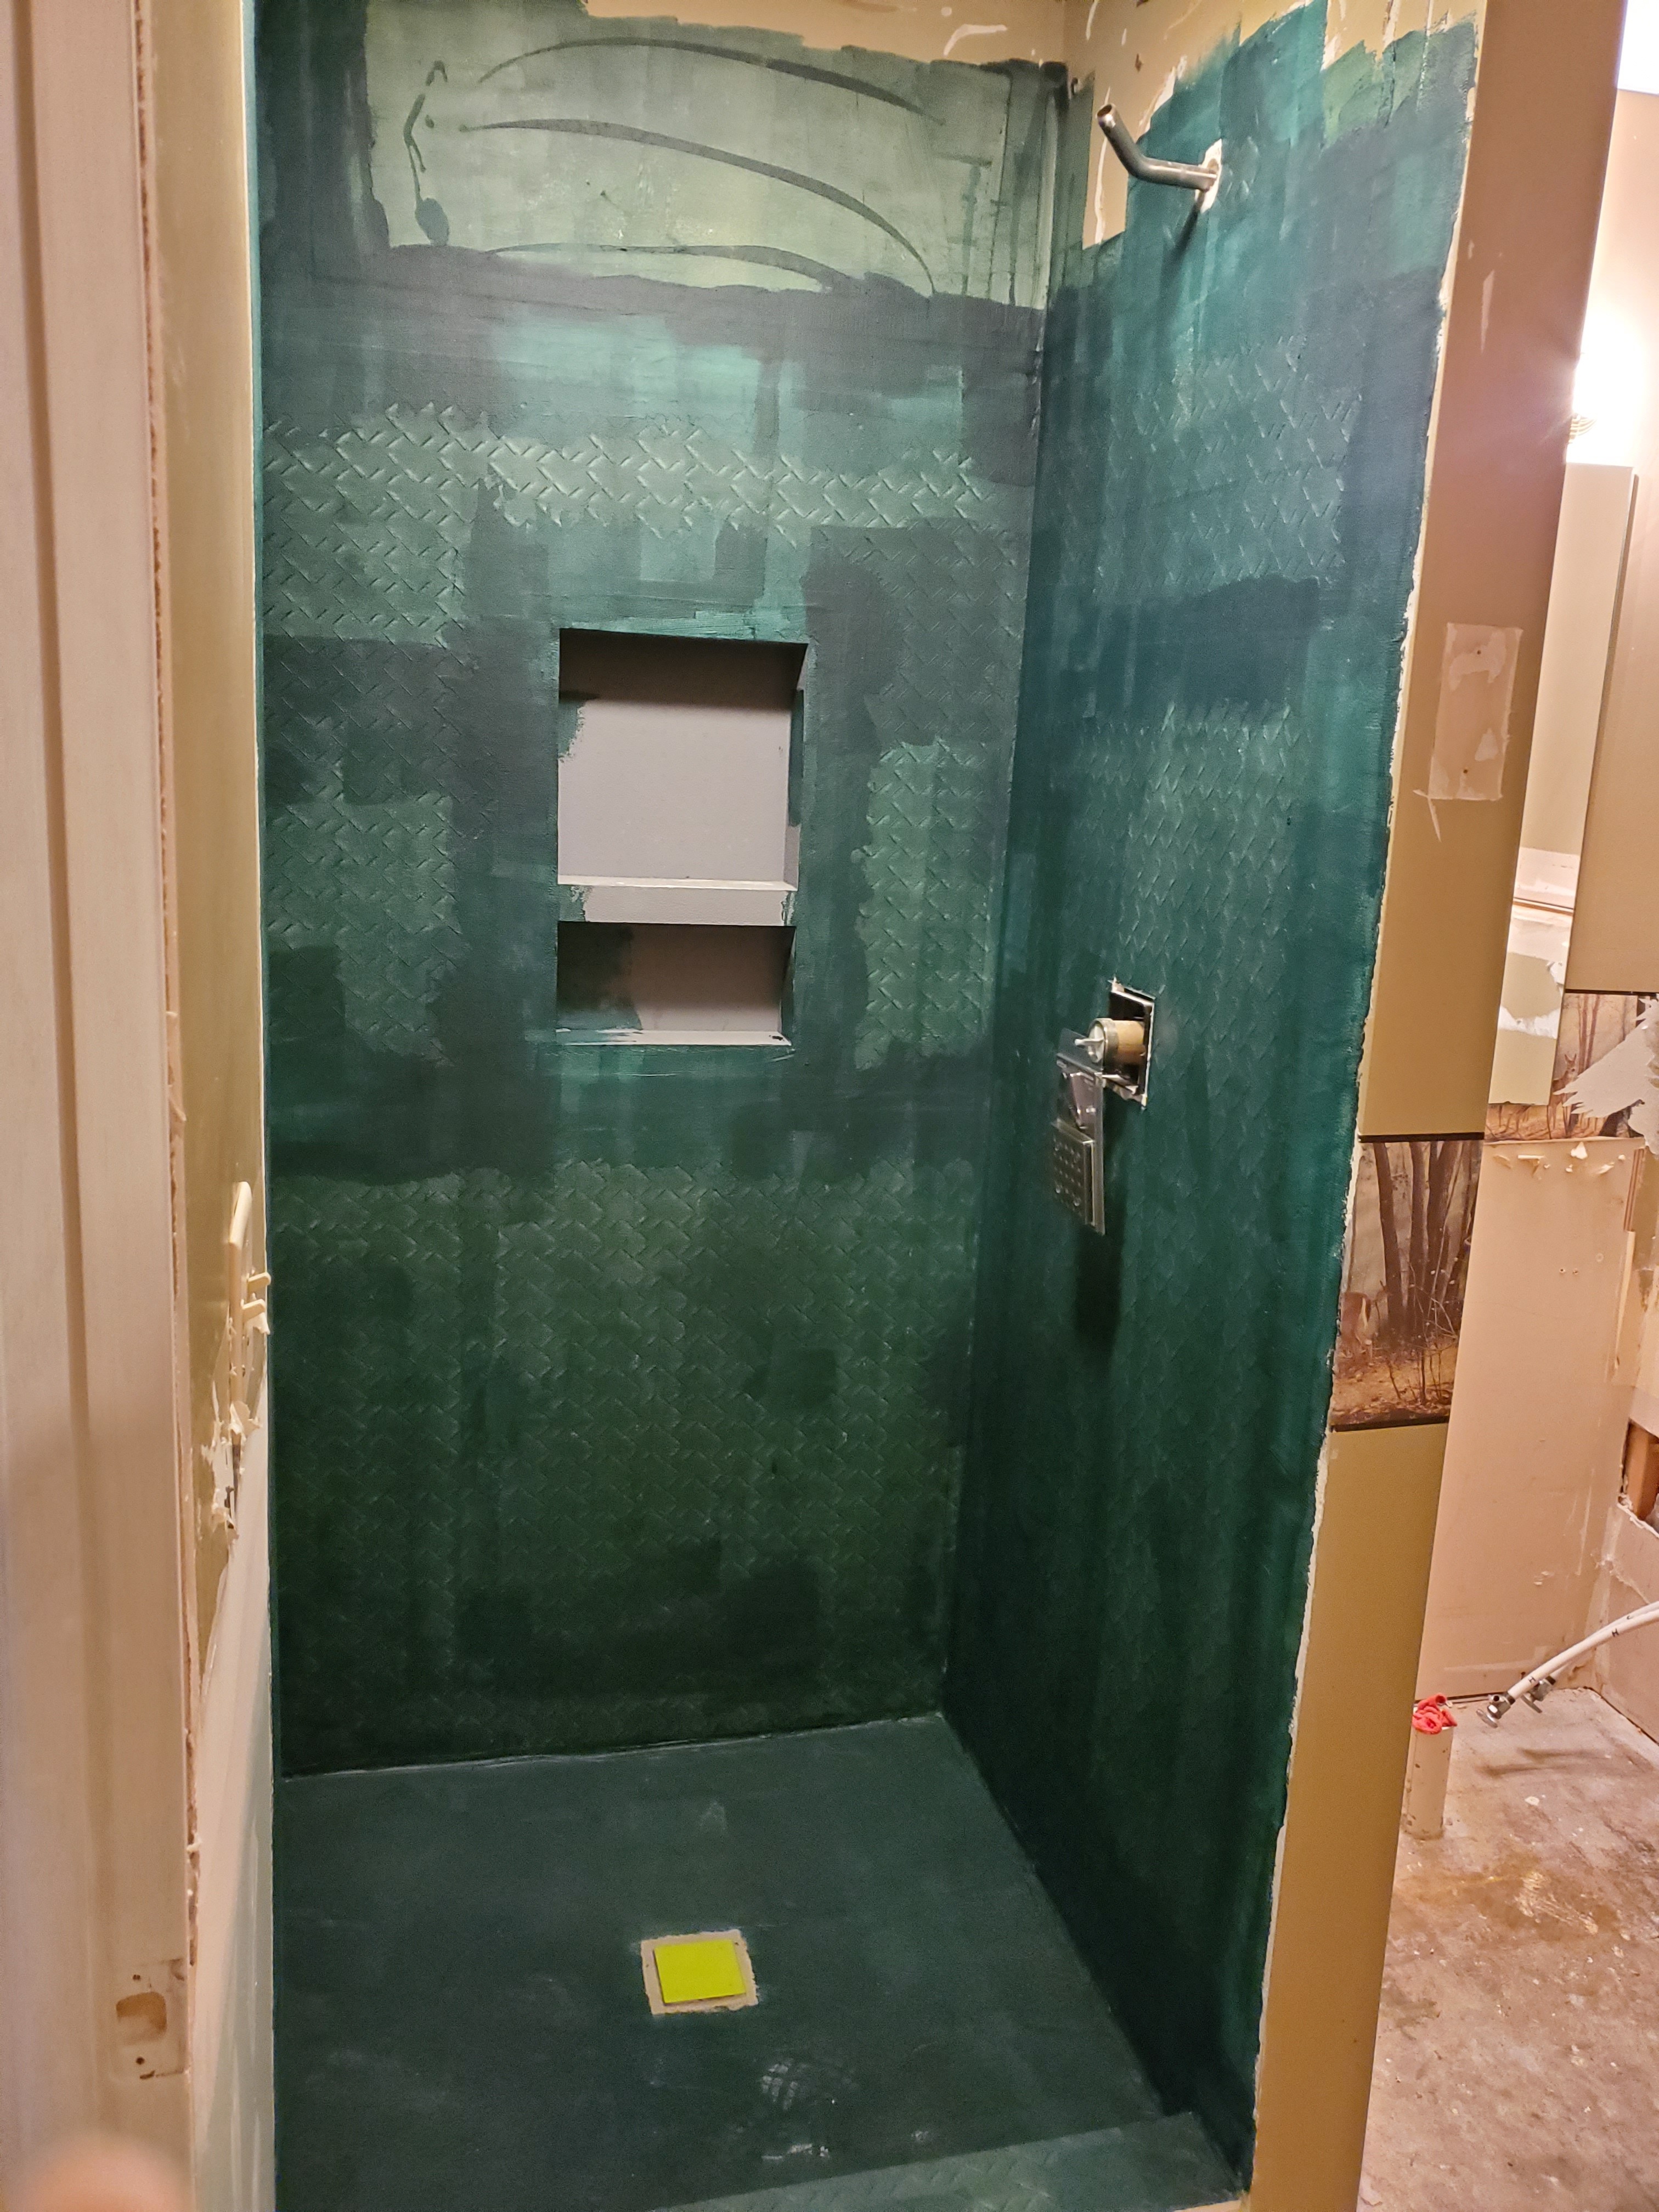
We have absolutely no regrets over the decision to expand the shower into the dead space we found behind the wall – it is so much more spacious now! And the double niche is so handy for our guests to keep their toiletries!

What I Wish I Had Done Differently

My biggest regret with this whole project is the top of the bench in the shower. I’ve talked about this before, but I didn’t plan all our materials in advance so when our tile guy presented an option that he thought would work for the top of the bench, I felt pressured to agree to it even though I didn’t love it. I’ve regretted this decision ever since. The tile he presented wasn’t even big enough to go wall to wall, so there is a grout line right down the middle. Not only do I not love the tile itself, but I really hate that grout line.

I was afraid to speak up and say no to that tile for a variety of reasons. I didn’t know where to go to source other tile options, I didn’t know how long it would take to order something else, I was afraid of going even more over budget, I didn’t want to be a problem client who delayed a project or was being difficult, I still hadn’t decided on a vanity top so I didn’t know what would match that . . . the list goes on. I wish I had just spoken up and said “thank you, but that’s not what I had envisioned. How can I go about finding other options?”

On that note, I wish we had relied less on our contractor and done more of the work ourselves. In the end, our contractor did a great job, but this was his side job that he fit in during evenings and some weekends and there were many moments I was itching to just jump in and do things myself so the project could keep moving. There’s also a LOT of communication that has to happen with a contractor and there were a few things that had to be re-done because they weren’t quite what we wanted the first time. That being said, working with a contractor made Justin and I realize that while we need someone else for major things like changing plumbing, moving electrical, knocking out and moving walls, etc., there are many things we can do ourselves. Our experience here actually propelled us into all our future DIY projects, which have saved us lots of money and ensured things happened just like we wanted. So maybe it’s a good thing we had this experience first to show us all the ways we could do things differently in the future!

What We Still Want to Do

I still want to replace the overhead boob light (if you know, you know) in the bedroom. I didn’t do this the first time around because we were already way over budget. Plus, the light box is off-centered in the room and the current light blends in well enough with the ceiling that it’s not very obvious. It will take the right kind of light to work and not make things look weird and off-kilter but I’m up for the challenge!

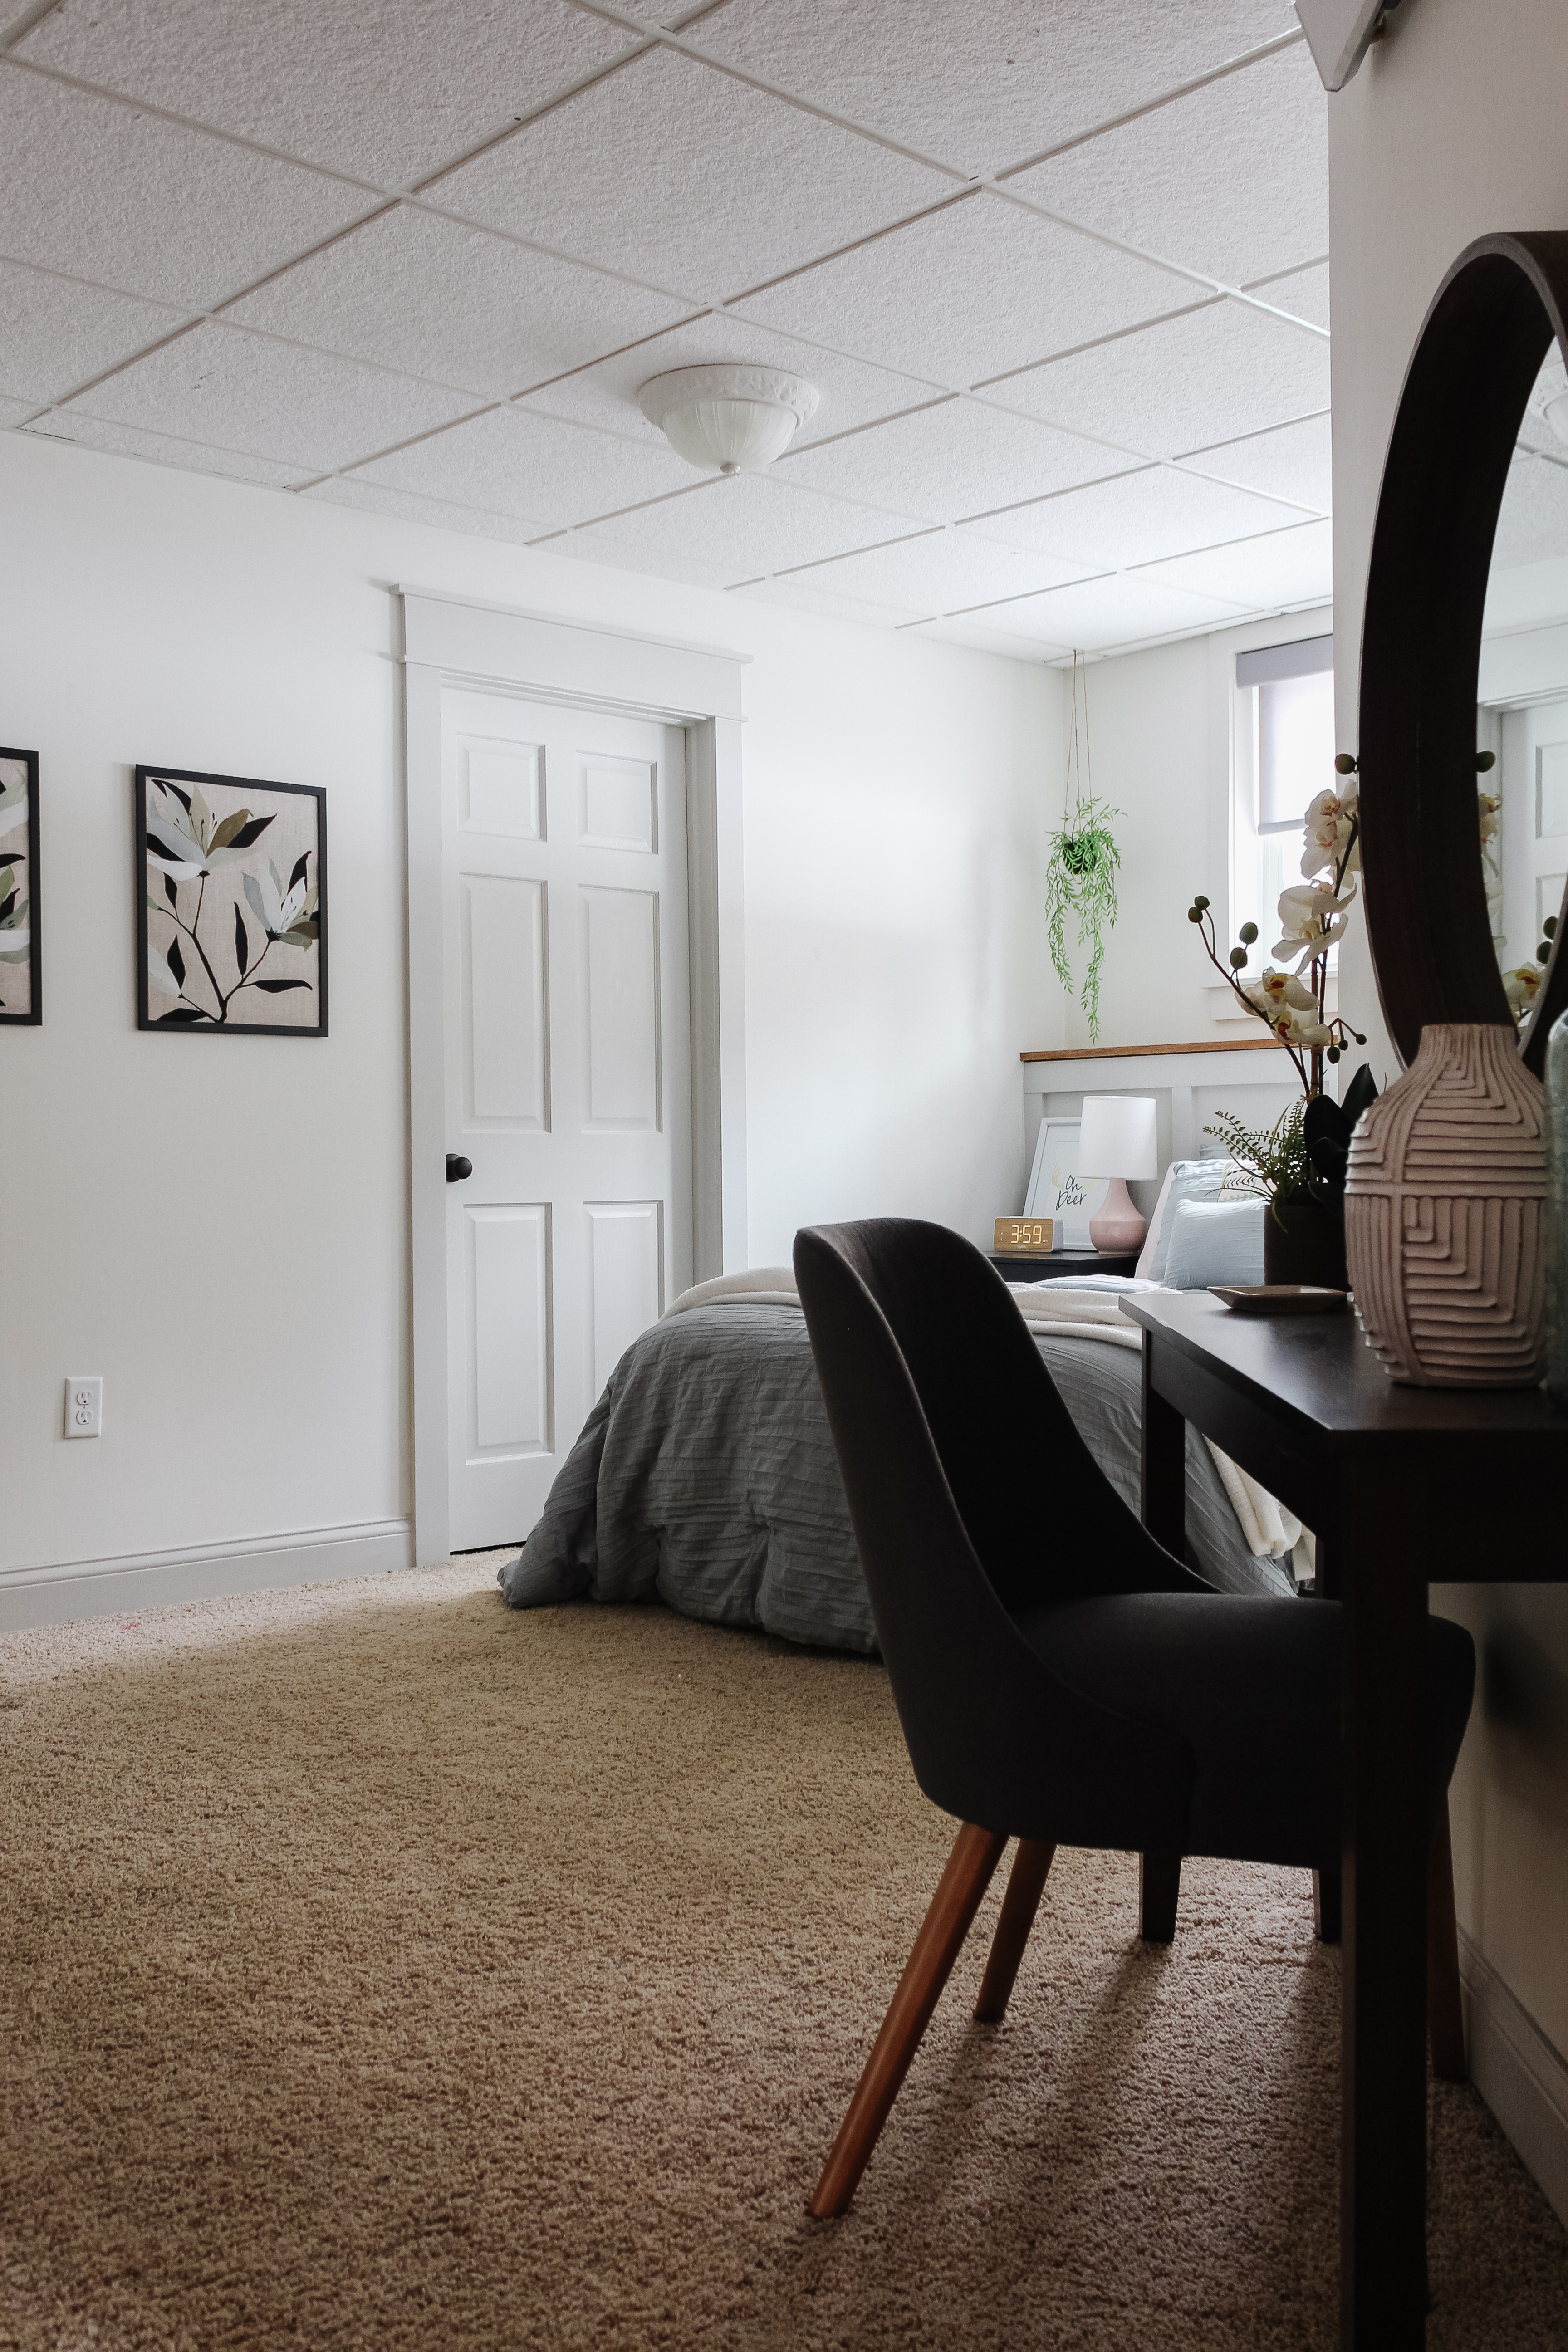
The carpet in here and throughout the rest of the basement is old, bubbling up in places, and has lots of discolorations and signs of wear so it definitely needs to be replaced. I also want to re-address the walls. I didn’t include the paint color as something I technically regret, because the white is honestly fine. At the time it felt fresh and clean; however, now it’s feeling boring and pretty uninspiring. I still love the contrast trim but I want to add wallpaper to all the walls (something a bit more understated than the previous wallpaper haha!) I’ve ordered a few samples and I’ve been having fun dreaming of different options for this room.

Lastly, down the road I’d love to have someone else come and re-do the shower bench top to something I actually like. I don’t know what that will involve or how difficult it would be, but I want to at least look into it and see what my options are (which I should’ve done in the first place!) It stinks to want to replace something that we spent money on to install, but I think it would be worth it.

Overall, we’re still really really happy with this space and we’re hopeful that we’ll be able to have a lot more guests come visit in 2021!

Going for BOLD in the Kids’ Bathroom

The kids’ bathroom got a little makeover recently and I am loving its new bold, fun look!

A Moody Bathroom Renovation

When we first moved in, there were glass shower doors on the tub, which we quickly removed and replaced with a shower curtain so we’d have an easier time bathing the kids. Other than that very small update, we hadn’t put any time and attention into this space since we moved in. Here’s what it looked like before:

20200726_152316

This project came on a whim. When I did my $0 bathroom makeover, I shopped my house and took the mirror from the kids’ bathroom. My intention was to just swap in another mirror, but when I took the original one down, I discovered a huge hole behind it! The new mirror I planned to put up was not the right size and shape to cover it so I asked Justin to just patch the hole and we’d just live with the patch job for a while.

20200809_092551

Justin came in with patching plaster and started to look around at all the walls in the bathroom. He commented they were all in rough shape – lots and lots of nicks, dings, holes, etc. His parents were visiting so we decided he should just patch all the walls and we’d quick paint the room since we had help with the kids. Well, one thing led to another and before we knew it, we decided to just update the entire room!

The kids’ bathroom is windowless and small, so I thought it would be the perfect opportunity to try out a bold paint color. We already had the botanical shower curtain from years ago so I used that as a starting point for finding the right color. I chose Sherwin Williams Cordial in Eggshell and painted the walls, ceilings, trim, and door. Justin was pretty skeptical about my painting the ceiling but it was a fun step away from convention and I love how it turned out! The color is moody and deep and just so dreamy.

A Moody Bathroom for Kids

The previous owners had left the black over-the-toilet storage shelf. While we’ve appreciated having the extra storage since the vanity is only 20 inches, the shelf was not very stable and could easily be knocked over by one of our kids. We decided to remove it and come up with a different storage solution.

Remember way back when we remodeled our guest bathroom? There was a half wall with a long board on top that we had to replace when we added trim to the wall. The original board has been in our garage ever since and we decided to use it here to make a couple new shelves. Justin planed the board down to size, sanded off all the previous stain, and put a few layers of clear polyurethane on top to seal it. We got these brackets and attached the boards to them and voila – two gorgeous shelves!

Kids Bathroom-11

I love that they are simple and modern and the light wood contrasts nicely with the dark paint color. I wanted the shelves to be both beautiful and functional so I shopped my home for picture frames and decor and found a few pretty storage solutions for keeping the practical items we reach for often.

We also swapped out the light fixture for this modern brass sconce and it made a huge difference! The mirror was a last minute decision – I planned to use an oval mirror to break up all the lines of the sconce and shelves. Once the oval mirror was up though it just did not feel right at all. This rectangular mirror with rounded edges provided the perfect balance of lines and curves!

Kids Bathroom-12

There used to be a very small towel bar to the right of the shower, but it felt much more practical to install a few hooks to hang multiple towels instead of just one. I chose three gold bath hooks – both because three felt right for the space and also because I’m subtly hinting to Justin that we should have another baby 😉 😉 😉

Kids Bathroom-5

LJ saw me scrolling through options for artwork above the hooks and he got really excited about this butterfly, so it felt like the perfect print to choose. I love online print shops – you buy your print, the file gets emailed to you, then you can print it off wherever you want! It allows me to have a nice variety of quality prints without spending a ton of money.

I’m so happy with how this bathroom turned out! I wanted something that felt appropriate for a children’s bathroom without screaming “I AM A CHILD’S BATHROOM” if that makes sense. Now it feels fun and unique and just right for kids while still fitting the style of the rest of our house. I love it!

Kids Bathroom-16

Sources

Wall Color: Sherwin Williams Cordial in Eggshell

Wall Sconce

Mirror

Black Shelf Brackets

Gold Bath Towel Hooks

Black Frame

Black and White Butterfly Print

Hand Towel

Black Wire Storage Basket


A $0 Bathroom Makeover

Do you ever get a strong desire to just DO something? I sometimes get this restless energy and just feel the need to accomplish something. It can be big, it can be small, but I just want to see tangible progress and a finished product. Last week, I got that urge. I wanted to channel my restless energy into a project, which is all well and good but … I also felt strongly that I did not want to spend any money. Hmm.

I looked around my house and decided to challenge myself to do a $0 makeover to one of our bathrooms. Using only items that I already had around the house, I set out to transform this room and I have to say, even without spending a dime, I’m absolutely thrilled with the result!

$0 Bathroom Makeover

I wasn’t really sure what to expect from this endeavor, but I decided to just dive on in without giving it much thought (seriously, I decided to do this and then started a half hour later). Sometimes it helps to not overthink things and just get moving!

Here’s what the bathroom looked like last week:

20200722_151004

Located right off our laundry room, just a few steps from the garage, this full bathroom is handy to have if you get really dirty outside and don’t want to track dirt through the house, or if you happen to be in the middle of a pandemic and want to shower after work before interacting with your family (who would’ve thought?!). Otherwise, the only time it gets used is when we have multiple guests staying with us and we use the nearby office as a spare bedroom and this as its accompanying bathroom.

HouseTour2020-2
A few encouraging mirror notes from me and LJ back in May when Justin was using this bathroom after work. ❤

The bathroom itself may not be used much, but since we use the garage as our main entry to the house, we see this room every single day. I would love to gut the space and expand our laundry room, but we’re probably at least 10 years away from making that dream a reality. In the meantime, I wanted to freshen this dingy and sad bathroom, and so the $0 bathroom update challenge began!

The very first thing I did was take down the old medicine cabinet mirror. Since we don’t really use this bathroom, there was no need to for that storage anyways. And bonus – I then sold it on Facebook Marketplace for $15, making this my first (and likely, only) renovation to actually turn a profit!  Once that was down, I wiped down all the walls, filled all the old holes with plaster, sanded, and primed all the walls.

I keep all the leftover paint from past projects and I raided my stash to find a color for the walls. I decided to go with a two-toned look and measured up 5 feet from the floor and taped a line around the room. I used Benjamin Moore Smoky Mountain on the bottom portion, trim, and baseboards (the same paint I used in our guest bathroom and secret nook) and Sherwin Williams Alabaster on the top and ceiling (the same paint I used in our basement kitchen).

Justin took leftover pine 1×3 boards we had in our barn and cut them to size and I painted them with stain from a previous project (Miniwax Provincial). We used a nail gun to attach them to the wall over the colorblock line and I love how this wood detail adds character and warmth to the room. We have a mudroom with all these unused hooks on the walls (the previous owners stored all their outdoor coats there) and I raided the stash to find three black hooks to add to the wood trim for towels. Perfect!

Laundry Bath-14

On to my favorite update: the vanity! After removing all hardware, I used deglosser leftover from painting the kitchen cabinets to prep the wood. I painted a layer of primer over top and went back to my stash to pick a cabinet color. This was a trickier process, because I had to find something that worked with the other colors already in the room. None of my initial colors felt quite right and I worried I didn’t have anything that would work, but then…waaaaaay in the back of my drawer full of paint samples, I found a small sample size of Sherwin Williams Agreeable Gray that I bought last year as a contender for the walls in our Phase One master bathroom update. I can’t even believe how perfect it is for this space and it made the vanity look 1000x better.

$0 Bathroom Makeover

I originally planned to keep all the handles and just spray paint them, but then I noticed the handles in our main floor powder room…

HouseTour2020-4

Eventually, we will update this half bathroom, but until then, it can have ugly old gold and white handles. 😉 I took the half bathroom’s vanity handles and spray painted them with a black spray paint from my stash.

Laundry Bath-12

I didn’t originally plan to replace the counter and sink, but as the project was underway, I remembered that we had an extra vanity top out in storage. We bought it at a Habitat for Humanity ReStore over a year ago – we thought we could use it in our guest bathroom and it was too good a deal to pass up (new for $45!!) so we bought it, only to come home and realize it was not the correct size. It’s just been in our barn ever since. Turns out, it was the exact size needed for this vanity – feels like it was meant to be! I guess this could feel like cheating the $0 goal since it’s something new, but since we’ve had it for over a year and didn’t spend the money specifically for this project, I’m still counting it as just using something we already had. 🙂 We caulked the sink in place on the cabinet and then ran another line of clear caulk (leftover from the basement kitchen project) around the edge to seal it along the walls.

Laundry Bath-2

The “new” faucet and stopper came from the old sink we took out during the guest bathroom renovation – we had kept it in our barn and the faucet was still in really good shape so we swapped it in and it completes the look! I like that it brings in a mixed metal look and ties in all the silver from the shower area.

I kept the same light above the mirror and the toilet paper holder, but I gave them a few coats of the same black spray paint I used on the vanity handles to give everything a nice cohesive look.

The last thing I needed to find was a mirror. I was super committed to spending $0, but it was tricky to find a mirror in our house that worked in the space. We tried three different ones – one was unframed and too hard to attach with the wood trim. One was too big, one was too small. I went searching the house in search of the “Goldilocks” mirror – one that was just right. I found the perfect mirror in the kids’ bathroom upstairs!

I loved the size and style, but did not love the color. I tried updating it with Rub n Buff, but that was too shiny and looked cheap. Then I tried my favorite gold spray paint and that was just right! I used this same spray paint to give a little update to the fan light on the ceiling too.

A $0 Bathroom Makeover

I raided my house for decor to finish off the space. The gorgeous pottery bowl on the wall was a wedding present – I have loved displaying in our previous homes but I hadn’t found the right place for it in this home until now. I love how it plays off all the different colors in the room and the round shape brings some softness to all the straight lines and angles in the room. I pulled an old planter that wasn’t being used and transplanted a few leaves from the snake plant in our playroom. I pulled soap from my stash (and even the colors work perfectly!) and a towel from my basement kitchen. A few items I had previously thrifted without a specific purpose in mind were suddenly just right for this space: a decorative bowl to store spare toiletries and washcloths and some cute pottery vessels to hold cotton balls and q-tips. A glass vase I had and some branches from a bush in our yard. It always amazes me how things I’ve had for years can feel fresh and new when I put them in a different place!

Laundry Bath-8

I could not be more thrilled with how this space turned out. Not only does it make me so happy to now have a cute bathroom instead of an eyesore, but this challenge served as such a great reminder that creating a home you love doesn’t have to cost a lot of (or in this case, any!) money. Shopping my house for decor, using up leftover paint and supplies from other projects, giving old fixtures a fresh look with simple spray paint, repurposing items from other renovations instead of just junking them . . . instead of just buying something to fit my needs, taking things I already had and getting creative with them is so satisfying! It stretched me and challenged me and that makes me love this bathroom even more now.

Laundry Bath

Sources

Wall Color: Sherwin Williams Alabaster (top), Benjamin Moore Smoky Mountain (bottom) both in Eggshell finish

Vanity Color: Sherwin Williams Agreeable Gray

Gold Spray Paint

Black Spray Paint


Lessons Learned: Guest Suite Reno

In case you missed it, I recently shared our renovated guest space. Our house has three bedrooms: three on the top floor and one in the basement. The basement bedroom has an attached bathroom and it made for a natural choice in guest room, but it was in desperate need of some updating.

To see pictures of the final bedroom, you can check out this post,

20200301_152608

And to see pictures of the final bathroom, you can check out this one.

20200214_080715

While Justin and I have done many small cosmetic changes to our previous homes, this was the first time we hired a contractor and did major renovation work. We learned so much from the project and today I thought it’d be fun to look back on the project as a whole: what we learned, what we loved, and what we wish we did differently.

Lesson #1: Plan Extra for Timeline and Budget

I had read somewhere to plan for a project to take 10% longer than expected and cost 10% more than expected. So we planned for extra time and money . . . and we were still way off. Our initial timeline of 5-6 weeks stretched to almost four months and we went over budget about 25% from our original estimate.

One big reason for the blowup of our original timeline and budget was the shower. When the old fiberglass shower was removed, we discovered unused space behind the wall and decided expand the shower to be much bigger and include a bench. This dramatically altered the timeline and budget with more time, more labor, more materials, and more money. We knew this and decided to allocate more money towards the project. And now that we’re on the other side, I can confidently say it was 100% worth making these changes. We love the shower and all the space it now has for our guests!20191030_202714

20200301_154146

Even with the changes to the shower, we still went over our adjusted budget. There were a few things that we didn’t initially take into account, such as a new shower fan and heaters for the room; however, a lot of our problem was that we knew the things we needed to buy on our own, but we didn’t actually plan out exactly what we would buy beforehand. Which leads me to my second lesson…

Lesson #2: Plan out ALL materials in advance

We knew we needed drawer handles. We didn’t plan which ones in advance. We knew we needed a shower door. We didn’t plan which one in advance. We knew we needed a light fixture, tiles, a counter top, faucet, a shower head, towel rods . . . you see where I’m going here. We didn’t plan any of this in advance. I waited to make those decision as we went along because I wanted to see how the room was coming together to make sure that whatever I chose was going to work.

20200211_154105

The problem with not knowing these details in advance is that we didn’t really know how much we could allocate to everything. We just had a general fund that we had set aside for the project and when we bought a shower door, tiles, towel hooks, etc, they just came out of the pool of money.

Looking back, this seems like a really obvious rookie mistake, right? I didn’t know how much each item was going to cost, and I was just choosing the items I liked as we went along. I was trying to stay balanced (i.e. I splurged on a shower door but said no to my dream mirror and chose a cheaper option) but in the end, the lack of planning is one of the reasons we went over budget. I really should have gone through and priced out every single item we needed to buy beforehand. That way I would have known exactly how much I had to spend on each item, and if there would have been items I wanted to change or add as we went along, I would’ve been able to adjust other items accordingly to stay in budget. Planning every item also would have helped me to see all the little items that I wasn’t initially thinking of, such as a shower valve, light bulbs, etc. to make sure we planned for everything.

#3: Don’t buy things too far in advance

This sounds like the opposite of what I just said, but while there were many things I should have planned in advance, there were also things I bought in advance that I shouldn’t have. For example, I bought not one, but TWO mirrors in advance. I thought I would use one for the bathroom mirror and couldn’t decide which one, so I got both. Unfortunately, I used the measurements based off the old mirror size. I didn’t know that the vanity would be raised or that the new light fixture would hang down further. The space for the mirror ended up being smaller than before and neither mirror worked in the space. Not only that, but I bought them too far in advance and they were both outside their return windows!

20200227_150907

Luckily, one mirror was able to be used in the guest room above the vanity table. The other mirror is still in the box but I do think I know where I want to put it now. Still, these were silly purchases to make so far in advance!

#4: Get clear on your vision

Probably our biggest lessons learned came from the bathroom vanity situation. I knew I wanted to change the vanity, and told our contractor we’d be replacing the old one, but didn’t have a clear vision for what that would look like. Demo had already begun when I decided I wanted to do a floating vanity. Then we realized the way the plumbing had been done wouldn’t work with a floating vanity and would be way too expensive to change. This shouldn’t have been shocking. We definitely could have looked at the plumbing from the get go and realized our limitations.

Then we decided to keep the old vanity  with a few updates and just replace the countertop. I searched and searched online and in stores for a pre-made one that would fit wall-to-wall, but couldn’t find one. We were already 3 weeks into the project when I talked to a local company about getting one made. We wasted seven weeks before switching to another company (read the whole story here).

20200211_153008

While I’m ultimately really happy with how the counter top turned out, if we would have honed in our vision for the vanity, realized we just needed a counter top made, and reached out to multiple companies from the get-go, we would have saved a ton of time and a whole lot of headaches and frustration.

Also, we would have avoided another hiccup, which was . . .

#5: Choose similar materials at the same time.

I chose the floor tile, shower floor tile, and shower wall tile all together. Then the tile guy brought in some samples for the shower threshold and bench. Then I chose the vanity top after all that was installed. Now, looking back, I wish I had chosen ALL the materials together. The one thing I really don’t like about the bathroom is the shower bench top.

20200306_085546

The option presented to me by our tile guy is fine. I like it enough, and it seemed like the best option at the time. But I don’t like that we had to use two pieces instead of one and now that all the other materials are in, it just doesn’t feel quite right with the rest of them. I really, REALLY wish I had used the same material on the bench top as we did on the counter top, but I didn’t know what that material would be when we did the shower.

This is a good example of many lessons learned together. I could have loved the bench top if I had a clear vision, if I had figured out all the materials and chosen them together, and if I had . . .

#6: Allow time to figure out what you really want

Because of my poor planning and because I didn’t have all my materials at once, I allowed myself to settle for something that was just okay. When my tile guy presented this top as an option, I didn’t research further. I wasn’t crazy about the tile, but I didn’t hate it and thought it was probably the best option. Yes, I should have started thinking about the materials earlier. But I also should have allowed myself a little time to look into other options to find something I loved instead of feeling pressure to just pick something and settle for just okay. I should have asked to delay the decision a day or two to look into other options.

#7: Test paint on the surface it will be on

I talked about this a little in the reveal post, but when I went to select a trim color for the guest bedroom, I tested it out on the wall because the trim wasn’t installed yet. Silly me! I knew to test it on multiple places throughout the room because light can change slightly throughout. I knew to test it next to the wall color to make sure I liked the contrast. And I liked the color I chose . . . until it was actually on the trim. The color looked different on the wood trim than it did on the wall (duh!) and I didn’t like it on the trim. So I had to go and re-paint all the doors trim. I love the new trim color, but it was tedious and annoying to re-do and had I just tested paint on the actual trim pieces I could have avoided the whole thing.

20200227_152721-1

#8: Get opinions from multiple contractors/companies

When we first started planning, we reached out to two contractors. I’m so glad we did, because only one of them proved to be reliable (obviously, this is the one we chose). Then when it came to vanity tops, I looked at multiple companies but only followed through with one (because at the time, this was the only company I could find with the material we wanted). Obviously, this company was not a good choice and we had to go back to the drawing board and find someone else. Lesson learned: always get multiple opinions/quotes/etc.

Overall, I love how both rooms turned out. In many ways, it fulfills and even exceeds my original vision for the space! We learned a lot from the whole experience and I know that the lessons learned will be valuable help to us as we continue to go through the house room by room and make this house into our dream home.

Guest Bathroom Reveal!

After starting this project the last week of October, our guest bathroom is finally finished! If you missed my previous posts for this project, you can check out our renovation progress and finishing touches.

When we first moved in, this windowless bathroom was dark (so much brown!), outdated, and didn’t function ideally. The shower was tiny and difficult for an adult to maneuver in, and the vanity left just enough space on either side for little things to fall down and get stuck. We didn’t really have many options for alternative layouts, but we decided to gut the space and start fresh. And fresh it is! In the words of Buddy the Elf, “I’m in love, I’m in love, and I don’t care who knows it!”

20191028_125741-120200211_152743-1

Ahhhh! I have all the heart eyes for this transformation. ❤

One of the biggest differences with the bathroom is the shower. I knew a tile shower would at least provide for a little more space inside than the previous fiberglass one and I fell in love with the handcrafted look of these subway tiles. Once our contractor ripped out the old shower, we realized that there was a ton of unused space behind the wall thanks to the built in cabinet in the bedroom, so we changed our initial plans to expand the shower and add a bench. While this pretty much destroyed our timeline and initial budget, it was so worth it! (I have no idea how I don’t have a better ‘before’ picture of the shower – all I have is a screen grab from my Instagram stories. Oops.)

screenshot_20200214-062120_instagram-120191030_202714-120200214_07063020200214_070536

The shower is not only gorgeous but so much more functional. I wanted matte black fixtures and particularly wanted a shower head with a hose because this shower is the one that people will come in and use to hose off from playing outside or swimming in our pond. The hose makes it much easier to quick rinse off without fully showering, particularly for children. The shower niche provides storage for toiletries, the bench is so useful, there is much more room overall, the varying tile and stone meshes perfectly, the glass door (I agonized over choices!) is gorgeous, I could go on and on. I love, love, love the new shower!

Another big change was with our vanity. I discussed the saga in this post, but basically, it took us a long time to figure out what type of vanity to do (plumbing limited my initial ideas) and then mid-renovation we started the process of getting a vanity top made. Unfortunately, we trusted the wrong company and they basically ghosted us and delayed the entire process. We started over with a new company and were able to find the perfect quartz remnant to use. I’m thrilled with the final product!

20191028_12580620200211_153008

We decided to save some money and keep the original vanity, but we updated it with a fresh coast of paint and new hardware. I love the mixed metal look so I used both matte black and brushed nickel finishes. We added a new board on the bottom front so we could elevate the vanity about 2 inches (it was lower than standard vanities today) and added a small piece of trim to each side to make it flush with the wall. With a new counter top and faucet, it looks like a completely different vanity!

20200211_153336

The little elevated bronze tray was a $2 gem I found in a thrift store and snapped up right away. I wasn’t sure what I would use it for at the time but I knew I would find a home for it. I love it in this space – it perfectly corrals the soap dispenser, a candle, and small (fake) succulent and I think the colors warm up what is otherwise a fairly cool-toned bathroom.

Because this is a basement bathroom, there is concrete foundation creating a half wall. I decided to use this to our advantage and make it into an intentional feature with board and batten trim and I LOVE how it turned out. It makes a statement right away when you first enter the bathroom!

20200211_152720

Justin cut a thick slab of white oak to fit the top of the wall and it makes the perfect shelf to display some decor and provide space for our guests to keep toiletries. We decided to leave it unstained – I love how the lighter color provides warmth to the space! – and just cover it with a few coats of water-based, polyurethane in a matte finish.

20200214_064518

The artwork is a custom piece by JBeck Studio and perfectly ties the bathroom and adjacent bedroom (reveal next week!) together. I had to go with fake plants since there is no window but I love the little touch of greenery.

Finishing touches like new baseboards and trim, a freshly painted door and new door handle, a wall heater (can you believe there was no heat source previously? Brr!), and updated lights and a mirror finished out the space. We’ve already had overnight guests and they gave the bathroom 5 stars . . . and I’m pretty sure they would’ve done that even if they weren’t my parents. 😉

Even though it’s the guest bathroom, it’s also the only bathroom on the basement level so it gets used frequently. I’m so happy we chose to do this as our first major renovation project!

20200211_15410520200211_15304820200211_15275620200214_07402120200214_06150620200211_15373120200206_15380620200214_080747And one final before and after because I just cannot get over the transformation. We may have gone over budget and timeline (we originally hoped to be done before Christmas) but we’re so happy with the finished space.

20191028_125815-120200214_080715

Sources

Wall Color: Benjamin Moore Smoky Mountain (color matched with Sherwin Williams)

Trim Color: Sherwin Williams Alabaster

Floor Mosaic Tile

Shower Floor & Niche Tile

Shower Wall Tile

Shower Head

Shower Handle

Shower Door

Bath Mat

Vanity Color: Sherwin Williams Repose Gray

Vanity Door Handles

Vanity Drawer Knobs

Vanity Counter Top: Viareggio Quartz Remnant

Undermount Sink

Vanity Faucet

Mirror

Hand Towel Rod

Toilet Paper Holder

Towel Hook

Behind Door Towel Hook

Shower Fan

Light Fixture

Wall Heater

Fake Plant

White Planter

Artwork: Custom from JBeck Studio

Guest Suite Renovation Progress

When Justin and I moved into our house, we fell in love with the layout and all the space, but we knew that the house needed some TLC to make it our own. We’re so excited to tackle it room by room and I’ve decided to document it here on the blog – I hope you enjoy the updates as much as we do! Our current project is: our guest suite.

Our house has four bedrooms. Three of them are on the top floor and the fourth is in the finished basement with an en suite, making it a natural choice for a guest room. Guests have some privacy and sleep undisturbed should our children decide to cry in the middle of the night. We love hosting and have overnight guests at least once a month so it is a priority for us to have a cozy and comfortable space for anyone staying with us.

While we loved the location and general layout of the guest room, there were some issues with it that caused it to be #2 on our list of rooms to update (our playroom being #1 – see that reveal here). First, the bedroom is actually *not* technically a bedroom because there is no window. This makes it PITCH black at night (there is also no window in the bathroom). In addition, the shower was problematic (small and difficult to control temperature), there was no heat source (no vents anywhere in either room!), there were strange and inconvenient outlet placements, there was a weird little built-in with an awkward TV opening, and cosmetically . . . let’s just say even when I did some minor decorating it didn’t exactly fit my style.

20191028_12564220191028_12570920191028_12584120191028_12573820191028_125815

Our renovation list includes:

-Install a window to make it a legal bedroom and introduce natural light

-Remove wallpaper, patch walls, and paint

-Move several outlets to more convenient locations

-Put door on the built-in TV opening (will be used for linen storage)

-Remove shower and replace with tile, new fixtures, and niche

-Replace bathroom flooring

-Replace vanity

-Replace bathroom lighting

-Add some sort of heat source to each room

Whew! Quite the laundry list of tasks, huh? We’ve done a lot of DIY projects in our previous homes but a big renovation like this is far beyond our capabilities so we hired a contractor. I’d say we’re about halfway done with the renovation so I thought it’d be a good time to show you some of the progress!

So far in the bedroom, the trim and doors have been removed, the doors have been primed, the wallpaper has been removed (HALLELUJAH!), and the walls have been patched. It has been SO cold in Indiana so we’ve held off on the window, but next week the weather is supposed to warm up a bit so it’s going in soon!

20191114_085655

In the bathroom we’ve made a LOT of progress and it’s going to be even better than I dreamed! When we ripped out the old shower, we discovered that there was some unused space behind the shower wall due to the bedroom built-ins. Jackpot!

20191030_202714

We immediately decided to change our plans and expand the shower into that unused space. This means more room for our guests to stand and we’re also able to install a bench along the back wall (our previous plans involved just a triangular shelf in the corner). This does significantly impact the cost, but I think it will be SO worth it. Every time I look at it now I’m just giddy and there’s not even tile yet!

20191114_085735

Whoop whoop!! Look at all that space!

20191114_085715

The old tile is all ripped up and I’m so excited to see the new tile go in. We’re still waiting on the tile for the shower floor to come in but in the meantime I’m getting all the heart eyes looking at what we have so far.

20191114_085809

The one area that isn’t going to work out like I’d hoped is our vanity. I had hoped to replace the old one with a floating vanity. I dreamt of this Ikea vanity with Semihandmade drawer fronts, but our space is about 3/4 inches too small. We considered having a custom one made but then discovered that due to the way plumbing had been originally installed, we’d have to dig the old plumbing out of the concrete, move it, and create a faux wall at the base of the floating vanity. It could have been done, but at a much higher cost than planned. We had to make a decision on what to spend the extra money on: a larger shower or a floating vanity. The vanity would add style but the shower would add so much extra space, function, and value to the house. It was a no-brainer. So the plan now is to keep the old vanity cabinet but update it with paint, new handles, and a new vanity top. It may not be *quite* what I originally envisioned but I’m still super excited!

20191114_085723

This is the first time Justin and I have done full room renovation, so we’re learning a lot. Mostly, these things take more time and money than expected ha! Overall, we’re really happy with the overall process and are very eager to see the finished product in a few weeks. Stay tuned!

Phase One Master Bathroom Reveal

Today I’m finally revealing our master bathroom “Phase One” update!

I wrote about the start of our plans and progress in this blog post but in case you missed it, the goal wasn’t to make this space the bathroom of our dreams. Eventually, we plan to gut the bathroom and change the layout but we are waiting to tackle that until all Justin’s student loans are paid off and we save up to do exactly what we’d like. We’re probably at least 5 years out being able to do a full renovation, so in the meantime, we wanted to do some very budget-friendly updates to freshen up the space and make us fall in love with what we already had.

A reminder on where we started:

Phase 1 Bath 2

The first thing to go was the carpet and I was more than ready to say goodbye. We ripped up the carpet, carpet pad, tack strip, and alllll the staples (tedious, but rewarding!). After painting the floor with a primer, we set down these peel and stick vinyl tiles. Honestly, I was intimidated by the thought of these but they were SO easy to work with! They are super sticky but once they were down on the floor, you could slide them around a bit if needed and even peel them back up if you needed to rearrange.

20191019_120200

LJ learned firsthand just how sticky the bottom of the tiles are – haha!

Master Bath 7

There are a lot of different angles in the room but the tiles could be cut with a regular scissors which was great! We were able to cut down on a lot of waste by using the same tile to cut multiple smaller pieces to fill in when we just needed a little bit to reach the wall. To cut unique pieces, I first took a piece of cardboard that I had cut to be the same size as the original tile, then I cut the cardboard to the needed size through trial and error and used it to trace the correct shape on the back of the tile. Then all I needed to do was cut the tile, peel the sticker back (where I had trace lines) and place it down!

Originally we thought we’d have to put down quarter round but the tiles slid right underneath the existing trim and we were happy enough with how it looked that we just decided it was good enough for phase one!

20191106_145328

The one thing that was frustrating with the tiles is that the edge patterns didn’t always match up. I often had to rotate it around several times or try different tile combinations to find the best fit. There are a lot of tiles that don’t exactly match up pattern-wise, but the overall pattern is busy enough that I don’t notice it unless I’m looking for it.

I was glad to see the brown go, but I’m still not totally satisfied with the color of the walls. I was shooting for a light gray and even tested out a few different colors. I chose Sherwin Williams Gray Strand and it looked gray in the can, looked gray in the paint tray, looked gray when tested on the wall (surrounded by white primer), but now that it’s fully covering the wall, it often tends to look blue. Argh! I think there are multiple factors here: the brown trim brings out warm tones and there is a lot of natural light that does the same thing. At night or on a cloudy day when there is less natural light, the walls do look grayer, and that’s what I was shooting for.

20191107_083010

I considered re-painting a different color but honestly, for a phase one, I think I’m just going to deal with it. Plus we already painted a LOT – one coat of primer and two coats of paint on the wall, then two coats of paint on the ceiling. We hadn’t originally planned on painting the ceiling, but the ceiling color was a creamy, almost yellow looking offwhite and I wanted a true white to help bring out the cool tones of paint on the wall. I do think it helped make a difference, plus it just looks nice and crisp now.

When we eventually redo the bathroom we will replace the vanities, but in the meantime I wanted to give them a fresh face lift. I had some paint leftover from our previous house (Sherwin Williams Urbane Bronze) and I love how it totally changed the look of the vanities for no additional cost. I picked up some new drawer pulls at Lowe’s to complete the facelift. We also ended up re-doing the caulk around the vanity top and sink since the old caulk was peeling and discolored.

Master Bath 1

We hadn’t planned on replacing the faucets, but while painting, the faucet on Justin’s head was knocked into and broke – you could no longer shut off by lifting the handle up and down but had to slide it to the right and we had to shut off the cold water valve because it never stopped flowing. Honestly, the old faucets were both not super functional and you had to push down the handle in a particular way to keep it from continuing to drip, so even though it put us over budget we decided to take this opportunity to swap them out for some new ones. I love the clean and simple look of these matte black ones and love the way it gives the vanity a cool mixed metals look with the brushed nickel drawer pulls.

Painted walls, refreshed vanities, new floors, some simple decor from things we already had (amazing what you can put together when you “shop” your own house) . . . I smile every time I walk into the bathroom now! It may still not be the bathroom of my dreams, but this little phase one update made me SO much happier with the space in the meantime. I’m loving the transformation!

Phase 1 Bath 220191106_143536

Phase 1 Bath 3Master Bath 2

Master Bath 420191106_143517

I love it so much!

Master Bath 3

Rough budget breakdown (we bought paint supplies like brushes trays, etc for multiple rooms of the house so I didn’t include them in this list):

New Vanity Handles: $19.07

Faucets: $189.57 ($89 each)

Toilet Wax Ring: $6.90

Paint: $30.87

Misc (chalk line, plumbing lines): $54.18

Vinyl: $332.21

Total: $632.80

We had hoped to spend $500 or less but once we decided to change out the faucets we knew we’d be going over. Justin and I are both still happy with the transformation and would definitely do it all over again. It was definitely worth spending a little now to love the space we’re in for the next 5 or more years. Honestly, even if we were never able to do more than this update, we would be content with the changes. It just goes to show you that you don’t need to spend thousands of dollars to love a space!


Phase One Master Bathroom Progress

A little while ago, I shared in my Instagram stories that we are doing a “Phase One” master bathroom update. It’s consumed most of my free time over the past week so today I thought I’d share our progress so far.

First of all, what do I mean by “phase one?” I was inspired by Chris Loves Julia and their Phase One kitchen update. After moving into their house, they weren’t ready for a full kitchen renovation but they did not like the look, feel, and function of their kitchen. So they set up to update it for under $1000 and make it work for the short term.  It’s still not their ideal kitchen, but the goal was to “fall in love with what they already had” with a few simple updates. I thought this was such a good idea, and it made me think of our bathroom.

When we first moved into our house, I knew I wanted to do major work in the master bathroom. Ideally, I’d like to completely gut it and re-work the layout (particularly the shower area, which is off to the right of the large vanity). We have a plan to do that someday, but we need to pay down Justin’s student loans first. It will likely be at least 5+ years until we can make it the bathroom of our dreams, so we decided in the meantime to just do a “phase one” refresh. My goal was to spend under $500 and do some simple updates to fall in love and be content with the layout as is, but make it feel fresh and clean.

Here’s what the bathroom looked like to begin with:

Phase 1 Bath 2Phase 1 Bath 3

The room is definitely dated, but the dark walls and carpet were my two biggest complaints. I am not a fan of carpet in the bathroom and this one had stains (mostly rust stains from the previous owners’ antique vanity) and other signs of wear and tear. That combined with dark colors just made it feel dingy.

The first thing we did was rip up the carpet. My dad came over last week and we spent an afternoon pulling it up and removing all the staples from the subfloor.

Phase 1 Bath 4

The nice thing about no flooring was it made painting easier – no worries about drips! I primed and trimmed out the walls quickly. You’ll notice I even painted a little love note in the space behind where my mirror will go on the wall. ❤

Phase 1 Bath 5

We’re going to lay down an inexpensive peel-and-stick vinyl and the directions called for the wood floor to be primed first. We used a shop vac to remove all debris and then primed the floors.

Phase 1 Bath 6

I finished painting the walls and then was inspired to also paint the vanities. I had plenty of paint in Sherwin Williams Urbane Bronze leftover from our previous house so this didn’t cost anything extra. Score!

Phase 1 Bath 1

Now my plan from here was just to paint the ceilings a fresh white, lay down the flooring, touch up some caulk, and be finished BUT . . . I can’t decide if I like the wall color! I chose Sherwin Williams Gray Screen and tested it in multiple places around the room before painting. It always looked gray when I tested, but now that it’s fully on the walls, it looks blue! I think the issue is the wood trim. When I tested the paint, it was surrounded by white primer and looked gray, but now that it’s outlined by wood, it brings out the brown undertones and looks blue. Depending on the amount of natural light, it does vary a little (you can see in the above picture that the walls around the tub even look different than other walls) but it never really looks like the gray I envisioned. So I can either repaint the walls a different color, paint the trim white to help it look gray, or leave it as is and deal with the blue. Sigh. None of those options are particularly appealing so I need to spend some time thinking about this.

I’ll be sure to report back once the room is totally finished in a week or two – I’m so excited to have an updated bathroom soon!