Plans for a Long-Overdue Dining Room Update!

One of my goals for 2021 was to paint the main areas of our house (kitchen, dining room, entryway/foyer, hallway, and living room) and if you follow me on Instagram, you know I’ve already started tackling this project! I decided to start with our dining room, which has remained virtually untouched renovation-wise since the day we moved in. As soon as paint started to transform the look of the room, my wheels started turning for a phase one renovation of the space! I thought it would be fun to take some time today and share what I’m thinking and some of the plans for the space.

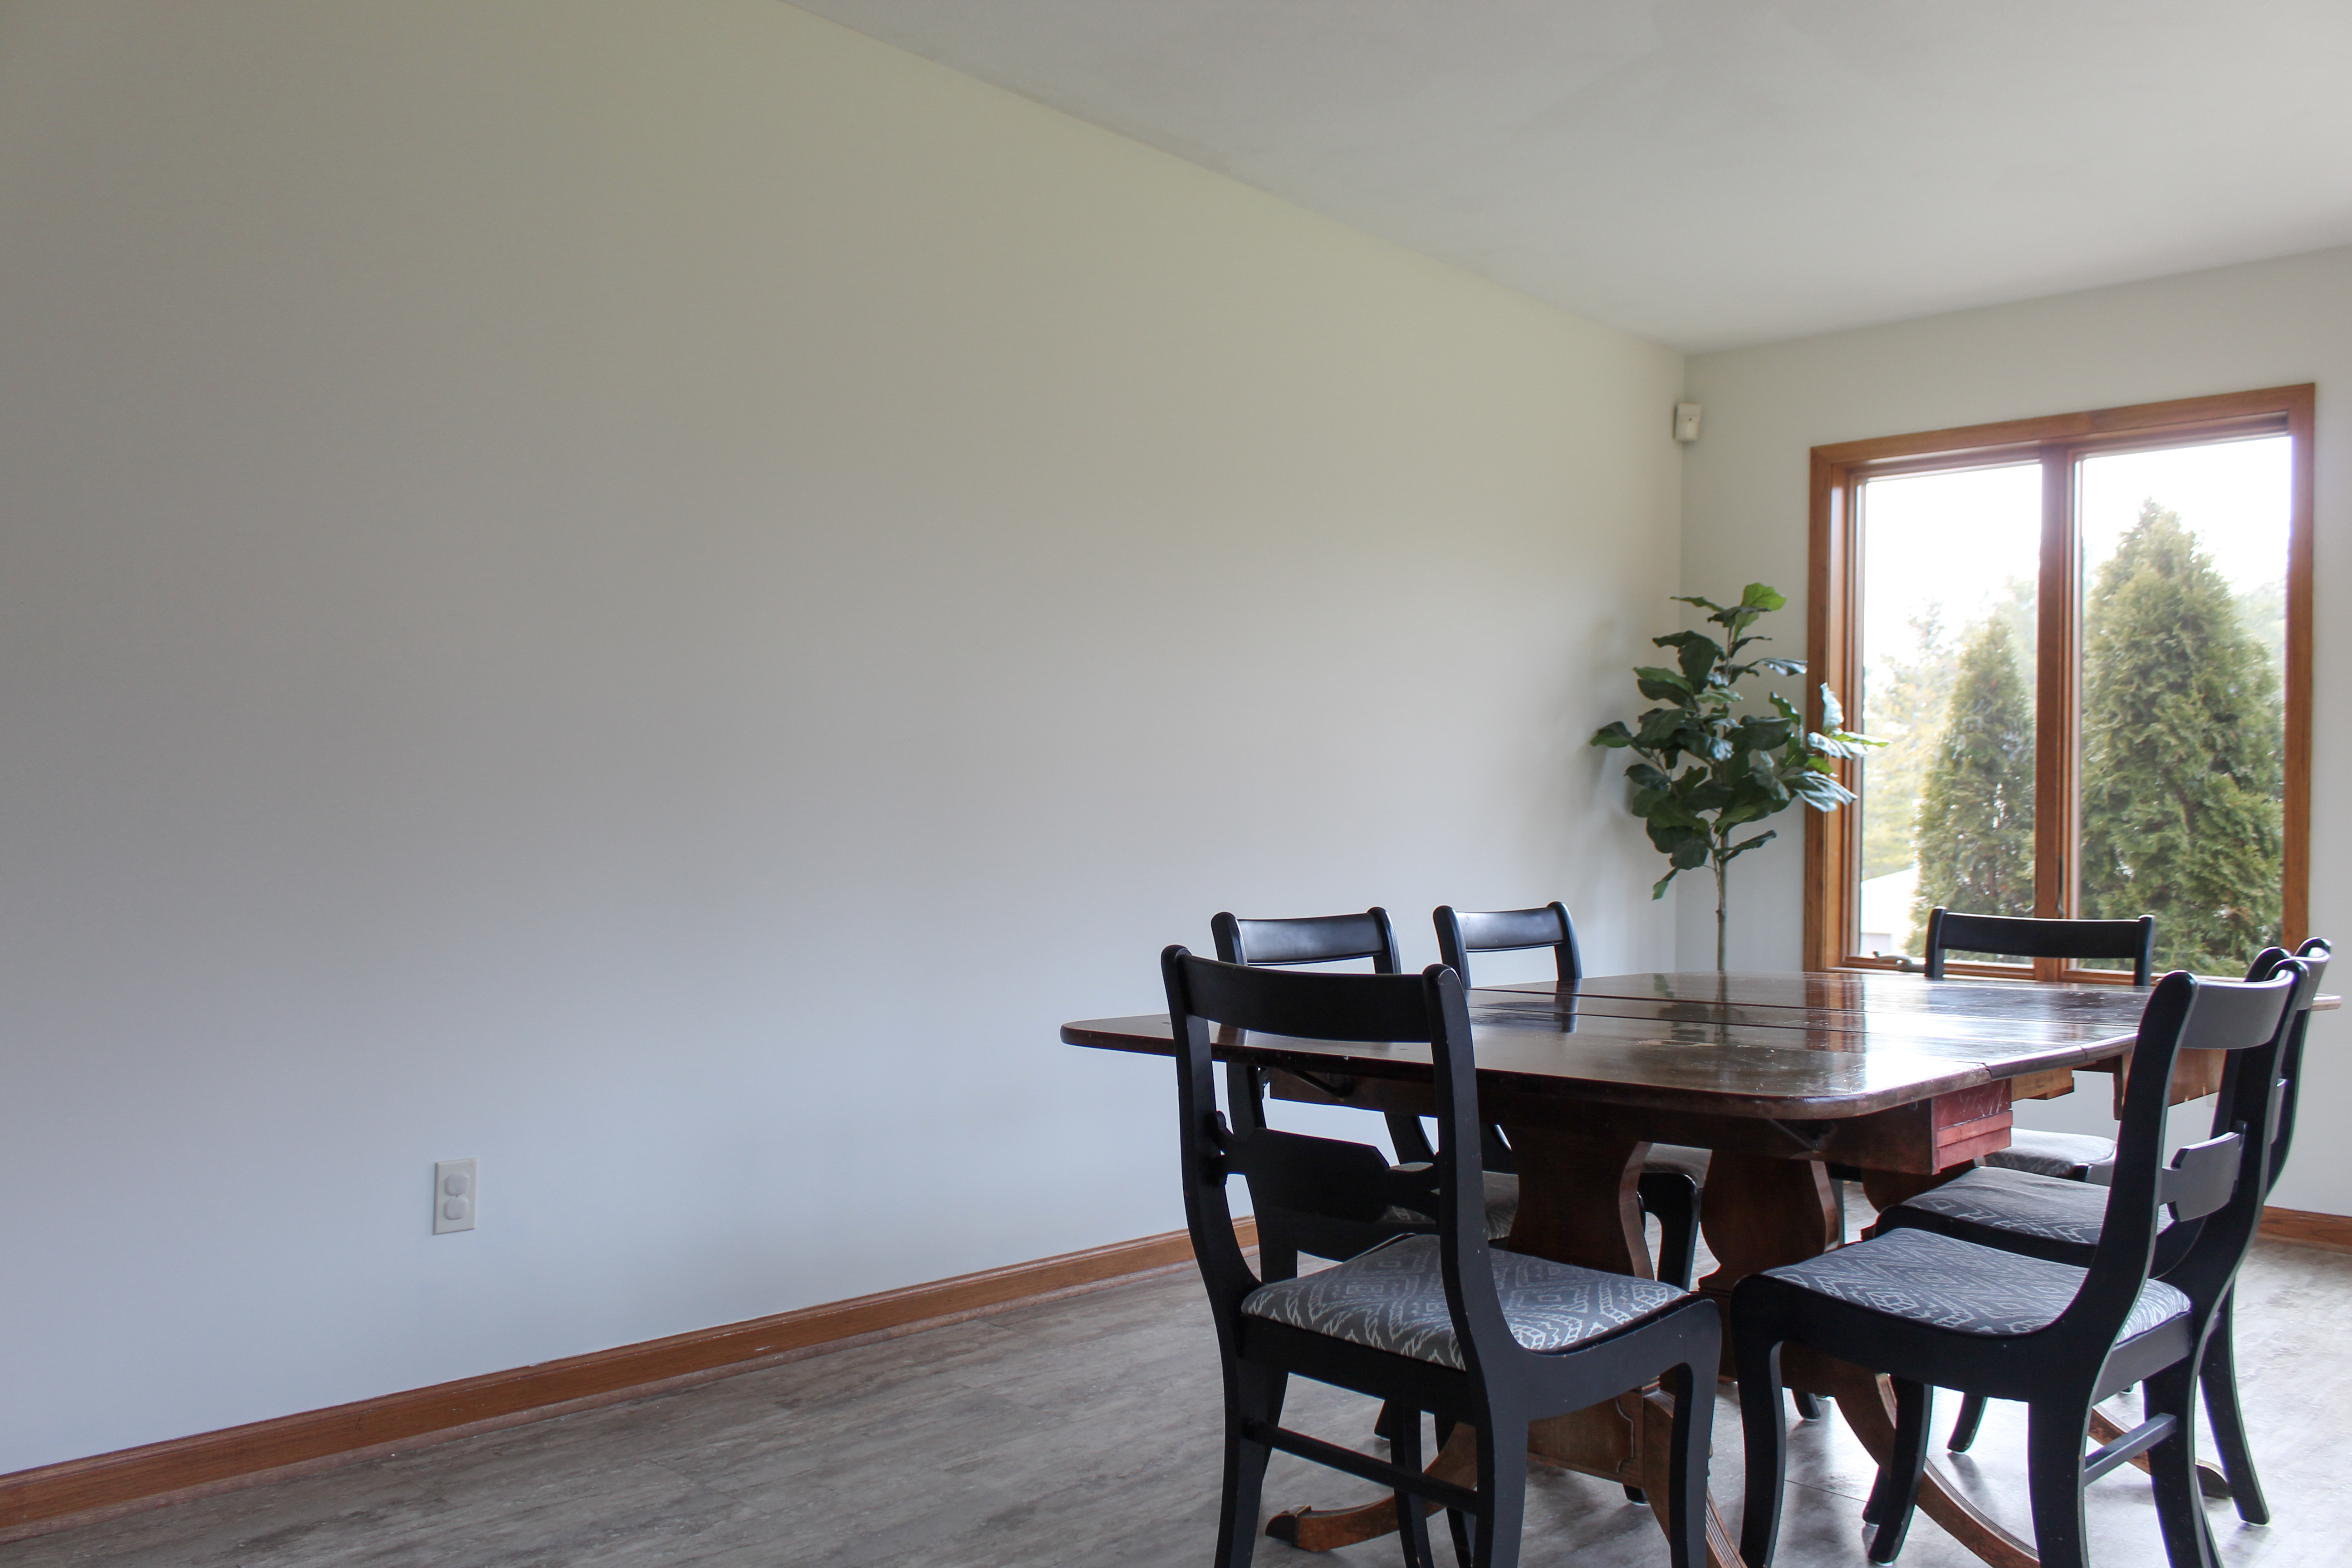
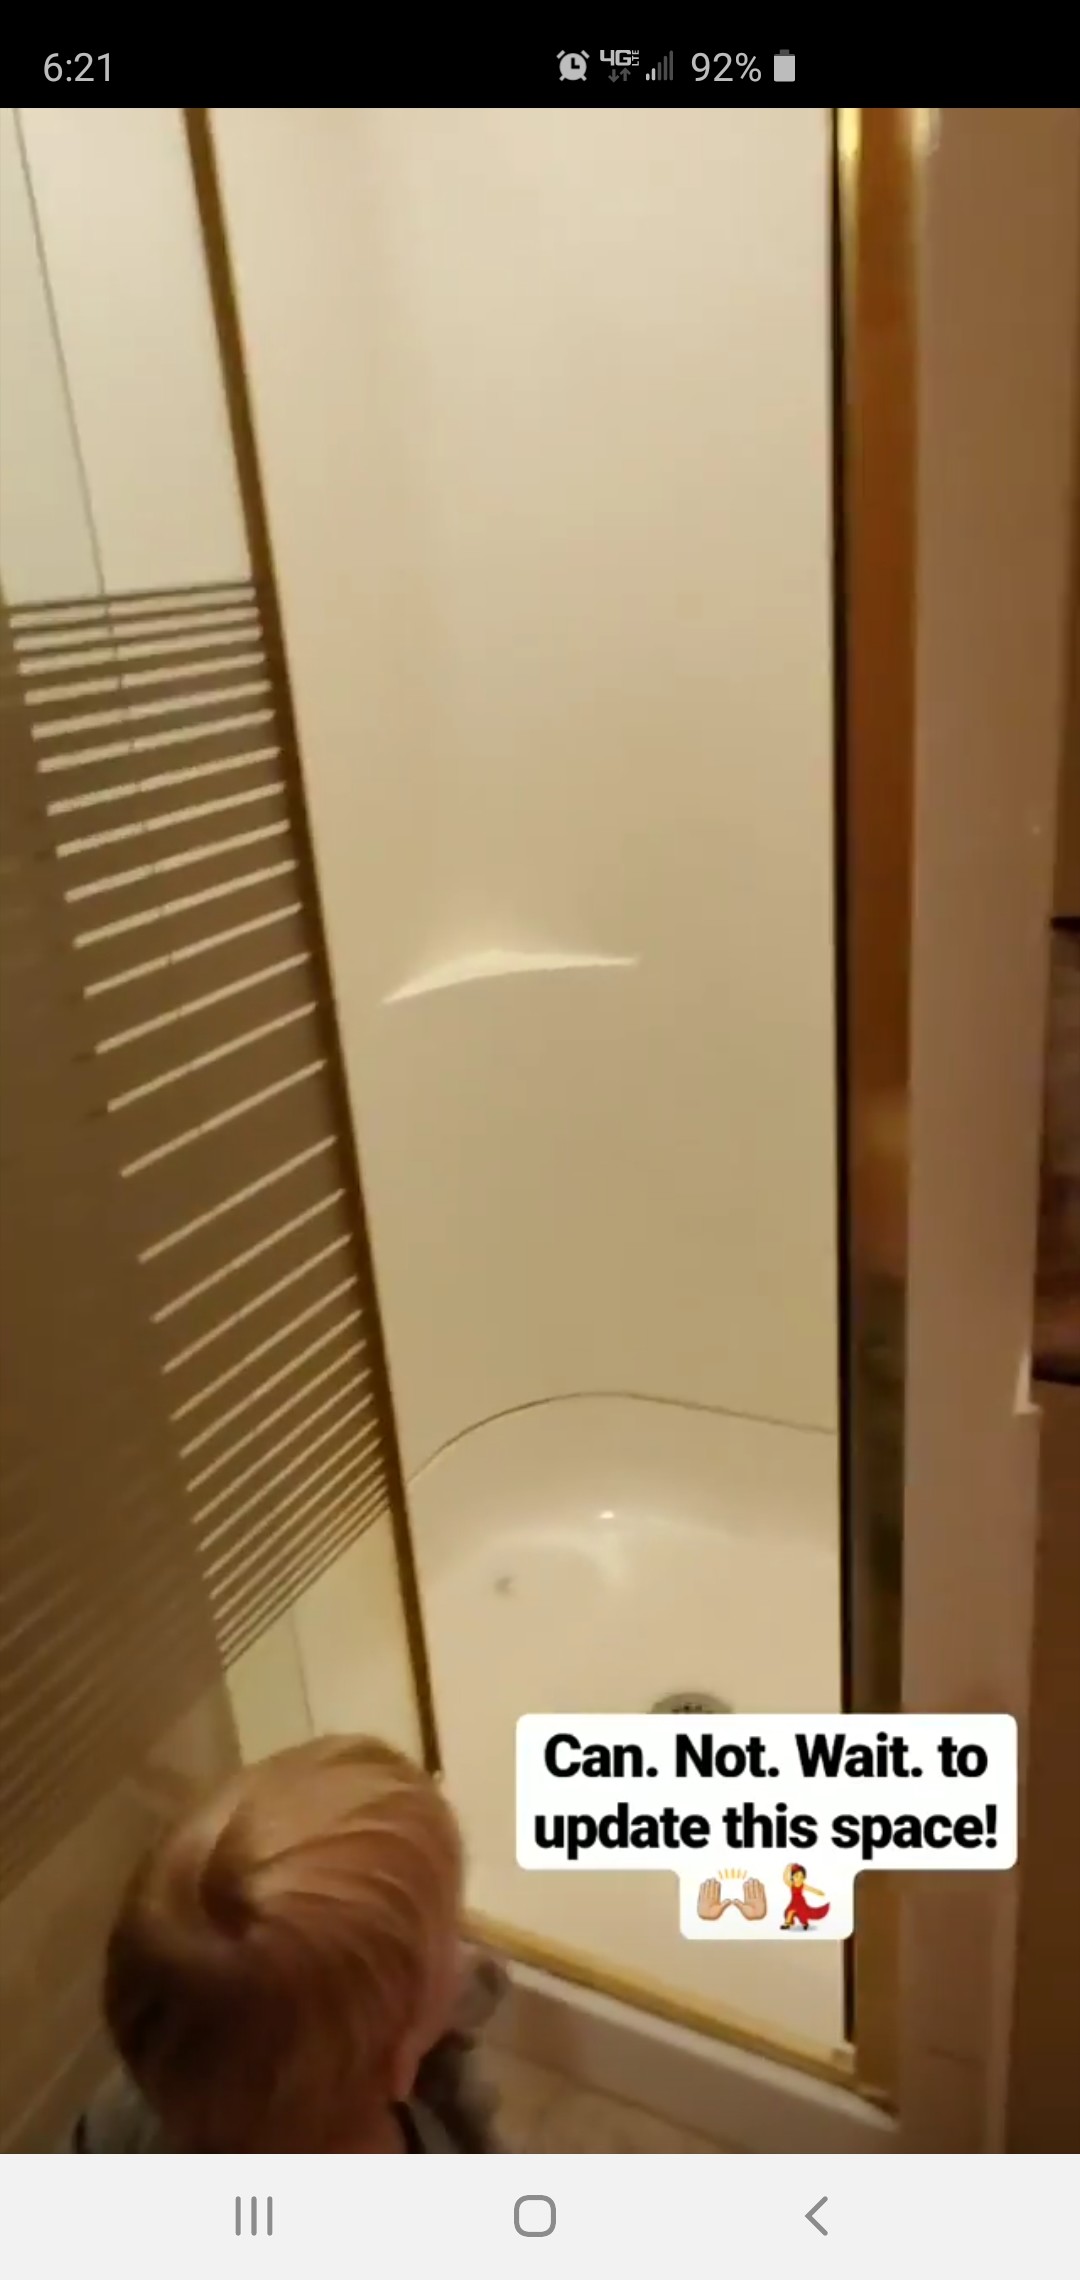
Here’s what the dining room looked like to begin with:

HouseTour2020-28

Pretty uninspiring, huh? The first step was patching over the many holes, dings, nicks, and scuffs along the walls, then covering them with a coat of my favorite primer and two coats of Sherwin Williams Alabaster in an eggshell finish. Here’s what it looks like now:

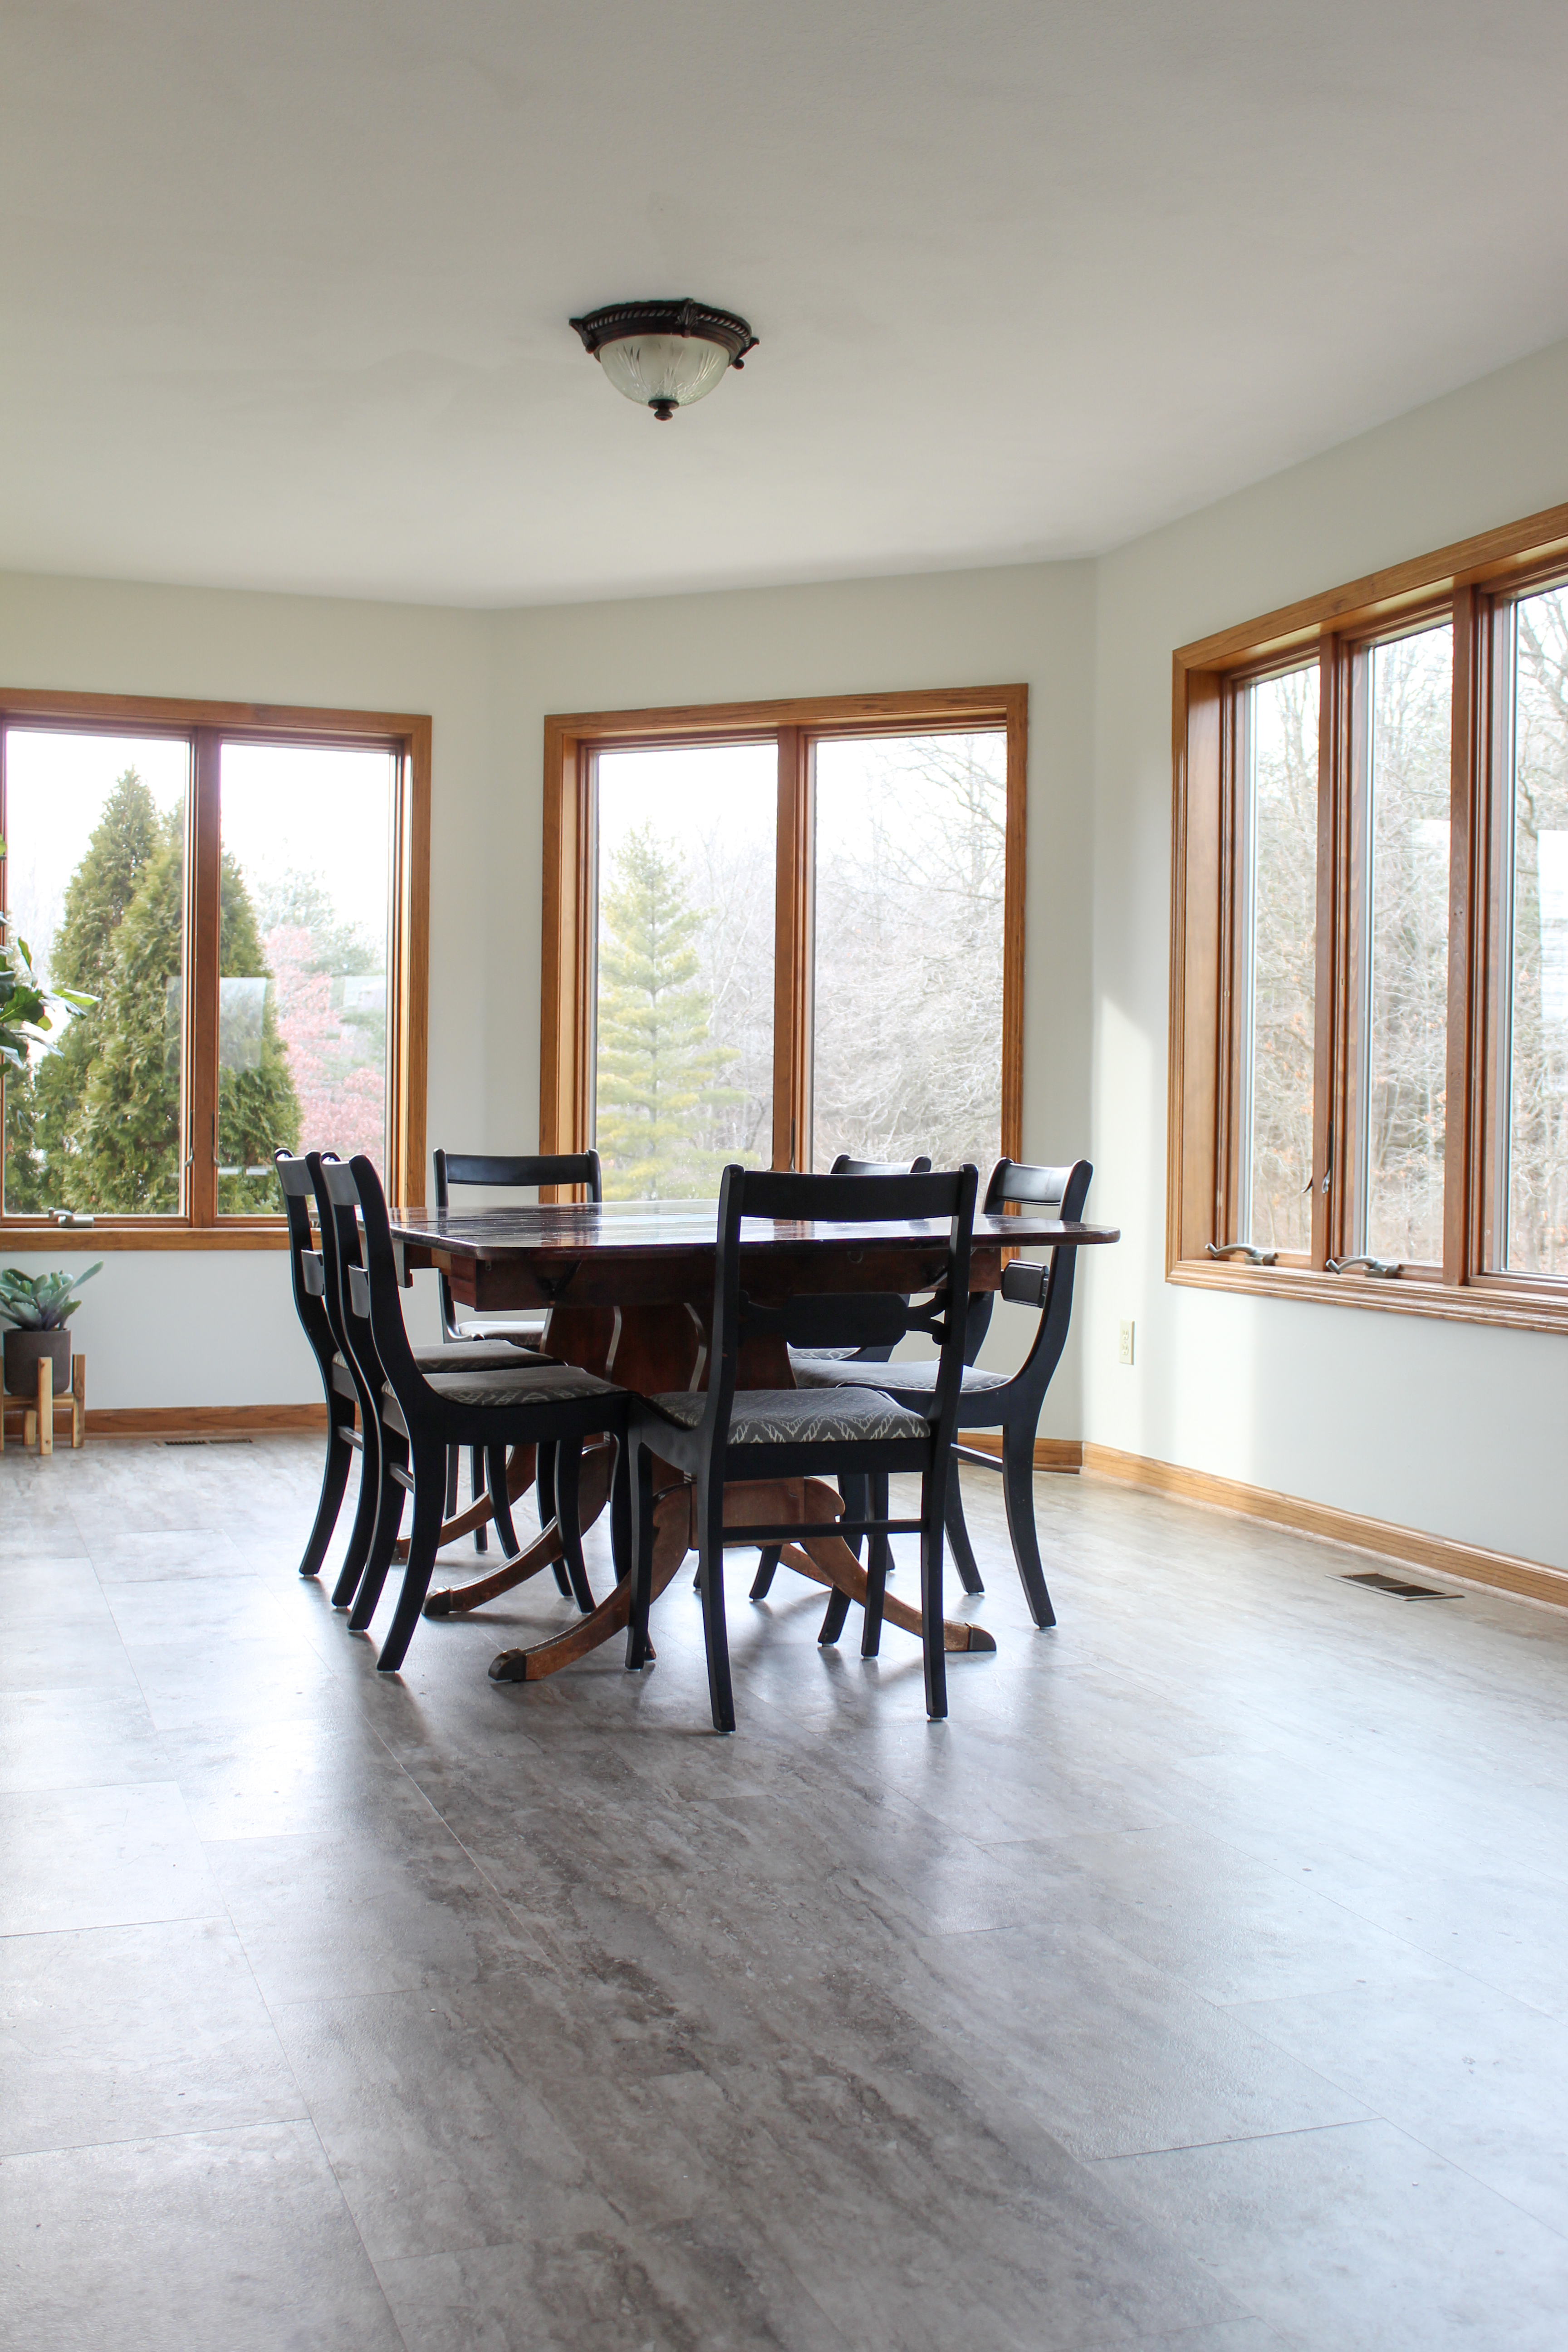
The soft, slightly creamy white feels like a breath of fresh air after almost two years of dingy brown walls and already the room feels so different. I’m excited to give this neglected room some additional, and much needed, TLC!

I love the the idea of mood boards and I think they can be so helpful in visualizing a space, but this busy mama just never has the time to sit down and create one! For me, Pinterest boards quickly and easily give me direction and corral all my ideas and vision into one space. Here’s what my dining room “mood board” currently looks like:

While Justin and I both agree that we would LOVE to update the flooring, we’re holding off for now. The kitchen, pantry, dining room, entryway, powder room, and laundry room all have the same flooring, and they’re connected in a way that isn’t conducive to changing the flooring unless you are going to do it for everything. We know that in a few years we’re planning to change the layout of our kitchen, so it makes sense to hold off on flooring until then. That means the baseboards also stay for now (I’m slowly swapping out the narrow baseboards in our house for a chunky 5 inch version) so I’m just going to paint them in a contrast color. I’m leaning towards using a soft greige like Sherwin Williams Agreeable Gray. I am going to also update the window trim, probably giving it the same look as our home office windows, and paint it the same contrast color as the baseboards.

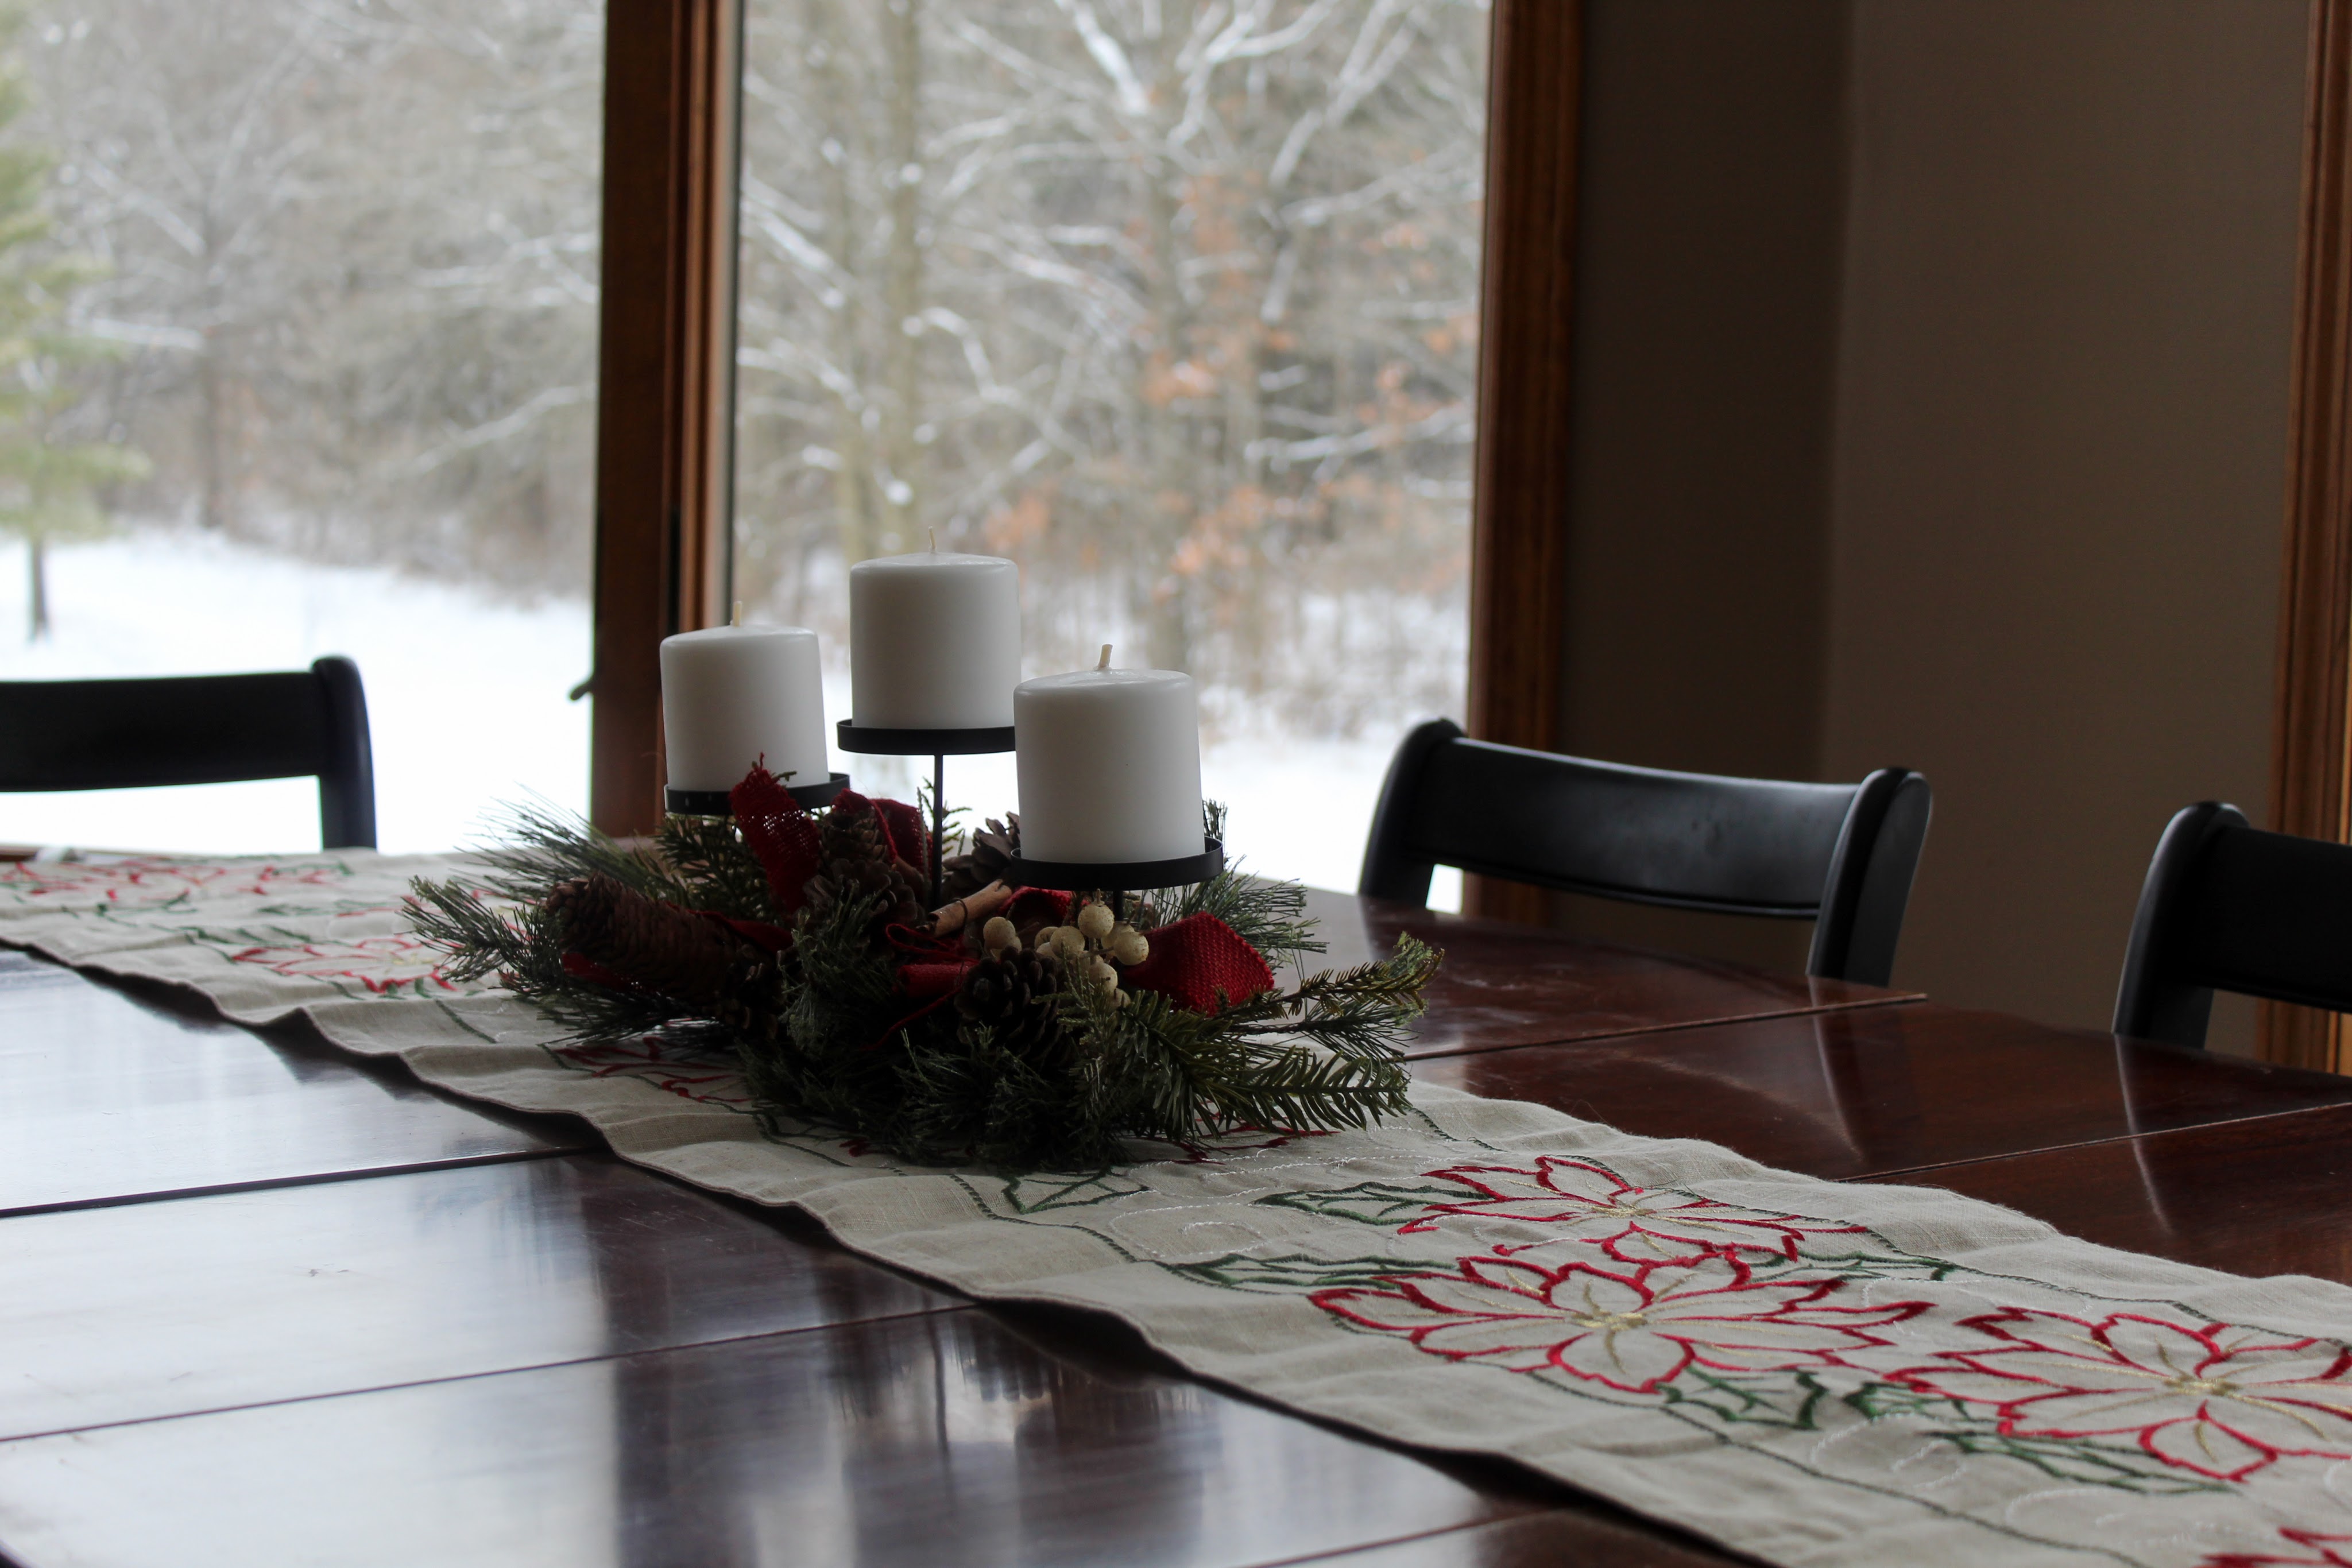
Once all that is completed, the fun will really start! The star of the room is actually not in the room at all: it’s the outdoors! The windows are the biggest statement in the room and they draw your eye outside to all the woods surrounding our house. It’s a fabulous view no matter the season and I’m going to add some window treatments to complement and highlight it.

Just look at the beautiful snow-covered trees that were outside in December!

The windows are large so I need pretty substantial, long curtain rods. I like the simplicity of these matte black ones! The walls come together at unusual angles so I’m also ordering two of these hinged curtain rod connectors to create one continuous curtain rod. As for curtains, I want to use them as a way to create a little drama and add some much needed color to the room – I’ve been debating between this soft rose color and this deep merlot color. I ordered a panel of each so I can see them in person before making my final decision but either way I’m excited for the texture that the velvet will bring to the space!

Since the windows are going to be the focal point, I’m keeping the rest of the room fairly simple. We’ll update the light fixture – I’m currently debating the simple elegance of this brass chandelier vs. the casual vibe of this modern bamboo pendant. I also want to add some artwork and center a large credenza along the window-less wall.

I’m loving the look of credenzas with reeded details but they are $$$$$ so I’m kicking around a few ideas for a possible DIY version…stay tuned for that!

The table and chairs are a big TBD. They are hand-me-downs and while they’ve served us well for the past 7.5 years of marriage, we’re not crazy about the look of them and we’re definitely ready for a change. That being said, this table extends to fit 14 people (!!) which is amazing for our large dining room, and as you can imagine, finding a replacement that is equally as expansive is incredibly expensive. I’m so afraid of dropping a ton of money on a new dining table only to find it clashes with our flooring when we finally update that. Yikes! So, we might keep what we’ve got for now, or we might find an inexpensive secondhand option that is more our style. We’ll see!

All in all, I think this will be a fairly budget-friendly makeover and will definitely tide us over until we’re able to do bigger changes like the flooring and table. Now that I’ve got a pretty clear vision moving forward, I’m excited to start ordering things and pulling this room together. I’ll definitely be sharing more of the day-by-day progress on my Instagram account (@simplifythechaos) so be sure to follow along there if you want more frequent updates!

Affiliate Disclosure: As an Amazon Associate, I earn from qualifying purchases. This means if you purchase something through an Amazon link I provided, I may earn a small commission. None of my recommendations or decisions are based on any commission I might receive from your purchases, but are all things I’ve either bought myself or am planning to buy. The decision to buy something is yours, and whether or not you decide to buy one through the link I provide is completely up to you. Thank you!

Lessons Learned: Guest Suite Reno

In case you missed it, I recently shared our renovated guest space. Our house has three bedrooms: three on the top floor and one in the basement. The basement bedroom has an attached bathroom and it made for a natural choice in guest room, but it was in desperate need of some updating.

To see pictures of the final bedroom, you can check out this post,

20200301_152608

And to see pictures of the final bathroom, you can check out this one.

20200214_080715

While Justin and I have done many small cosmetic changes to our previous homes, this was the first time we hired a contractor and did major renovation work. We learned so much from the project and today I thought it’d be fun to look back on the project as a whole: what we learned, what we loved, and what we wish we did differently.

Lesson #1: Plan Extra for Timeline and Budget

I had read somewhere to plan for a project to take 10% longer than expected and cost 10% more than expected. So we planned for extra time and money . . . and we were still way off. Our initial timeline of 5-6 weeks stretched to almost four months and we went over budget about 25% from our original estimate.

One big reason for the blowup of our original timeline and budget was the shower. When the old fiberglass shower was removed, we discovered unused space behind the wall and decided expand the shower to be much bigger and include a bench. This dramatically altered the timeline and budget with more time, more labor, more materials, and more money. We knew this and decided to allocate more money towards the project. And now that we’re on the other side, I can confidently say it was 100% worth making these changes. We love the shower and all the space it now has for our guests!20191030_202714

20200301_154146

Even with the changes to the shower, we still went over our adjusted budget. There were a few things that we didn’t initially take into account, such as a new shower fan and heaters for the room; however, a lot of our problem was that we knew the things we needed to buy on our own, but we didn’t actually plan out exactly what we would buy beforehand. Which leads me to my second lesson…

Lesson #2: Plan out ALL materials in advance

We knew we needed drawer handles. We didn’t plan which ones in advance. We knew we needed a shower door. We didn’t plan which one in advance. We knew we needed a light fixture, tiles, a counter top, faucet, a shower head, towel rods . . . you see where I’m going here. We didn’t plan any of this in advance. I waited to make those decision as we went along because I wanted to see how the room was coming together to make sure that whatever I chose was going to work.

20200211_154105

The problem with not knowing these details in advance is that we didn’t really know how much we could allocate to everything. We just had a general fund that we had set aside for the project and when we bought a shower door, tiles, towel hooks, etc, they just came out of the pool of money.

Looking back, this seems like a really obvious rookie mistake, right? I didn’t know how much each item was going to cost, and I was just choosing the items I liked as we went along. I was trying to stay balanced (i.e. I splurged on a shower door but said no to my dream mirror and chose a cheaper option) but in the end, the lack of planning is one of the reasons we went over budget. I really should have gone through and priced out every single item we needed to buy beforehand. That way I would have known exactly how much I had to spend on each item, and if there would have been items I wanted to change or add as we went along, I would’ve been able to adjust other items accordingly to stay in budget. Planning every item also would have helped me to see all the little items that I wasn’t initially thinking of, such as a shower valve, light bulbs, etc. to make sure we planned for everything.

#3: Don’t buy things too far in advance

This sounds like the opposite of what I just said, but while there were many things I should have planned in advance, there were also things I bought in advance that I shouldn’t have. For example, I bought not one, but TWO mirrors in advance. I thought I would use one for the bathroom mirror and couldn’t decide which one, so I got both. Unfortunately, I used the measurements based off the old mirror size. I didn’t know that the vanity would be raised or that the new light fixture would hang down further. The space for the mirror ended up being smaller than before and neither mirror worked in the space. Not only that, but I bought them too far in advance and they were both outside their return windows!

20200227_150907

Luckily, one mirror was able to be used in the guest room above the vanity table. The other mirror is still in the box but I do think I know where I want to put it now. Still, these were silly purchases to make so far in advance!

#4: Get clear on your vision

Probably our biggest lessons learned came from the bathroom vanity situation. I knew I wanted to change the vanity, and told our contractor we’d be replacing the old one, but didn’t have a clear vision for what that would look like. Demo had already begun when I decided I wanted to do a floating vanity. Then we realized the way the plumbing had been done wouldn’t work with a floating vanity and would be way too expensive to change. This shouldn’t have been shocking. We definitely could have looked at the plumbing from the get go and realized our limitations.

Then we decided to keep the old vanity  with a few updates and just replace the countertop. I searched and searched online and in stores for a pre-made one that would fit wall-to-wall, but couldn’t find one. We were already 3 weeks into the project when I talked to a local company about getting one made. We wasted seven weeks before switching to another company (read the whole story here).

20200211_153008

While I’m ultimately really happy with how the counter top turned out, if we would have honed in our vision for the vanity, realized we just needed a counter top made, and reached out to multiple companies from the get-go, we would have saved a ton of time and a whole lot of headaches and frustration.

Also, we would have avoided another hiccup, which was . . .

#5: Choose similar materials at the same time.

I chose the floor tile, shower floor tile, and shower wall tile all together. Then the tile guy brought in some samples for the shower threshold and bench. Then I chose the vanity top after all that was installed. Now, looking back, I wish I had chosen ALL the materials together. The one thing I really don’t like about the bathroom is the shower bench top.

20200306_085546

The option presented to me by our tile guy is fine. I like it enough, and it seemed like the best option at the time. But I don’t like that we had to use two pieces instead of one and now that all the other materials are in, it just doesn’t feel quite right with the rest of them. I really, REALLY wish I had used the same material on the bench top as we did on the counter top, but I didn’t know what that material would be when we did the shower.

This is a good example of many lessons learned together. I could have loved the bench top if I had a clear vision, if I had figured out all the materials and chosen them together, and if I had . . .

#6: Allow time to figure out what you really want

Because of my poor planning and because I didn’t have all my materials at once, I allowed myself to settle for something that was just okay. When my tile guy presented this top as an option, I didn’t research further. I wasn’t crazy about the tile, but I didn’t hate it and thought it was probably the best option. Yes, I should have started thinking about the materials earlier. But I also should have allowed myself a little time to look into other options to find something I loved instead of feeling pressure to just pick something and settle for just okay. I should have asked to delay the decision a day or two to look into other options.

#7: Test paint on the surface it will be on

I talked about this a little in the reveal post, but when I went to select a trim color for the guest bedroom, I tested it out on the wall because the trim wasn’t installed yet. Silly me! I knew to test it on multiple places throughout the room because light can change slightly throughout. I knew to test it next to the wall color to make sure I liked the contrast. And I liked the color I chose . . . until it was actually on the trim. The color looked different on the wood trim than it did on the wall (duh!) and I didn’t like it on the trim. So I had to go and re-paint all the doors trim. I love the new trim color, but it was tedious and annoying to re-do and had I just tested paint on the actual trim pieces I could have avoided the whole thing.

20200227_152721-1

#8: Get opinions from multiple contractors/companies

When we first started planning, we reached out to two contractors. I’m so glad we did, because only one of them proved to be reliable (obviously, this is the one we chose). Then when it came to vanity tops, I looked at multiple companies but only followed through with one (because at the time, this was the only company I could find with the material we wanted). Obviously, this company was not a good choice and we had to go back to the drawing board and find someone else. Lesson learned: always get multiple opinions/quotes/etc.

Overall, I love how both rooms turned out. In many ways, it fulfills and even exceeds my original vision for the space! We learned a lot from the whole experience and I know that the lessons learned will be valuable help to us as we continue to go through the house room by room and make this house into our dream home.

Guest Bathroom Reveal!

After starting this project the last week of October, our guest bathroom is finally finished! If you missed my previous posts for this project, you can check out our renovation progress and finishing touches.

When we first moved in, this windowless bathroom was dark (so much brown!), outdated, and didn’t function ideally. The shower was tiny and difficult for an adult to maneuver in, and the vanity left just enough space on either side for little things to fall down and get stuck. We didn’t really have many options for alternative layouts, but we decided to gut the space and start fresh. And fresh it is! In the words of Buddy the Elf, “I’m in love, I’m in love, and I don’t care who knows it!”

20191028_125741-120200211_152743-1

Ahhhh! I have all the heart eyes for this transformation. ❤

One of the biggest differences with the bathroom is the shower. I knew a tile shower would at least provide for a little more space inside than the previous fiberglass one and I fell in love with the handcrafted look of these subway tiles. Once our contractor ripped out the old shower, we realized that there was a ton of unused space behind the wall thanks to the built in cabinet in the bedroom, so we changed our initial plans to expand the shower and add a bench. While this pretty much destroyed our timeline and initial budget, it was so worth it! (I have no idea how I don’t have a better ‘before’ picture of the shower – all I have is a screen grab from my Instagram stories. Oops.)

screenshot_20200214-062120_instagram-120191030_202714-120200214_07063020200214_070536

The shower is not only gorgeous but so much more functional. I wanted matte black fixtures and particularly wanted a shower head with a hose because this shower is the one that people will come in and use to hose off from playing outside or swimming in our pond. The hose makes it much easier to quick rinse off without fully showering, particularly for children. The shower niche provides storage for toiletries, the bench is so useful, there is much more room overall, the varying tile and stone meshes perfectly, the glass door (I agonized over choices!) is gorgeous, I could go on and on. I love, love, love the new shower!

Another big change was with our vanity. I discussed the saga in this post, but basically, it took us a long time to figure out what type of vanity to do (plumbing limited my initial ideas) and then mid-renovation we started the process of getting a vanity top made. Unfortunately, we trusted the wrong company and they basically ghosted us and delayed the entire process. We started over with a new company and were able to find the perfect quartz remnant to use. I’m thrilled with the final product!

20191028_12580620200211_153008

We decided to save some money and keep the original vanity, but we updated it with a fresh coast of paint and new hardware. I love the mixed metal look so I used both matte black and brushed nickel finishes. We added a new board on the bottom front so we could elevate the vanity about 2 inches (it was lower than standard vanities today) and added a small piece of trim to each side to make it flush with the wall. With a new counter top and faucet, it looks like a completely different vanity!

20200211_153336

The little elevated bronze tray was a $2 gem I found in a thrift store and snapped up right away. I wasn’t sure what I would use it for at the time but I knew I would find a home for it. I love it in this space – it perfectly corrals the soap dispenser, a candle, and small (fake) succulent and I think the colors warm up what is otherwise a fairly cool-toned bathroom.

Because this is a basement bathroom, there is concrete foundation creating a half wall. I decided to use this to our advantage and make it into an intentional feature with board and batten trim and I LOVE how it turned out. It makes a statement right away when you first enter the bathroom!

20200211_152720

Justin cut a thick slab of white oak to fit the top of the wall and it makes the perfect shelf to display some decor and provide space for our guests to keep toiletries. We decided to leave it unstained – I love how the lighter color provides warmth to the space! – and just cover it with a few coats of water-based, polyurethane in a matte finish.

20200214_064518

The artwork is a custom piece by JBeck Studio and perfectly ties the bathroom and adjacent bedroom (reveal next week!) together. I had to go with fake plants since there is no window but I love the little touch of greenery.

Finishing touches like new baseboards and trim, a freshly painted door and new door handle, a wall heater (can you believe there was no heat source previously? Brr!), and updated lights and a mirror finished out the space. We’ve already had overnight guests and they gave the bathroom 5 stars . . . and I’m pretty sure they would’ve done that even if they weren’t my parents. 😉

Even though it’s the guest bathroom, it’s also the only bathroom on the basement level so it gets used frequently. I’m so happy we chose to do this as our first major renovation project!

20200211_15410520200211_15304820200211_15275620200214_07402120200214_06150620200211_15373120200206_15380620200214_080747
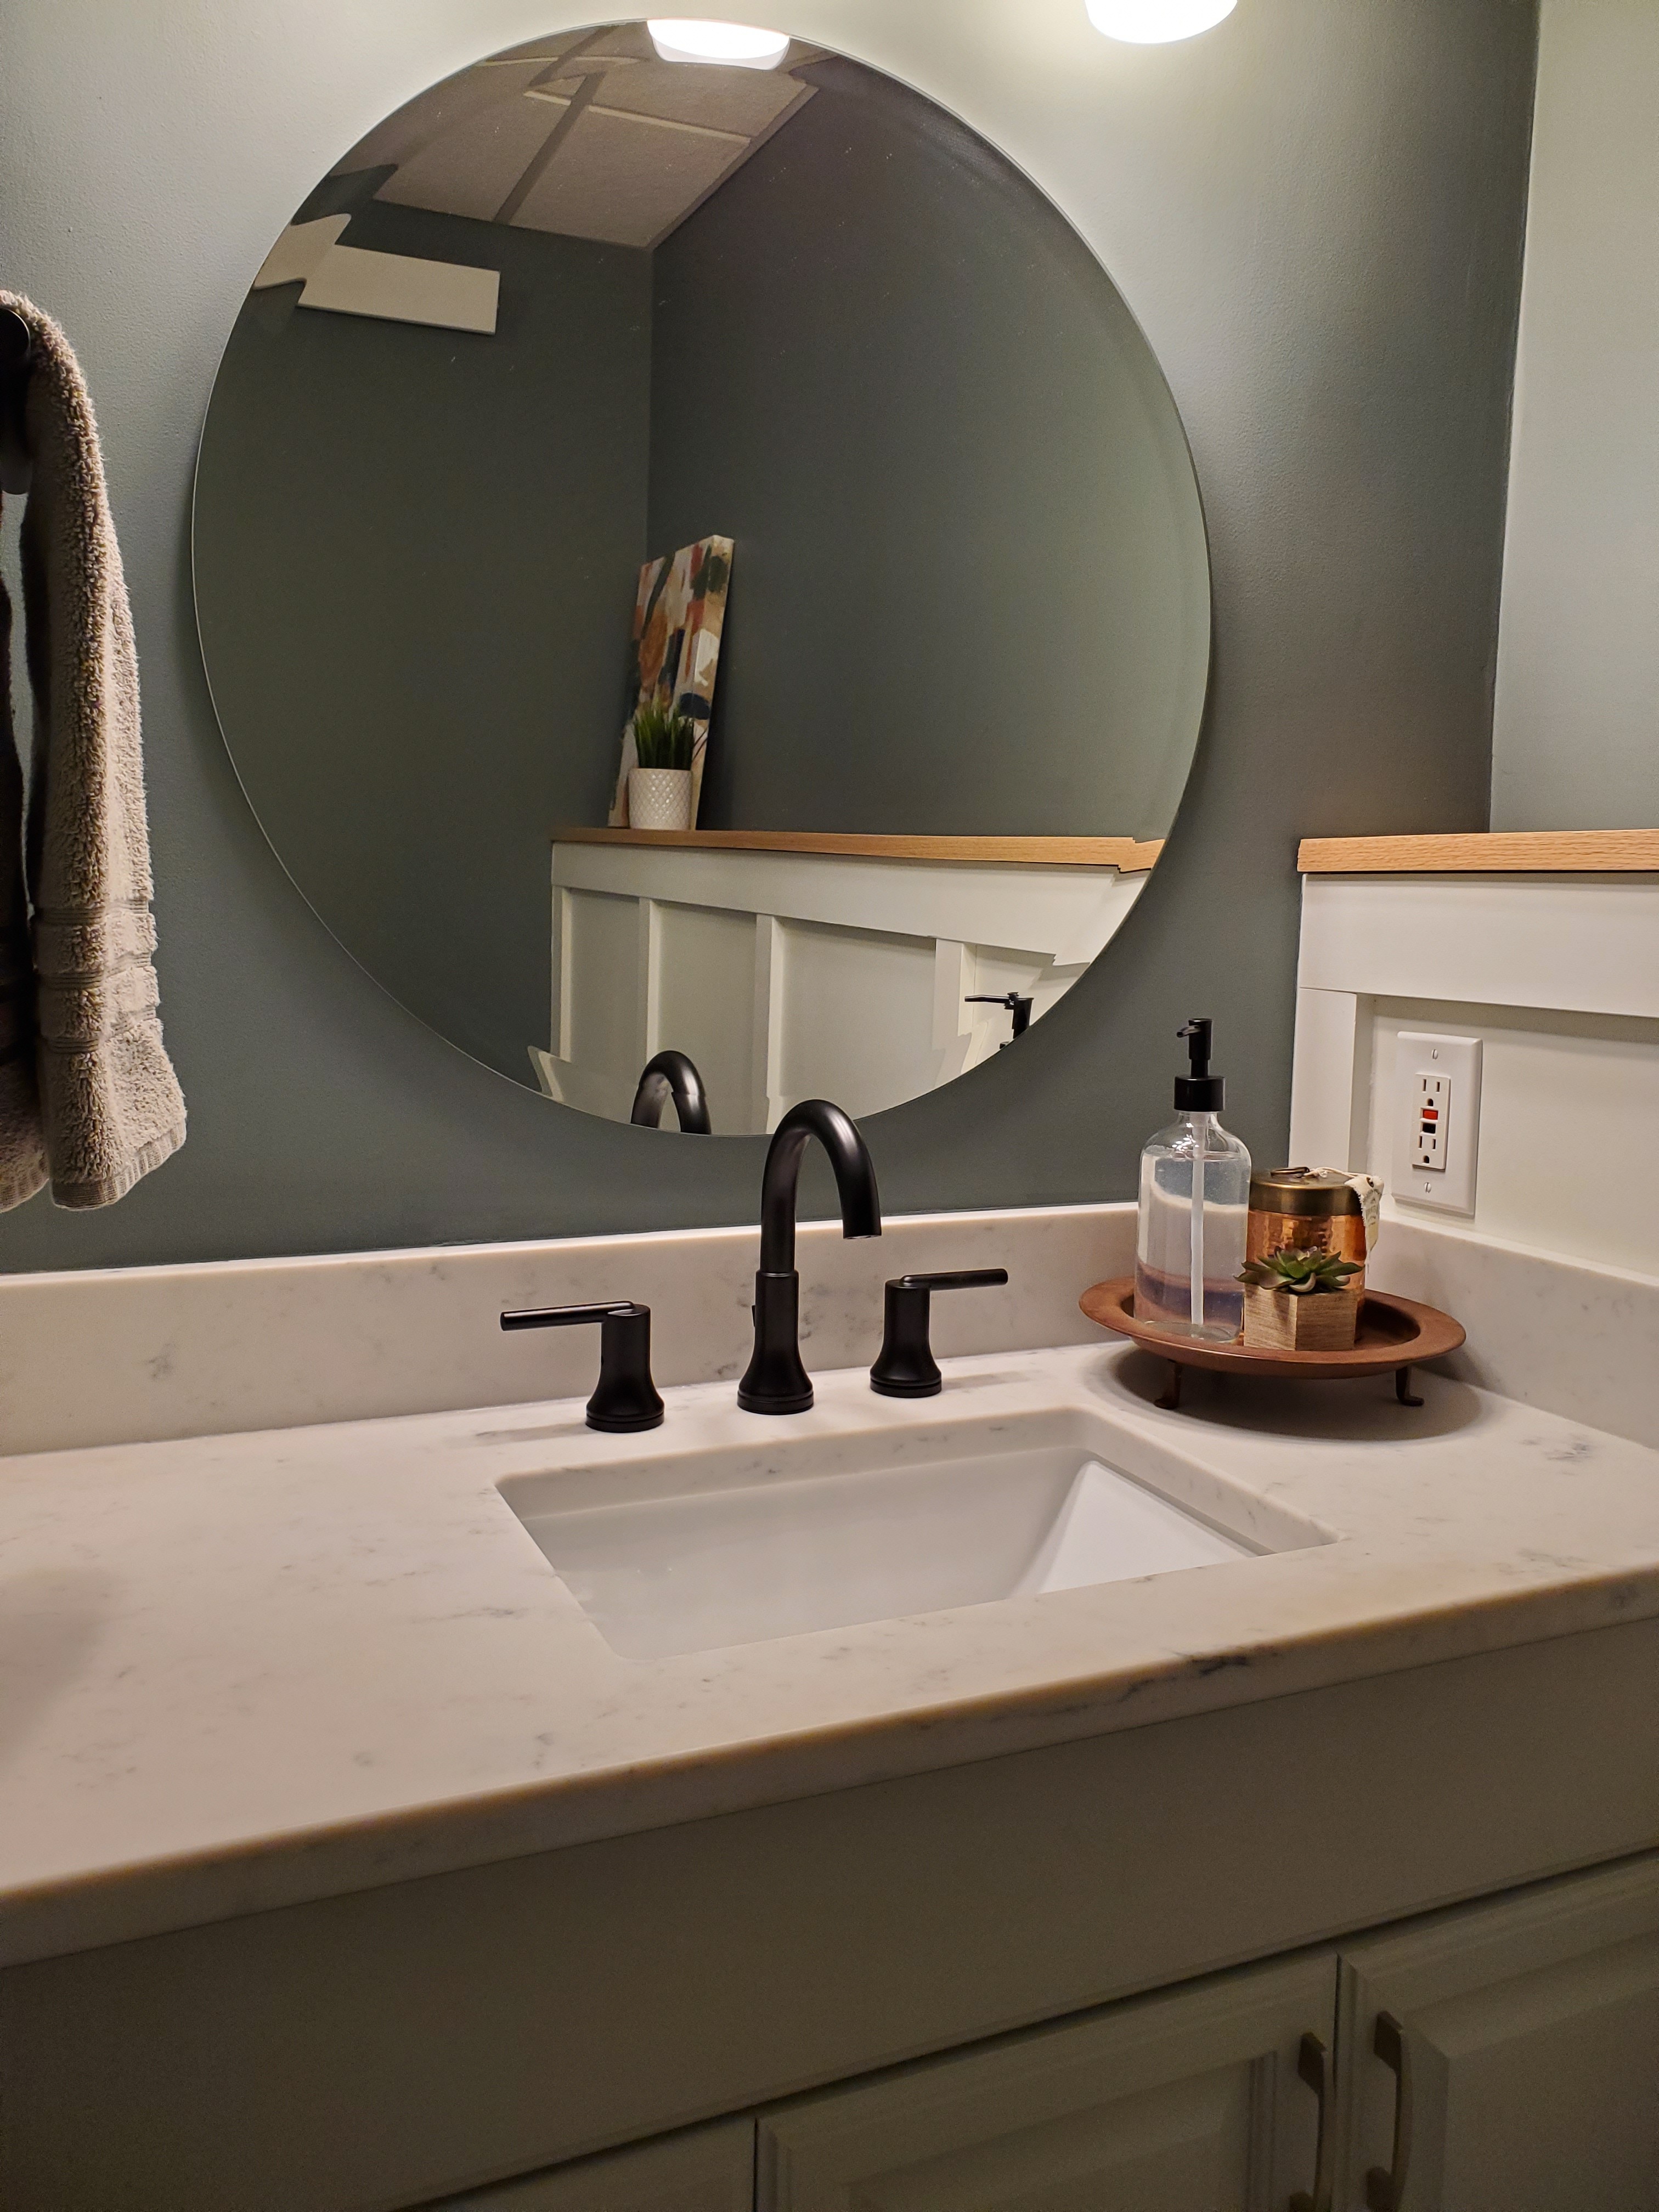
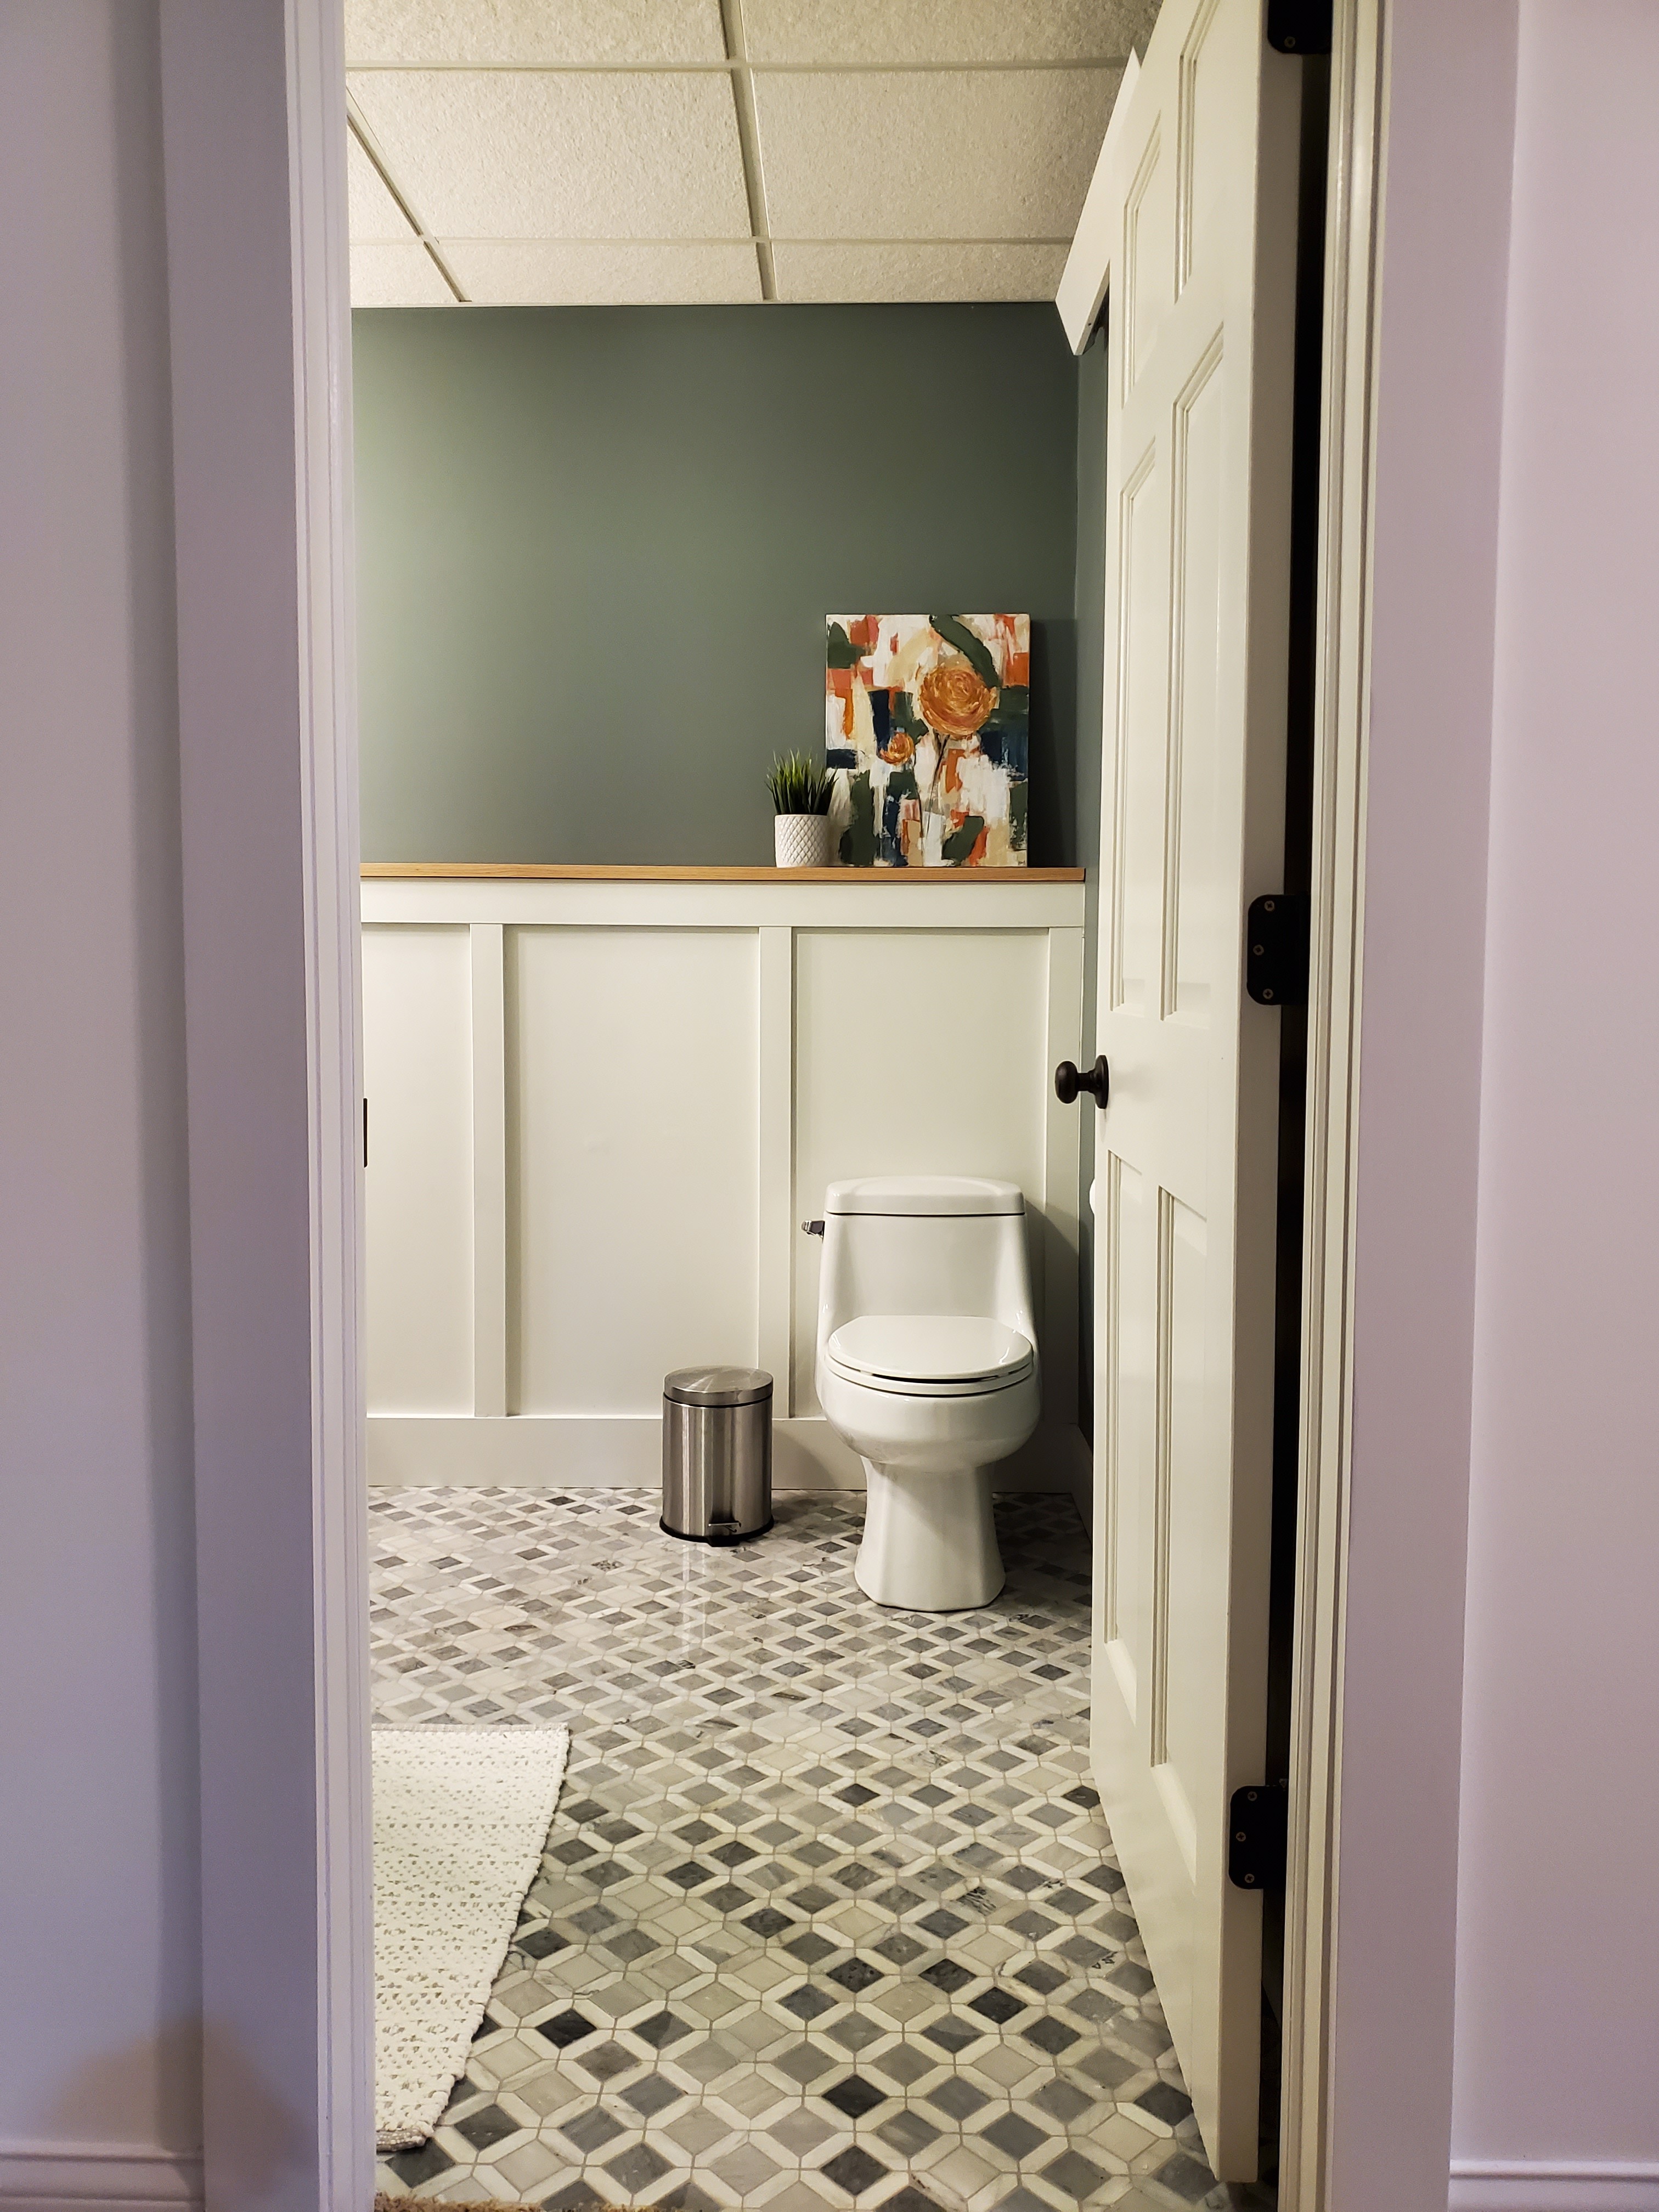
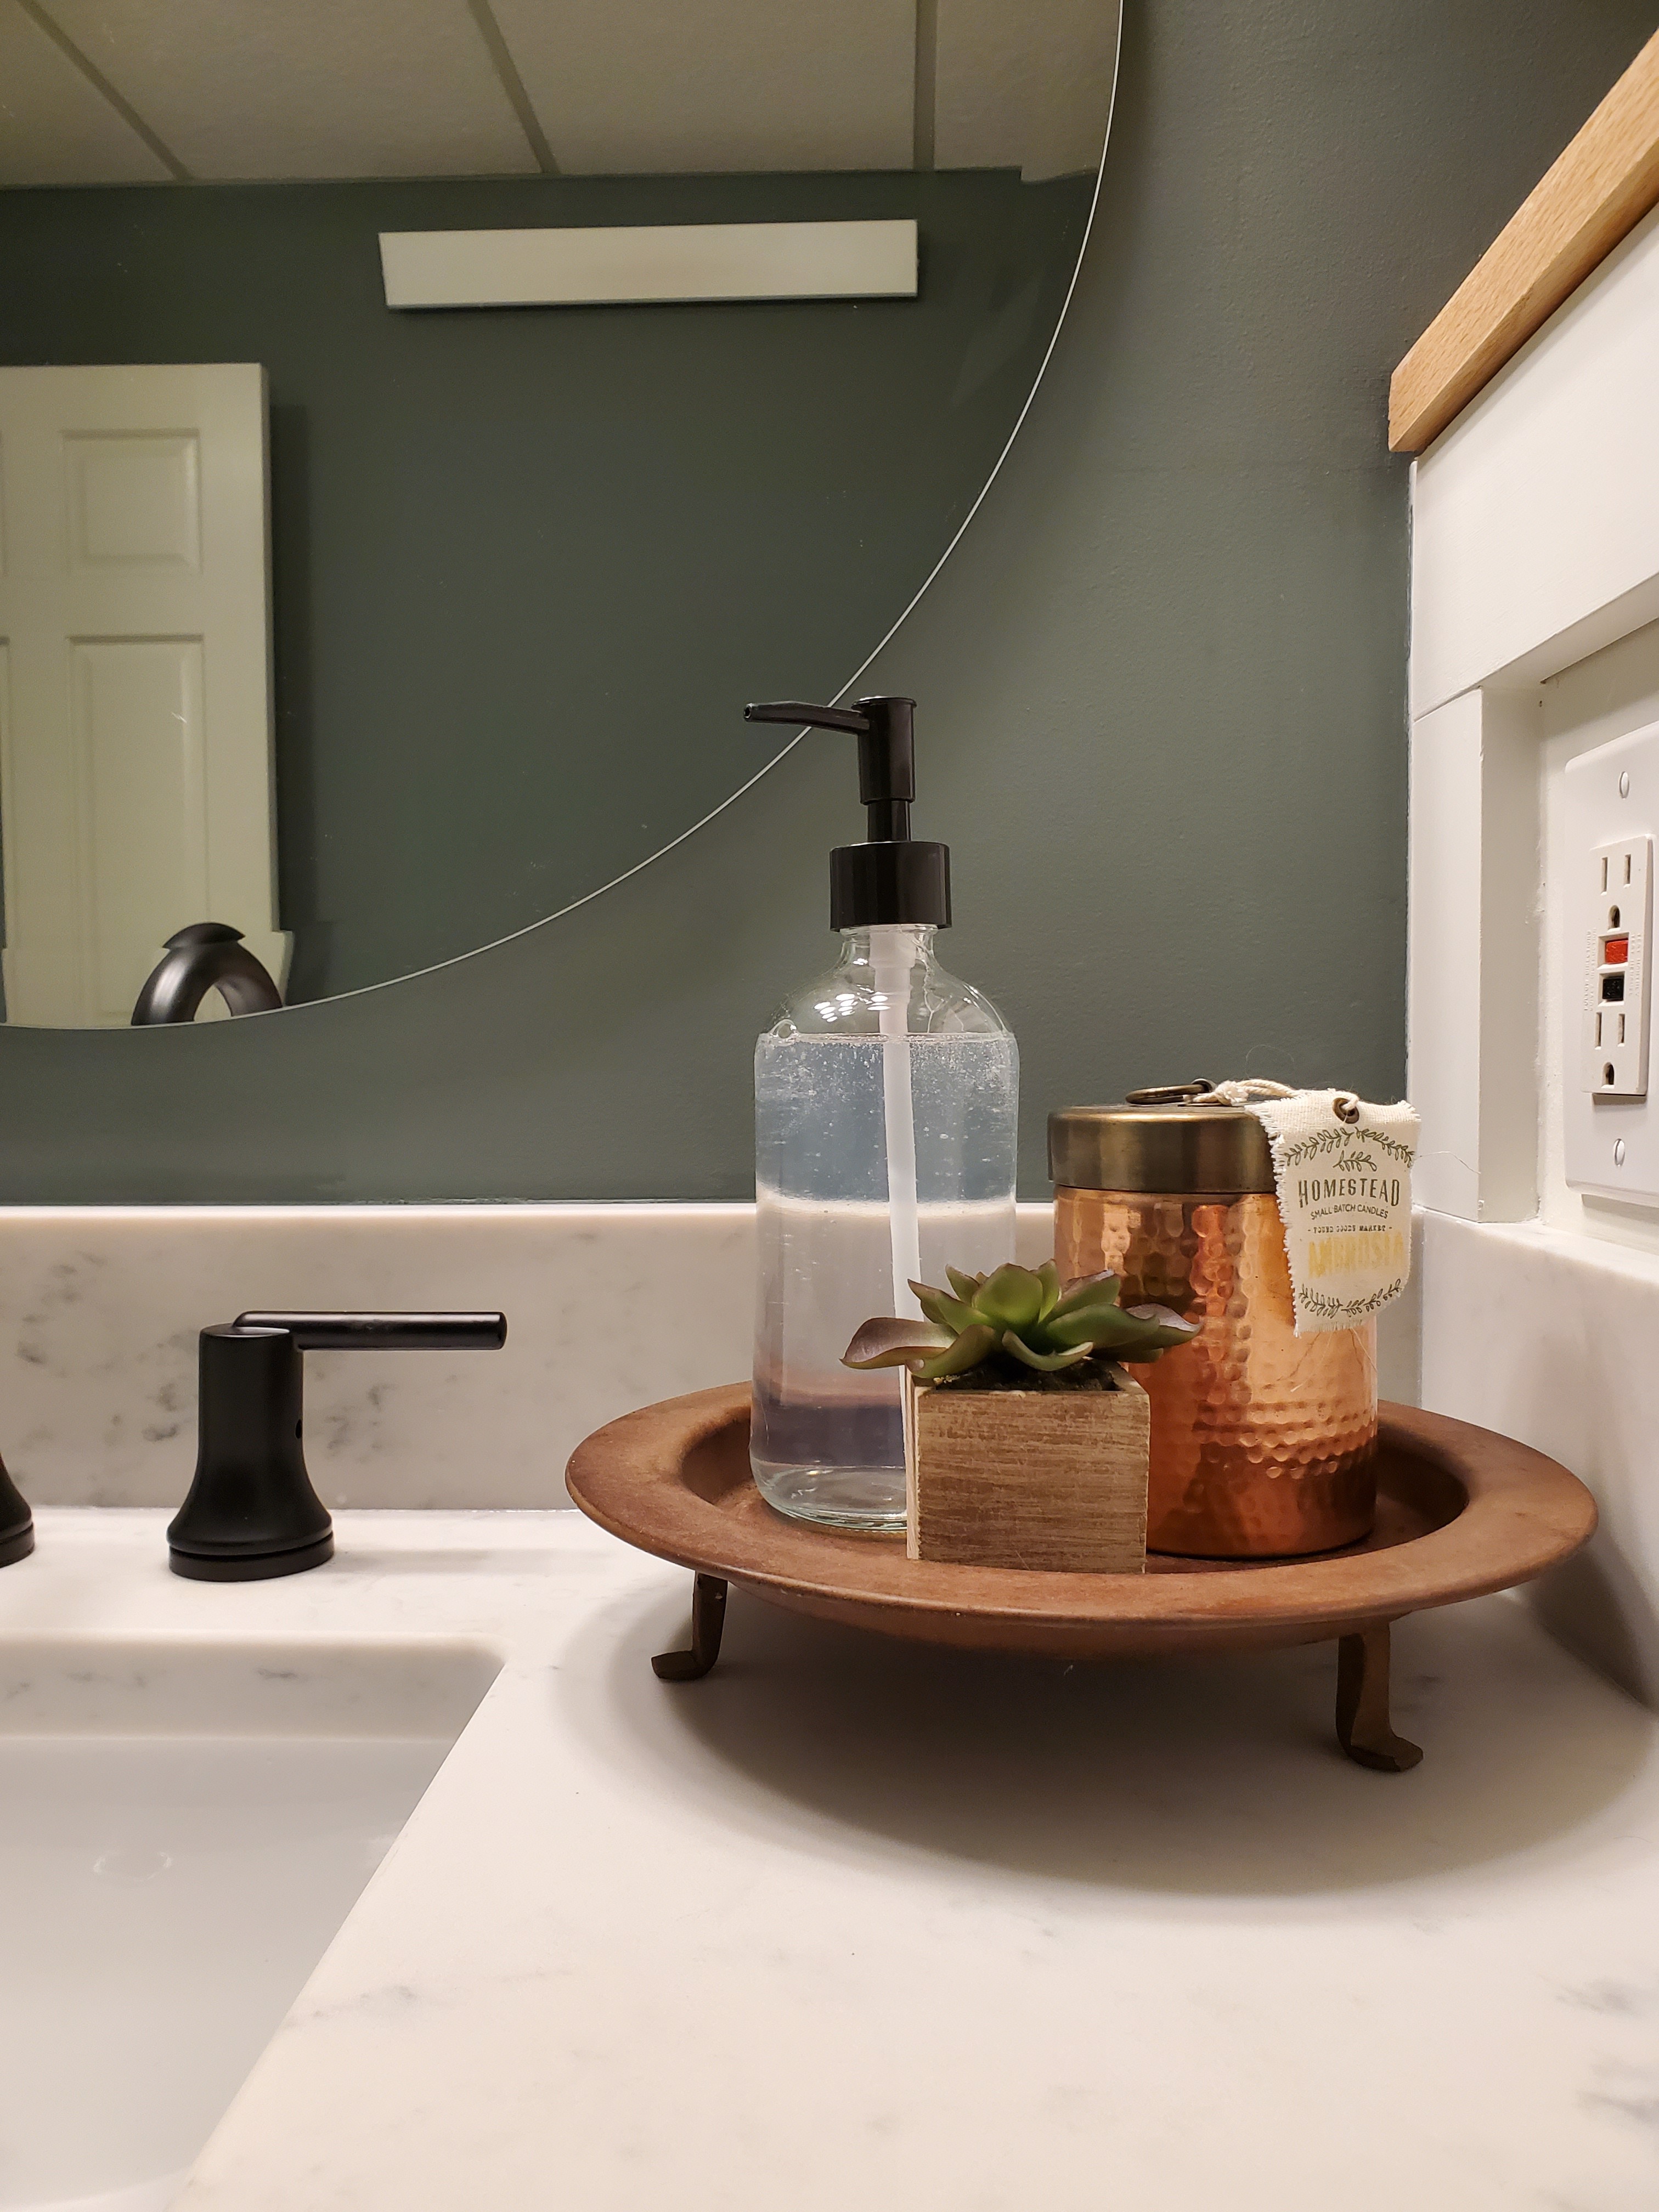
And one final before and after because I just cannot get over the transformation. We may have gone over budget and timeline (we originally hoped to be done before Christmas) but we’re so happy with the finished space.

20191028_125815-120200214_080715

Sources

Wall Color: Benjamin Moore Smoky Mountain (color matched with Sherwin Williams)

Trim Color: Sherwin Williams Alabaster

Floor Mosaic Tile

Shower Floor & Niche Tile

Shower Wall Tile

Shower Head

Shower Handle

Shower Door

Bath Mat

Vanity Color: Sherwin Williams Repose Gray

Vanity Door Handles

Vanity Drawer Knobs

Vanity Counter Top: Viareggio Quartz Remnant

Undermount Sink

Vanity Faucet

Mirror

Hand Towel Rod

Toilet Paper Holder

Towel Hook

Behind Door Towel Hook

Shower Fan

Light Fixture

Wall Heater

Fake Plant

White Planter

Artwork: Custom from JBeck Studio

Linen Closet Reveal

The guest suite renovation is so close to being finished! We have an installation date for our vanity top and a few other odds and ends to put in place but it should all be wrapped up by the end of next week – I can’t believe the countdown is in single digits!

While the entire project isn’t quite done, I couldn’t resist revealing one aspect that is finished: the transformation of our built-in linen closet!

20200130_153306

I never thought I would be so excited about a place to store blankets, but here we are.

Let’s take a quick walk down memory lane and look where this all started.

20191028_125841

This was originally meant to be a TV cabinet; however, the house is 20 years old now and this built-in was made with big and boxy TVs in mind. Remember these?

Image result for sony tv from 2000
Source

What a flashback! Truthfully, even if we could have fit a modern TV, I doubt we would have. Since the room is our guest room, I wanted to make the built-in more functional and aesthetically pleasing. A closed linen closet was the perfect solution!

Since there is also a closet door on this wall and not much space for artwork, making the cabinet a focal point by painting it a different color was a no-brainer. After testing out multiple colors, I settled on Sherwin Williams Oyster Bay. I also knew I wanted to incorporate black accents into the guest room since I’m using a lot of matte black fixtures in the adjoining bathroom. I found these bin pulls and offset handles during Rejuvenation’s sale and fell in love.

20191219_152243

We had to replace several of the drawer slides and LJ enjoyed throwing toys in the openings before all the drawers were put back in. 😉

I knew we’d be storing extra blankets, pillows, towels, etc in the top cabinet and the large opening wasn’t very practical for storing all that so Justin made a simple shelf to match the one already in there.

20200112_213547

Our contractor built two doors to cover up the opening and installed them when they were primed but not painted. (Hi Vi!)

20200111_142354

We hit a slight hiccup here. When I first tested out colors for the built-in, I got those little sample sizes you see in the above picture. Unfortunately, what I had bought covered everything except the doors, so I had to go back and get another little jar to finish the doors and it wasn’t the same shade! I went to the same place and asked for the exact same color and product, but the shade was ever so slightly off. It probably wouldn’t have been super noticeable to a casual observer, but I could tell the doors were different than the rest of it and it was going to bother me to no end. I ended up going back to the store and getting the shade a THIRD time, hoping that the third one would match the first and I’d only have to repaint the doors, but the third shade matched the second. I ended up having to repaint the entire front of the built-in and the drawer fronts. Super annoying, but I was happier knowing everything matched perfectly.

Lastly, Justin drilled holes and attached the door handles and the cabinet was finished!

20200130_20333020200130_20355420200130_15480620200130_154949

The closet is stocked with extra pillows, blankets, towels, washcloths, and a variety of toiletry items that our guests may need. I keep things like travel-sized shampoo & conditioner, lotion, bar soap, toothpaste, dry shampoo, contact solution, q-tips, extra toothbrushes, extra razors, feminine products, cotton balls, extra toothbrushes . . . anything I can think of that a guest may have forgotten that they can use without having to ask. The drawers are empty and available for guests to use if they want.

I’m so happy with how this piece turned out – I can hardly believe it is the same TV cabinet from just a couple months ago! It’s so gratifying to see a vision come to life and this one turned out just like I had hoped.

20200130_153726

Now on to the next project!

Guest Suite: The final touches!

The guest room is getting so close to being finished!

20200108_064956-1

Truthfully, I had expected that we would be totally done with the project by now. We started the project in the last week of October and the estimated project length was roughly 4-5 weeks.

When the old shower was ripped out during the demolition stage, we realized there was plenty of unusable space behind the wall and decided to expand the shower and add a bench. This addition made our project timeline more like 6 weeks. So we hoped to be finished right around mid-December.

By December 20, almost everything was completed. But then the remaining projects unfortunately stalled. Right now we have three remaining projects that need to be finished:

1 – Add a shelf board to the top of the half walls in each room.

20200106_101230

Since these are basement rooms, we have a half wall of concrete foundation that juts into them. I’ve made this into a kind of accent piece by adding board and batten to the front of each wall, but we still need to finish it off with a stained board on top. It’ll create a nice shelf for guests to use when finished! We planned to use the same boards that were originally there to save some money, but we realized that the board and batten made the wall wider than the original shelf. Justin just picked up new boards this week, so our weekend goal is to get them cut, sanded, stained, and ready to install!

2 – Close off the former TV nook built-in with doors to make it a linen closet.

20200110_093429

The previous homeowners had a TV in their built-in cabinet, but since the space is boxy and doesn’t fit modern TV screen sizes well, we are closing it off with new doors and turning it into storage for extra blankets, pillows, towels, etc. for guest use. Our contractor is finishing up our doors this week (the only reason this got delayed was because of the holidays) and will be installing them Saturday!

3 – Order and Install a new vanity counter top

20200106_101216

This vanity has been a source of frustration for a while. We originally hoped to replace the entire thing. I really wanted a floating vanity, but in order to do that we would’ve had to totally rework the plumbing and dig out a bunch of concrete. It would’ve added a lot of cost to the project and we decided we would rather put the money towards making the shower bigger and more functional than just getting a different style vanity with essentially the same function. Now that the shower is finished, I think that decision was definitely the right one! Here’s a sneak peek:

20200106_101314

Unfortunately, the nook for the vanity space is a little awkward. It’s 39″ wide in the front and 38 1/2″ wide in the back. Standard vanities either leave too much of a gap on the sides for things to fall down or are too big for the space. A fully custom vanity wasn’t in the budget, so we decided to add a piece of wood on the sides of the old vanity to make it flush with the wall, paint it and add new hardware, and order a custom counter top. I contacted a company with great reviews to help us out. They came out and did measurements and were going to get back to me within 2 weeks. After hearing nothing for 3 weeks, I reached out and the woman explained that she had a death in the family and wasn’t expecting to have so much time out of the office around Thanksgiving but should have the estimates soon. Totally understandable. So I waited. And waited. And reached out 2 weeks later . . . and have heard nothing since. It’s been seven weeks since they came out to measure but they’ve essentially ghosted me. I’ve had to start over at square one which is extremely frustrating. I just went to another company’s showroom yesterday, and have another one to reach out to today. Hopefully we’ll be able to make some decisions and get a pretty quick turnaround because that’s really the last thing needed to make the bathroom fully functional!

20200109_103412

Other than that, I’m just figuring out final details like hanging artwork and installing towel hooks. Our window treatments get installed next Wednesday and we have guests coming Thursday (they’ll have to use the sink in the basement kitchen outside the guest room since that won’t be finished yet). I cannot wait to share the finished space soon!