A Modern Look for an Ikea Hemnes Dresser

Our bedroom dresser is finally finished! And can you believe it’s Ikea!?

It took me a long time to find a style of dresser that felt right for the room, and then I came across this one and fell in love . . . with everything except the price tag.

I decided to try to recreate this look using a much less expensive Ikea Hemnes dresser. Last week I shared how I sanded off the old gray stain and re-stained it in black (read all about that process here). Although the Hemnes does come in a brown-black stain, my Ikea didn’t have it in stock. This ended up being a blessing because it would’ve been too hard to try to fill the drawer pull holes and stain those as an exact match to the original black stain so my only choice would have been paint (and I am so glad I still have a stained wood look!)

I searched and searched for leather pulls to attach to the top of the drawer fronts and stumbled upon these beauties on Etsy. I chose brass nails and cognac leather.

When the pulls arrived, I realized that there wasn’t quite enough space for them to sit on top of the drawer front without catching the dresser frame so I asked Justin if he could cut small notches at the top of each drawer front to create space. This ended up being a slow, laborious process and we’ve spent our evenings working on through it. We set up shop in our basement, turned on the TV, and tackled each drawer pull one by one.

First, I measured exactly where I wanted each drawer pull to be (it ended up being just shy of 5 5/8″ from the end of each drawer front). Once I had the pull in place, I marked it on each side with a pencil.

Then Justin clamped down a straight edge to create a guide marking the bottom depth of where he wanted the notch to be. He took a hand saw and sawed over the lines I had marked until his saw hit the depth of the straight edge.

He then took a chisel and started chipping away in between the two saw lines.

By far, the chiseling took the longest! He had to try to be as precise as possible so that he wouldn’t chip away too much that the drawer pull wouldn’t cover it.

Once the notches were finished, I took over the rest of the process.

The notches often had the tiniest of chips on the edges, but I took a black permanent marker and colored them in and they became invisible! This would have actually been easier with a fine-tip marker, but I worked with what I had.

Once the edges were colored in, I set the drawer pull inside and hammered it in using the brass nails that came with the pulls.

Repeat twelve times and you have yourself a fully functional dresser! I am really happy with how these drawer pulls turned out. It looks like they were always meant to be inset like that!

I knew I loved it before, but once everything was in place in our bedroom, I couldn’t even contain my excitement. It is PERFECT for the space and I love that we spent the extra time and effort to really make it shine.

I still plan to create a large gallery wall above the dresser and I’ve been slowly gathering things to include – I think that will be the perfect finishing touch to this part of our bedroom!

Dresser Budget Breakdown

Ikea Hemnes Dresser: $298.53

Black Stain: $13.32

Polyurethane: $17.09

Synthetic Bristle Brush: $7.60

Leather Drawer Pulls: $101.61

Total Cost: $438.15 – much much better than my inspiration dresser’s $1800!!

Staining an Ikea Hemnes Dresser Black!

When I was searching for dresser ideas for my primary bedroom renovation, I came across this dresser and it stopped me in my tracks:

I loved so much about this dresser: the clean lines, the black stain, the subtle wood grain, the leather drawer pulls. Really the only thing about it I didn’t like was the price. Yikes! At first I considered building my own dresser to mimic this one, but thankfully I was talked out of that. Instead, I decided to take a basic Ikea Hemnes dresser and recreate this look for a tiny fraction of the cost.

The Hemnes does come in a black-brown stain but it was out of stock so I bought it in a gray stain. At first, I covered it with a coat of paint in Sherwin Williams Tricorn Black, but I did not like the way it turned out at all. It looked like, well, a cheap dresser that was painted. Luckily, the latex paint sanded off very easily and I was able to start over with a different plan. Here’s what I did:

Materials

-Ikea Hemnes Dresser

-Orbital Sander + 80 grit and 120 grit sandpaper

-Plastic Wood

latex gloves

Black Stain

-Foam Brushes

-Clean, dry cloth

Painters Tape

Brown Stain

Polycrylic

Synthetic Bristle Brush

Tack Cloth

-220 or 400-grit sandpaper

The first thing I needed to do was sand off the old gray stain. By far, this was the step that took the longest! I used an orbital sander and 80-grit sandpaper to get most of the stain off, then I went over the whole thing again with 120-grit sandpaper to smooth the coarse surface.

Before sanding down the drawer fronts, I filled in each of the drawer pull holes with plastic wood. This product only takes about 15 minutes to dry and then you can sand and stain it just like the rest of the wood.

You can see that there are still some traces of gray stain left on the dresser above. I decided to save myself the time and effort of removing every tiny bit because I knew that the black would cover it up without anyone being able to tell it was there.

After everything was sanded with both grits of sandpaper, I wiped down every surface with a tack cloth to collect all the dust. I also used painter’s tape to tape off the bottom of the legs (making the top of the tape line even with the bottom of the dresser body) because I wanted to stain that part a different color. More on that later!

I tested out a few black stains and settled on this water-based solid color stain. I used a foam brush to apply the stain in long strokes, making sure to follow the direction of the wood grain. I like to wear latex gloves when staining to protect my hands.

This stain is thick and absorbs pretty quickly so I worked in small sections and wiped the excess stain off with a clean, dry scrap cloth.

You can see above what the wood looked like after one coat of coverage. I wanted to see less of the wood grain, so after letting the surfaces dry for about 2 hours, I reapplied a second thin coat of stain on top using the same process as before, except working in smaller sections so I could wipe the stain off a little quicker (thus, keeping it from penetrating too much and getting too dark). Here’s a good comparison of what one coat vs. two looked like:

After all the black stain dried, it was time for the bottom of the legs. I tore off the painter’s tape at the bottom of the legs and put new tape that lined up with the bottom of the black stain (note: for the bottom of the legs, I made sure to sand away all of the previous gray stain). I had a bunch of random stains leftover from previous projects and after testing them out, I settled on this provincial.

I set the legs on top of scrap wood so I could get all the way to the bottom without ruining the floor. I didn’t want the stain to be too dark so I applied a light coat of stain with a foam brush and wiped it off almost immediately. Then I removed the tape – I love a nice, crisp line!

After the provincial stain dried, the dresser was ready for topcoat. I chose this Polycrylic Protective Finish in a clear matte finish. After carefully stirring, I used a new synthetic bristle brush to apply a thick layer in long strokes, again following the direction of the wood grain.

Polycrylic looks white and bubbly when first applied. It dries clear, but the bubbles do leave a slight amount of a textured feel. After letting the first coat dry, I used a 400-grit sandpaper to very lightly (seriously, hardly any pressure is needed!) sand the surface smooth again.

After sanding the dresser and drawer fronts, I wiped everything down with a clean tack cloth and then repeated another round of Polycrylic + light sand + tack cloth. Once everything completely dried, I could pop the drawer back in and admire the (almost) finished result!

Even though I’m still waiting on the new drawer pulls to come in, I am so so thrilled with how this dresser is turning out. The picture truly doesn’t do it justice. It looks so chic! It has the same clean lines look and subtle wood grain that my inspiration dresser had and I love the added character from the stained legs. It definitely looks like a higher-end product and I’m so glad I went with my gut on re-staining this one!

An Ikea Hack for Vittsjo Shelves

On Monday I shared Justin’s work office reveal and without question the star of the show was his shelving unit! Today I’m sharing all the details about the hack that took these three Ikea shelves and kicked them up several notches.

We bought three of these Vittsjo shelves from Ikea. Initially I had hoped to use this double Vittsjo, which is a bit more cost-effective, but it was out of stock in my store. This ended up being a blessing because I actually love the look and scale of three even better! The units came with glass inserts to create the shelves, but I was inspired by the chunkier look that Kim and Scott from Yellow Brick Home gave their Vittsjo and we decided to create a similar look. (Note: If you’re interested in doing this hack for yourself, I’ve included a full list of all the materials we used at the bottom of this post!)

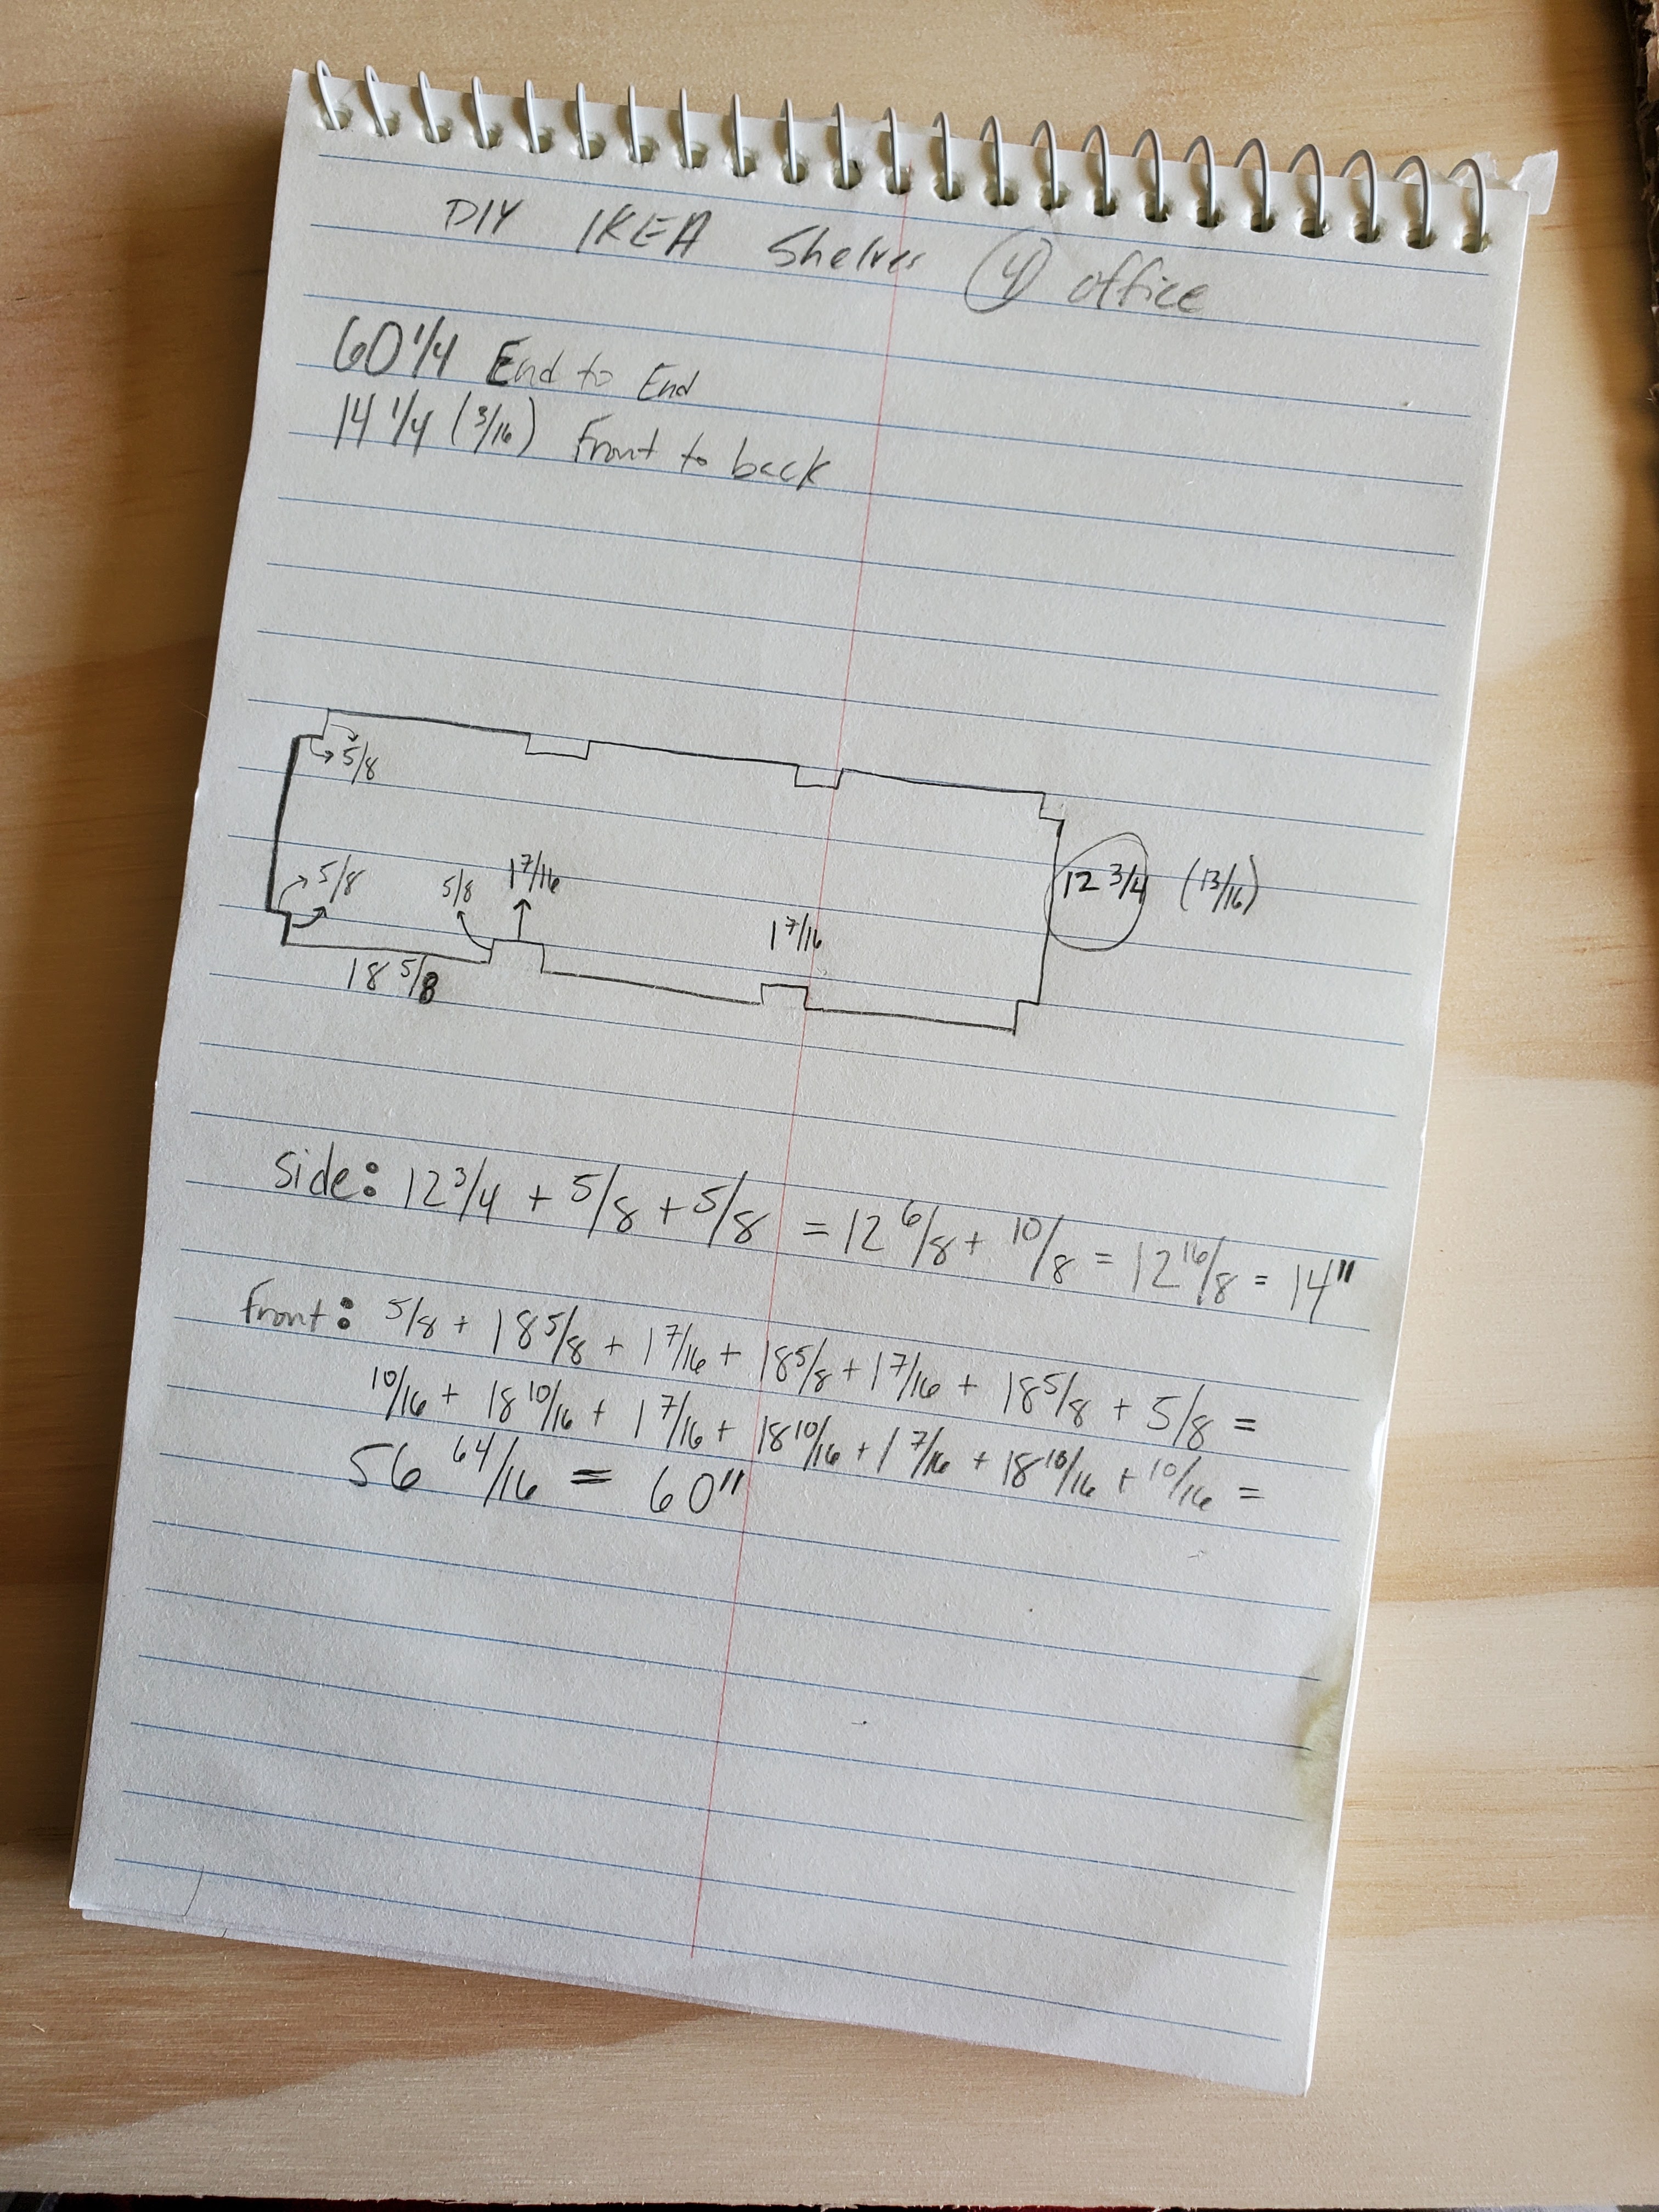
Once all three units were assembled, we lined them up against the wall and Justin took measurements of the total length and width of one shelf spanning all three units and sketched out an outline, making sure to include all the places we would need to make notches to accommodate the vertical posts.

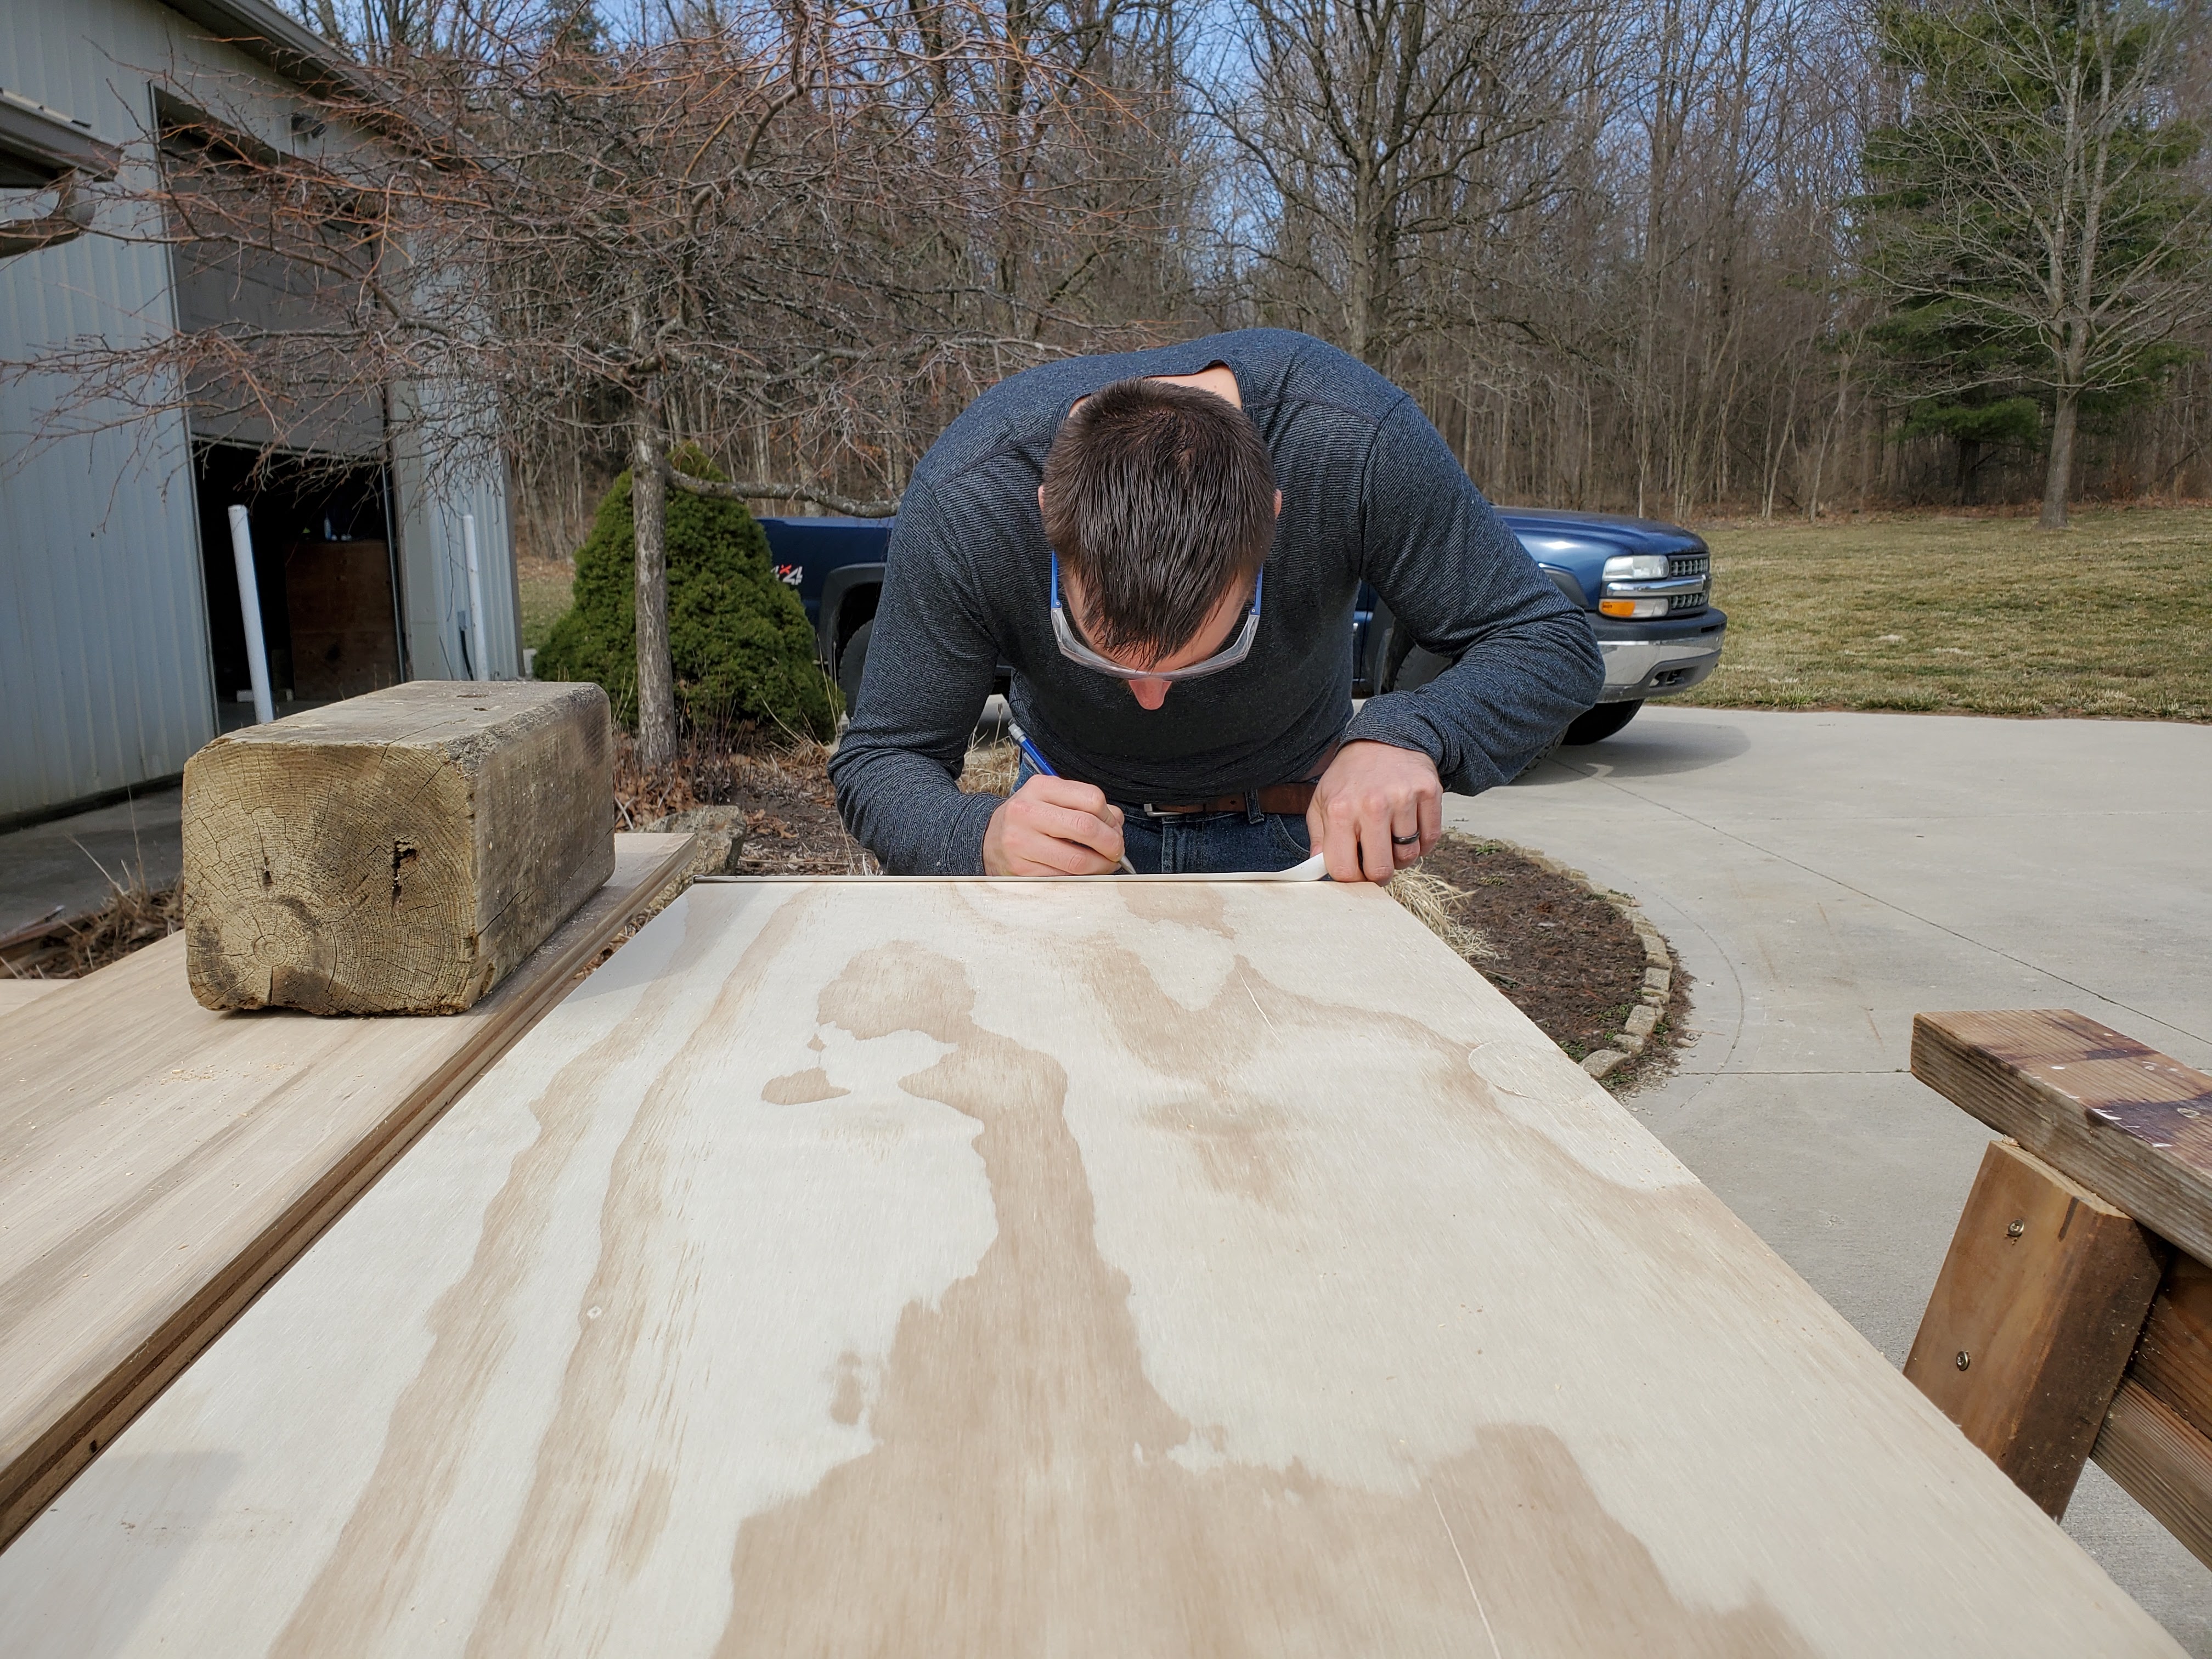
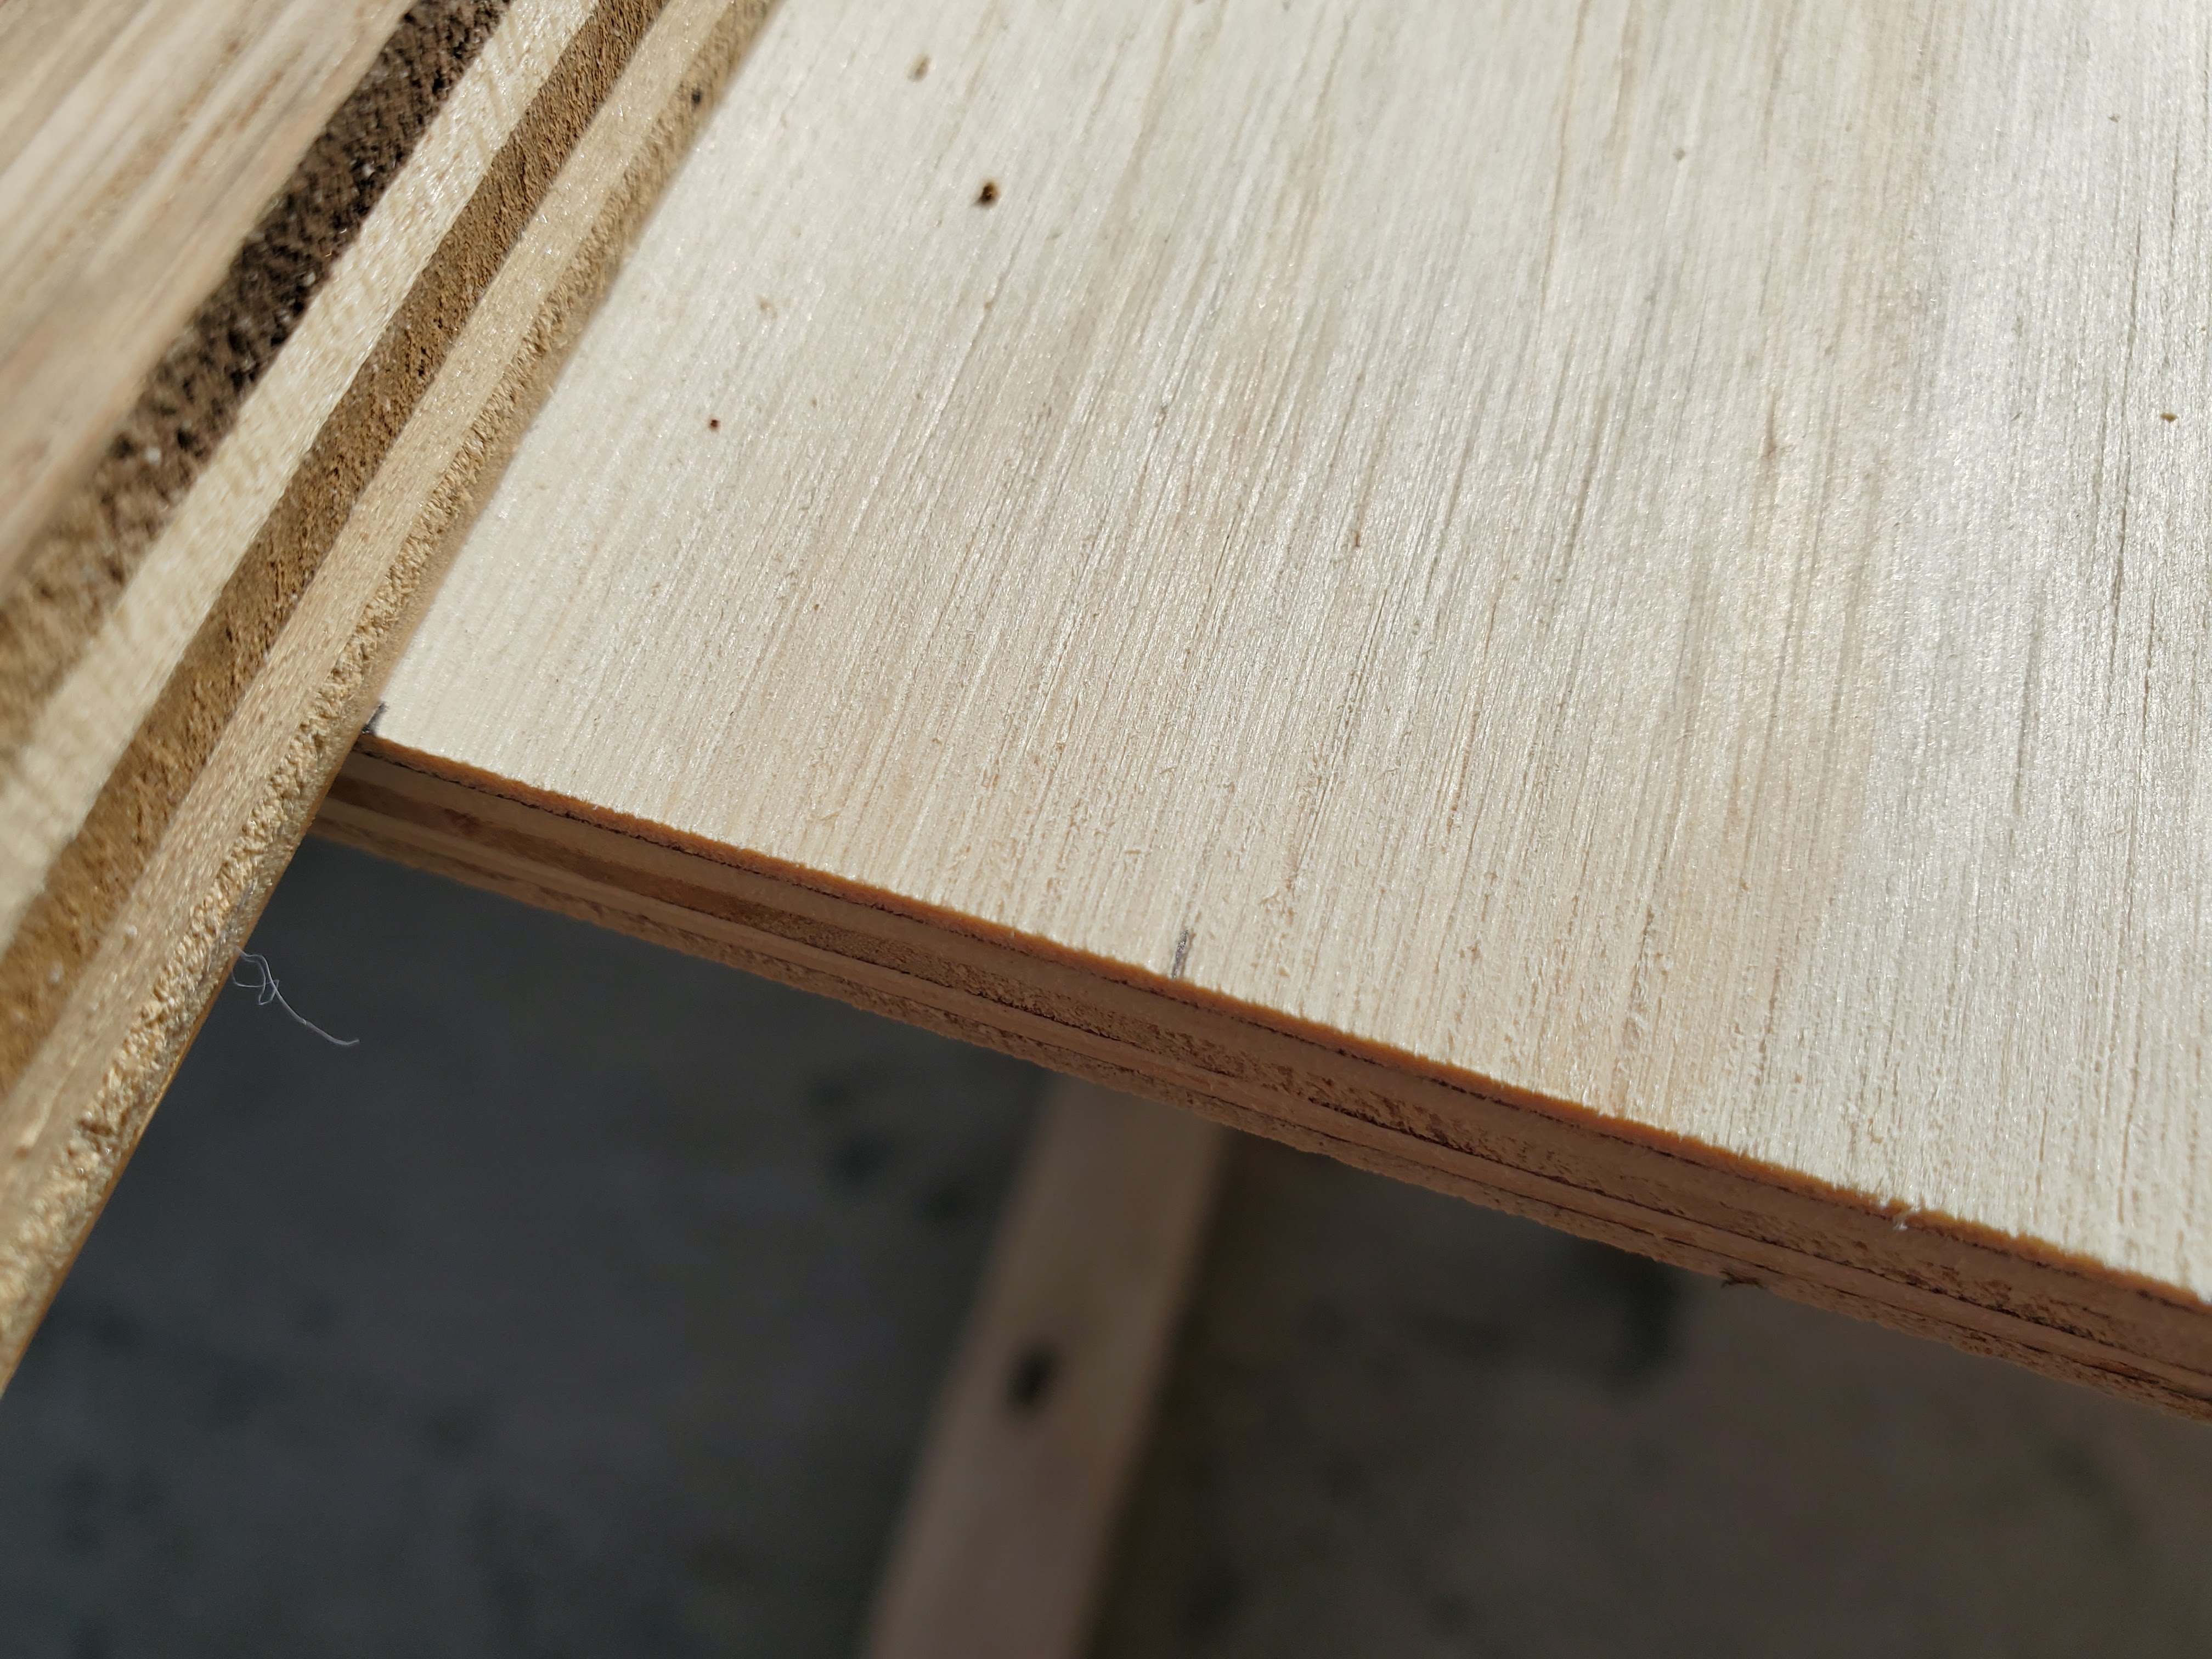
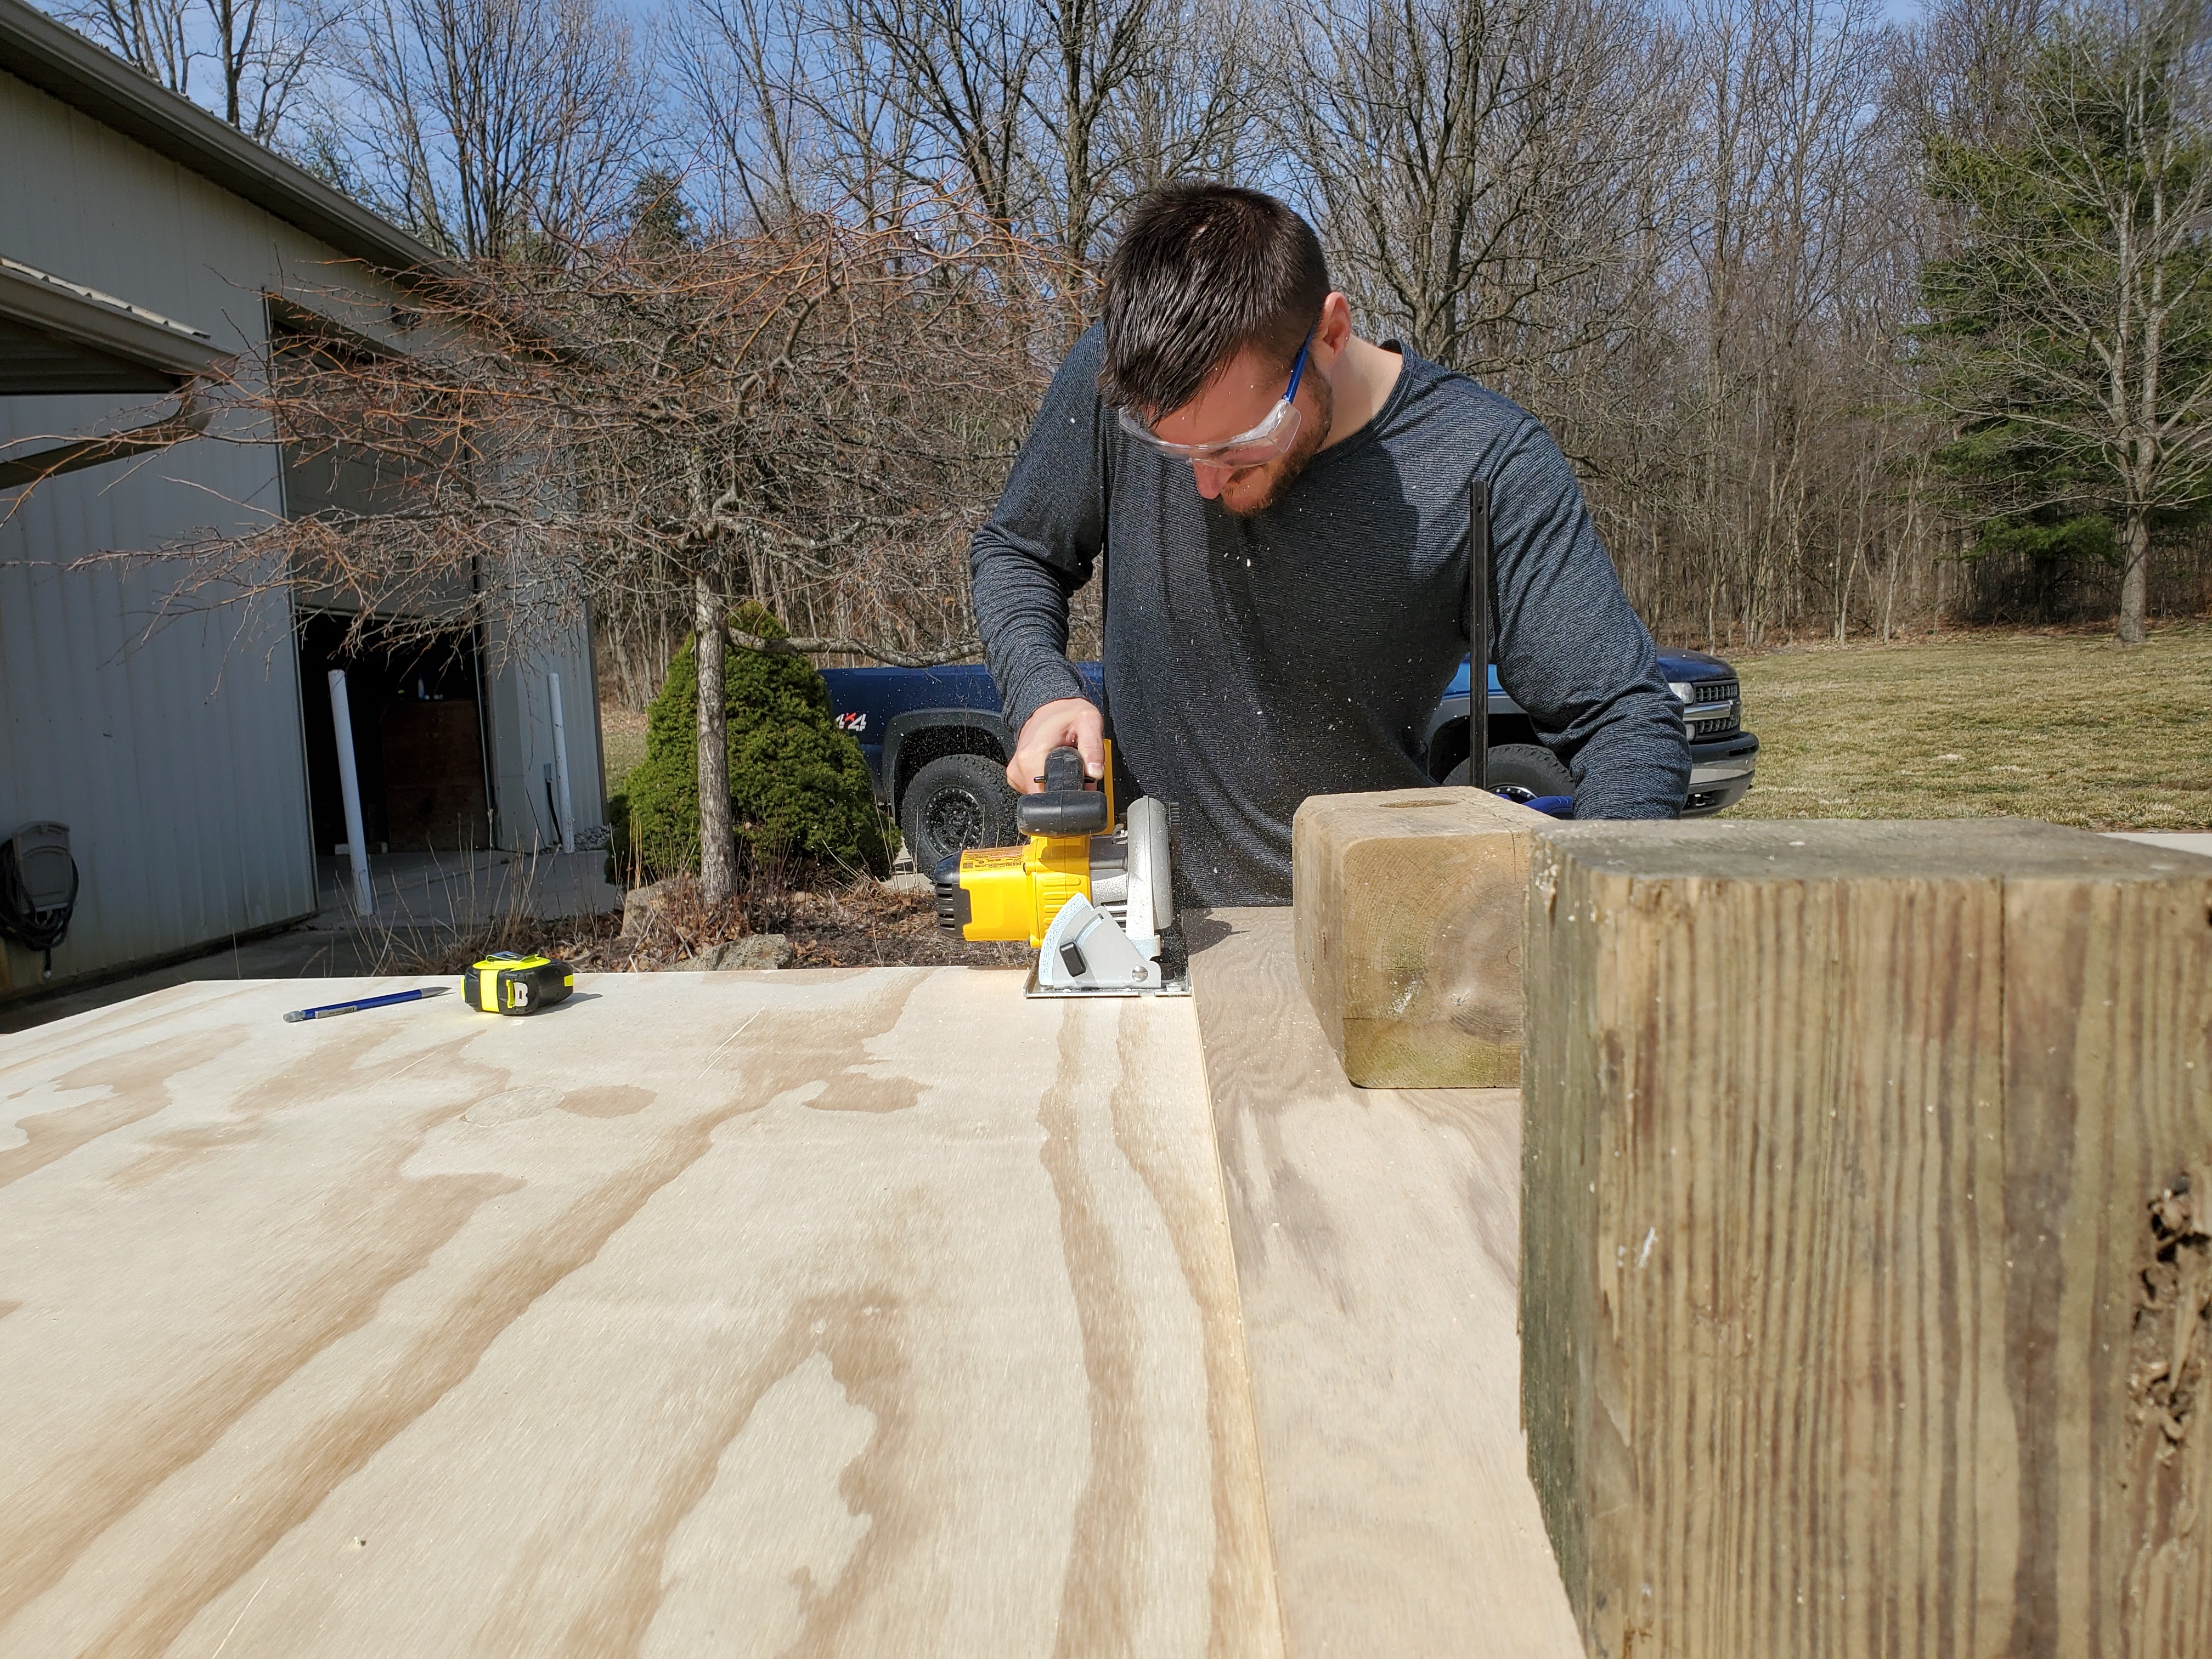
Each shelf would have a length of 60″ and a width of 14″. We bought a sheet of 1/2″ plywood, which was enough to make three long shelves and three small pieces for the bottom shelf . The sheet was 4′ x 8′, so our first step was to cut it down to the correct length. It was a gorgeous day, so Justin wheeled his work table outside!

Justin planned to use his circular saw for cutting the plywood to length so after measuring and marking the 60″ length, he also measured and marked out exactly where the edge of the circular saw’s guide would be when it cut the length. We clamped down a piece of scrap wood with a straight edge right where the circular saw guide would run so that Justin would have a solid wall to keep the saw’s guide flush against. This ensured a super straight cut! He also tossed a couple of larger blocks of scrap wood on top to keep the guide wood firmly in place.

After taking this picture, I was in charge of holding the side of the plywood hanging off the work table (since the saw couldn’t be directly over the table or it would have cut into it) and catching the part getting cut off. We saved that excess piece to make the bottom shelf pieces later!

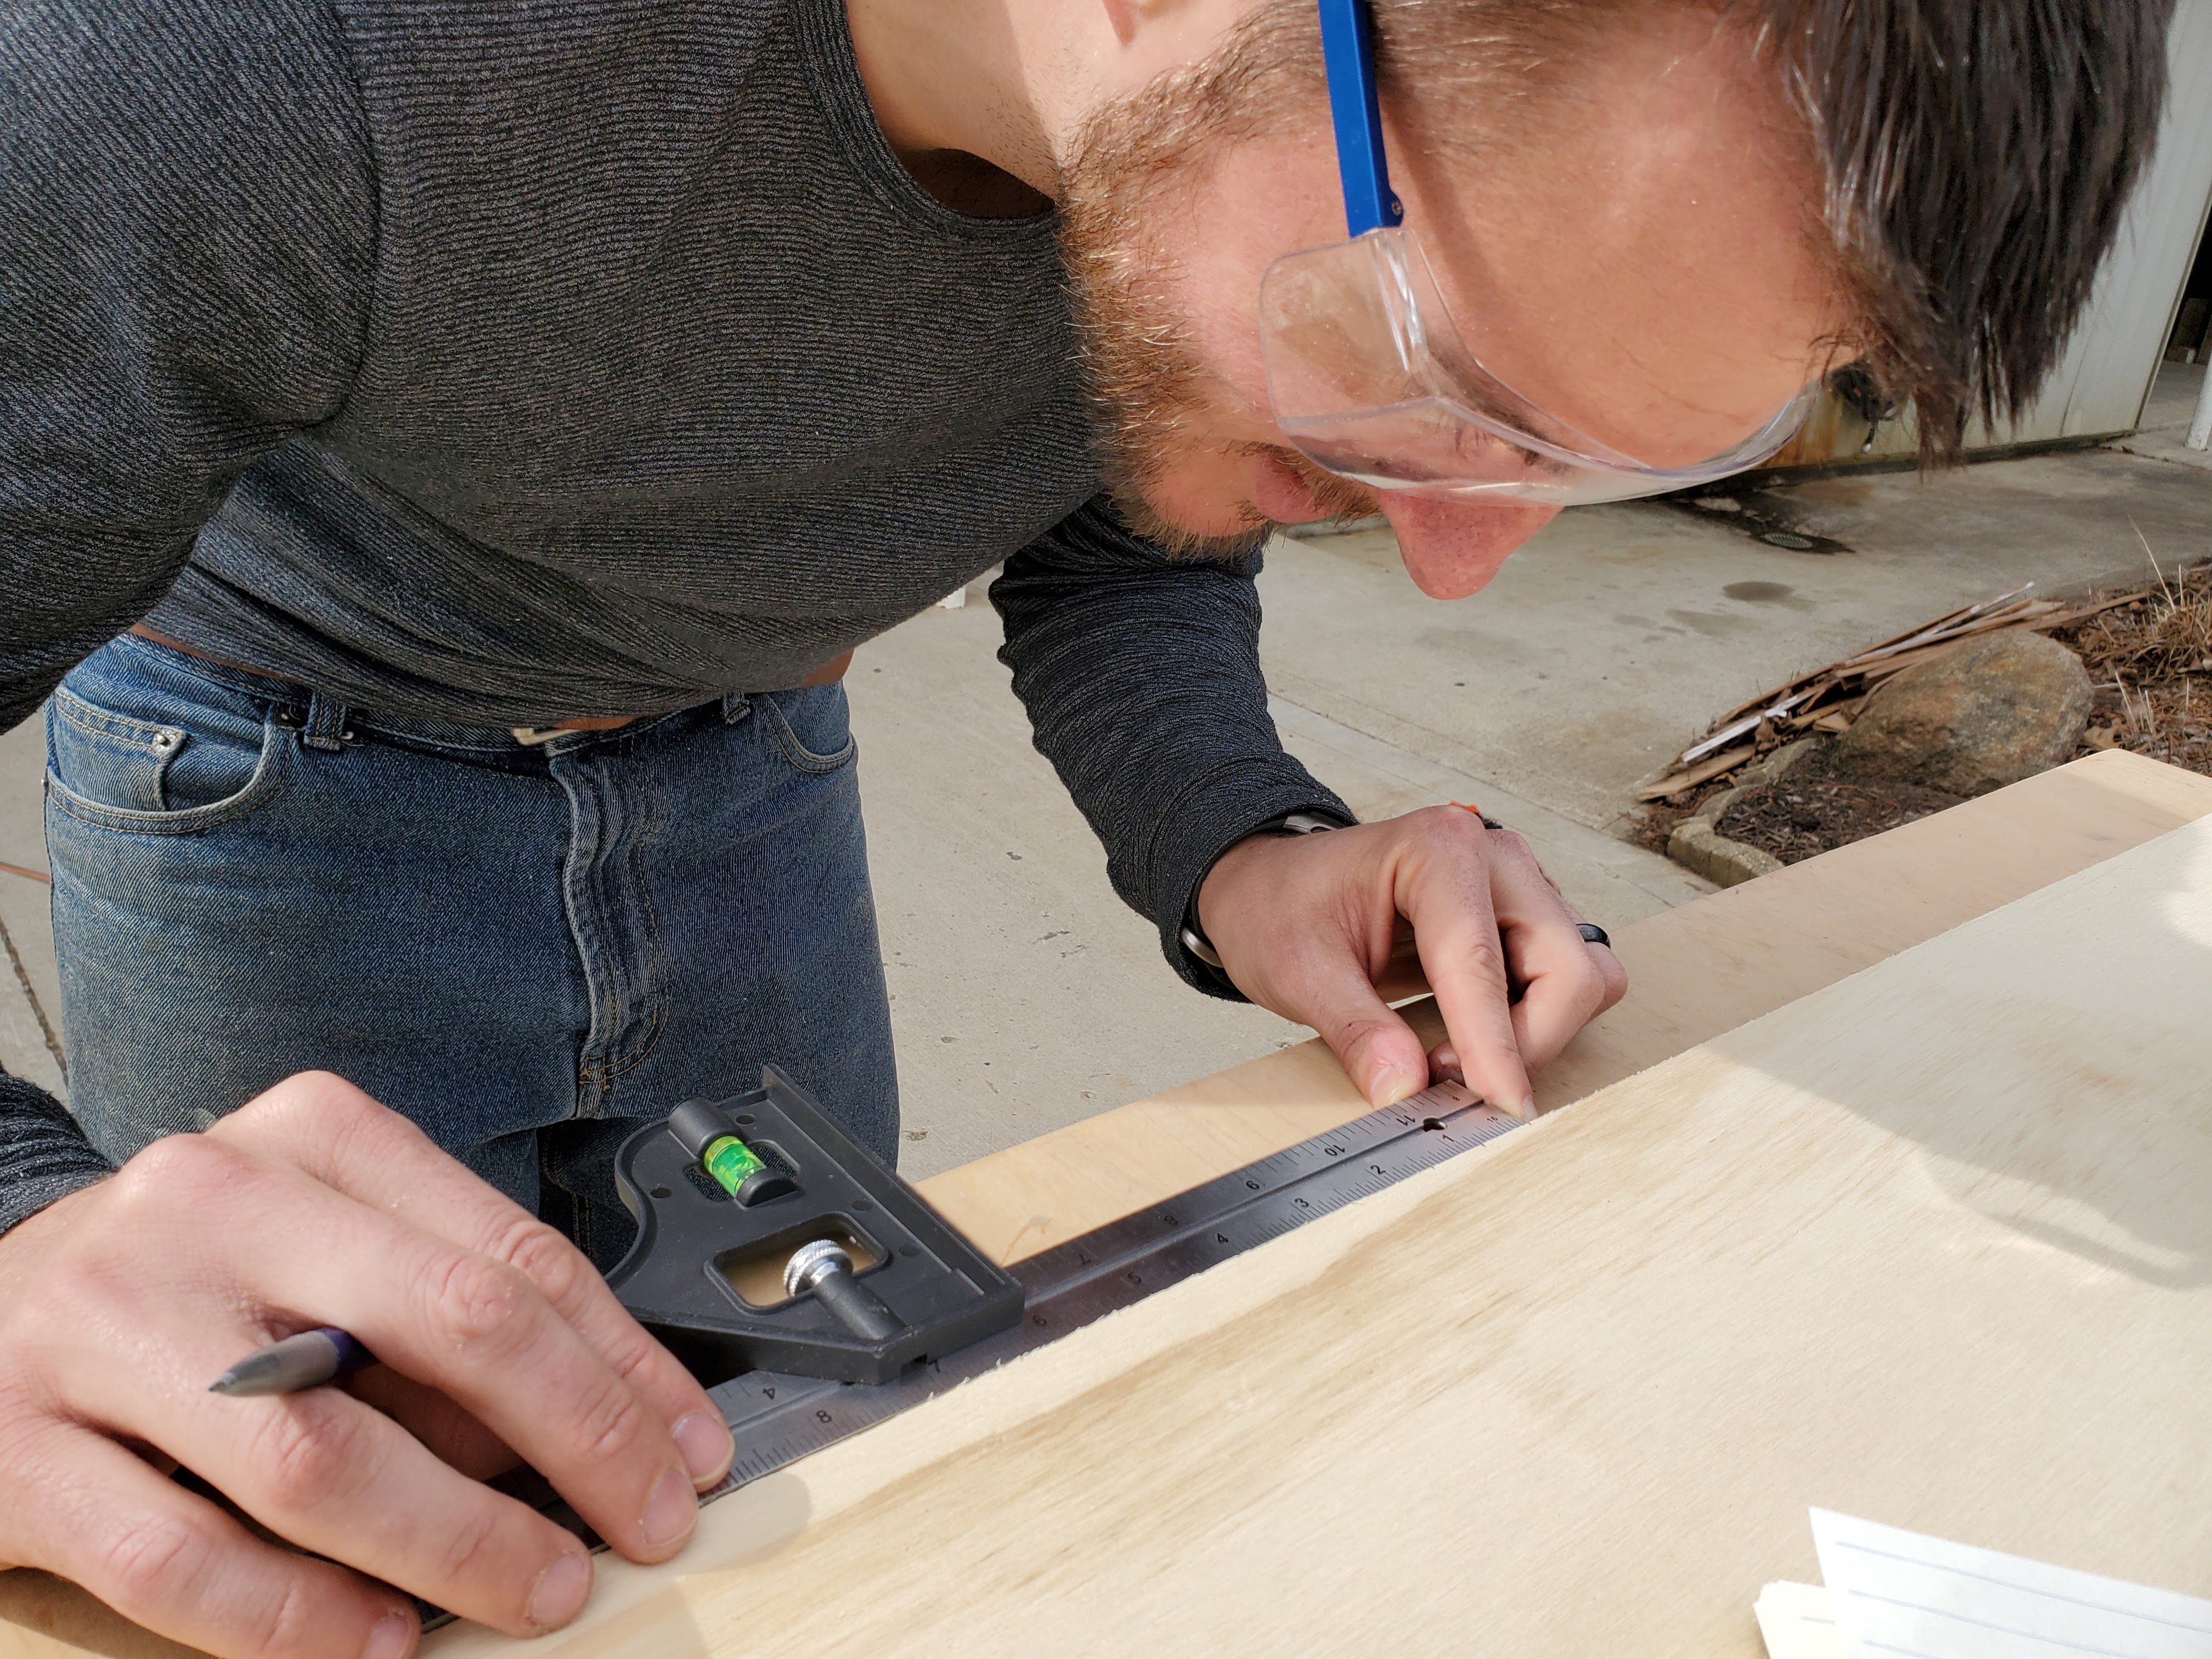
Once the sheet was cut to length, the next step was cutting the width of each shelf. We repeated the same process as before – measuring and marking the width (14″) and also making a mark where the edge of the circular saw guide would be.

Here’s a close-up of the two marks he made. Can you see the little mark right on the edge where the guide wood is placed? That is exactly where the edge of the circular saw will be when Justin cuts the shelf to length. The other pencil mark along the edge is marking where the saw blade will cut the shelf to the correct width.

We repeated this process two more times to create three shelves with a 14″ width.

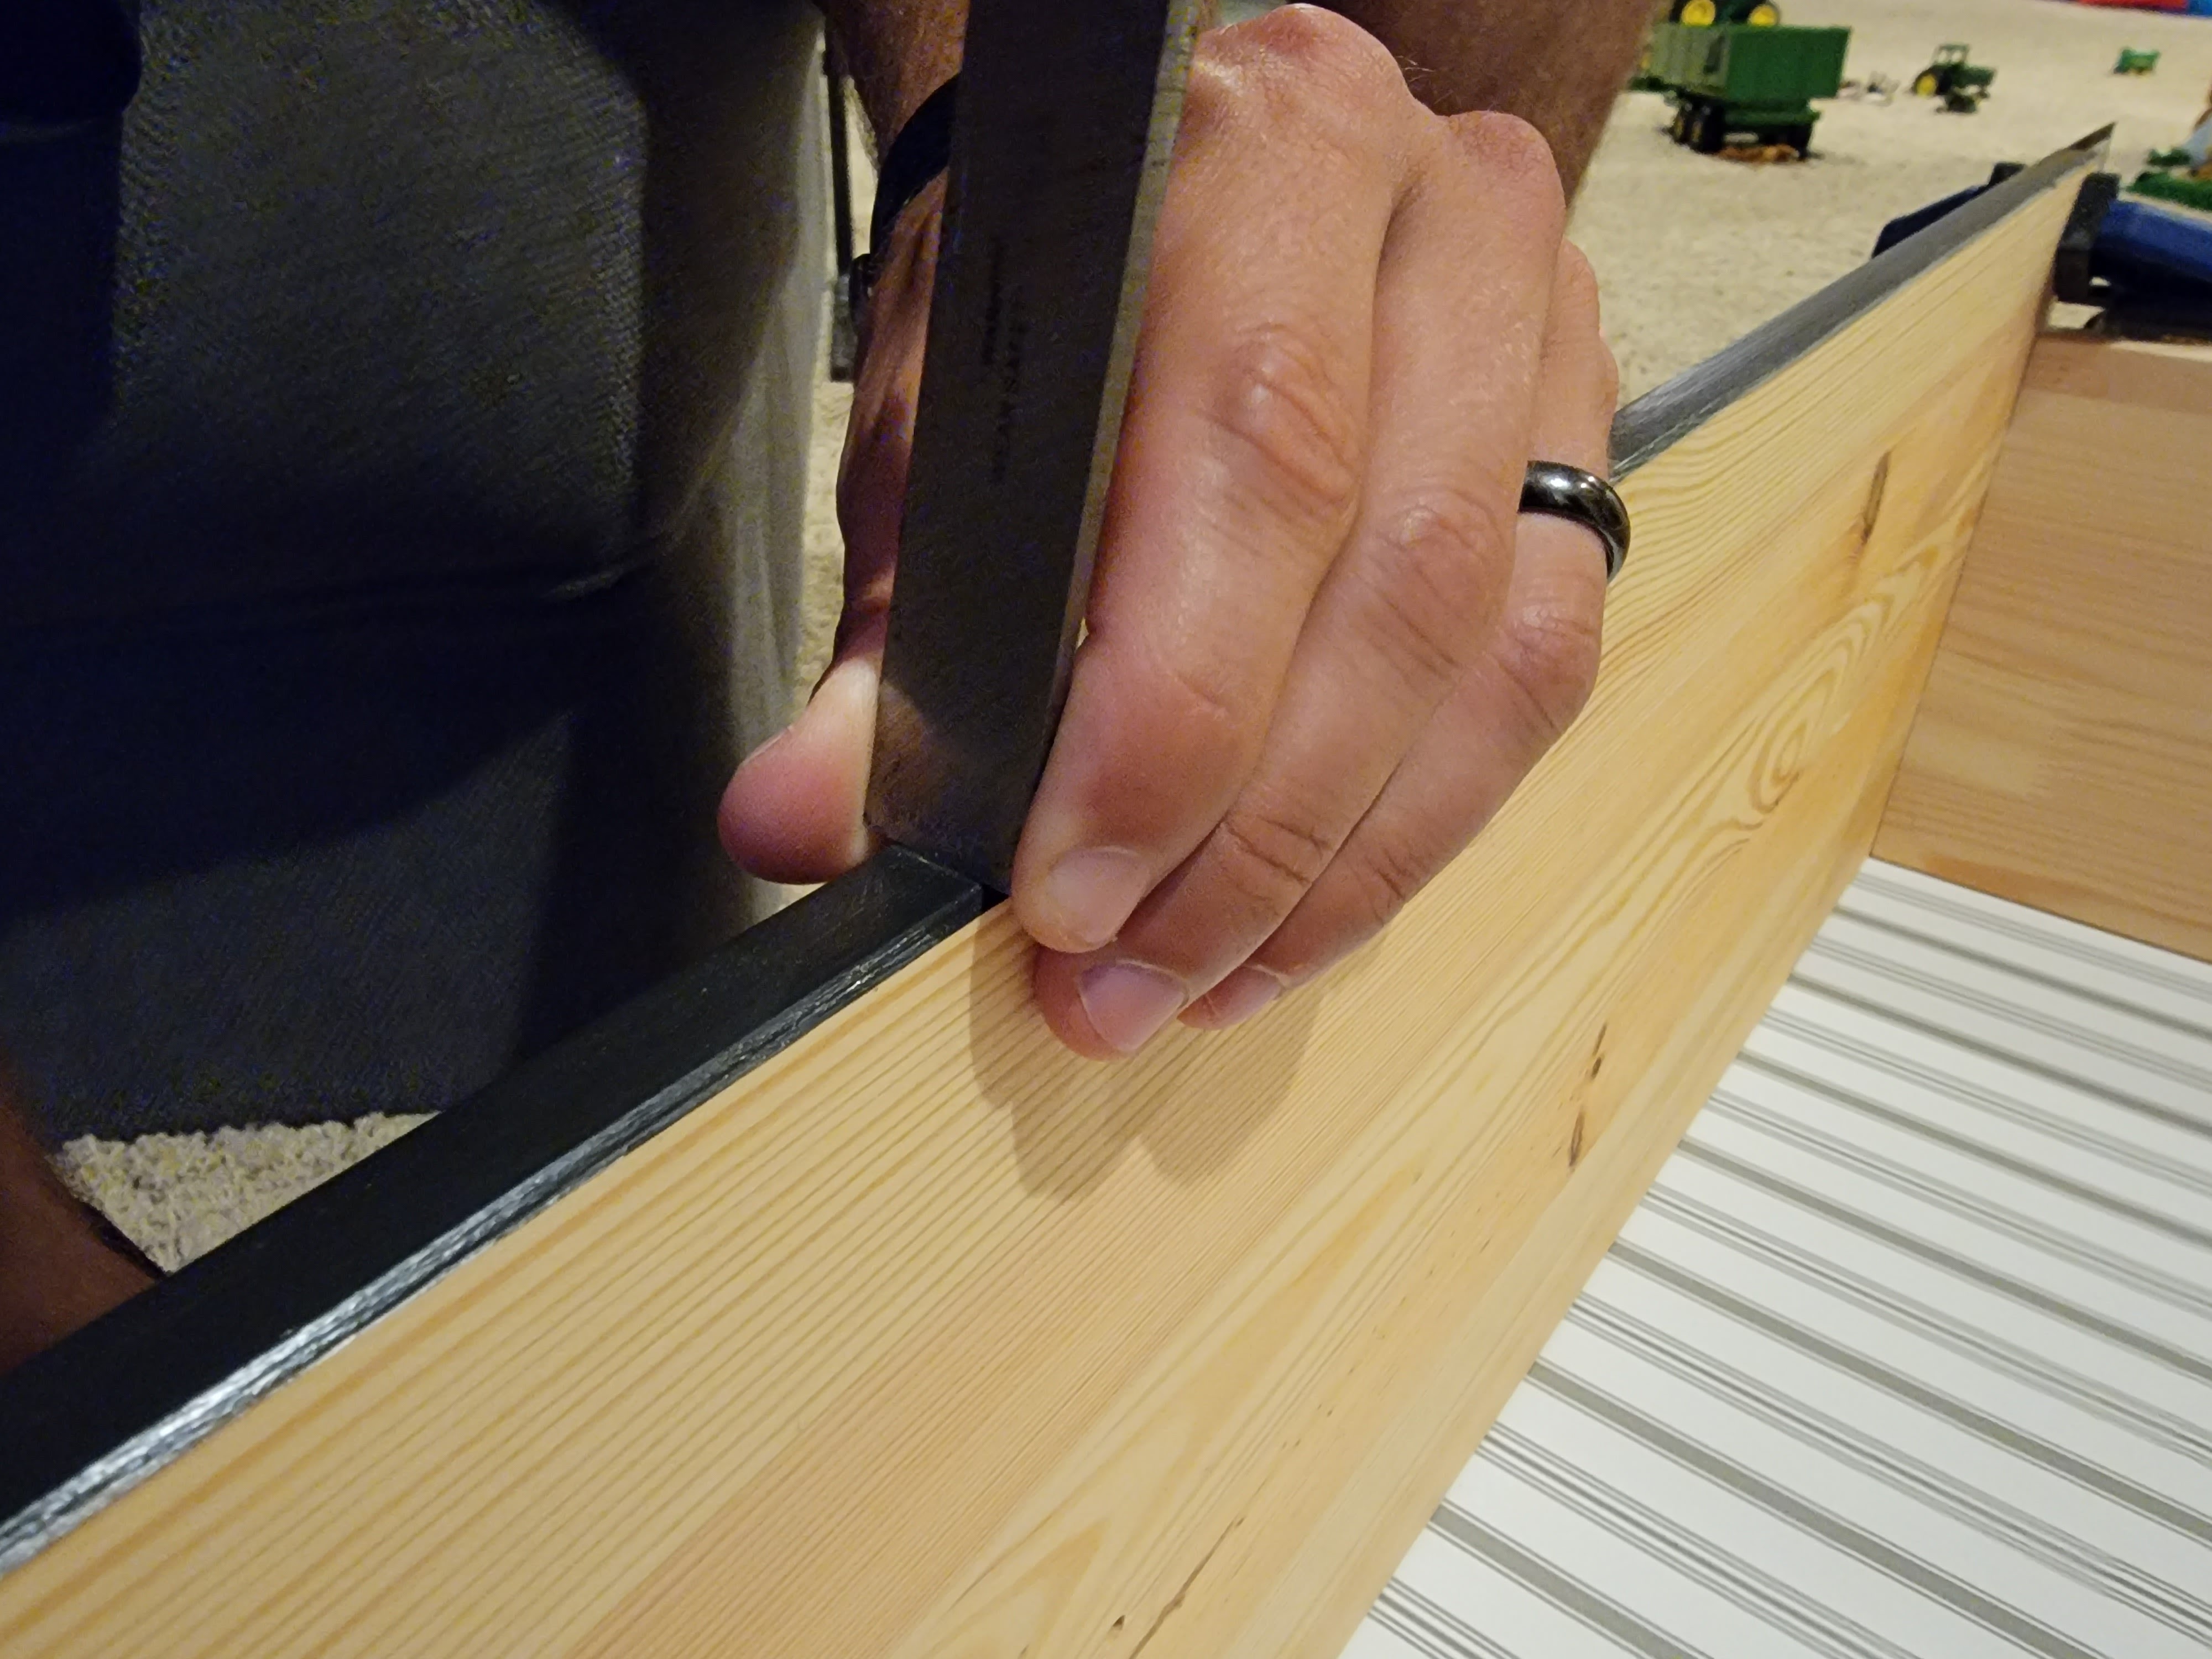
Next up was marking and cutting out all the notches. Using the outline he had drawn with all the shelf measurements, Justin used his combination square to mark where each notch should go.

This step took the longest, but creating a precise outline of the notch was necessary so he would know exactly where to cut. We highly recommend double checking measurements! Justin initially measured to the wrong spot and the notch would have been off but I noticed it in time and we were able to correct it before cutting. Measure twice (or three times!), cut once!

To cut out the notches, Justin used his jigsaw. He first cut the two parallel lines coming in from the edge.

Before cutting the top line, he drilled a small hole near the top of the notch.

This hole served as a place to start the jigsaw for a more precise cut on the final line at the top of the notch.

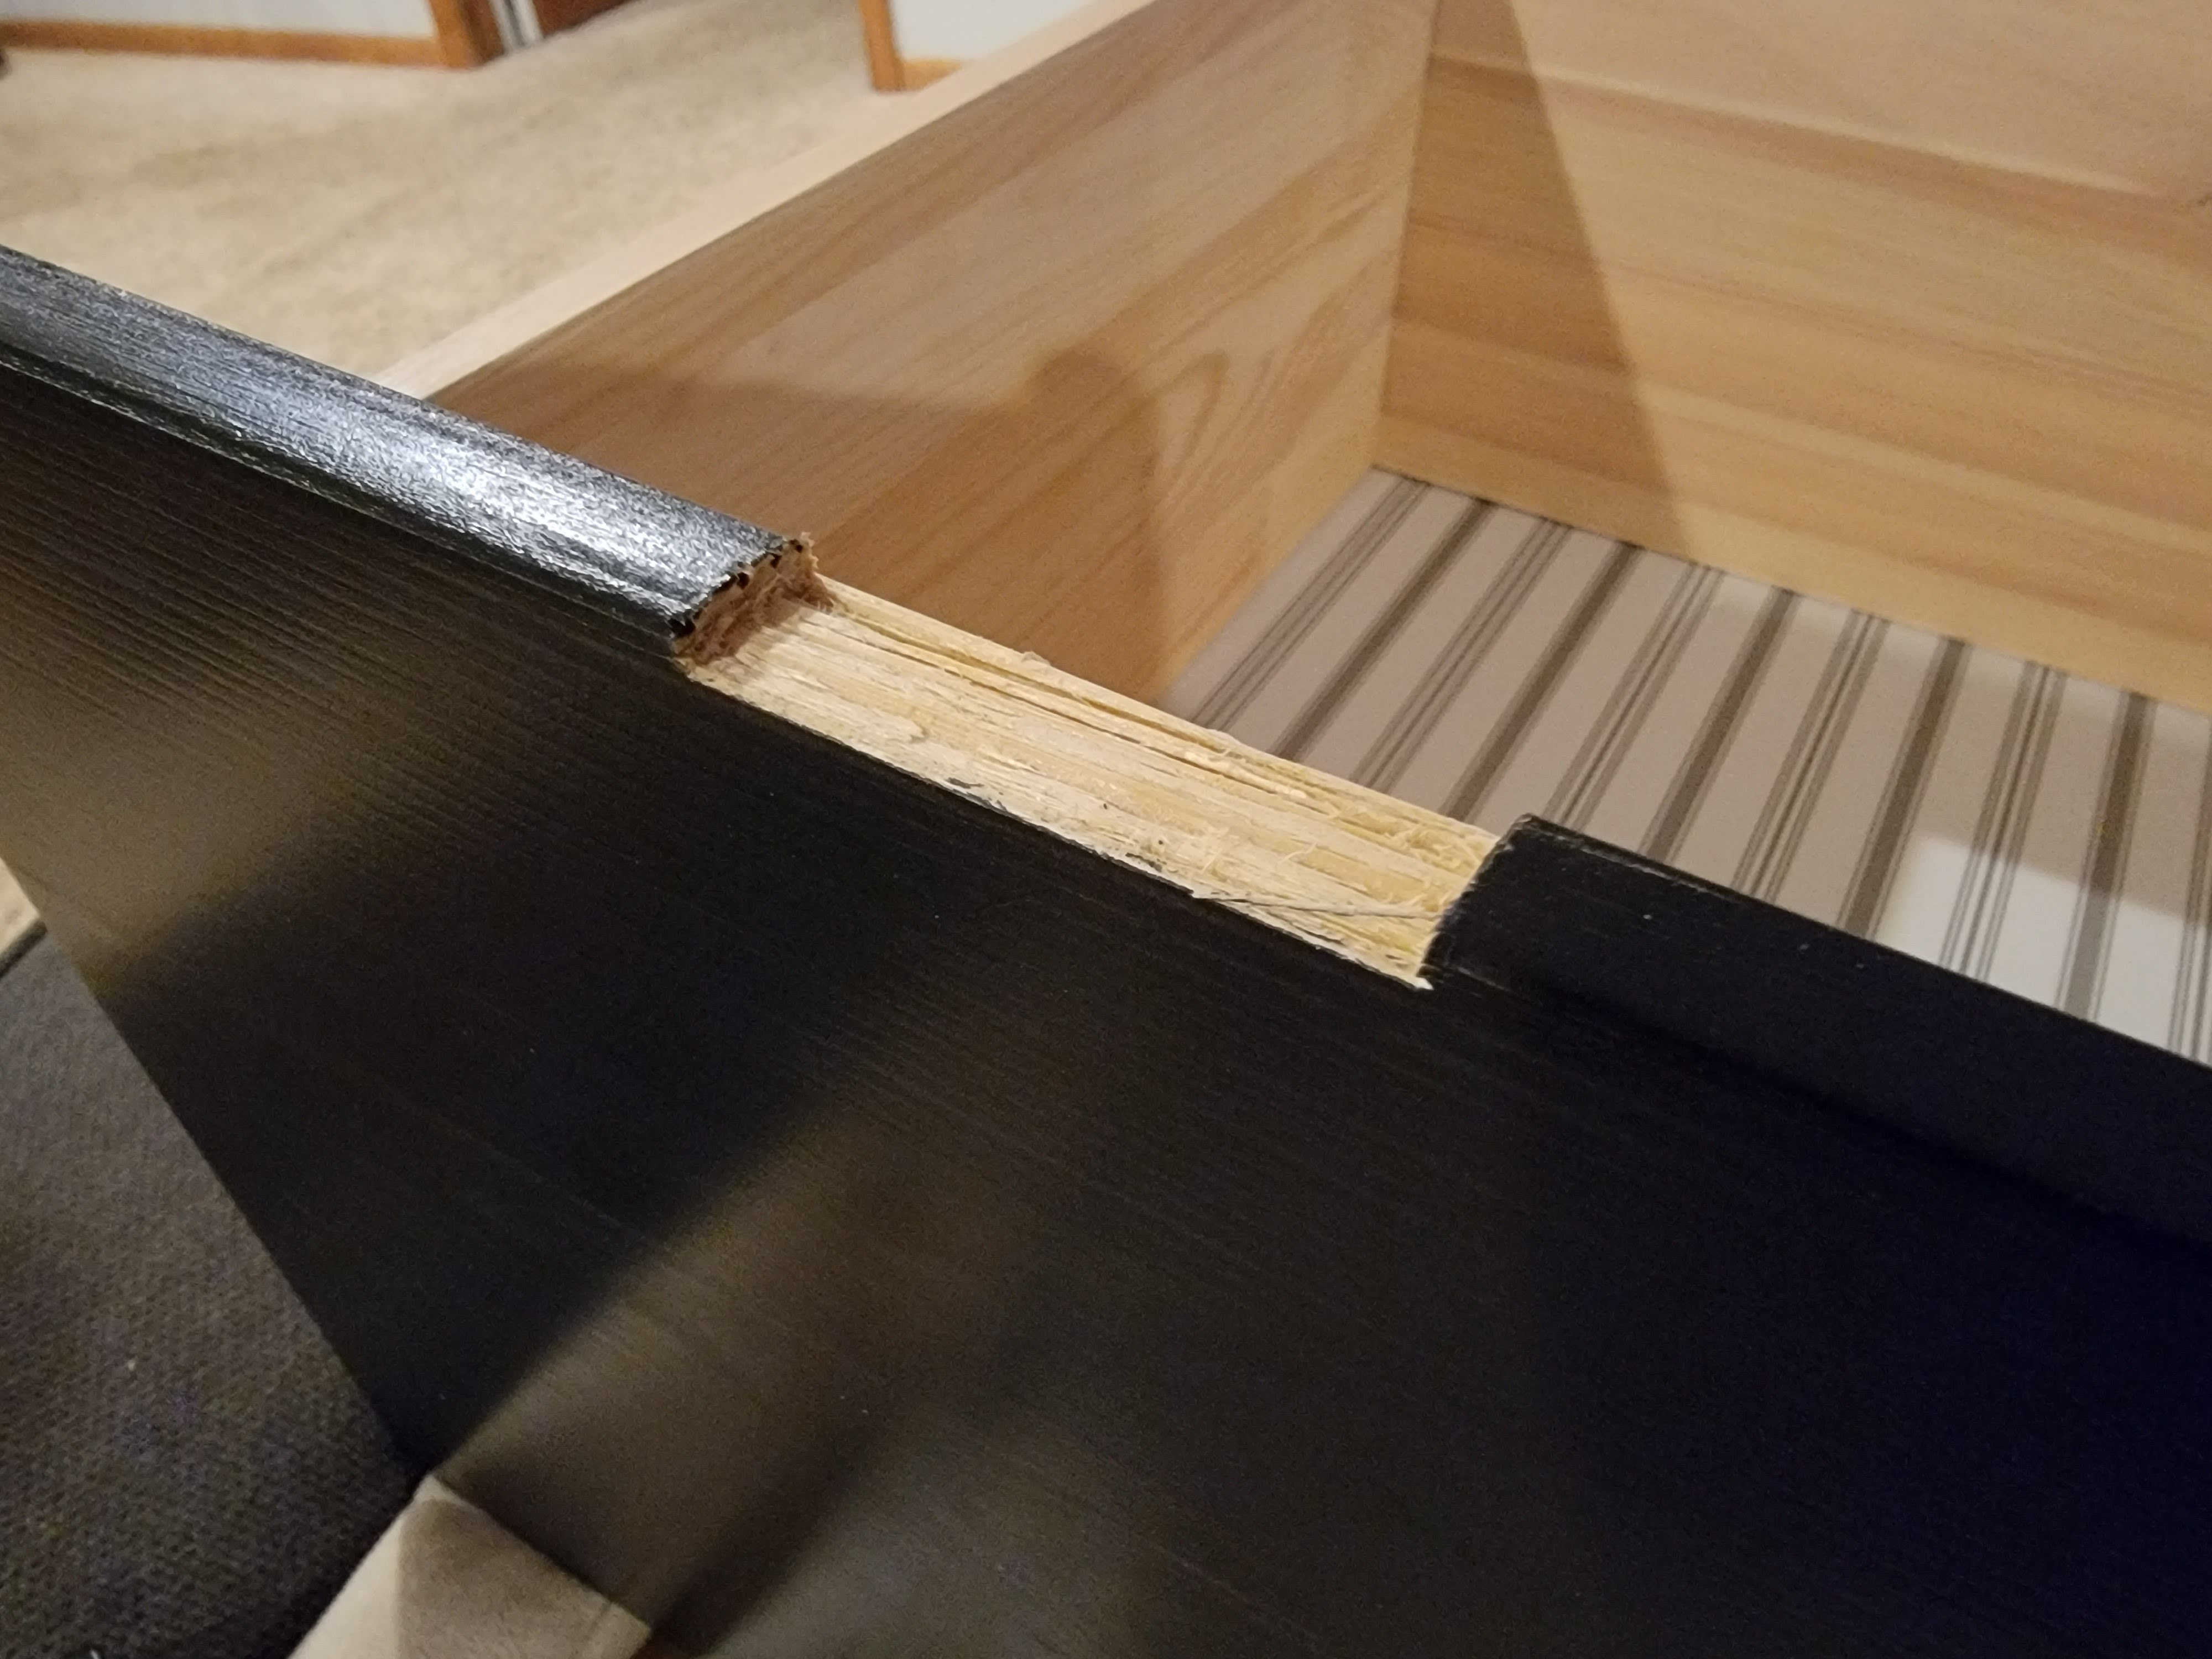
Justin repeated this process for all the notches and then lightly sanded all the edges and corners with 120-grit sandpaper. We tested this shelf to make sure it fit on our Vittsjo units (it did!) and then this one served as a template to trace notches on the remaining two shelves.

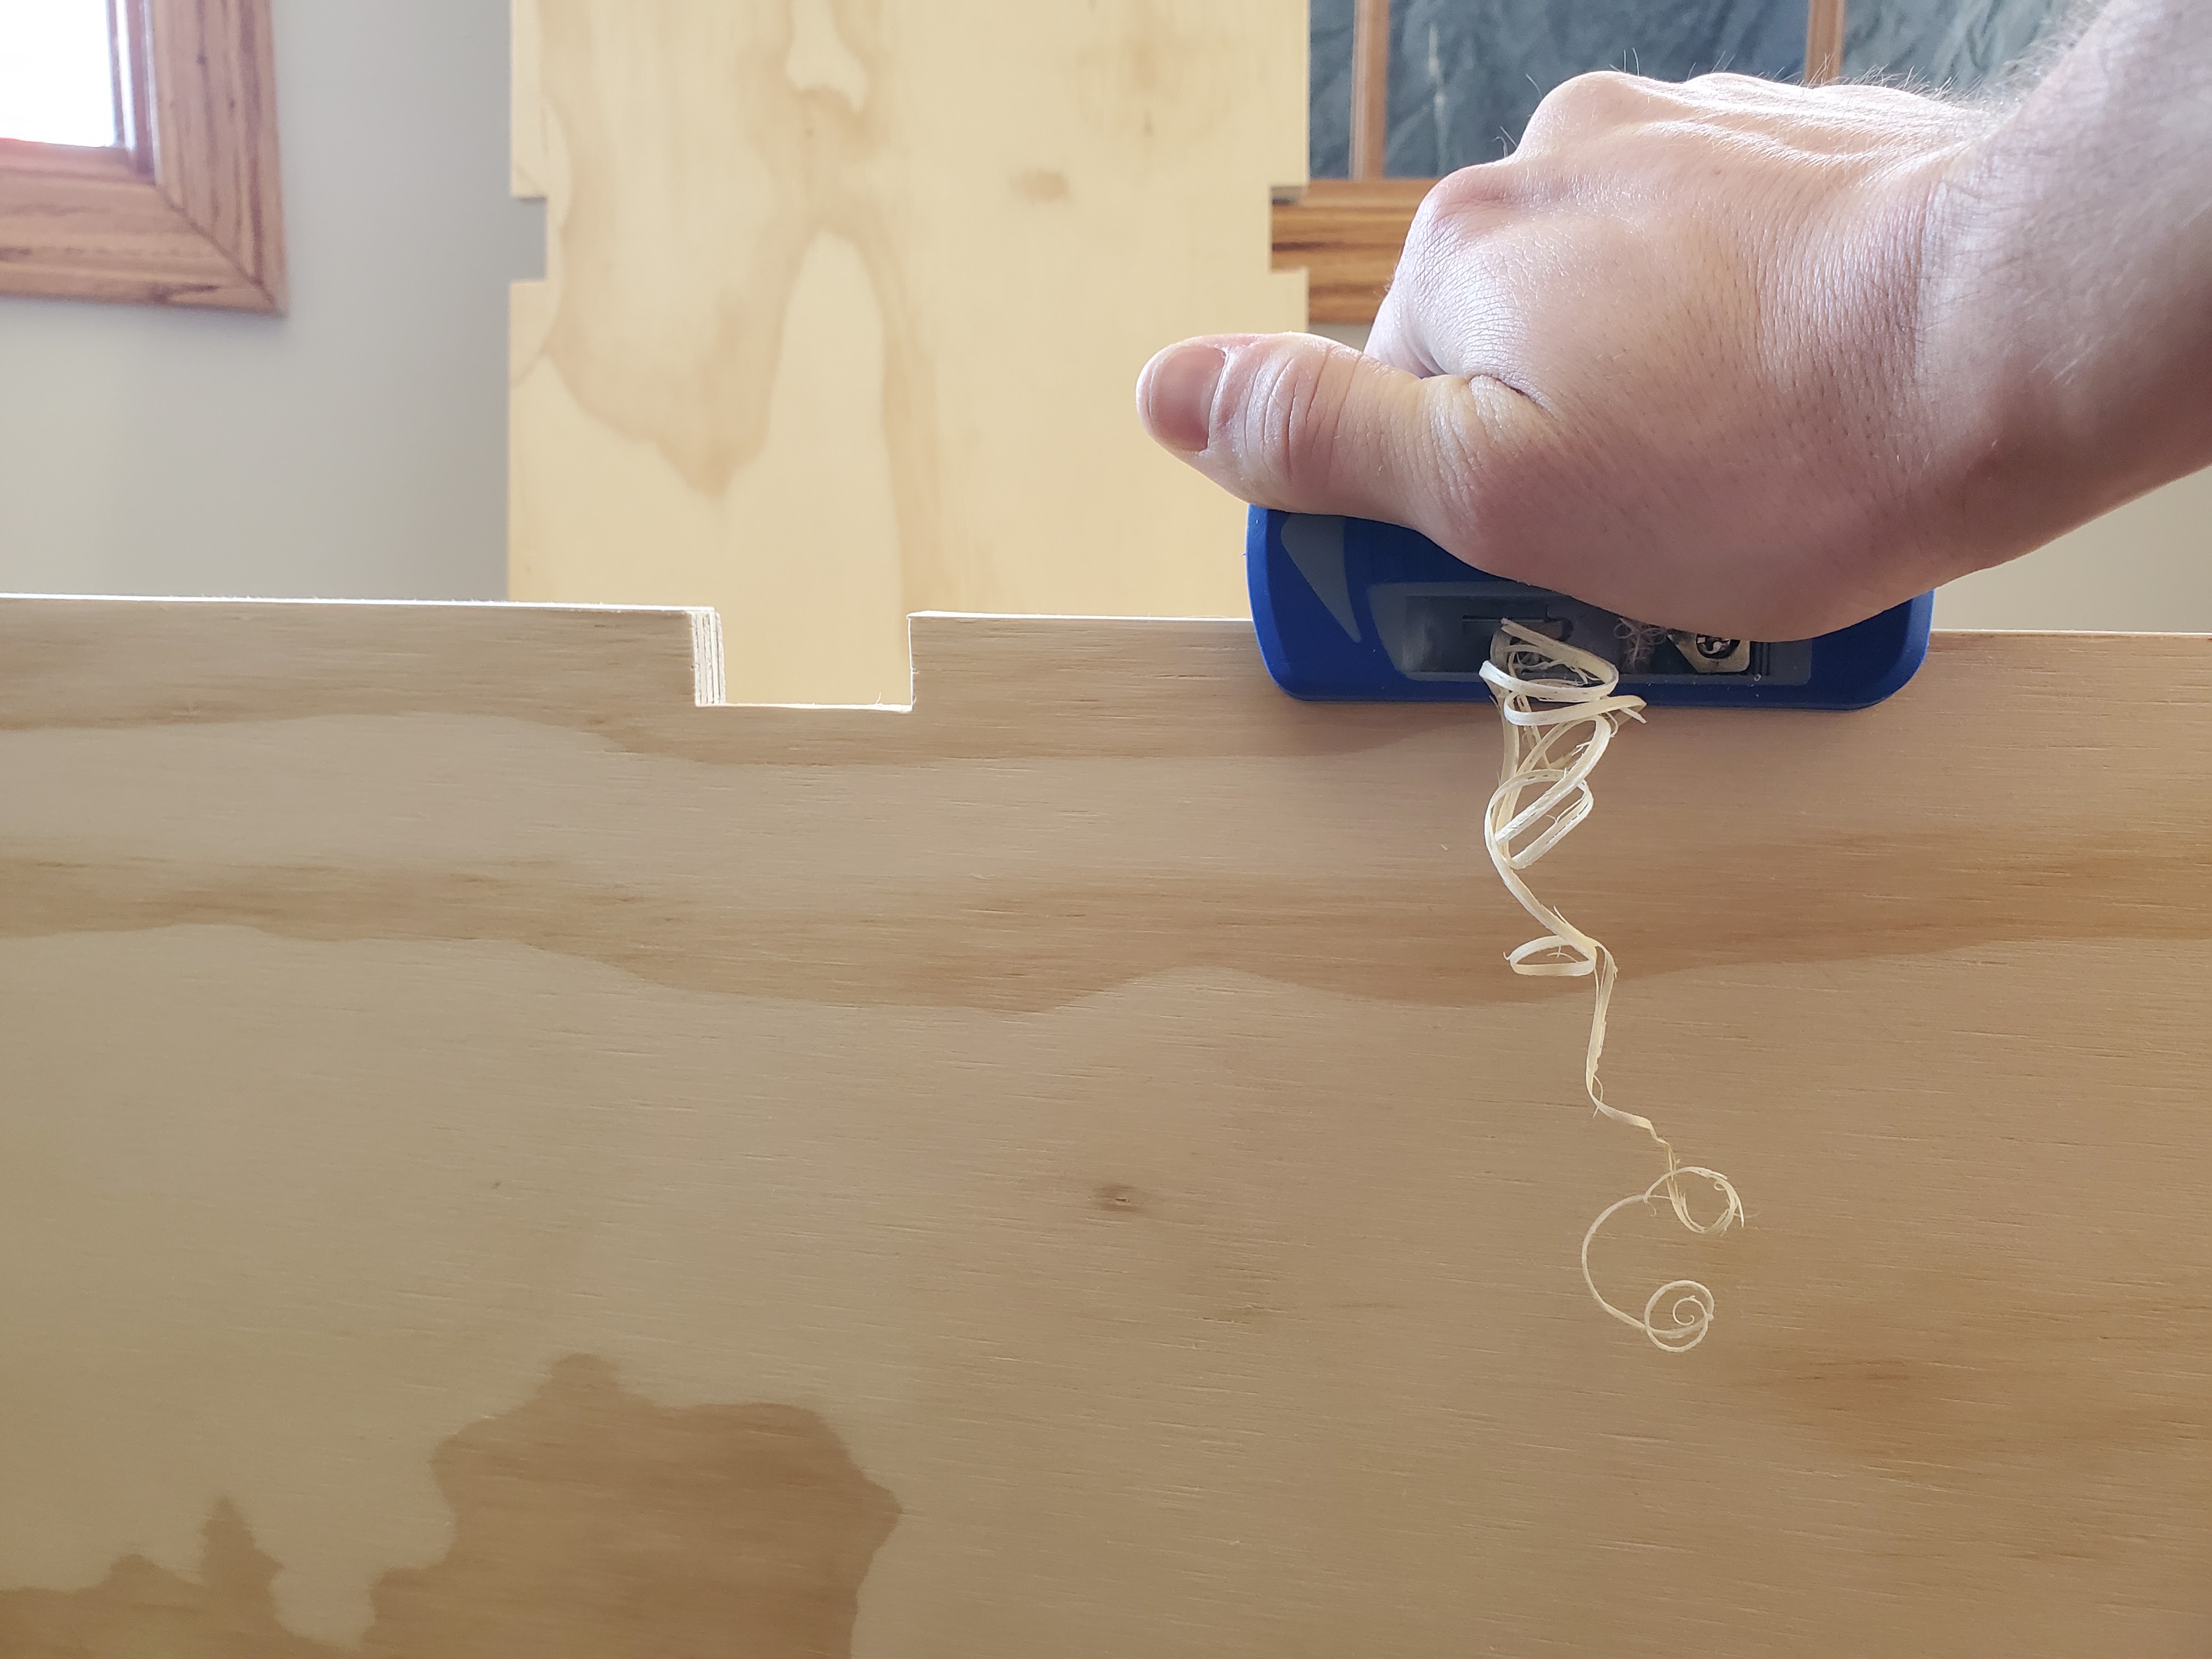
Once all the shelves were cut and we made sure they all fit, I started applying this 1/2″ edge banding on all the exposed edges. This step is definitely optional if you like the look of the layers of plywood, but we used it for our DIY play kitchen and I liked the cleaner look that edge banding provided.

The edge banding has dried glue on the back that is activated by heat. I turned my iron on to the cotton setting (a pretty high heat – around 400 degrees), placed the banding glue-side down on the side of the plywood, and ran the iron over the banding.

I kept the iron moving the whole time, rubbing back and forth over the same small area for 4-5 seconds, working my way slowly down to the end.

When I got near the end, I used a scissors to snip the band right at the edge of the plywood, and continued ironing to seal the end.

The nice thing about edge banding is if you get a little off and your band is crooked or slipped a bit, you just run the iron over it again to heat up the glue and then you can slide it to adjust positioning or even totally take it off and re-apply. I think it’s a very beginner-friendly DIY trick to elevate the look of plywood!

The edge banding was slightly wider than the plywood so we got this edge banding trimmer to shave off the excess. We had to adjust the blades so it didn’t shave too much off and the tool itself required quite a bit of forearm strength to use so Justin handled this task. šŸ˜‰

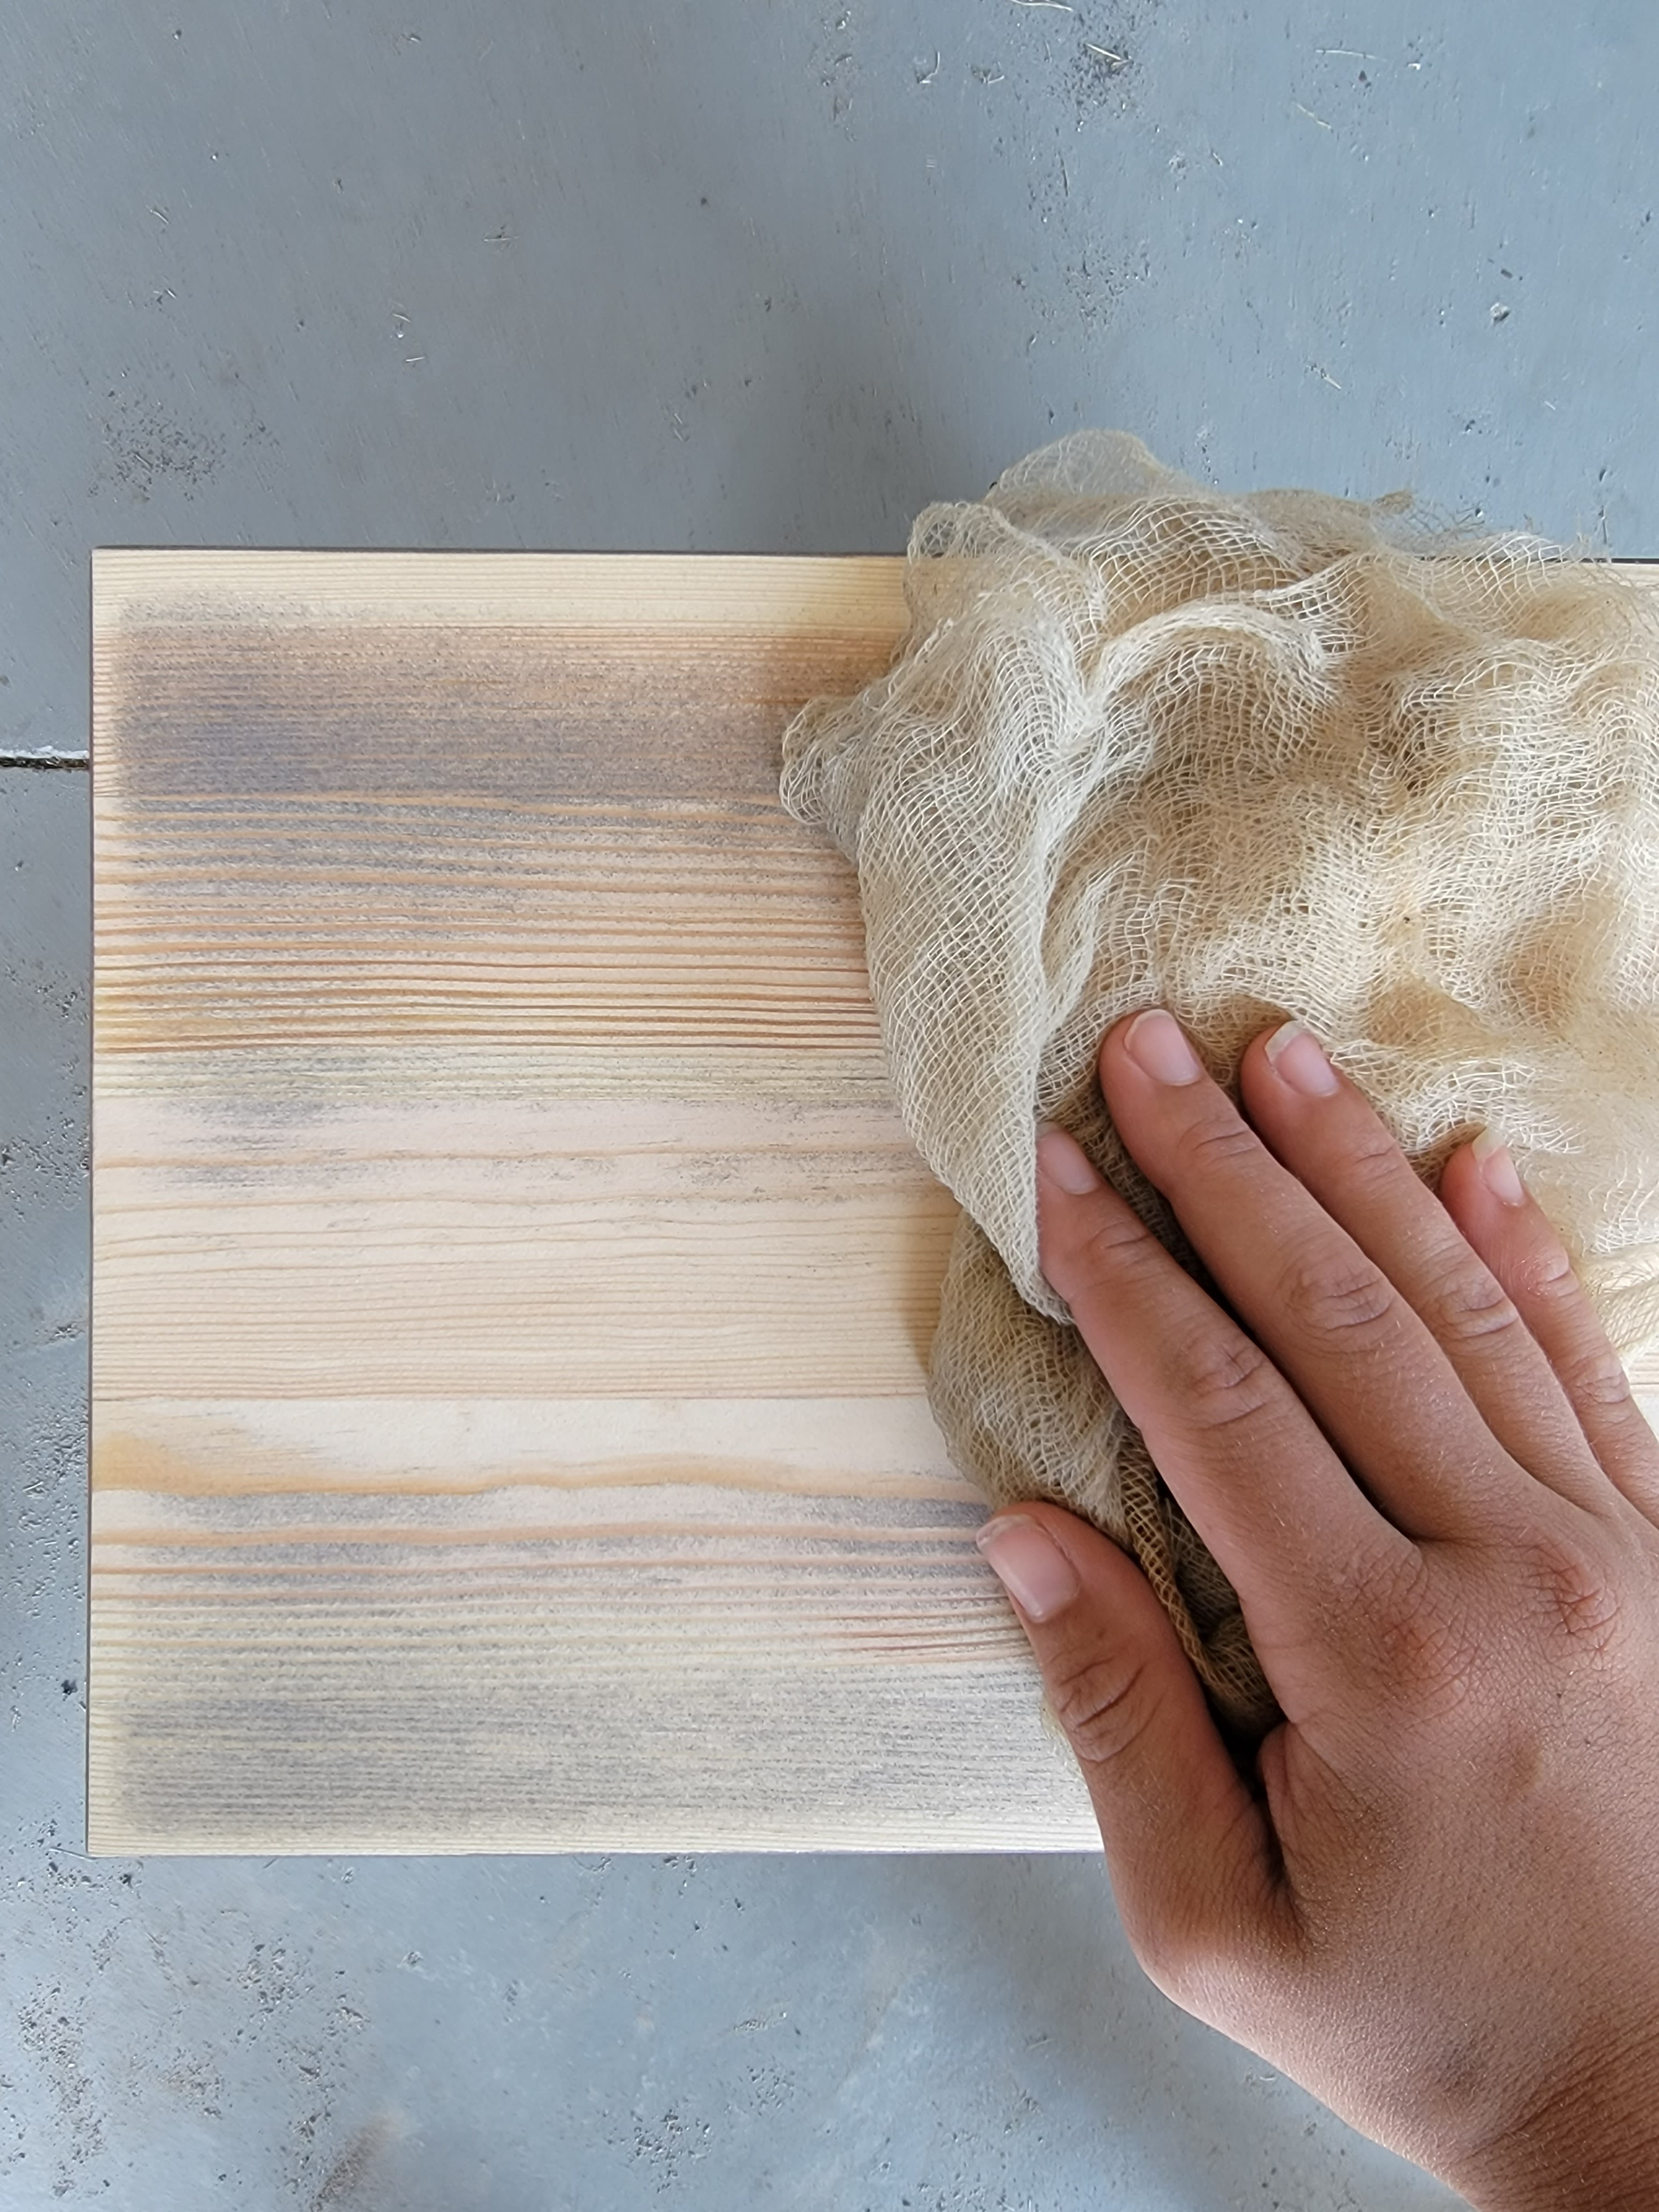
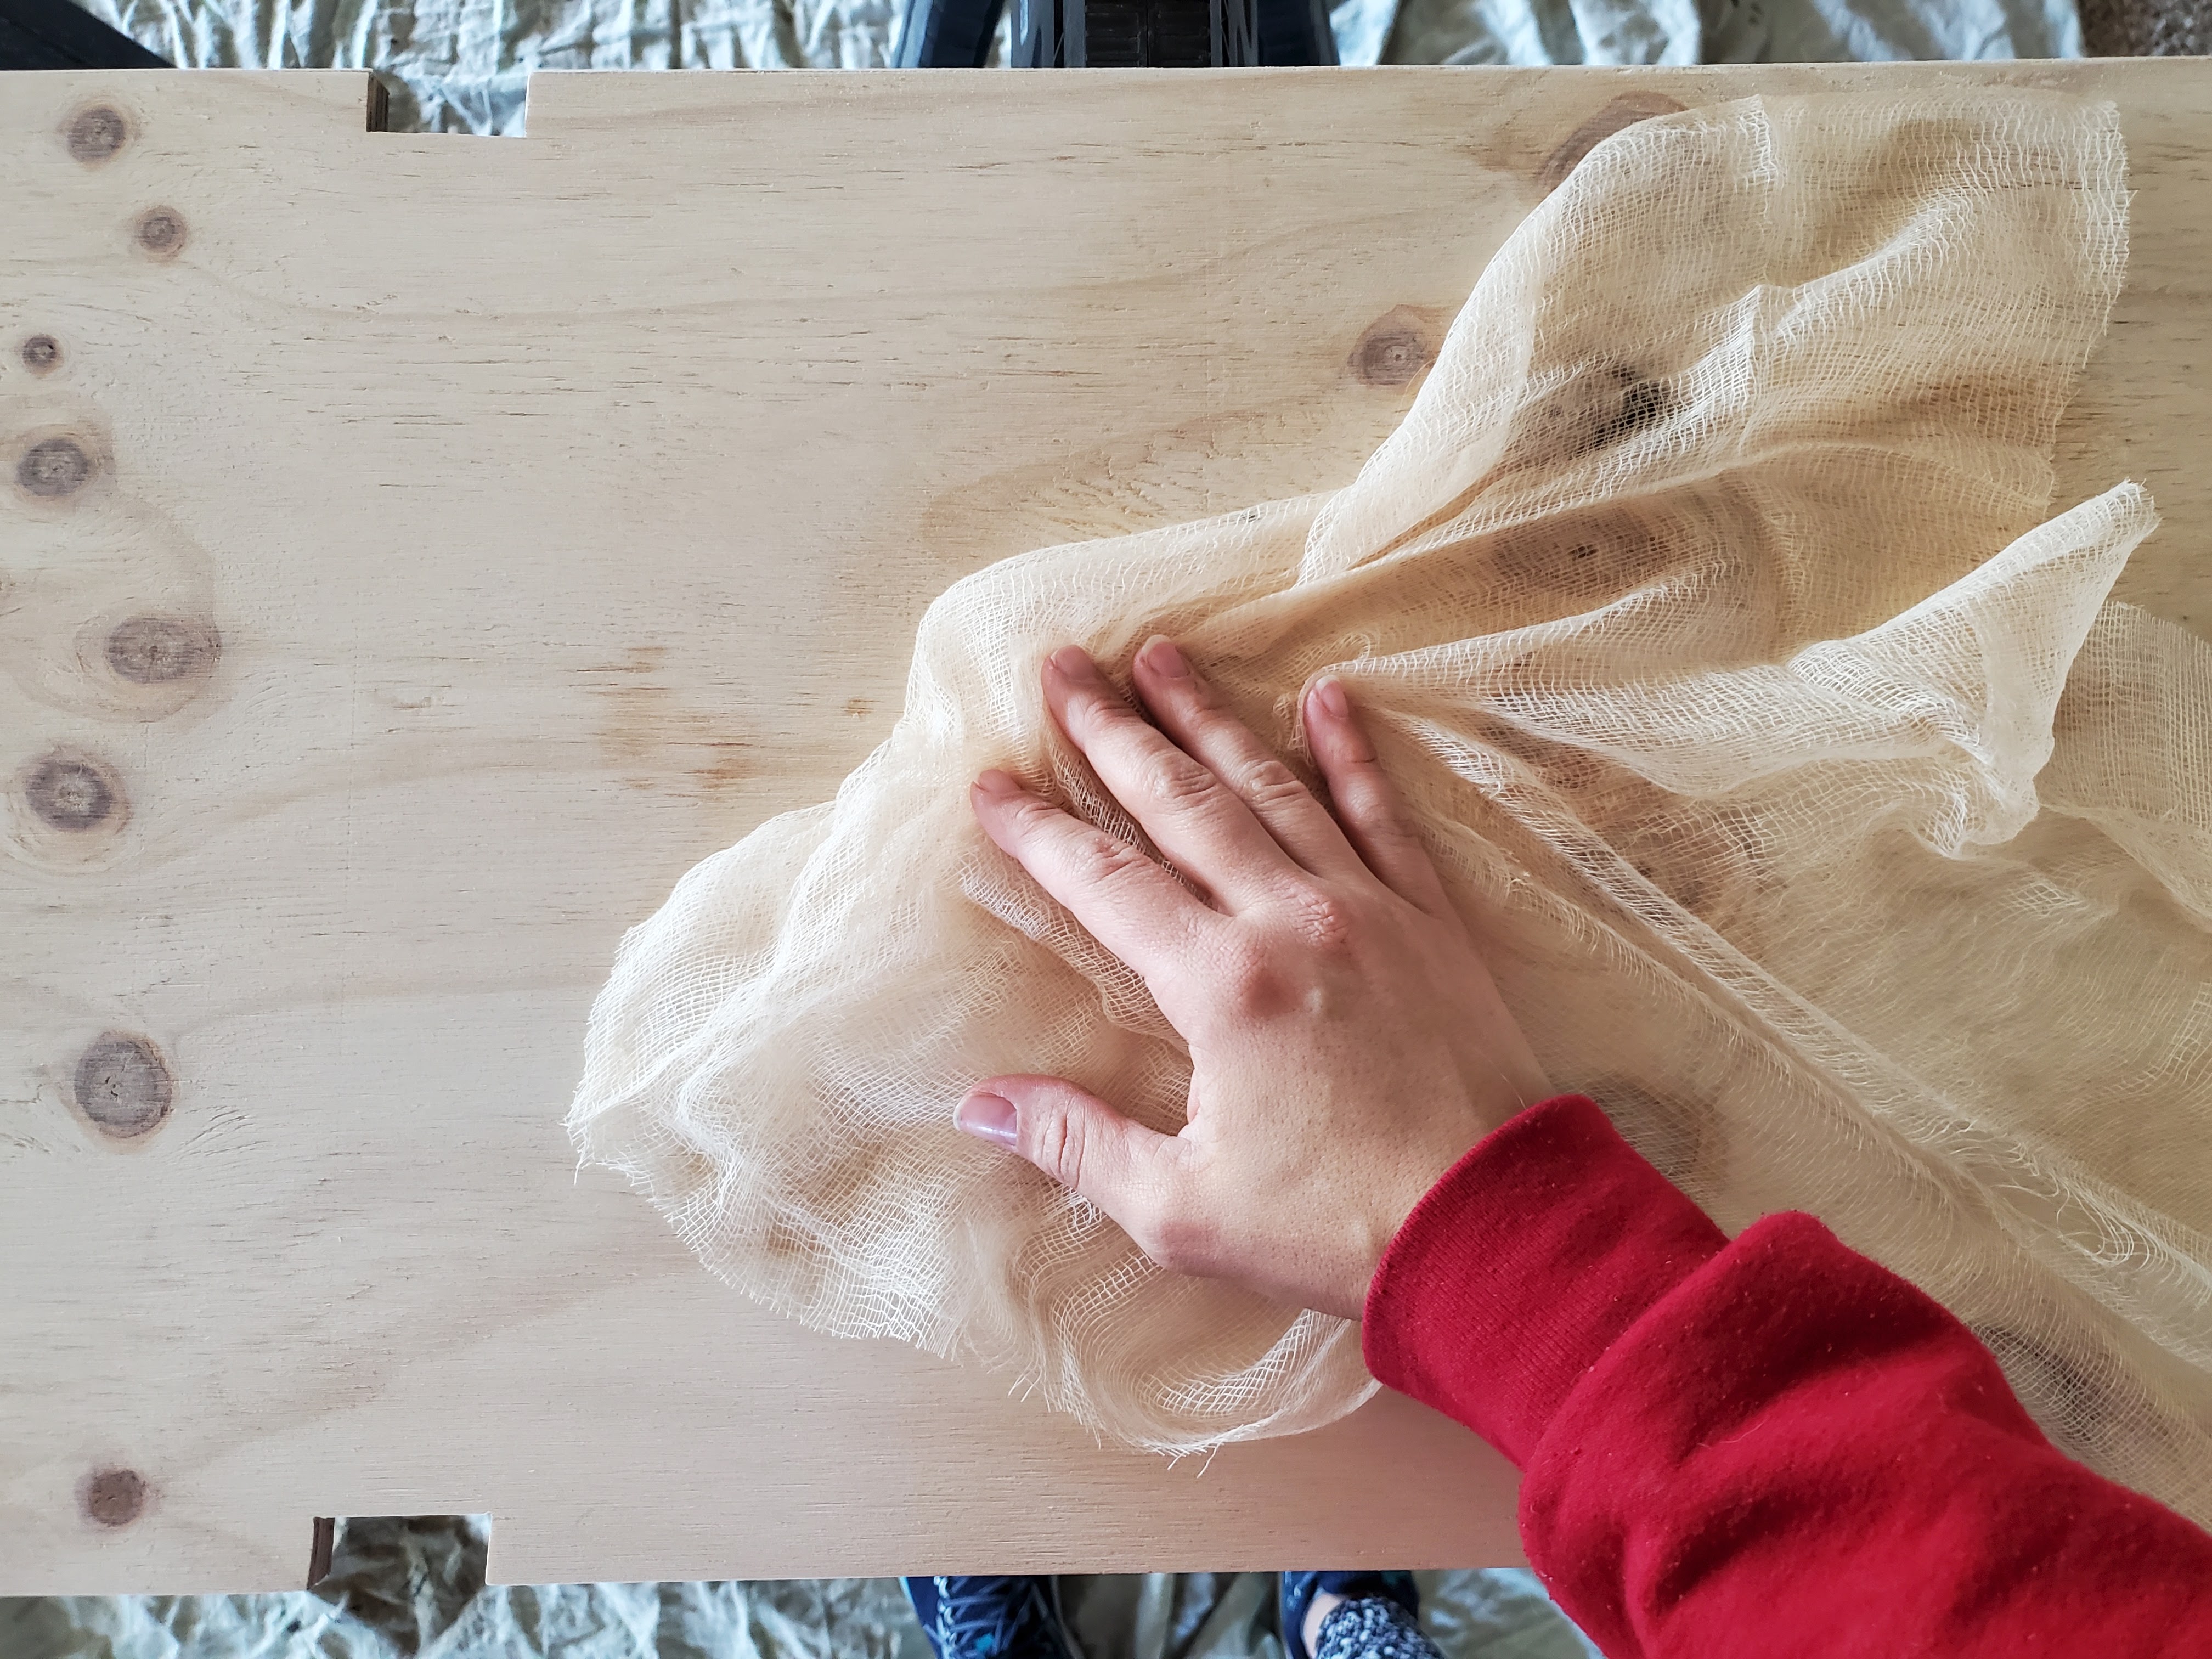
Once all the edge banding was trimmed, Justin did a quick round of sanding with 220-grit sandpaper on his orbital sander to give the shelves a nice smooth finish. I wiped them down with a tack cloth . . .

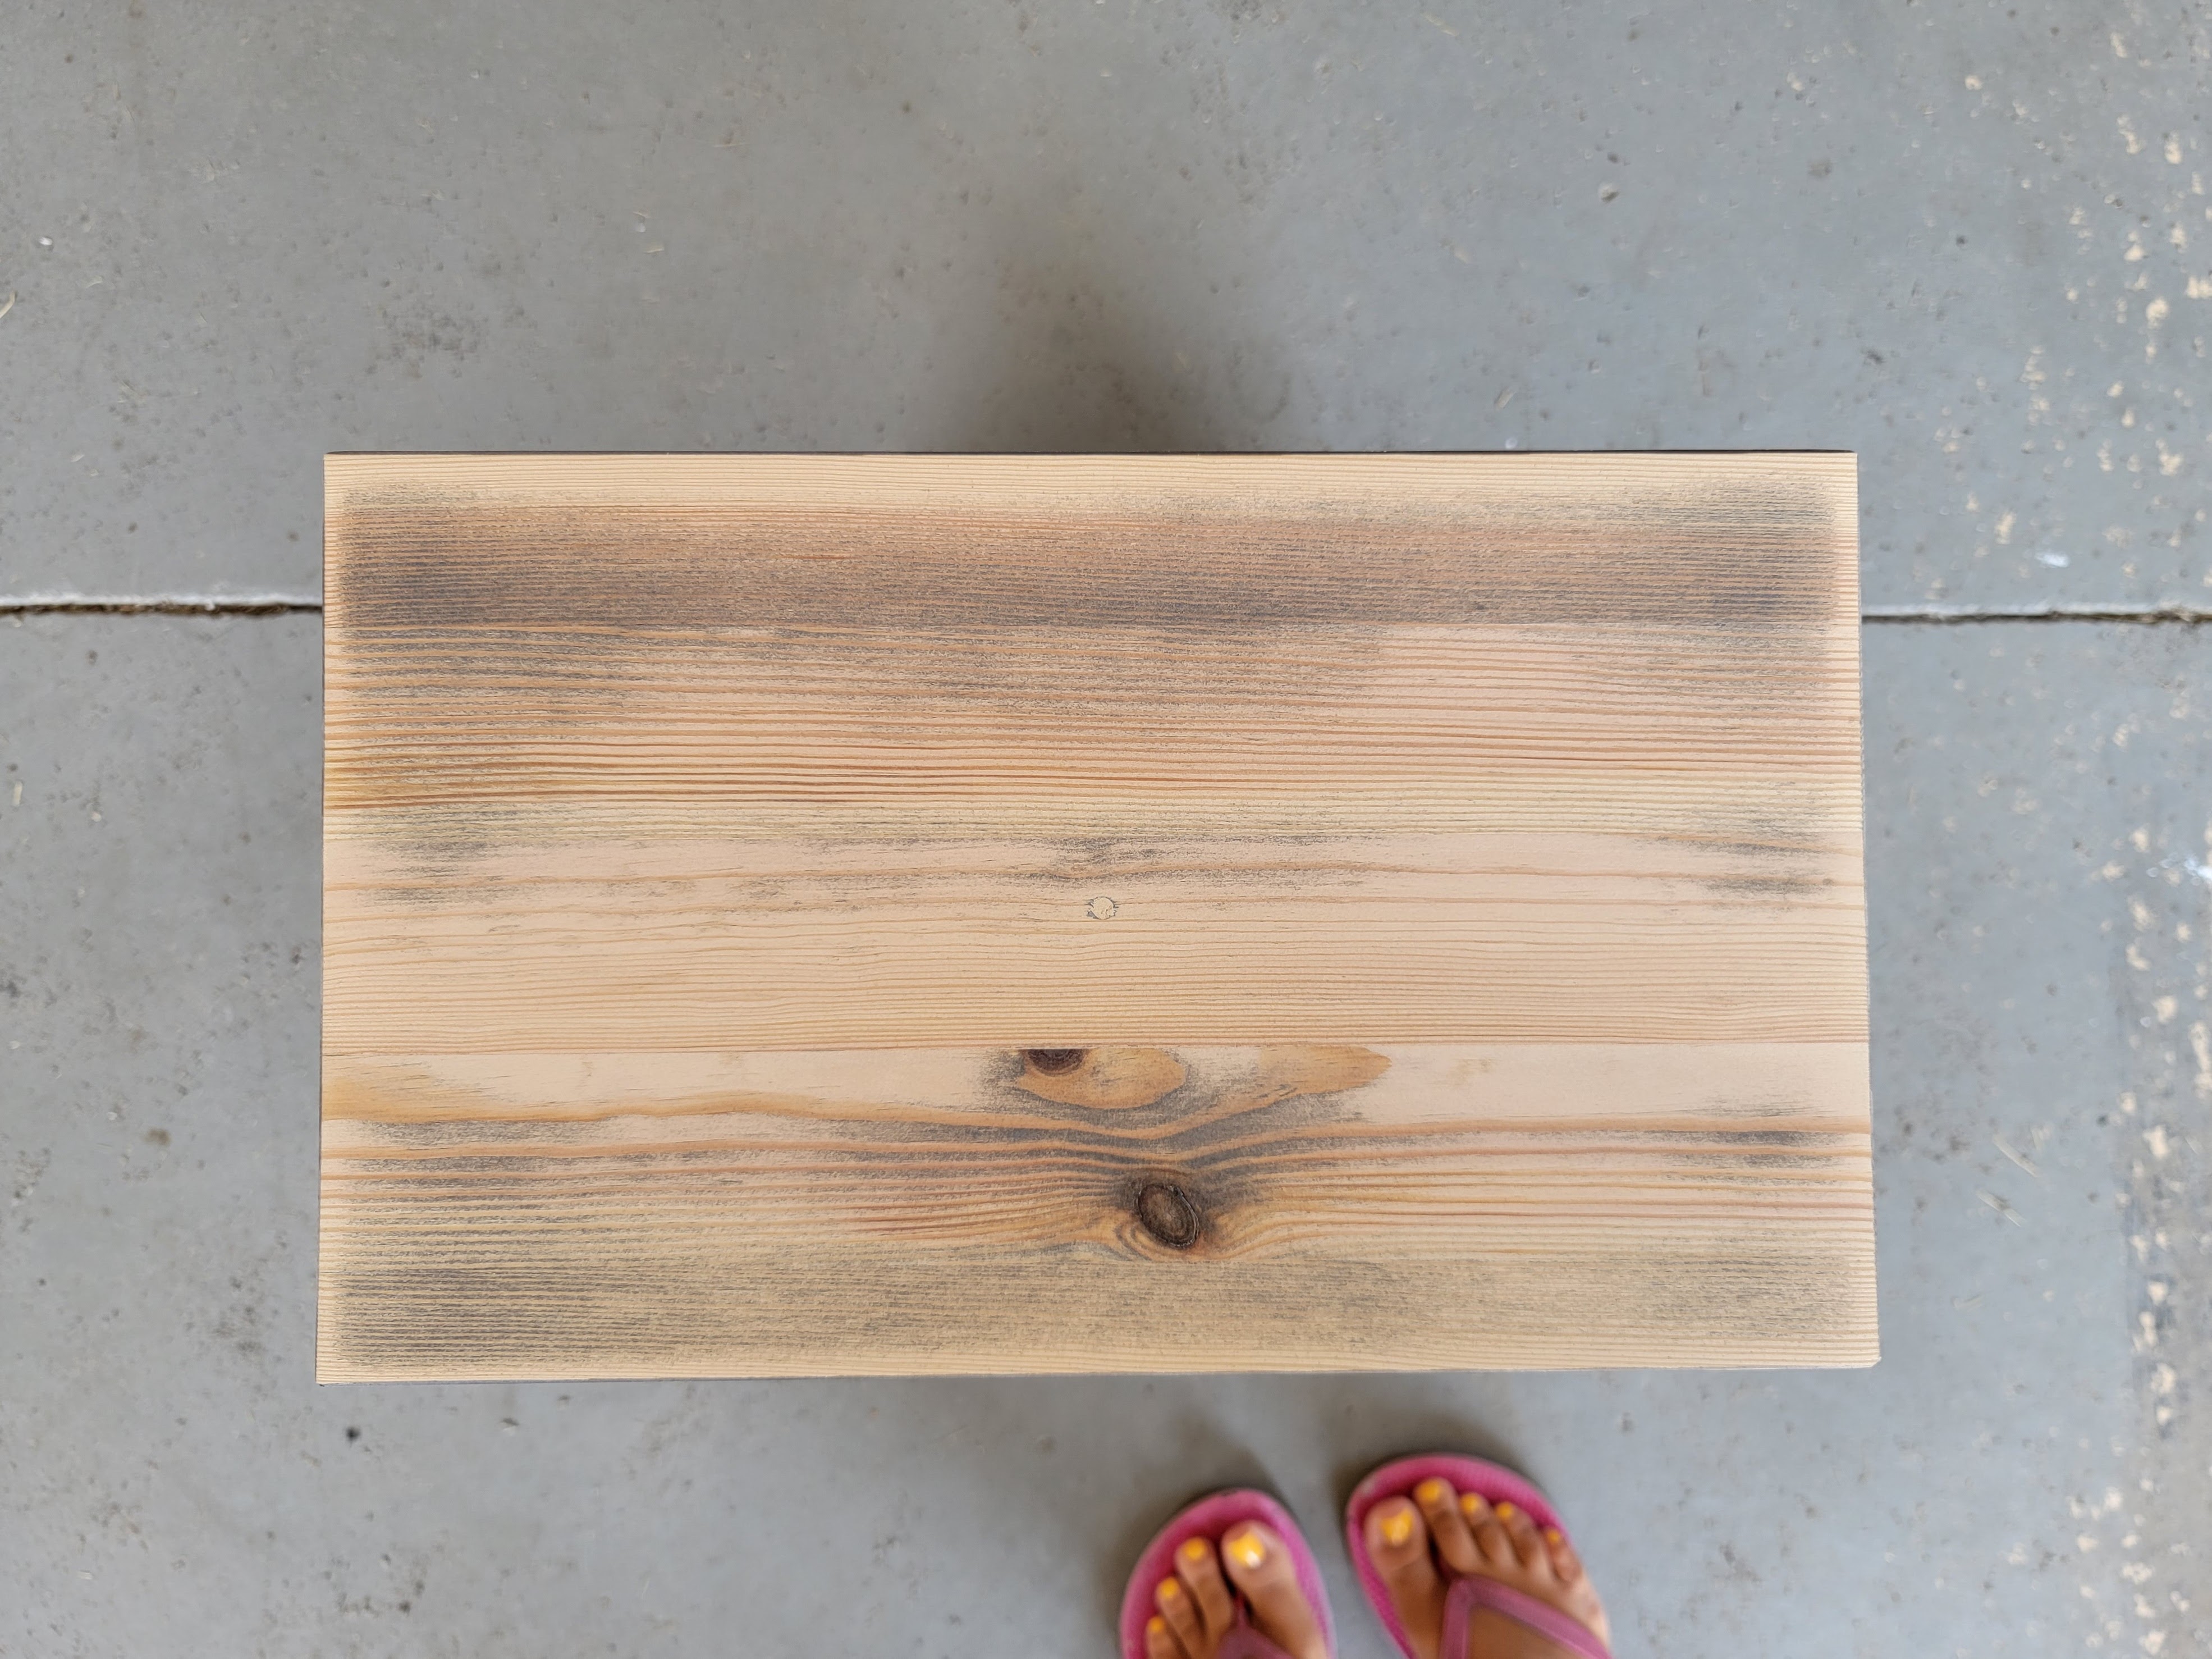
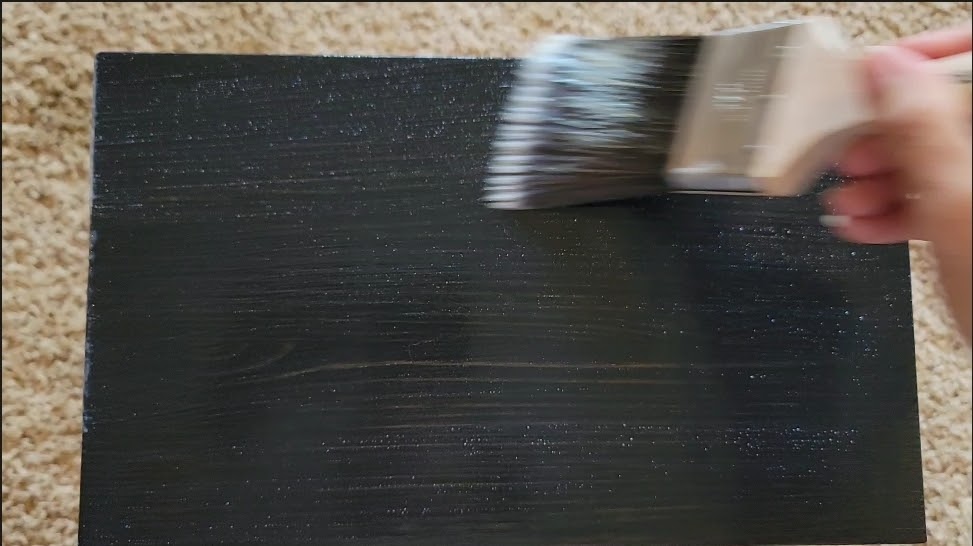
. . . and proceeded to stain them. We used stain and polyurethane we already had on hand and I used foam brushes to apply one coat of stain and two coats of polyurethane to the shelves.

After letting them dry, I very lightly buffed by hand using 400-grit sandpaper. Then it was time to assemble them in their new home in Justin’s office and style them!

You’ll notice we also cut three individual pieces to fit the lowest shelf. These were much more straightforward than the other shelves because the Vittsjo units came with a piece of rectangular wood to fit in each bottom shelf and we decided to keep that recessed look rather than cut another shelf like the other three. Justin just traced the wood three times onto the excess plywood we had after cutting the other three shelves to length, cut out each rectangle, and I stained them. No funky cuts or edge banding required!

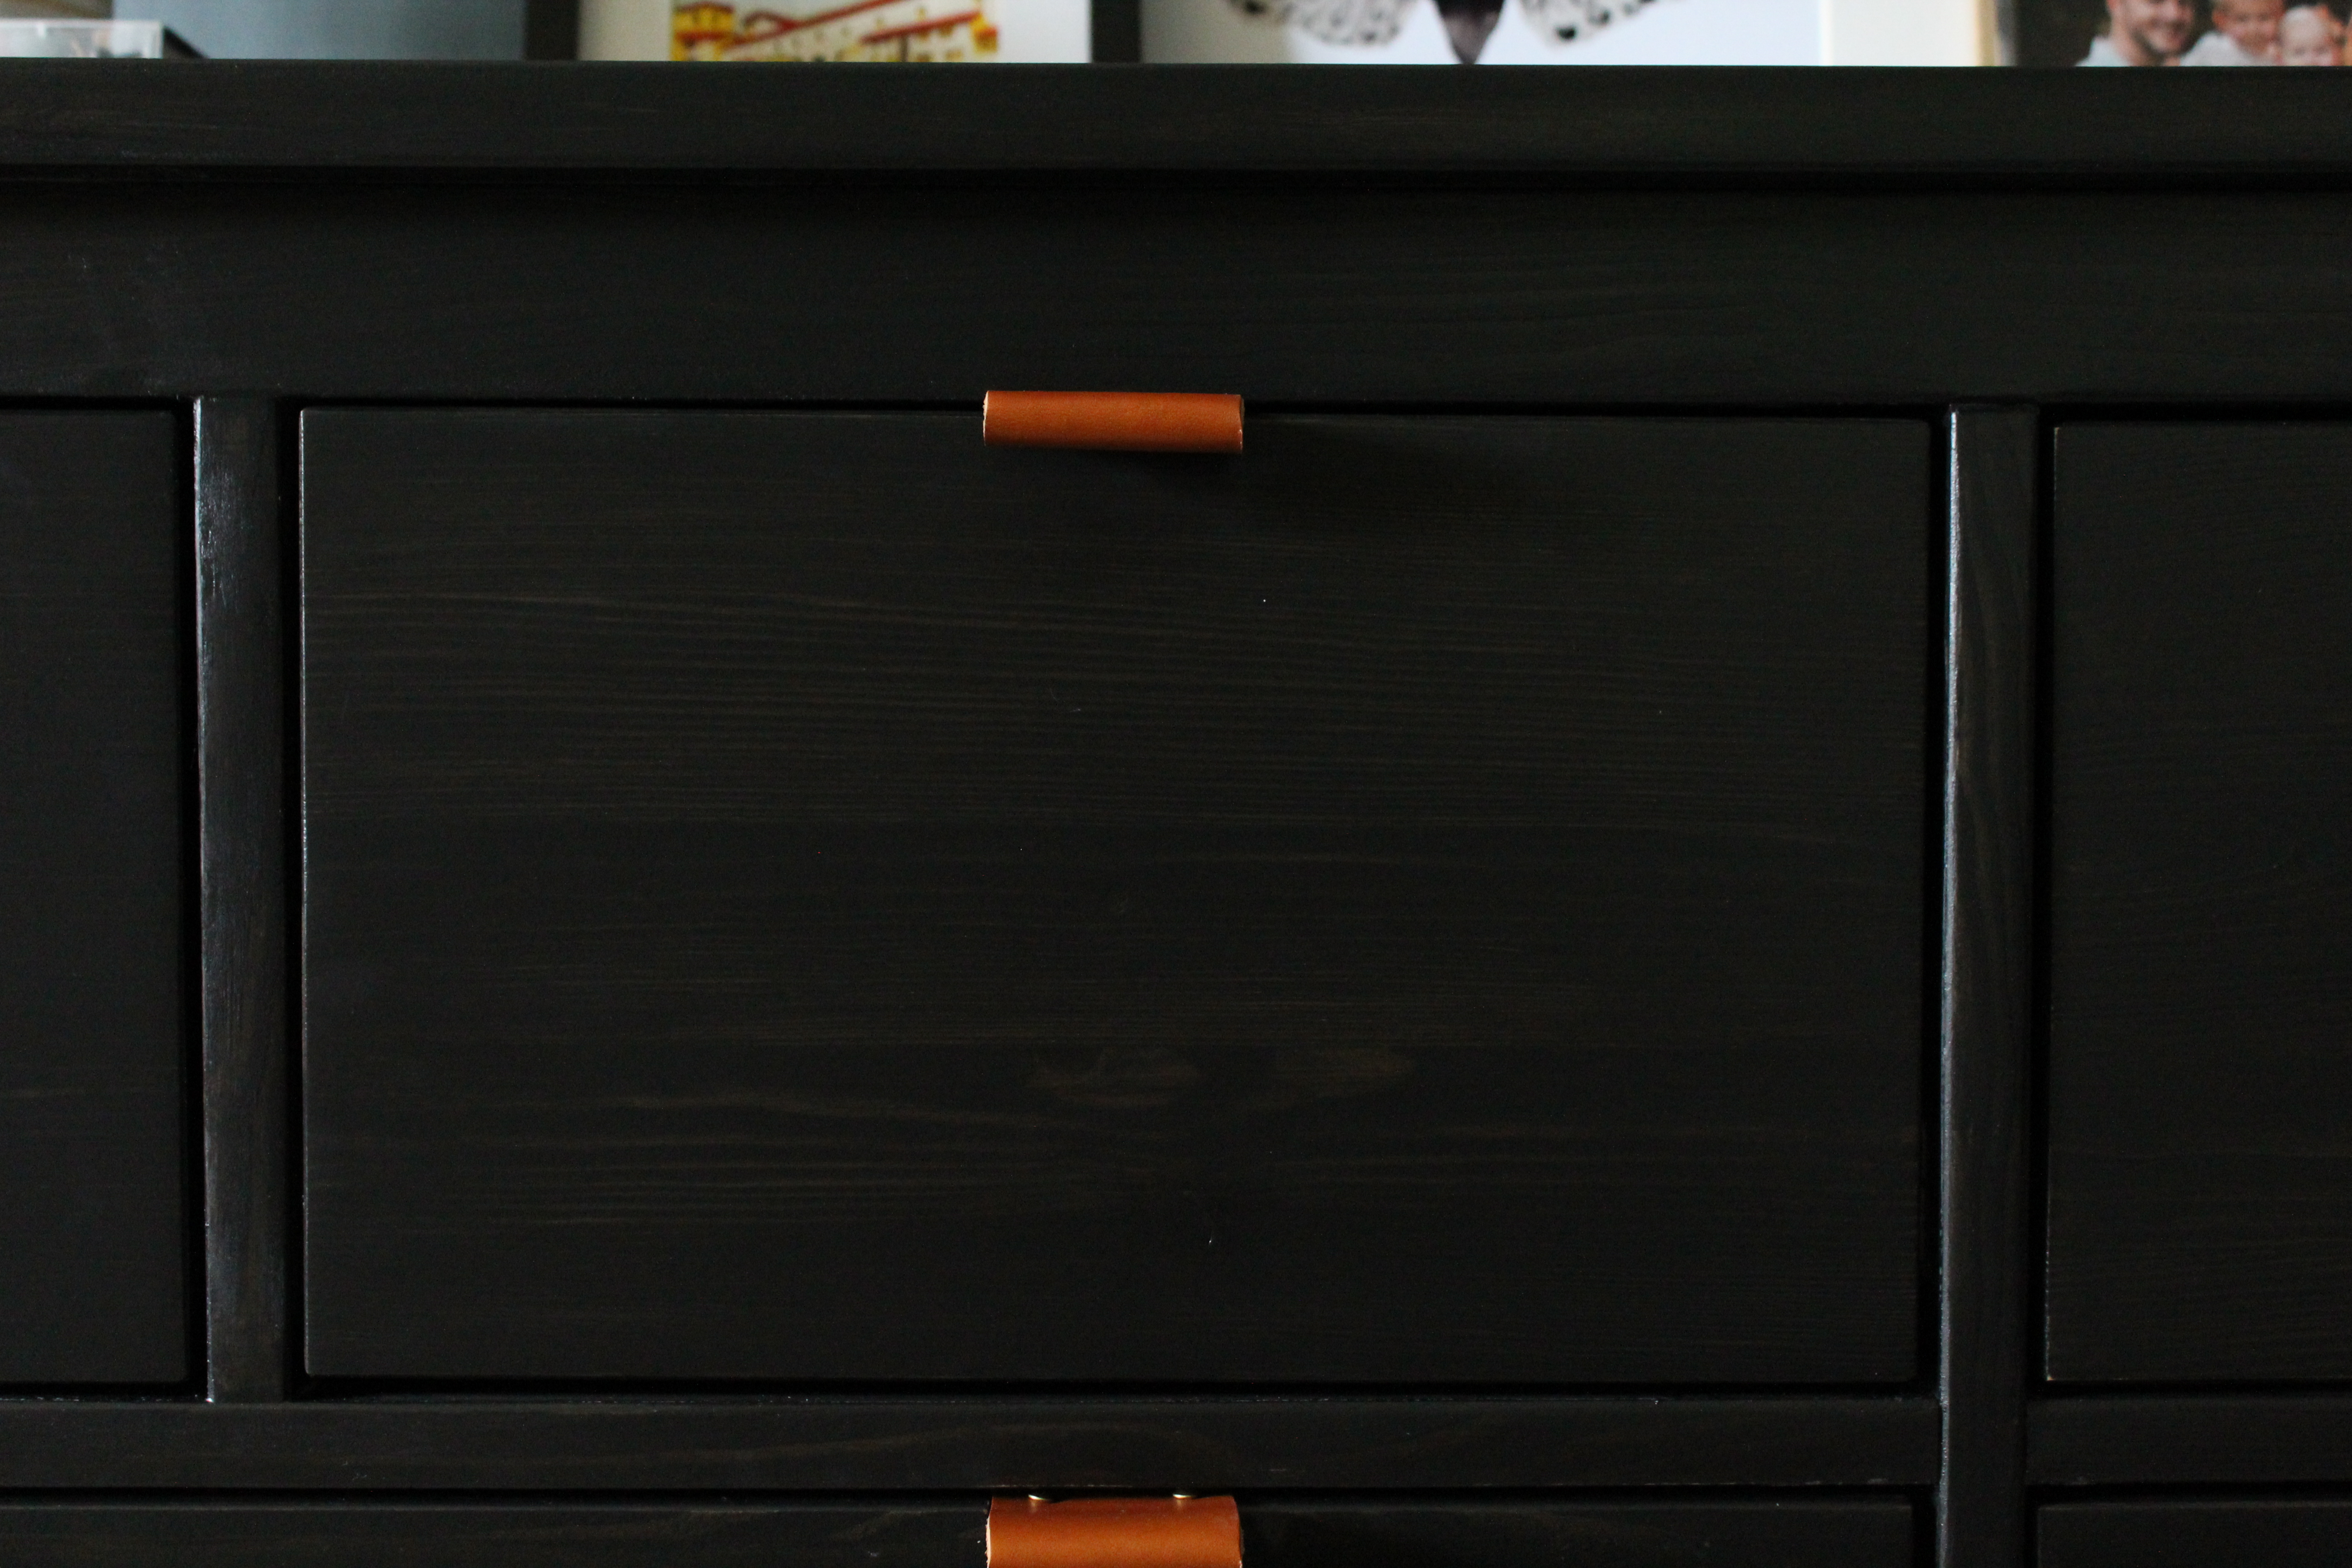
We are thrilled with the way the edge banding looks. It creates the look of a solid piece of wood instead of plywood and looks so streamlined!

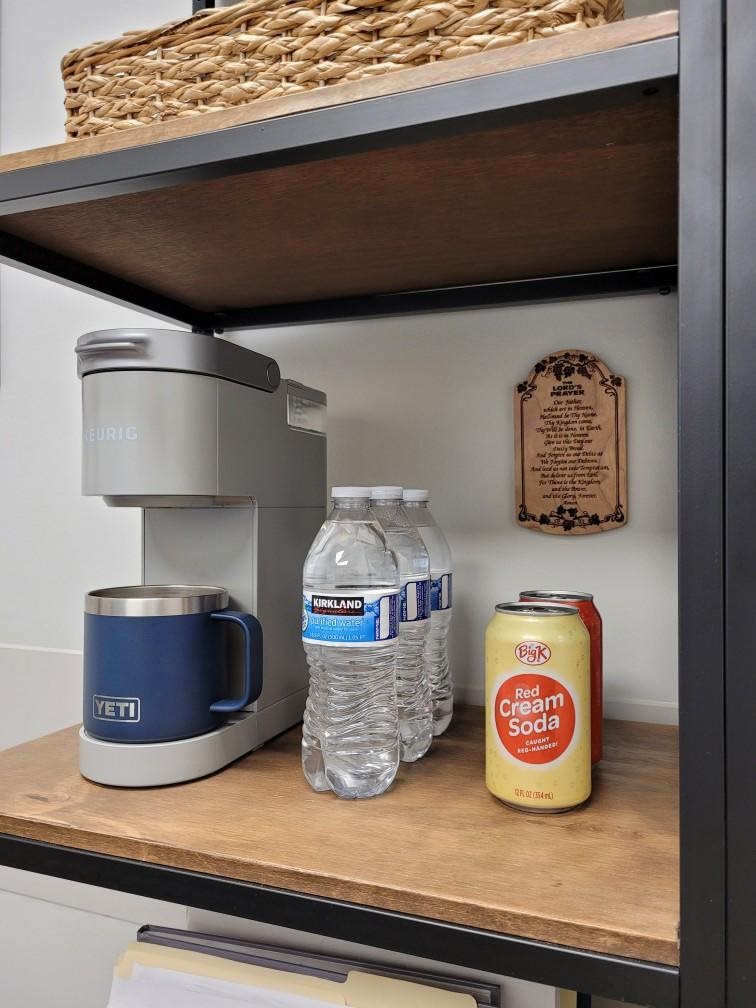
One of the shelves holds Justin’s coffee maker and some drink options, so we’re glad we put two coats of polyurethane on top to help with durability in case of a spill.

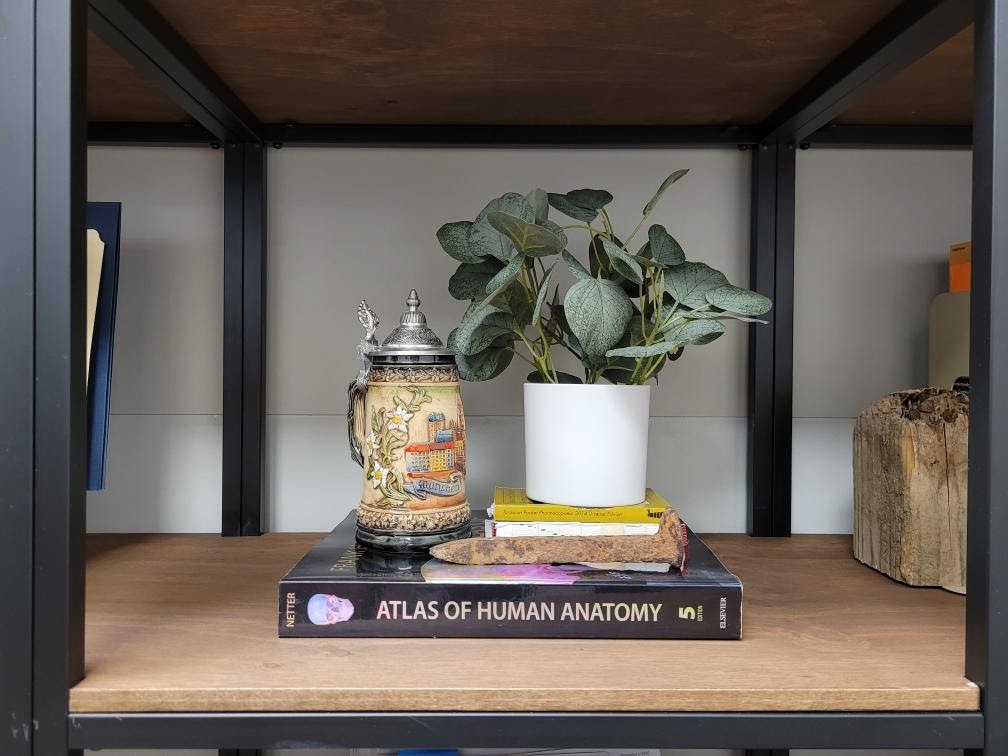
The wood look also brings in a lot of warmth and contrast to a room that otherwise was pretty bland and sterile-looking. It also provides a great base for displaying a variety of pieces that reflect Justin’s personality and profession.

We’re so happy with the results of this Ikea hack! It gave the simple black shelves an elevated look full of character and was just what this space needed!

Materials Used (for a complete list of sources on the shelves, check out this post!)

-1/2 inch sheet of 4′ x 8′ plywood

-circular saw

-jigsaw

-drill

-measuring tape

-combination square

-sandpaper (we used 120 grit, 220 grit, and 400 grit)

1/2 inch edge banding

-steam iron

-scissors

-stain

-polyurethane

foam brushes

optional materials:

-clamps

-scrap wood with a straight edge

-orbital sander

edge band trimmers