A Quick Makeover for Justin’s Office

Yesterday I spent about three hours doing a flash room makeover to a room in desperate need of some help: Justin’s work office!

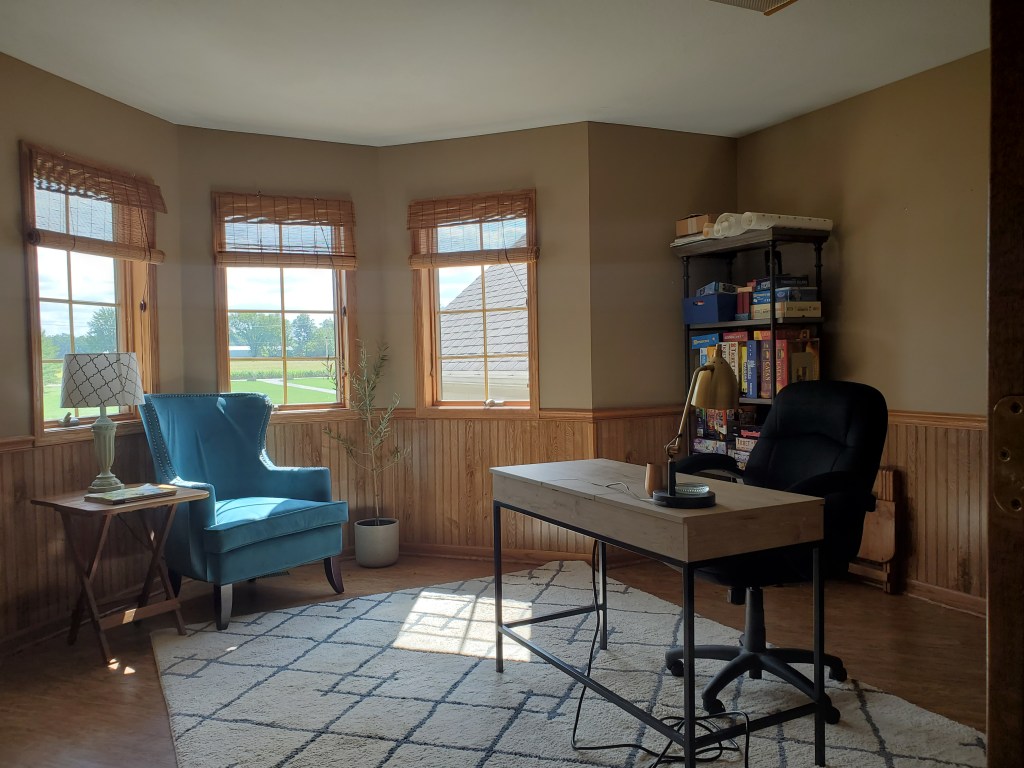
Justin works in the healthcare field and moved into a new office building in January 2021. Since moving in, he had done virtually nothing in terms of decorating his office space and asked me to help. Here’s what the room looked like prior to my, shall we say, intervention:

Not exactly an inspiring space, huh?

When thinking about what to do in the room, there were some obvious challenges. The room is painted the same color as all the other rooms on the floor and it’s obviously not our building so we couldn’t make any permanent updates. There’s no window, so I couldn’t use natural light or bring in real plants, and the light in there is fluorescent, which isn’t flattering to work with. While we couldn’t make any changes to the room itself, I was excited to think of ways to bring in interest, character, and functionality despite those limitations. My goal was to make this room more comfortable and reflective of Justin while still remaining functional and professional.

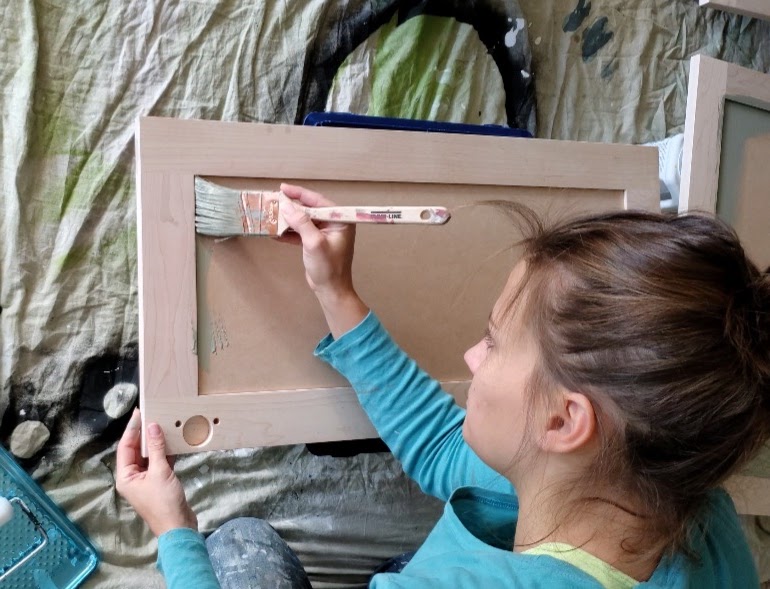
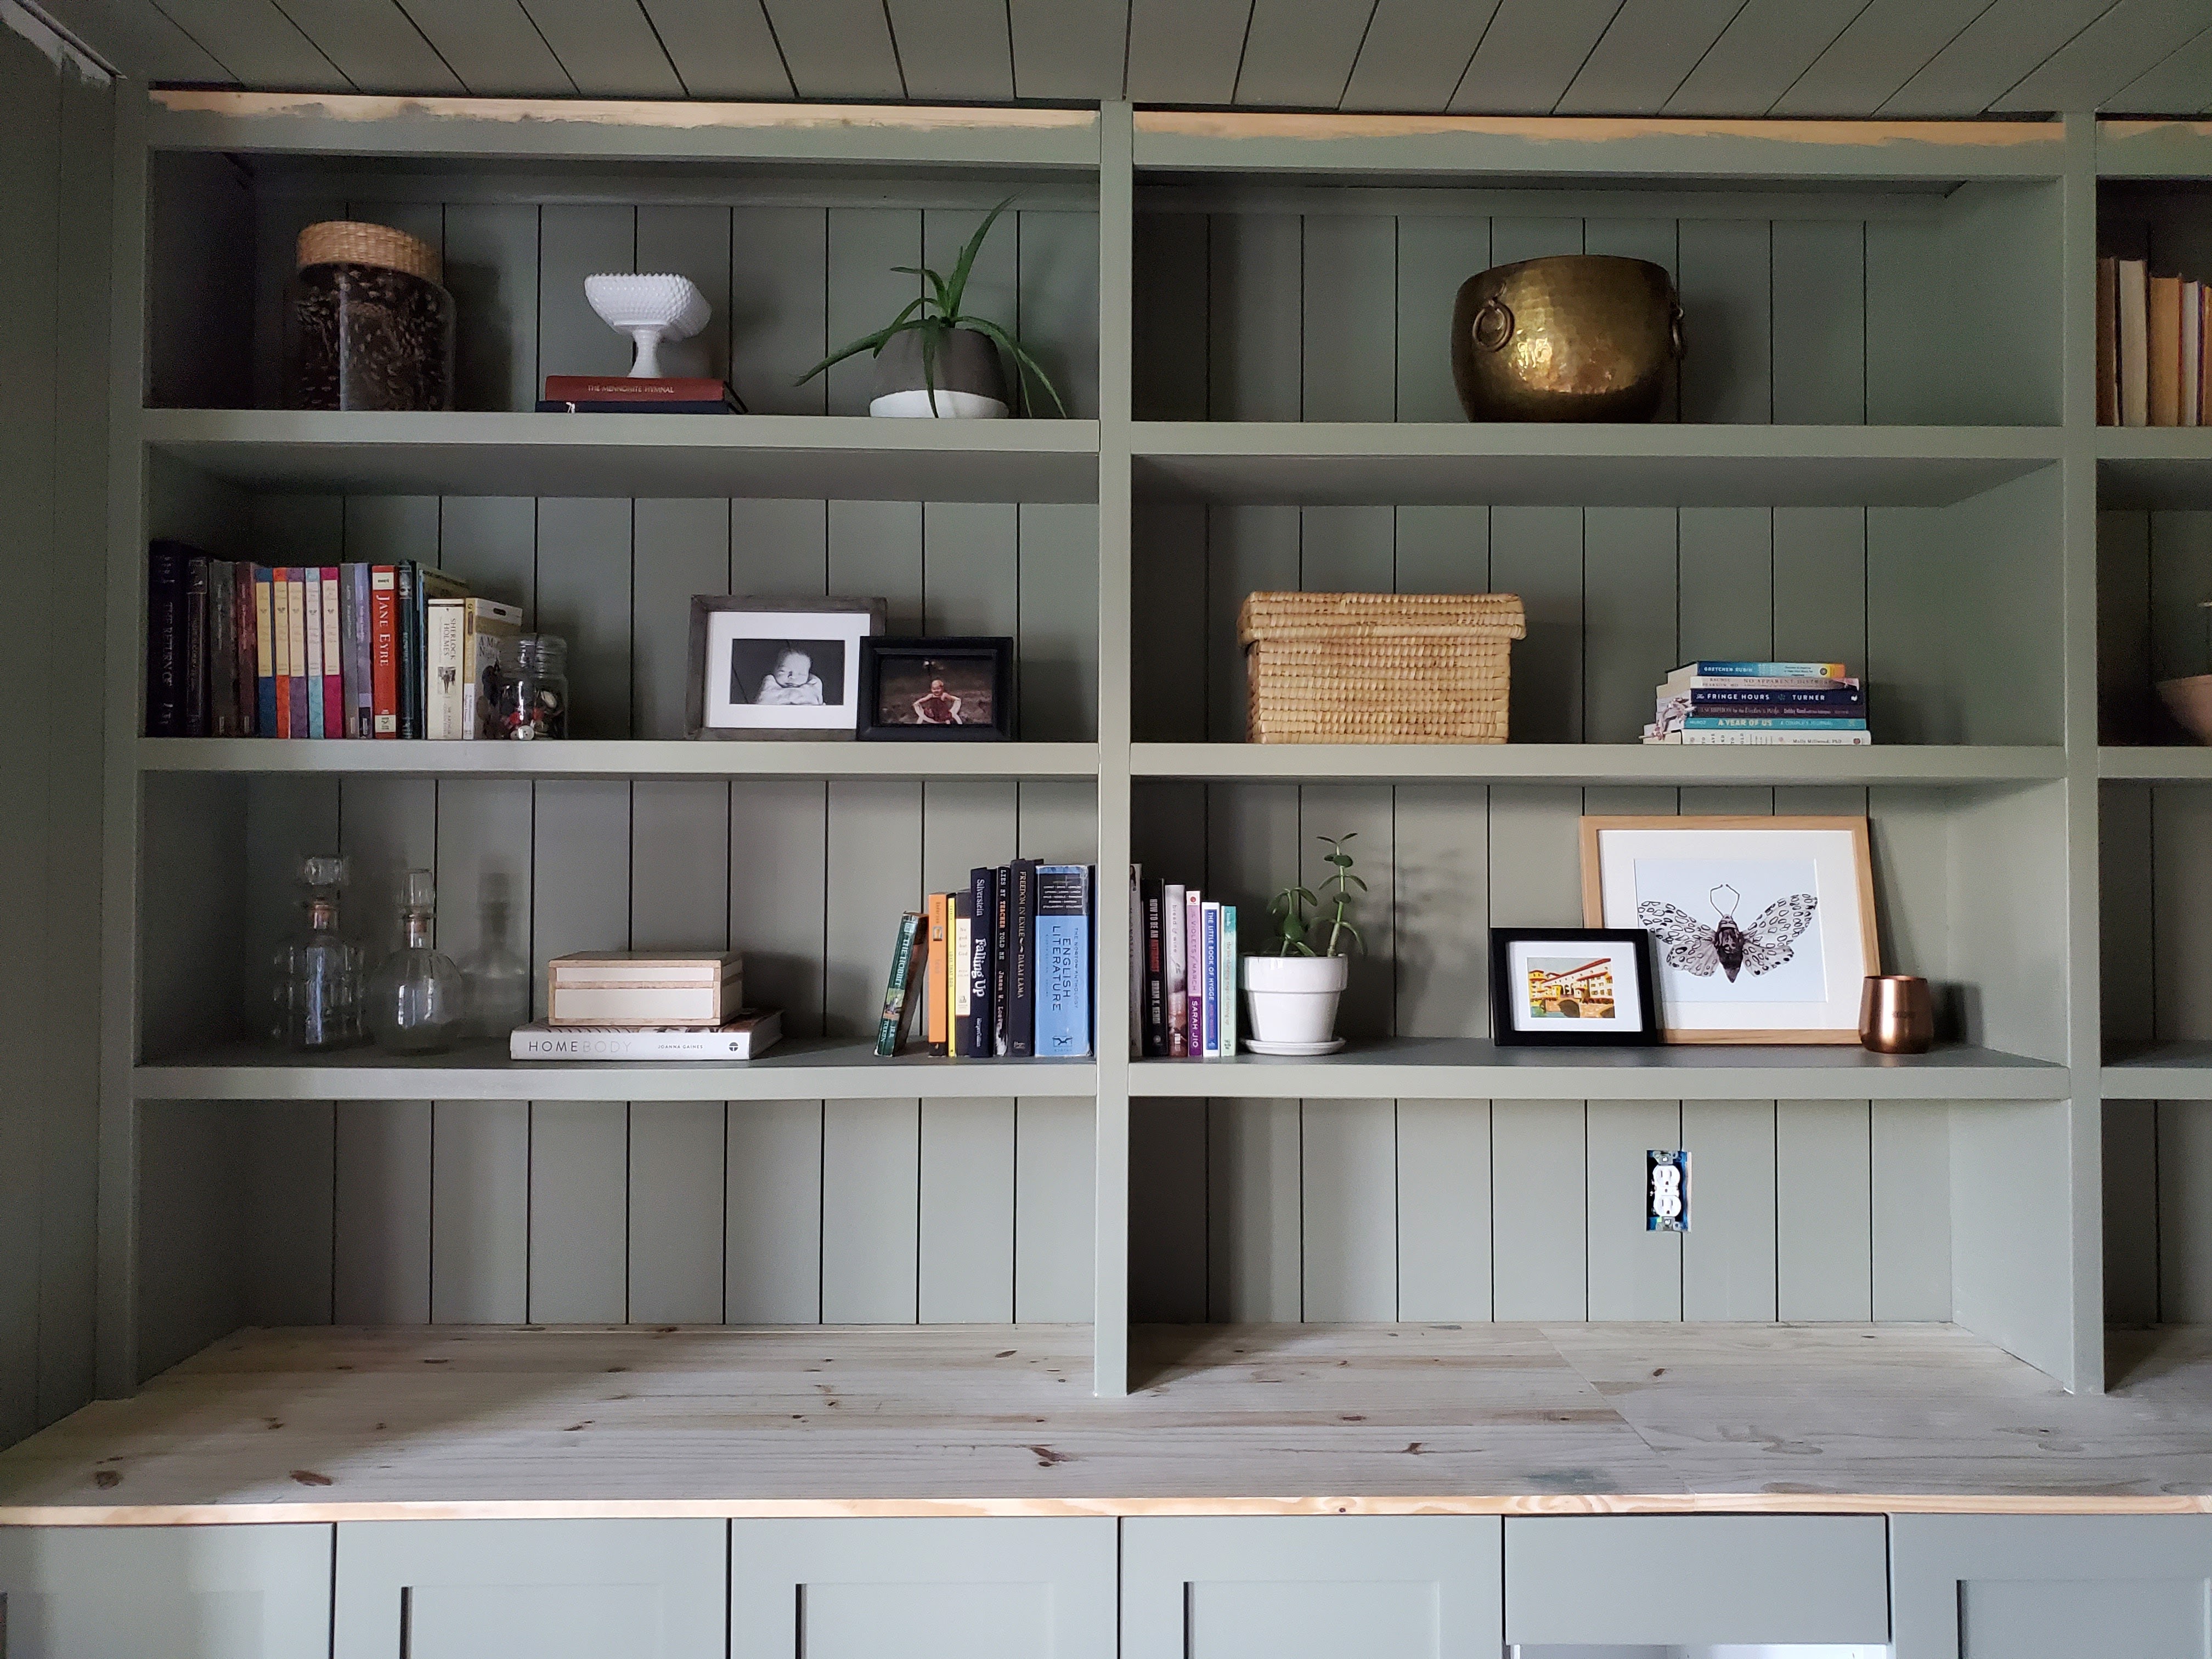
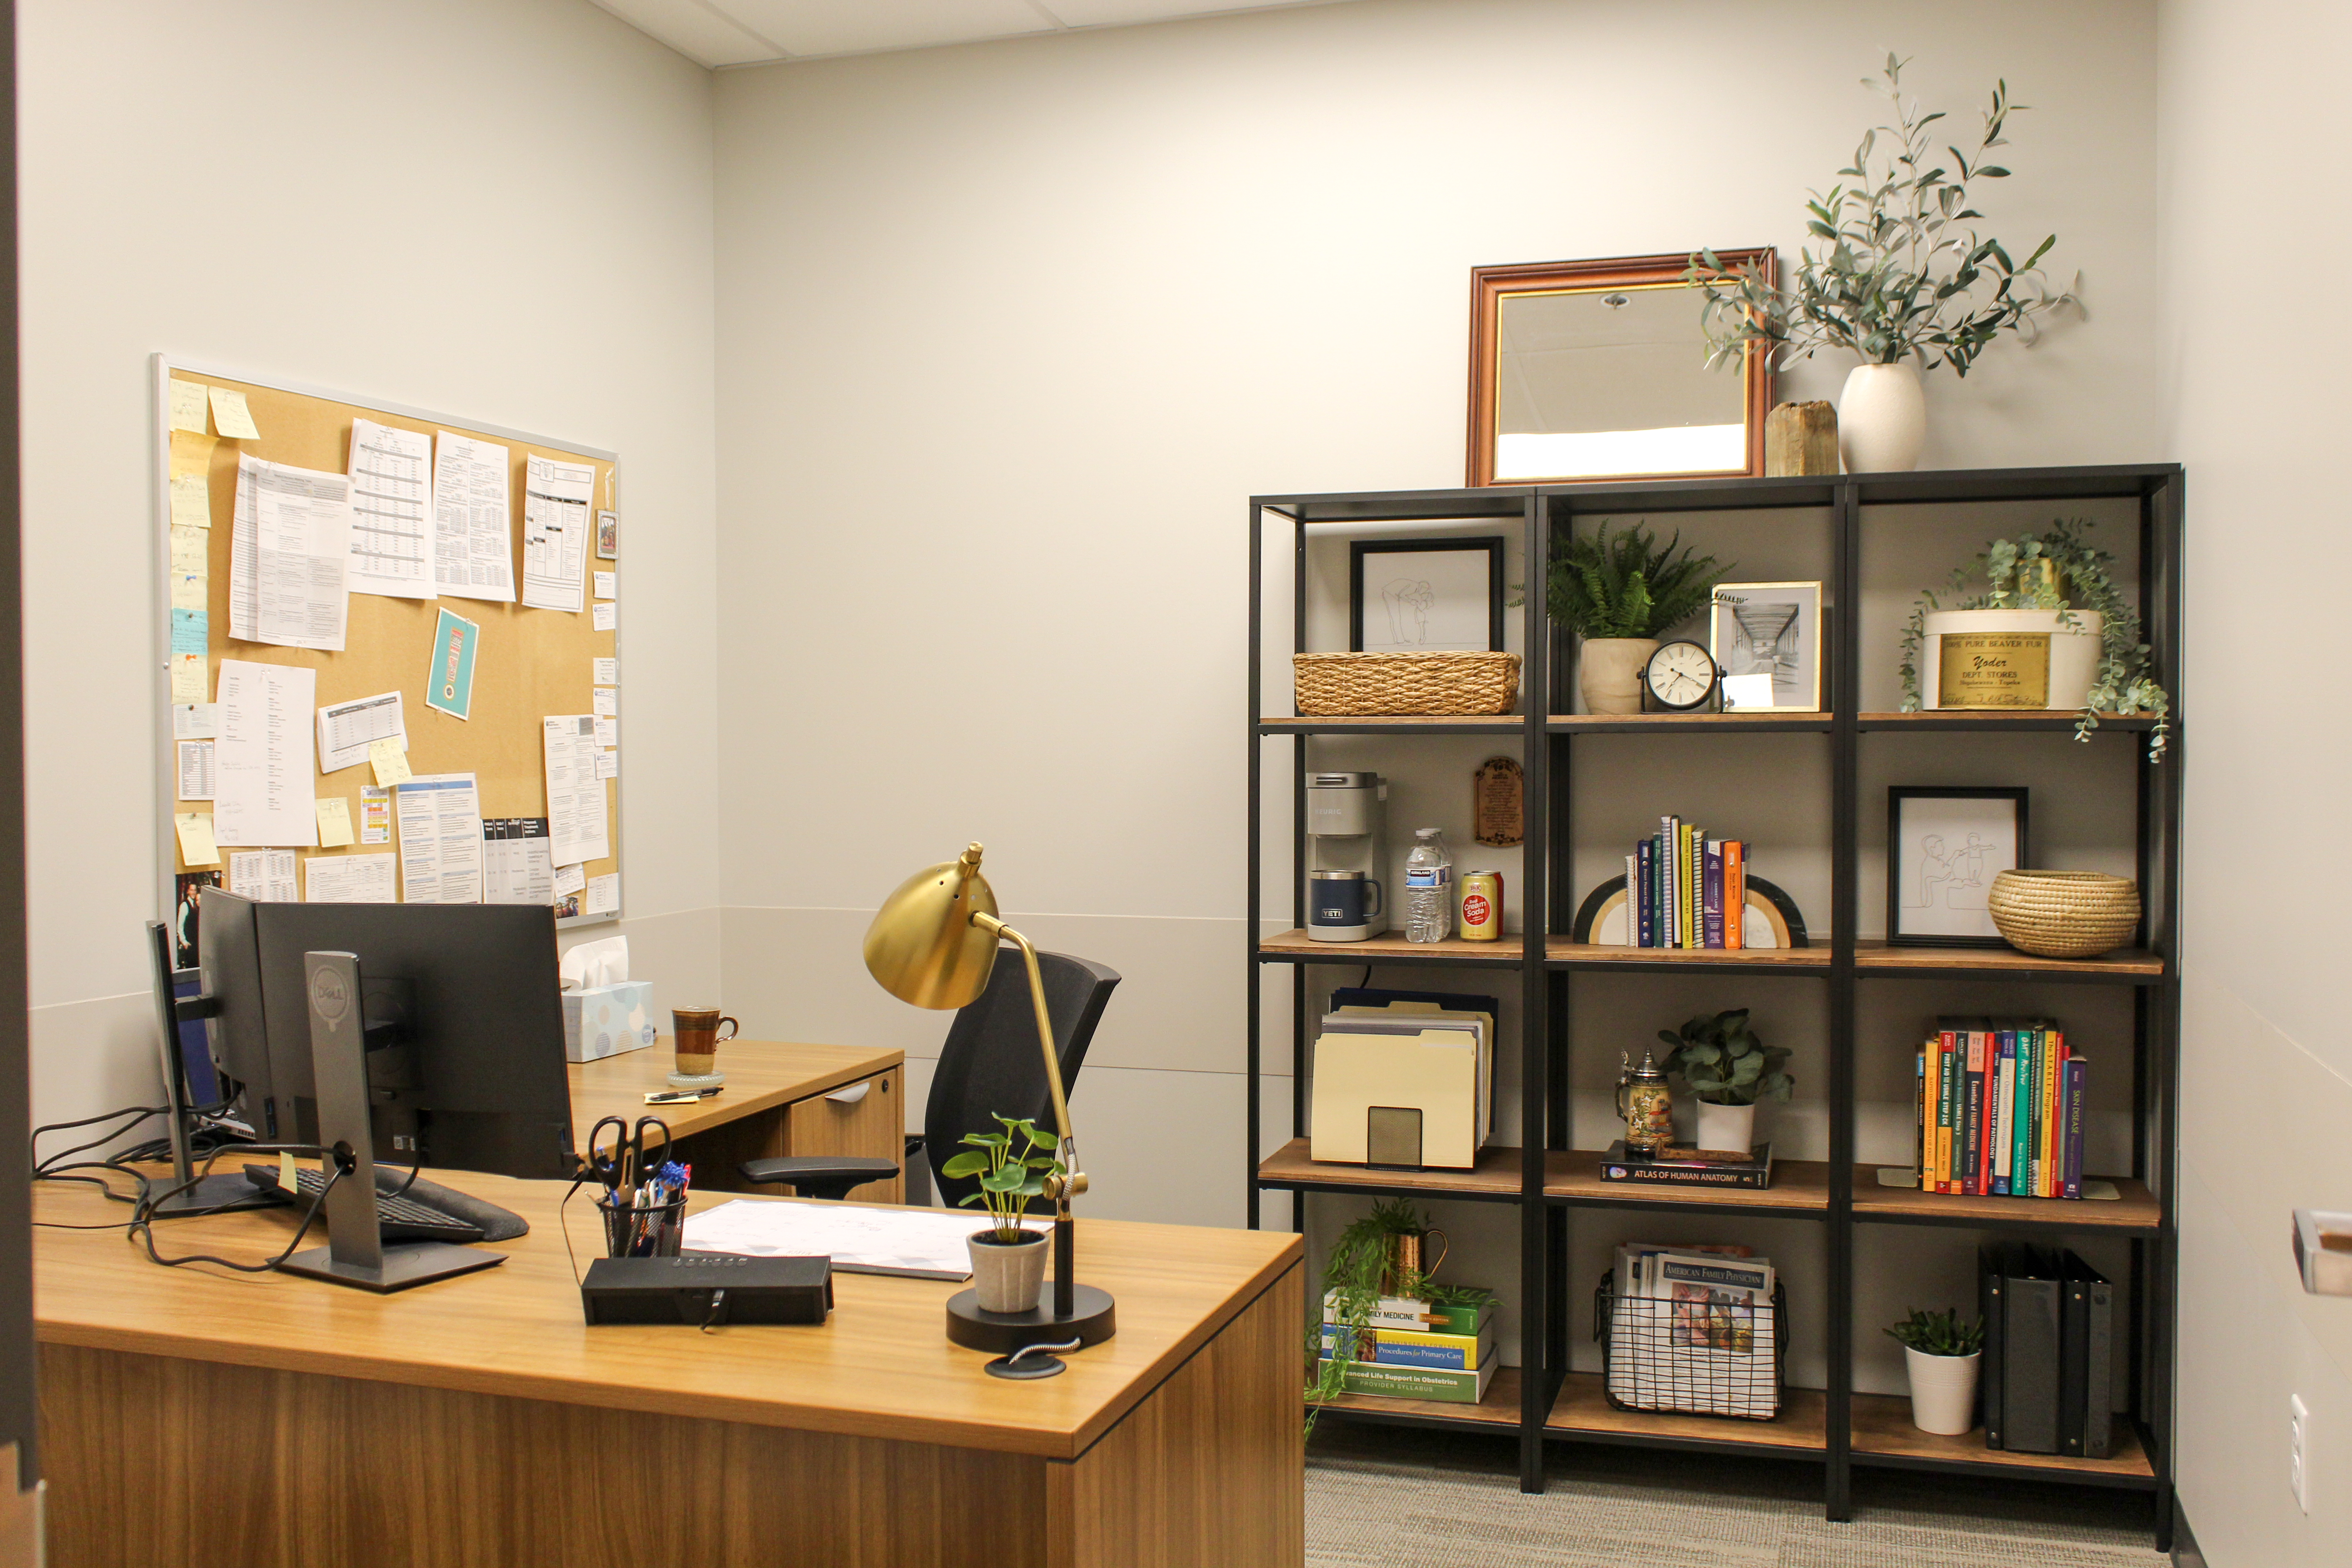
A bookshelf felt like an obvious choice to create some interest and offer a practical storage solution. I chose to create one large unit out of three Ikea Vittsjo shelves – I loved that these metal shelves brought in black accents but the slim frames and open back and sides kept them from overwhelming the space. In lieu of the glass inserts the Vittsjo came with, Justin and I made long shelves out of plywood (tutorial coming soon!) for a more substantial look. I love that the wood tones also help the shelving unit tie in to his desk.

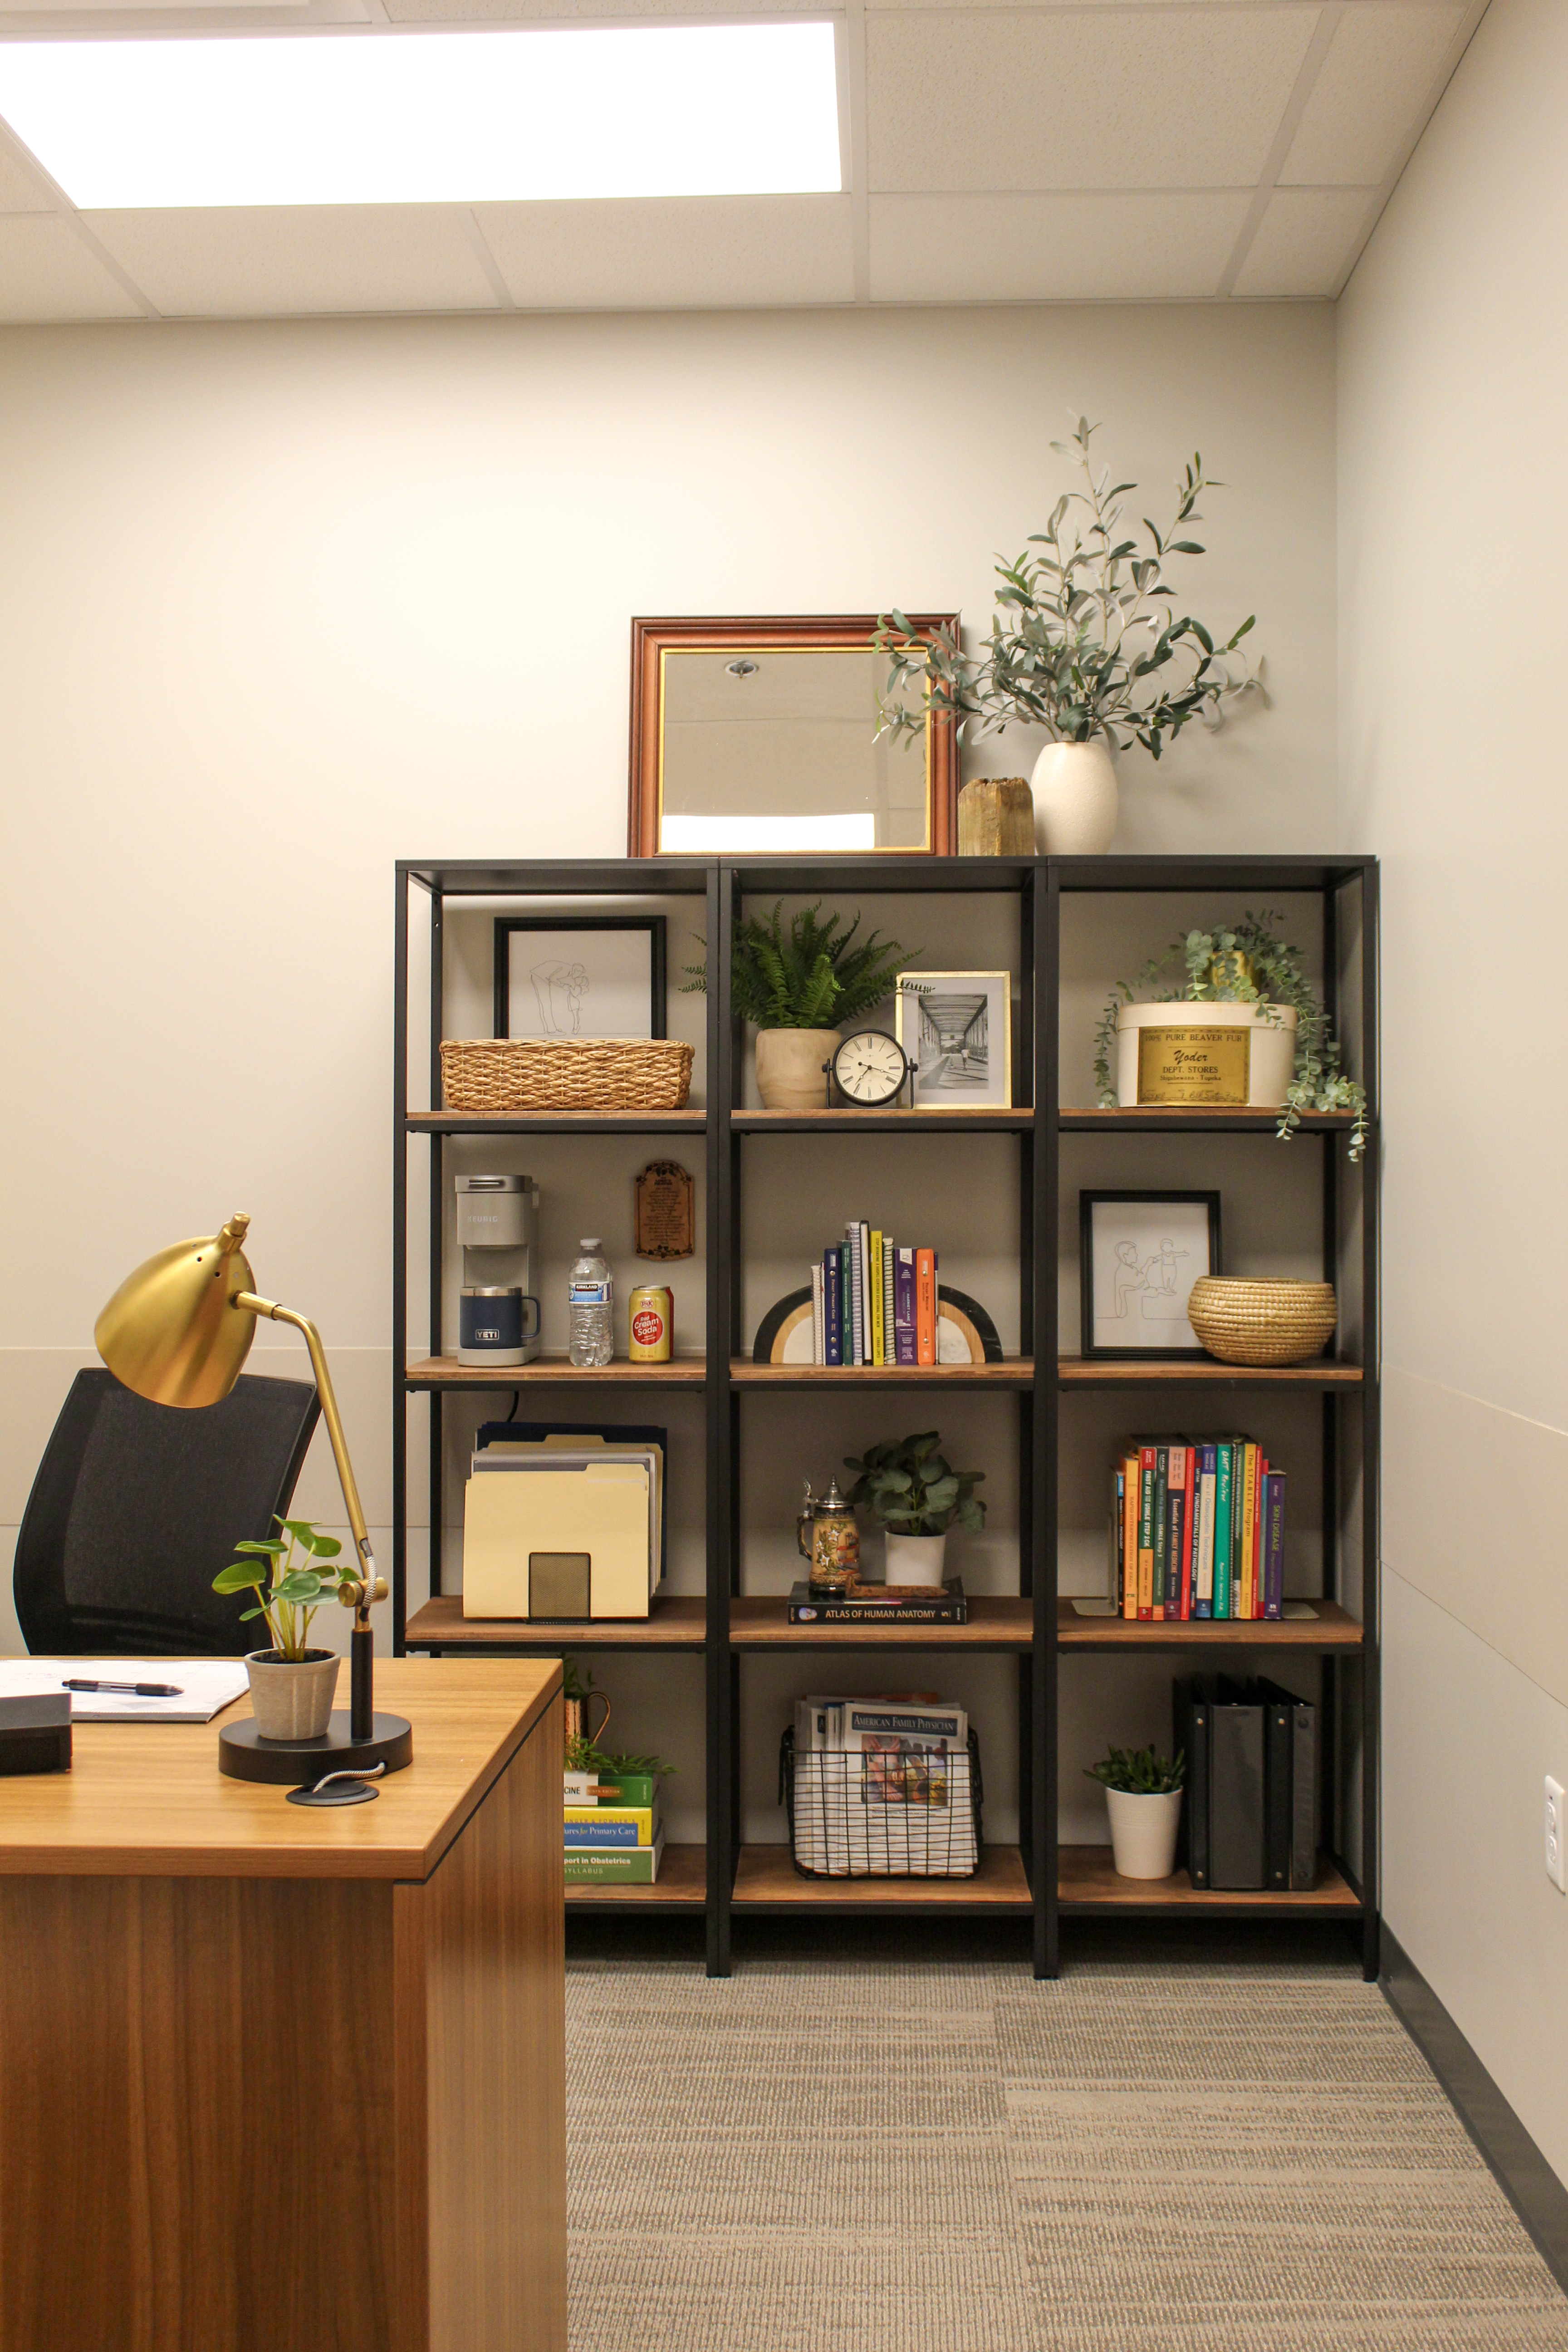
I used a variety of wood tones, storage baskets with natural fibers, and faux plants to bring in warmth, texture, and life to the space and incorporated black and metal accents to keep a masculine vibe. A mirror placed on top of the shelves helps reflect the light and mimic the effects of a window.

While I wanted these shelves to look good, they also needed to be workhorses for storage. Justin has a lot of books, magazines, and papers he needs to be able to reference easily, plus several things he likes to have quick access to (coffee, mints, etc). I kept all but the largest of his books arranged vertically so he can easily pull what he needs from the shelf and corralled all his magazines in a black wire storage basket so they’re easy to flip through and find the one he’s looking for. His loose papers are now stored in simple file folders and stay neat and orderly tucked in a black file organizer.

His coffeemaker sits ready to go next to some other drink options and a medium sized basket above hides all his Keurig cups.

Another basket now discreetly stores his stash of mints so he can grab one easily as he walks in or out of his office.

I wanted to be very intentional about sprinkling little tidbits of Justin’s personality throughout the bookcase. A beer stein from a trip he took to Europe, a hat box that belonged to his maternal grandfather, and a little wooden engraving of The Lord’s Prayer given to him by his paternal grandparents – these sentimental items reflect his history and heritage.

A worn piece of scrap wood on the top shelf provides rustic sculptural interest while giving a nod to his passion for woodworking and salvaging old wood. I also purchased the digital downloads of two minimalist line drawings from BFF Print Shop, one with a father and son and one with a father and daughter, and displayed them in thrift store frames that I spray painted black. I love that they’re an artistic tribute to Justin’s role as father but the clean lines and black and white color palate keep them from feeling too busy among the other items. All these personal touches take the room from being a standard workspace to something that is distinctly Justin’s.

The grid-like pattern of the shelves combined with all the books, papers, and frames created a lot of sharp angles so things like the clock, rounded bookends, a circular basket, and the organic feel of all the leaves throughout helped soften the overall look.

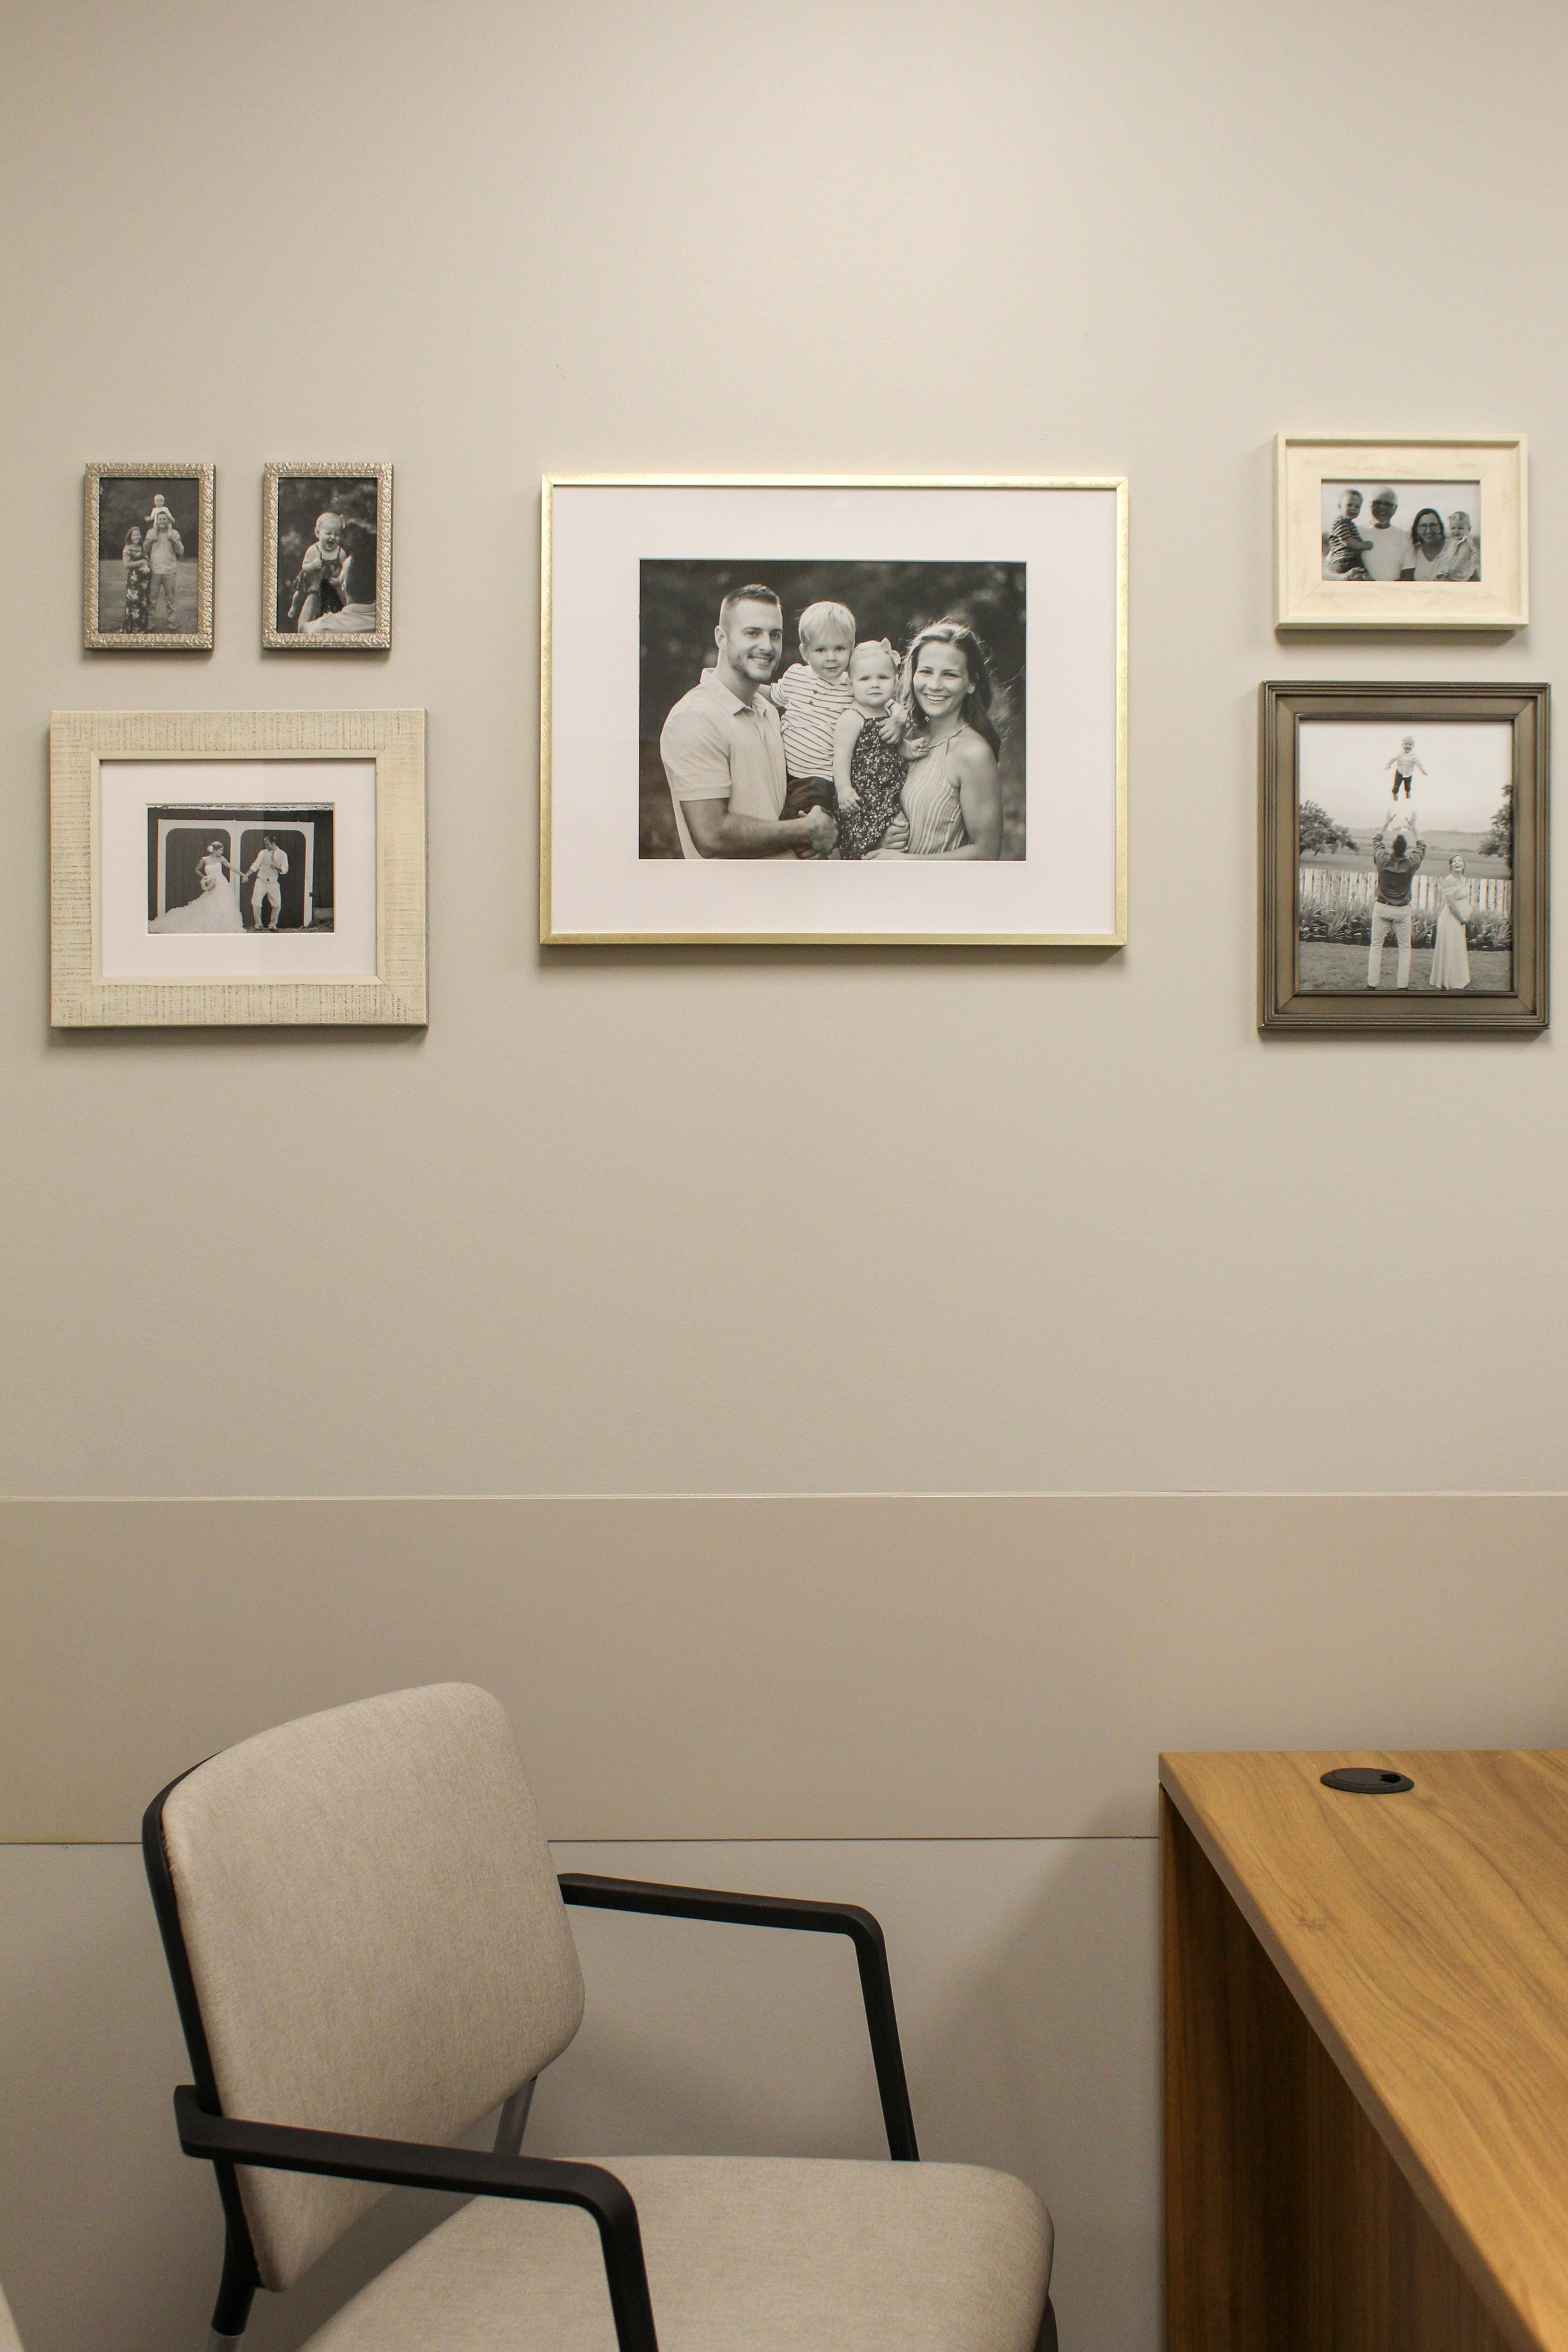
On the wall to the other wide of his desk, I also included a gallery wall of black and white family photos. Justin faces this wall when seated at his desk and he wanted to be able to see us throughout his day (melt my heart!) I chose a mixed finish look with gold, silver, and light wood frames and kept all the pictures black and white for a more coordinated look.

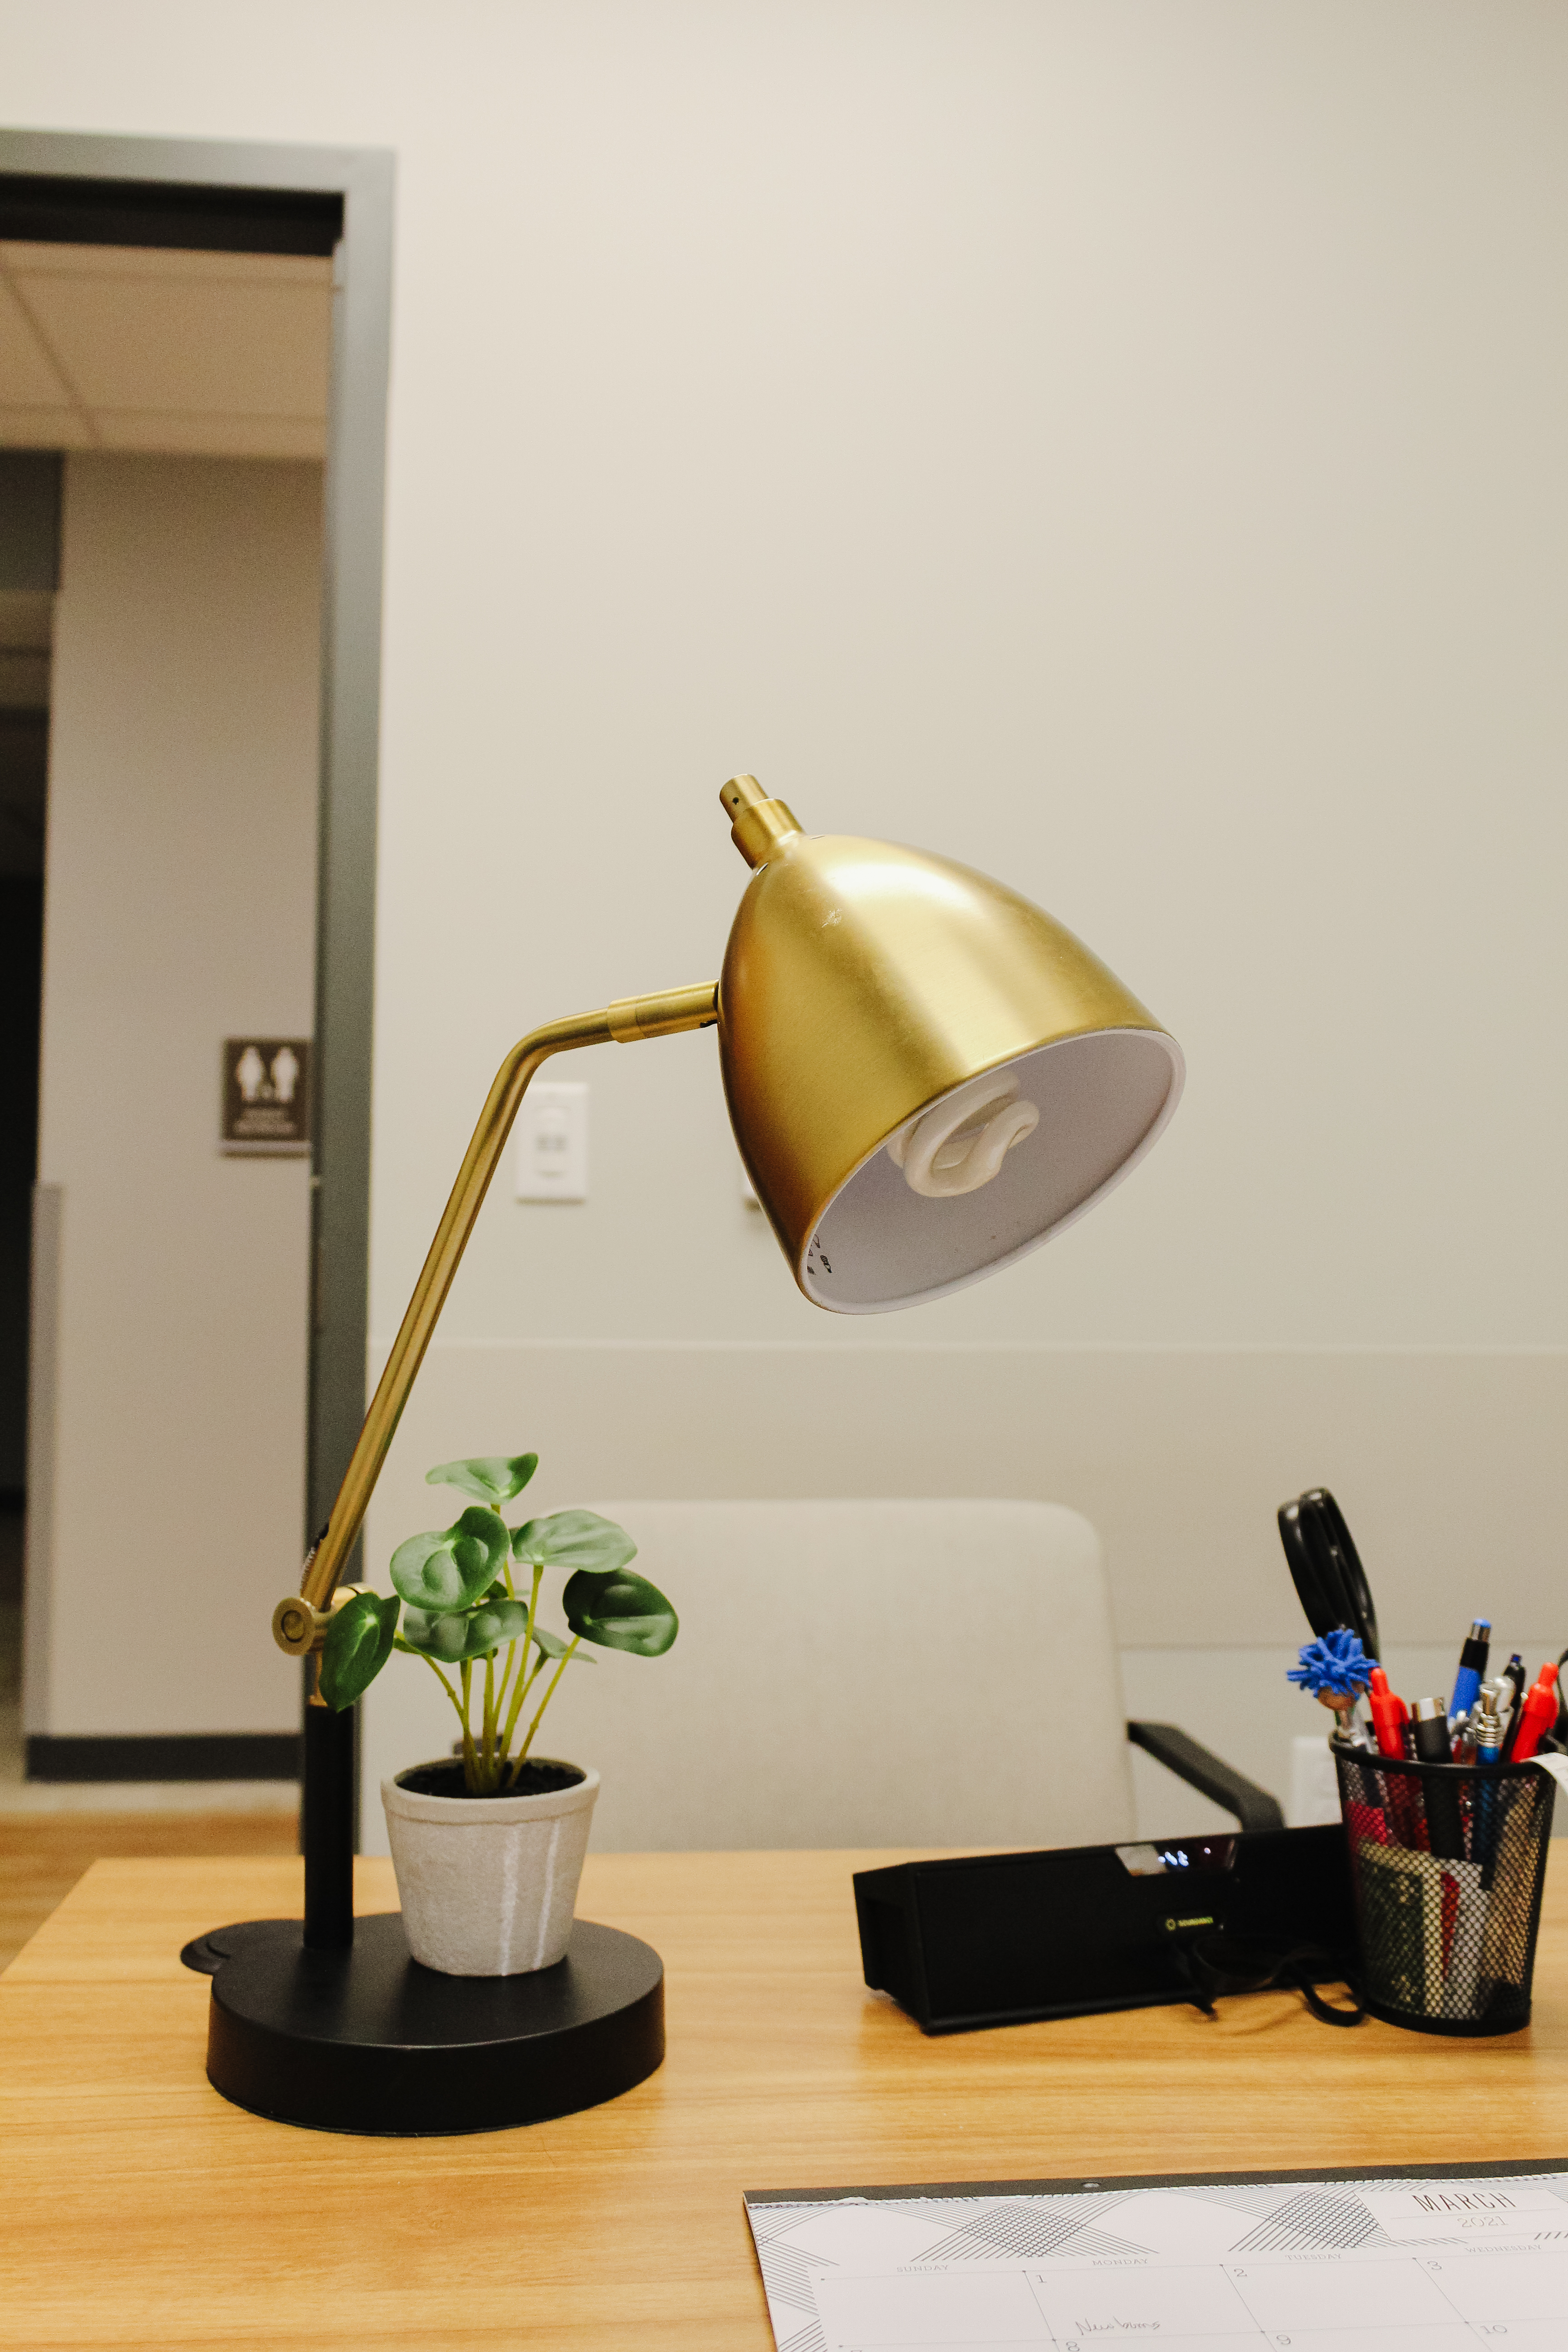
I added a lamp and small faux plant to his desk as well to create a cozier feel for his desk and give him an option if he needs a break from the fluorescent light.

Given the limitations we had in this office space, it was never going to feel quite as homey as, well, our home; however, Justin spends so much time here that it was important to have a space that feels comfortable and inspiring. It turns out, the office didn’t require a complete overhaul to achieve that! I think this is true for any similar space. Maybe you work in an office (or are transitioning back to it soon) or you’re renting your current home or apartment and can’t make big changes or maybe you just don’t have the budget for a big change in your home – a functional piece of furniture, items with varying degrees of warmth and texture, and glimpses of personality throughout can be enough to totally transform a space!

Sources (note: anything not listed is either thrifted, old, or no longer sold)

Bookshelf: Ikea Vittsjo (tutorial coming soon!)

Faux plants: here, here, here, and here

Father and Son Line Drawing (digital download)

Father and Daughter Line Drawing (digital download)

Black Wire Basket

Black Clock

Keurig K-Mini

Round basket

Rectangular basket

Gallery Wall Frames: here, here, here, and here

One Room Challenge Week Five: Cabinet Doors are on!

It’s the second-to-last week of the One Room Challenge and now that all the shiplap is finished, things have really picked up!

ORC-Guest-400x218.png

One thing that got checked off the list this past week was the completion of the window trim. We had trimmed out each window with a 1×4 and Justin then ripped a board into 1/2 inch strips and nailed it around the edges. This helped hide any gaps left in between the shiplap and the 1×4 and gave everything a nice, finished look.

Other than that, the biggest change that has happened this week has been the addition of our cabinet doors!

When we first started planning out the built-ins, we contemplated DIYing cabinet doors. I’m so glad that we ultimately decided to outsource that project because these Semihandmade door and drawer fronts are perfect and were a breeze to paint and install!

Semihandmade is a company that makes different styles of door and drawer fronts that are fit to the same specifications as an Ikea cabinet door. This means you can purchase the Ikea base cabinet, which is a very inexpensive, and then add different doors to create a more custom look. I’m really impressed with how it elevates the look of the cabinets without breaking the bank!

You can order doors in various colors but I went for the unpainted DIY version so I could paint them the exact same color as the rest of the built-in: Treron by Farrow and Ball that I color-matched at Lowe’s. Before painting, I did rub a fresh tack cloth over the fronts and backs of all the doors, because they shipped from the factory covered in a fine layer of sawdust.

I placed each door face down on top of paint cans (so they would be elevated off the ground) and started painting all the backs. I highly, highly recommend painting the backs first so that when you flip them to paint the other side, the back is the painted side that touches the paint cans – if one side is going to get nicked or scratched or stuck after painting, you definitely want it to be the side that rarely gets seen!

(Apologies for the quality and angles of these pictures – I didn’t take photos of this process so these are just screen grabs from the timelapse videos I posted on Instagram).

I used a paint + primer so I did not do a separate layer of primer. I used an angled brush to trim out the edges of each inset . . .

. . . and then I used this six inch foam roller on the rest of the doors to create a really smooth finish.

I painted all the backs of the doors, waited about 3 hours, and then painted a second coat. I let them dry overnight and then flipped them over to paint the fronts. I did the exact same process of two coats, this time also rolling the door sides, and let them dry again overnight. The next morning (probably about 18 hours later), we attached them to the cabinets using the hardware we bought from Ikea. They were very simple to install!

Yesterday, I spent time in the afternoon playing around with arranging the shelves. I’m definitely not done with them, but it was fun to get started with different placements. As you can see, we still need to finish assembling the drawers in the middle, but so far, I’m really pleased with the look!

Other things we need to accomplish this week:

-add the final trim pieces around the door frame

-add thin piece of trim between cabinets and the wall

-paint + install crown molding

-paint + install baseboards

-install cabinet hardware

-paint countertop (while I like the natural wood look, up close it looks silly because we had to use two boards to achieve the length and it’s just too obvious to leave natural)

-paint outlet covers and duct vent to match wall color

-paint the inside of the window frames

-install curtain rod + hang curtains

-move in the rugs, desk, chair, and finishing touches!

Can we get all this done in one week? We’ll see! In the meantime, you can check out all the other guest participants in the One Room Challenge here.

Fall 2020 One Room Challenge Week One: My Dreamy Office Plans!

I am so excited for another round of the One Room Challenge!

ORC-Guest-400white.jpg

After tackling our basement kitchen renovation in the spring challenge, I was inspired to choose another space to renovate for the fall challenge. If you’ve been following me on Instagram lately, you know I’ve chosen to renovate our home office and make it the dreamy office + library of my dreams.

Here’s where we started at the beginning of this challenge:

One Room Challenge Home Office Renovation

When we first moved in, this was one of the rooms I was most excited about. From the first moment I saw it, I knew that this could be a special room. First of all, I think the French doors (which aren’t really pictured but you can see a bit of them in the first image) set the stage for a dramatic space. My heart was immediately invested in the idea of built-in storage along the far wall and I could picture this being a warm and cozy space to work on a computer or relax and curl up with a good book. Unfortunately, this room was not high on our priority list so for the first year (yes, year!) of living here it looked more or less like this:

I joked that this was our “Room of Requirement” (Harry Potter anyone?) because it had all the unpacked boxes from our move. All the extra stuff that we didn’t need yet was stored here and whenever I needed to find something random, this was usually where I found it. It was a hot mess of a room and didn’t get fully unpacked until July (14 months after moving in). Throughout that time it rarely ever got used as an office – I would typically just work in the less-cluttered kitchen – but it did sometimes double up as an overflow guest room. The picture below shows how last fall, my in-laws stayed in here because our guest room was mid-renovation AND a couch from our living room had to get moved in as well because of our Christmas tree in the living room. All our boxes were shoved either behind the couch or under the desk on the left side of the room. Suffice to say, this room has been a workhorse for us.

Now that we’ve tackled a few of the more pressing needs in our house, it felt like the right time to address this room and I can barely contain my excitement! My goal to create storage with the built-in cabinets + bookcases while still allowing plenty of room for a desk and office chair. I’m also hoping to create a cozy reading space tucked in the bay window area.

The Plans

This is the largest-scale DIY room renovation that Justin and I have ever tackled on our own. Justin was admittedly nervous that my plans would be too difficult to actually implement ourselves (in all fairness, I do tend to make things sound like they’ll be easier to do than they actually are haha) but so far we’re cautiously optimistic about completing this project! Our to-do list includes:

-remove all existing beadboard

-DIY built-in storage along the back wall with closed cabinets on the bottom and open bookshelves on top

-install vertical planks from floor to ceiling on all walls (and hopefully the ceiling too!)

-replace window and door trim

-replace baseboards

-add crown molding

-PAINT!

-replace light fixture (that fluorescent one has got to GO)

-finishing touches: curtains, cozy seating, all the fun stuff!

We’ve already ripped out all the beadboard and the built-ins are underway! If you follow me on Instagram (@simplifythechaos) you can see all the progress there. We just finished all the trimming out and plan to fill all the nail holes this week. I’ll share all the details on the DIY built-ins next Thursday! For now I’ll leave you with this little sneak peek:

I’m SO excited to transform this space into the office + library of my dreams. Check back here on Thursdays to watch the progress unfold! šŸ™‚ In the meantime, you can check out all the other ORC participants and their chosen rooms here.