Creating a Simple Craft Space for the Kids

While I finished up the largest part of the kitchen renovation a couple weeks ago, there was one lingering area I had yet to address: the desk. Since the One Room Challenge starts Thursday and that will take most of my home project focus, I decided to spend time yesterday giving a quick and inexpensive refresh to this space.

This little desk area on the side of our kitchen used to be where I worked from home; however, once we completed our office, this space became an area for the kids’ creative activities. We store their playdoh, markers, crayons, stickers, paper, etc. here and they spend hours crafting, making sweet little messes, and stretching their creative muscles. Here’s what it looked like before we did anything to the kitchen:

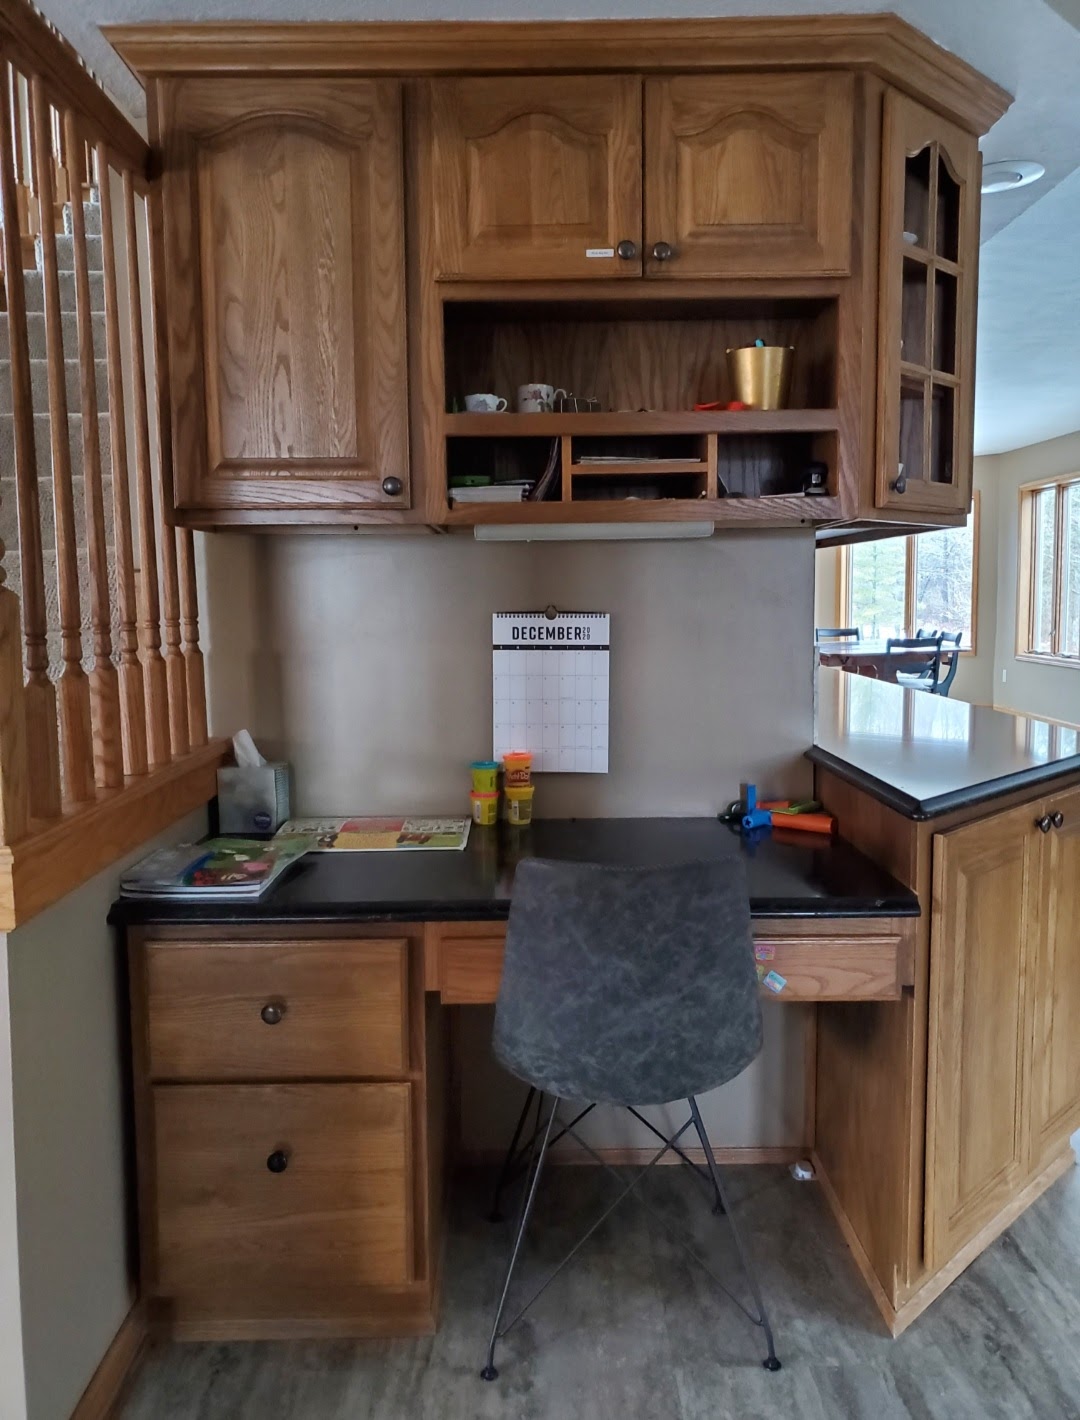
I painted the cabinets a few weeks ago with the rest of the kitchen but hadn’t done anything else yet. It was time to finish!

A very realistic look at what the space is like on a daily basis.

My goal from this space was to make it feel cohesive with the rest of the house while still feeling like a distinct space for kids. The first step was removing all the stickers off the wall (lol) and then I painted the wall to match the rest of the main floor with one coat of primer and two coats Sherwin Williams Alabaster in Eggshell.

I wanted to have a cute way for the kids to display some of their artwork on the wall above the desk but didn’t want to spend money so I went searching through our house. I found some old 14″ x 14″ corkboards that had been in storage for years (leftover from a DIY project Justin made 6-7 years ago). I collected them from our garage and found some baker’s twine in my gift wrapping supplies. Since our kids are too little to use thumbtacks, I pulled the twine over the front of the corkboard and wrapped it around the back, securing it with masking tape. A simple and inexpensive DIY project that took less than 20 minutes for two corkboards!

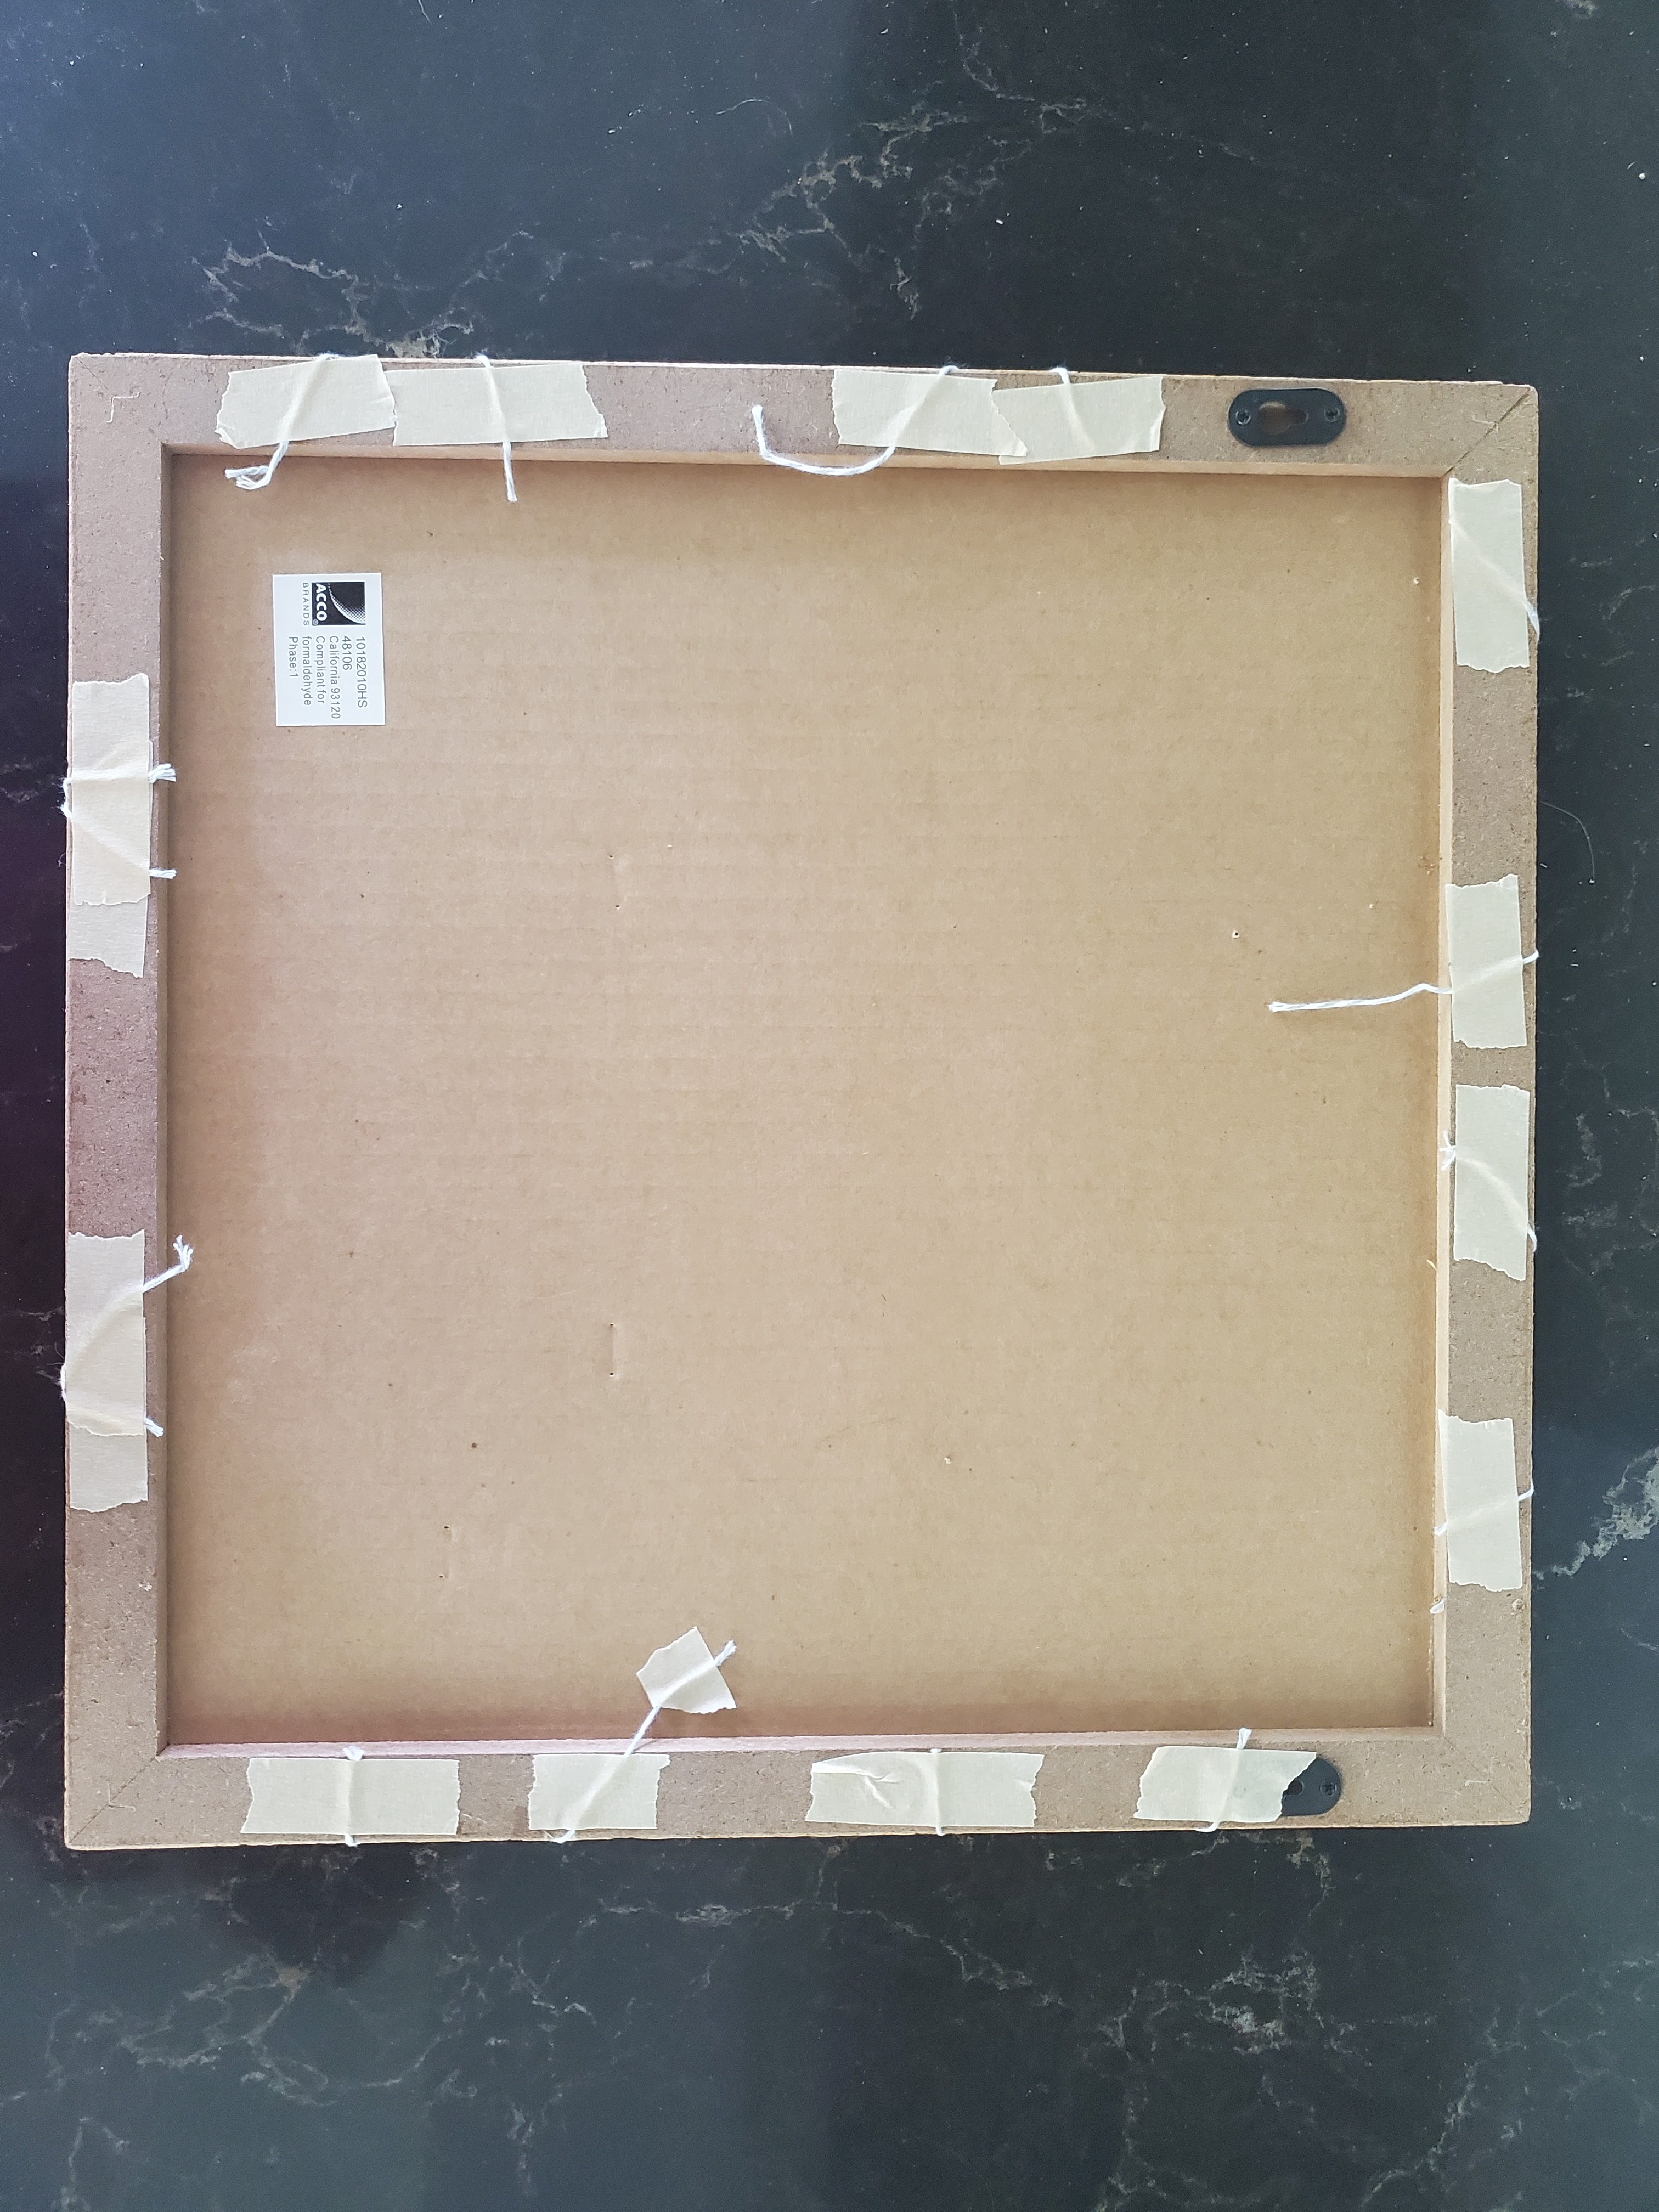
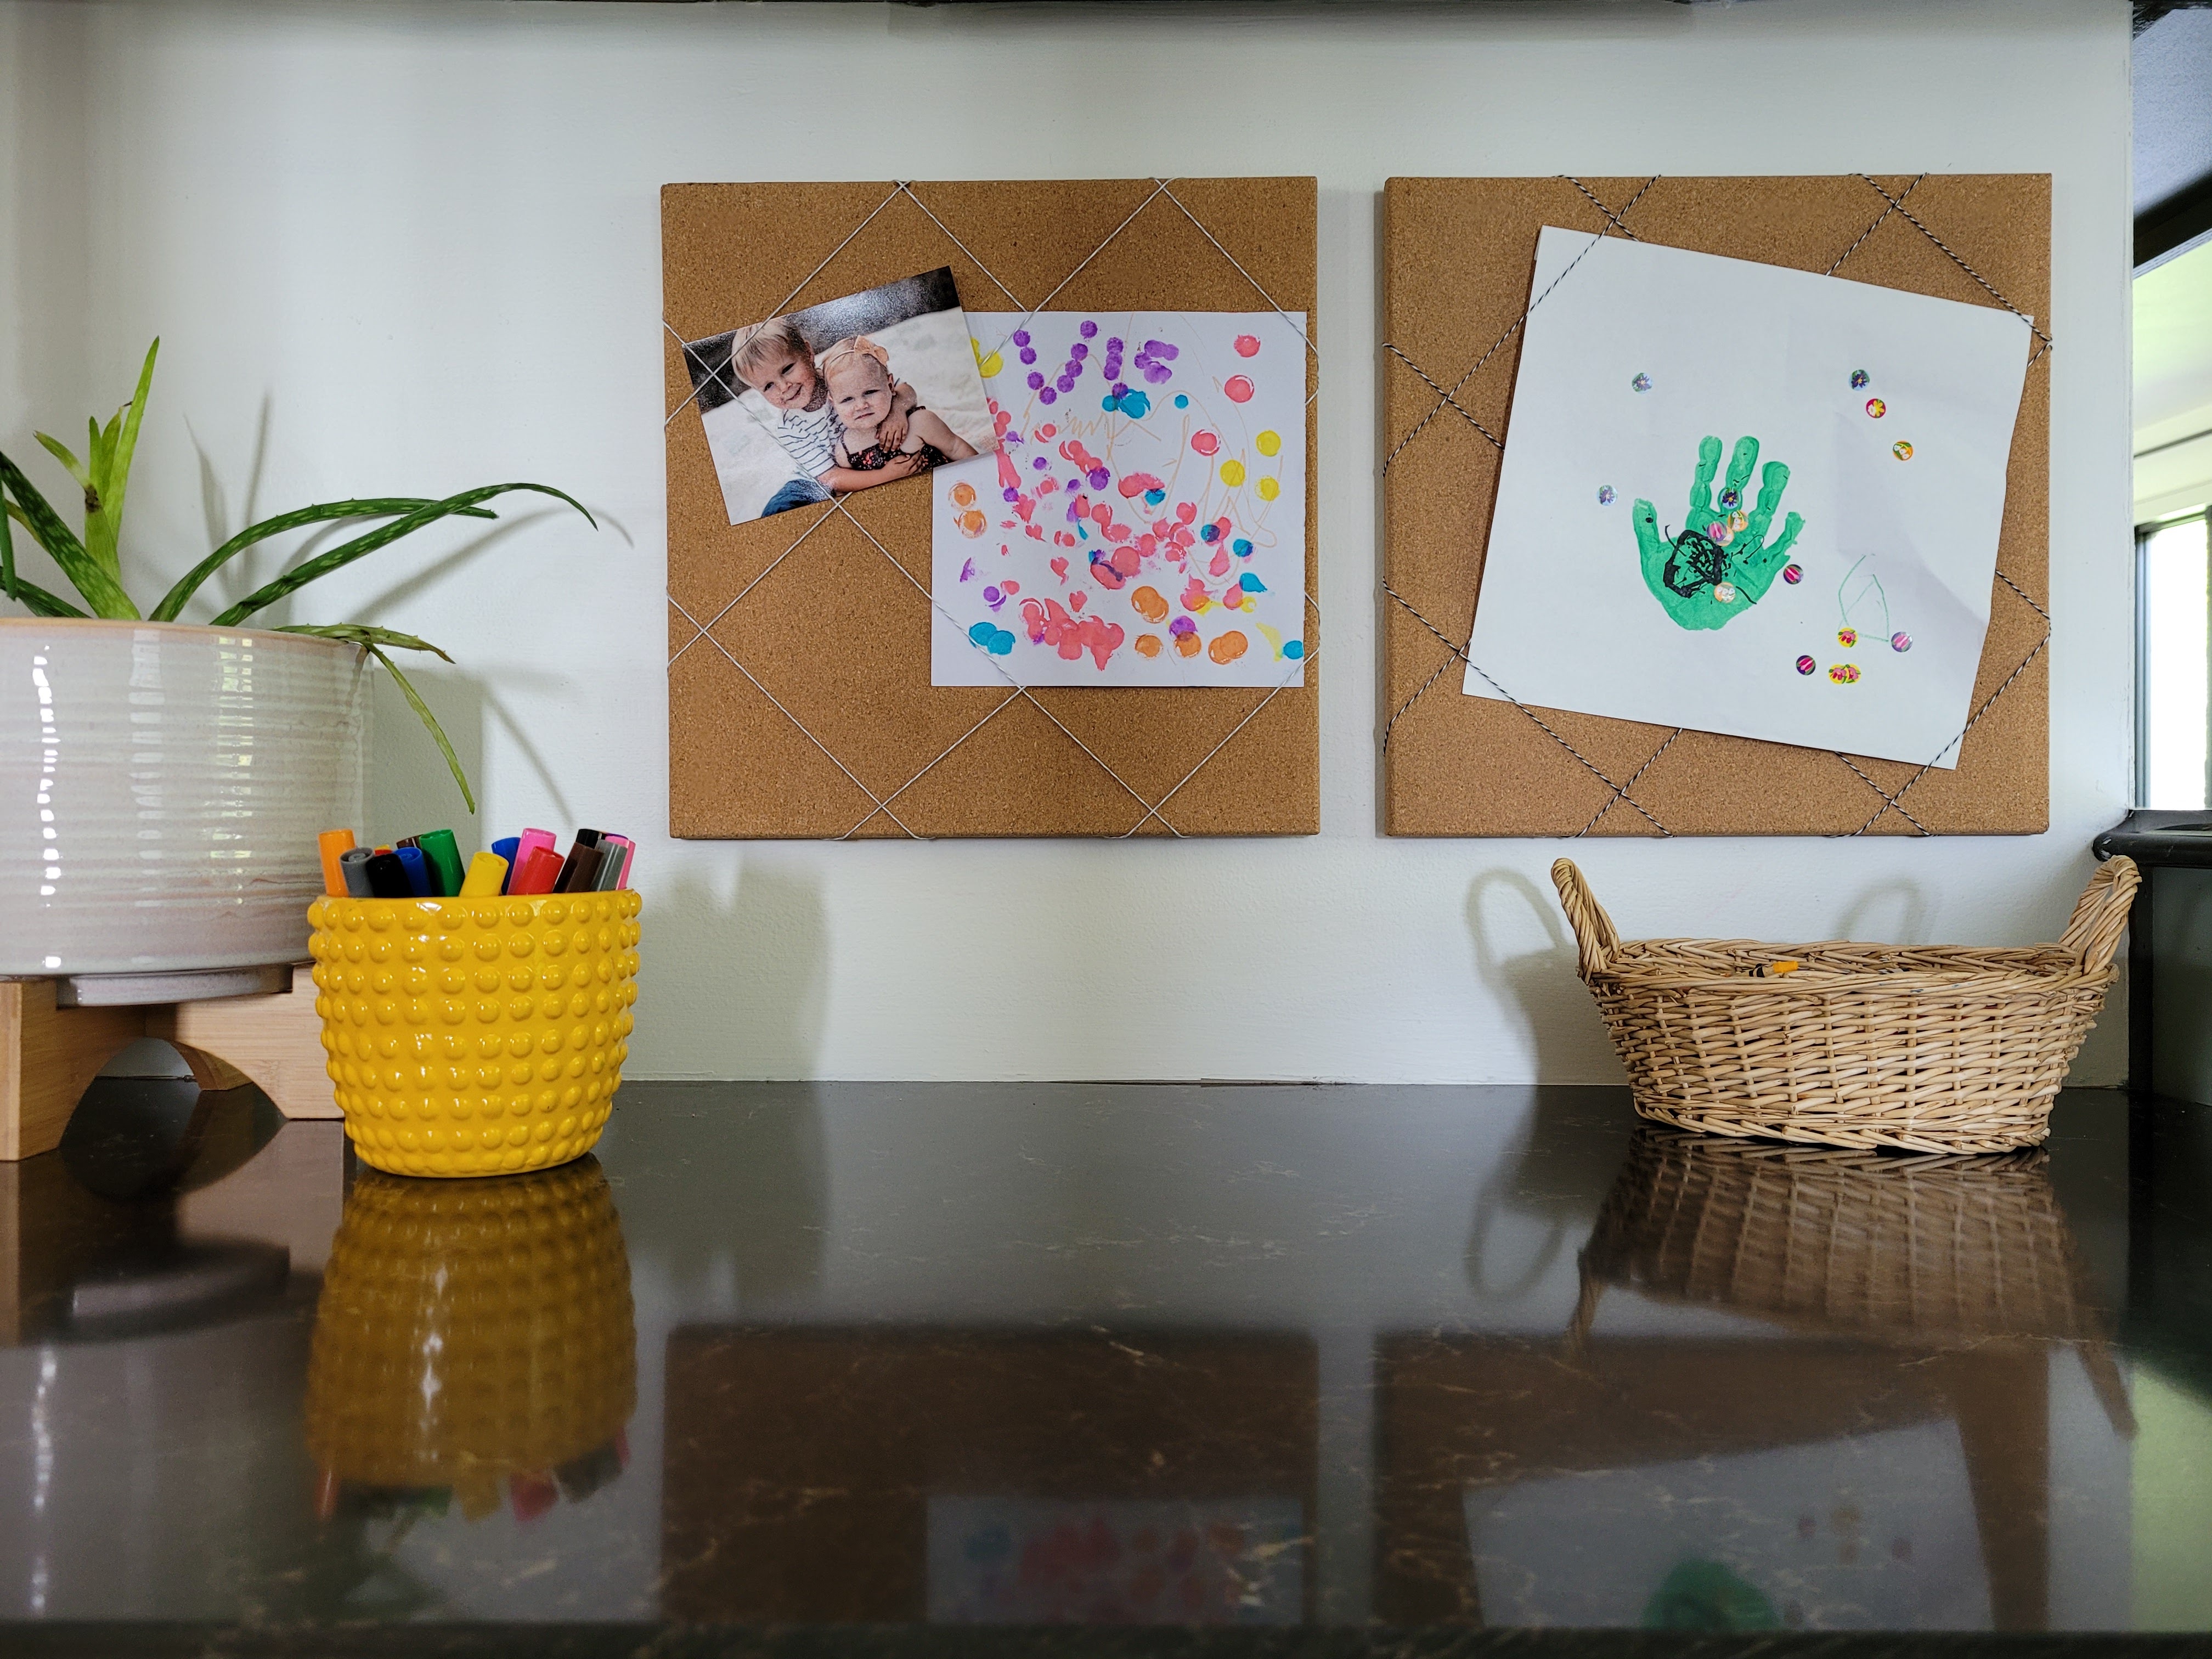
I created a crisscross pattern over the front of the corkboard so now they can just slide their artwork in behind the twine and it’s easy to swap out creations when they want.

I attached the corkboards to the wall using command picture hanging strips. I love that these don’t damage the wall if I decide to take them down later, and the Velcro allows me to easily take the corkboard off the wall if I ever want to access the outlet behind (the kids don’t have a need for it, but it’s nice to know we can access it if we need to).

I finished off the space with an aloe plant and two thrifted containers to hold markers and crayons. Both the yellow container and the basket were $3 each at thrift stores, bringing the grand total investment spent for this specific area to $6. Not too shabby!

All in all, this little refresh took about half a day – and most of that time was dry time in between paint coats. I probably spent about 2-2.5 active hours working on it and while it’s far from glamorous, I’m happy with the result. The space fits in with the rest of the home but still feels distinctly like an area for kids. Both kids have already used it since I finished up and I foresee lots more creativity and fun memories happening right here!

Sources:

Cabinet Color: SW Link Gray

Wall Color: SW Alabaster

Trim Color: SW Agreeable Gray

Planter and Chair are from Marshall’s

Yellow container and basket are thrifted

Citrus Recipe Box

Wedding Wednesday: The Decorations, Part 2

Not gonna lie, it’s been a long day and my hubster wants to chillax on the couch and catch up on last night’s episode of “The Voice” so I’m gonna just get right down to it so I can go join him! It’s Wedding Wednesday and the decorating fun continues!!

Wedding Wednesday

Our wedding took place on my grandparent’s farm, which is now owned by my parents. My parents decided to renovate the old farmhouse in the months before the wedding, and one of the things they updated was the windows. Putting new windows in = tons of old, rustic wooden windows for me to use for DIY decorations!! YAY!

Here are some of the ways I incorporated these windows into the decor:

DIY Window Pane with blown up photo

Believe it or not, this window frame came with the perfect amount of aging/distressing so I didn’t have to do anything to it. All I did was clean the window with some simple wood cleaner and it was done! I printed out the photo at Costco because it was the only place I could find that would print off a near poster-size picture and didn’t charge a ridiculous amount of money for it. Score!

Engagement pictures in rustic window frame. Wedding DIY.

I used the same process as before (but with smaller pictures) in the above window frame. I’m sure you can find some super crafty way of attaching photos to a window on Pinterest, but I’m going to be very real about the un-crafty way I created these.

1. I cleaned the window and glass.

2. I placed one picture at a time behind the glass of the window and moved it until the exact part of the picture I wanted to see was “framed” by the window pane.

3. Without shifting the picture, I carefully pressed it into into the glass. Making sure the picture was flat against the window glass, I used my nail to bend a crease in the picture up against the side of the window frame. This marked the outline of the part of the picture I wanted to see

4. I cut out the picture using my crease as an outline (I left a slight edge around the crease in case I needed to shift the picture. Better to have to trim it a little more than realize I came up short!)

5. I used masking tape to attach the picture to the side of the window glass.

6. I repeated all those steps for the remaining three window panes!

Like I said, you’ll probably find a more conventional, “crafty” way to do this using fancier tools and a more exact method on different blogs or DIY websites; however, this is what worked for me because it was quick and easy! I loved the result and no one saw the back of the windows anyways so the whole tacky-masking-tape-thing can stay our little secret, right?

Engagement photos in old window frame, stacked crates, DIY wedding decor

While I liked the first two window frames (which were placed by the “welcome table” that I talked about in last week’s post), this last one was probably my favorite. I loved the double window; it was so unique! I propped it up against this display of new and old crates found in my parents’ attic near the walkway where people went from the ceremony to the reception. The yard at the farmhouse was very big and thus, difficult to decorate, so this display was a simple way of adding some cool decorations without spending a lot of time or effort or going overboard. I found the J & S letters at TJ Maxx and the wooden hearts were handcrafted by a dear family friend. The wine bottles were part of a whole ‘nother DIY project that I’ll discuss in a later post. I was really happy with how this display turned out!

In the spirit of window crafting, I’ll share one more thing! Our seating arrangement was created using an old storm door found in the attic of the old farmhouse.

Old door used to display seating chart. Wedding DIY

I alternated seating arrangement cards with engagement photos on the windows of the door and absolutely loved the way it turned out! For this, I used clear reusable tabs on the back of the photos and seating cards to attach them to the glass. My dad created a simple arch and used swinging screws to attach the door to the arch to put it at eye level with our guests.

seating arrangement on window pane

If you look closely, you’ll see I used the same tree design on the seating cards that we had on our invitations and programs. It was the perfect way to tie everything together!

All photographs are copyright of the fantastic Rothwell Photography.

And that concludes another Wedding Wednesday! Have a good evening!

***

I am slowly inching my way into a spring wardrobe — here’s hoping the cold winter is finally gone!

Teacher outfit blog: pink and brown, bow belt, flower necklace

Sweater cardigan: Maurices (similar here)~ Cami: Express (exact old)~ Khaki pants: Maurices (similar here) ~ Flats: Target (exact here) ~ Belt: Via Plato’s Closet ~ Necklace: Lia Sophia “Flower Pot” (no longer available; similar here)

Nail Polish Organization

Hello hello!

This past weekend Justin and I drove 6 hours to Pennsylvania to visit his extended family on his mom’s side. It was SO good to see everyone — all but one cousin was able to make it and we had a great time catching up with family. Since we didn’t have school today due to MLK, Jr. Day, we were able to take it slow coming home. It’s good to be back!

Nail Polish Organization

I never miss an opportunity to organize and today was no exception. I have been in desperate need of repainting my toenails (why is that so difficult to keep up with in the winter??) and I figured no better time than a lazy day off work to do them so I pulled out my nail polish tin.

simplifythechaos.comI bought this tin at Wal-Mart in college on clearance for 75 cents. At the time, it was perfect for my needs and I could fit everything in there. It has served me well! However, as my nail polish collection has grown, this tin has become more and more unorganized. Looking for a particular color takes a while, and if I’m looking for inspiration and want to just browse my colors, it takes waaaaay too long!

I decided it was time to say farewell to the tin and come up with something else. I still wanted something that would still be a space-saver, but also maybe display my polishes a little better.

simplifythechaos.comI had an old hurricane glass jar from Michael’s that I had been using as a candle holder for a while. I got tired of that look so I decided to switch it up and use it as my new nail polish storage!

I really like that this is a colorful display and I’m able to see all of my polishes easily. I also think it’s a pretty cute addition to my dresser. I can see that maybe someday I’ll get annoyed with digging all the way to the bottom for polishes and I may need to come up with a different option, but for now, I love it!

simplifythechaos.comNow my nails are done and it’s time for me to snuggle up with my hubby and puppy and watch The Bachelor 🙂

Have a great week!