Using Fabric Scraps to Wrap Presents

With three weeks to go until Christmas, I’m about 90% done with my shopping and ready for the next phase: wrapping. I love a beautifully wrapped present and truly enjoy wrapping gifts for friends and loved ones. The biggest downfall for me is it always feels pretty wasteful to see the beautiful paper get ripped up and thrown in the trash. This year I decided to try something new – it’s inexpensive, sustainable, and pretty which is a win win win in my book!

A few months ago, I was wandered down the fabric aisle of my local thrift store. A large piece of fabric caught my eye – a plaid pattern with greens, reds, and golds that felt so festive without being obvious. I immediately was inspired and thought what if I used this for wrapping presents? Sure it’s not actually wrapping paper, but it could work, right? I bought the fabric for a couple bucks and started to look through the fabric sections every time I went thrifting, picking up a 1/2 yard here, a yard there, etc. Fabric scraps can be found in all sizes for just a dollar or two and soon I had a little collection of fabric for wrapping.

None of the patterns are actually Christmas-y. There’s no reindeer or Santa or holly or candy canes or anything like that, but I chose a variety of textures and patterns that together have an overall festive feel. I also got out my collection of ribbons – a couple rolls were new but I’ve also saved bits of twine and ribbons from gifts I’ve received over the years and thrifted some rolls as well (I thrifted that red and green plaid ribbon over 10 years ago!)

When it came to wrapping, it was basically the same process as with paper. I measured how much I needed for each present and cut the fabric to size.

I tested a few tapes and found that duct tape actually worked the best for fabric. I taped the initial edges directly to the box like I would with traditional wrapping paper and Scotch tape.

To hide the tape, I rolled it to tuck behind the final fold on each side.

I tied each package up with a ribbon, making sure to have the ribbon hold down the sides where I folded the fabric to keep everything securely wrapped.

That’s it! It’s super easy and basically the same process as with traditional paper. I love how all of the presents turned out! The collection of gifts looks unique and fun and I can’t wait to give them out this Christmas. It also makes me so happy to know this is very low waste – all of this wrapping material will be saved and used again for years to come.

Bringing Vintage Brass Back to Life in Three Easy Steps

I recently went to a local vintage sale and scored two different sets of three bells as well as a larger, wall-mounted dinner bell. Typically with vintage pieces, I like to keep the patina (the green or brown tarnished look that happens over time), as I think it adds character and charm. For some of the bells, however, the thing I loved most was the intricate etching and I felt like the high level of patina actually hid a lot of the beautiful detail. Much as I loved the warmth of age, I made the decision to polish them so they could (literally and figuratively) shine again.

I first learned about Brasso last year when I installed raw brass sconces in our primary bedroom. It’s a polish that can clean stainless steel, chrome, aluminum, pewter, bronze, copper, and of course, brass. A quick side note: I have been slowly switching my cleaning products over to nontoxic options when possible, and there are ways to clean brass more naturally (this article has a variety of ideas). That being said, in the past, I have attempted to clean thrifted metal items like brass and copper with things like lemon or ketchup – with mixed results. Since my bedroom sconces were new, raw, and not exactly inexpensive, I chose to forgo a homemade paste and follow the manufacturer’s recommendation to use Brasso instead. I was pleased with the result and am personally fine keeping it in my cleaning product stash, particularly given its infrequent use, so that’s what I chose to stick with here.

The process of polishing is actually very easy, so today I thought I’d share what I did in case anyone else has a piece they want to try shining up!

Materials

Brasso metal polish

-newspaper (or something to protect your work surface)

-latex gloves

-two clean cloths

First up, make sure your workspace is prepped with a few layers of newspaper or something else to protect the surface. You’ll want to be in a well-ventilated area and make sure to wear gloves!

Shake the Brasso and squeeze a dollop out onto a clean cloth.

Using a circular motion, rub the Brasso all over the surface of the item, applying more as needed.

I suggest starting with a light pressure until you see how the metal is shining up, and then adjust as needed depending on how much patina you want to keep. For these bells, I didn’t want them to end up too shiny and new-looking, so I kept a light pressure the entire time.

Once you have applied cleaner all over your item, use a clean, soft cloth to buff the surface.

That’s it! Easy Peasy. It only took me about five minutes to polish each bell and reveal the unique, beautiful details.

I’m sure there are people who would argue that all vintage pieces should be left alone and might feel I made the wrong decision here. As I said earlier, I’m usually on Team Patina = Character! But I do think there’s a time and a place to work on a piece and I honestly have no regrets about polishing these. I’m all about cultivating a home that feels collected, cozy, and comfortable, with items that make me and my family happy. The details on these bells are now so vivid and eye-catching in person and I know I will appreciate them for years to come. And as the years go by, I’ll get to enjoy watching the slow process of the patina coming back 🙂

Now I’m curious – are you team polish or team leave as-is?

Decorating with the Feeling of Fall

I don’t do a ton of seasonal decorating throughout the year, but the months of September – December just hit different for me. I love switching things up for fall and then Christmas! This year I felt inspired to decorate for fall but felt less drawn to “typical” fall décor like mounds of pumpkins and more drawn to subtle things that have the feeling of fall.

I didn’t want to spend a lot of money, so I shopped my home and hit up the thrift stores for inspiration. Today I wanted to share some of the things that I’m using that felt like fall to me. There’s a good mix of things from Target, things I thrifted, and things I DIYed (like these cute pumpkins made from old books!) – in other words, a collected mix that fits right in with the rest of the house!

Warm Metals

I think warm metals like brass and copper mimic the golden yellow and orange leaves of fall, and while use these metals in my house all year long, adding even more into my décor this time of year definitely strengthens the fall vibe.

Two copper-colored pots caught my eye at the thrift store – they were just the right size for planters. I added a few small rocks to the bottoms to create some drainage before adding in plants. In one, I decided to combine beauty + function and filled it with a cilantro plant I can snip from for meals. I especially love the copper + wood combination; it feels so warm and cozy on my kitchen counter!

Even the playroom got a little fall addition with this fun little brass and copper pot I thrifted!

I’ve slowly been thrifting a small collection of brass candlesticks and a variety of tapered candles in different colors and sizes. Brass candles + white tapers felt like the perfect fall combination for my dining room table. I had initially hoped to use thrifted candles, but the ones I found ended up being too discolored so I bought a simple set from Target. Add in a fall garland and plaid tablecloth and it feels just right for a simple fall tablescape.

And speaking of candles . . .

Candles/Scent

I don’t burn many candles throughout the year, but come fall, I love to have a candle burning. It not only makes my home feel cozy and warm, but I love the scents of fall candles. I’m not a huge fan of pumpkin scents but I enjoy things like apple, amber, and spices like cinnamon, nutmeg, and clove. I love that candles have the power to make you feel like you’re sitting around a campfire or walking through a farmer’s market! I particularly love this autumn candle from a local small business:

Also, did you notice that white pumpkin peeking out from behind my green glass jars? I picked that up from Target a few years ago and it’s currently housing treats.

Colored Vessels

To me personally, bright orange feels “Halloween-y” but muted orange feels like “general fall.” Does that make any sense? Unless it is an actual pumpkin or gourd that came from nature, I kind of reserve any bright orange décor for just the month of October. Otherwise, the oranges I use are muted and soft and I work to incorporate other earthy fall tones like shades of brown, green, red, and yellow.

In my search for non-traditional fall décor, I thrifted some vessels in earth tones – dark brown pitchers and the tinted green glass bottles shown on my kitchen island above – that feel like subtle nods to fall. I pair them with objects in wood, stone, copper, brass, etc. and the overall effect is definitely a fall vibe.

Thrifted: cutting board, copper container, ceramic pitcher. Target: frame, candle (old).

PS – I don’t really do fall artwork but couldn’t resist this digital download print. The print itself was about $4, printing it at my local FedEx print shop was about $2, and I already had the frame. Inexpensive and cute seasonal artwork!

Dried Florals/Greenery

The easiest and cheapest way to incorporate fall into my home is to head outside and bring it in. Last September, I snipped some hydrangeas from our bush outside and stuck them in a vase in our bedroom. They have held up for an entire year as cute – and FREE – decor. This year, I once again headed outside to forage for fall and was not disappointed.

I scoured the trees and flowerbeds and Justin brought some clippings from the woods – it was fun to see what all we could gather!

Along with greenery, another very inexpensive option I decided to display was my seasonal groceries, like the apples in a wooden bowl above.

I placed some bosc pears on a black wooden pedestal I thrifted a while ago; paired with a few fall leaves from outside and a copper candle, it creates a simple little fall moment (a temporary fall moment anyways; as I type this up, LJ is looking through the pears deciding which one he wants to eat!)

Patterned Textiles

I had hoped to thrift textiles like blankets and napkins that felt like fall, but the thing about thrifting is sometimes you hit the jackpot and other times you don’t. It’s a waiting game that rewards the patient and persistent, so I’m not giving up, but I currently don’t have as many textiles as I had hoped for. One thing I did find is a large swatch of plaid fabric for $4. It’s unfinished, and I actually bought it with a Christmas project in mind (stay tuned!), but it was just large enough to work as a fall tablecloth for now. I threw it over the table in our basement and love how it looks paired with these vessels + greenery.

Mix and Match!

You probably picked up on this, but my favorite fall moments are a mix of things on this list. It was actually pretty hard for me to figure out which picture to include in each section on this post because they all had multiple elements! I also love the juxtaposition of something new from Target mixed with something thrifted that is likely years, if not decades, old. It creates a unique mix that feels just right for me.

I also had a lot of fun shopping my own home and seeing things with fresh eyes. I pulled out my cookbooks from the cabinet and displayed a couple that had a fall vibe. I rearranged various bowls, vases, and trays that I’ve picked up over the years to display different fall items. It’s always amazing to see what I already have by just shopping around the rooms.

I fully expect these little fall moments in my house to fluctuate throughout the season – first of all, the fruit is going to get eaten ha! But also, I’m going to continue to have my eye out for little things here and there that feel like fall and I’m sure I’ll be tweaking things as time goes on. For me, that’s half the fun!

Happy Fall!

How to Upgrade a Frameless Mirror with a DIY Frame

A couple weeks ago, I shared the $20 goodwill dresser that I fixed up for my sister’s baby’s nursery. While I am so proud of that DIY transformation, I’m equally proud of another DIY transformation: the mirror that hangs above it!

Way back in 2019 when we renovated our guest bathroom, we took out the 2′ x 3′ frameless builder-grade mirror the previous owners had hanging. (Also, enjoy this little flashback of the deer-themed wallpaper!)

I originally tried to donate it to our local ReStore, but they don’t accept frameless glass for safety reasons so it’s just been sitting in our garage ever since. Once I saw Tiffany’s awesome upgrade to her mirror, inspiration immediately struck and I knew it would be the perfect surprise to gift my sister along with her nursery dresser.

This ended up being a fairly simple DIY project, so I wrote up a tutorial for anyone who wants to give this a try. We added a few extra things from Tiffany’s original inspiration video and that’s one of the great things about creating a frame from scratch – it allows you to customize to fit your exact needs!

Materials

-Sheet of 1/2″ thick plywood

-1″ x 2″ boards

-1/4″ x 3/4″ trim (optional; only needed if you’re doing the inner piece of trim)

heavy duty liquid nails adhesive

caulk gun

wood glue

-clamps; various sizes

-nail gun + 1 1/2″ inch nails

-circular saw

-miter saw

-long level (optional)

-table saw (optional; only needed if you’re doing the inner piece of trim)

gorilla glue (optional; only needed if you’re doing the inner piece of trim)

-foam brush

-paint or stain

picture hanging kit (if hanging the mirror)

Step One: Trace the mirror onto plywood

We laid the mirror on top of the sheet of plywood, lining up two sides with the edges of the plywood, and traced the outline of the other two sides with a pencil.

Step Two: Cut the plywood on the traced lines

I used a circular saw to cut on the lines we marked.

Optional Step: For an extra precise straight cut, we clamped a long level to the plywood to use as a guide. This did require careful checking and re-checking before starting the cut to make sure that the placement of the level would correctly align the blade of the saw with the line we had traced, but it was worth the effort. I held the saw in place against the level while running the saw and it ensured that the cut was perfectly straight all the way across.

Step Three: Attach the mirror to the plywood

Once the plywood was cut to the same size as the mirror, I used the caulk gun to apply the heavy duty liquid nails adhesive all over one side of the plywood.

We set the mirror down on top of the glue and made sure all the edges were lined up with the plywood.

Our plywood was old and slightly warped, so we used some scrap wood and clamps to tightly seal the mirror to the plywood and let it set overnight.

Step Four: Cut the wood for the frame

Once the mirror was fastened to the plywood, Justin used the miter saw to cut the 1″ x 2″ boards to size for each side of the frame. We considered two options for fit: straight cut corners or 45 degree corners.

We chose to cut each corner at a 45 degree angle rather than straight cuts. It did require a little extra thinking through and measuring before cutting, but again, it was worth for us to get the look we wanted.

It was very important to make sure the corner of the each cut was exactly lined up with the corner of the plywood. If it was a little too long, there would be a gap between the wood and the mirror. If it was a little too short, there would be a gap where the frame corners didn’t quite meet. In the picture below, the wood was cut a little too long – see how there is a small overhang of the side piece? We marked where the end of the plywood hit the side and Justin cut to that line to make sure the corner exactly lined up.

Step Five: Paint or Stain the Wood

Before securing any of the wood in place, I used a foam brush to apply everything with a light coat of stain to the wood. I decided to stain instead of paint because my sister chose a natural wood crib so I knew it would tie in nicely, plus the light wood color coordinated well with the color I chose for the leather dresser drawer handles.

Note: This step could definitely happen after all the wood is installed. I chose to do it in this step to avoid having to try to stain in corners and potentially have uneven coverage or get it on the glass. Just my personal preference!

Step Six: Attach the sides of the frame to the plywood

We did a dry fit to make sure the sides all lined up perfectly (they did!) and then applied a small bead of wood glue to the bottom of each piece where it would meet the plywood.

We fit each piece in place, then used the nail gun to add a couple 1 1/2″ inch nails to each side, making sure to aim low enough to hit plywood and not glass. I did not want a lot of nail holes, but we also wanted to make sure things were super secure, so the combination of wood glue + nails worked for us.

We used clamps to keep things in place while the wood glue dried (this was probably unnecessary but it gave us peace of mind that things would dry tightly in place).

(Optional) Step Seven: Cut wood for inner trim

We could have stopped at this point and probably would have under normal circumstances. This looked great! Except for one thing . . . our mirror had sustained a bit of damage in the garage and was missing a small corner. We decided to fix this by adding one more trim piece directly on top of the glass to hide the damage.

We bought 1/4″ x 3/4″ strips of wood. They were originally a little wider than I wanted (right one in the picture below), so we used the table saw to rip each piece down to 1/2″ wide (left one in the picture below).

Justin used the miter saw to cut each side to size (with 45 degree angles on each end) and after checking placement with a dry fit all around, we used a bead of gorilla glue on the back to secure each piece directly onto the glass.

(Optional) Step Eight: Attach hanging hardware

We gave everything time to dry and then Justin used heavy duty wire and d-hooks from a picture-hanging kit we have (here is a similar kit). We used an online reference guide to help us decide exactly where to place the d-hooks for best hanging. If you choose to hang your mirror, it is very important to weigh the mirror first and make sure the hanging materials you’re using can support the weight of the mirror safely!

I absolutely love how this mirror turned out. I was so excited to surprise my sister with it – it’s the perfect complement to the nursery dresser and fits the room so well. She loved it!

The cost of this project will vary depending on the type of wood you use and how many materials you have to buy vs. what you already have on hand. I used oak boards, which are a little more expensive than other types, but I already had the plywood and all other materials, so that kept cost down for me. Large mirrors can be expensive, and I’m so glad I was able to take a mirror I already had and give it a completely fresh look that was considerably less than the cost of a brand new mirror.

What do you think? Are you ready to try this DIY yourself?

Kids’ Bedroom: The Curtain Saga is Over!

The kids’ shared bedroom, which used to be just LJ’s room, has been through a lot of changes in the almost three years we’ve lived here but one particular area has changed the most: the window treatments. Just this morning, I changed things up again but this time, I feel confident in saying they’re going to stay for many years!

When we first moved in, the previous owners left their curtain rods and mismatched roller blinds hanging. I kept the roller blinds and just hung up the curtains we brought from LJ’s nursery. His first nursery only had one window though, so I only had two panels – one for each window. From an aesthetic standpoint, it wasn’t a great look but from a practical standpoint, it worked fine.

I lived with that look for just over a year and in June 2021, I decided to do an inexpensive update. I removed the mismatched roller shades, painted the windows, updated the window trim, and took down the old curtain rods. I had leftover rods that I didn’t use from hanging our dining room curtains, so I repurposed them in here (I didn’t have all the pieces but I hot glued the end caps to the open end of the curtain rod to make it look finished!) and added inexpensive blackout curtains that I got on sale. Unfortunately, the curtain rods were just a single rod and didn’t extend, and the curtains only came in an 84″ length, so it wasn’t my “high and wide” preference but it was an inexpensive way to make this room feel much more cohesive. And somehow, the only photos I can find of this set up all look like this – ha! Vi had obviously already moved in at this point.

Once I updated the kids shared room with matching beds and new furniture, the short, narrowly placed curtains just felt cramped. Three out of four of them were behind something, and they didn’t do much to make the room feel more expansive. I shared my dilemma in this post: replace curtains or go without?

I took down the old curtains and hung blackout blinds only. (Side note: these were very easy to install and I was able to do it completely by myself!) Going to just blinds actually made the room feel too empty. Plus, I needed curtains to block out the small strip of light that still came through around the sides. Also, Vi’s side of the room has four more inches of wall space than LJ’s – without curtains to help offset the difference, it’s pretty obvious when you’re in the room.

So it came full circle back to curtains, but this time – I wanted them high and wide! My main goals were to make the room feel taller and more expansive and offset the asymmetrical wall space by cheating that curtain side out just a little. I ordered these grid curtains, which I thought would add a little pattern and fit my gender neutral theme, but could also definitely stay long term when Vi moves out since this will eventually be a shared boy room. The curtain delivery got a bit delayed and just came in last night; I was too excited to finally get them up on the wall so rather than wait for Justin to come home, I decided to figure out how to hang the new rods and curtains myself!

I followed this tutorial from Young House Love and made a quick little template out of cardboard marking where I wanted each curtain rod hook to go. I drilled pilot holes, hammered in anchors, and secured each hook in place. Following that tutorial made things surprisingly very doable for one person and I’m so proud that they are hung securely and evenly!

If you look closely, you can see I cheated just a bit more fabric width onto Vi’s side of the room. I don’t think it’s noticeable unless you’re looking for it, but it does make the sides feel more balanced! I’m very happy with how it looks and am feeling so accomplished to have done all this by myself in just under 90 minutes.

As happy as I would be to just sit back and enjoy looking at these new curtains, another delivery for this room is scheduled to arrive tomorrow so I’ll be back working in here soon. I’m excited to keep transforming this space piece by piece!

Sources

Windowpane Curtains

Blackout Blinds

Curtain Rods

Wall Color: Sherwin Williams Eider White and Nordic Bleu

Bedframes: Vintage

Vi’s Sheet Set

LJ’s Sheet Set

Yellow Quilts

Striped Throw Blanket

Updating a Bedroom with a Geometric Accent Wall!

A friend of a friend reached out to me a couple weeks ago to ask if she could hire us to install a geometric accent wall in her main bedroom. They had already painted the walls in Sherwin Williams Peppercorn (a gorgeous moody gray!) but felt like the room needed a little something extra. She sent me an inspiration picture and after talking it over with Justin, we decided this sounded like a fun project to tackle together and agreed to do it.

This project took less than 24 hours, cost about $70 in materials, and was pretty easy to do. In other words, a quick, low-cost, relatively easy DIY project that was perfect for a Saturday!

Materials

1 1/2″ primed pine (we used 10 8′ boards)

painters tape

-miter saw

-nail gun + nails (we used 1 1/2″ nails)

spackling

combination square

-220 grit and 440 grit sandpaper

-six inch foam roller

-sawhorses

-paint

-optional: square layout tool; stud finder

On Friday afternoon, Justin and I went over to map out the pattern using painters tape (I chose tape with a width of 1.41″ so it would closely mimic the size of the 1.5″ trim). This served two purposes: it gave the homeowners a chance to make sure they liked the pattern and also helped us know exactly how much trim we need to complete the project.

We chose to use this 1 1/2″ primed pine, which comes in 8 foot lengths, so we created the pattern in a way that ensured no section was longer than 8 feet. We wanted to keep things as simple as possible by sticking to 90, 60, and 30 degree angles and we used this square layout tool to help place the first few pieces. While this tool was helpful in giving us a starting point for placing trim at the correct angle, once the first few pieces were taped down we saved some time and effort and eyeballed the rest of the trim placement. If you want to make your pattern super precise you can absolutely measure the angles for each taped piece but since this was just a guideline for us, we weren’t worried about precision.

We used an 8 foot piece as a guide for figuring out where we wanted each piece of trim to go, then placed the tape right along the side of the board for a nice straight line.

We started on the far right side of the room and created a triangle using the top right corner of the wall as the 90 degree angle, then built out the pattern from there.

Once the whole pattern was up on the wall, we got the homeowners’ approval and made a couple changes at their request. I wanted them to sit with it overnight so they had a chance to make sure they were totally happy with the pattern before we started since tape is way easier to change than installed trim.

At home that night, I used a six inch foam roller to paint two coats of Sherwin Williams Peppercorn in eggshell finish on the trim pieces and let them cure overnight.

On Saturday morning we loaded everything up and headed over to their house to install. We began with the long piece of trim stretching from the right corner of the wall to the baseboards. We knew this piece of trim would create a right triangle with the right wall and baseboard which made figuring out the angles pretty easy. I made a lovely diagram to help you visualize what I’m talking about 😉

We knew the length of this trim was just shy of 8 feet, so Justin used his miter saw to trim what would be the “top” end at a 30 degree angle and the “bottom” end to a 60 degree angle, making sure the angles were pointed in the correct directions to line up with the wall and baseboard.

The tape was just a guideline so we were not stressed about lining things up exactly. Once both ends of the trim were cut to the correct angle, we just placed the trim flush against both the corner of the walls and the baseboard and Justin used his nail gun to attach it to the wall. It didn’t end up exactly where our taped line was, but it was pretty close!

We wanted as few nail holes as possible, so I used a stud finder to locate all the studs in the wall and placed a small piece of tape over each one so Justin could nail directly into studs for a secure hold with minimal nails.

We decided to install all the longest boards first and then go back and fill in with the shorter pieces of trim. We worked our way across the wall from right to left, building off of each board we installed. The picture below gives you a good idea of the “in progress” part – we removed the corresponding piece of tape prior to installing each piece of trim and rolled back the intersecting pieces so that they wouldn’t get in the way of install.

Installation wasn’t hard once you understood the general math we were working with. I’ll walk you through our process as we installed trim where the far right green tape is marking in the picture below.

We had already installed the longer trim it would intersect with, and that installed trim made a triangle with the wall and taped line as shown in my lovely drawing below.

We knew we had cut the top angle of the long trim at 30 degrees. We wanted the short trim piece to intersect with the long trim piece at a 90 degree angle. That left one angle, “x”, to figure out. The sum of the angles of a triangle is 180 degrees. 90+30=120, meaning the last angle would be 60 degrees. (It’s worth noting that we didn’t actually do calculations every time – we used 30, 60, and 90 degree angles for the entire wall so determining angles was easy!)

Justin used his miter saw to cut one end of a piece of trim to 60 degrees, intentionally keeping it longer than we needed.

He brought the trim back inside, placed the angled cut flush against the wall, and then used the combination square to ensure the new trim was intersecting the installed trim at a perfect 90 degree angle.

Once the trim was at the correct angle, he marked it right where it intersected the installed trim and cut it right on that line.

Once the length was cut at a straight angle, it fit perfectly in the intended space and Justin nailed it into the wall. That’s the general process we used with each piece of trim, although sometimes instead of a wall being one side of the ‘triangle,’ it was the ceiling or baseboard or another piece of trim.

While Justin focused on cutting down and installing the trim pieces, I visually checked each piece prior to install to make sure the pattern continued to look uniform.

I also followed behind him to fill in all the nail holes using this spackling.

I like using this product because it goes on pink and turns white as it dries. Usually I’ll just lightly sand it with my finger, but this time I put the spackling on a little thicker than normal. I waited until it was completely dry, then lightly sanded it smooth, first with a 220 grit sandpaper and then with a 440 grit sandpaper. I used a little piece of painters tape to create a shelf underneath each patched hole prior to sanding so the tape would catch a good amount of the dust from sanding.

I had thought we’d need to caulk each piece, but we ended up really liking the crisp lines that the trim created on the wall. Plus, the fact that Justin was nailing into studs as often as possible meant there was a nice tight fit with almost no gaps. I did caulk a couple places between the trim and the far walls where there was a little bit more of a gap. After all the holes were sanded and the caulk dried, I used my foam roller to do a quick once over on the whole thing.

And with that – we were done!

The new bed the homeowners chose was really heavy, so we offered to help them put it together before we left. It looks so awesome up against the wall!

We started taping out the pattern around 5:00 pm on Friday, and we were totally finished with the wall by 2:30 pm on Saturday. Quick, easy, low-cost, but big impact – I’m so glad we decided to take on this project!

Sources:

Wall Color: Sherwin Williams Peppercorn

Ceiling Color: Sherwin Williams Alabaster

Bed: Restoration Hardware

Easy, Collected Gallery Walls

I’ve been working on some smaller projects around the house lately, one of which was finally getting some art up on the main floor walls. Once everything had a fresh coat of paint (Sherwin Williams Alabaster), it was time to add some personality back in! There were two areas that I wanted to include artwork in the form of gallery walls. One was a wall in between the living room and kitchen, and the other was actually two walls that frame our spiral staircase into the basement.

Sometimes when I group frames together, I want them to be the same size, color, or material; however, for both of these spaces I wanted a more collected look since I would be using a mixture of new and old photos. I picked up large frames, small frames, frames in non-standard sizes, gold frames, silver frames, wooden frames – anything that was in good condition and a size and shape I liked. I chose to thrift instead of buy new because it would not only give me more of the unique, collected look I was going for, but also cost a fraction of the price of new frames. Most of the frames I bought fell somewhere between 50 cents to three dollars a piece. Here’s one thrift store haul where I got all these frames for $16 total.

To give you context, the one single frame I had to buy brand new (for the unusually sized caricature picture) was $25! Thrifting is the way to go!

Once I had collected around 30 frames, I laid them all out on my dining room table to get a feel for how everything looked together. This also gave me a good idea of which ones I wanted to change the color of, either because the metal was rusting and dingy, or on the opposite end, was really shiny and cheap-looking, or because the frame was wooden and didn’t fit the vibe I was going for. (Check out the frame that came complete with a hand-drawn cow, haha!)

Some frames got a couple light coats of spray paint (either this black one or this gold one). Tip: I like to save used paint trays from previous projects because they make perfect little backdrops for spray painting small items!

I also used Rub n Buff in antique gold to update a few frames. For these, I placed the frame on a cardboard cereal box I pulled from my recycling bin to protect the counter. Then I squeezed a small mount of rub n buff onto a cheap makeup brush (I got one for like $2 at Target) and dabbed it onto the frame, buffing softly over and over until I achieved the look I wanted. In the picture below, the left and bottom side of the frame have been finished and the top and right side haven’t been done yet. See the difference? It took away the cheap-looking shine and gave it a more antique gold look.

Once the frames were all ready, it was time to choose what to hang!

The wall in between the kitchen and living room houses used to be such an eyesore. It had our thermostat, an unused humidifier control, and lots of toddler scribbles on the wall.

A fresh coat of paint and removing the old humidifier control helped significantly, but I was eager to get some other things up on the wall to distract from that device sticking out like a sore thumb!

For this particular gallery wall, I wanted to gather mementos and photographs that are extra special for our family. I chose a few items from travels, a wallpaper label that was discovered in a renovation of my grandparent’s farmhouse, two recipes, one in my grandma’s handwriting and one in Justin’s grandma’s, a picture of my dad, brother, and me from childhood at a place special to our family history, and a photo of my maternal grandfather with his parents at their home in Puerto Rico.

I’ll often map out where I want everything to go before hanging anything, but for this wall, I just went one frame at a time and went based on what placement felt right.

Before hanging, I removed any of the little collapsible stands behind the frames. These aren’t necessary to have when the picture is being hung, and will often prevent the frame from lying flush against the wall. I used a pair of vice grip pliers to pull them off. Sometimes on older frames, I could just use my hand to pull the stand and the whole thing would come off, other times, I had to use the pliers to pull off the metal hinge as well.

To hang the pictures, I used picture hanging command strips. I like these because it’s a way to hang lots of pictures without adding lots of nail holes. I’m happy with how this wall turned out and I love that it helps camouflage the thermostat!

For the walls around the staircase, I wanted a mixed metal look and chose gold, silver, and black frames. To keep a cohesive look, I went with all black and white photos and specifically chose a mix of professional family photos and more casual candid shots from our life.

I also included pictures of our grandparents, special handwritten notes, and a caricature of Justin and me from a work holiday party a couple years ago.

I love the mix of old and new, traditional and modern, formal and casual. It really feels so representative of our family and each one is special to us! I decided to have the frames loosely follow the curve of the staircase and I plan to add to it over the years so it continues to reflect our family.

I’m really happy with the way both gallery walls have not only added interest to our plain white walls, but they have added so much personality. Our family is so well represented – our history, our ancestors, and the ordinary, and everyday moments that make up our lives. It is a small change that made a huge difference in making this home really feel like ours.

Our DIY Play Kitchen!

Tomorrow is Christmas and we finished up kids’ gift just in time: a play kitchen built from scratch!

Originally I hoped to re-purpose an old TV entertainment center, but after spending hours scouring Facebook marketplace and multiple thrift stores around town, I came up empty. With only two weeks left before Christmas, I was too crunched for time to keep searching. So instead, we decided to build one!

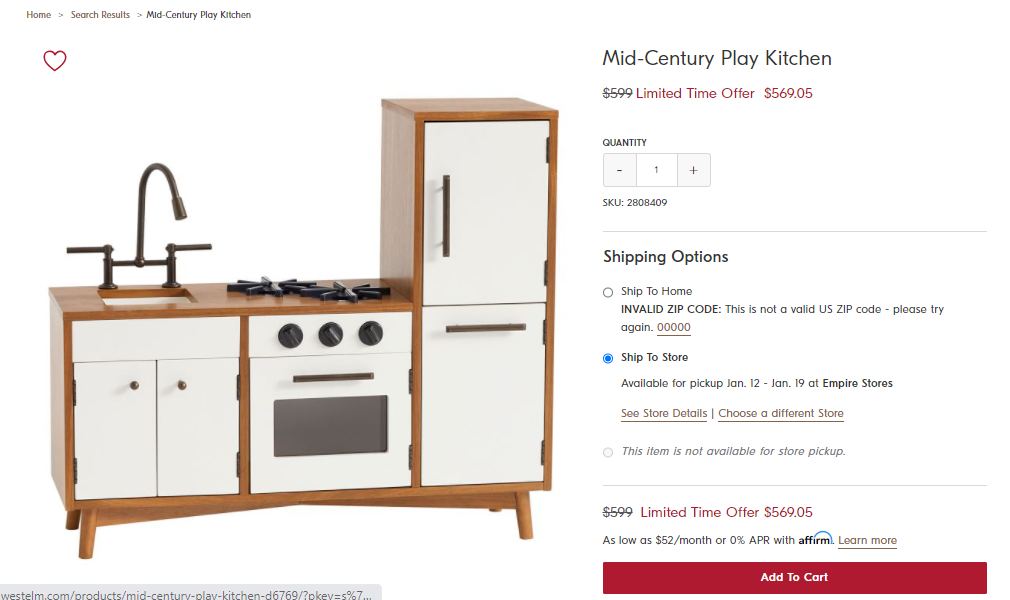
My brainstorming session started with a Pinterest search, where I found this play kitchen from West Elm. I fell in love with the look, but definitely not with the price. I knew Justin and I could come up with something similar for a lot less than $600.

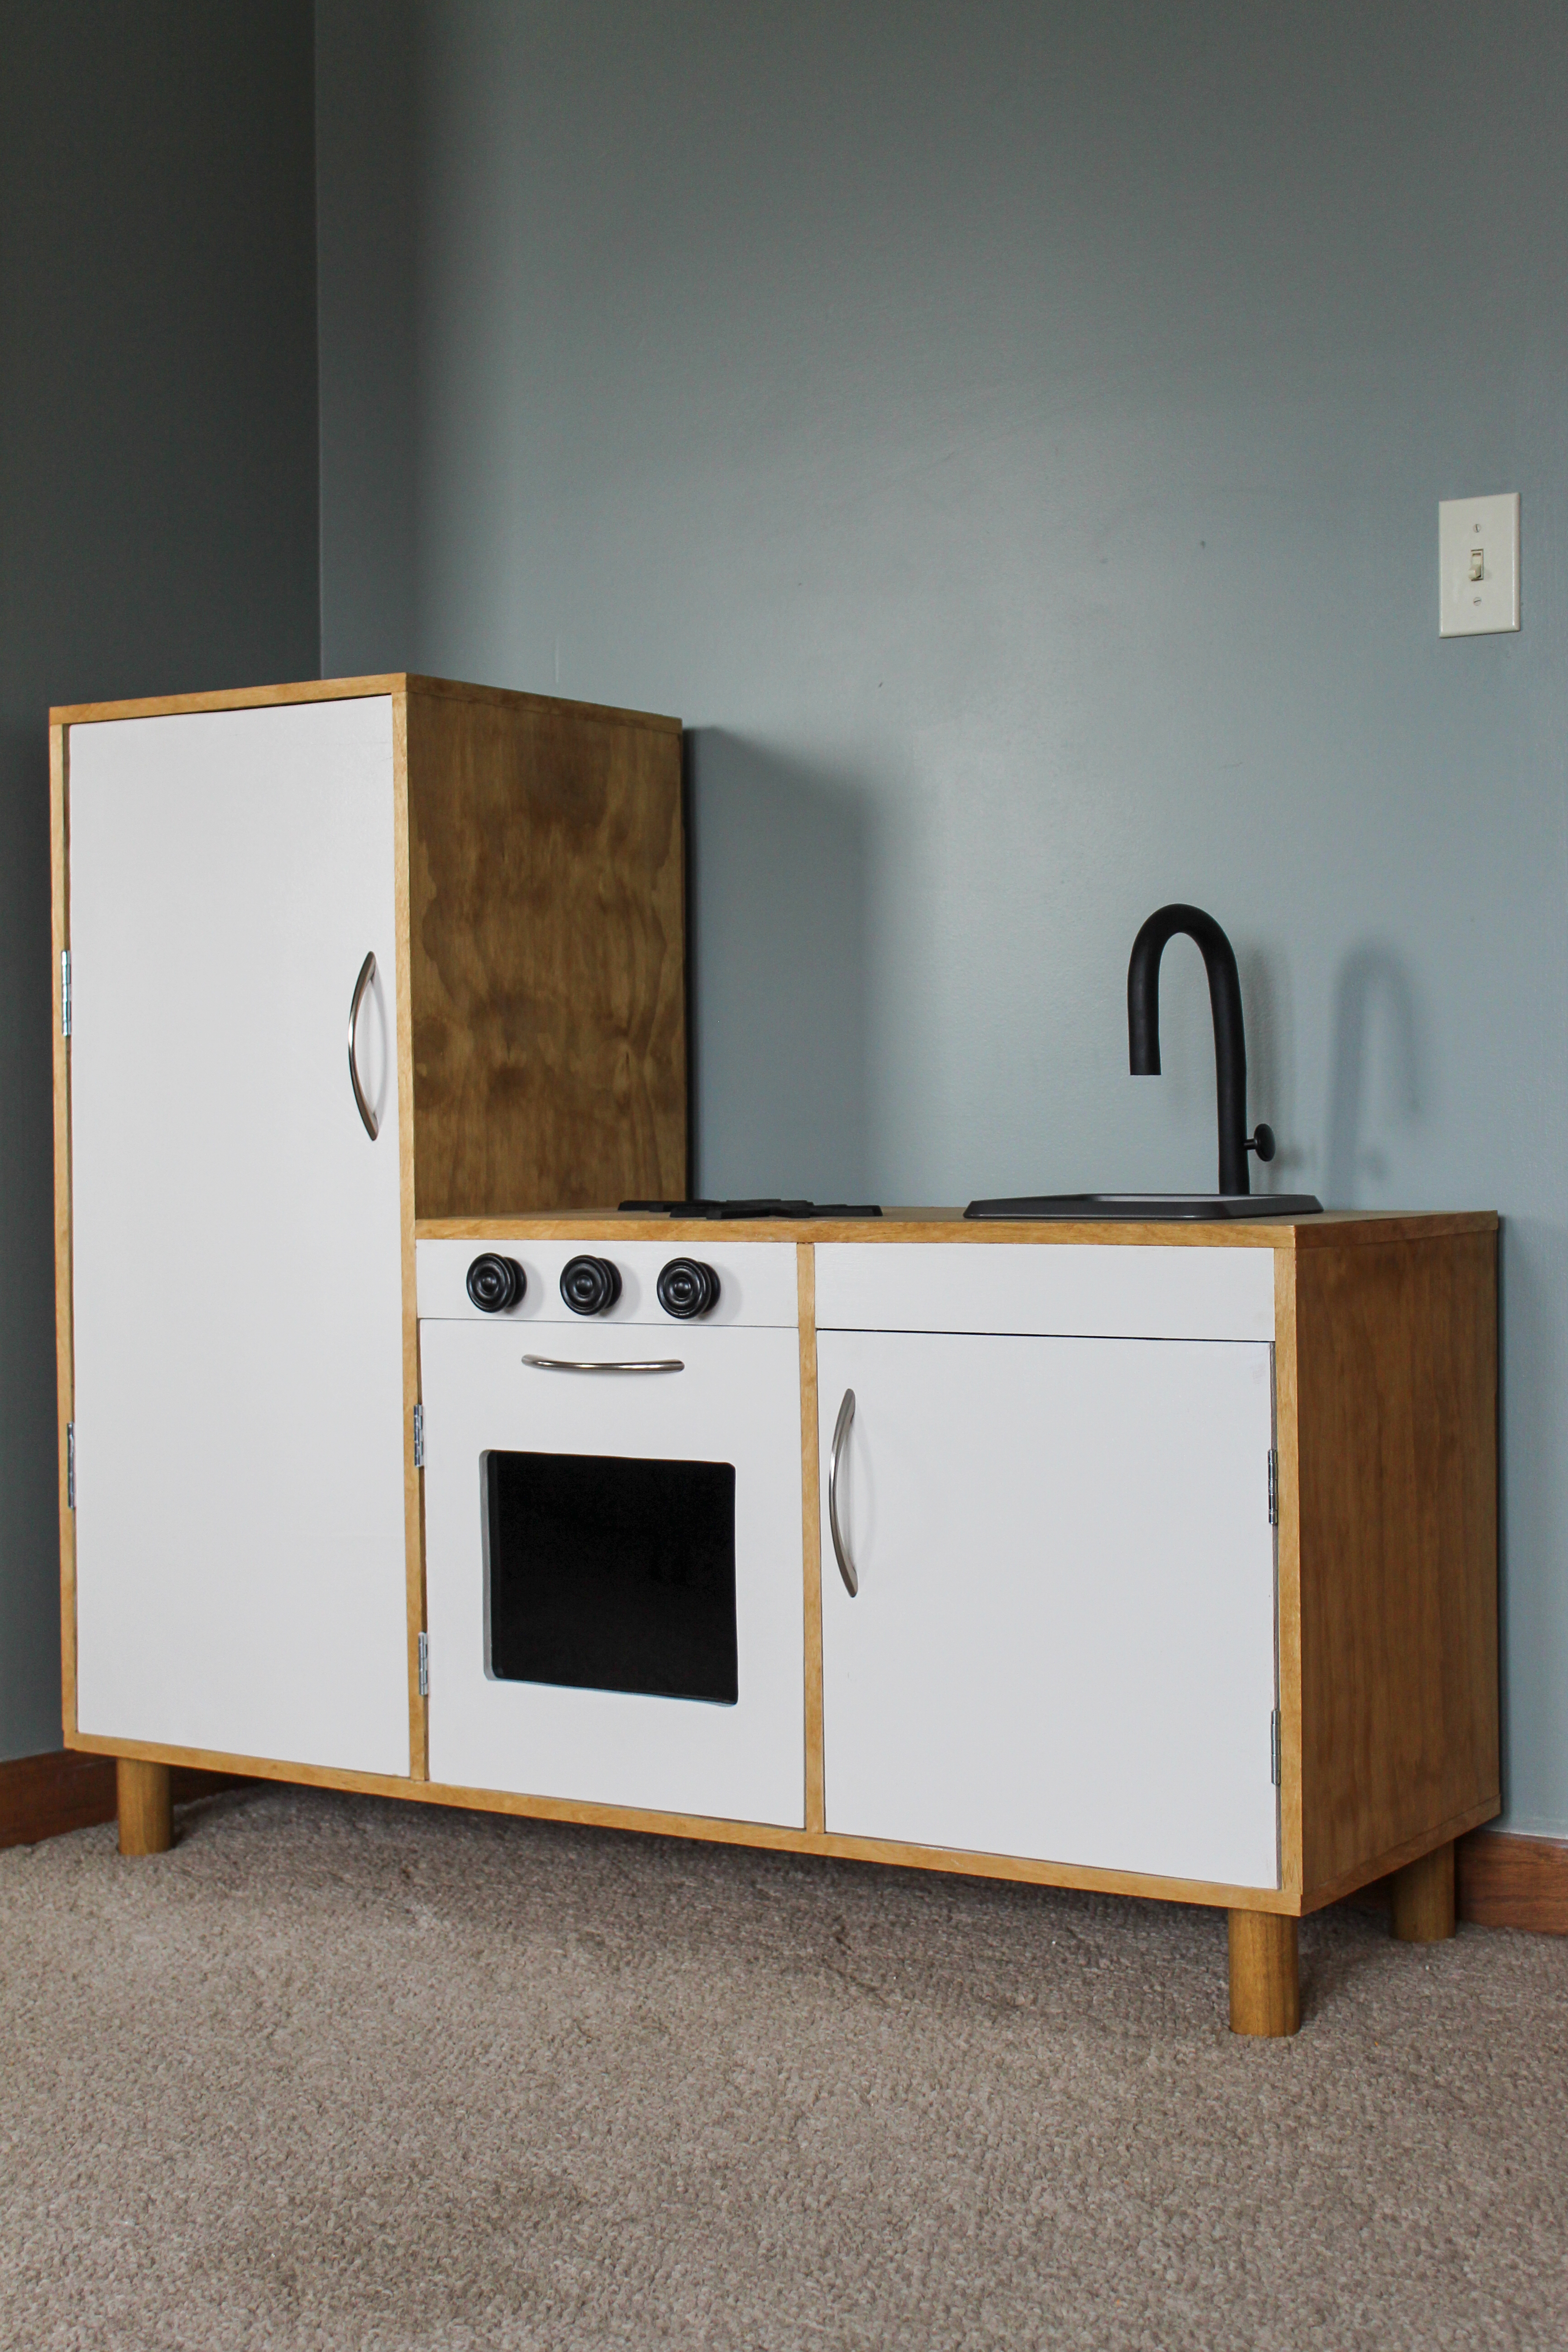
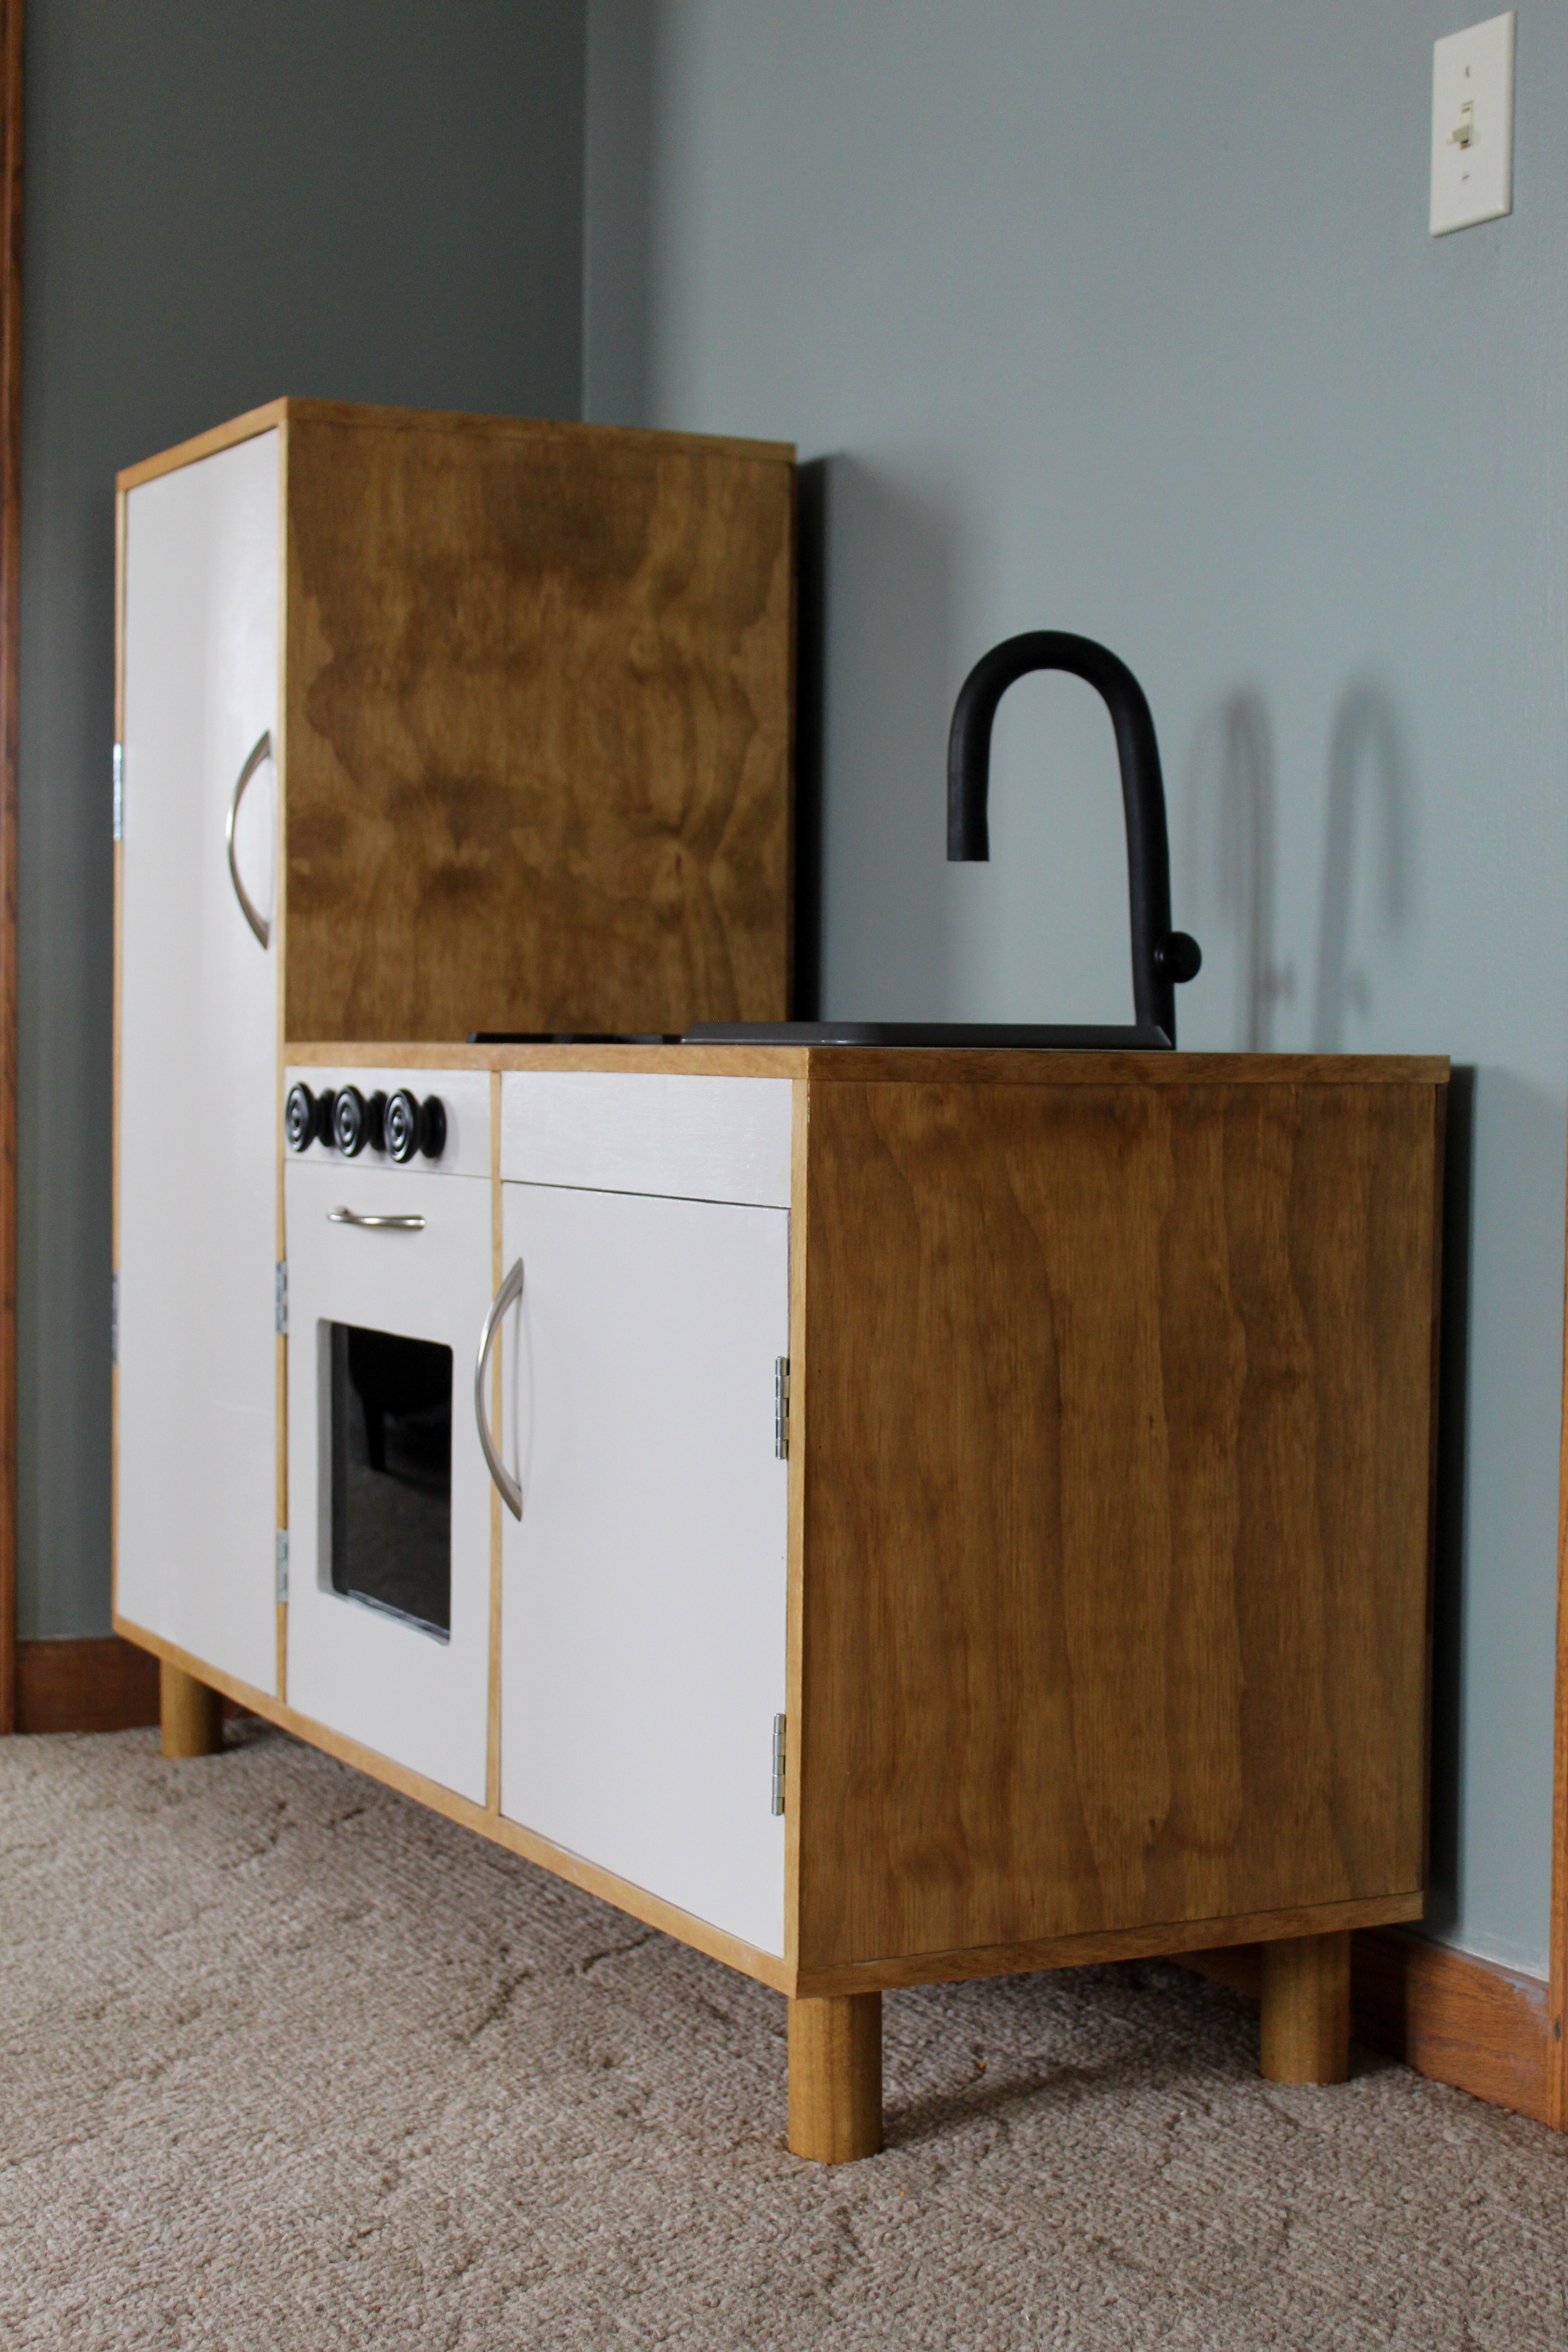
So with that as a starting block, here’s where we ended up!

I’m so incredibly pleased with how this turned out and I can’t wait for our kids to see it tomorrow morning!

If you’re interested in how we created this play kitchen from scratch in just under two weeks, buckle up, because I’ve got all the details below. 😉

How We Created Our DIY Play Kitchen

Materials

-5/8″ width plywood

-1/2″ width plywood

-2″ dowel rod

-3 door handles

-1×3″ board

-6 small door hinges

-5/8″ edge banding

-wood stain

-3 wooden knobs

-3/4″ drain pipe

-8×8 nonstick cake pan

-plastic/plexiglass

-1 small knob

-wood glue

-gorilla glue

-wood stain

-white paint

-black spray paint

Tools we used included: miter saw, nail gun, circular saw, drill press, jig saw, and kreg jig. We also used a few pieces of scrap wood throughout the project.

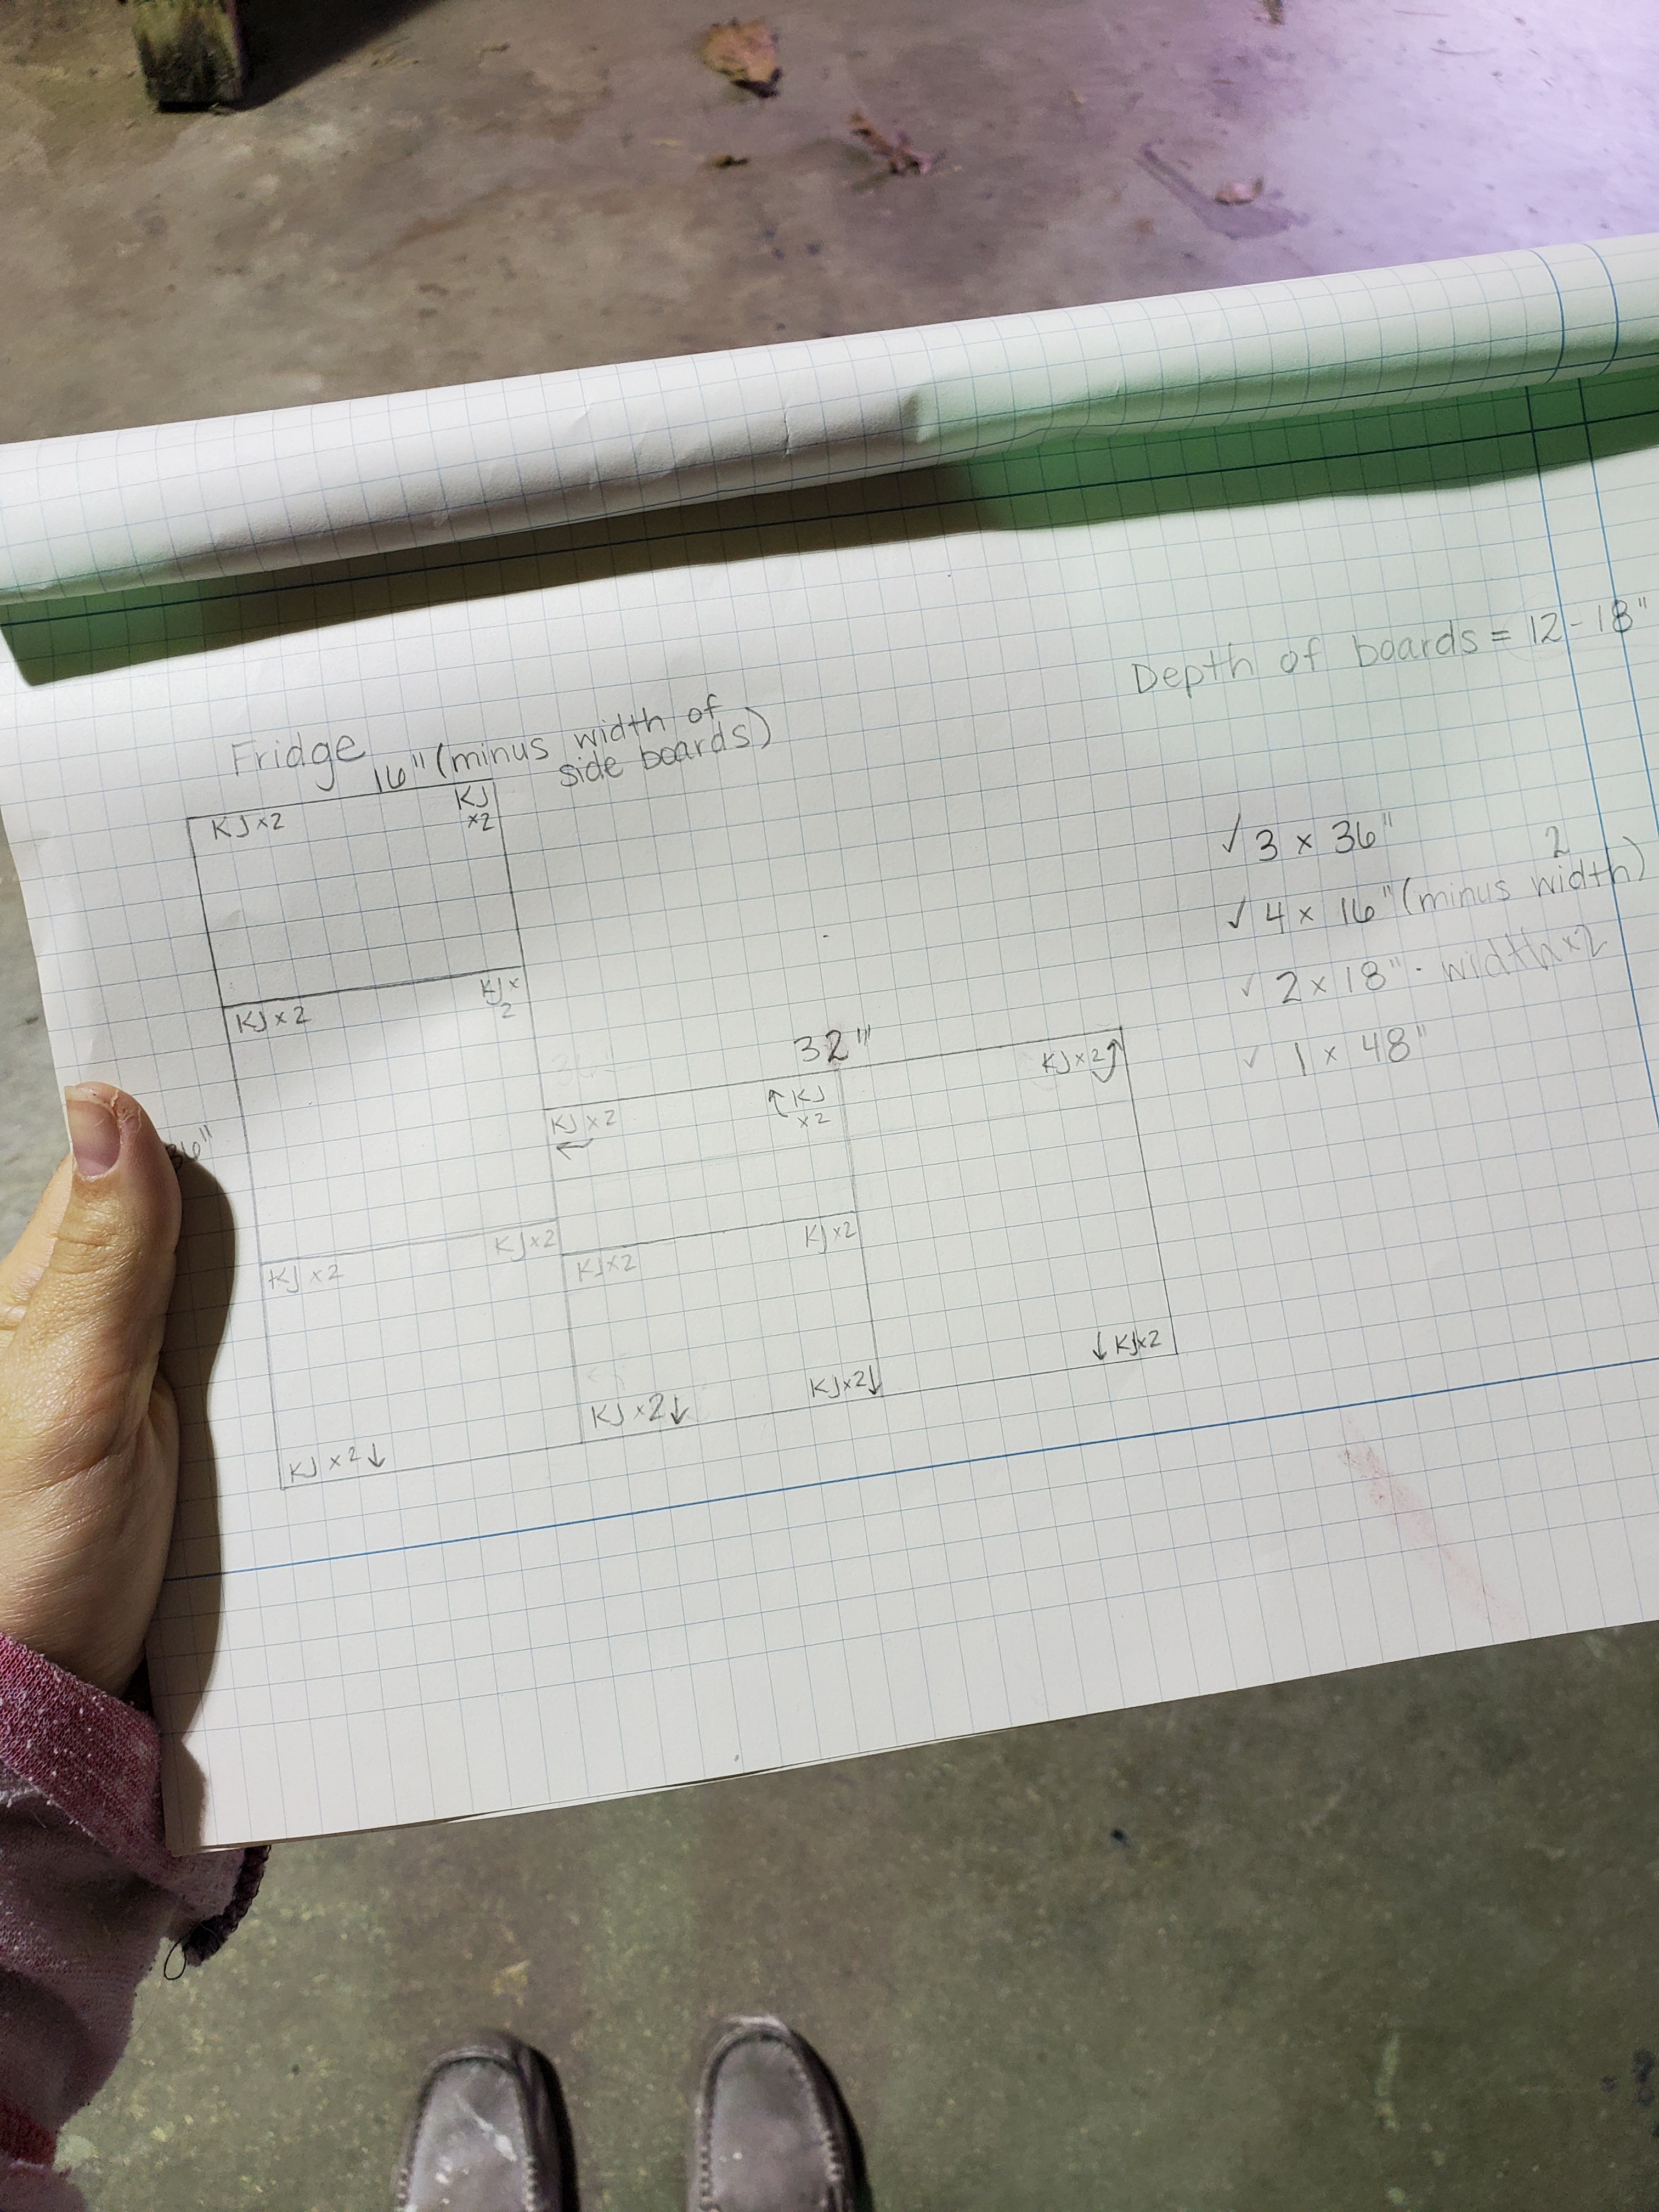
We started out with a simple outline I drew up. The nice thing about building from scratch is that I could choose exactly the dimensions that would work for our space. I decided on 36″ high and 48″ wide (divided equally to make the fridge, stove, and sink each 16″ wide).

I highly highly recommend sketching up as much as you can beforehand; it helps you visualize what steps you need to take to make everything and also what materials you’re going to need. Below you can see how I sketched out the frame and all the shelves and marked where all the kreg jigs (KJ) would go. On the right you can see where I calculated how many pieces of each length of board I would need. This didn’t take long to sketch up, but was really helpful in calculating materials and forming a plan of attack.

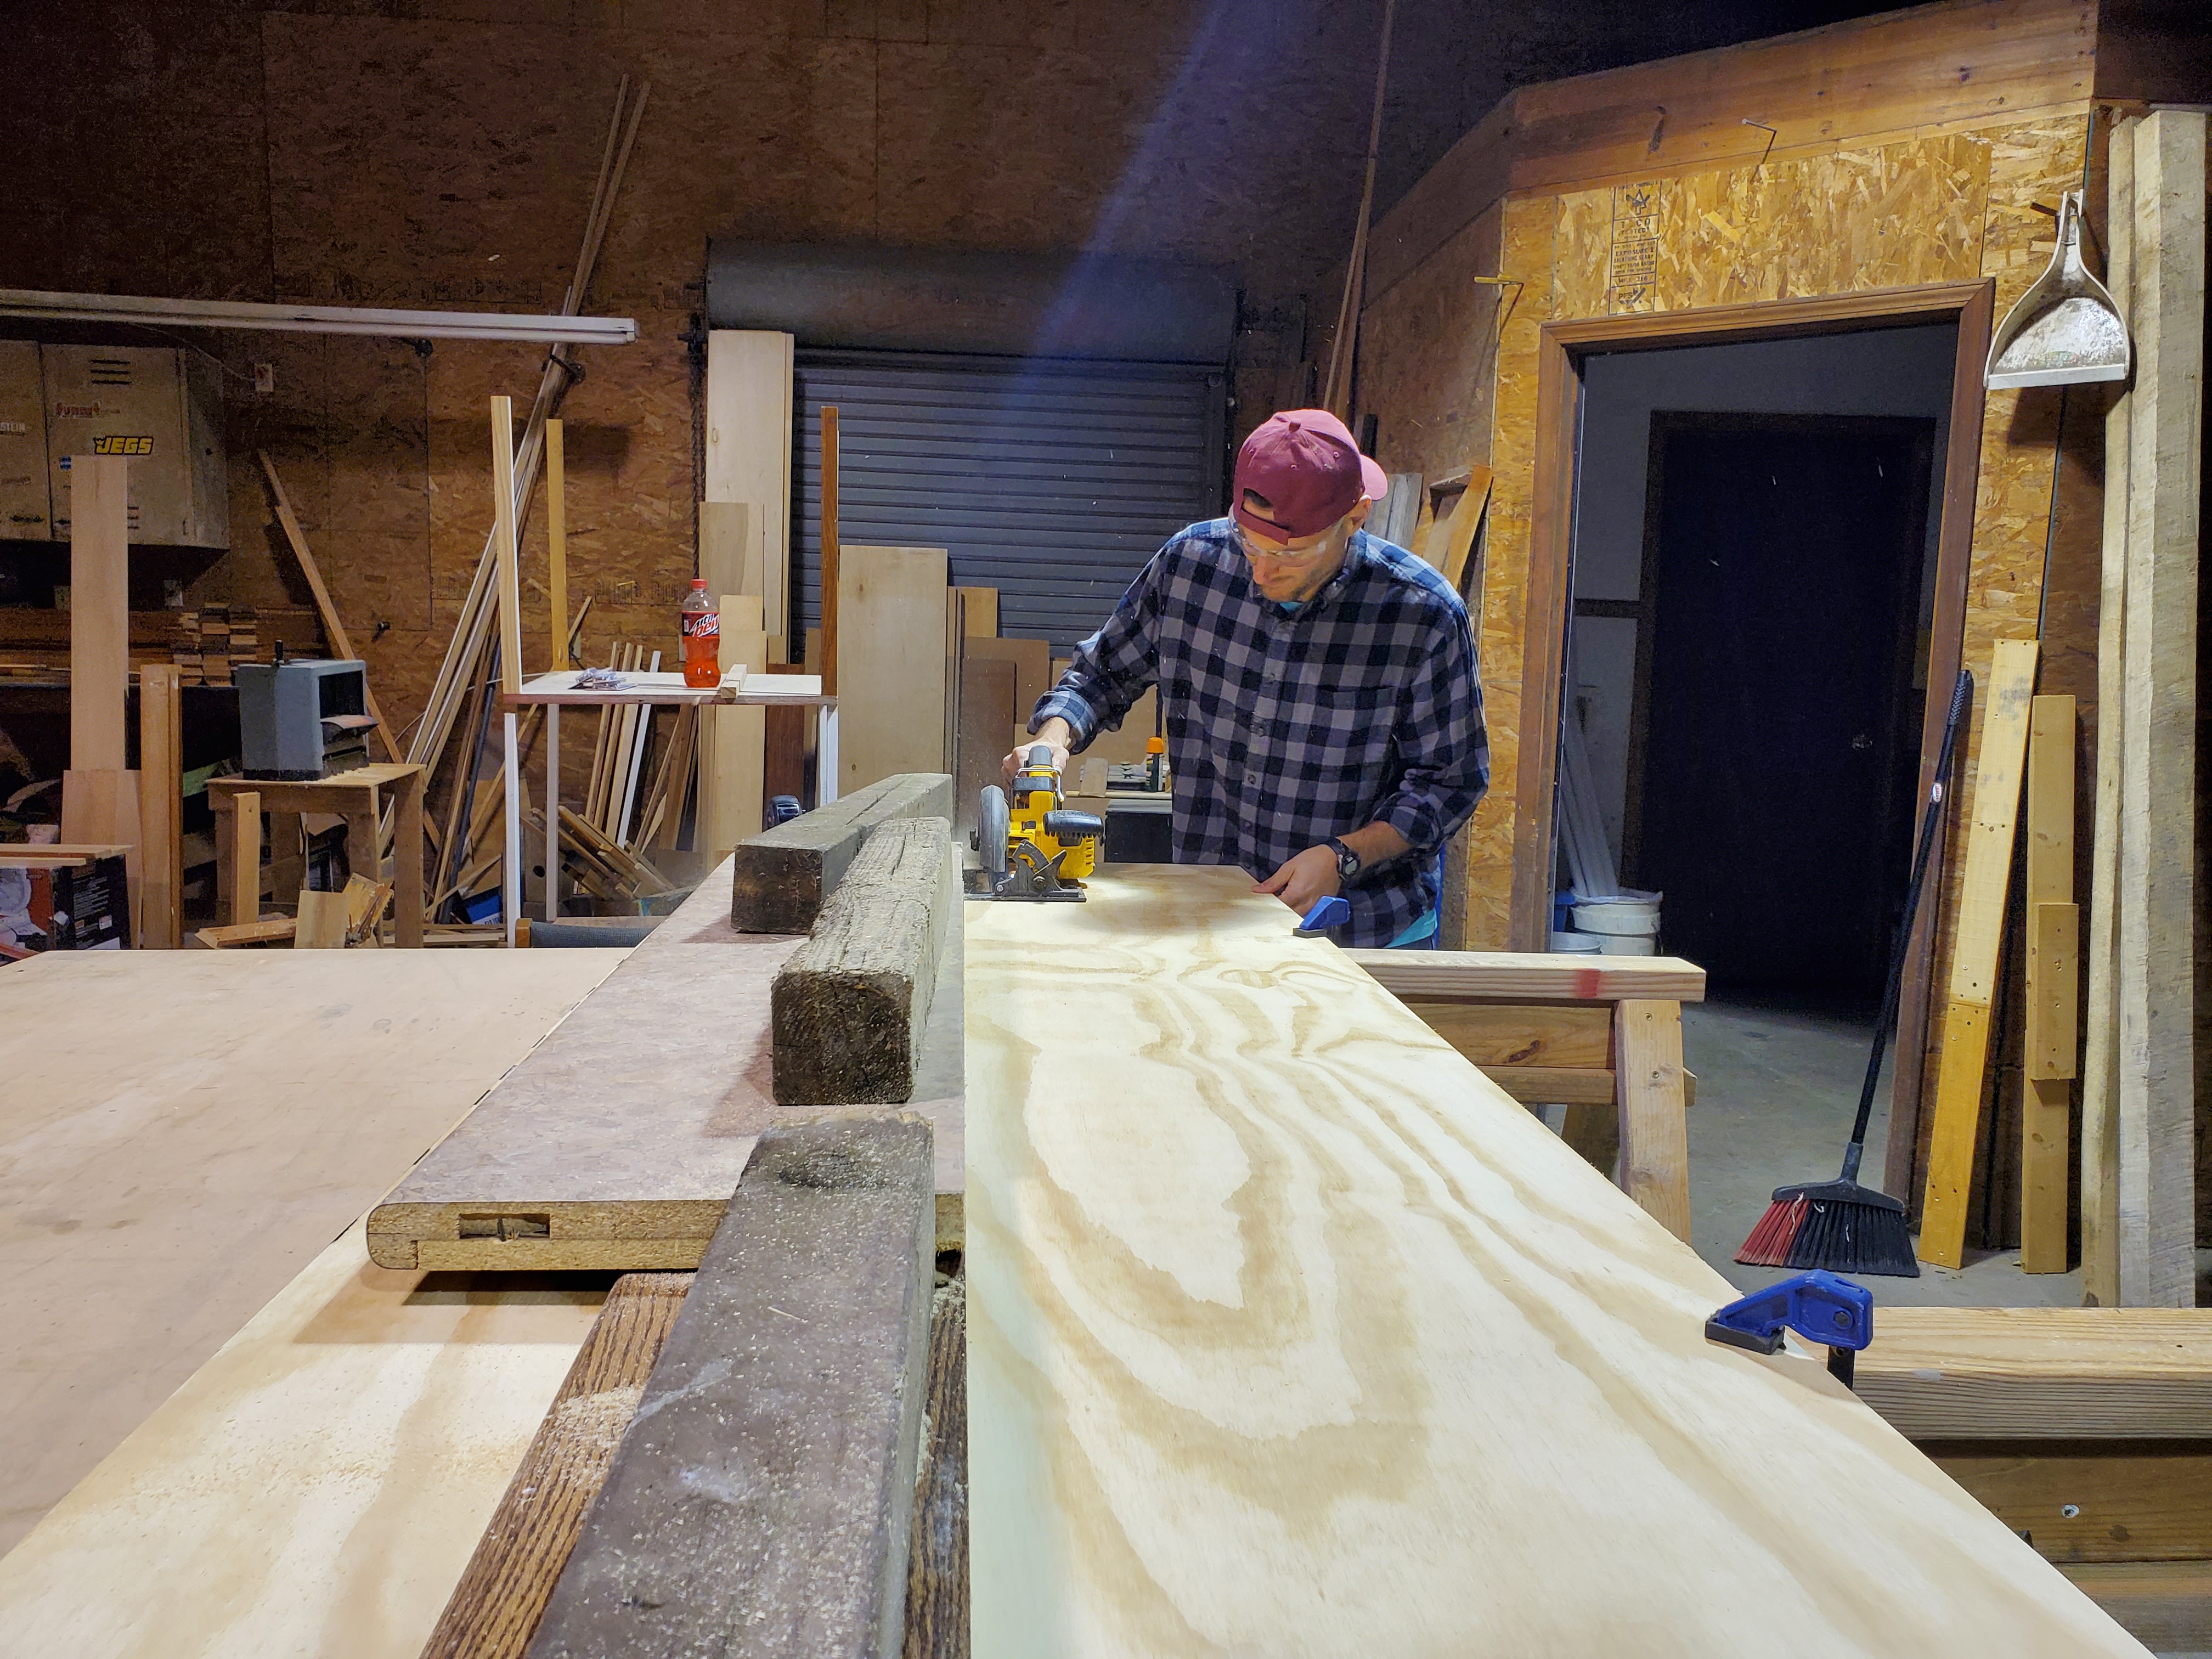
We started with a sheet of plywood in a 5/8″ width. The sheets are 4’x 8′ and because of my sketches and planning, I knew that we could make the entire frame out of one sheet. Justin set up a guide using a long piece of oak to make a super straight cut and piled a few pieces of old laminate and scrap wood to add weight to make sure the plywood didn’t bow at all.

He used a circular saw to the sheet of plywood into three equal strips – because the width of the saw blade takes away a fraction with each pass, these strips ended up being just under 16″ wide. Then he used his miter saw to cut each strip into the lengths we needed.

Justin started out by building the frame of each section, using kreg jigs to connect each of the pieces together. He also used wood glue and clamps in a few places to make the frame extra secure. (Also, I always feel like I need to preface pictures in our garage by saying we’re not really Nascar fans haha. That sign is leftover from the previous owners and we just never took it down).

After the frame was finished, Justin cut down an old piece of 1/4″ thick plywood to create the backing.

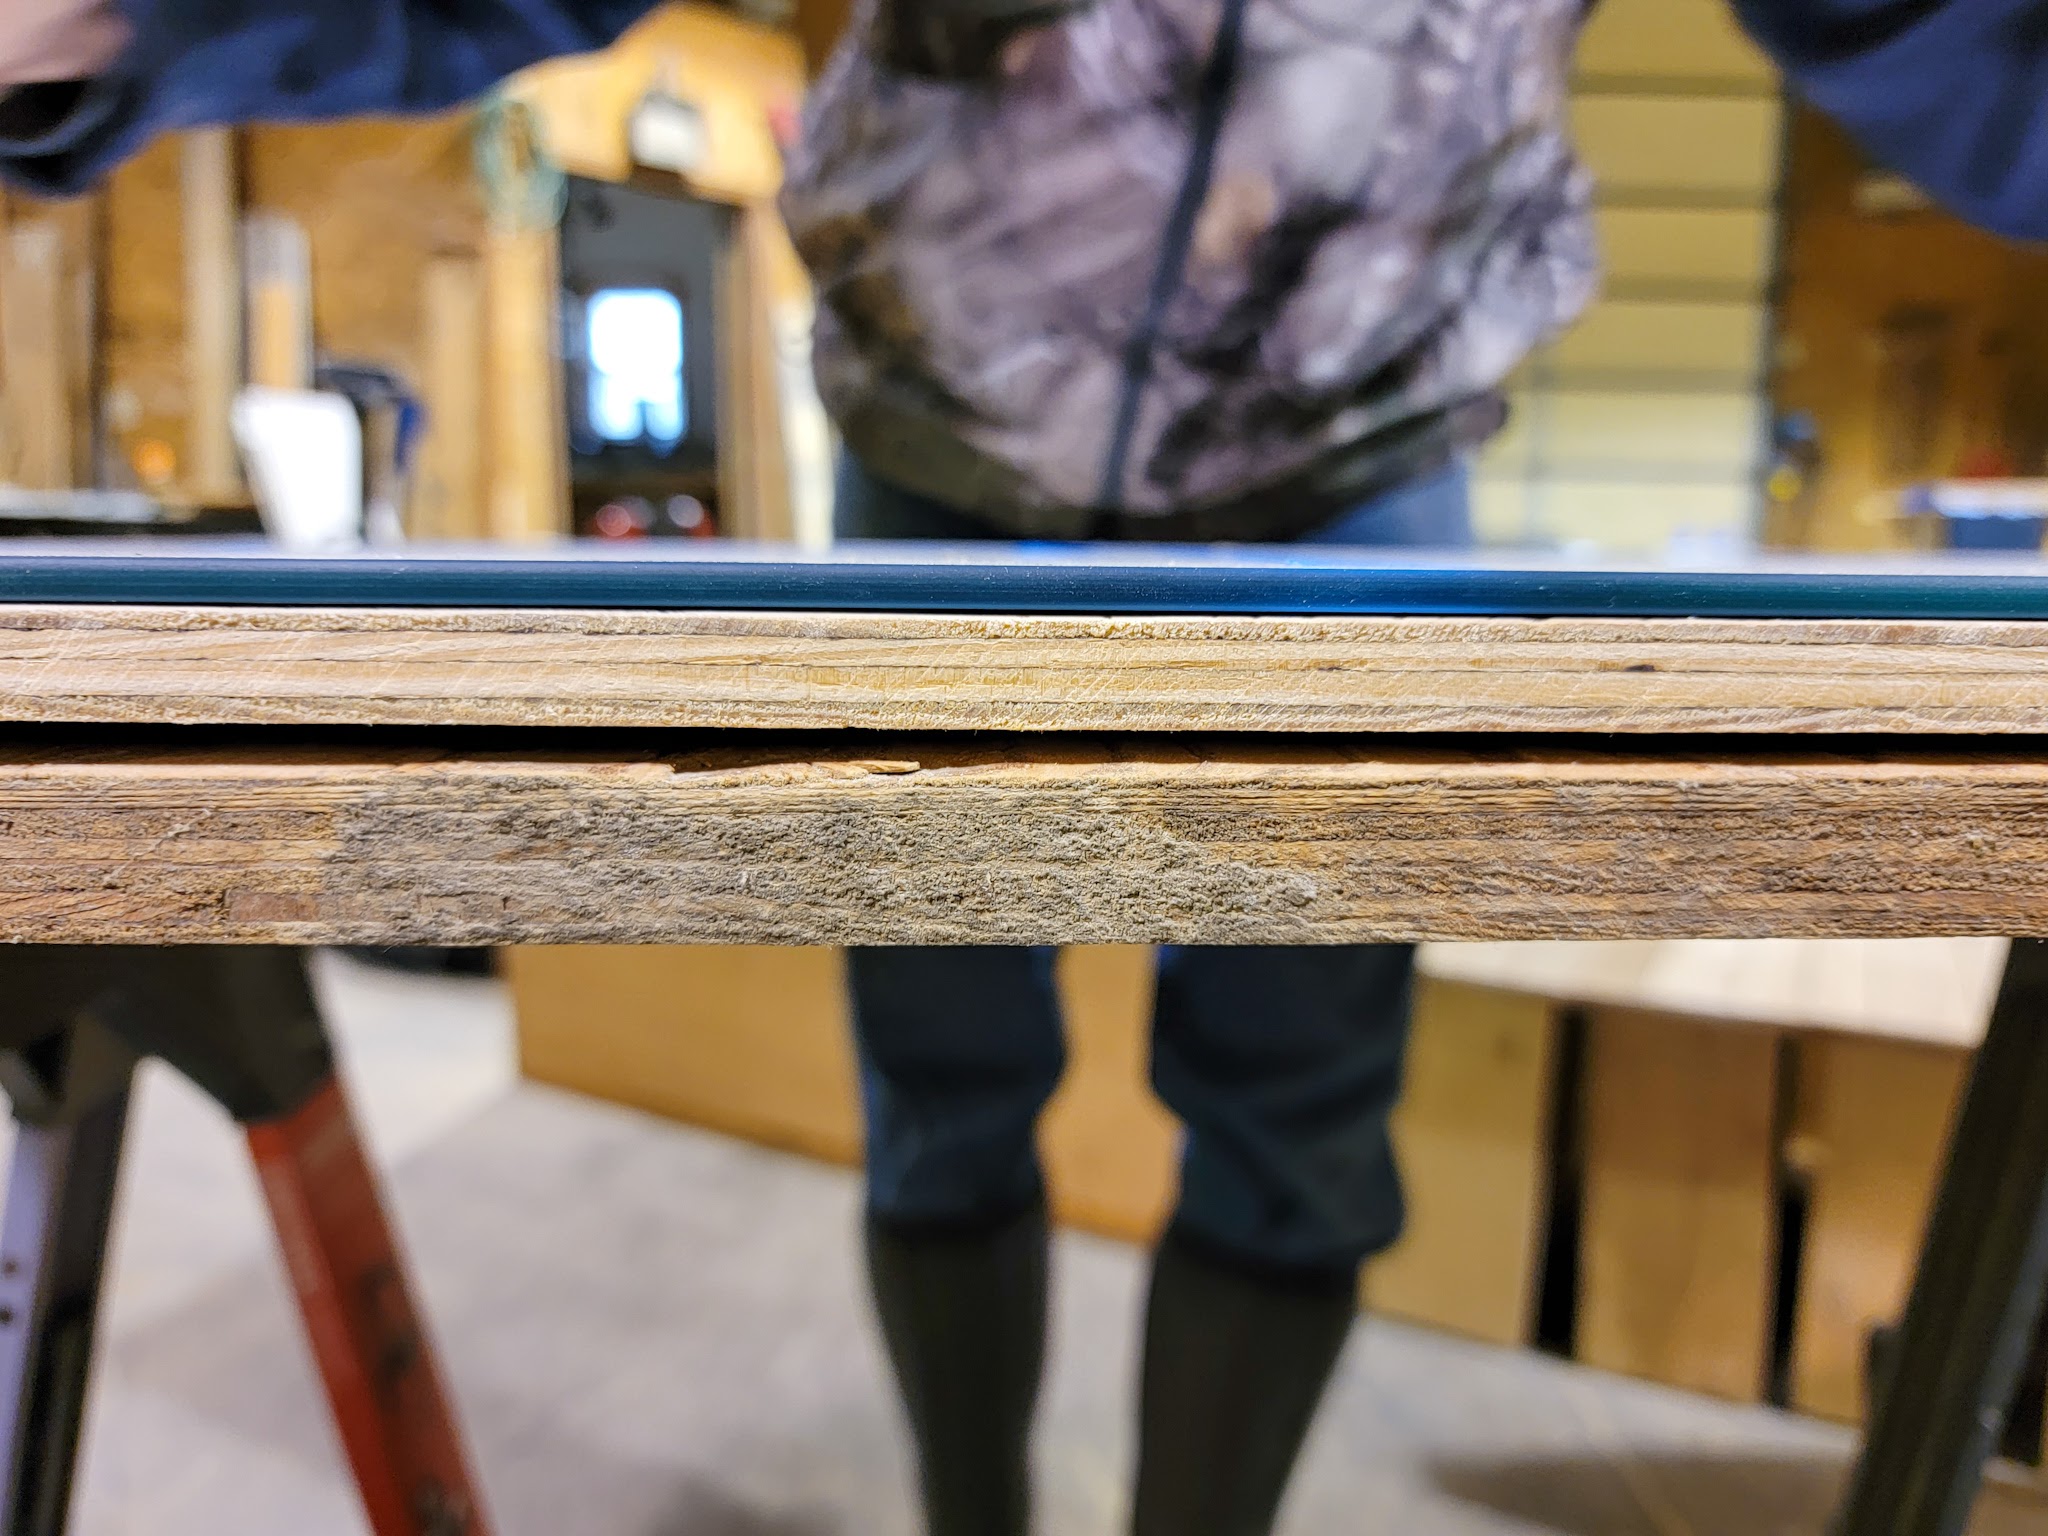
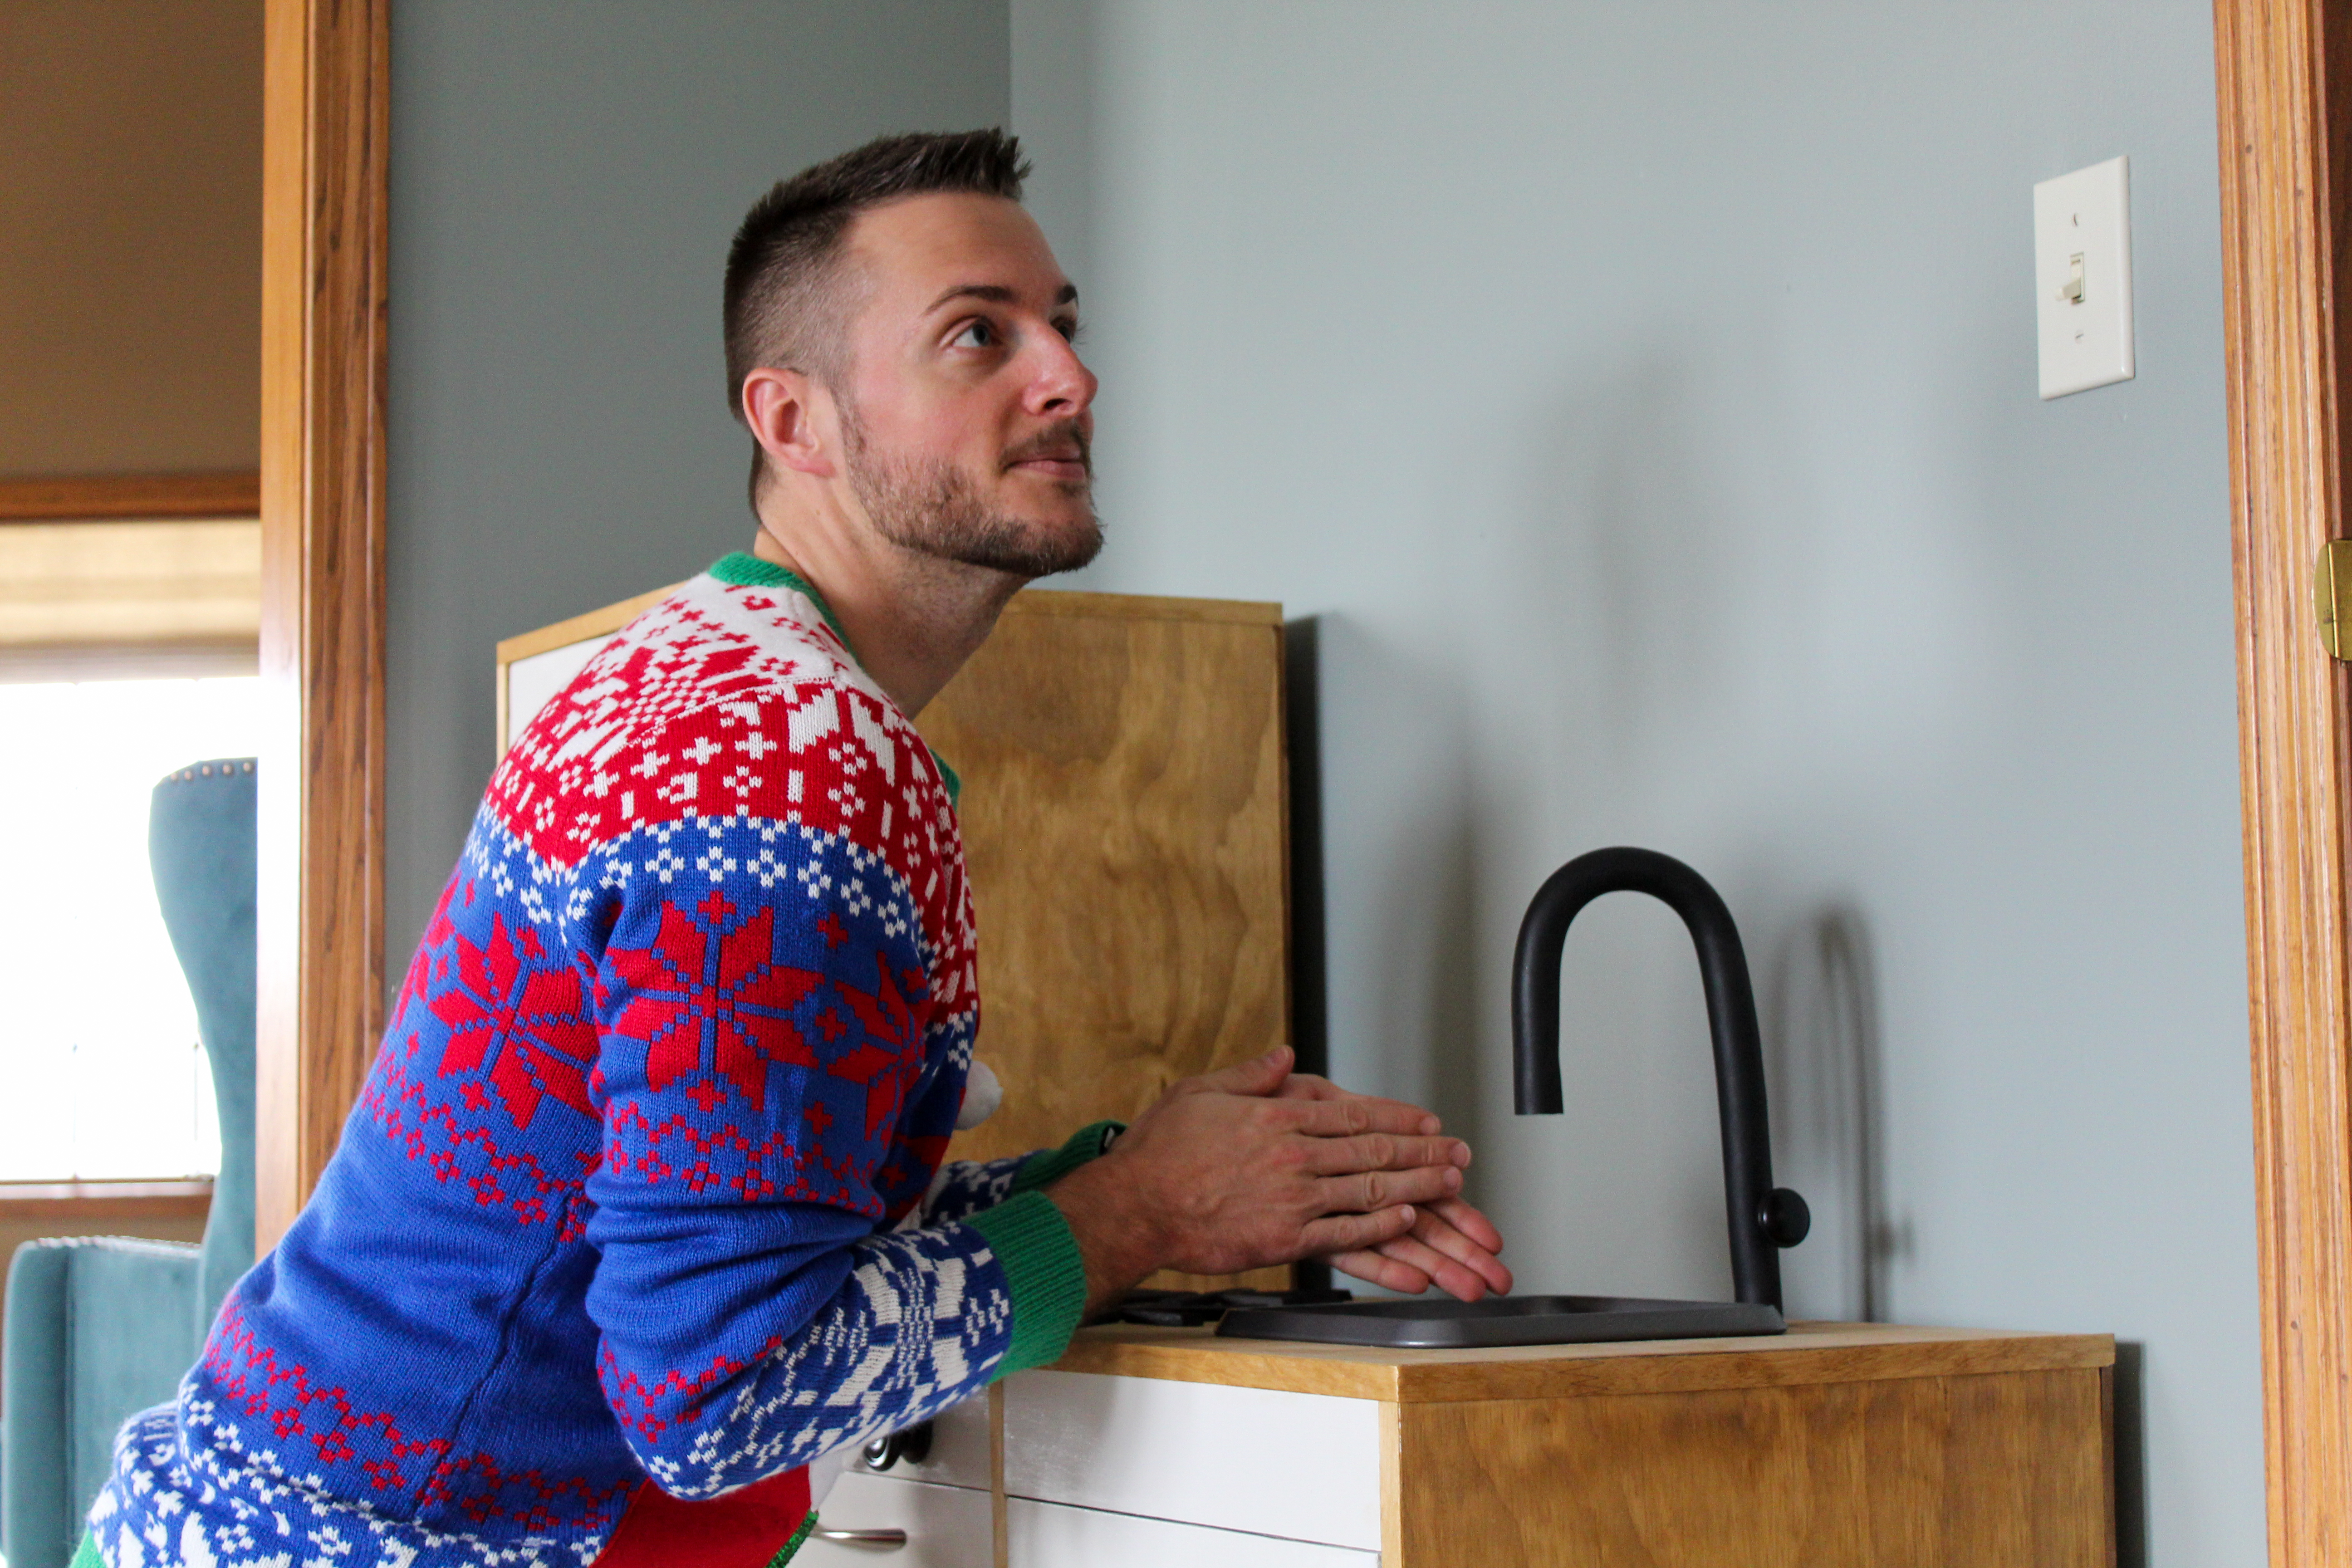
He attached this plywood to the back of the frame with a nail gun. (Can we take a moment to appreciate the outfit? 😉 It was COLD in that barn!)

Justin also cut down a scrap 1×3 and attached it underneath the “countertop” in the sink and oven sections using another kreg jig. I needed this piece so I had a space to attach oven knobs, and it just visually made sense to also have one in the sink section as well.

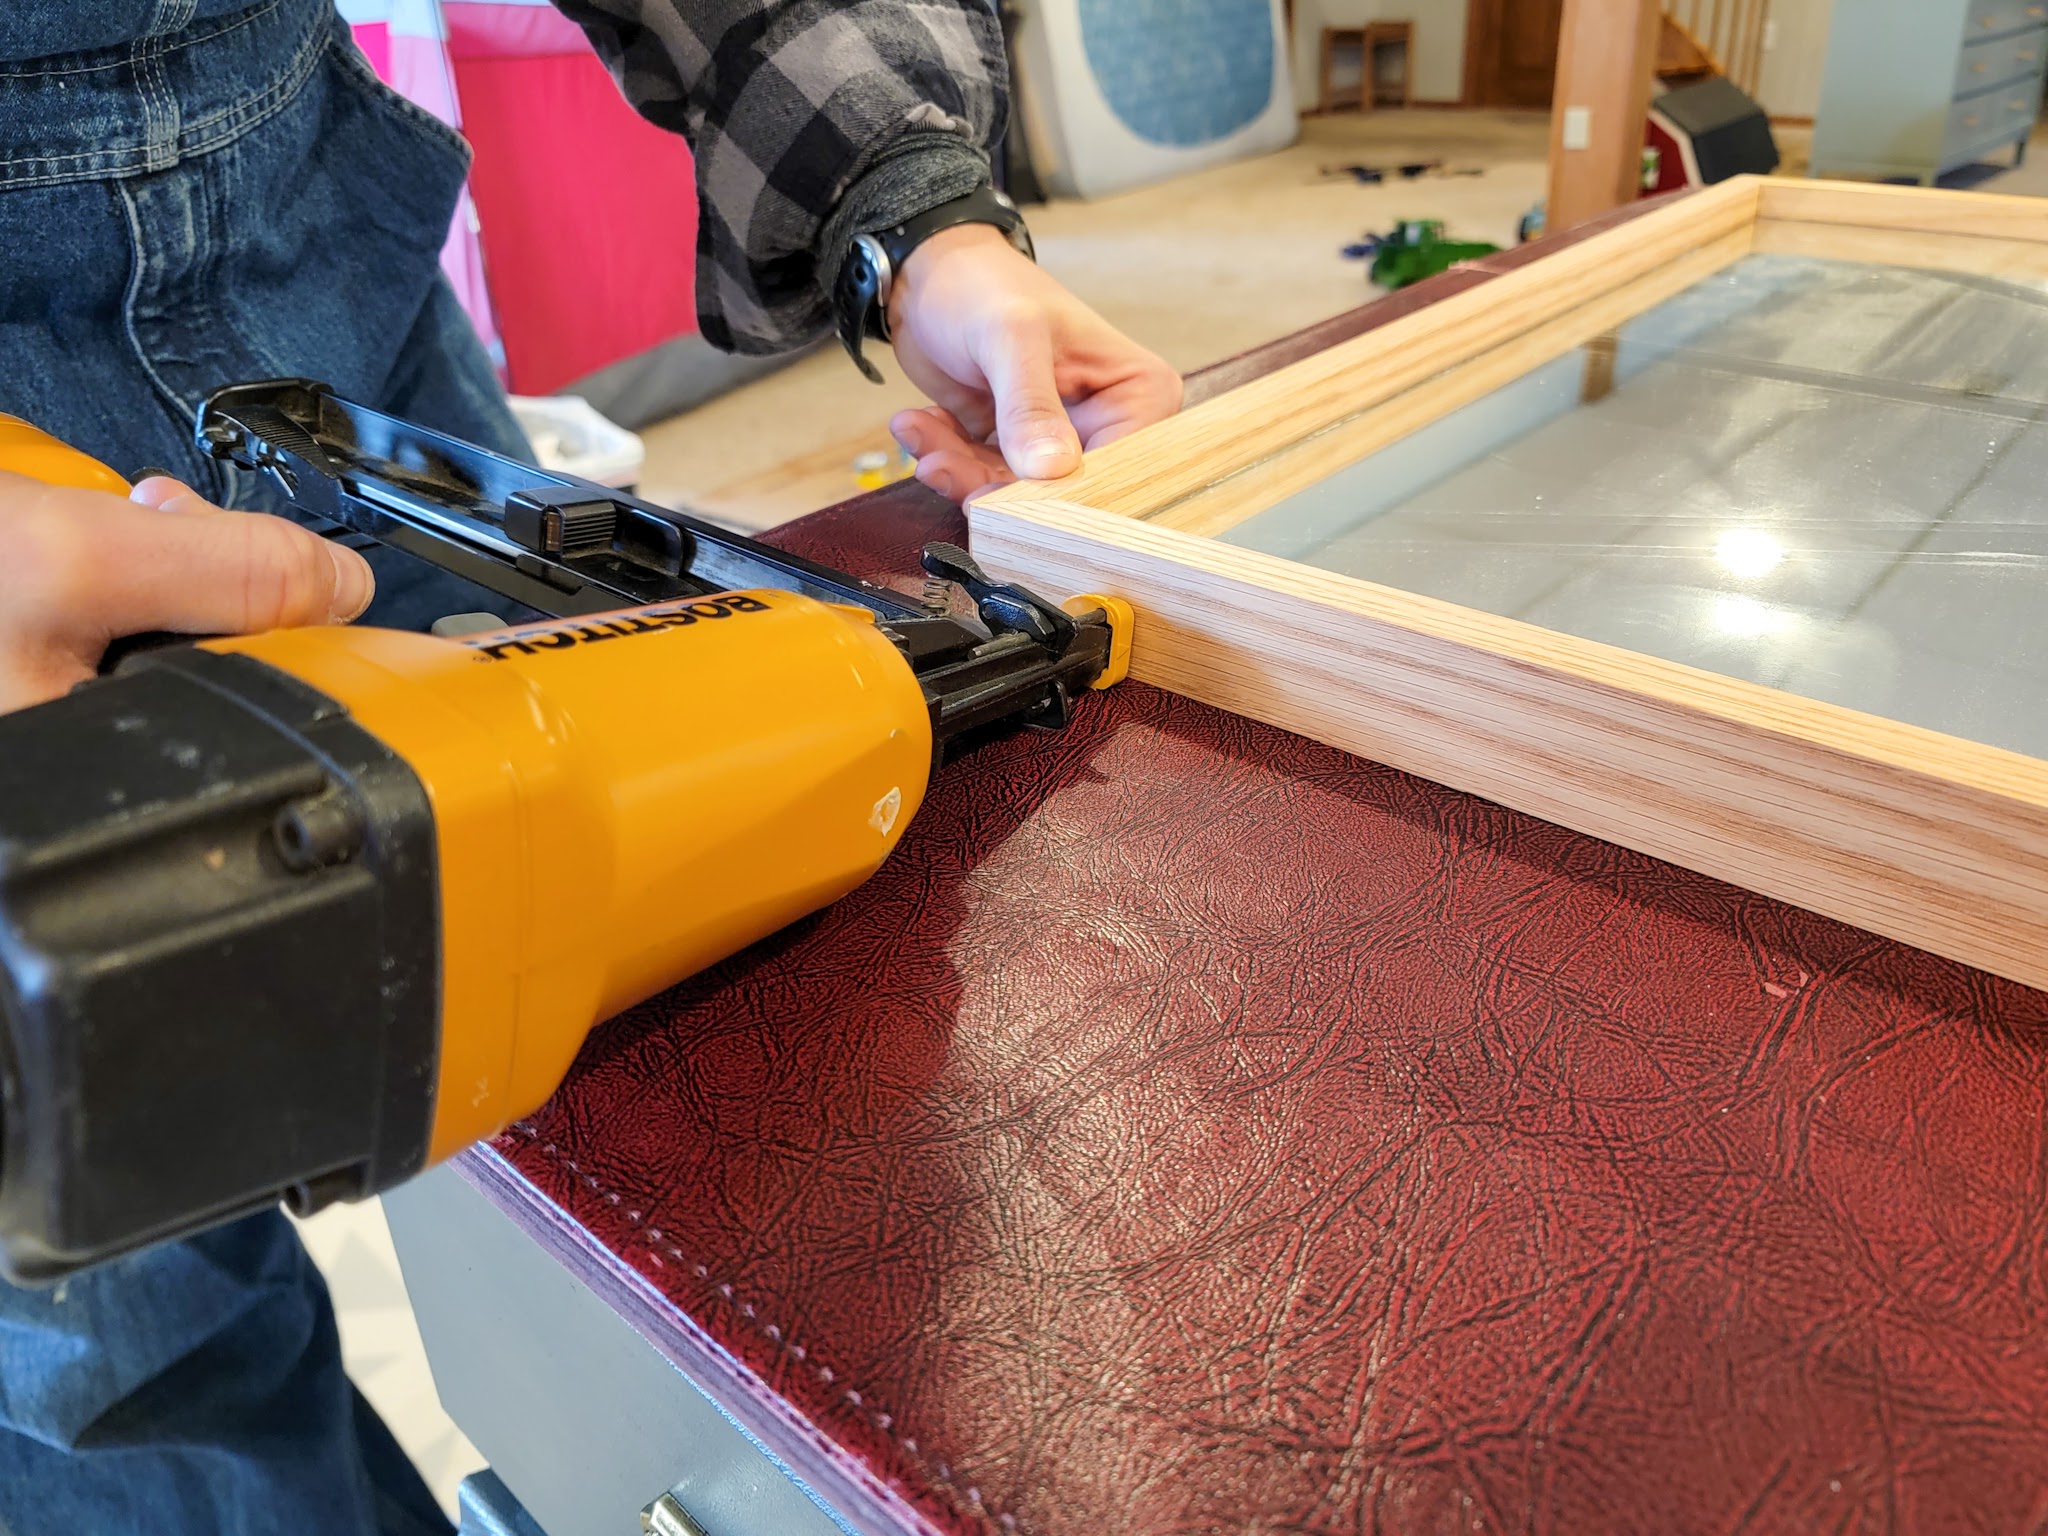
Next up was the shelves! Originally we thought we’d atttach these with more kreg jigs, but instead Justin just cut each shelf down to size and attached them with a nail gun.

Notice that he specifically cut the shelves so that they stopped short of the front edge – this is to accommodate the width of the door so the doors could be inset (flush with the sides).

After all the shelves were in place, we moved on to the legs. Justin bought a 2″ diameter dowel rod and cut it down into four 4″ long pieces. He measured out the center of each dowel rod and used a drill press to predrill a hole in the center of each one.

We marked out where each leg was going to go and Justin predrilled a hole in where each one was going to go.

It’s possibly overkill, but we used 3″ screws to attach the legs. We wanted them to be very secure and this definitely did the trick!

For the doors, Justin used a 1/2″ sheet of plywood to cut each size we needed. Because that width is hard to attach hinges to, he cut down a piece of scrap wood and screwed a small block to the door so he had a place to attach the hinge. If you want to avoid this extra step, you can just use a wider board to make the door.

With the frame, shelves, legs, and doors in place, it was my turn! I used my favorite Kilz primer on the doors and then painted two coats of Sherwin Williams Dot to Dot in Satin. I had this paint leftover from a previous project and it worked perfectly!

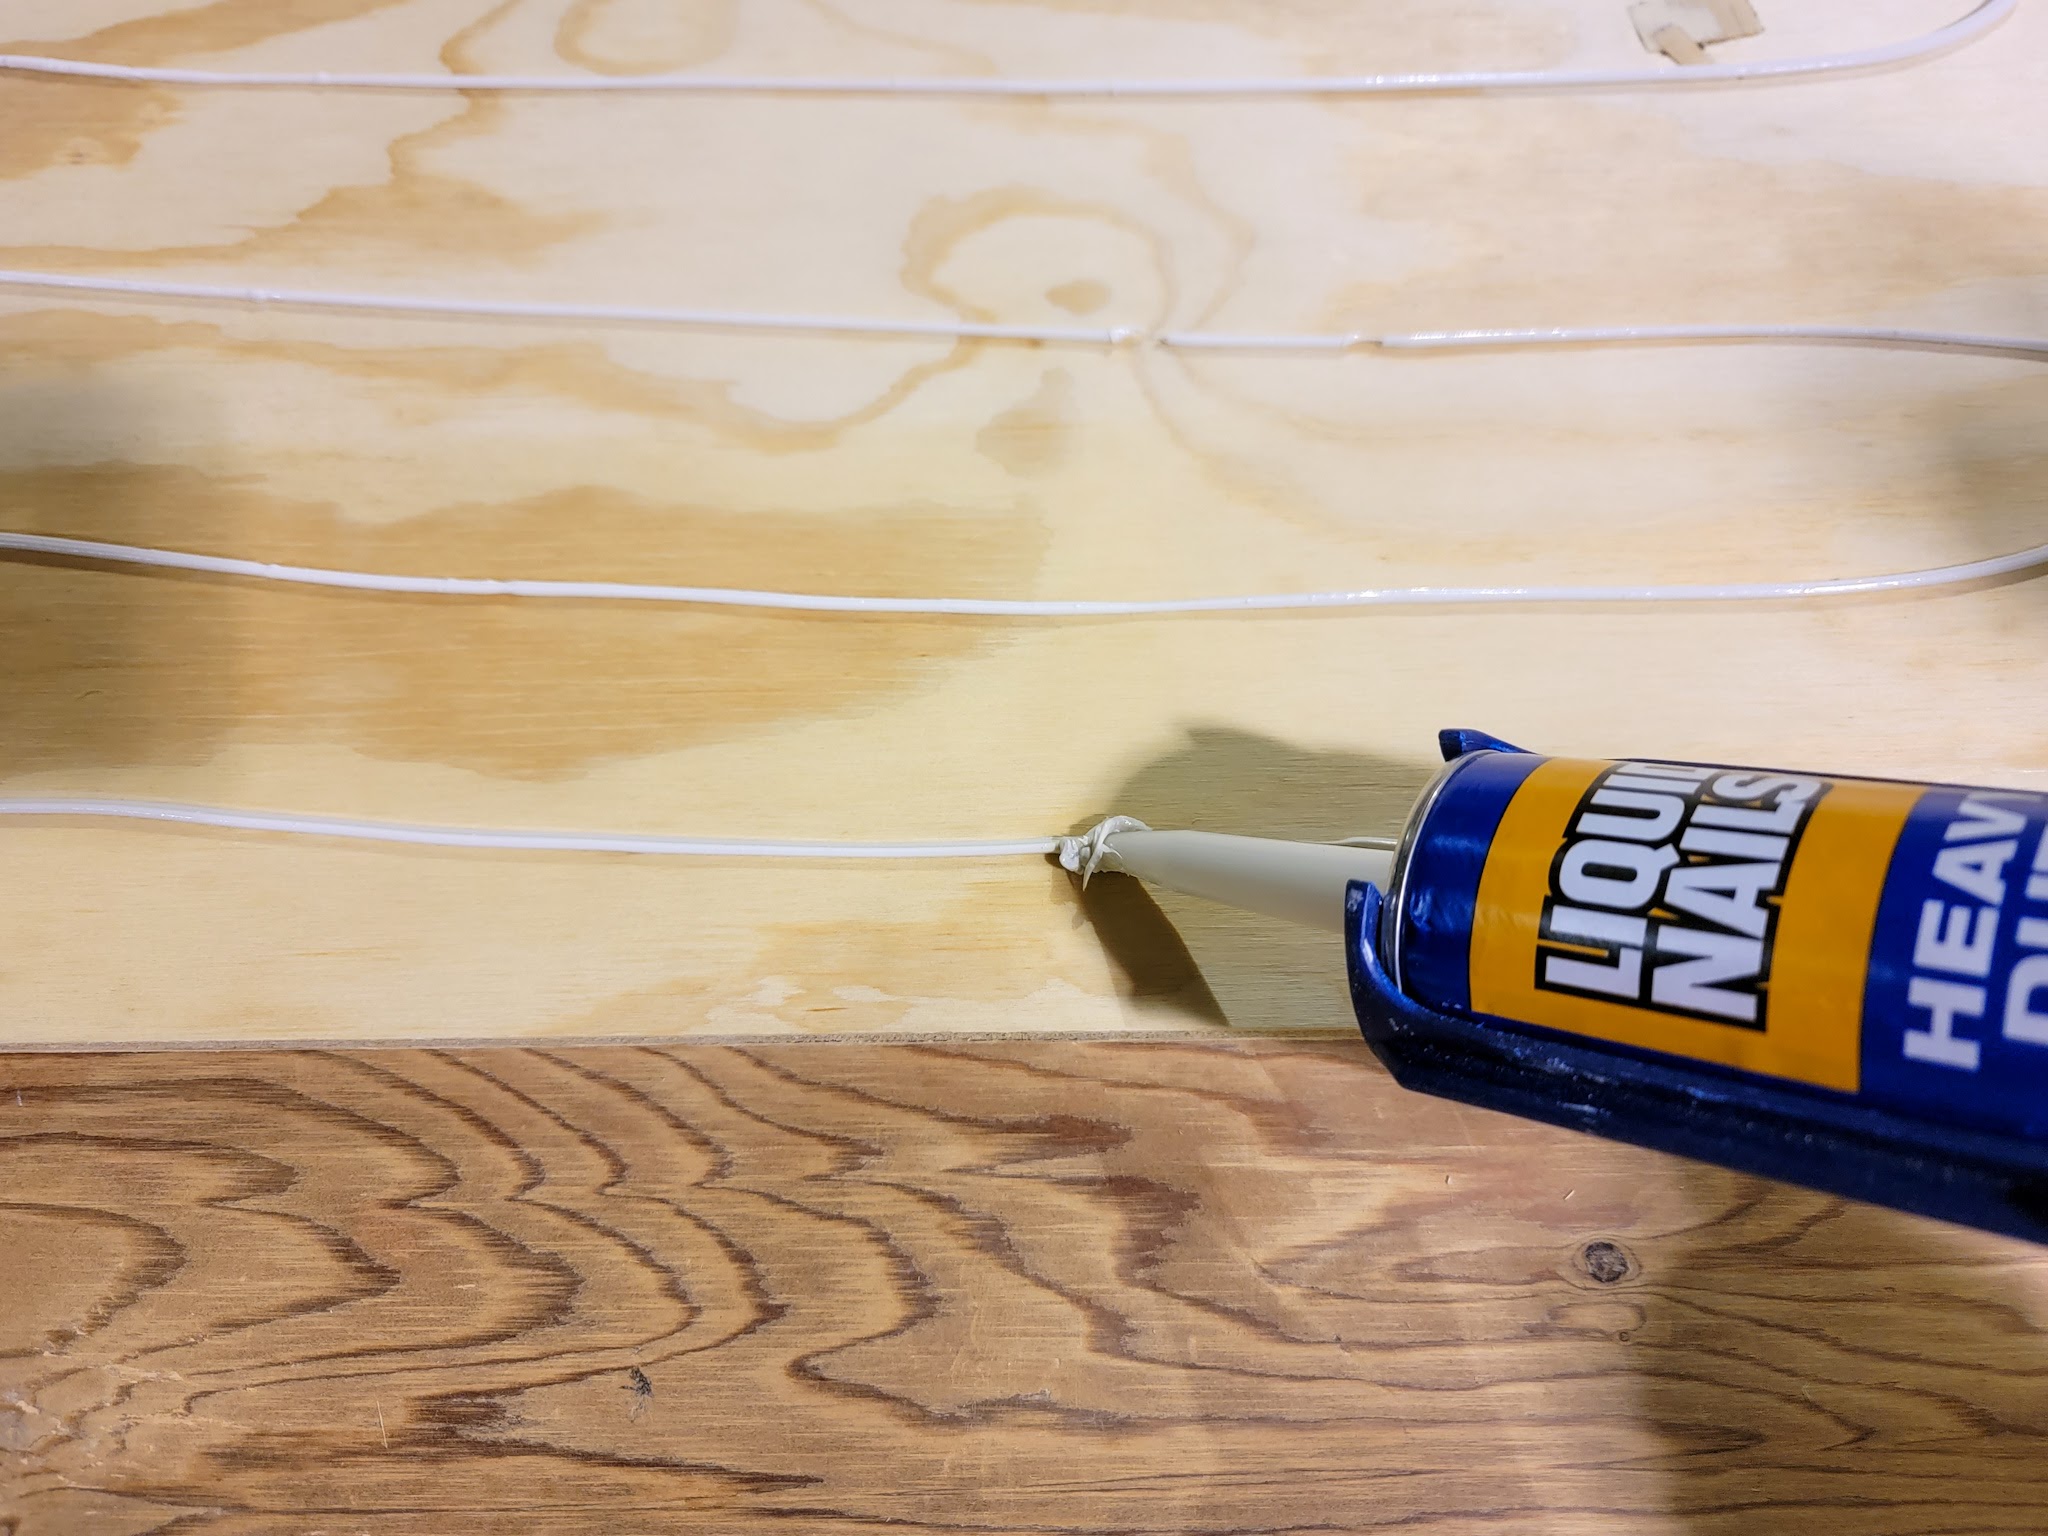
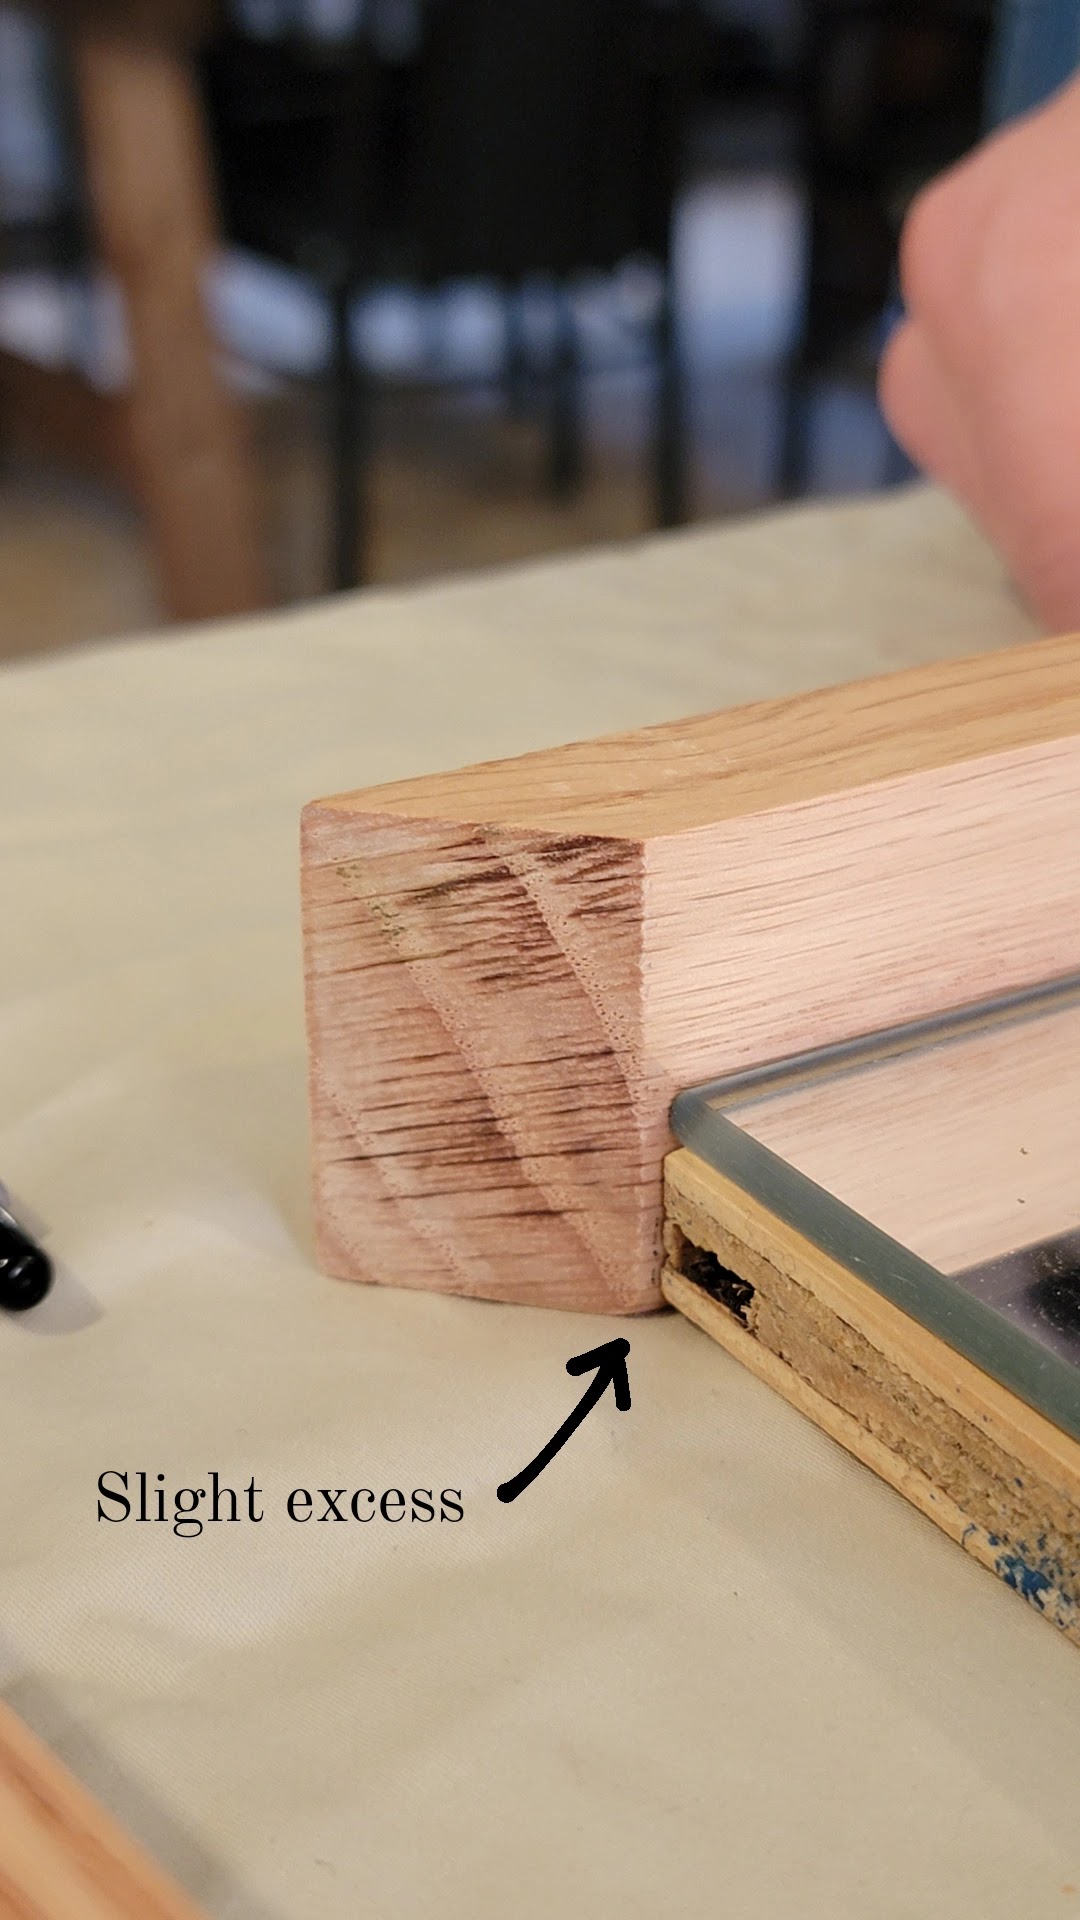
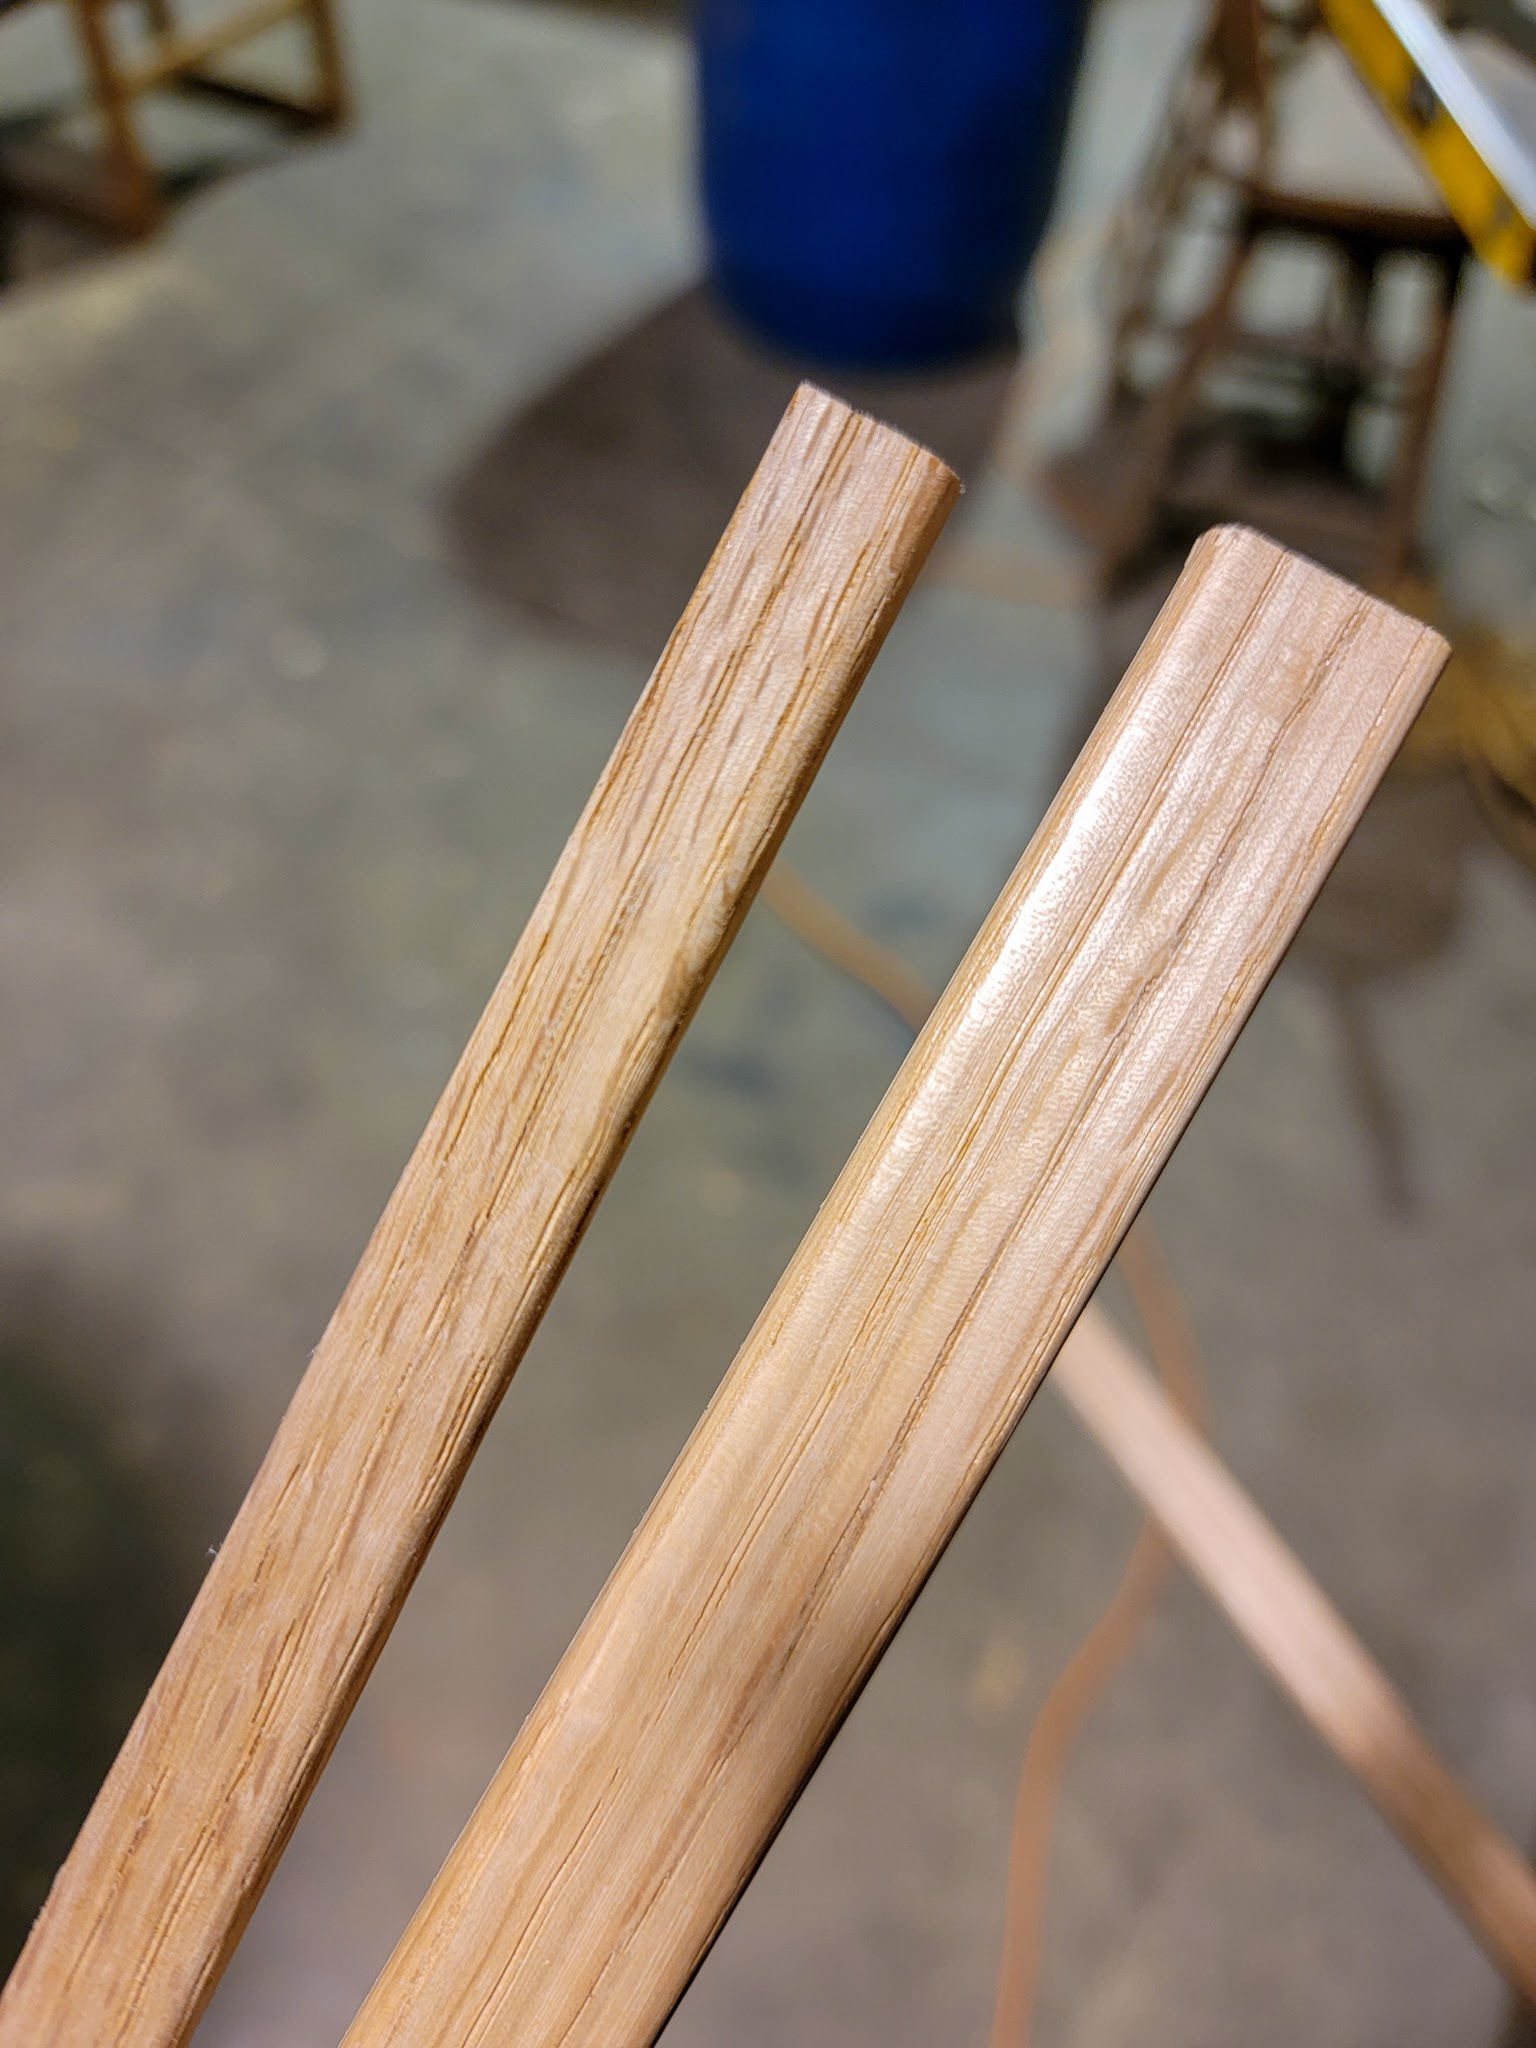
Next up was to put edge banding on all the front-facing plywood boards. I appreciate the lightweight nature and inexpensive cost of plywood, but not the look haha! I bought this 5/8″ edge banding to create the look of a solid piece of wood. It comes with a dried adhesive on the back that is heat activated. I heated up an iron to the “cotton” setting (a fairly high heat), held my edge banding in place against the side of the plywood, and ran the iron over it to activate the glue. I worked in roughly 4-6 inch sections and ran the iron back and forth over each section for about 20 seconds or so. It was a slower process, but look at the difference it made on the left vs. right!

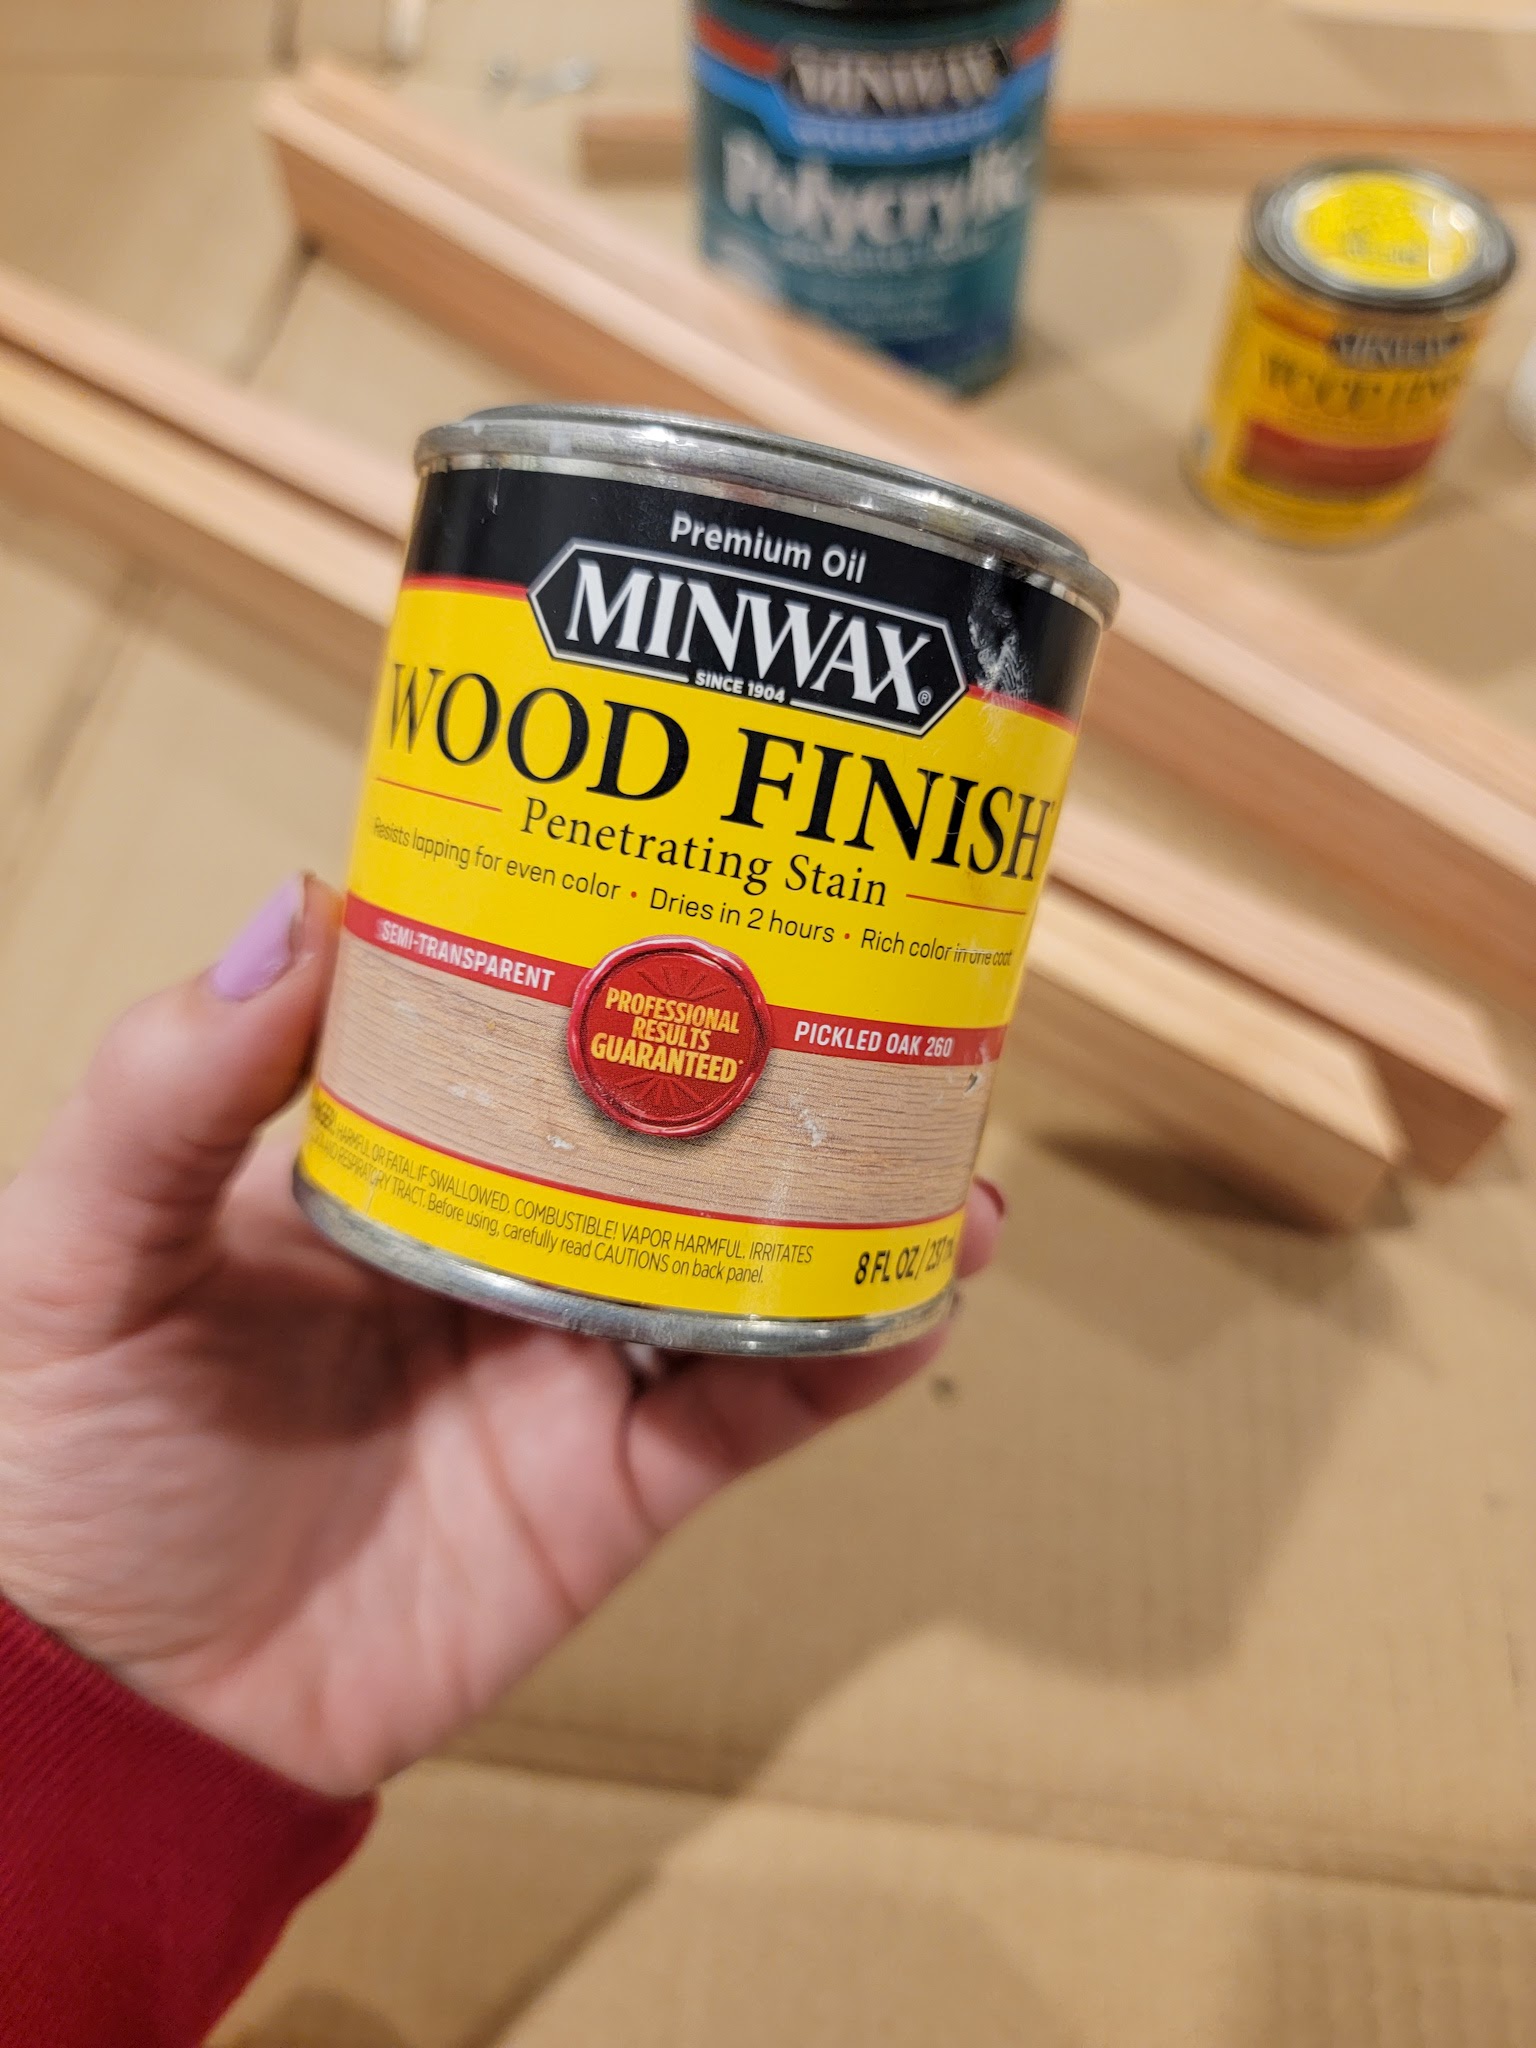
The best part of this edge banding is it is paintable and stainable, so I could give it the same look as the rest of the plywood. I tested out some stains that we already had and quickly settled on this one.

On a trip to my local Habitat for Humanity ReStore, I hit the jackpot with some inexpensive finds to complete the kitchen. I found some simple rounded silver handles for 50 cents each that were perfect for the doors, some wooden knobs that I thought would make cute oven knobs (pack of 5 knobs for $2!), and a drain hose ($6) and knob (50 cents) for the faucet. For less than $10, it was such a great score!

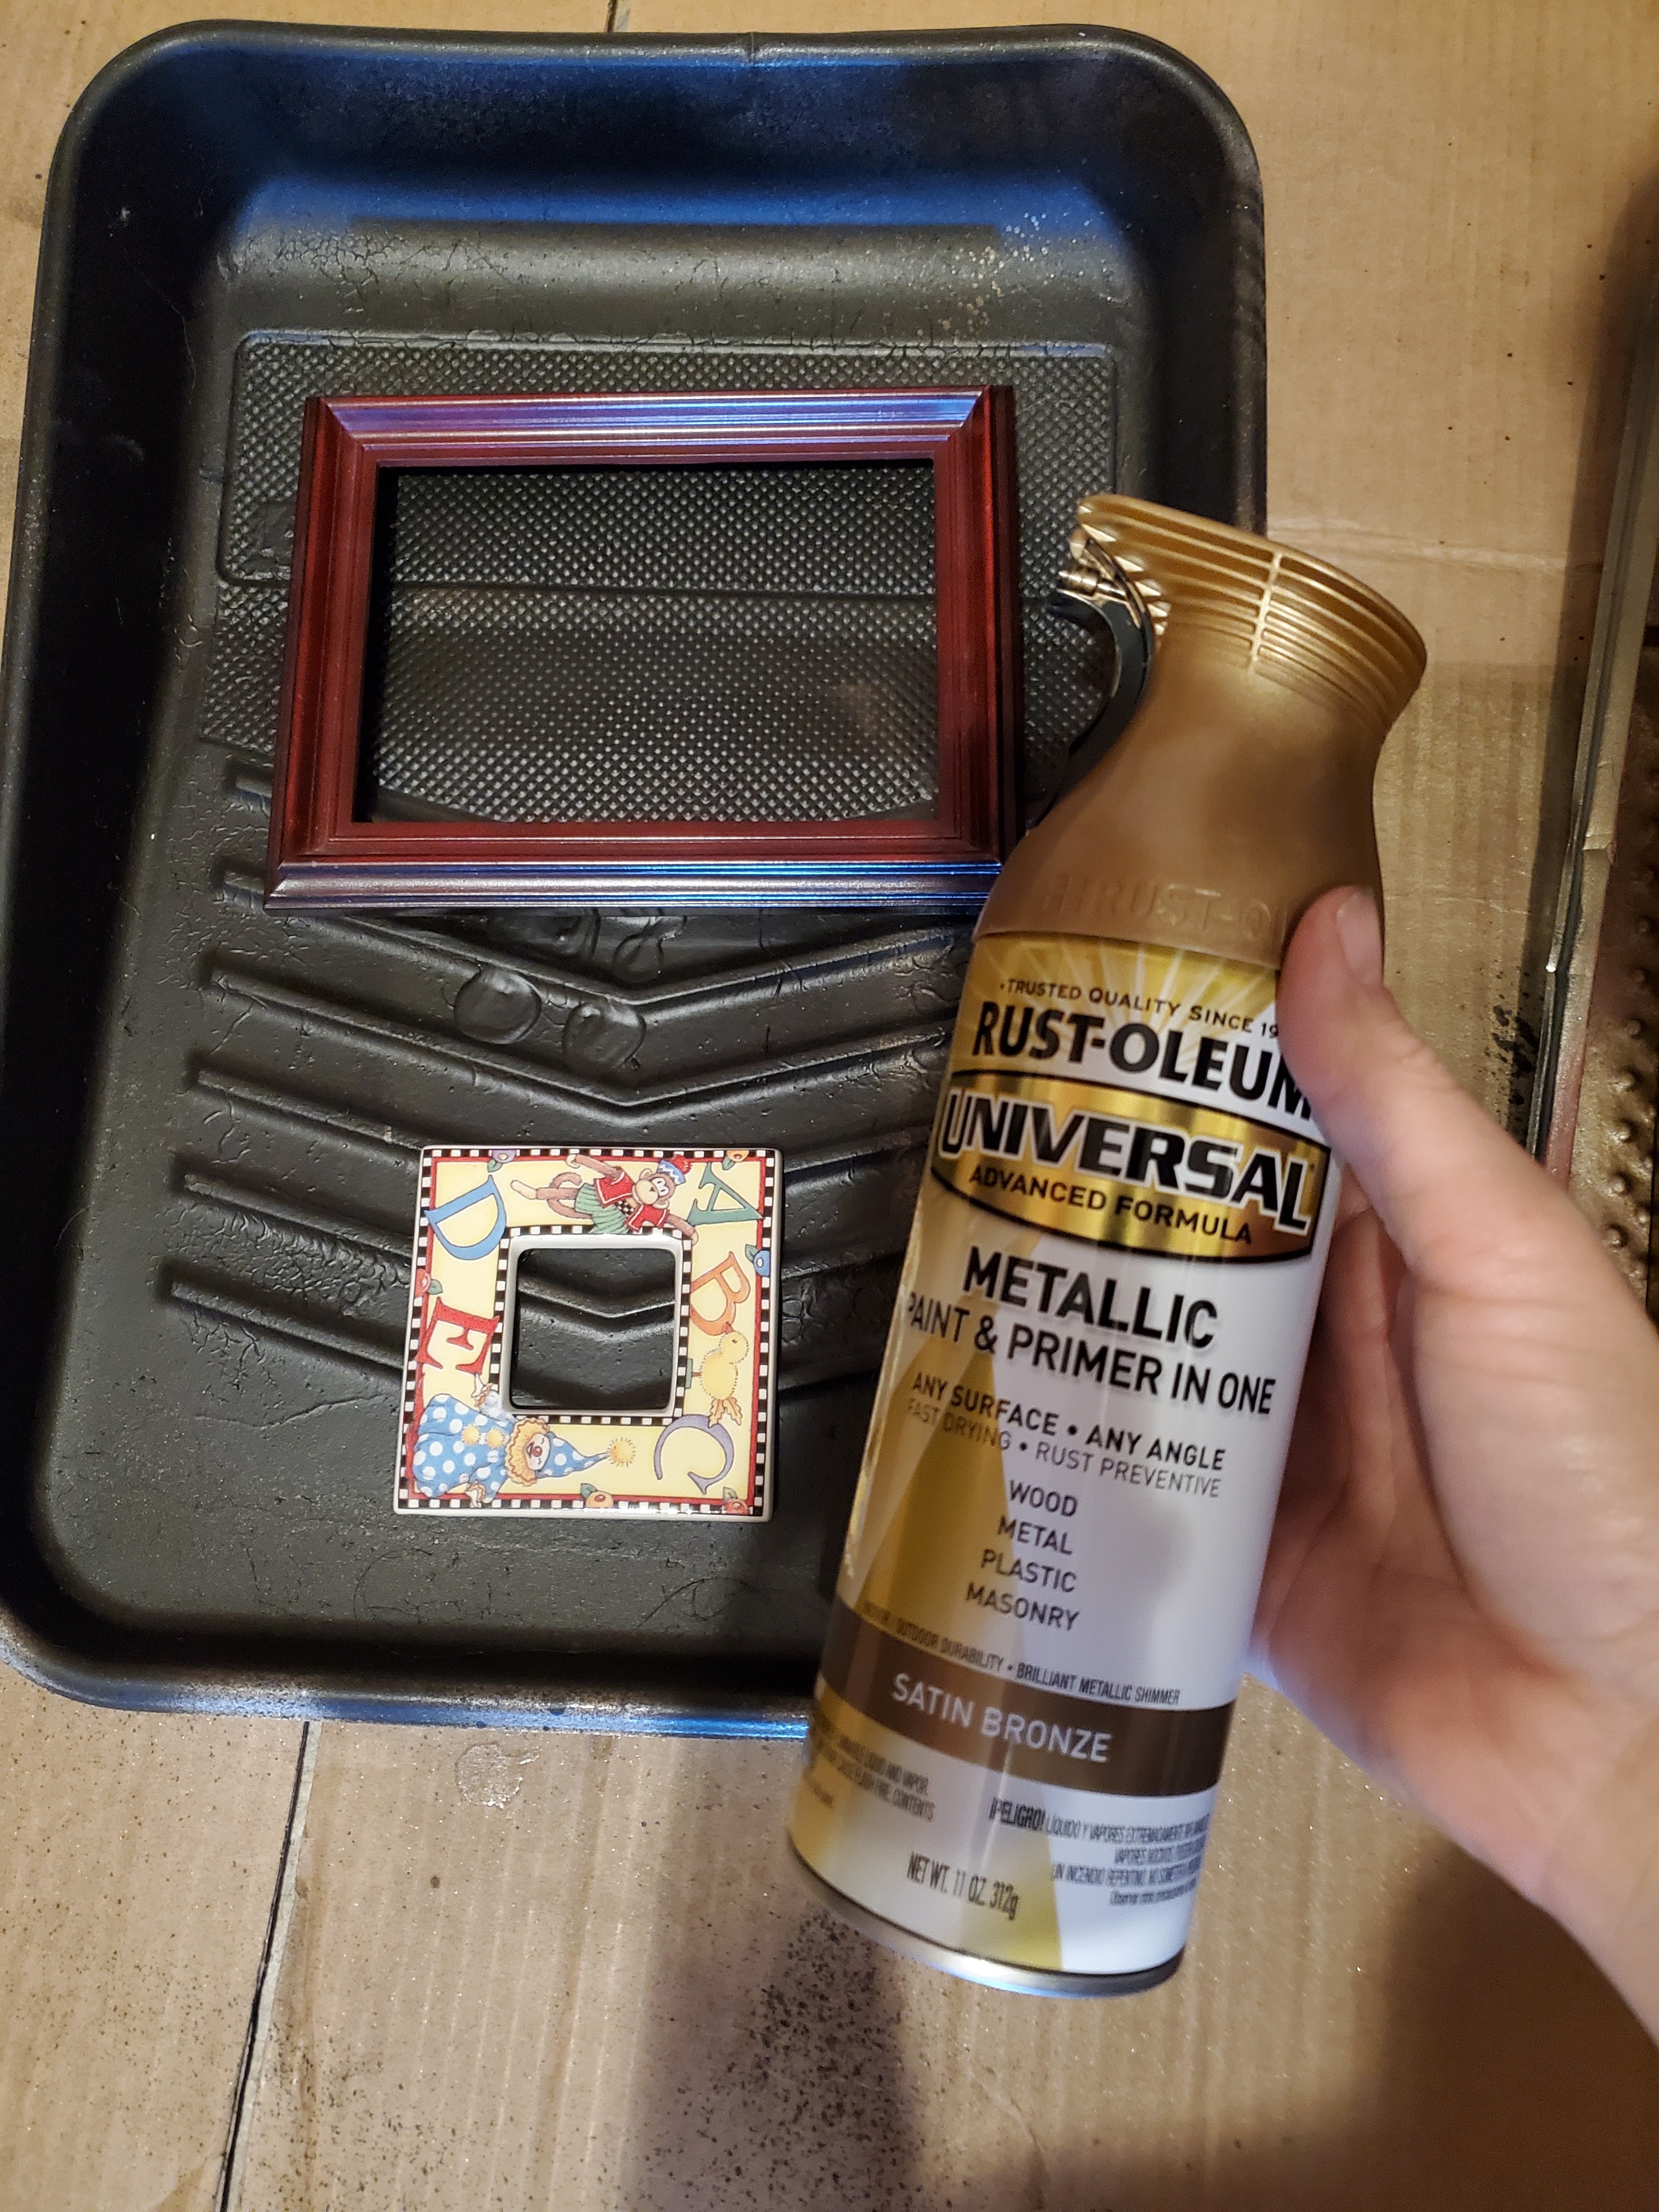
I spray painted the wooden knobs and settled on three for the front of the oven. I measured out and drilled three holes in the front and LOVE how they turned out.

To create the look of an oven, I made a 10″ x 7.5″ rounded template on piece of paper and traced it on the back of the oven door. Justin then used a jigsaw to cut out a hole and sanded down the edges.

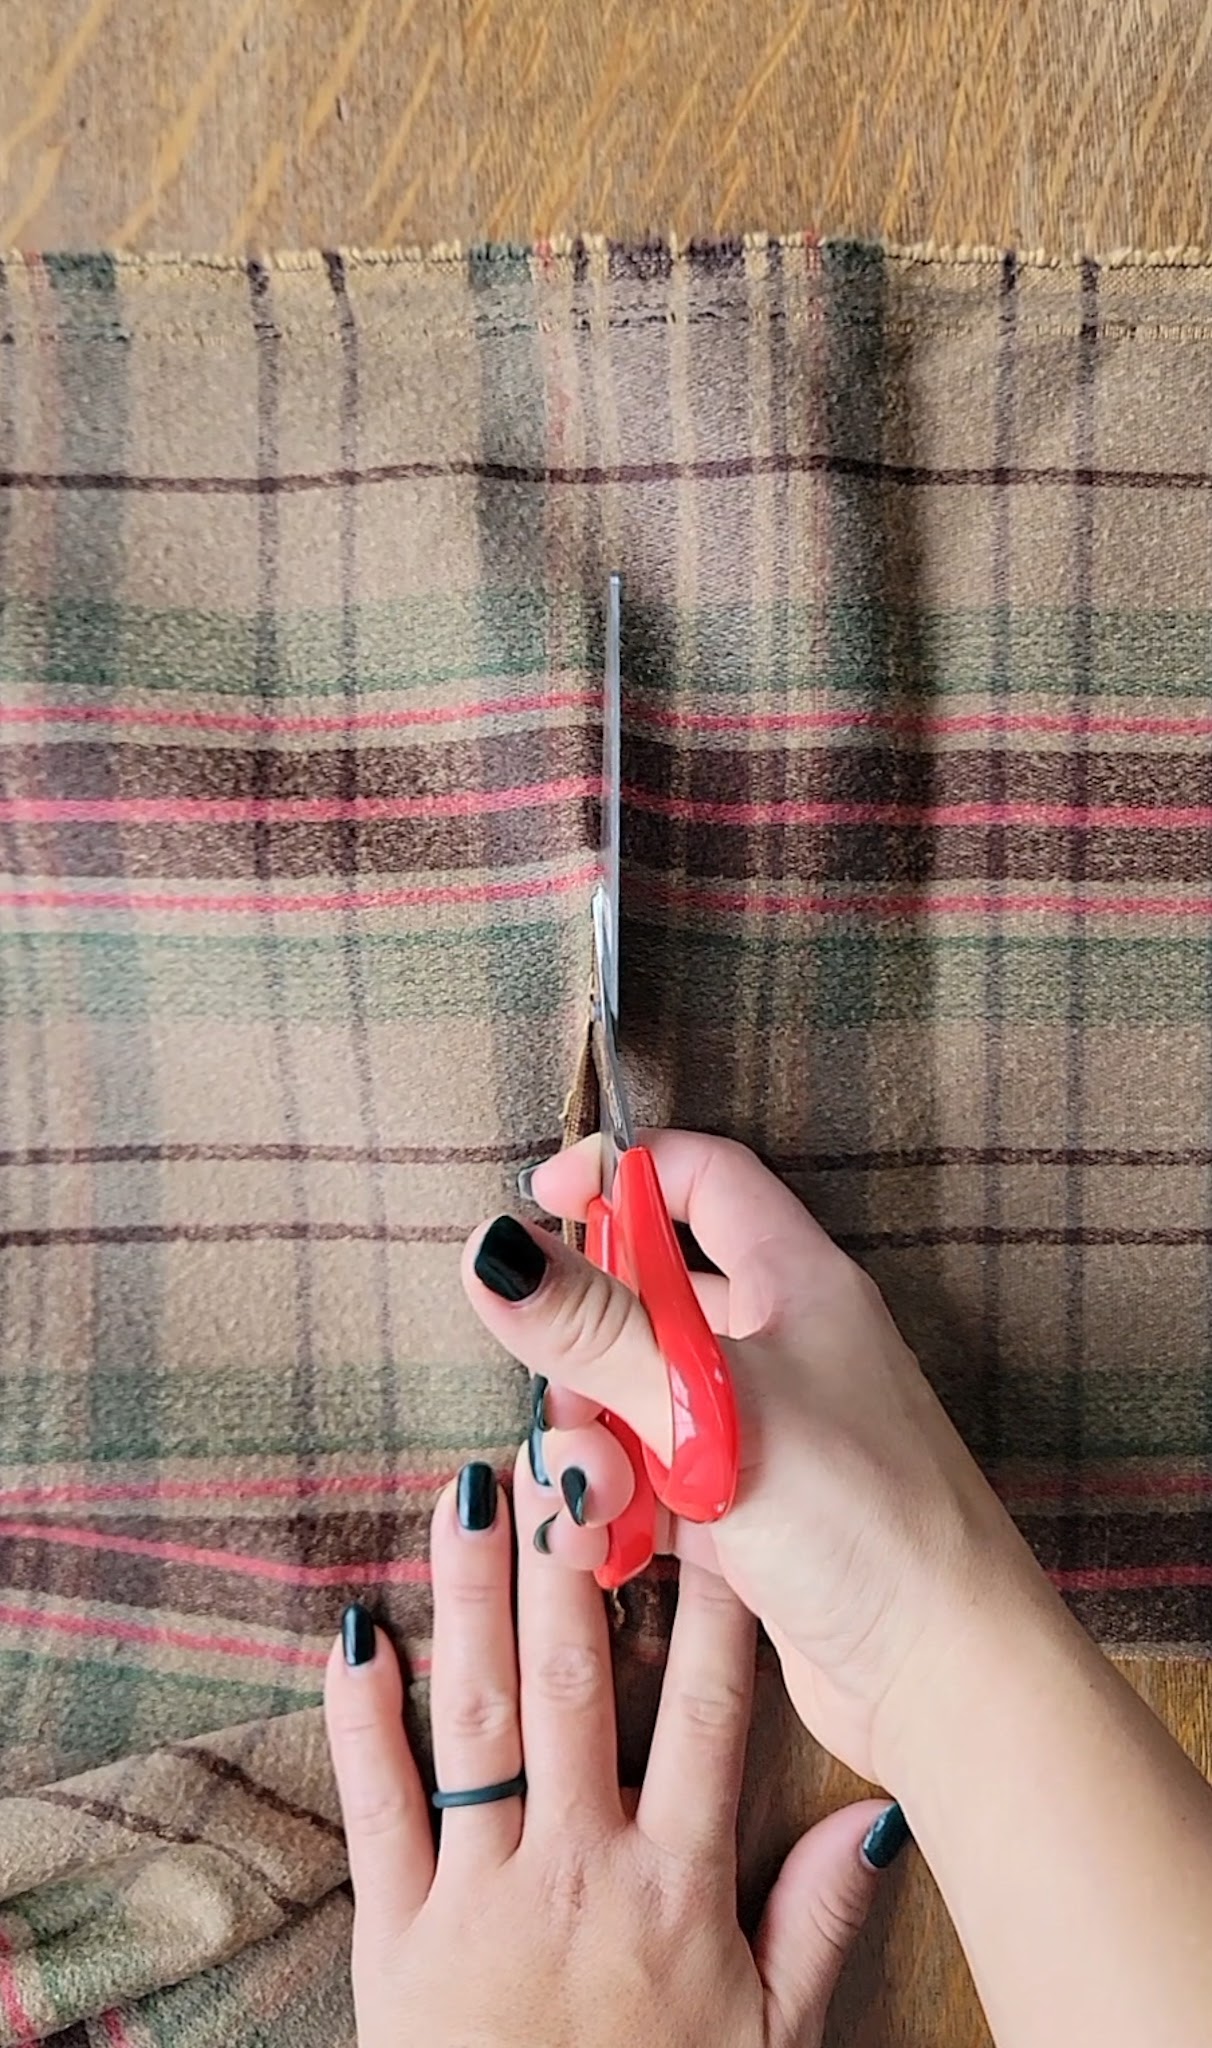
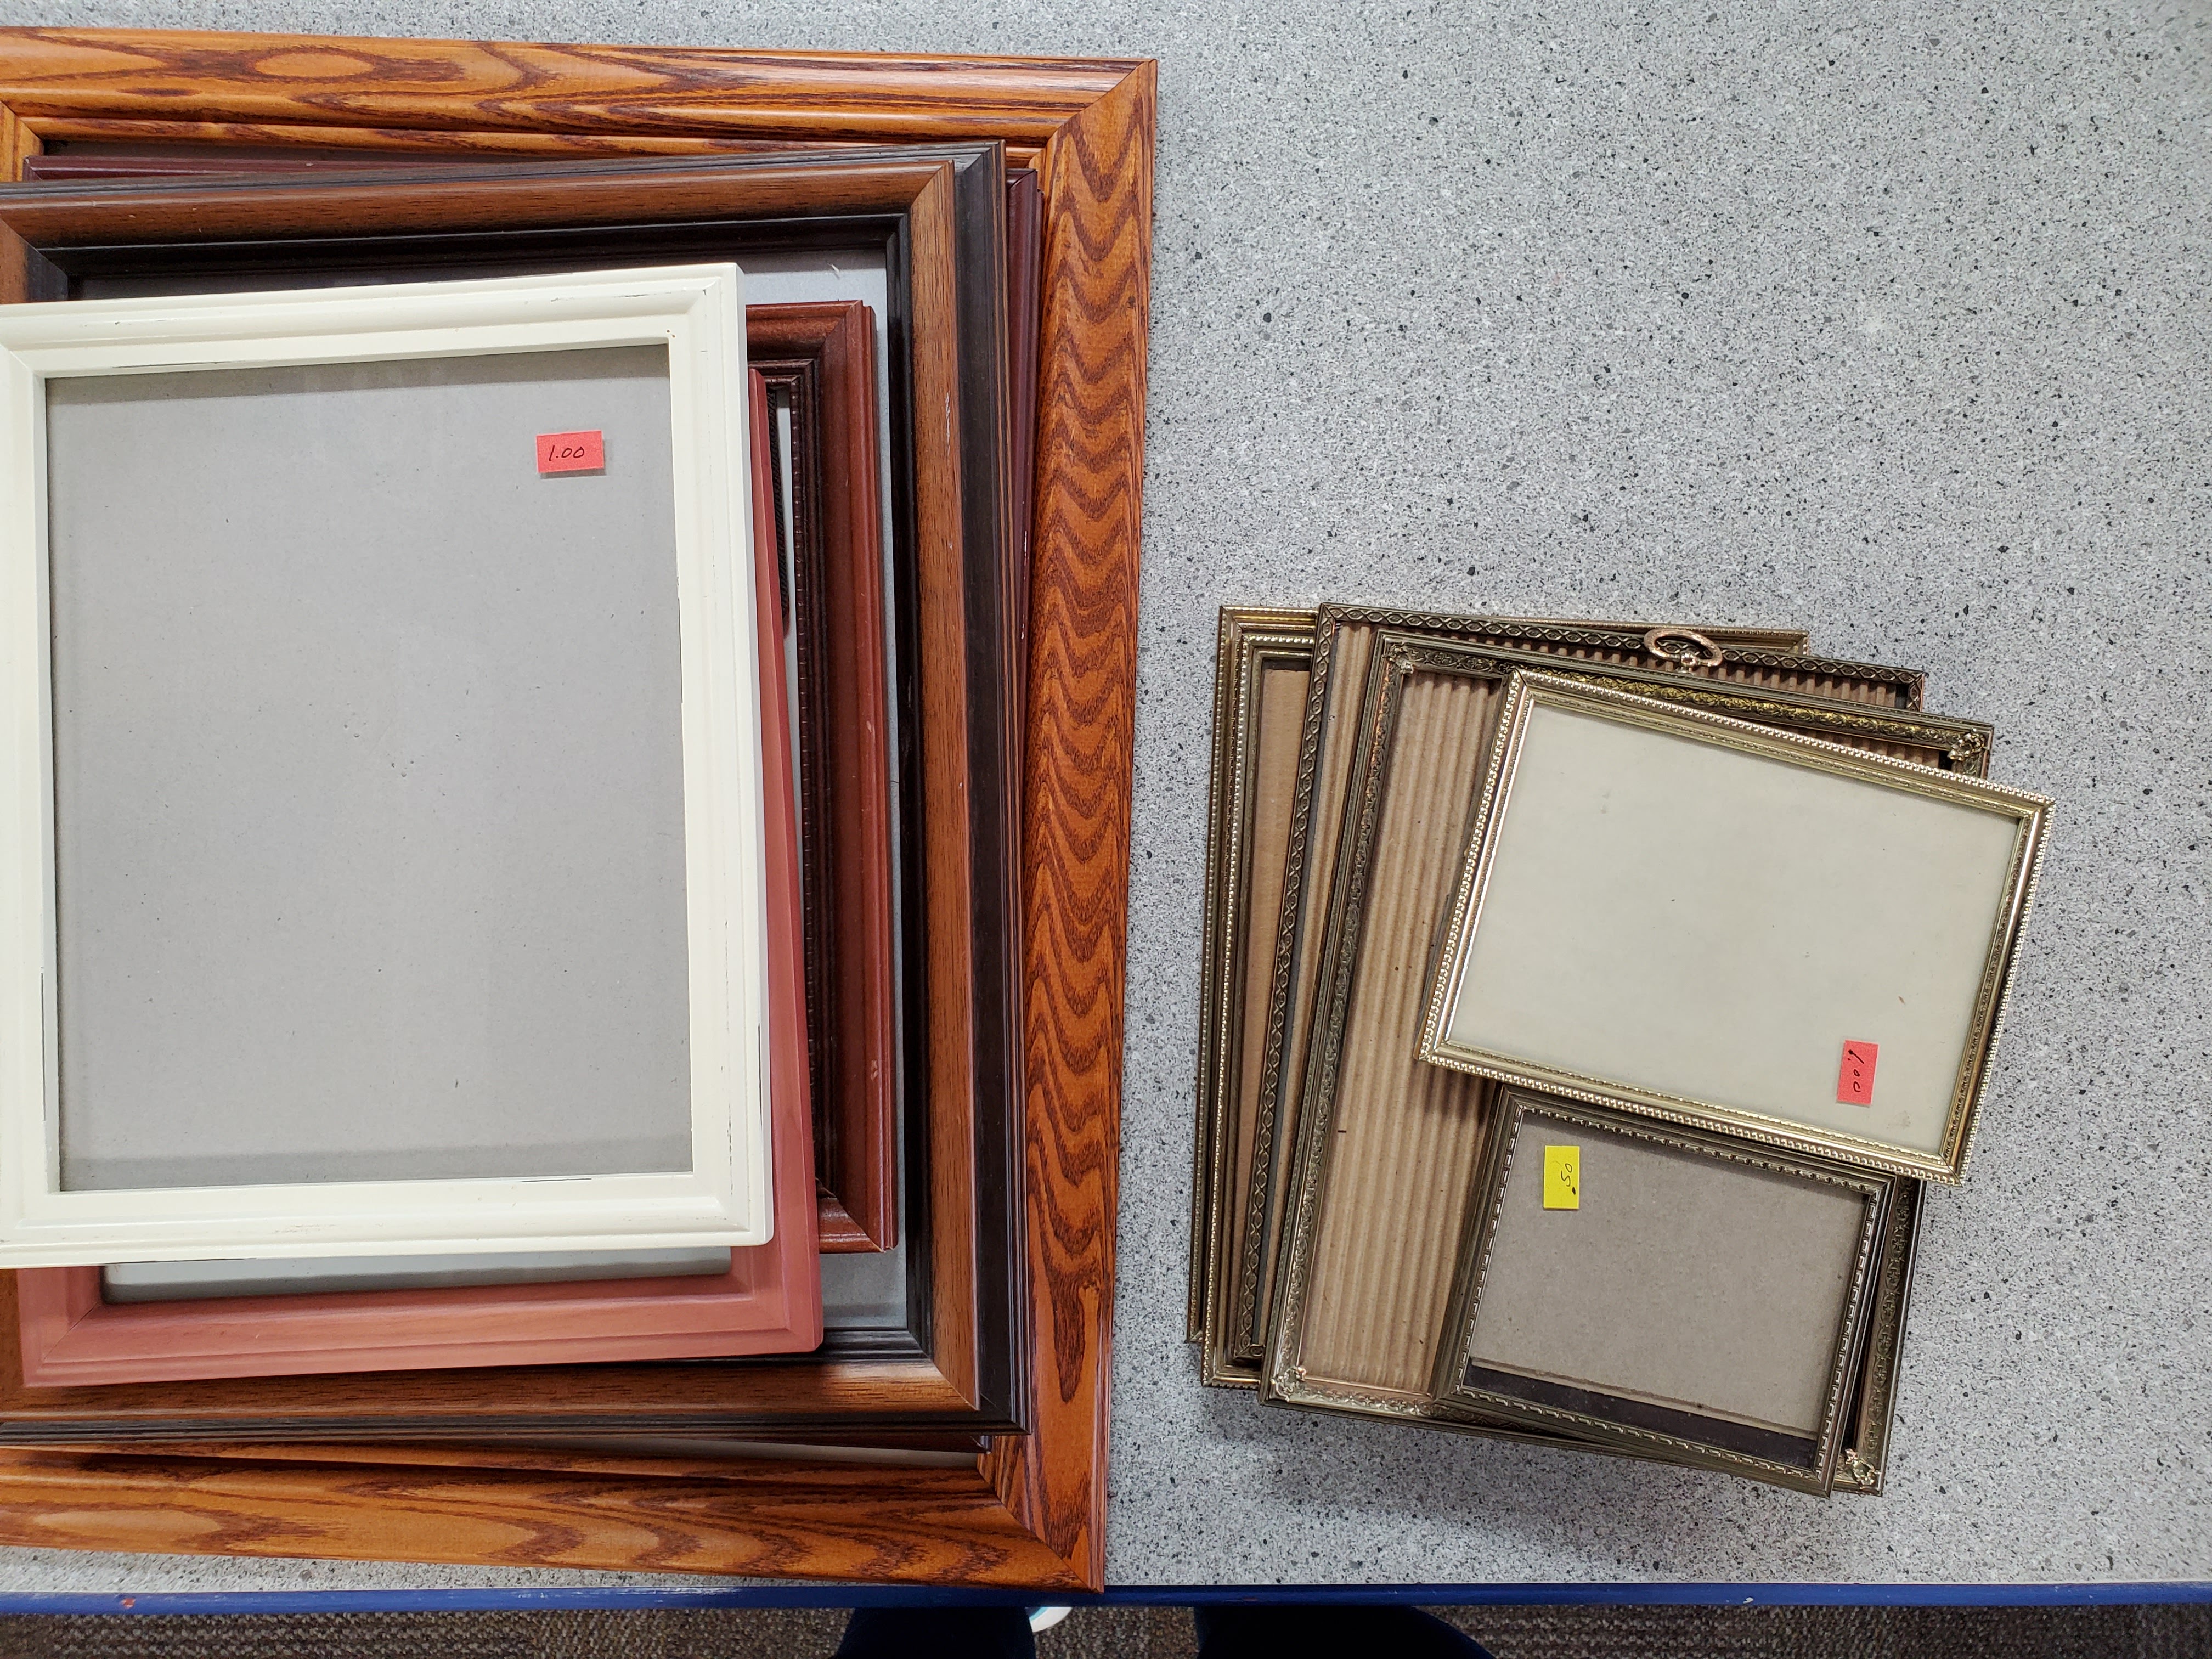
I then took the plastic inserts from from a large Ikea frame I had (I don’t like the shine it creates on my pictures!) and cut down two pieces to 12″ x 9.5″ to have some overlap. These cut easily with scissors, but I would recommend trying out a small test piece first because there’s a learning curve to how you need to hold the plastic and cut in order to not have a chipped edge.

I spray painted one piece black and left the other clear. I used gorilla glue to glue the black one down first (keeping the spray painted side facing away from the hole of the oven door). Then I glued the clear piece on top of the spray painted side to keep the paint from getting scratched during playtime.

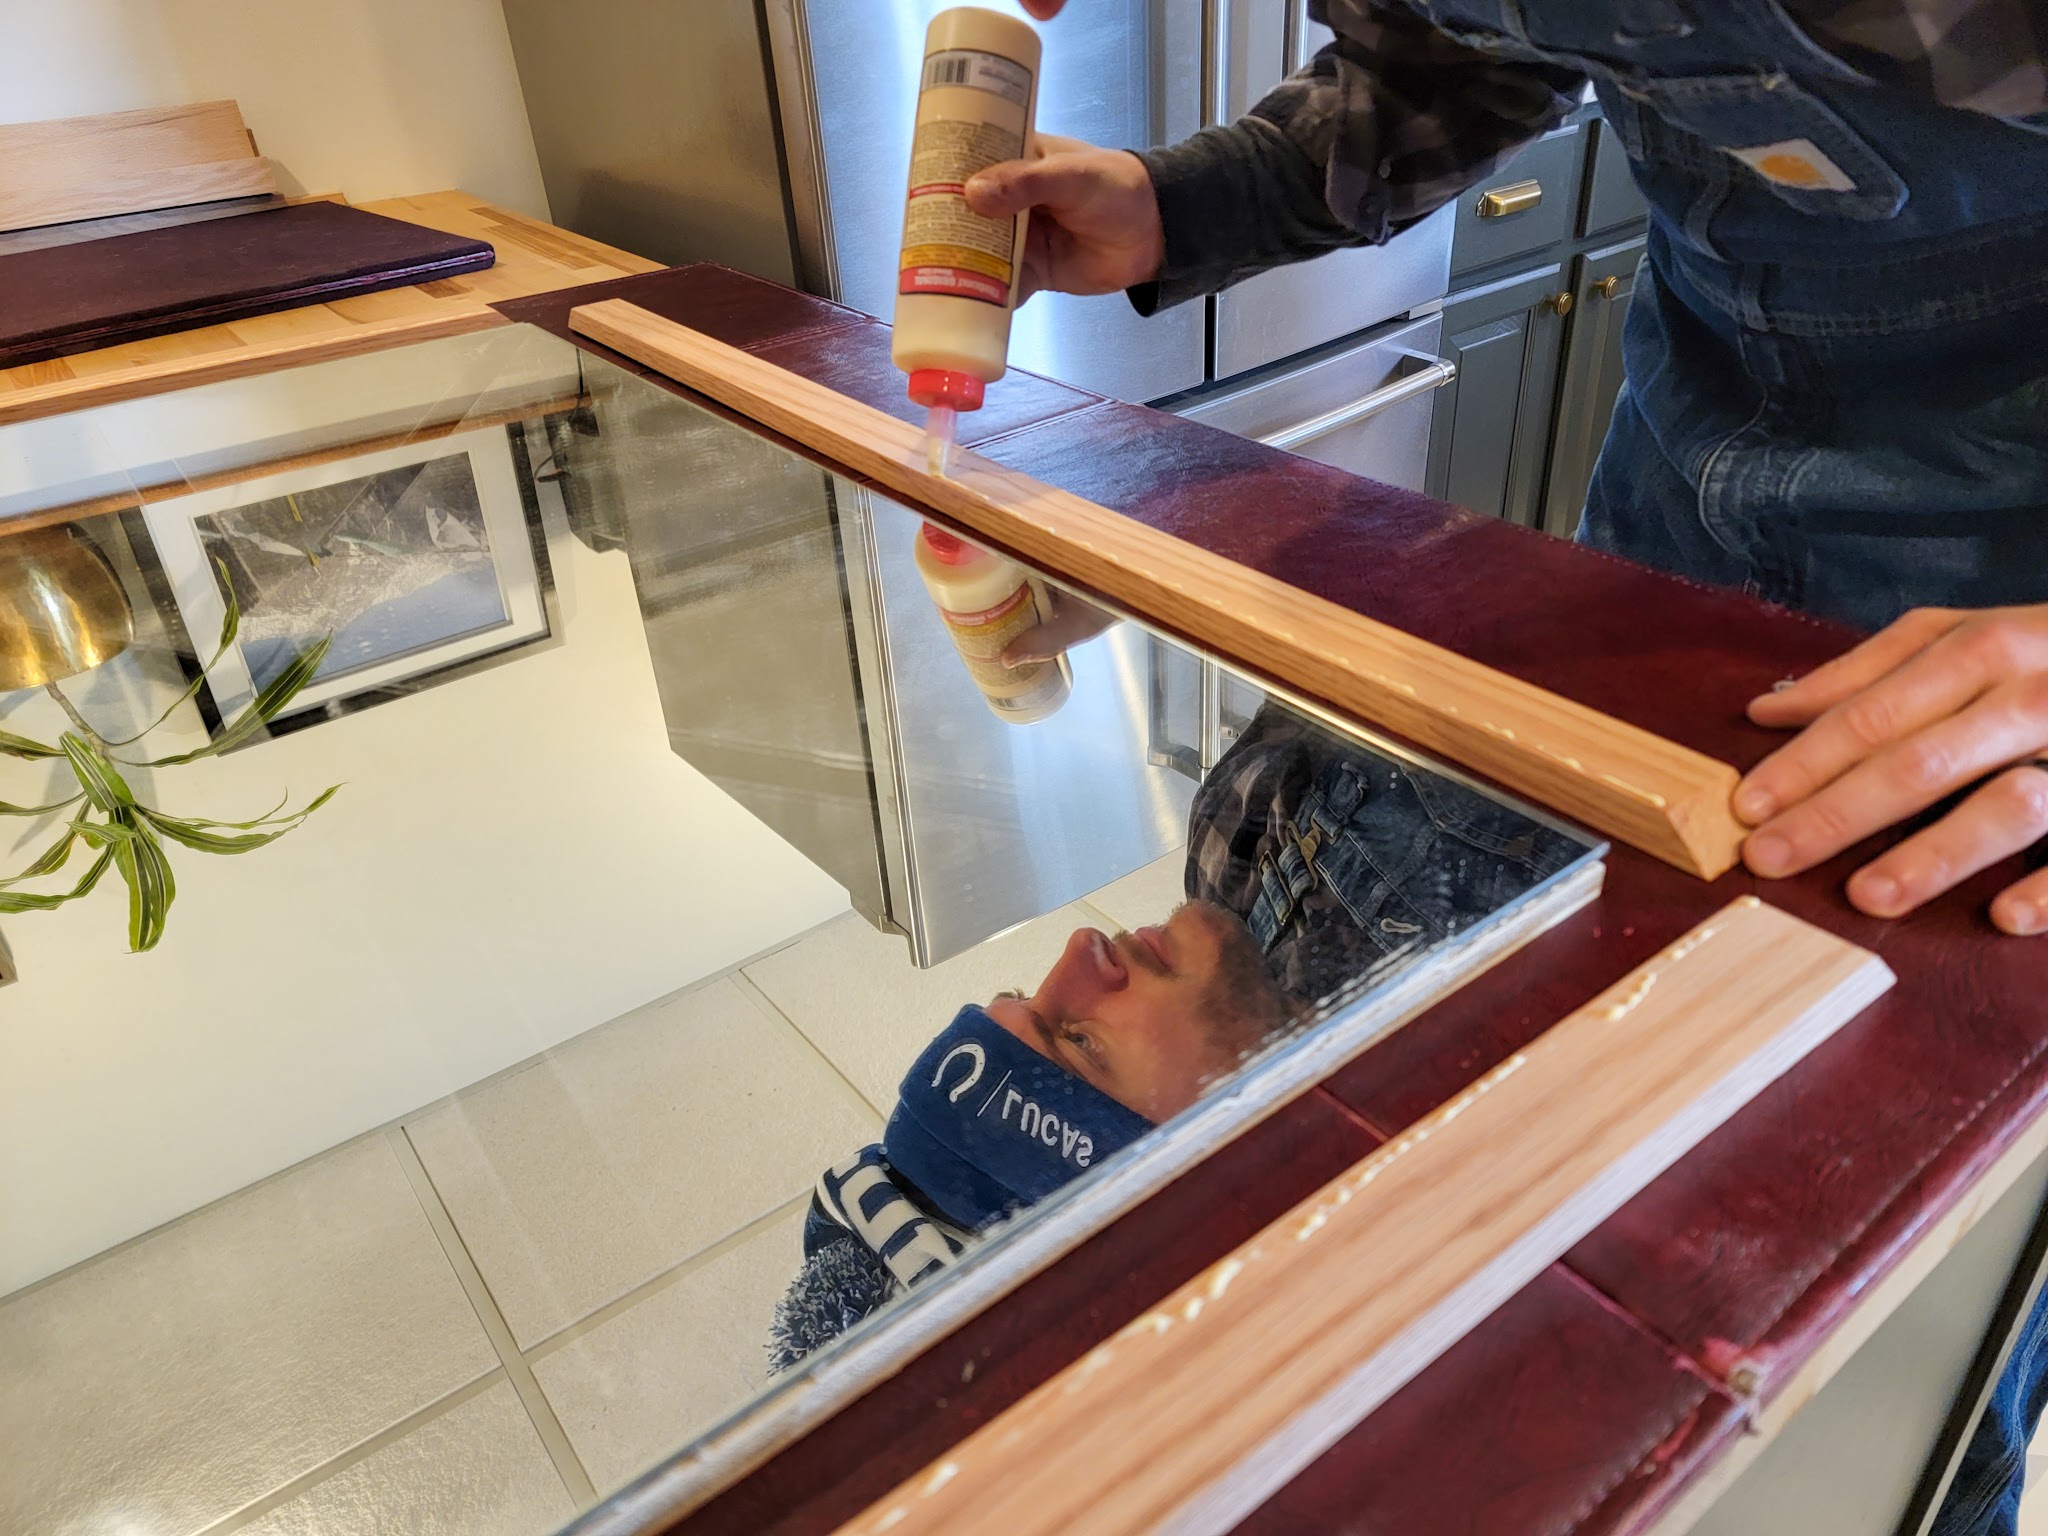
Next up was the burners! I took a long piece of scrap shiplap that we trimmed off when working on our office project and cut it down into 16 pieces just short of 3 inches each. I spray painted each strip black and after they dried, I squeezed a very thin line of wood glue onto the back of each one.

I created a little asterisk pattern with these strips to create two little burners. I think they turned out so cute!

Last up was the sink area! Originally, I bought a small plastic tub that I was going to create a sink but I didn’t realize it had a small lip that would prevent it from laying flush. So we quick did a curbside pickup for a little 8×8 cake pan from Target to use instead. We traced an outline right on the countertop (the smaller one is from the first plastic tub we didn’t use, the larger one is from the cake pan we did use).

Justin used his jigsaw to cut out this hole and the cake pan fit in perfectly!

To create the faucet, we used this 3/4″ drain pipe tube that I found at the ReStore. Can you see how one end is already perfectly formed like a faucet?

I used painters tape to mark where to cut the hose at and used a utility knife to create a clean cut.

We marked where we wanted the faucet and Justin used a 1″ drill bit to create a hole.

This next part felt very MacGyver-y. We cut the tube to length so about 2 inches would stick out in the bottom sink cabinet. We then spliced the part that would be under the counter into four pieces.

Justin screwed each spliced section up into the bottom part of the cabinet so that the faucet couldn’t be pulled out the top. We also stuck a small piece of scrap wood in the tube to help keep its upright shape.

Then he screwed a scrap piece of wood under all the spliced sections – the purpose of this was to keep the faucet from being pushed down into the hole.

It might not look pretty, but will keep the faucet in place securely now. It can’t be pushed down or pulled up!

Lastly, I spray painted the little gold knob that I bought for 50 cents black and we drilled through the tube (and wood inside) to screw it in place and create a little faucet handle.

All in all, I’m VERY pleased with how this project turned out! And because we thrifted a ton of materials and already had lots of things like the stain, paint, screws, scrap wood, etc, the project ended up costing us around $80.

The kitchen has already been tested out and if Justin is any indication, the kids will have fun with this tomorrow morning. 😉

Sources

(Note: Most of what I used was thrifted or scrap material, but here’s what I used that I have sources for!)

-Paint: Sherwin Williams Dot to Dot in Satin

Black Spray Paint

Cake Pan (for sink)

edge banding (affiliate link)

wood stain

-the plastic inserts came from these Ikea frames

Final Baby Prep

10 days.

I can officially count down the days until baby comes on my fingers. Ahh!!

The nice thing about having to schedule a repeat c-section is that even if baby does decide to come early, there is a definite eviction date. Baby will no longer be in my belly after August 23 – I am just so excited to meet this little one!

I’ve shared before that it took quite a while for my nesting urges to kick in this time, but once they did, they really did. In the last two weeks, Justin and I have worked to transform an old dresser, paint the walls, set up a crib, and get some semblance of a nursery together. Whew! Now that we have the hospital bags ready and a little nursery, I feel as prepared as I can be for baby to arrive!

1308-2019-0935504153562757900609.jpeg

I kept the nursery preparations very simple for baby #2 for three big reasons. First, we kept LJ in a bassinet in our room for the first 8 weeks and plan to do the same with this baby. Because of this, the nursery really isn’t going to get used for the first two months of baby’s life. Second, since we did not find out the gender, I didn’t want to do too much decorating in advance. Once baby comes, I’ll be able to customize it a little better and actually hang things on the wall. And third, all baby NEEDS right away is a source of food and a place to sleep. Once we had that covered, I decided not to stress too much about anything else.

Today I thought I’d just share a little glimpse into what we did for the simplified nursery.

Enjoy!

Baby #2’s Simplified Nursery

So up until about two weeks ago, the nursery still looked like this:

0722191257a.jpg

Brown walls, random furniture, and an air mattress because we had been using it as an extra guest bedroom. It doesn’t exactly scream “welcome, baby!” does it? I had at least started to sort some of our newborn clothes though 😉

My #1 goal was to lighten up the room. I wanted something bright and airy, so after we primed the walls, for the first time in my life chose to paint walls white. Normally I’m not a fan of white walls, but since we didn’t know the gender, I decided to go this route this time. Eventually, I plan to make the wall behind the crib an accent wall of some kind. For now, simple, crisp, clean white will do.

0813190830a.jpg

Next, I wanted to create a cute little dresser for the wall on the opposite side of the room to give a little color to the room. I found this fairly ugly dresser for $10 on Craigslist and knew I could transform it to just what I wanted. I enlisted Justin’s help (I was more of the visionary, he was more of the laborer ha!) and I’m so happy with how it turned out! We sanded it down, primed, two coats of paint (Sherwin Williams Green Tartan), and added some new hardware. Then Justin used dowel rods to create legs and give it a bit more height. I also had him add a stained board to the front because the piece of plywood that was there was very flimsy and cheap. Plus, I thought it gave a little more character. I love it now!

0808191339c.jpg

Dresser: $10

New hardware: $18 total (including tax and shipping)

Paint: $13

Wood + dowel: $7

We had the primer, stain, and brushes already. So the total cost of this dresser was right under $50 total. Win!

A friend had an extra crib but it did not have the ability to adjust mattress height for a baby, so we put that crib in LJ’s room and moved his crib to the baby’s room. Another friend is done having babies and was ready to part with her glider. I added a simple piece of artwork that was previously in LJ’s nursery, hung blackout curtains in a shade of minty green that will complement pink or blue, and brought in our trusty sound machine and salt lamp for once baby is ready to sleep in the nursery. And done!

It’s definitely very simple, but I’m so happy we decided to freshen up the room and I cannot wait to see our little one in it so soon!

A Look Back on our Home

It’s moving week!

Justin and I officially close on our new home on Friday afternoon and Saturday is moving day! I can’t believe that it’s finally here. I shared in a previous post that we were not initially planning to look for another house until the fall, but we found our dream property and we jumped on it. We did a 60 day closing since it was a sudden-ish decision and this gave us some extra time to prepare (and the sellers extra time to move out) so it’s been a bit of a long process. Now that we’re down to the final few days, both Justin and I are getting super excited!

While we’re thrilled for this new adventure and truly looking forward to settling in to our new home and starting the next chapter of our family’s life there, it is bittersweet to be leaving our current home. We bought this home when we moved to Indiana 3 years ago and we put a ton of hard work into it. Justin ripped up old carpeting and tile by himself. We recruited family to come help us tear down old wallpaper, repair holes in the walls, and repaint every single wall. I painted all the trim and doors. We replaced some light fixtures and we had new laminate flooring and carpet installed. Our friends Jeremy and Bethany came for a weekend to help us install a new subway tile backsplash in our kitchen. Cabinets got painted, flowers got planted, a house became our home. We love this place and truly made it our own over these past 3 years. We love our neighbors, we love our location. We love the memories we’ve made here. We are going to miss this place.

I thought it would be fitting to share some before-and-after pictures today as a little tribute to this sweet little home of ours. It’s the first home Justin and I bought. It’s where we mourned the loss of our first baby and joyfully brought LJ home a little over a year later. It’s where we hosted fun backyard parties, where we shared our dreams for our family’s future. We’ll always remember it fondly and I am thankful we’ll take the pictures and memories with us.

Entryway

Foyer After

I love that Scout made a cameo in the “after” shot because that little landing has been his favorite spot in this house. He spends most of his day perched there. We think he likes it because he can see out the front door and windows and also keep track of us in the living room and TV/playroom. As you can see, we changed out all flooring, painted the walls, and also painted the railing. We also changed the light fixture although it’s not visible in the picture.

Living Room

Living Room Before

Living Room After

Living Room After2.jpg

The most dramatic changes in this room was paint and flooring. This was really the first room we tackled when we moved in. Justin ripped up all that old carpet and we had new laminate flooring installed.

TV Room/Playroom

Den Before.jpg

TV Playroom After 1TV Playroom After 2

The previous owners used this space off the front door as an office. We initially thought we’d use this space as a dining room, but then we decided we’d get way more use out of it as a cozy den and it became a TV room (and then also a playroom when LJ came along – check out pics of this space on a typical day here). This became our favorite place to hang out as a family! Justin ripped up the hallway tile and laminate flooring here too and we had the same laminate installed as in the living room to make the first floor feel less broken up.

Den looking out.jpg

Half Bath

Half Bath Before

Half Bath After

The first floor half bath was the only room in the house that had floor-to-ceiling wallpaper (and toilet humor-themed wallpaper at that) and I was all too happy to see it go. I chose a dark color for the walls of this small space and I love how it turned out!

Dining Room/Kitchen

Dining Room Before

Dining Room After.jpg

In my opinion, this space was the most dramatic transformation. The tile was in good shape so we left it but pretty much everything else changed. New paint on the walls, painted cabinets, new dining light fixture, new backsplash, new appliances – we loved how this room turned out!

Kitchen 2.jpg

Laundry Room

Rounding out the first floor is the little laundry room off the kitchen. This wasn’t a big space, but painted walls and cabinets with a little bit of decor made a big difference!

Hallway Nook

20160328_163501

0426191413a

Our home is 3 bedrooms but when we moved in we knew we wanted to keep a guest room available for family and hoped to soon convert the other room to a nursery so I needed to get creative with finding space for a little home office. At the top of our staircase there is a fairly large landing with just enough space for a small bookcase and desk and it worked out perfectly for an office! The bookcase faced the stairway and the desk fit perfectly in the little nook – it was such a cozy place to light a candle and get some work done.

Master Bedroom

We rearranged the layout from how the previous owners had done things and I think it helped open up the room and make it seem much larger. Painted trim and walls gave it a fresh, relaxing facelift!

Master Bathroom

The “before” picture on the left isn’t great, but it gives you a small idea of our little updates. We didn’t do much in this room – took down the wallpaper border, fresh cost of paint, painted trim, and hung new towel rods.

Guest Room

Guest Room BeforeGuest Room After

We took down that border wall paper and those shelves, which were a HUGE pain because they were all anchored into the wall. There was a ton of patchwork involved but after a fresh coat of paint the room was refreshed! We kept it pretty simple in here, just enough to make a cozy space for guests to stay.

Hallway/Guest Bathroom

Guest Bath After

The hallway bath was mostly used as a guest bathroom since we just bathed LJ in ours. We painted the walls and cabinet (I actually love how the dark cabinet turned out!), added vanity fixtures, and took down the old shower door and exchanged it for a curtain rod.

Nursery

Nursery Before.jpg

Nursery After

My favorite room in the whole house! It was used by the previous owners as an office and we didn’t do much with it for a while. Then, when I found out I was pregnant, we started dreaming of a nursery. I would spend time praying in the room for the baby we would soon welcome into our home. Sadly, that pregnancy was ectopic and we did not get to meet that baby (read more of the story here). I shut the door and stopped dreaming to deal with my grief. Then slowly, I started going in there again. I painted the room before I was pregnant again, believing that someday a baby would need this room. I got this sign off Etsy as the first piece of nursery decor and when I got the glorious positive pregnancy test a few months later, I immediately hung it up by the door. This room has seen tears, rejoicing, preparations, and so many snuggles. I’m so thankful for this room!

And that’s our home. It’s been so good to us and we’re so thankful to have called this place home for 3 years. Now on to the next adventure!