Wedding Wednesday: Ceremony Decorations

Hey Mike! What day is it!?

Hump Day

The students at my school absolutely love quoting this commercial. I have to admit that it does bring some much-needed energy to help push through the day! Whoot whoot! 😉

Wedding Wednesday

Continuing on my decoration trend, let’s talk ceremony decorations!

Since the ceremony was happening outdoors, I wanted to keep the decor to a minimum and let nature do most of the work. We had white chairs arranged on the lawn in a semi-circle with a middle aisle. At the entrance to the main aisle, there were sets of three tall tree stumps of varying heights.

wine bottles and stumps // simple wedding decorEach of the stumps had a glass bottle (these were all beer bottles spray painted in wedding colors) holding a single flower. We varied the flowers to give it a little more pizazz.

easy DIY wedding decor

I really liked the way this turned out! It gave just the right touch without going overboard or taking tons of time.

The only other ceremony decorations were at the front of the aisle. A dear family friend of mine (basically a grandfather for me) constructed a beautiful arch for us. I absolutely loved it!

simple white wedding arch

Side note: I also really enjoyed this moment of the ceremony. 😉

We had some slate tiles to stand on since there was a chance of rain (and it did rain) so we wouldn’t be standing in wet grass or mud. Under the arch I placed an antique table that belongs to my family. I covered it with a simple lace doily from my mom’s house and set three pitchers on top.

simple wedding table for footwashing

The pitcher in the middle was a gift from our pastor. It was handmade (though not by him) and came with a matching basin. Instead of a unity candle, we decided to have footwashing. This is an important tradition in our denomination and we really wanted this to be part of our ceremony. I’ll give more details in a future post!

simple wedding footwashing

The other pitchers belong to Justin’s mother. They each had water in them; instead of our mother’s lighting candles, we had them pour water from the pitchers into the main pitcher we used for footwashing.

white coffee filter pom hanging at wedding

The only other decorations we had were a few white coffee filter poms hanging in the trees. These were made by my sister-in-law and provided a nice little touch.

Other than that, we let nature do the talking. And I was okay with that. 🙂

backyard wedding ceremony

Happy hump day!

All wedding photos are copyright Rothwell Photography.

***

I love maxi dresses; they are so simple but still look like you put in some effort! Today’s look:

Striped blazer, black maxi dress

Blazer: Maurices (exact old) ~ Maxi Dress: Modcloth (no longer available; cute option here) ~ Earrings: Premier Designs (exact old) ~ Bangle set: Shop Ruche (exact here) ~ Ballet Flats: Fergalicious by Fergie (similar here)


Wedding Wednesday: The Decorations, Part 2

Not gonna lie, it’s been a long day and my hubster wants to chillax on the couch and catch up on last night’s episode of “The Voice” so I’m gonna just get right down to it so I can go join him! It’s Wedding Wednesday and the decorating fun continues!!

Wedding Wednesday

Our wedding took place on my grandparent’s farm, which is now owned by my parents. My parents decided to renovate the old farmhouse in the months before the wedding, and one of the things they updated was the windows. Putting new windows in = tons of old, rustic wooden windows for me to use for DIY decorations!! YAY!

Here are some of the ways I incorporated these windows into the decor:

DIY Window Pane with blown up photo

Believe it or not, this window frame came with the perfect amount of aging/distressing so I didn’t have to do anything to it. All I did was clean the window with some simple wood cleaner and it was done! I printed out the photo at Costco because it was the only place I could find that would print off a near poster-size picture and didn’t charge a ridiculous amount of money for it. Score!

Engagement pictures in rustic window frame. Wedding DIY.

I used the same process as before (but with smaller pictures) in the above window frame. I’m sure you can find some super crafty way of attaching photos to a window on Pinterest, but I’m going to be very real about the un-crafty way I created these.

1. I cleaned the window and glass.

2. I placed one picture at a time behind the glass of the window and moved it until the exact part of the picture I wanted to see was “framed” by the window pane.

3. Without shifting the picture, I carefully pressed it into into the glass. Making sure the picture was flat against the window glass, I used my nail to bend a crease in the picture up against the side of the window frame. This marked the outline of the part of the picture I wanted to see

4. I cut out the picture using my crease as an outline (I left a slight edge around the crease in case I needed to shift the picture. Better to have to trim it a little more than realize I came up short!)

5. I used masking tape to attach the picture to the side of the window glass.

6. I repeated all those steps for the remaining three window panes!

Like I said, you’ll probably find a more conventional, “crafty” way to do this using fancier tools and a more exact method on different blogs or DIY websites; however, this is what worked for me because it was quick and easy! I loved the result and no one saw the back of the windows anyways so the whole tacky-masking-tape-thing can stay our little secret, right?

Engagement photos in old window frame, stacked crates, DIY wedding decor

While I liked the first two window frames (which were placed by the “welcome table” that I talked about in last week’s post), this last one was probably my favorite. I loved the double window; it was so unique! I propped it up against this display of new and old crates found in my parents’ attic near the walkway where people went from the ceremony to the reception. The yard at the farmhouse was very big and thus, difficult to decorate, so this display was a simple way of adding some cool decorations without spending a lot of time or effort or going overboard. I found the J & S letters at TJ Maxx and the wooden hearts were handcrafted by a dear family friend. The wine bottles were part of a whole ‘nother DIY project that I’ll discuss in a later post. I was really happy with how this display turned out!

In the spirit of window crafting, I’ll share one more thing! Our seating arrangement was created using an old storm door found in the attic of the old farmhouse.

Old door used to display seating chart. Wedding DIY

I alternated seating arrangement cards with engagement photos on the windows of the door and absolutely loved the way it turned out! For this, I used clear reusable tabs on the back of the photos and seating cards to attach them to the glass. My dad created a simple arch and used swinging screws to attach the door to the arch to put it at eye level with our guests.

seating arrangement on window pane

If you look closely, you’ll see I used the same tree design on the seating cards that we had on our invitations and programs. It was the perfect way to tie everything together!

All photographs are copyright of the fantastic Rothwell Photography.

And that concludes another Wedding Wednesday! Have a good evening!

***

I am slowly inching my way into a spring wardrobe — here’s hoping the cold winter is finally gone!

Teacher outfit blog: pink and brown, bow belt, flower necklace

Sweater cardigan: Maurices (similar here)~ Cami: Express (exact old)~ Khaki pants: Maurices (similar here) ~ Flats: Target (exact here) ~ Belt: Via Plato’s Closet ~ Necklace: Lia Sophia “Flower Pot” (no longer available; similar here)

March Madness!

One of my favorite times of the year (in the sporting world, that is) is finally heeeeeeeere! First day of SPRING and it’s March Madness!

Now, I would never classify myself as a huge college basketball fan. I really don’t watch much during the regular season, though I am a huge Ohio State fan in all sports so I will occasionally watch a game of theirs. All that being said, I just LOVE the March Madness tournament!

Every year, I fill out two brackets. One is what I call my “coin flip bracket,” where every decision is based on the flip of a quarter (heads = top team wins, tails = bottom team wins). It’s so fun to see how things work out when it’s left purely to chance! I also fill out a “date night” bracket; Justin and I each fill out a bracket and exchange them. At the end of the tournament, whoever had the better bracket gets taken out to dinner by the loser. It’s a fun excuse to go out to eat and have some fun. 🙂 **Sidenote: Justin has beaten me the last two years but I have a good feeling about this year! Time to win a date!!

I have so much fun filling out my bracket that I thought I should incorporate it into my classroom too. Here’s what I did during my planning period today: Using March Madness in the classroomMy students all got really excited when they saw the bracket! I knew it would be a fun thing for them to see and keep track of the tournament with, but then I thought about trying to make this a learning experience too. Turns out, there are a lot of ways to make the bracket fun and educational! Here are a few ideas I came up with:

Making March Madness Work in the Classroom

1. Probability For this one, you have to take rankings out of the equation. I’d phrase a question like: “If all teams had identical records, what is the probability that . . .”

  • “. . . a team from the West wins the tournament?”
  • “. . . a team that begins with an ‘A’ or ‘C’ wins the tournament?”
  • “. . . Ohio State will win the tournament?”
  • “. . . the final match-up will be between Villanova and Arizona?”

Get creative! We did probability with marbles and cards and the students all felt that it wasn’t relevant to their lives. Now is a good time to engage their attention (even if it isn’t truly chance since there are rankings in real life)

2. Statistics Use the records to your advantage! Have the students discuss a particular game (have info up on the board for those who didn’t watch) and figure out a particular player’s statistics. (i.e. “Player B made 5 of 9 shots last night. What was his percentage of made shots?”)

3. Writing assignment Have the students make-up a story about an unbelievable upset (they can pick the teams from the bracket to write about) and have them give specific details using whatever writing strategy you’re currently working on (i.e. using specific adjectives, adding proper nouns, etc)

4. Graphing Have a poll question written on the board (I’m going to let students actually write on the board since they love to do that but you could have them do it by raising their hands). For example, your question could be:

  • “Who do you think will win the whole tournament?”
  • “Who do you think will win the South/East/West/MidWest?”
  • “Which is your favorite team still in the tournament?”

Collect student answers (you can have one student be the recorder as other students raise their hands or you can have them write their answer on the board — perhaps in simple tally form depending on how you worded the question). Then you can work on graphing the student responses in pie charts, bar graphs, etc.

5. Summary writing. Write a ton of statistics from a game that has been played up on the board and have students take that information and write a game re-cap summary. Remind them of important things summaries need (recount highlights and include major details such as the score) and have them make up a quote from a player or coach to include as practice for writing with quotations.

I’m very excited to implement this in my classroom! I’m going to just have a fun poll question on the board each day too so it stays interactive and keeps the students engaged. I think it will be fun! Please let me know if you have any other fun strategies for involving students in March Madness and I’ll gladly add them to my list!

***

Today’s outfit didn’t exactly scream “spring” but when it’s only gonna be a high in the mid-50s, it’s hard to go too crazy.

navy and white stripes, white pants, statement necklaceShirt: TJ Maxx (exact unavailable) ~ Pants: New York & Company (similar here) ~ Flats: Target (exact here) ~ Necklace: Purple Peridot (exact here)

Momma B’s Lasagna

It’s finally Friday! (Am I the only one who sings that song regularly on Fridays? I sure hope not!)

I am feeling a bit sore today because yesterday after running a mile for warm-up, my friend Lindsay and I tried a new NikeFit workout called “Dynamic Kettlebell” — it was intense!

Dynamic KettlebellI absolutely love the NikeFit app! This workout was 30 minutes long and kept us engaged the whole time. It worked our legs, butts, abs, and arms in different ways and I am definitely feeling it today! I just hope the soreness doesn’t stick around so I’m ready to go for my 5k race tomorrow. It’s my first ever race and I’m a little nervous; I am in no way a runner but I do love a challenge and I’m excited to participate in this event!

After my workout I was super hungry so I came home and started cooking up a delicious and filling meal — my mom’s famous lasagna! This was an absolute favorite of mine (growing up I requested it for my birthday meal every year) and it is always a crowd pleaser. I thought I’d share it with you today so you too can appreciate my mom’s amazingness. 🙂

Momma B’s Lasagna

Momma B's Lasagna IngredientsIngredients for meat sauce:

-1 pound ground beef

-1 Tbsp parsley flakes

-1 Tbsp basil

-1 1/2 tsp salt

-2 8 oz. cans tomato sauce

-12 oz tomato paste (I use the kind with no salt added; if yours has salt, I recommend not adding the full amount of salt listed above)

Ingredients for cottage cheese layer:

-3 c. cottage cheese

-2 beaten eggs

-2 tsp salt (I usually do a little less)

– 1/2 tsp pepper

-2 Tbsp parsley flakes

Extra ingredients:

-9 lasagna noodles (I use brown rice pasta noodles)

-1 lb mozzerella cheese

-parsley to sprinkle on top

Directions:

1. Brown the ground beef in a large skillet and add the rest of the ingredients once you drain the meat. Simmer the mixture until the sauce is thick (approx. 30 minutes), stirring occasionally.

Momma B's Lasagna Meat Sauce2. While the sauce is thickening, boil the lasagna noodles. As the noodles are boiling, pre-heat the oven to 375.

3. Mix together the ingredients listed above for the “cottage cheese layer.” (Not gonna lie, this mixture doesn’t look very appealing but just trust me, it will be worth it!)

Momma B's Lasagna Cottage Cheese Layer4. Rinse the lasagna noodles in a colander. By this time, the sauce should be close to finished.

5. Place 3 noodles on the bottom of a 9 x 13 baking dish. Next, put half of the cottage cheese mixture on top. It’s okay if the mixture doesn’t actually cover all the noodles; the meat sauce will even it out. (I use a spatula to smooth each layer).

Momma B's Lasagna Layer 16. Add half of the meat sauce on top of the cottage cheese and cover with a layer of mozzerella.

Momma B's Lasagna Layer 2

Momma B's Lasagna Layer 37. Repeat steps 5-6.

8. Top the lasagna with the final three noodles and cover with mozzerella. Sprinkle a bit of parsley on top.

Momma B's Lasagna Top Layer9. Cover the dish with baking foil and bake at 375 for 30 minutes.

Momma B's Lasagna Finished10. Enjoy!!

Momma B's Lasagna Slice***

Loved styling my new Stella & Dot bracelet into my casual Friday look!

striped cardigan, long necklace, jeans, nude pumpsCardigan: Bought at consignment store (similar here) ~ Lace Shirt: Express (exact old, similar here) ~ Jeans: American Eagle (similar here) ~ Necklace: Express (old) ~ Renegade Bracelet: Stella Dot (exact here) ~ Arrow Bracelet: Ebay (no longer available)

The after-effects of a Juice Cleanse

Ugh. Today has not been the most fun of days.

After three days of nothing but fruits and veggies (whether in whole form or in juice), my body is not adjusting back to my “normal” food well.

This morning I had a bowl of cereal and skim milk, the same thing I’ve had every morning for the last several months. Normally I love starting my day out with cereal but today I didn’t feel that great afterwards. I kind of missed my refreshing morning juice! Tomorrow I’m definitely going to start my day off with some nice fresh juice.

For lunch I had yogurt with granola, like a normal lunch. I didn’t feel too bad after that, but then I made a mistake. Remember that delicious looking birthday cake my co-worker had yesterday? She saved me a piece and after eating it, I felt horrible. There was so much butter and sugar in it that I felt like sludge afterwards.

This has really made me realize how much food impacts your energy level and regular functioning. Even though I’m off my cleanse, I still need to incorporate lots of fruits and veggies into my everyday eating. And I really need to be careful about the amount of artificial sweeteners I eat. Butter, sugar, chocolate, and oils are things that suck my energy — and they’re not good for me anyways so limiting my intake of them can only be a good thing! 🙂

Tonight I’m making dinner and I think a nice fresh salad sounds like the perfect addition to the meal! I love that I’m actually craving veggies now!

***

Today’s outfit retreated back into winter layers and colors because it SNOWED last night and is cold again. I’m officially done with cold weather!

black cardigan, purple tank, black pinstripe pantsBlack cardigan: Express (exact old, similar here and here) ~ Purple tank: Express (exact old) ~ Black cami layered underneath: Express (exact here, similar here) ~ Pinstripe pants: Express (exact old, similar here) ~ Black beaded necklace: Premier Jewelry (exact old, similar here)

Wedding Wednesday: Operation Honeymoon!

First and foremost, today marks the last day of my 3-day juice cleanse!!

In the first two days of the cleanse, I made a huge juice in the morning and split it between breakfast and lunch. Yesterday, however, I was craving some change so I made a smaller juice for breakfast and then a different juice for lunch.

My breakfast juice was DELICIOUS! I’m going to call this my Peaches & Cream Morning Juice 🙂

Peaches & Cream Breakfast Juice

Ingredients:

-1 large handful of kale

-2 peaches

-10-12 strawberries

-1 banana

-a sprinkling of chia seeds (I added these to the juice afterwards)

This was probably one of my favorite juices so far — I stuck it in the freezer for about 20 minutes before leaving the house and it froze just enough to taste like a delicious smoothie! YUM!

For lunch, I made a greener juice.

Green Lunch Juice

Ingredients:

-2 handfuls spinach

-1 handful kale

-1/2 cucumber (I am not a huge fan of the cucumber taste in juice and I didn’t want it to be overwhelming. If you love cucumber, you could use the whole thing)

-1 pear

-1 apple (wish I had green apples for a true “green” juice!)

This juice was pretty good as well, although not as delectable as the morning juice. By lunchtime, I was just craving real food! While I wasn’t hungry (an 8 oz. juice is actually very filling!) I missed the texture of different types of foods. It didn’t help that it was my co-worker’s birthday and I had to stare at this all day long:

Temptation!

Yeah. It was brutal! I had to watch everyone eat it while munching on carrot sticks at my desk.

Yet another carrot

Pathetic, I know.

After a quick workout at the gym, it was time to head home and freshen up for DINNER. A real live dinner!! We went over to our friends’ house where they had prepared a feast!

First meal!!

My friend Kristen was the one who initially suggested doing the cleanse and we were both salivating watching her husband prepare lemon alfredo chicken pasta and perfectly steamed broccoli! This meal was perfection and it was definitely worth the wait!

A few tips for anyone considering a juice fast:

-Listen to your body! I tried a 3 mile run the first day of the cleanse and that was a mistake — my body was still adjusting at that point and I wish I would have done a lighter workout.

-Incoroporate whole fruits and veggies. I never would have survived on just juice so I munched on bananas, strawberries, and carrots in between meals.

-Do it with a partner! Kristen and I both admitted we would have cheated many times had we not known there was someone there to keep us accountable. We were both really proud of ourselves for sticking with it and not cheating or giving up!

While I’m actually glad I had this experience, I think I’ll stick to juicing just once a day for the time being. 🙂

Wedding Wednesday: Operation Honeymoon!

About this time last year, my workout routine was getting more and more intense to prepare for the wedding! There are few things more motivating to get your butt to the gym than knowing you’re going to stand in front of 200+ people in a form-fitting dress and have pictures in it that last a lifetime! Also motivating is knowing you’ll frolic on the beach in a bikini the next week on your honeymoon. Needless to say, I was working hard! I found that having an actual plan for my workout helped me adequately rotate muscle groups and make sure I was getting a good mix of strength training and cardio. I even created a workout chart I called “Operation Honeymoon” to help motivate me! I wrote down everything I wanted to do each day (i.e. Monday: 60 minute kickboxing class; Tuesday: 2 mile run, 30 minutes arms strength training; Wednesday: 30 minutes on bike, 30 minutes legs strength training, etc). My plan was for 6 days a week and I tried to keep mixing up what I did so I never got into a workout rut. I was really thankful for all my hard work once my wedding day came! There is nothing quite like feeling fabulous and fit on your wedding day! 🙂

If you are getting married and want to get in shape (or just want to have a healthy workout plan), I highly recommend created an actual physical plan of what you want to do each day. It helps keep you accountable and also gives you and idea of what you need to work on each time you go to the gym!

***

Today’s outfit was filled with bright colors because it’s finally sunny and warm! (Never mind that it’s supposed to snow tomorrow…)

coral shirt with turquoise jewelry

 V-neck shirt: Old Navy (similar here) ~ Lace cami: Express (similar here and here) ~ Khaki pants: Maurices (similar here) ~ Leopard Flats: Target (exact here) ~ Necklace: Premier Jewelry (exact old)

Juice Cleanse Day Two!

Day two of the juice cleanse is on! So far I’m feeling pretty good, but yesterday I ran 3.25 miles (I’m running a 5k on Saturday) and by the end I was NOT feeling very well. I’m not sure this juice cleanse provides enough calories (and possibly not enough protein) for such strenuous exercise. I think today I’ll just stick to a light workout.

Last night’s dinner was the first real challenge for me because before I made my juice, I cooked a huge pot of chili for Justin. OH MY GOSH it was ridiculously tempting. Luckily, I made enough chili for leftovers so I won’t have to cook again tonight and be tempted again.

03-10 DinnerI had to throw in a bunch of strawberries for something to chew. The juice was yummy but I just needed something “extra!”

My dinner juice consisted of:

-2 handfuls of spinach

-1 banana

-1 apple

-4-5 pieces of bok choy (kind of a mix between lettuce and celery if that makes sense at all)

Morning Beet Juice

Morning Beet Juice Ingredients :: simplifythechaos.comMy juice this morning consisted of:

-2 apples

-4 clementines

-1/4 pineapple (half of what is shown)

-handful of kale

-2 large handfuls of spinach

-1 beet (peeled)

This juice is also really good but the beet kind of gives it what my husband calls “a dirt taste.” I have to agree that the beet significantly changes the taste but it was good variety to add! I had half the juice for breakfast and half for lunch with a banana and carrots as snacks. Tonight I want to try a juice with lots of greens–we’ll see how that goes. I’m halfway through this juice cleanse!!

***

Today’s outfit was simple with a touch of sparkle!

cardigan, pencil skirt, statement necklace. teacher outfit blog :: simplifythechaos.com  Cardigan: Old Navy (similar here) ~ Lace cami: Express (similar here and here) ~ Grey pencil skirt: Laundry by Shelli Segal (similar here and here) ~ Grey pumps: Bandolino (similar here) ~ Necklace: Purple Peridot “Crystal Sparkler” (exact here)

Let the Juice Cleanse begin

Well, Daylight Savings Time is officially kicking my booty. Last night Justin and I thought we had changed all the clocks, but we forgot one crucial one in our living room and by the time we realized it, it was already way past our bedtime (yes, we have a bedtime). Needless to say, that led to accidentally sleeping in WAY too long this morning so it’s been a bit of a rough start for me with the time change!

Juice Cleanse

I have really enjoyed the juices that Justin and I have been trying lately; it’s been fun to come up with different combinations! Yesterday I was talking to one of my good friends and she expressed a lot of interest in doing a 3-day juice cleanse. Even though I initially said I had no interest in a juice fast of any kind, she convinced me to give it a try with her. We started today and so far, so good! I made an extra big juice for breakfast and brought half with me to school for lunch.

Morning Burst JuiceI had to drink it on the way to work because of my super hurried morning!

I made my Morning Burst Juice again but added an extra apple and pineapple. It was a pretty frothy juice (I blame the banana) but very yummy! I enjoyed having another one for lunch as well. In addition to the juices, I packed lots of carrot sticks and a banana; there is NO way I’d be able to survive on only three juices! I plan on making a snack juice after my run this afternoon and then a dinner juice later in the evening. It will be hard to cook Justin dinner and watch him eat it, but I really want to try to make it through this cleanse!

***

It was finally above 60 today and it’s sunny so it feels like spring is really on its way! I wanted to pick fun springy colors for my outfit and here’s what I came up with (open-toed shoes!! Yay!) Details on wear page.

Orange stripes, green statement necklace, navy ankle pants, orange strappy heelsSweater: Express

Pants: Target

Shoes: Bakers

Necklace: Bluetique

Wedding Wednesday: Wedding Party

So yesterday after school I had a meeting and then Justin and I had friends over for dinner. No time to blog! Therefore, “Wedding Wednesday” is happening on a Thursday. And in my own little blog world, there is nothing wrong with that. 🙂 So let’s get to it!

Wedding Wednesday: The Wedding Party!

Since the last two Wedding Wednesdays have focused on what Justin and I wore, I decided to keep that theme going and discuss the bridal party!

From day one of planning, Justin and I knew that we wanted our wedding to be FUN — our goal was for the whole day to just be a celebration! Nothing super fancy and stiff because that’s just not us. We wanted our wedding party to be comfortable and happy so we gave them a lot of freedom with their outfits. I did this mostly because I have been in a few weddings and I’ve learned a few things. For starters, while it is a HUGE honor to be part of this special day in someone’s life, it is really kind of annoying to have to shell out $200 for a dress/suit you hate and will never wear again. Nothing against the bride or groom, but if their style is not yours, it’s hard to spend lots of money on clothes that aren’t “you.” In addition to that, everyone in our party was either a young professional just starting a career, starting graduate school, or still in college (a.k.a. BROKE). Our wedding took place in my hometown and many had to take off work and pay for travel just to get there. We didn’t want to put a financial burden on anyone so letting them pick their outfits ensured they not only felt comfortable in what they wore but also spent an amount of money that was comfortable to them.

Here are the results (all photos copyright the incredible Rothwell Photography):

Copyright Rothwell Photography

I absolutely LOVED how everything came together! I’m so glad everyone put some personality into their outfits.

While I was very pleased with how everything turned out, there are some things you should consider if you’re giving your wedding party freedom in choosing their own outfits. Here are my top tips:

1. Give your attendants clear guidelines. For my girls, I told them to pick a knee-length navy dress. Since my family is fairly conservative, I asked that hemlines be no more than one inch above the knee. I did not care about sleeves/strapless/neckline other than to ask that there not be cleavage. I also sent them pictures of dresses I liked as examples and a few of them ended up buying dresses that I sent as examples. SHOW THEM PICTURES! They might think they know what you’re looking for but they could be on the wrong page — make sure they see the type of overall look you’re going for with your wedding.  I also told them to pick nude shoes that they would be comfortable in (flats, heels, sandals, etc) but asked that they not be flip flops.

Copyright Rothwell Photography

For the guys, I asked them to wear khaki dress pants and brown shoes (we provided the shirt and suspenders). I did not care about color or style, although in hindsight I wish I had told them not to wear pants with pleats because that ended up looking a little strange with suspenders. For the tie, I sent them a link to the Bows N Ties website because they organize their ties into color palettes. I asked them to choose a tie from a specific page that they liked and would want to wear again.

Copyright Rothwell Photography

2. Make sure to approve of all outfits . . . I had my girls text me a picture of their chosen dress before they bought it just to make sure it was okay. They were all really willing to do this because no one wanted to stick out by being the oddball in a dress that looked “off” from the party. I didn’t ask them to, but most also texted a pic of the shoes to make sure they got approval. We also approved all the guys ties before they bought them to make sure there weren’t a ton of duplicates or one that clashed.

3. . . . but be flexible with individual styles. One of our ushers felt that he didn’t look quite right in thicker ties and wanted a skinny tie that was not offered on the website we sent. We told him to order one he liked (but just double check with us before buying to make sure the color worked) and felt comfortable in. Be willing to consider all requests, and think about what is really important. You might not love lace, but if your sister picks a dress with lace that she loves and is happy in and it fits in with the rest of the dresses, that might be worth letting slide even if it’s not your favorite. If you feel yourself wanting to control the dresses on a micro-detail level, letting your attendants pick their dress might not be the right move for you.

Copyright Rothwell Photography

4. If you don’t want to give up complete control, consider allowing attendants to choose details. For example, consider a dress that can be worn multiple ways (strapless, one shoulder, spaghetti strap) to let each girl wear what they’re comfortable in. Or allow them to choose their jewelry or shoes even if they’re all wearing the same dress. I bought my girls each a piece of jewelry, but I let them pick it out so it’d be something they’d wear again and again and think of our wedding!

5. Make sure it all “fits” by choosing a few details to keep consistent. Giving too much freedom can look chaotic or keep your party from looking like a cohesive unit. For example, if you just want attendants to wear a blue dress with no other guidelines, they might all wear something totally different and not look like they belong together. I’ve seen weddings where you can’t even tell who is in the party because the outfits are all so different. If that’s your style, go for it! For me, I wanted my party to still look coordinated. I had the girls all in dresses of the same length and the guys in the same shirt and suspenders. While our ushers wore white shirts and our groomsmen green, their looks still coordinated well together! Because there was so much variation in style of dress, shade of khaki pant, and style of tie, the party needed a few key details to be the same in order to “fit” together.

Copyright Rothwell Photography

I hope you have found this list helpful! I had many compliments from guests (and even some people who weren’t at our wedding but saw pictures) on how great our party looked and several attendants commented on how much they appreciated getting to choose a style that they liked and would wear again . . . AND that fit their budget! I highly recommend considering letting your attendants in on some of the decision making — I’m really glad we did!

Previous Wedding Wednesday Posts:

The Suit

The Dress

The Planning

My #1 Advice

 ***

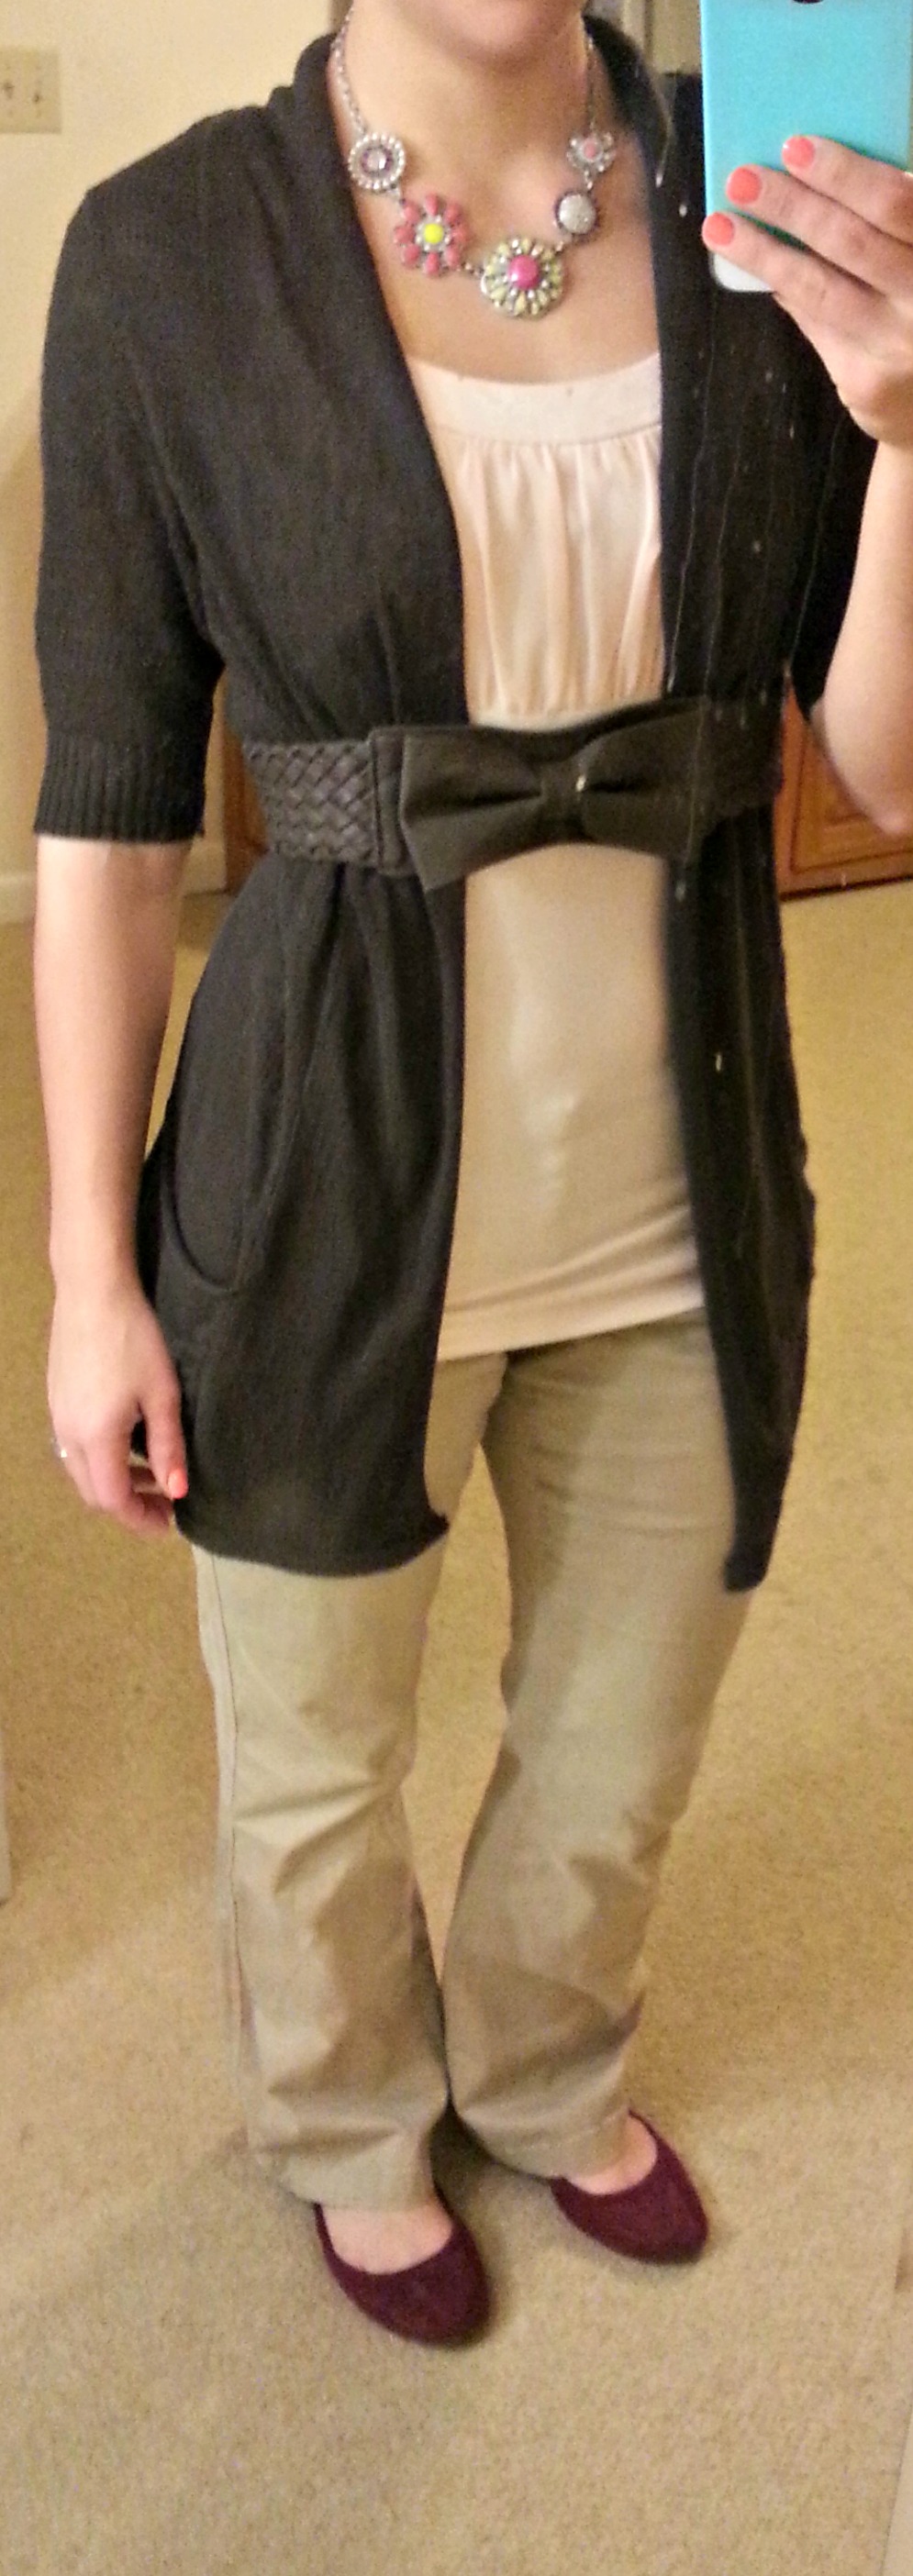
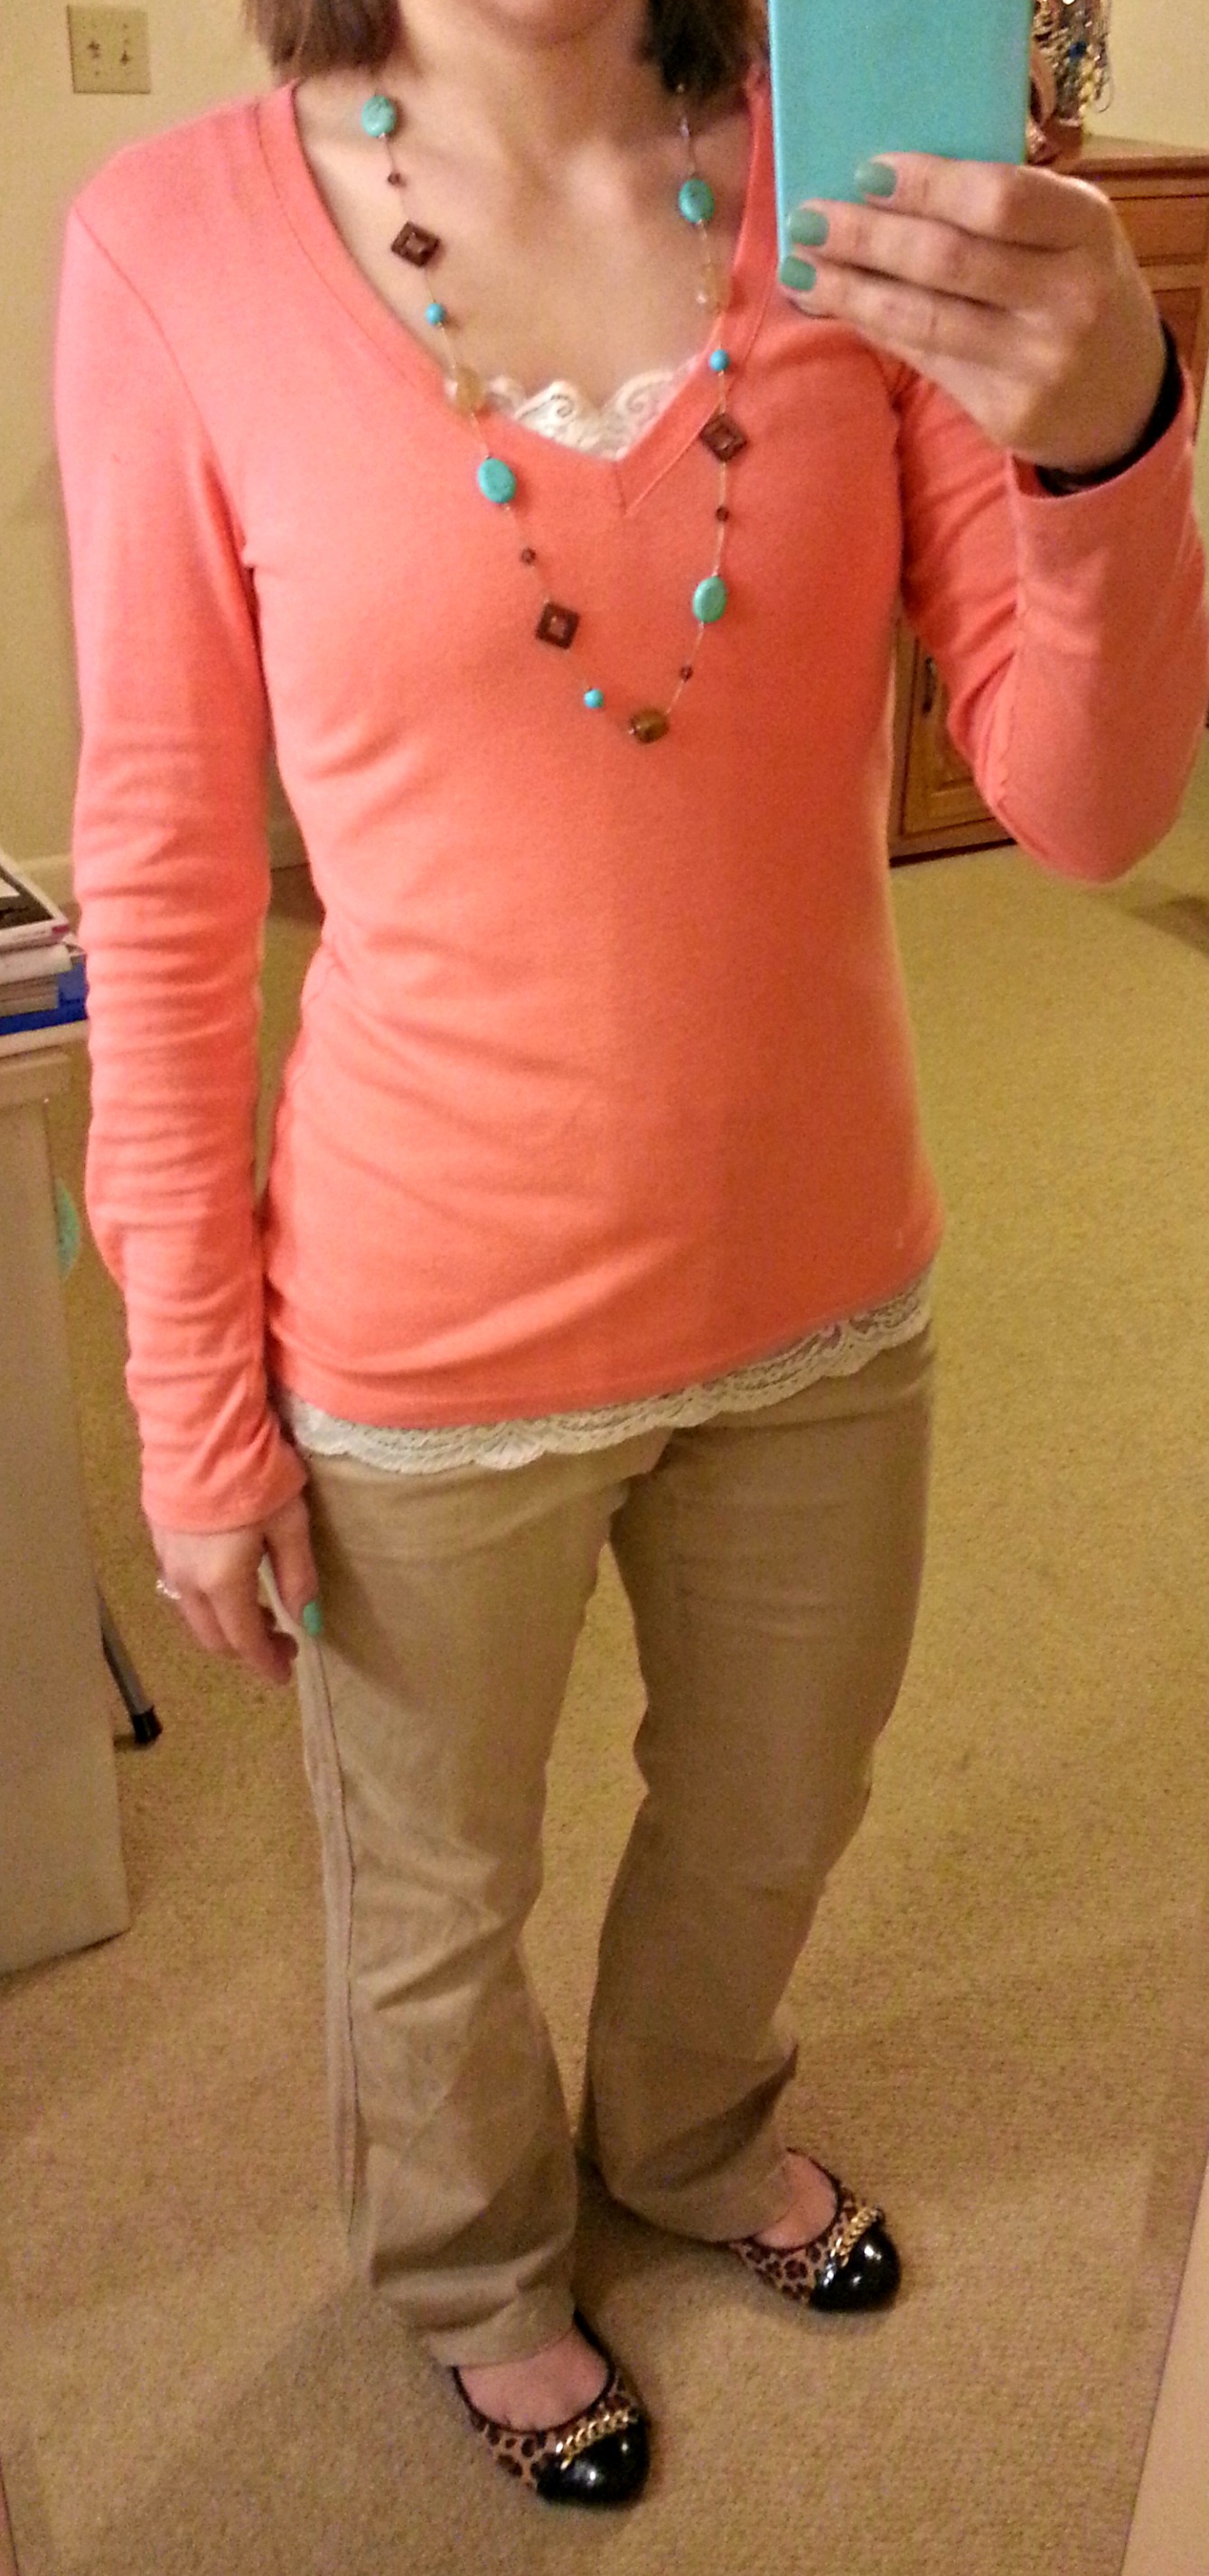
I was feeling polka dots for today’s outfit so I kept piling on the dots! Details to available pieces on Wear page.

teacher outfit blog :: simplifythechaos.comSweater: New York & Company

Blouse: New York & Company

Skirt: Kohls

Tights: Express

Pumps: Maurices

Necklace: Forever 21
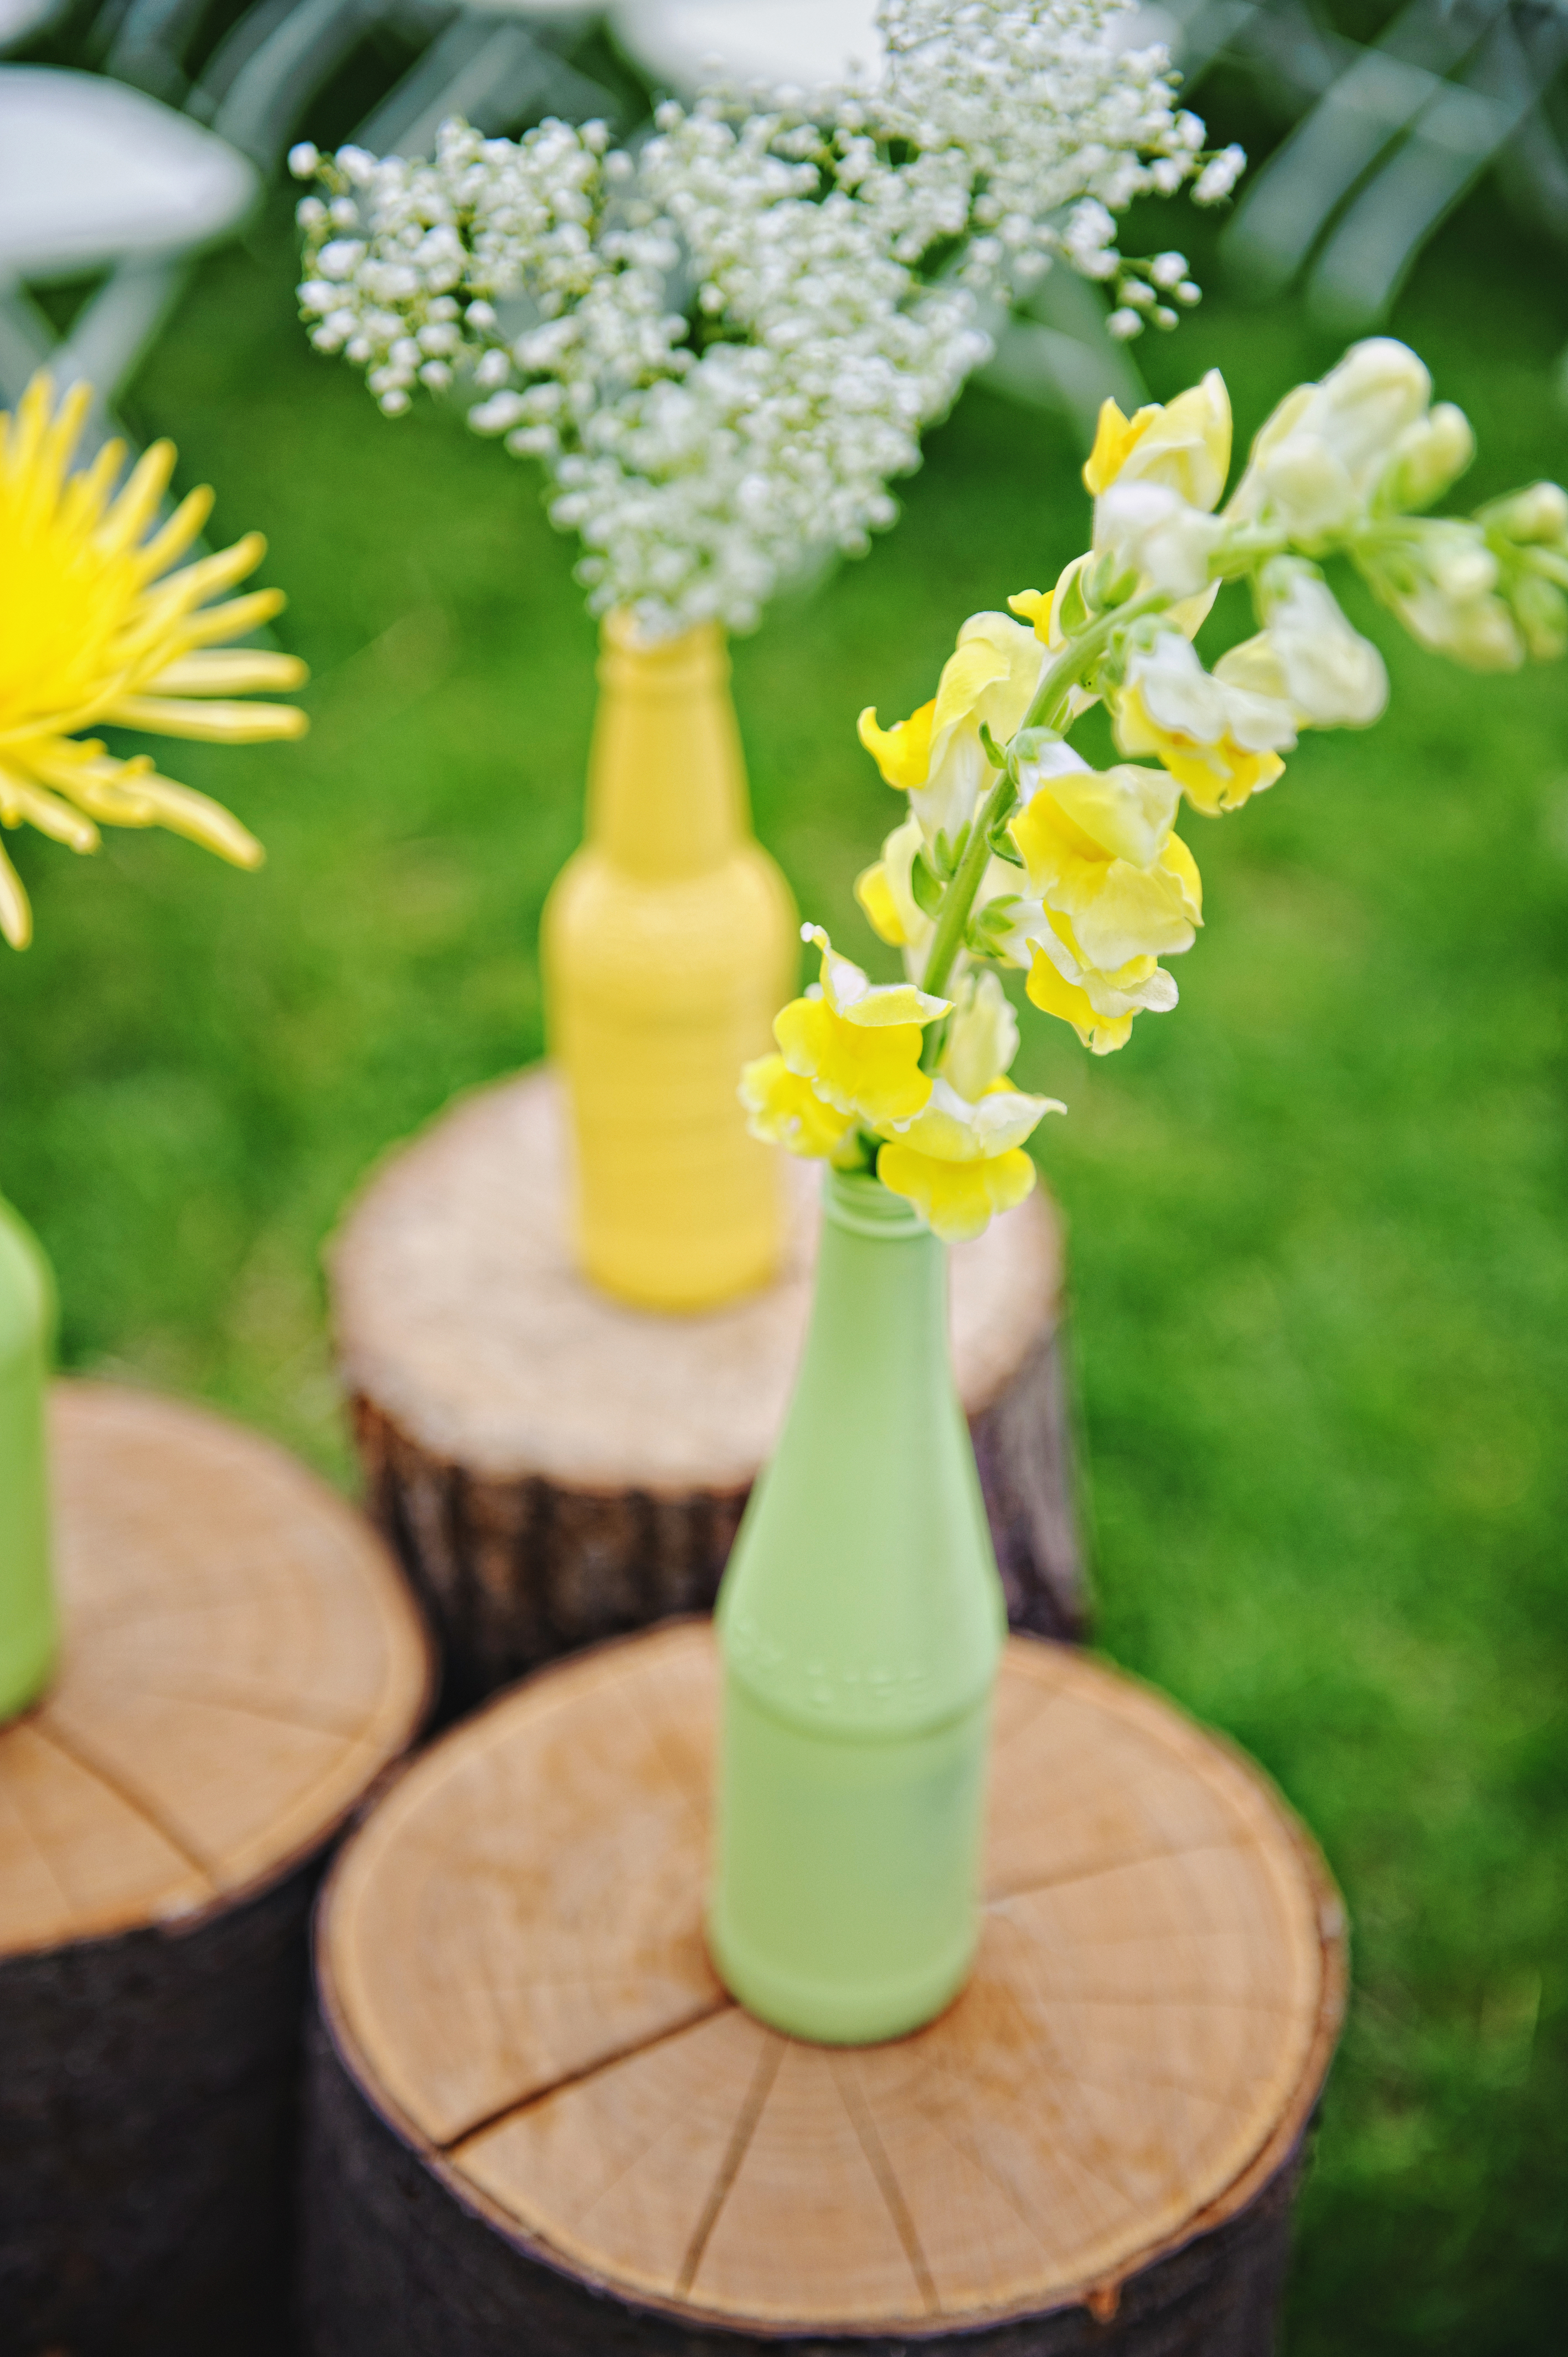
Outfit catch-up + Juice!

Hi y’all!

Another day off of school due to snow (I don’t know about you, but I am READY for spring to get here!) which I spent cleaning, doing laundry, and . . . napping. Not even a little bit ashamed about it either.

Morning Burst Juice

Today for breakfast Justin and I tried a new juice and we LOVED it! I am calling it my “morning burst” juice because it seriously gave me the perfect boost of energy to start my day! This is definitely going to make it into our regular rotation.

Ingredients:

-2-3 handfuls spinach

-1 banana (two if they are small)

-1 large apple

-1/4 pineapple

-1 pear

Morning Burst Juice Ingredients

So delicious! I added water to mine to make it less thick but Justin loves the thicker/frothier taste so he didn’t. We were both big fans!!

Morning Burst Juice

Outfit Catch-up

Since I’ve been horrible at blogging lately, here are my latest work outfits! Details to all available pieces can be found on the wear page. Enjoy!

teacher outfit blog :: simplifythechaos.com teacher outfit blog :: simplifythechaos.com teacher outfit blog :: simplifythechaos.com teacher outfit blog :: simplifythechaos.com teacher outfit blog :: simplifythechaos.com teacher outfit blog :: simplifythechaos.com teacher outfit blog :: simplifythechaos.com