Holiday Home Tour 2020

We’re officially ONE WEEK away from Christmas! I’ve been feeling extra festive all week, so today I’m going to give a little tour of my home decorated for the holidays.

But first, a disclaimer: we have a three-year-old and a one-year-old running around, so all decorations within their reach (and I’m constantly surprised by what all they can reach haha!) need to be toddler friendly. On top of that, we’re not hosting any Christmas parties or having any people over right now, so no one outside our family is even seeing our house. All that to say, my decorating this year was more minimal than normal. I kept things simple by focusing on a few areas throughout the house that we use the most frequently.

It’s easy to feel discouraged by my efforts when I see all the gorgeously decorated homes circulating social media these days. It seems like every holiday tour features a showstopper house! But the reality is, our family life is not conducive to a picture-perfect home at this point in time. And someday when I’m able to go all out and decorate my house the way I want to, I know I’ll miss the simple little Christmases when my kids were little. The sticky fingers baking Christmas cookies, the sweet little holiday crafts, the wonder in their eyes as they look at the lights on the tree or delight in an ornament with their picture on it, their little bodies curled up next to mine as we watch a Christmas movie together. These little people years are magical too, so I am going to proudly document our home as it looks for this stage in our family’s life.

I snapped this photo the other day when I was working in the office and they were drawing. I love how it looks like they’re both writing letters to Santa ha! I love my sweet little Christmas-pajama wearing elves.

Ok – on to the tour! Our living room is the main area we hang out in as a family, and with the large bay window, it makes for an obvious choice for our Christmas tree. My favorite is at night when the lights from the tree reflect on all the windows – it feels truly magical!

I’ve said it before, but every year my favorite ornaments are the ones that show our “first” years. First year married, and then first year for both our kids. Since LJ was born around Thanksgiving, his got to be extra festive 😉

Since our house does not have a fireplace, we use our stair railing instead. I string garland down the railing and then hang all six of our stockings (two adults, two kids, two dogs!) on the living room side of the railing. I love using monogram ornaments to mark everyone’s stocking.

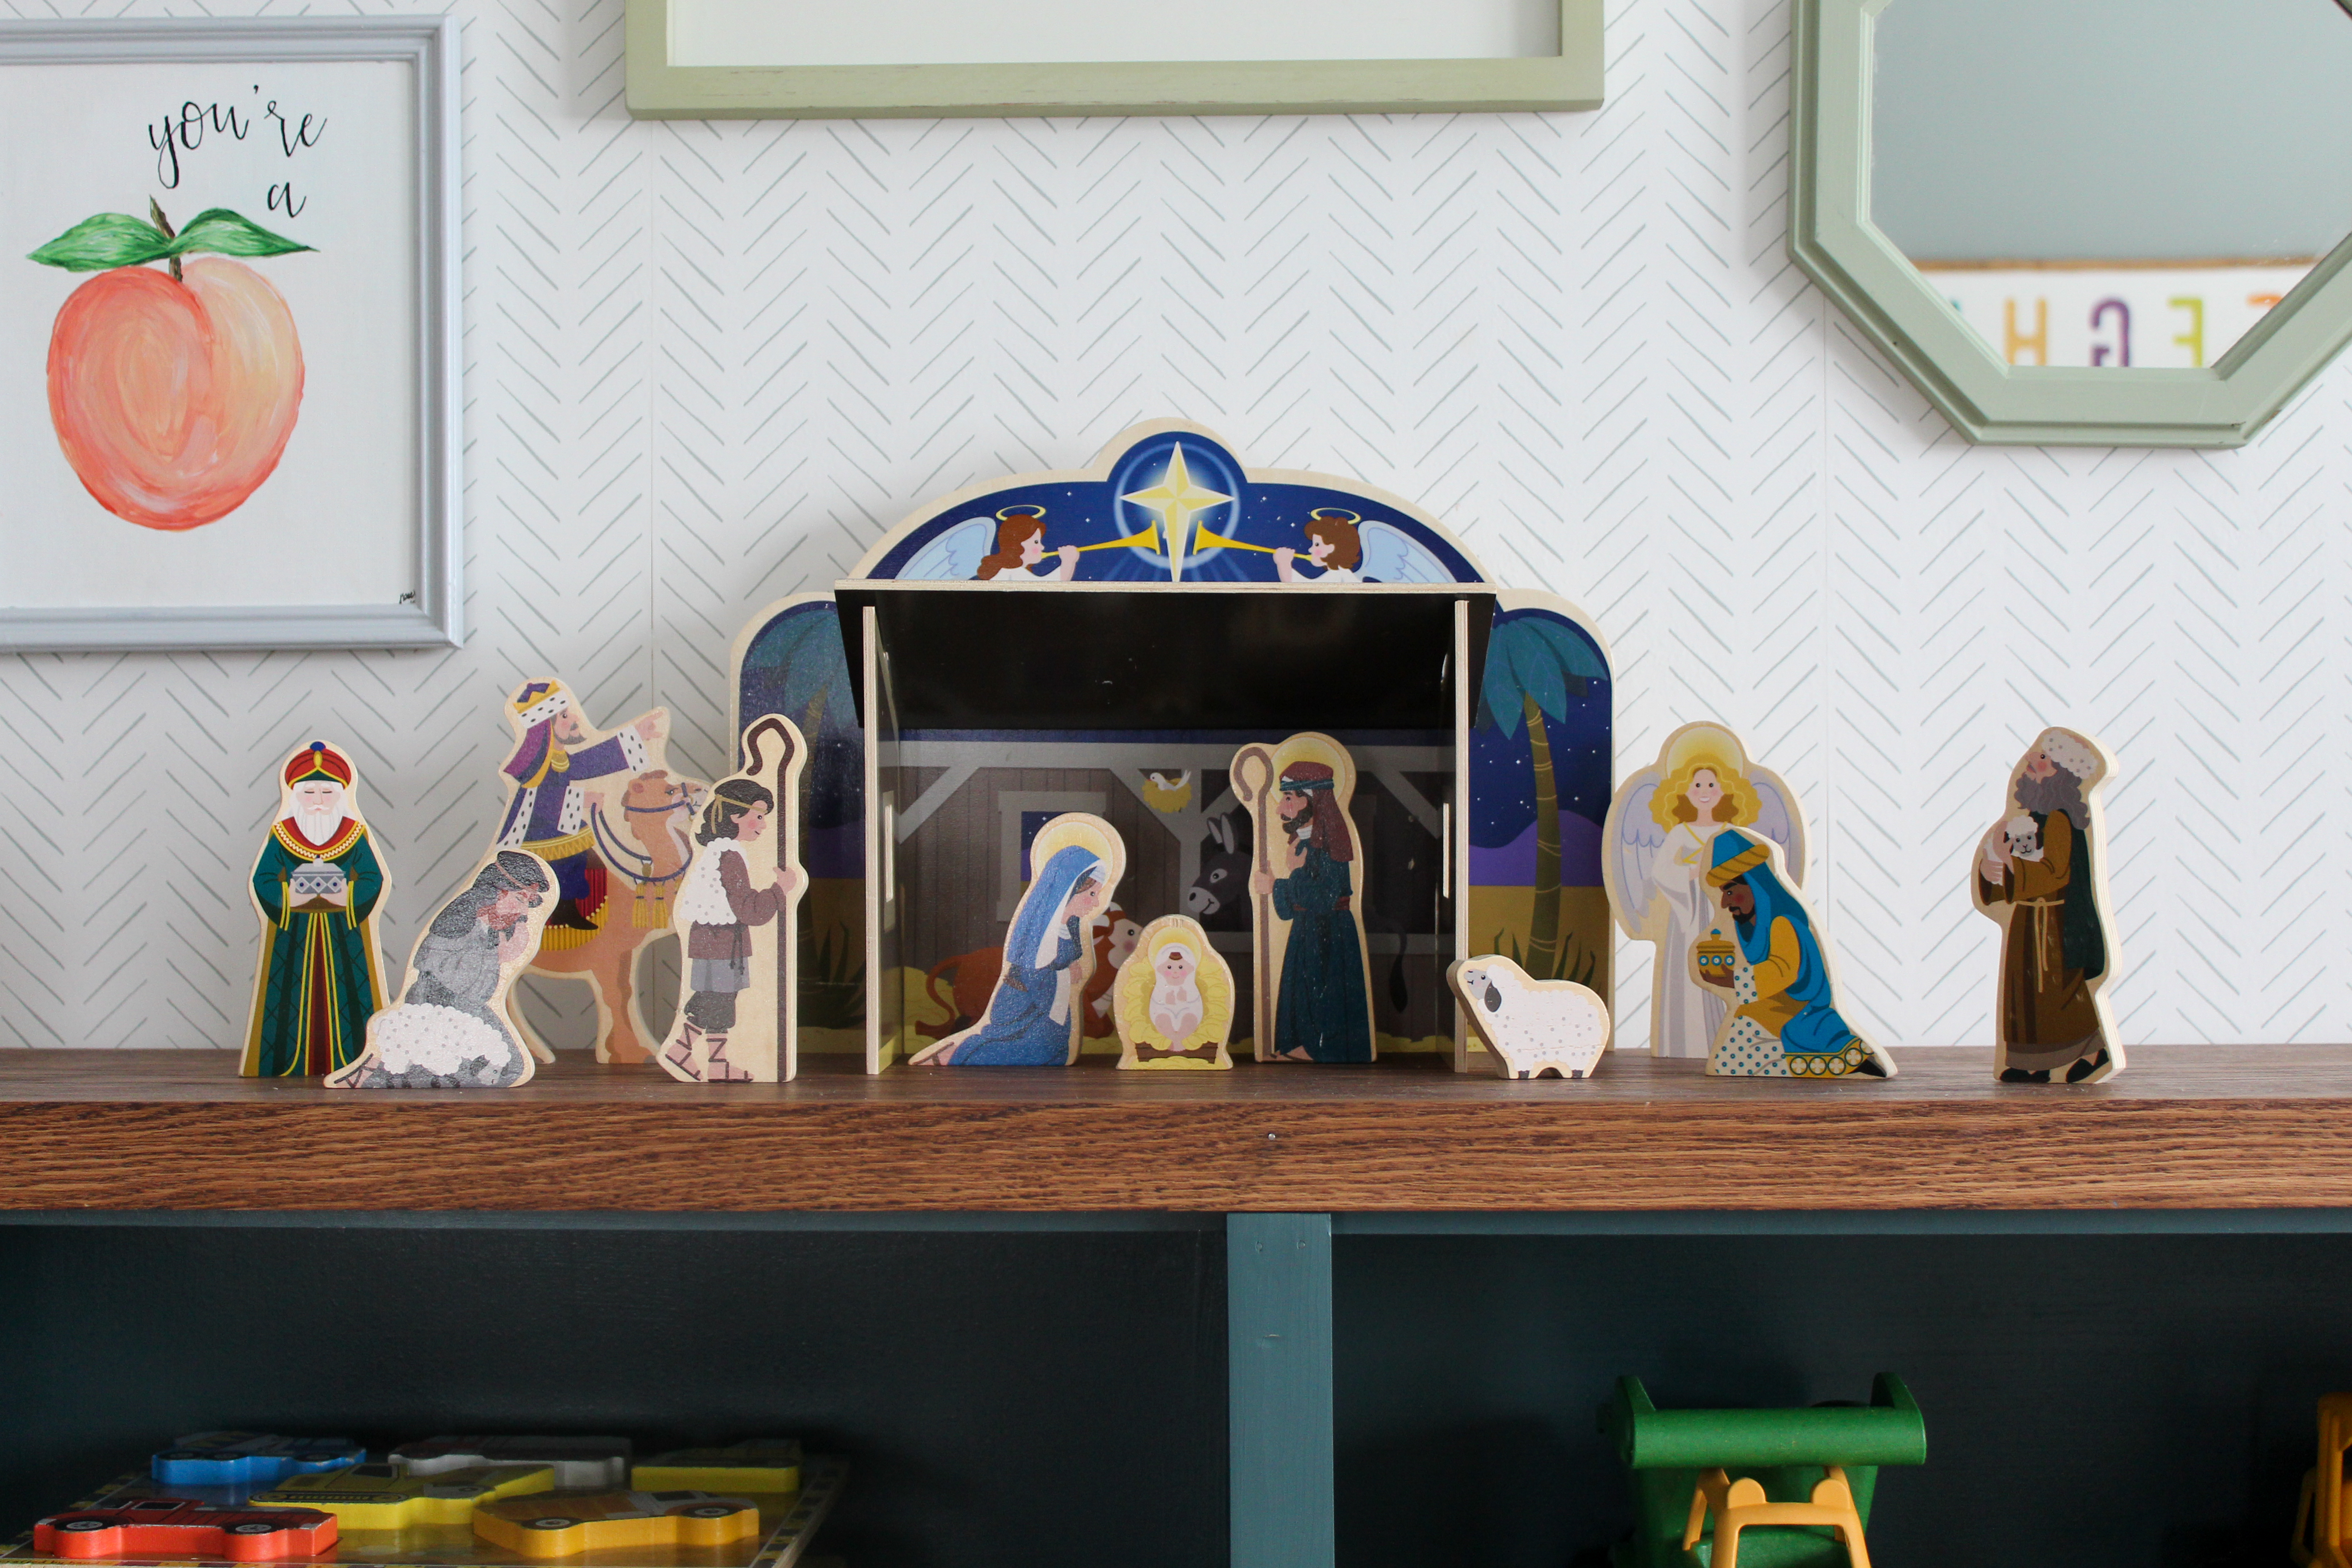
We learned pretty quickly with toddlers that we can’t keep anything on our end tables without getting knocked off, so this kid-friendly wooden nativity set is a perfect option! The barn was made from an older man at my church who became a kind of surrogate grandfather for me over the years and it is very special to me. His granddaughter made all the people out of dowel rods, scrap cloth, and pipe cleaner – this could easily be a family craft project if you want an inexpensive nativity for kids to play with! My kids love it!

Christmas pillows are another easy, kid-friendly way to add a festive feel.

Macie approves of my Christmas blanket. 😉

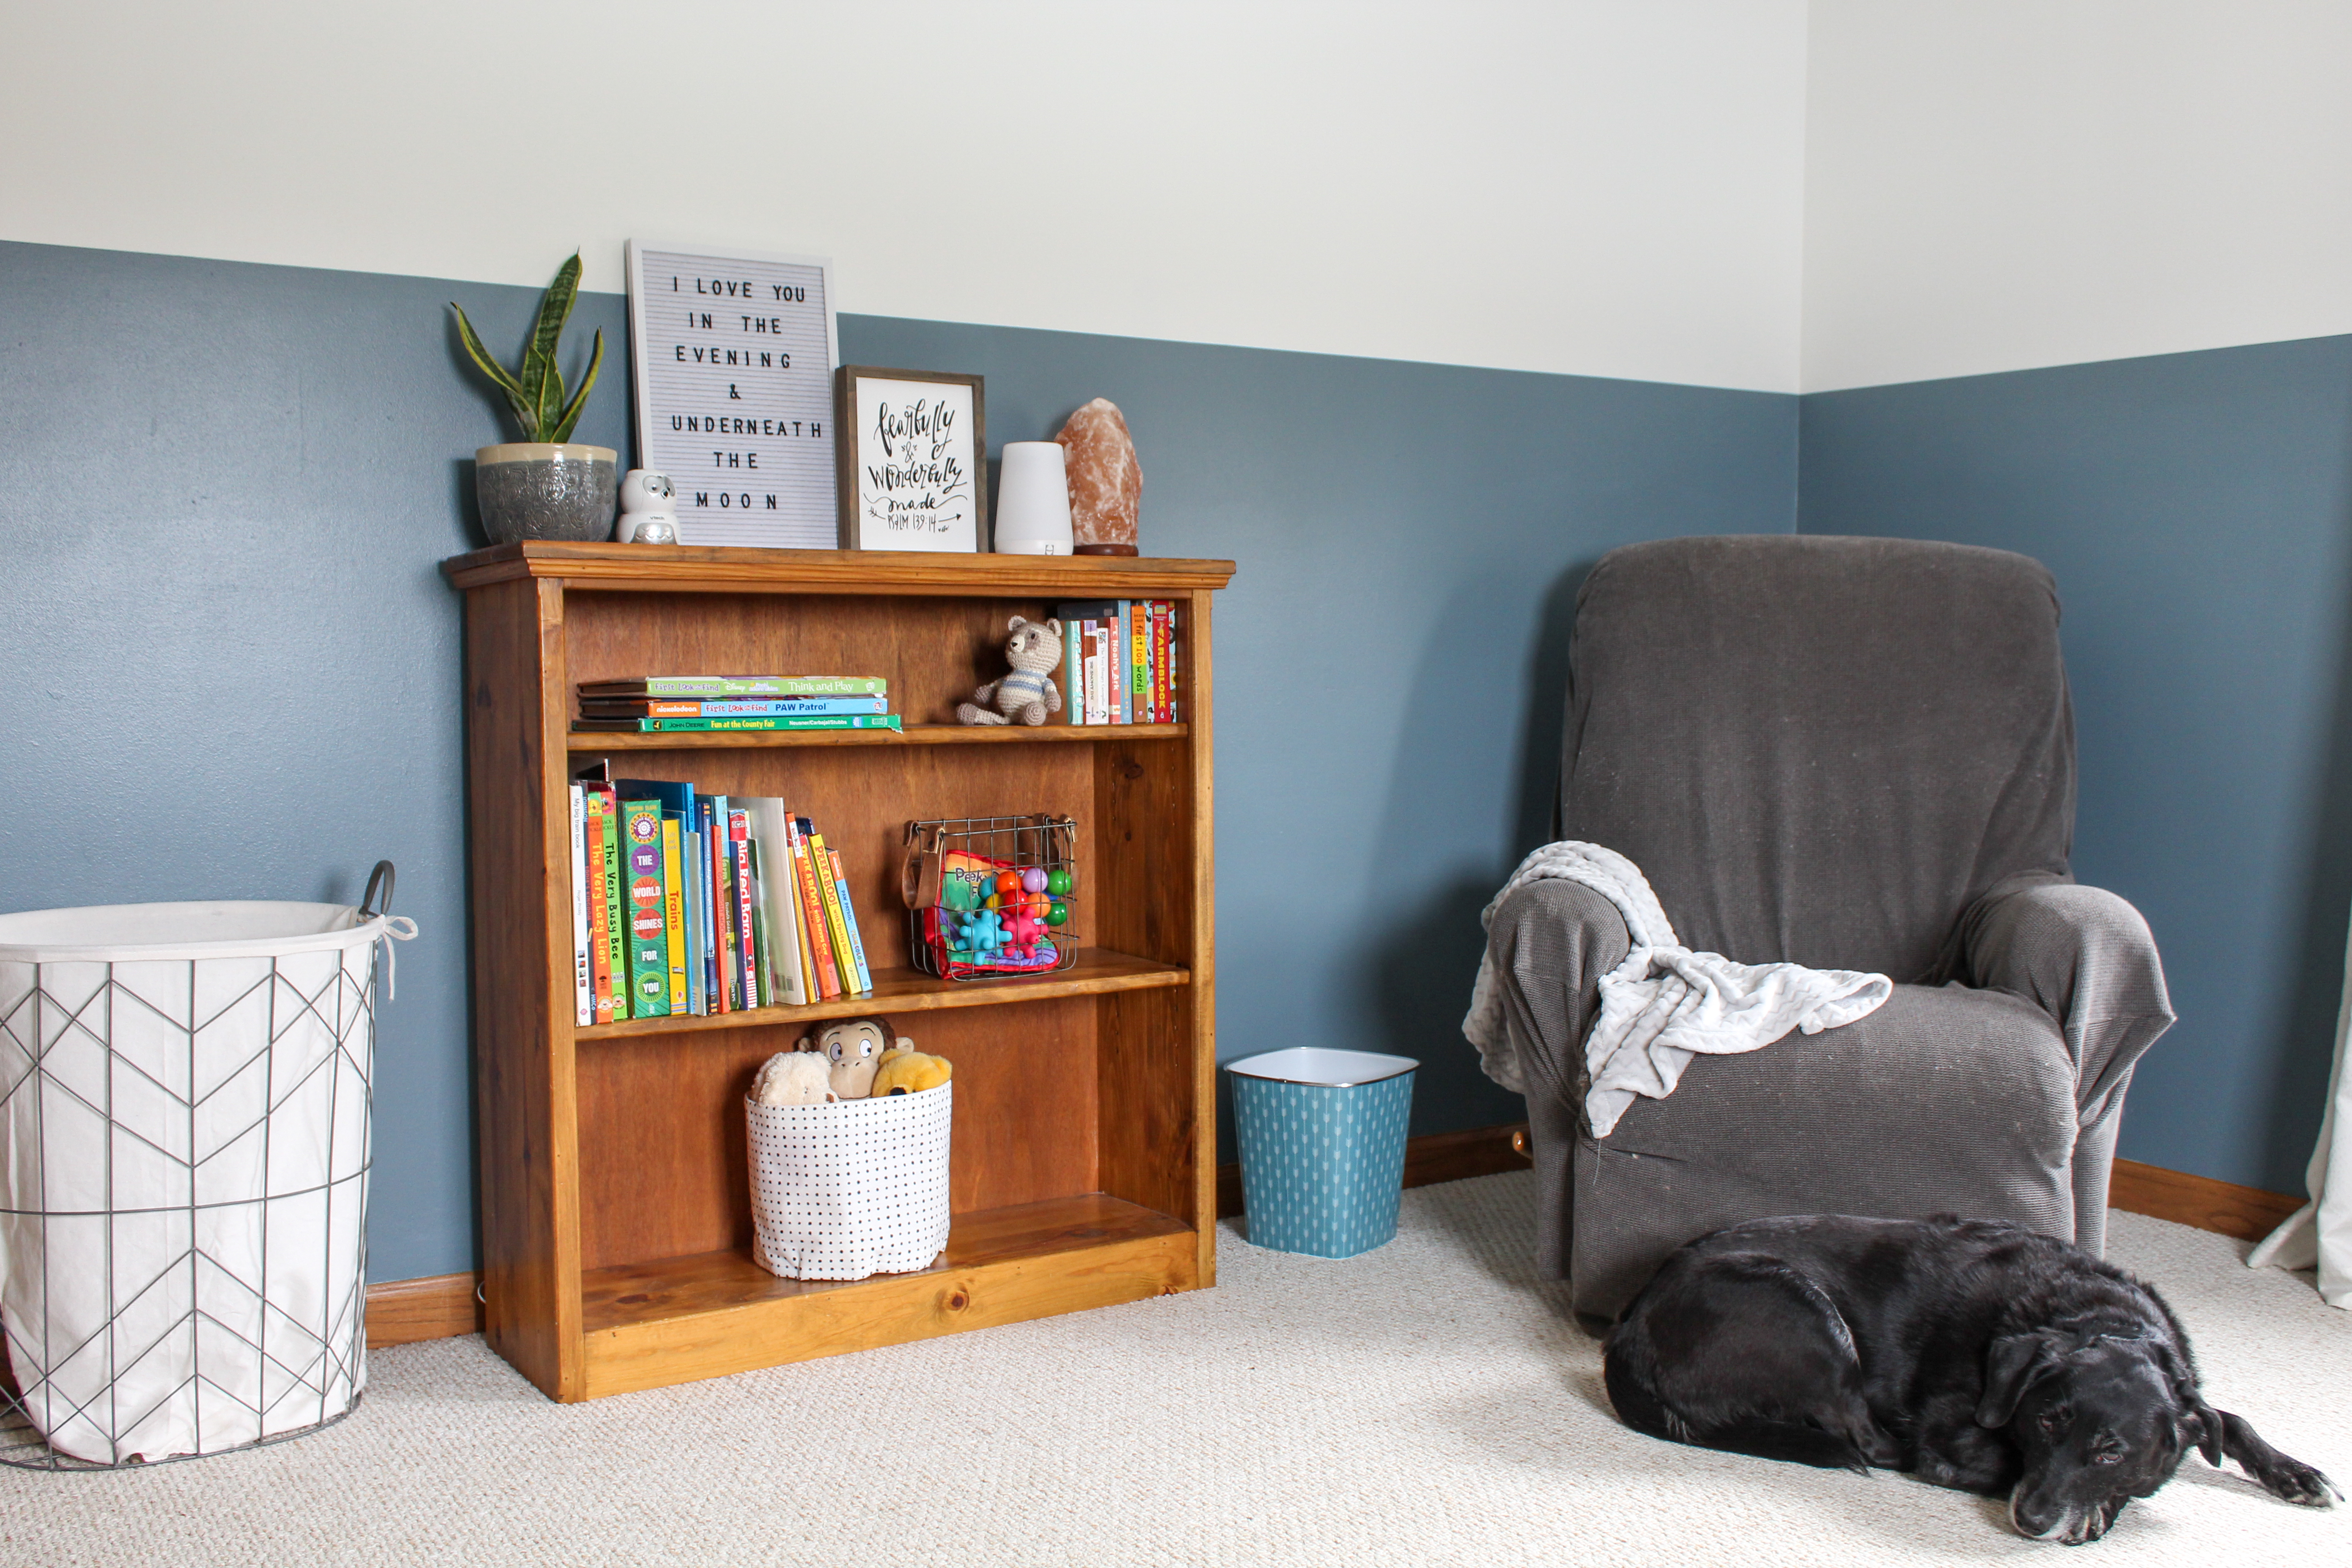
I used the large cased opening from the living room to the playroom to hang our mistletoe. I love that this view also shows the reindeer sign and nativity on the shelf – just a few little sprinkles of Christmas in a room that needs to stay functional for playtime.

I also keep a little basket on the shelf for all our holiday books!

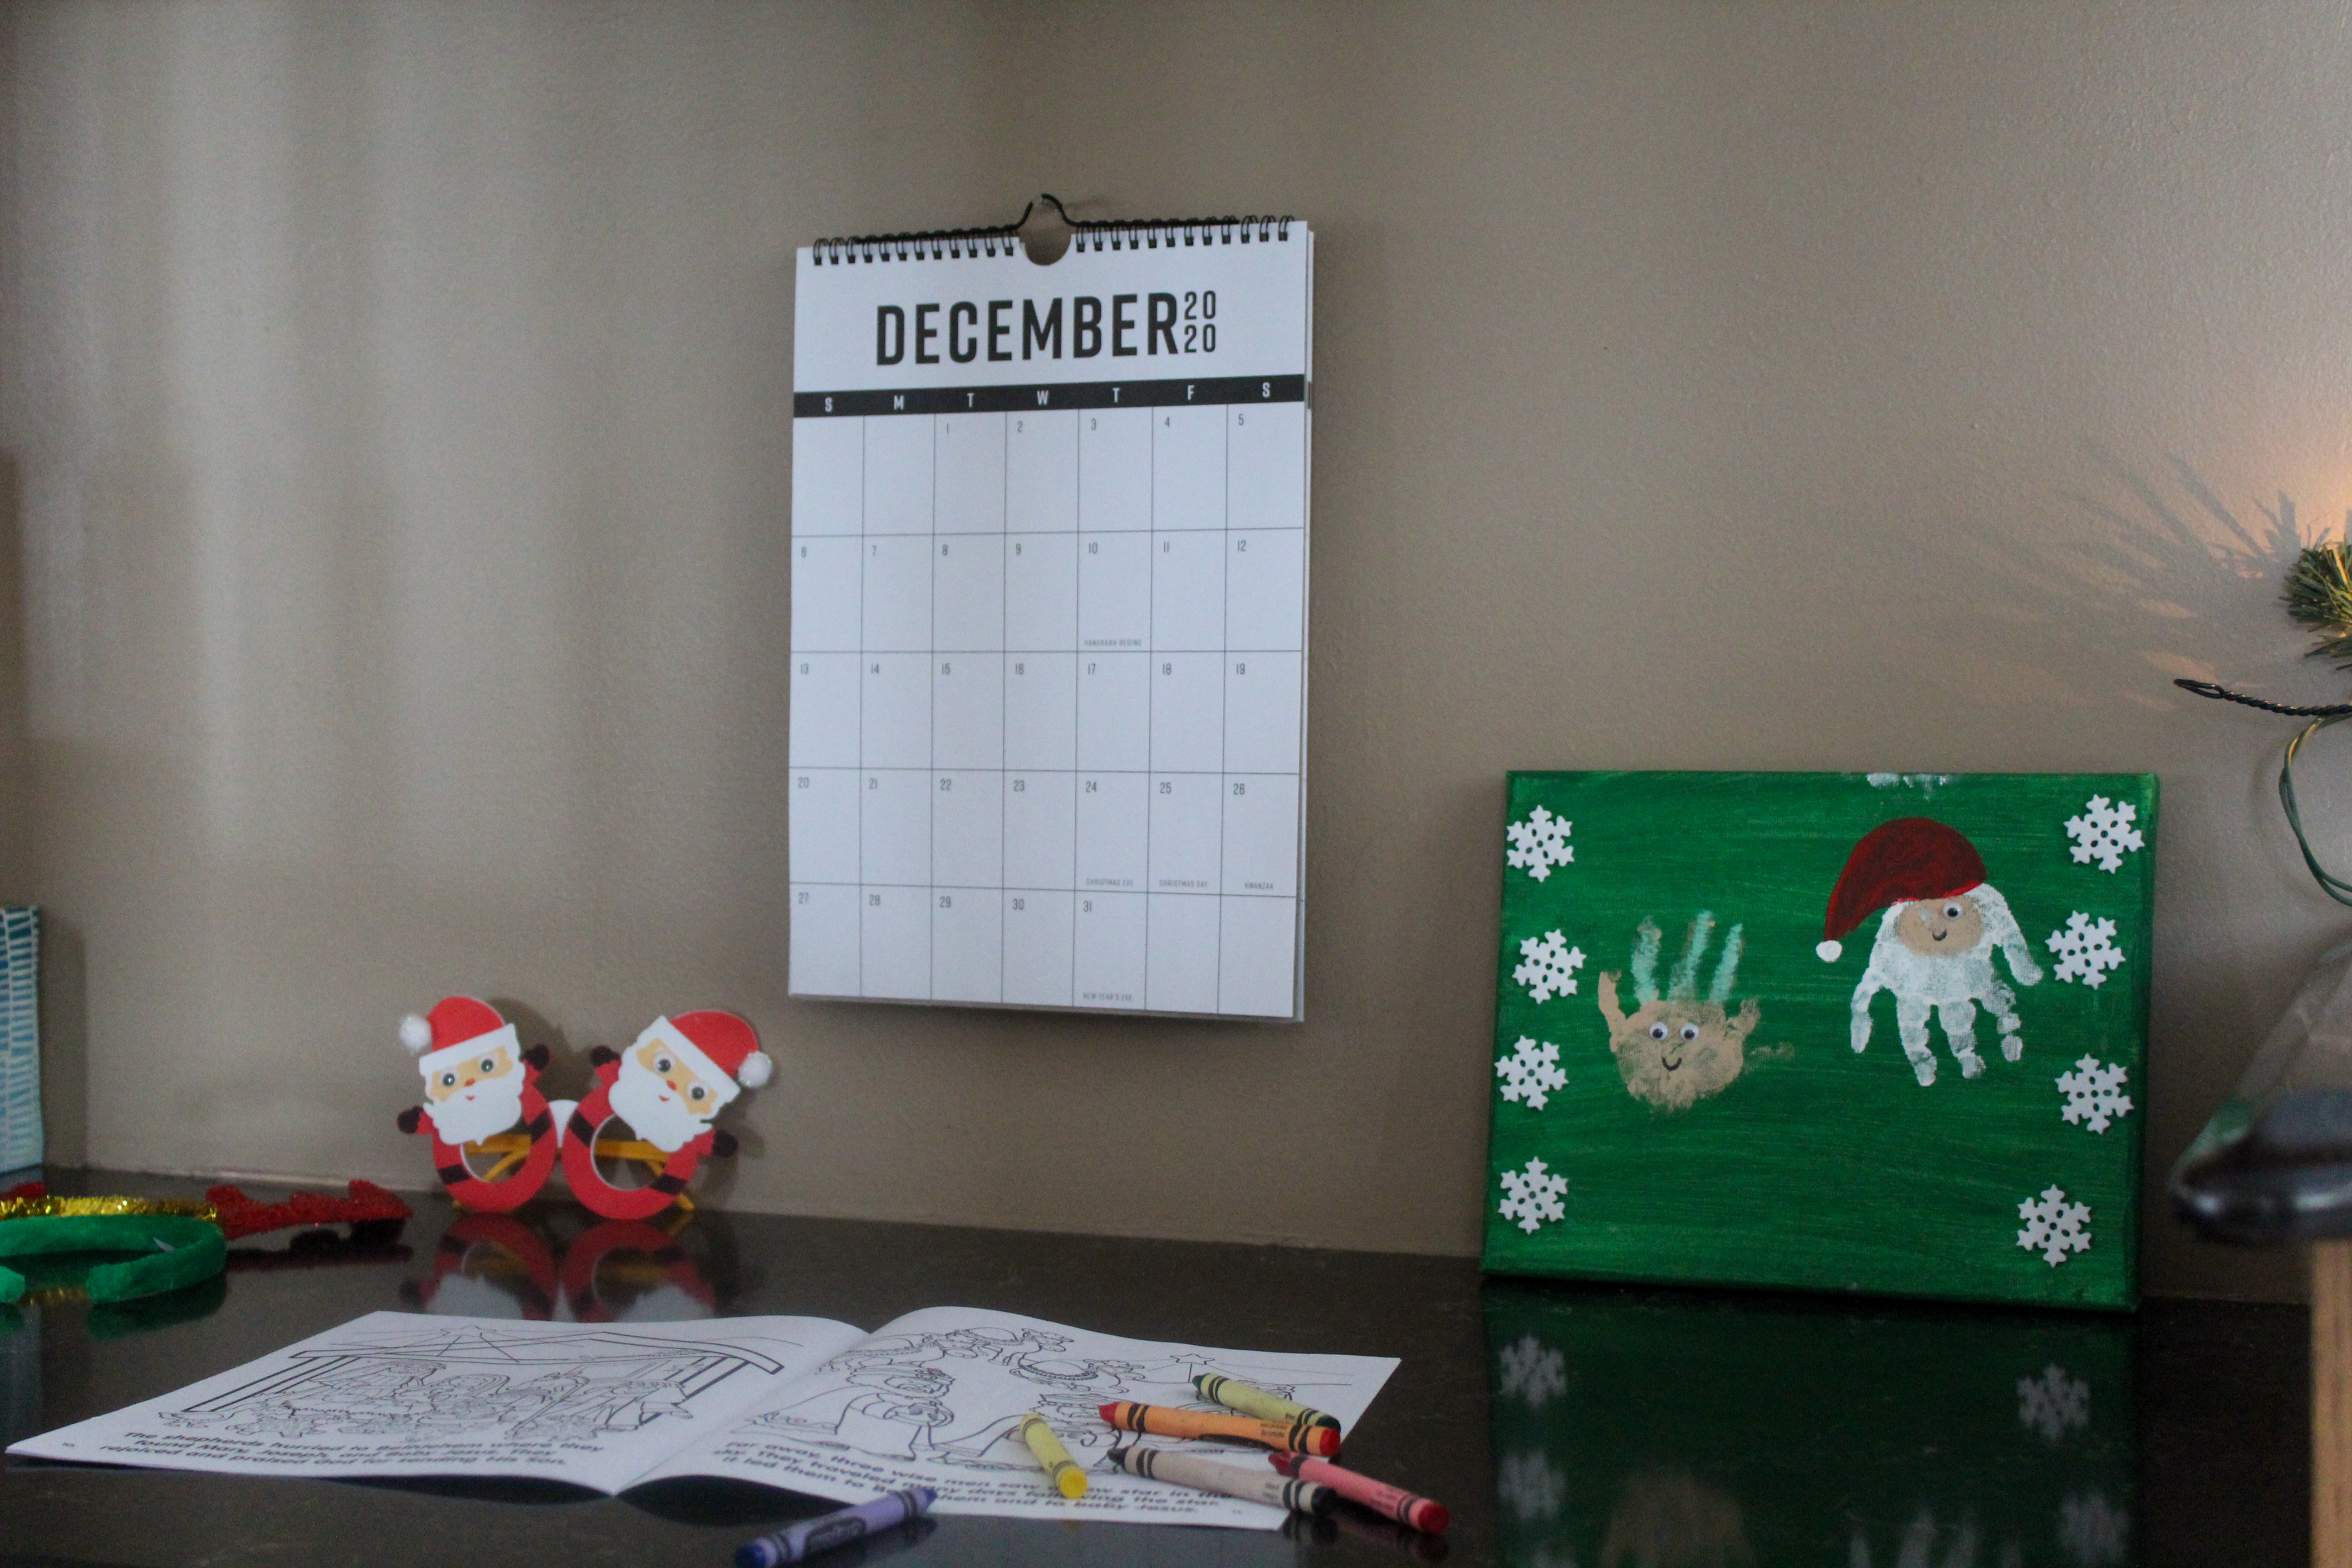
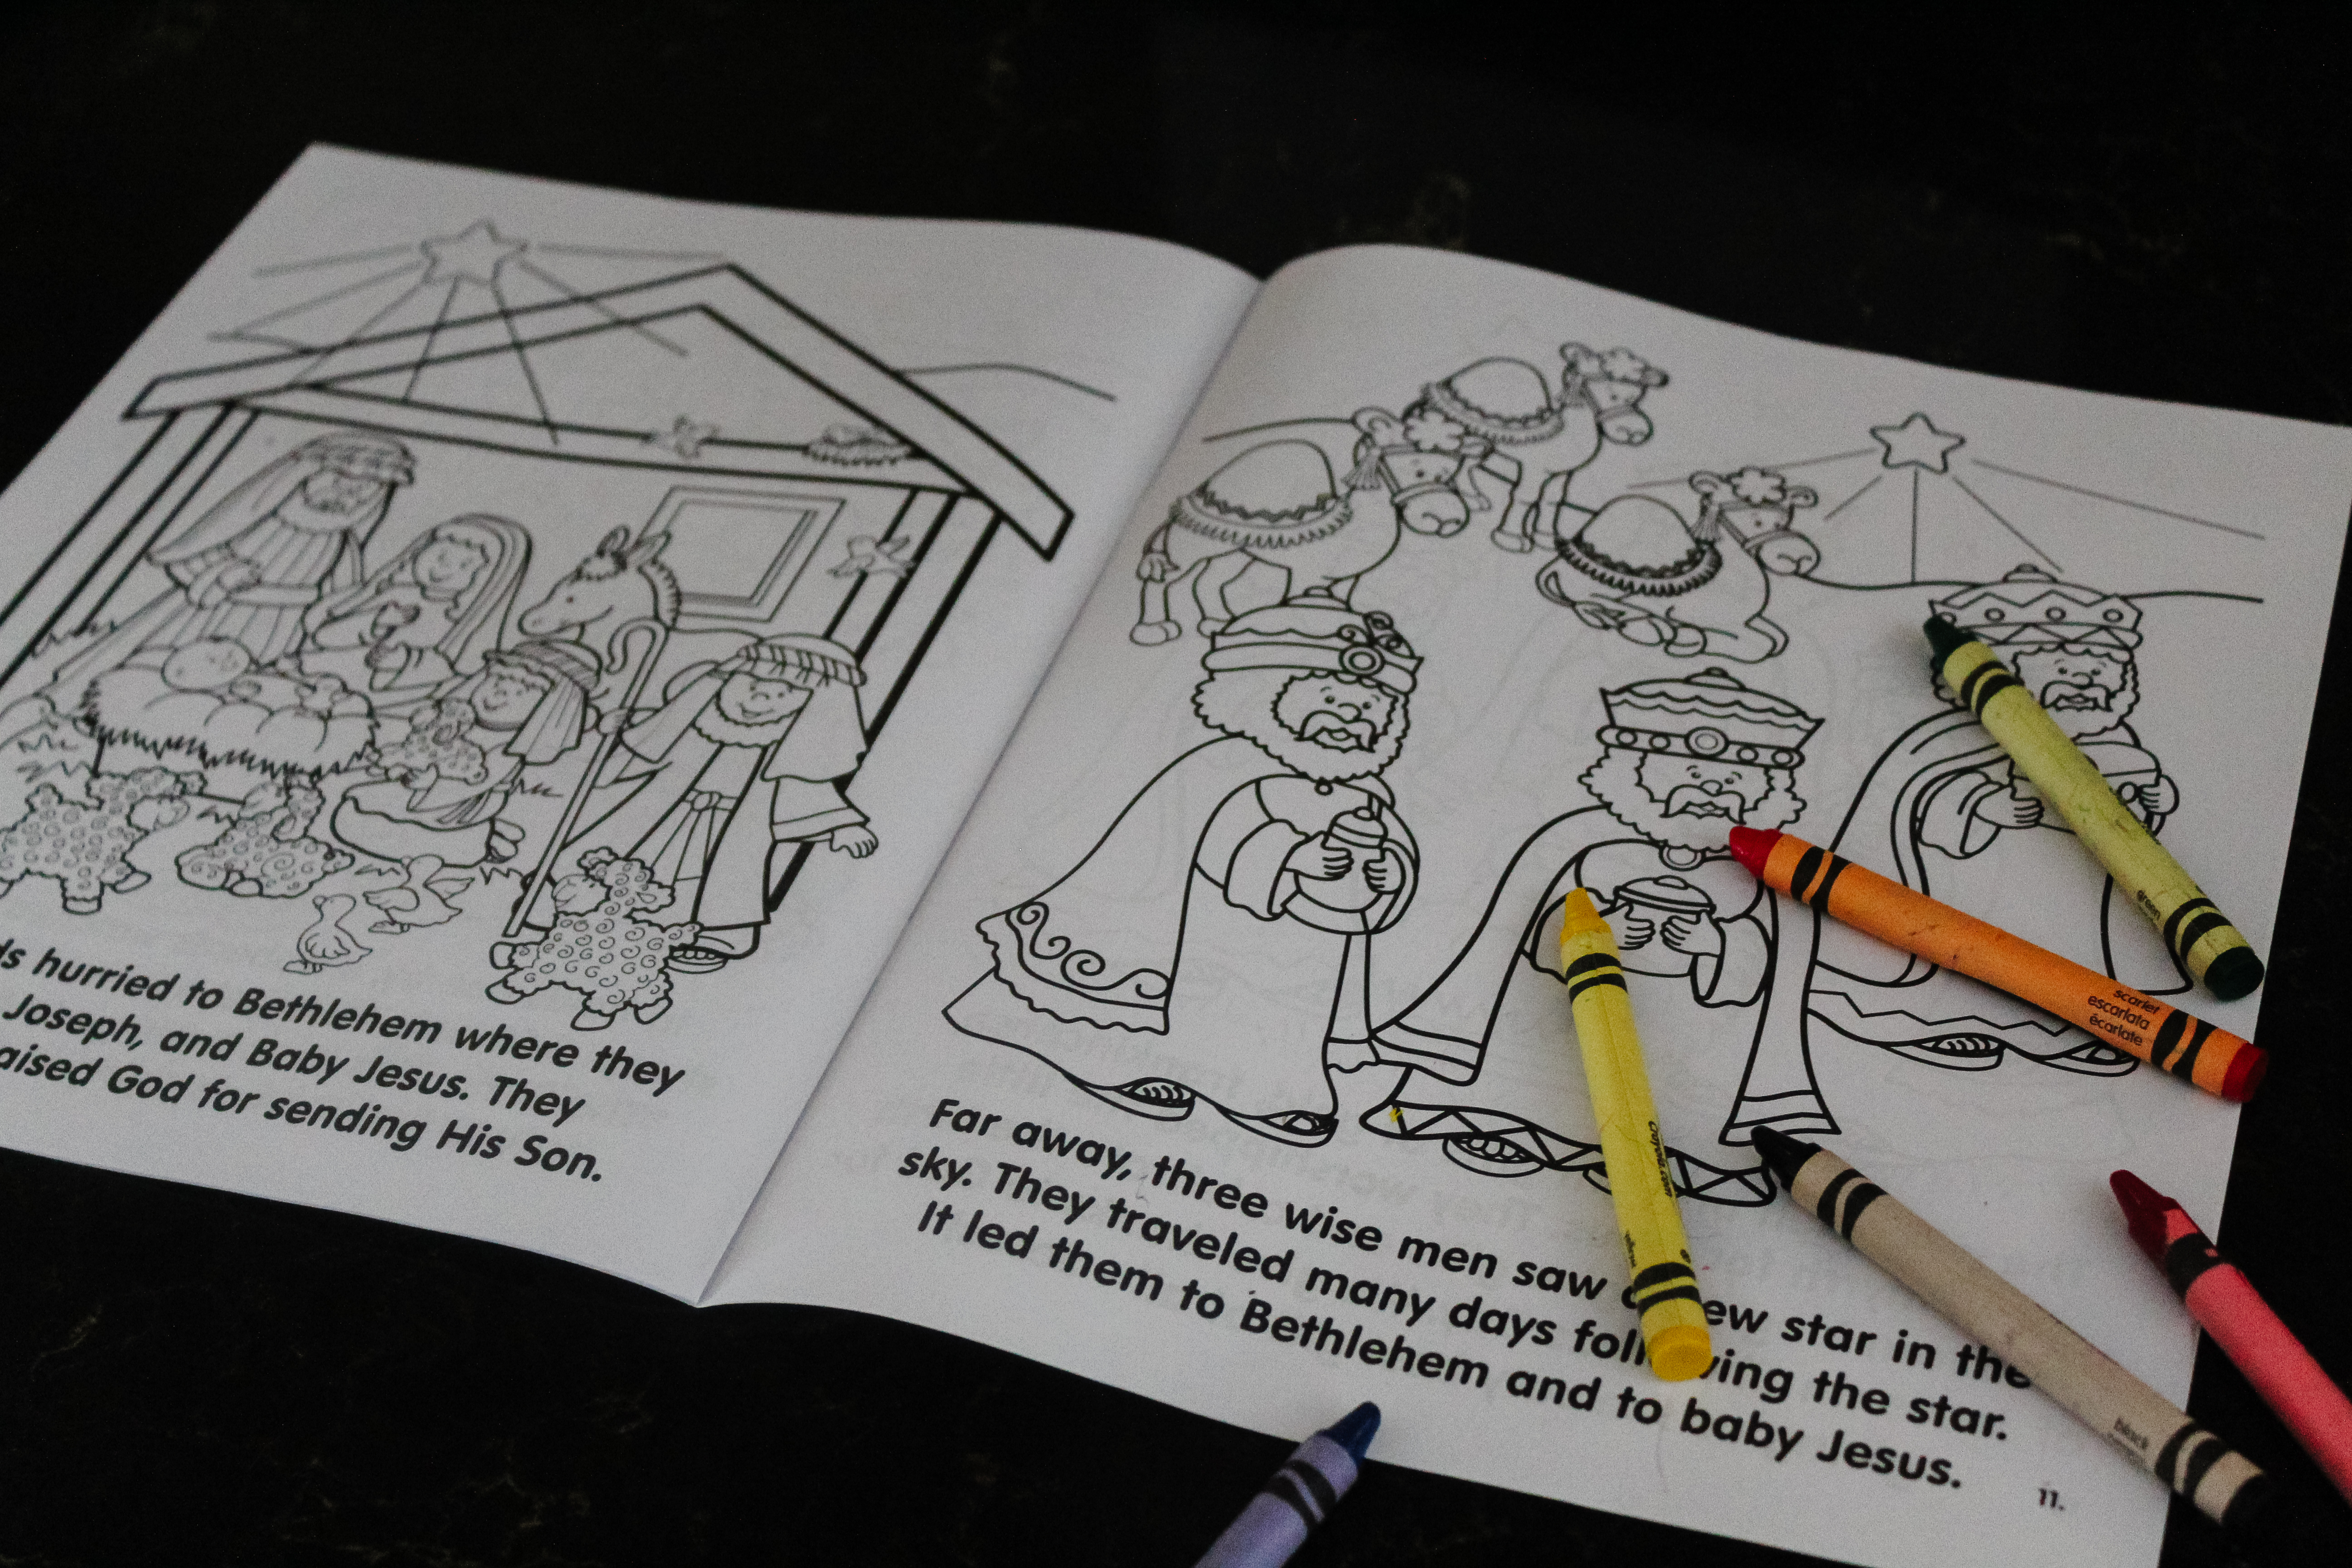
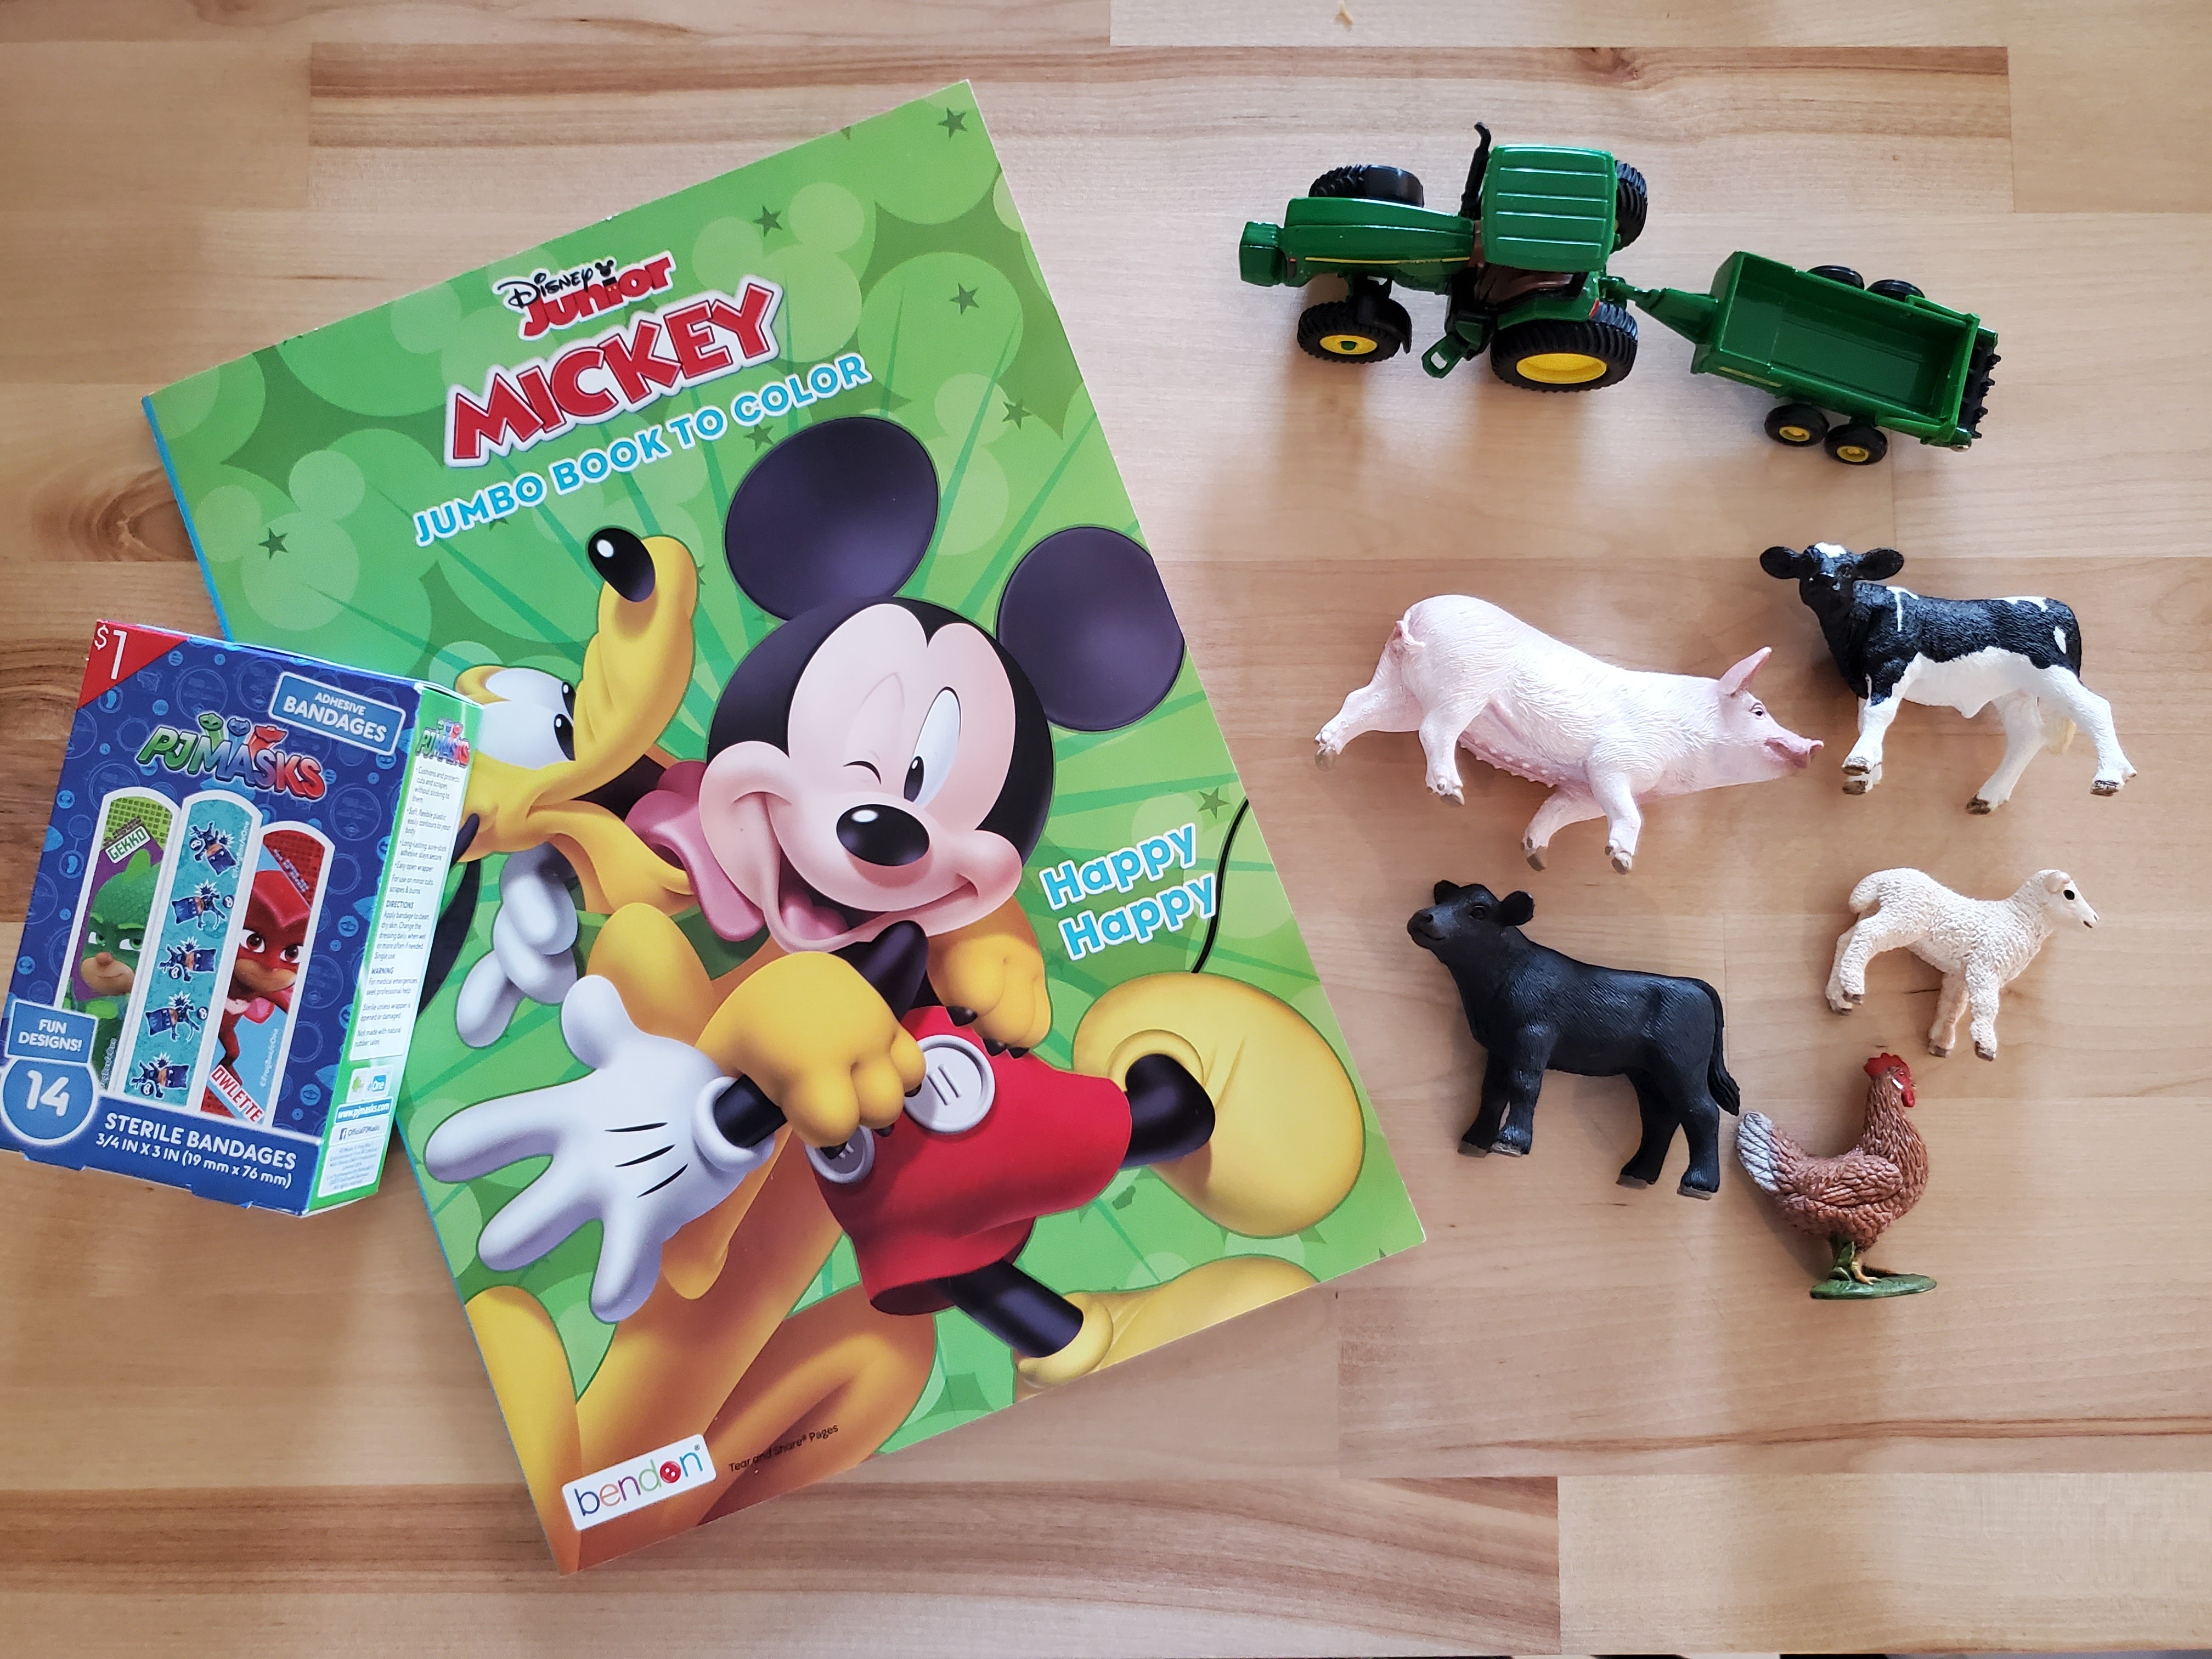
Once the office was completed, I moved all my things out of the little desk area in our kitchen and that space became a little craft zone for LJ. It’s where we store all his stickers, crayons, coloring books, etc and right now it holds a few toddler-friendly Christmas items too.

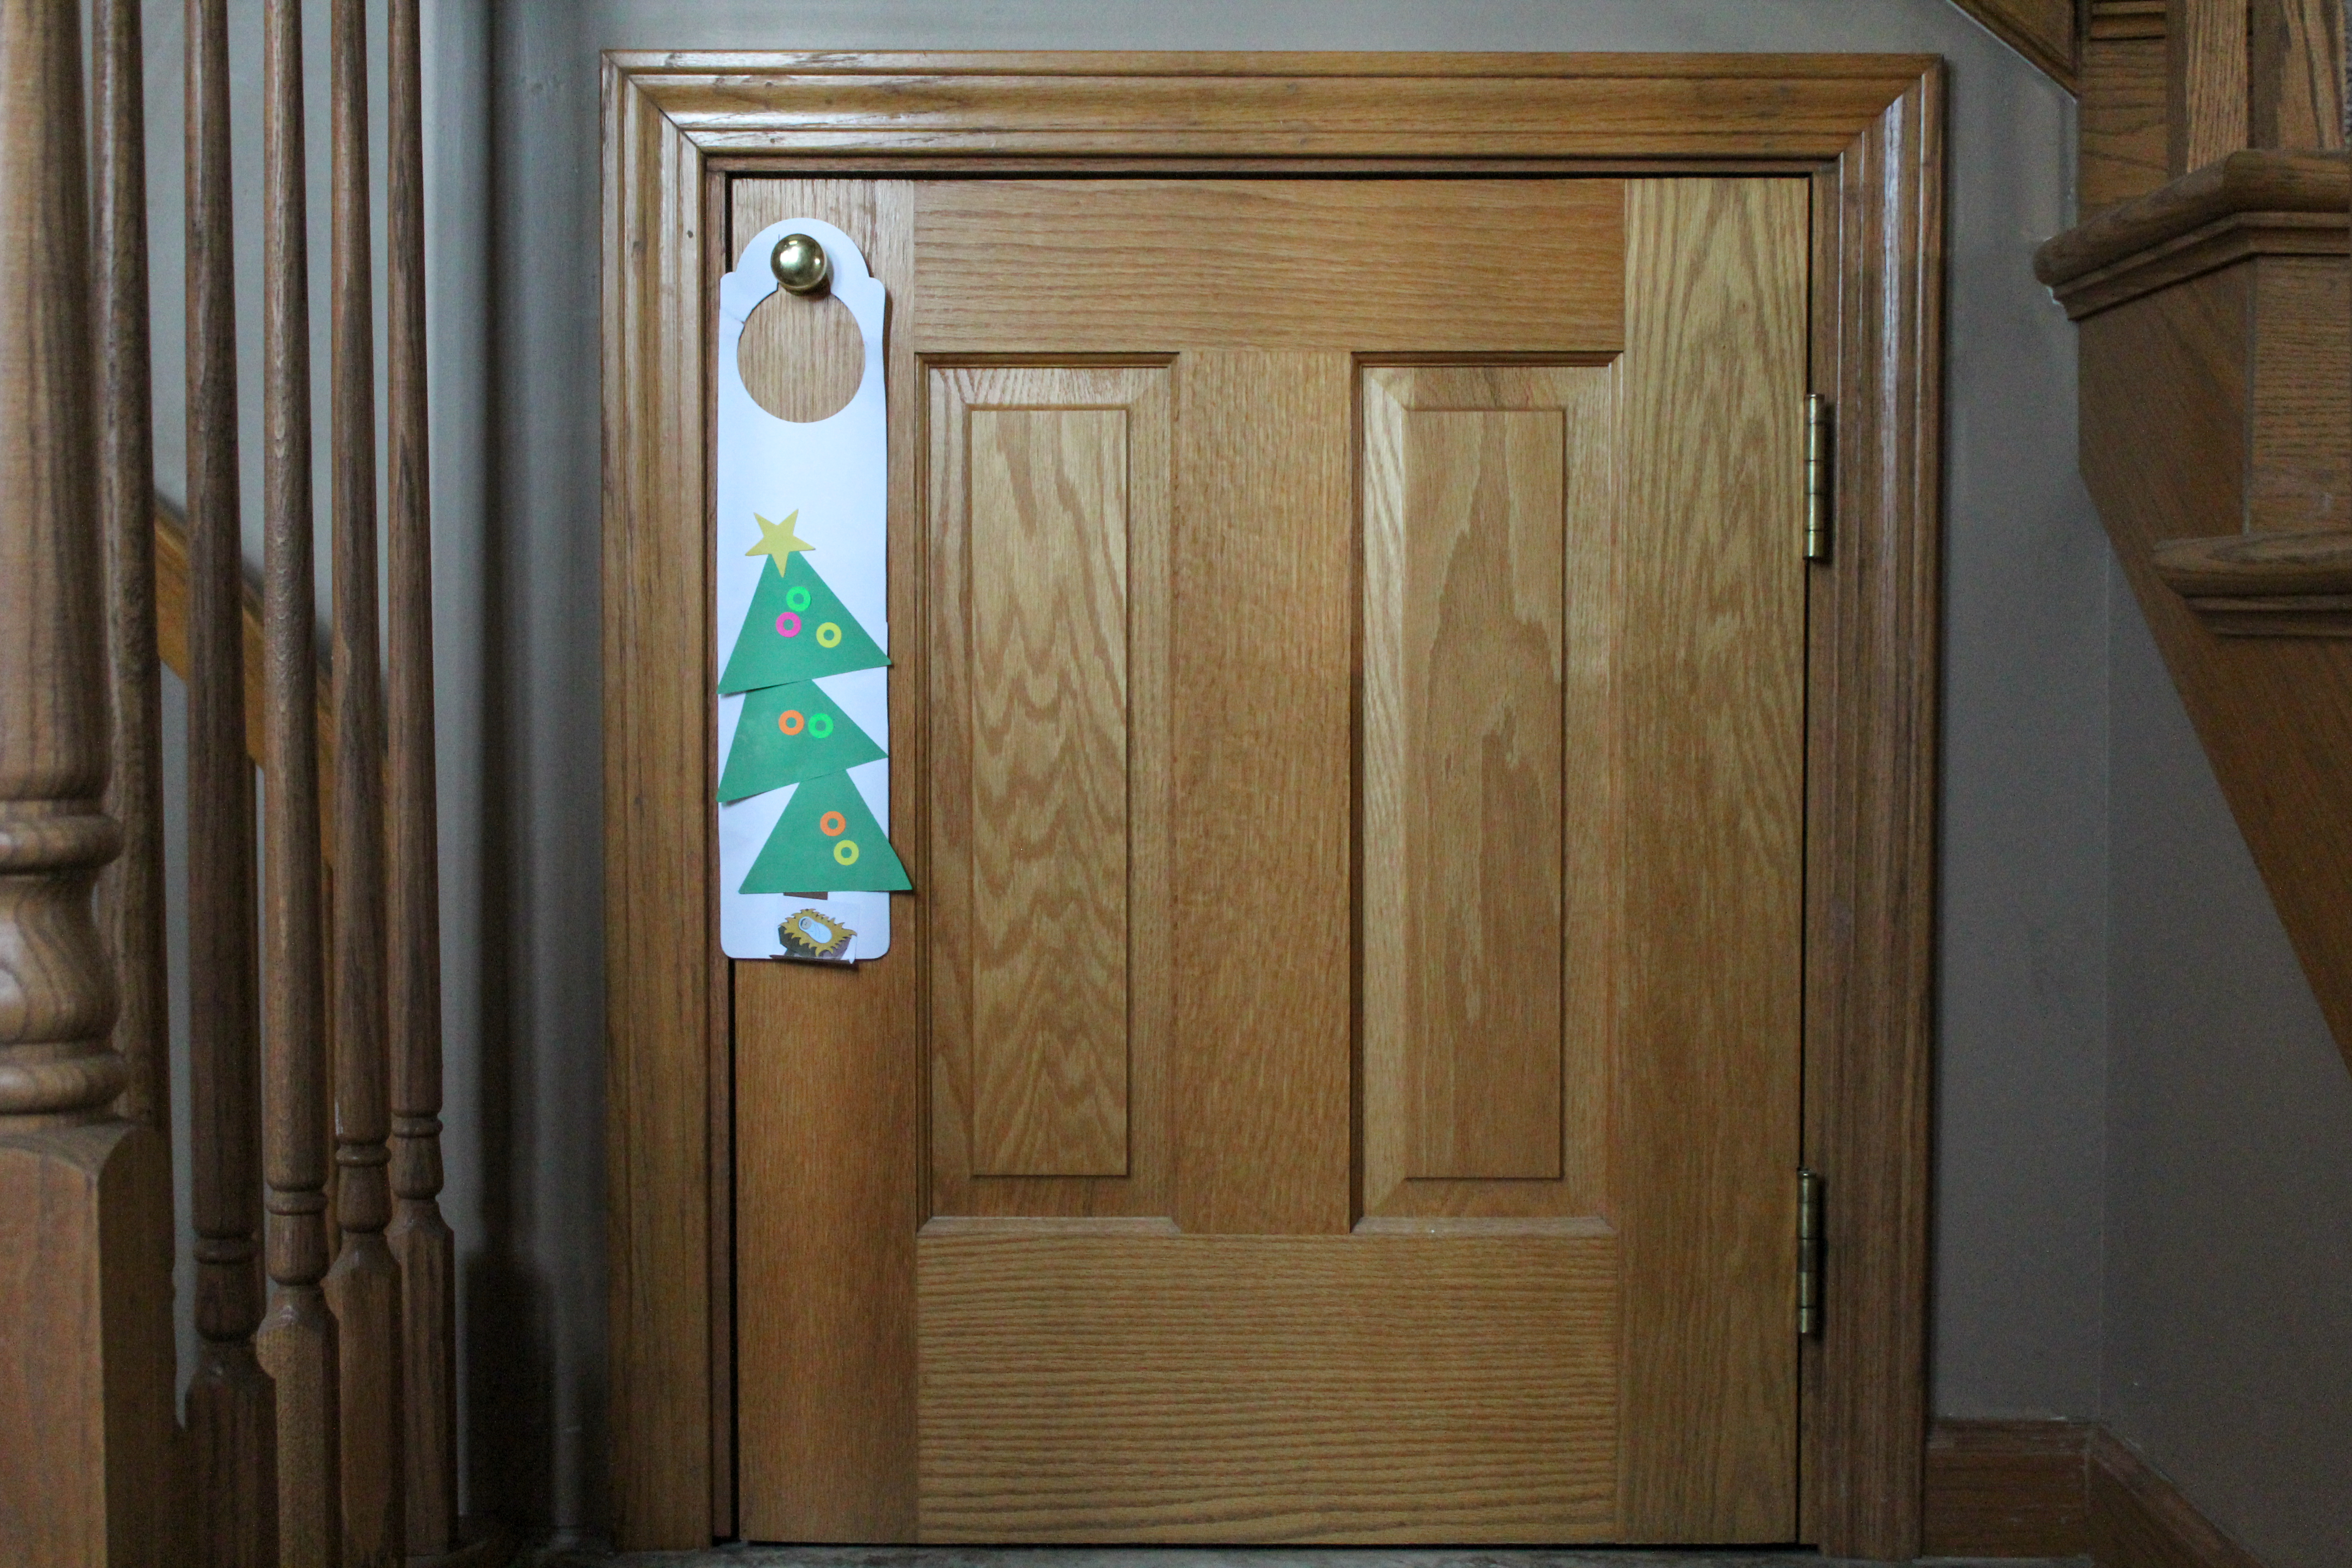
LJ also made a little Christmas tree decoration that he chose to hang on the door to his secret nook which I think is just about the most precious thing ever!

Our dining room was kept very minimal this year with just a simple runner and centerpiece. We let the winter wonderland outside be the star!

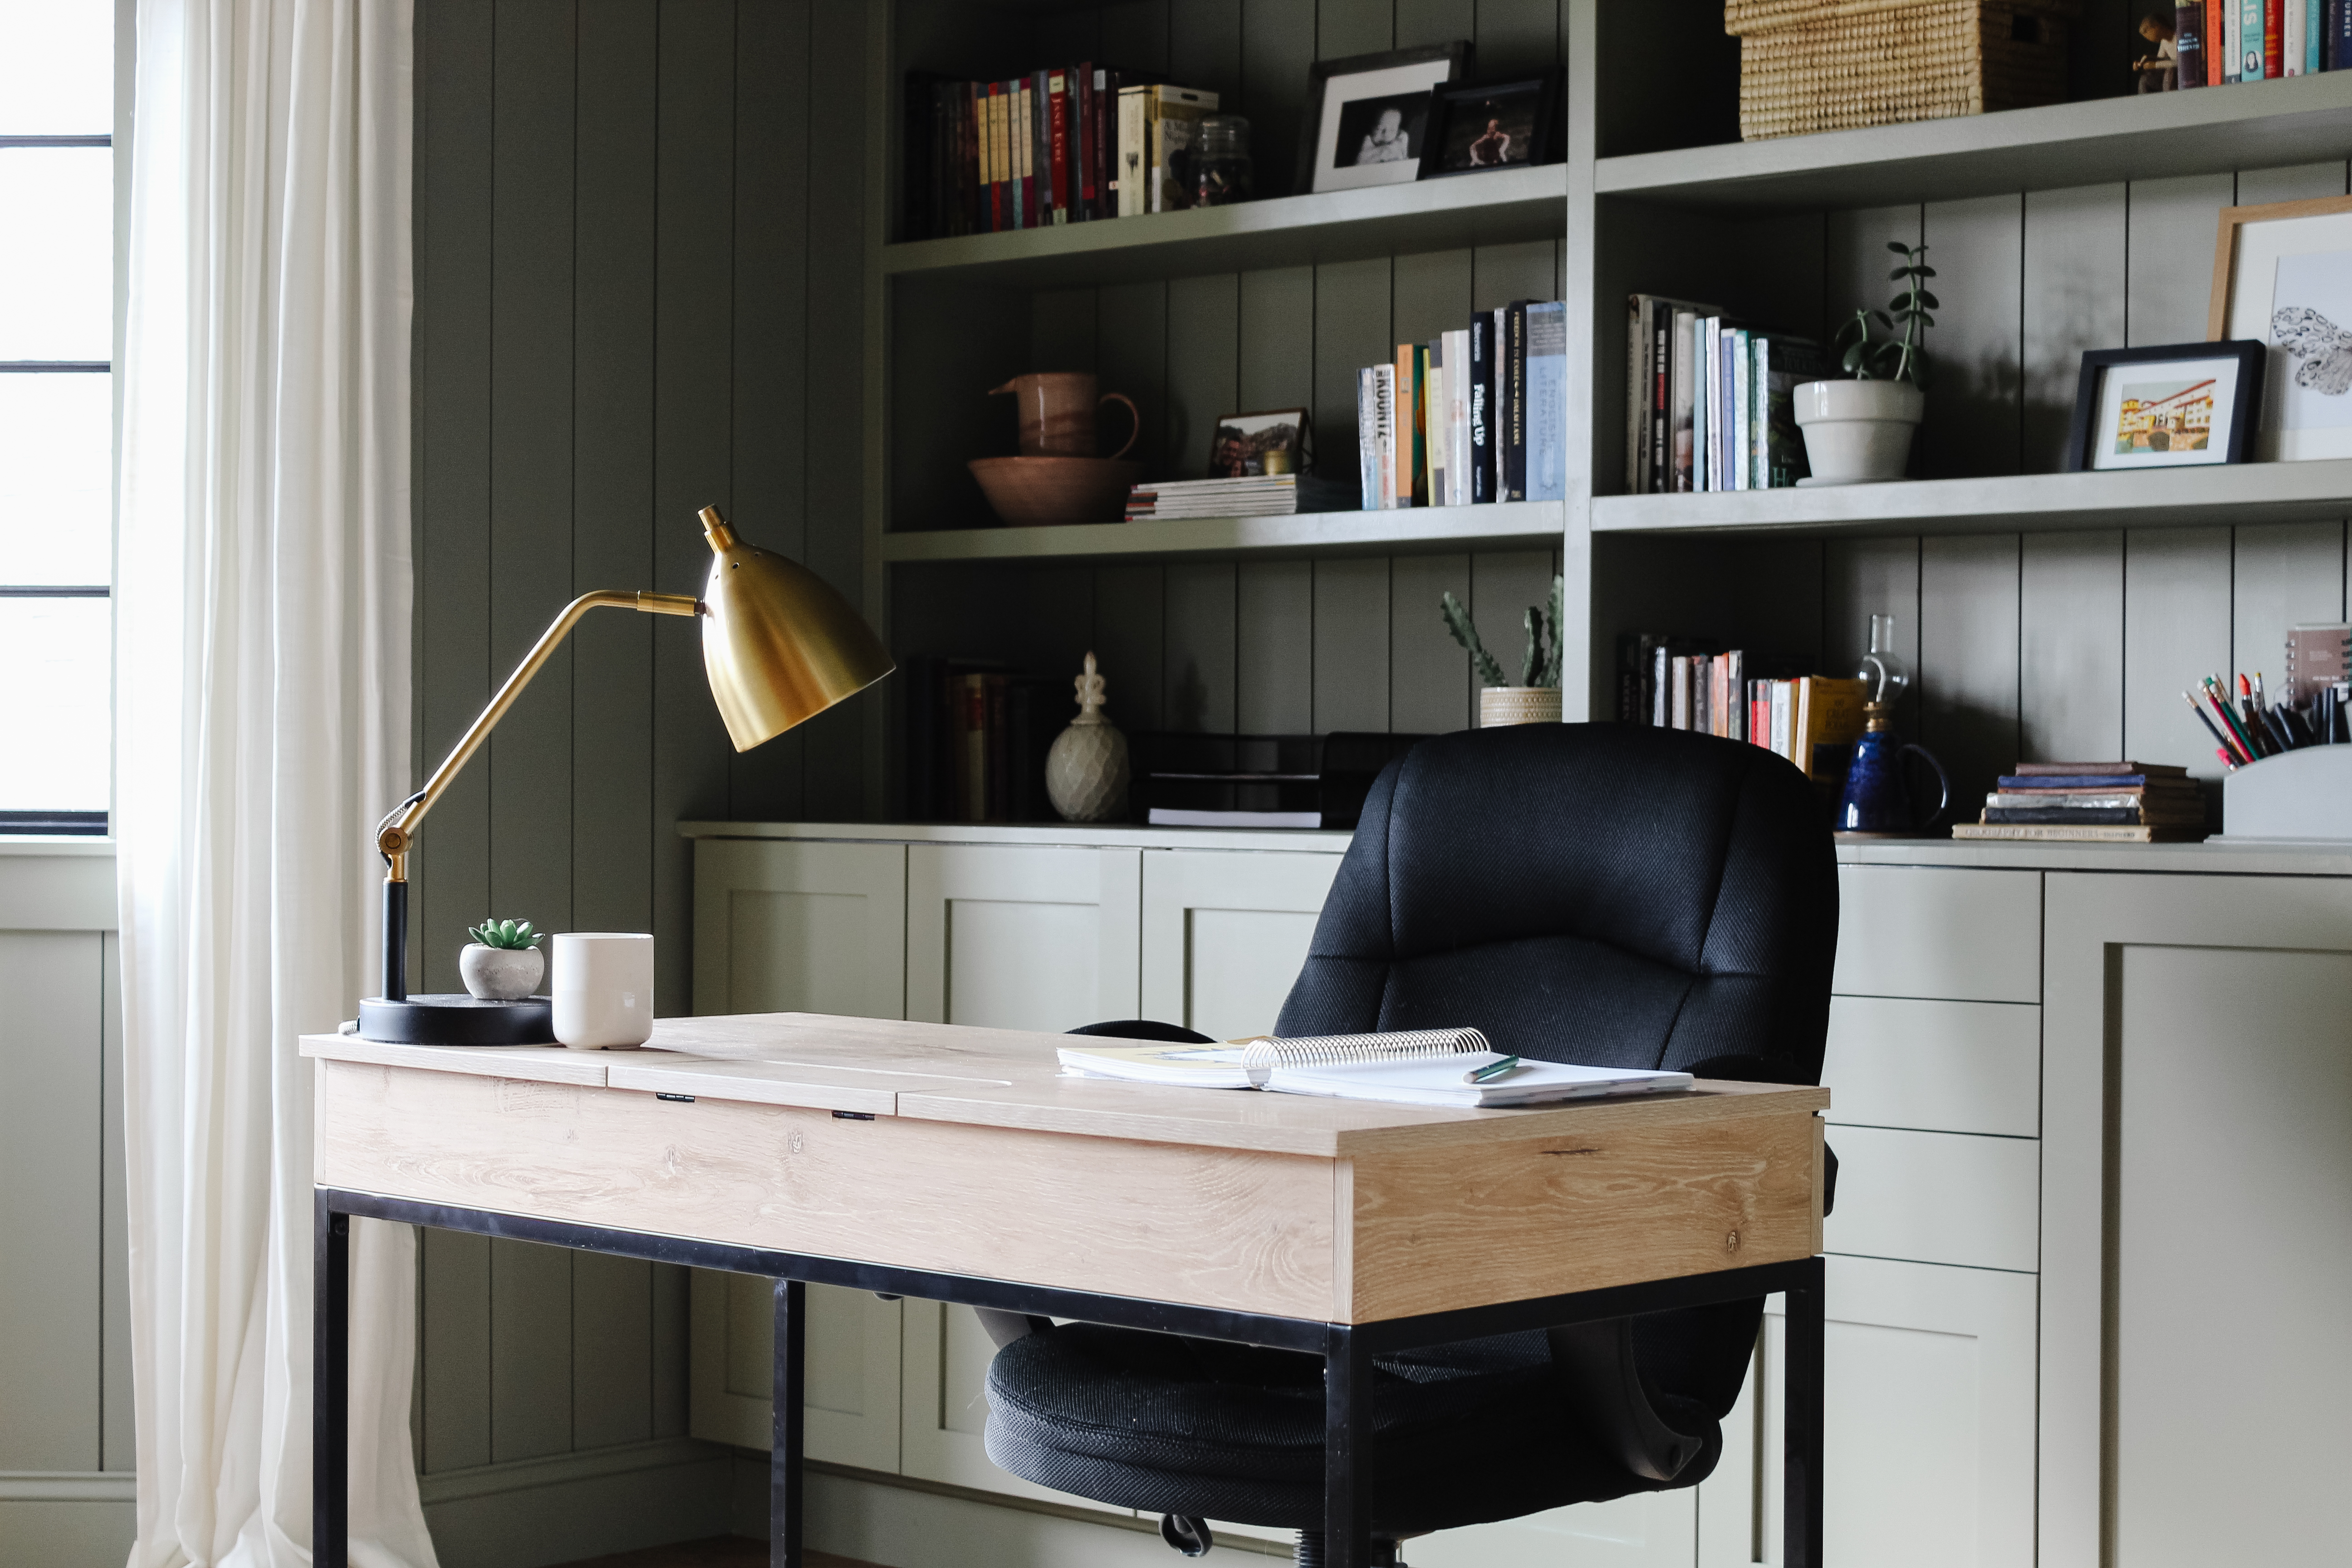
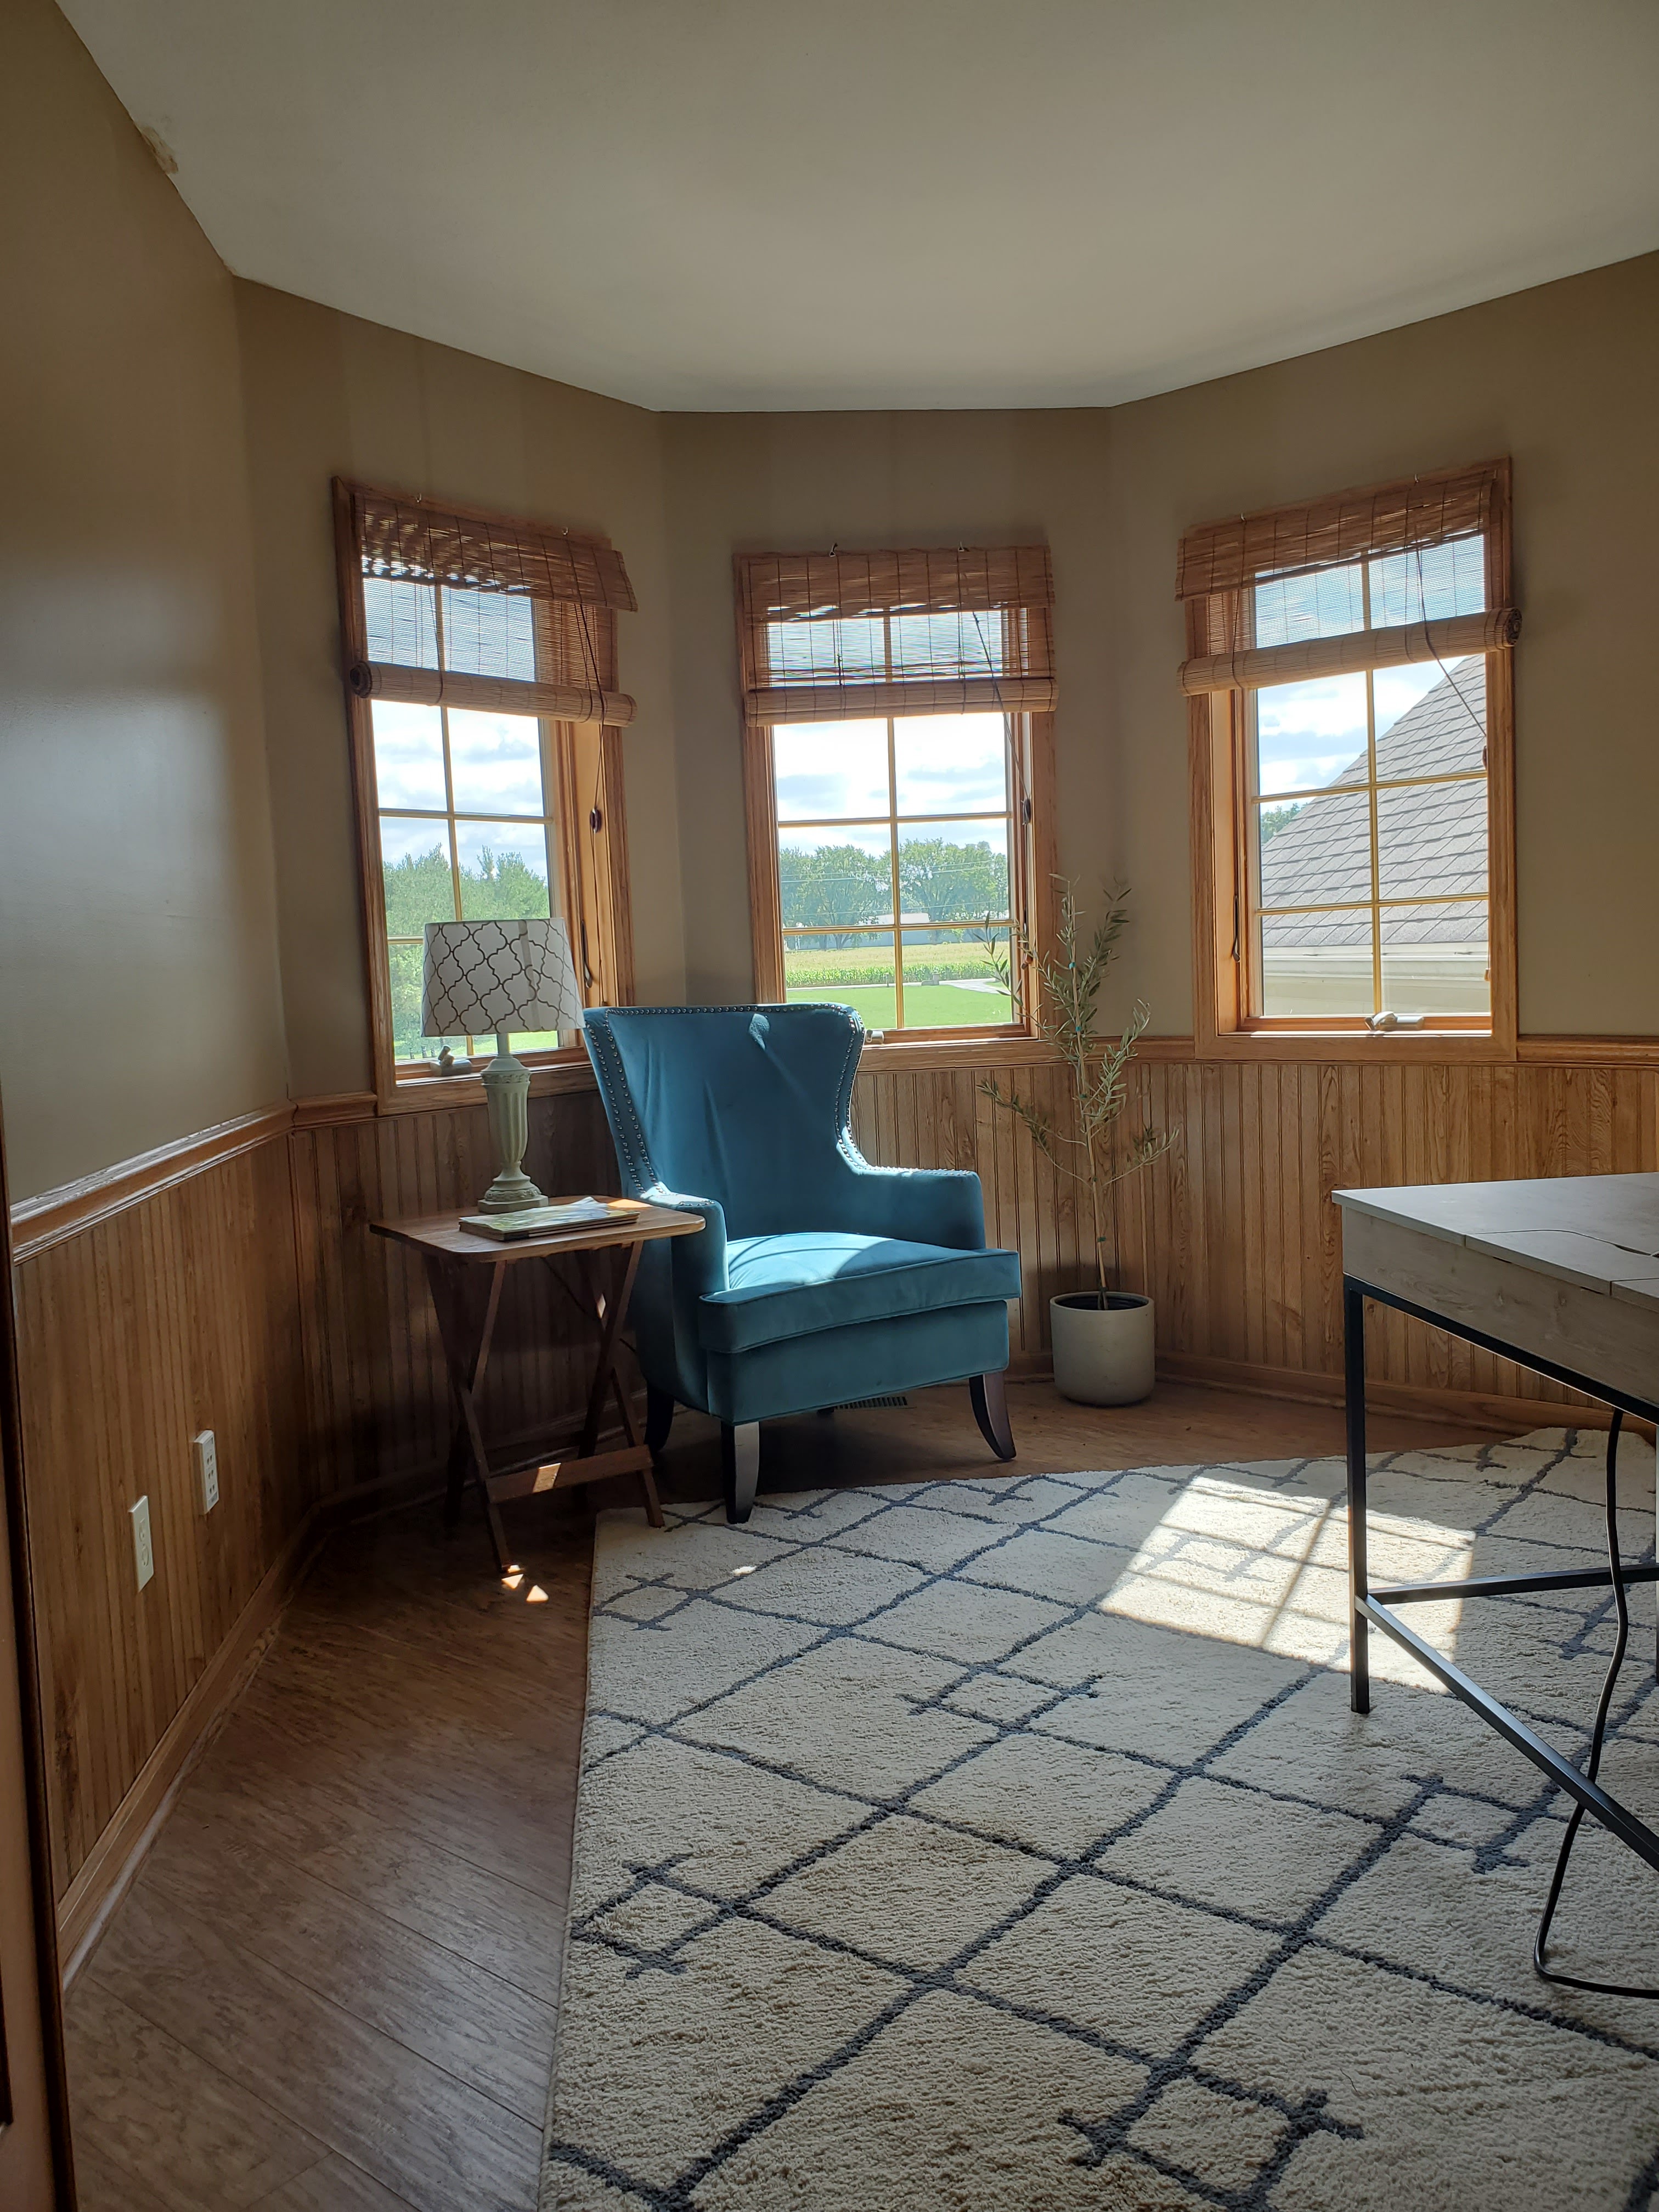
My office is the one area that I decorated just for me. The rest of the house is minimal and toddler-friendly, but this is the one room I decorated the way I wish I could decorate the entire house. Needless to say, I love it!

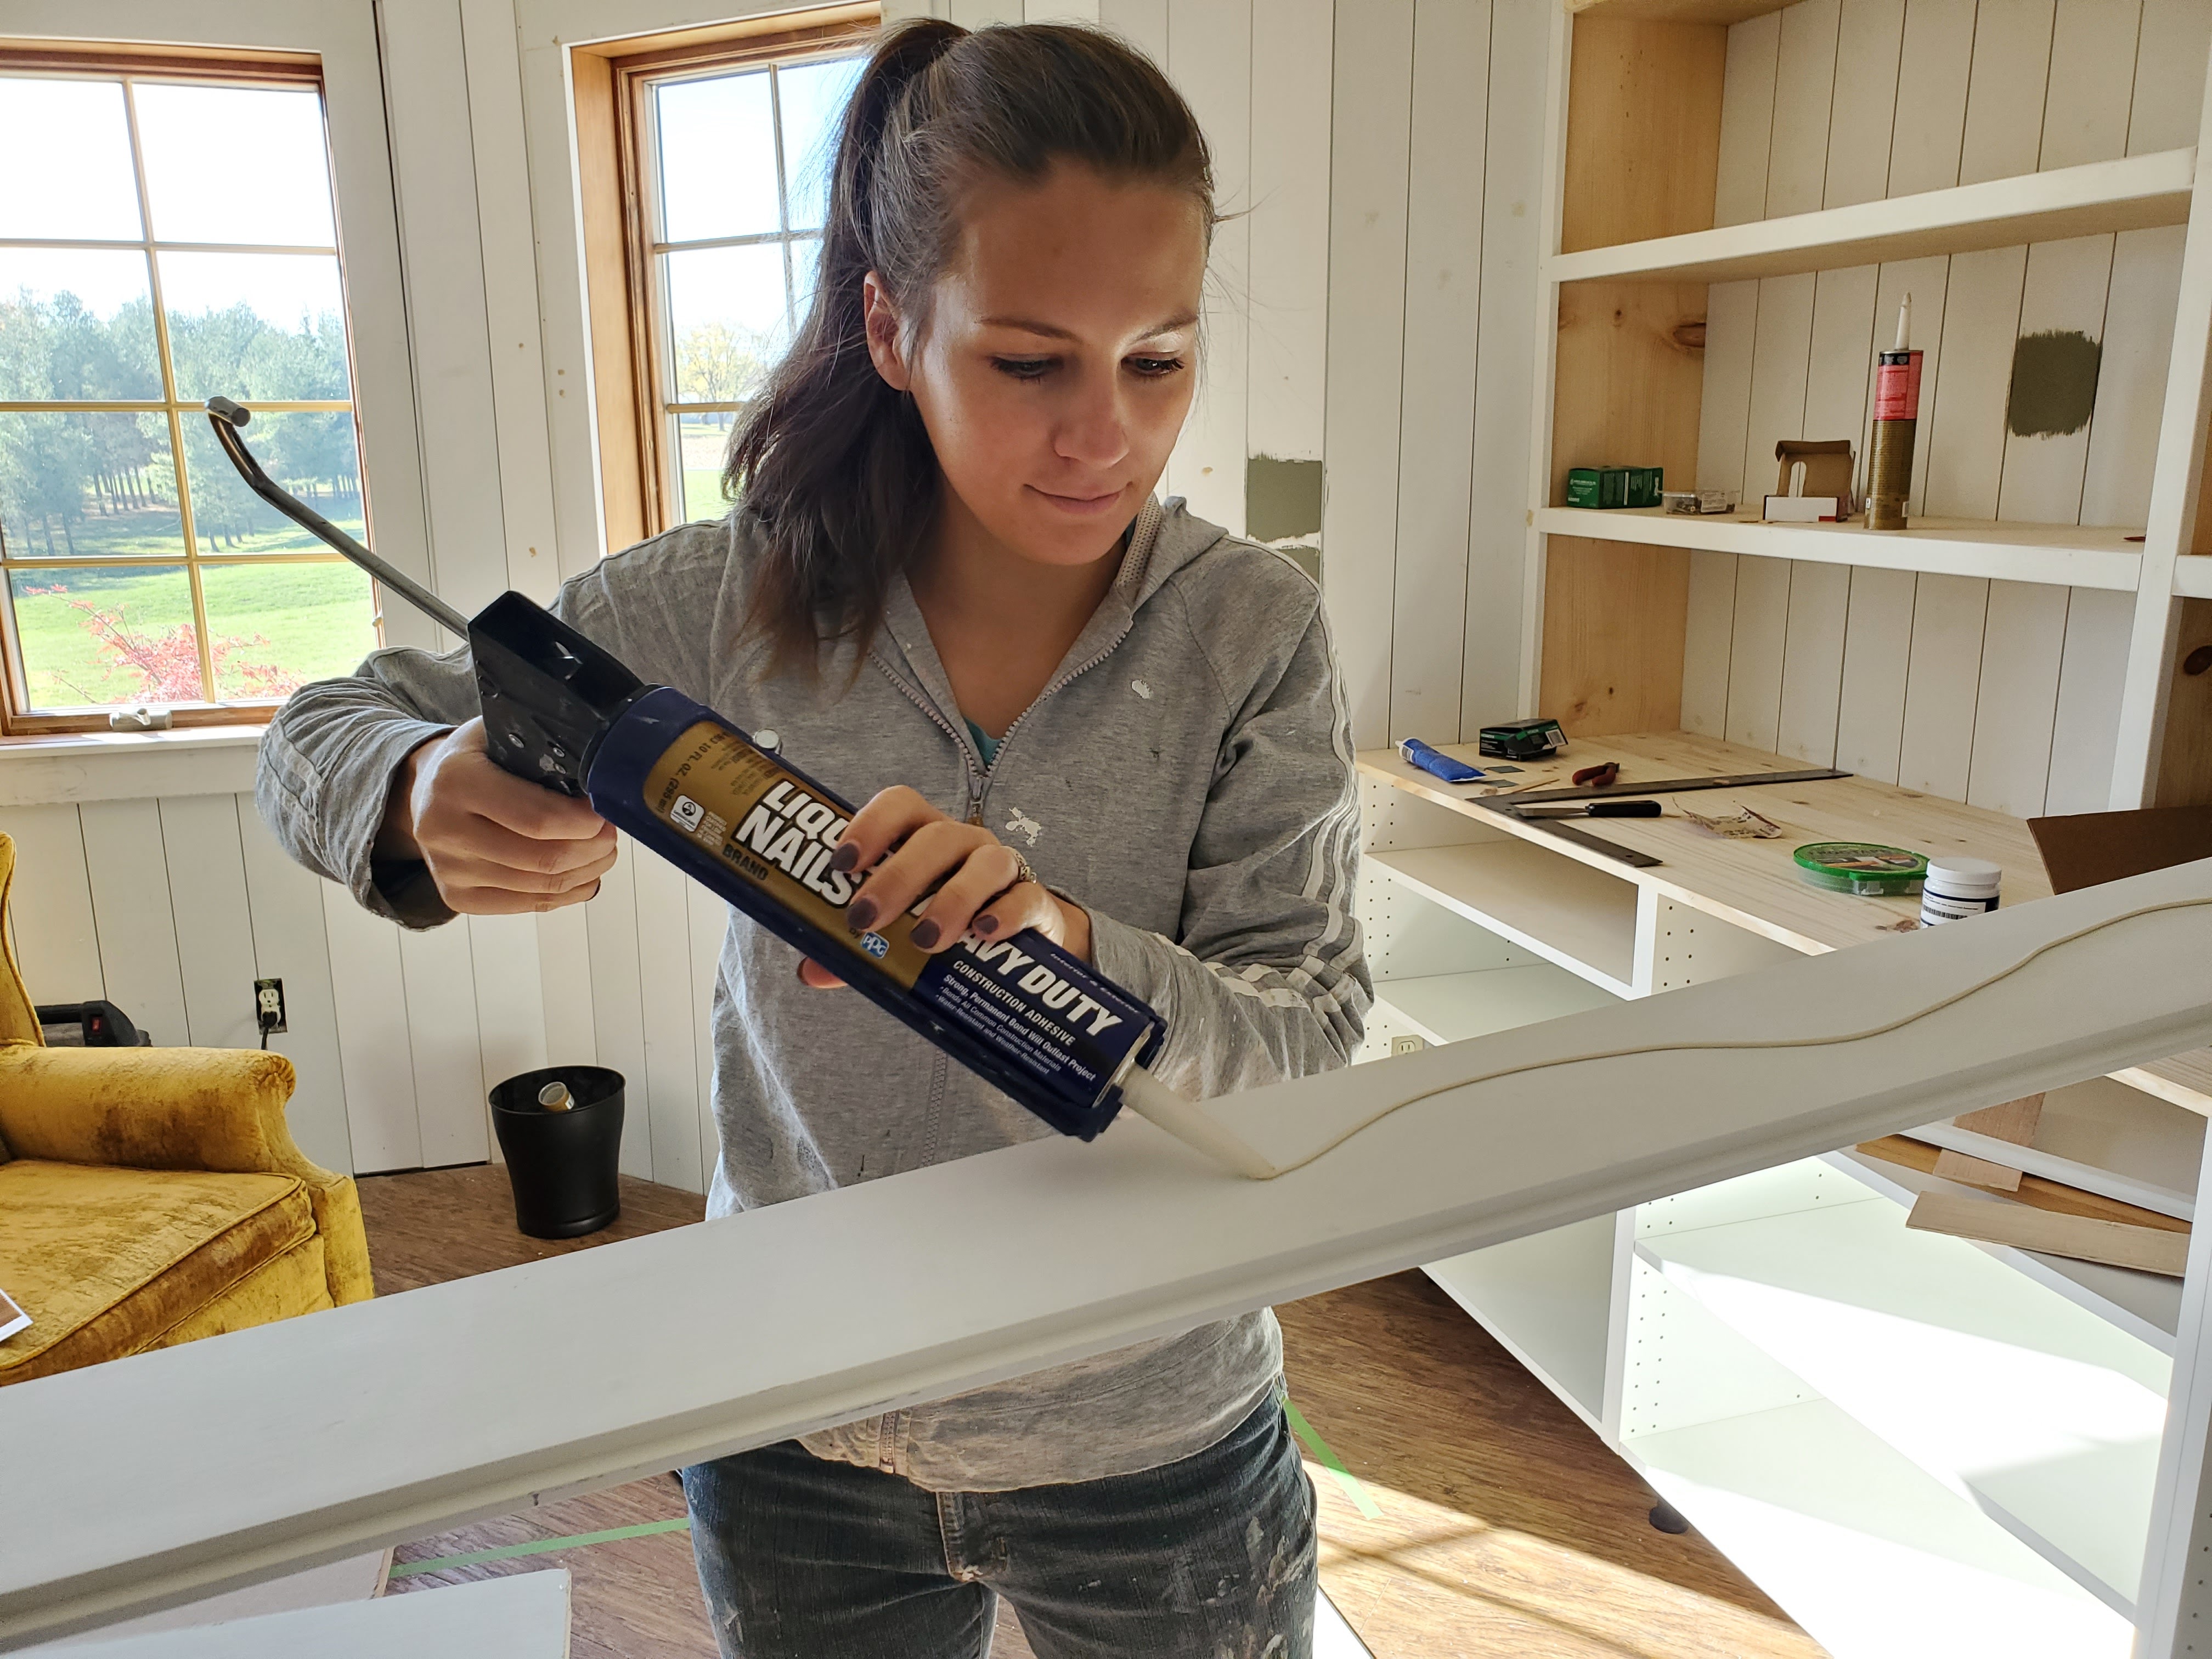
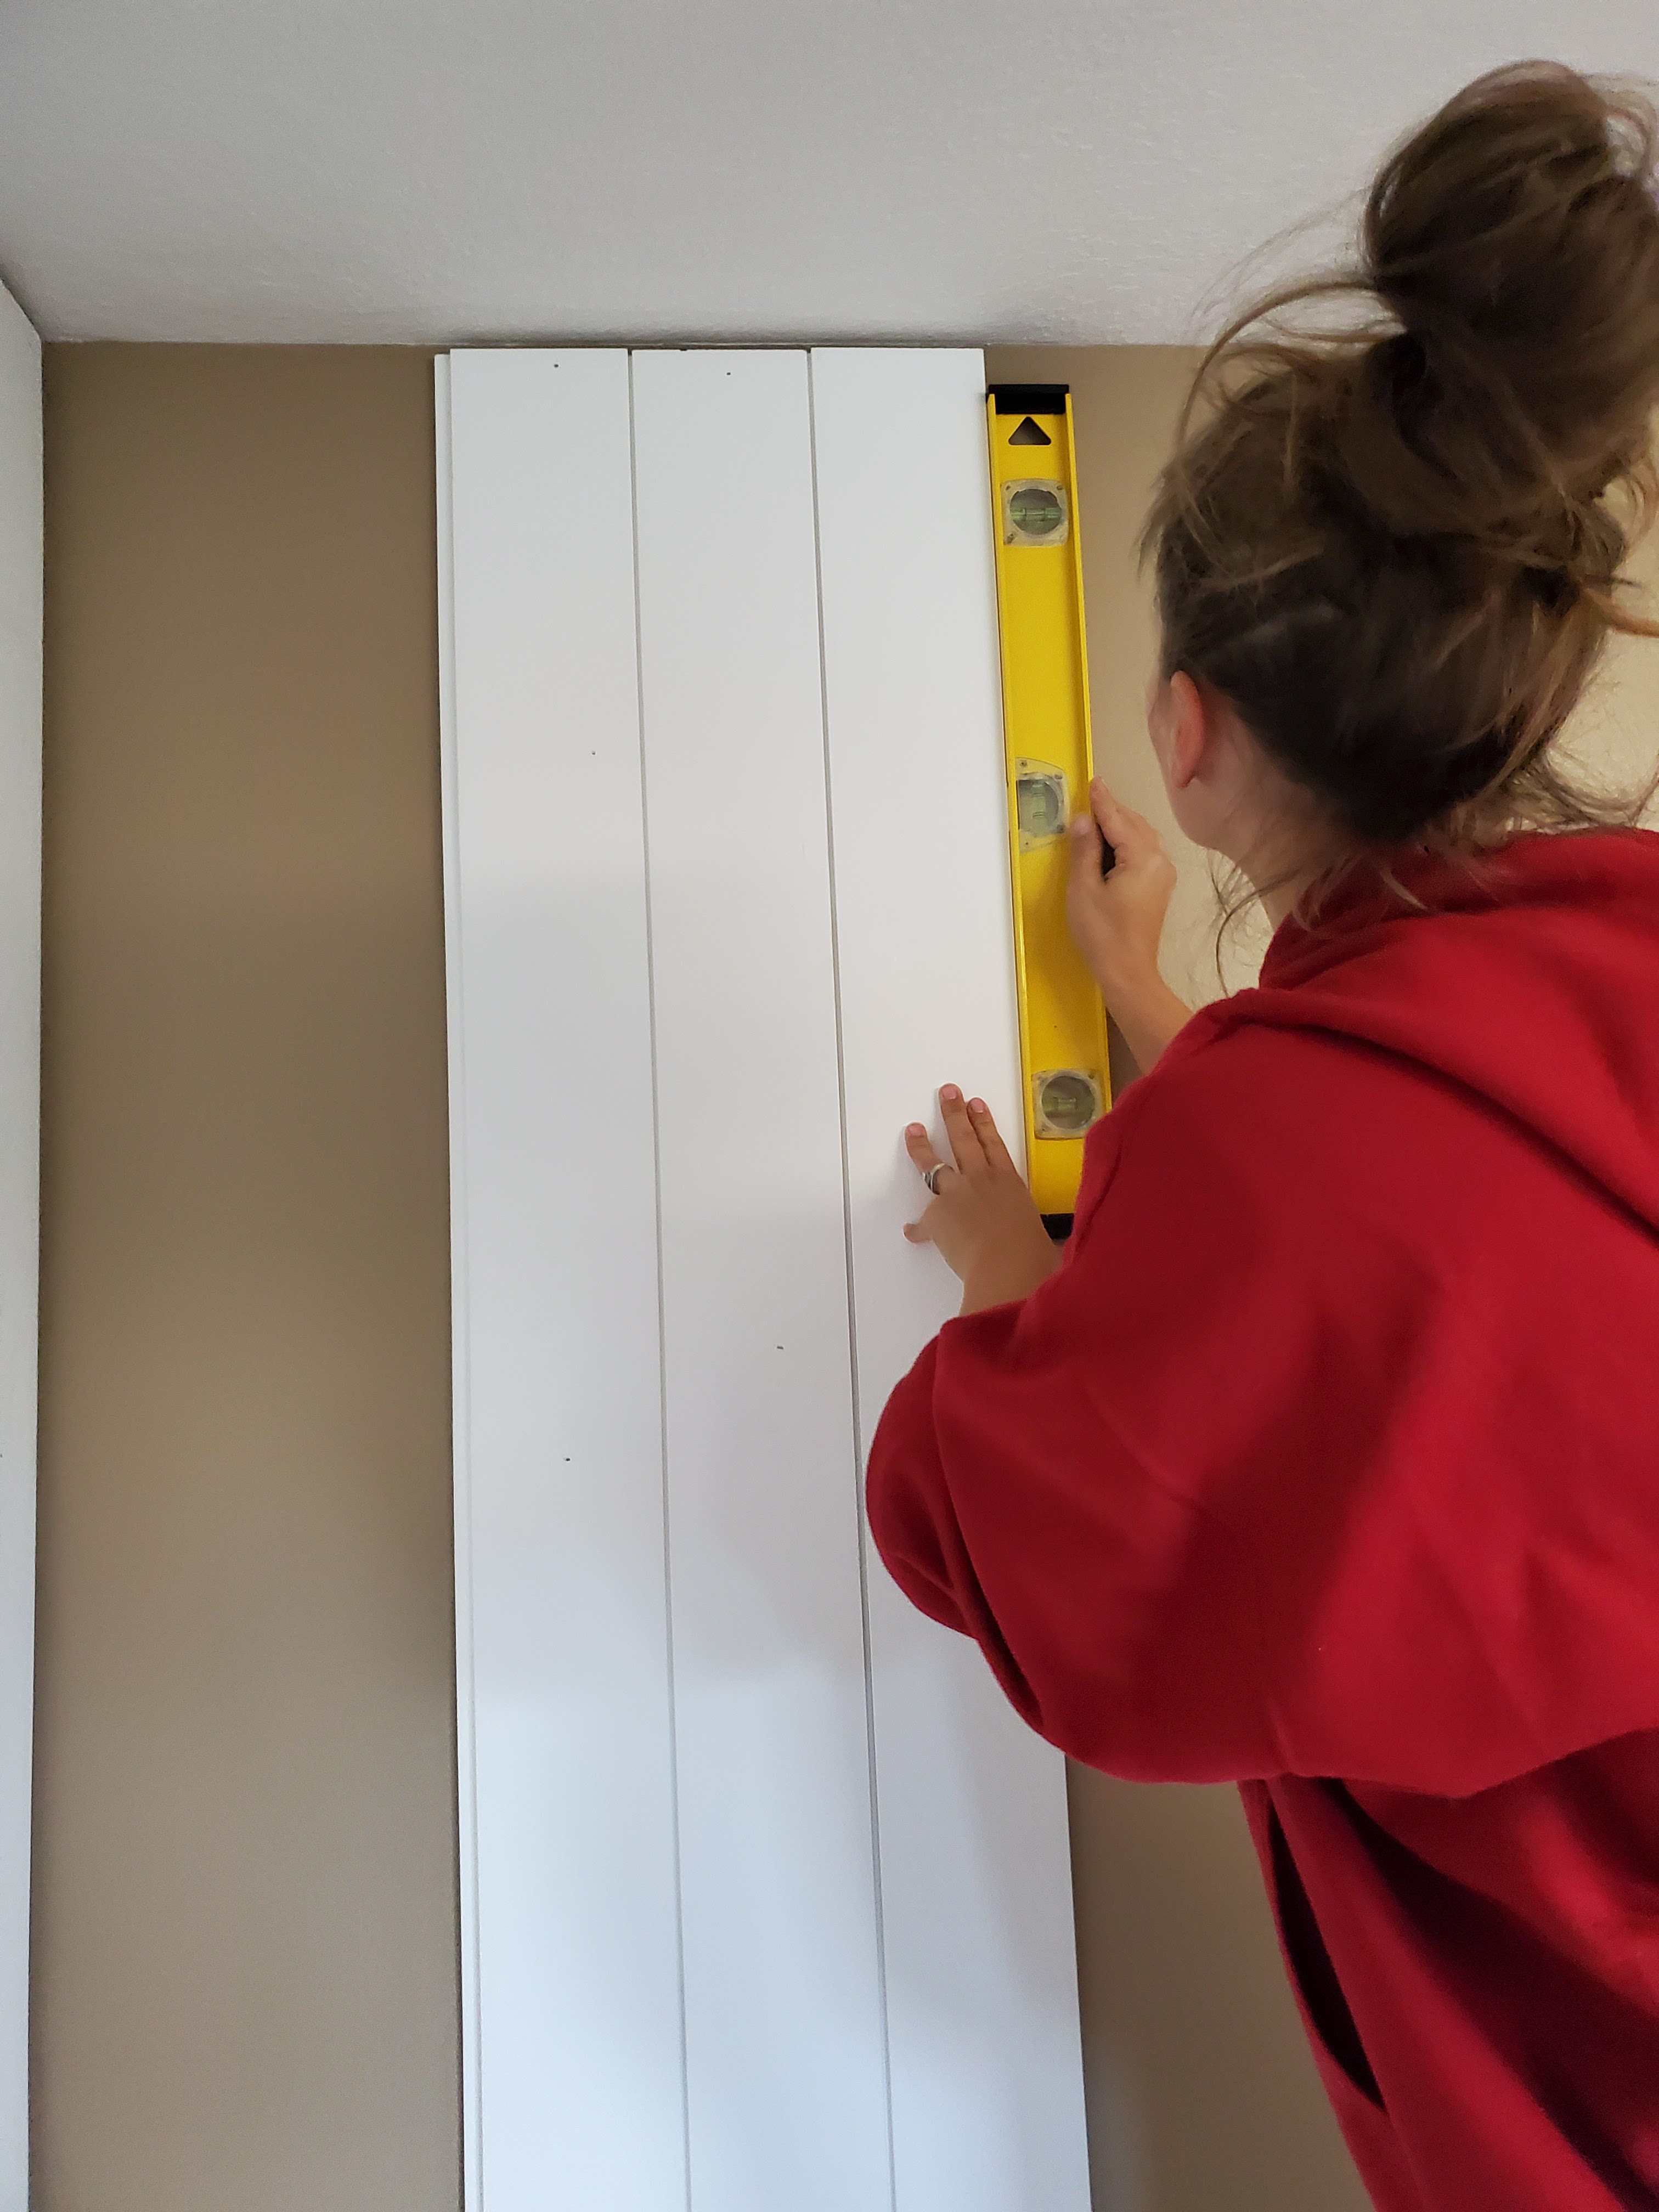
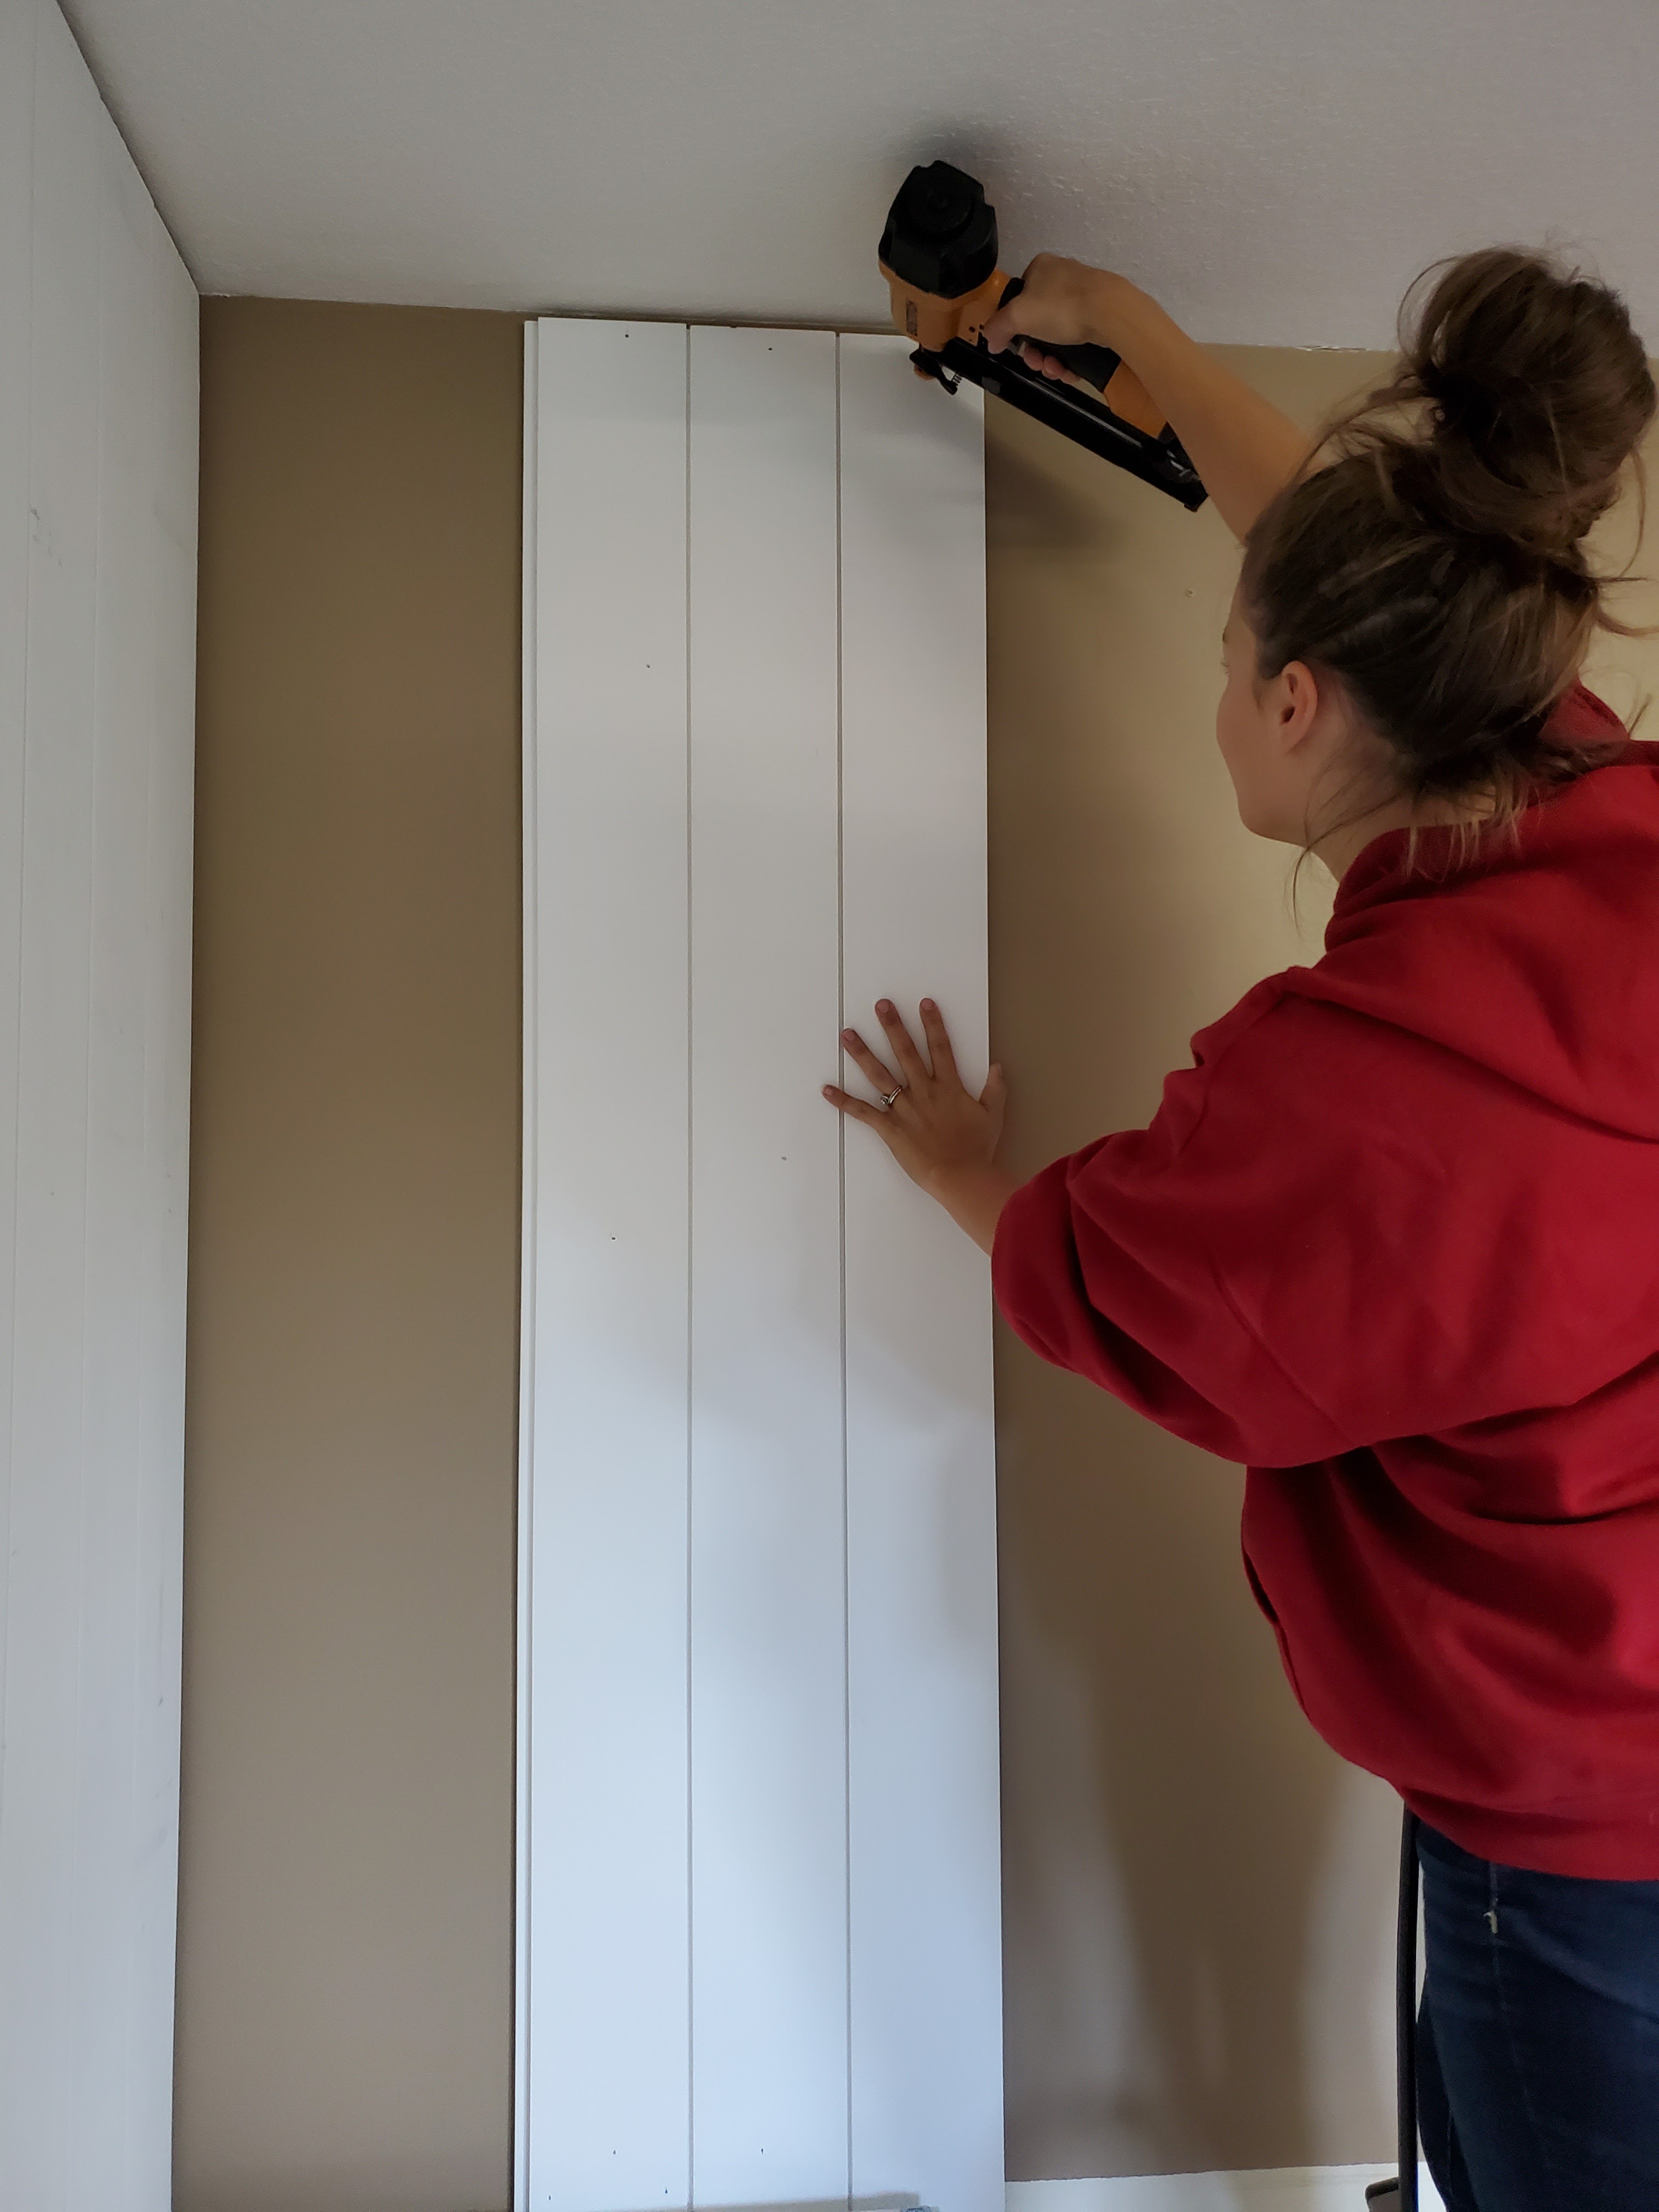
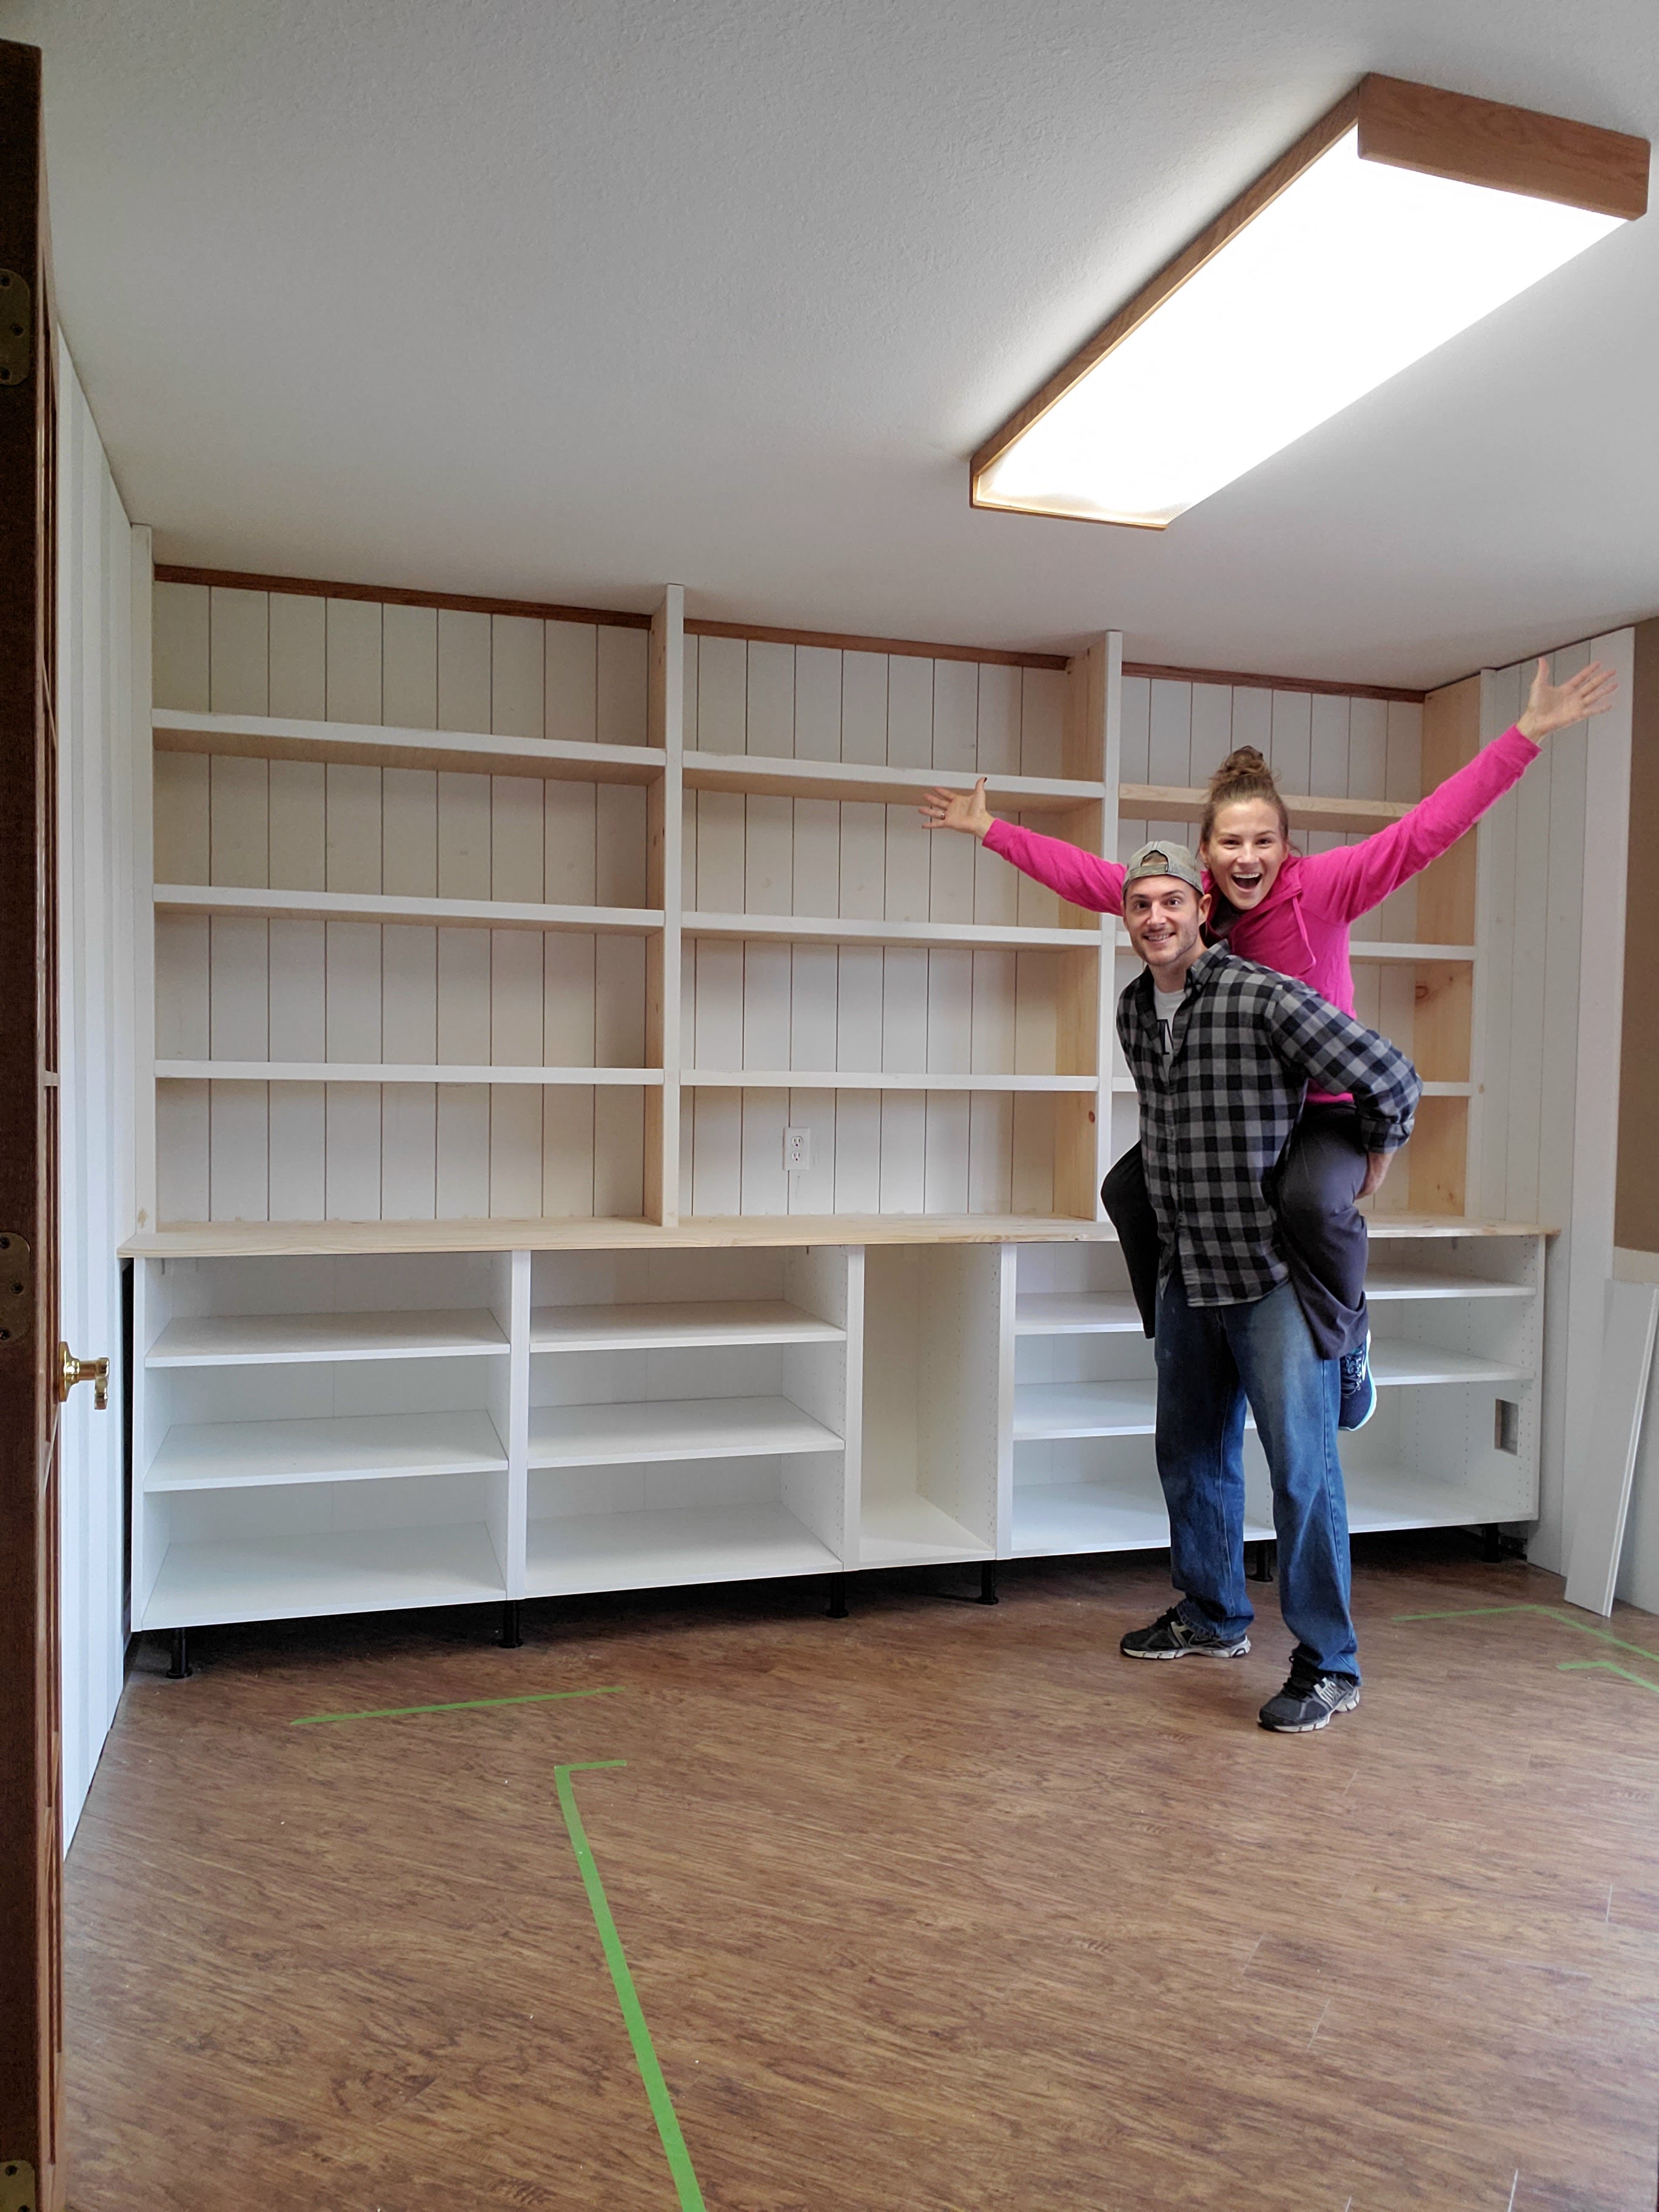
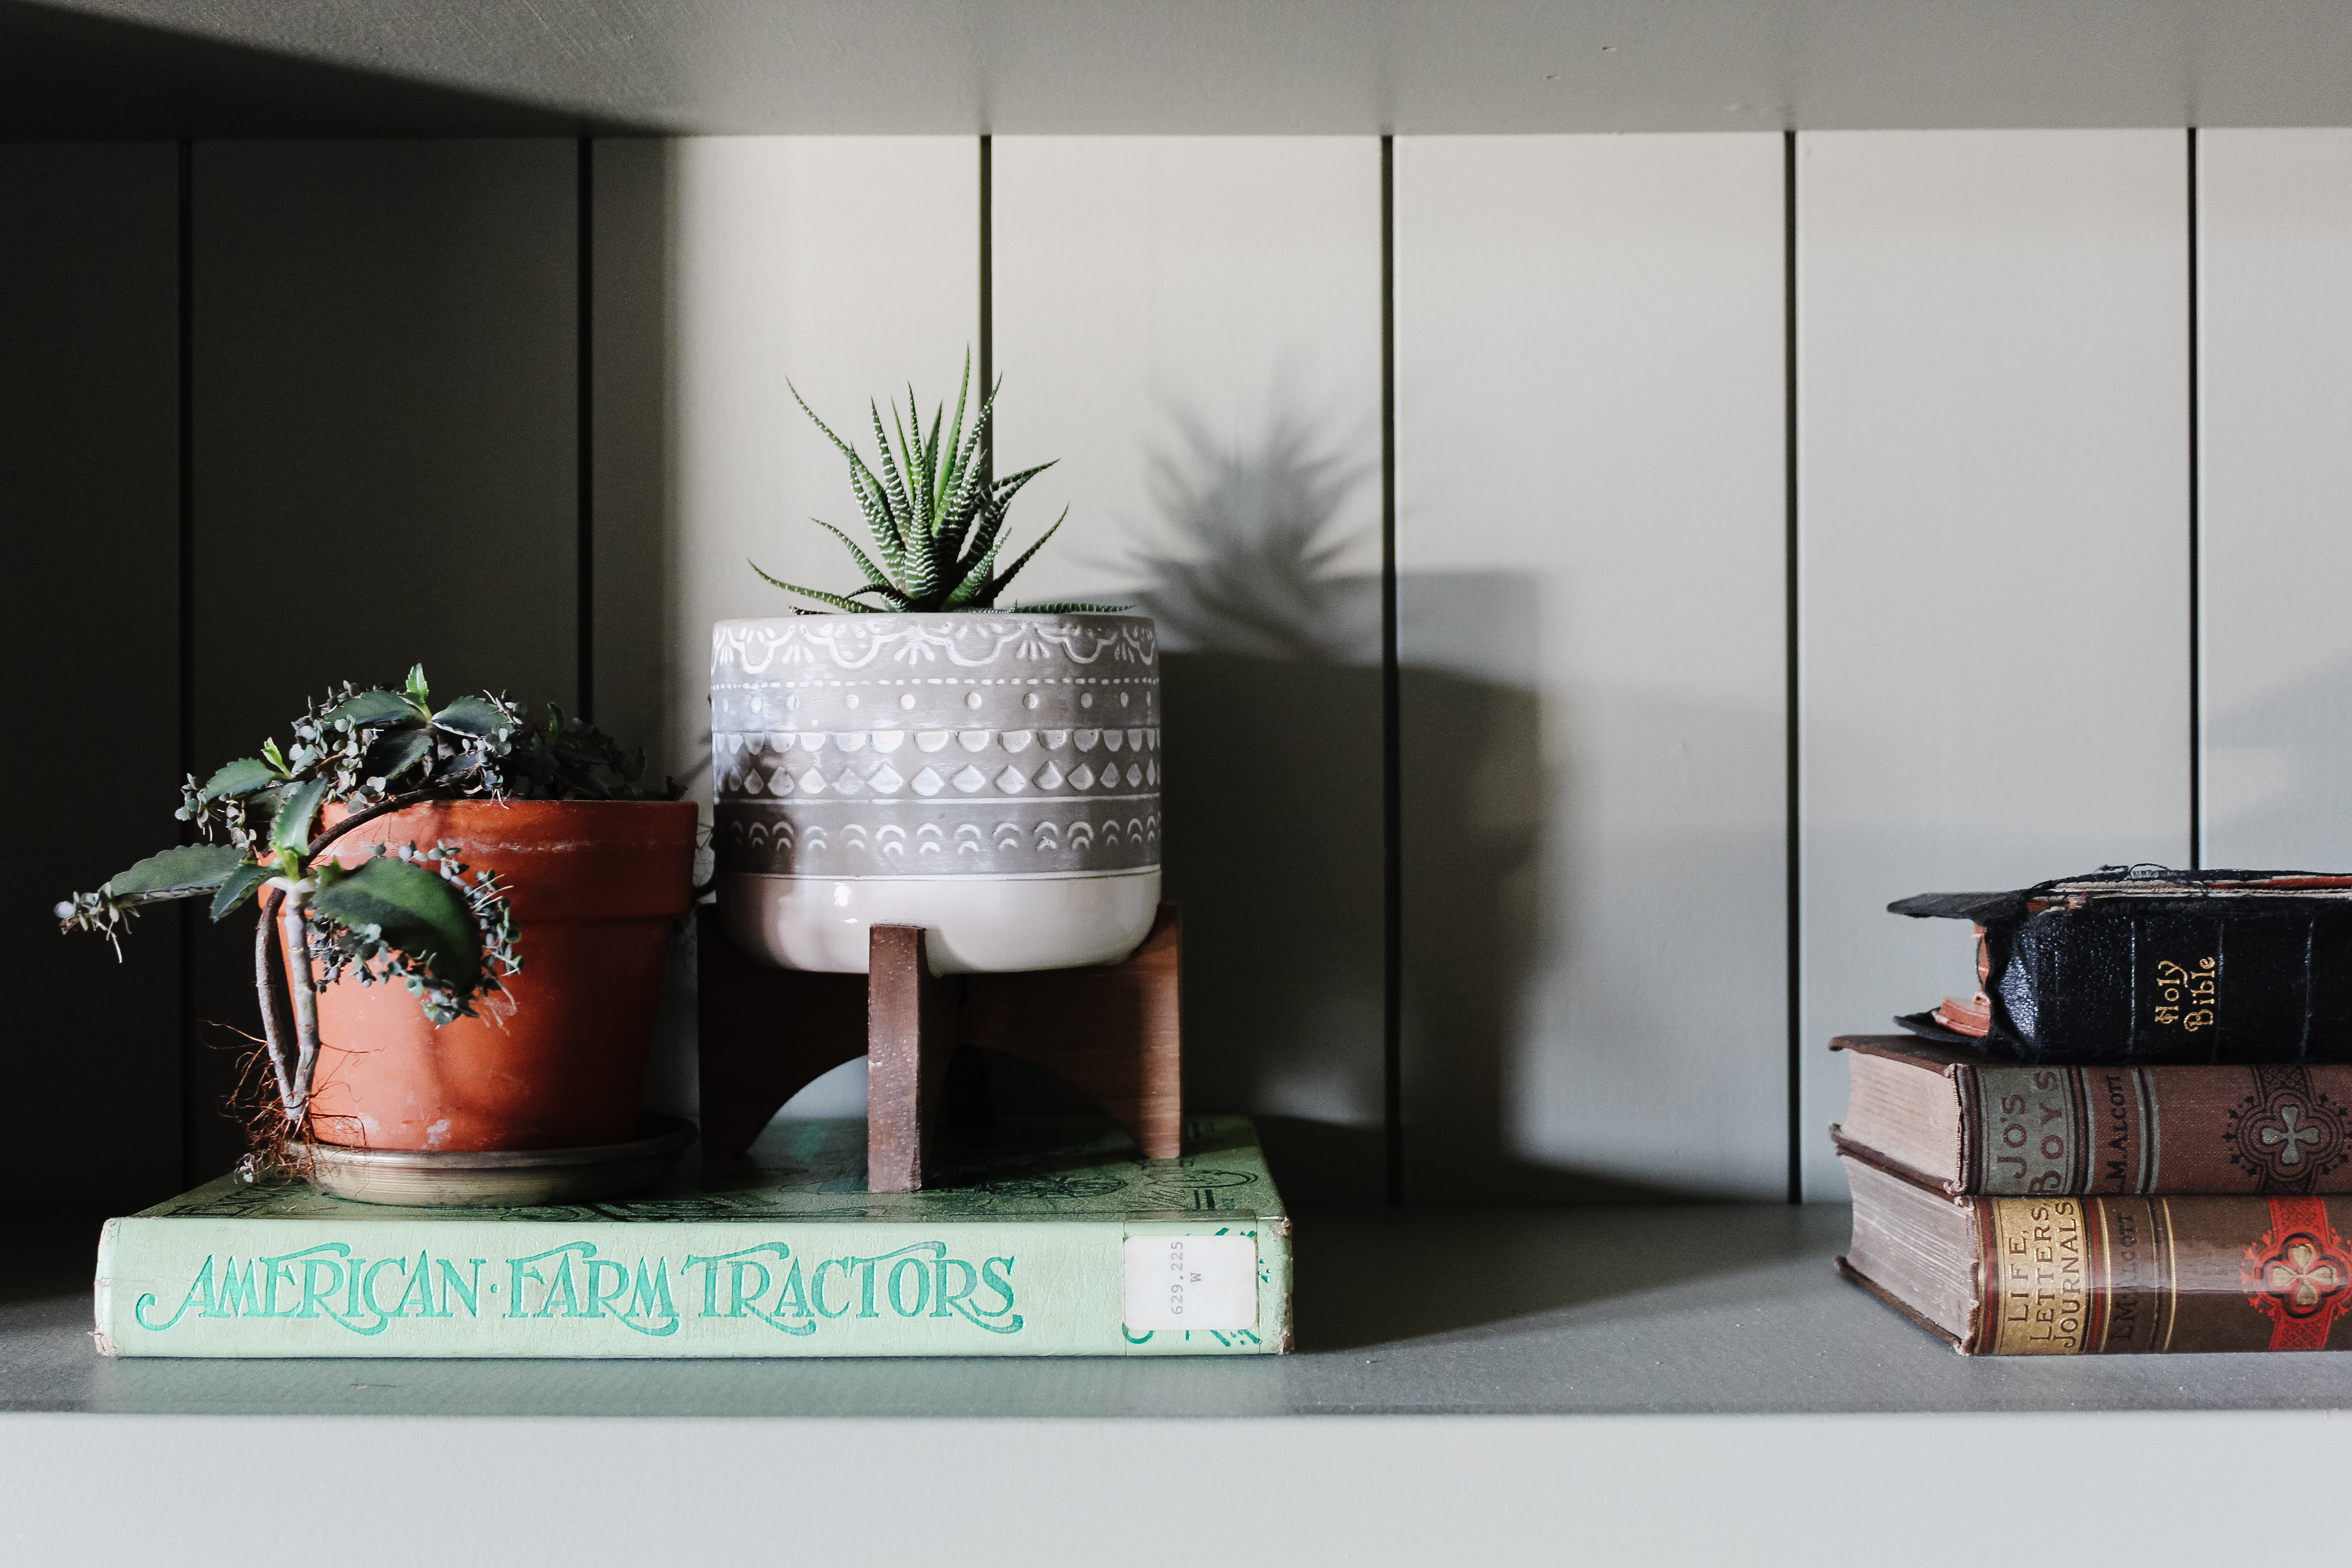
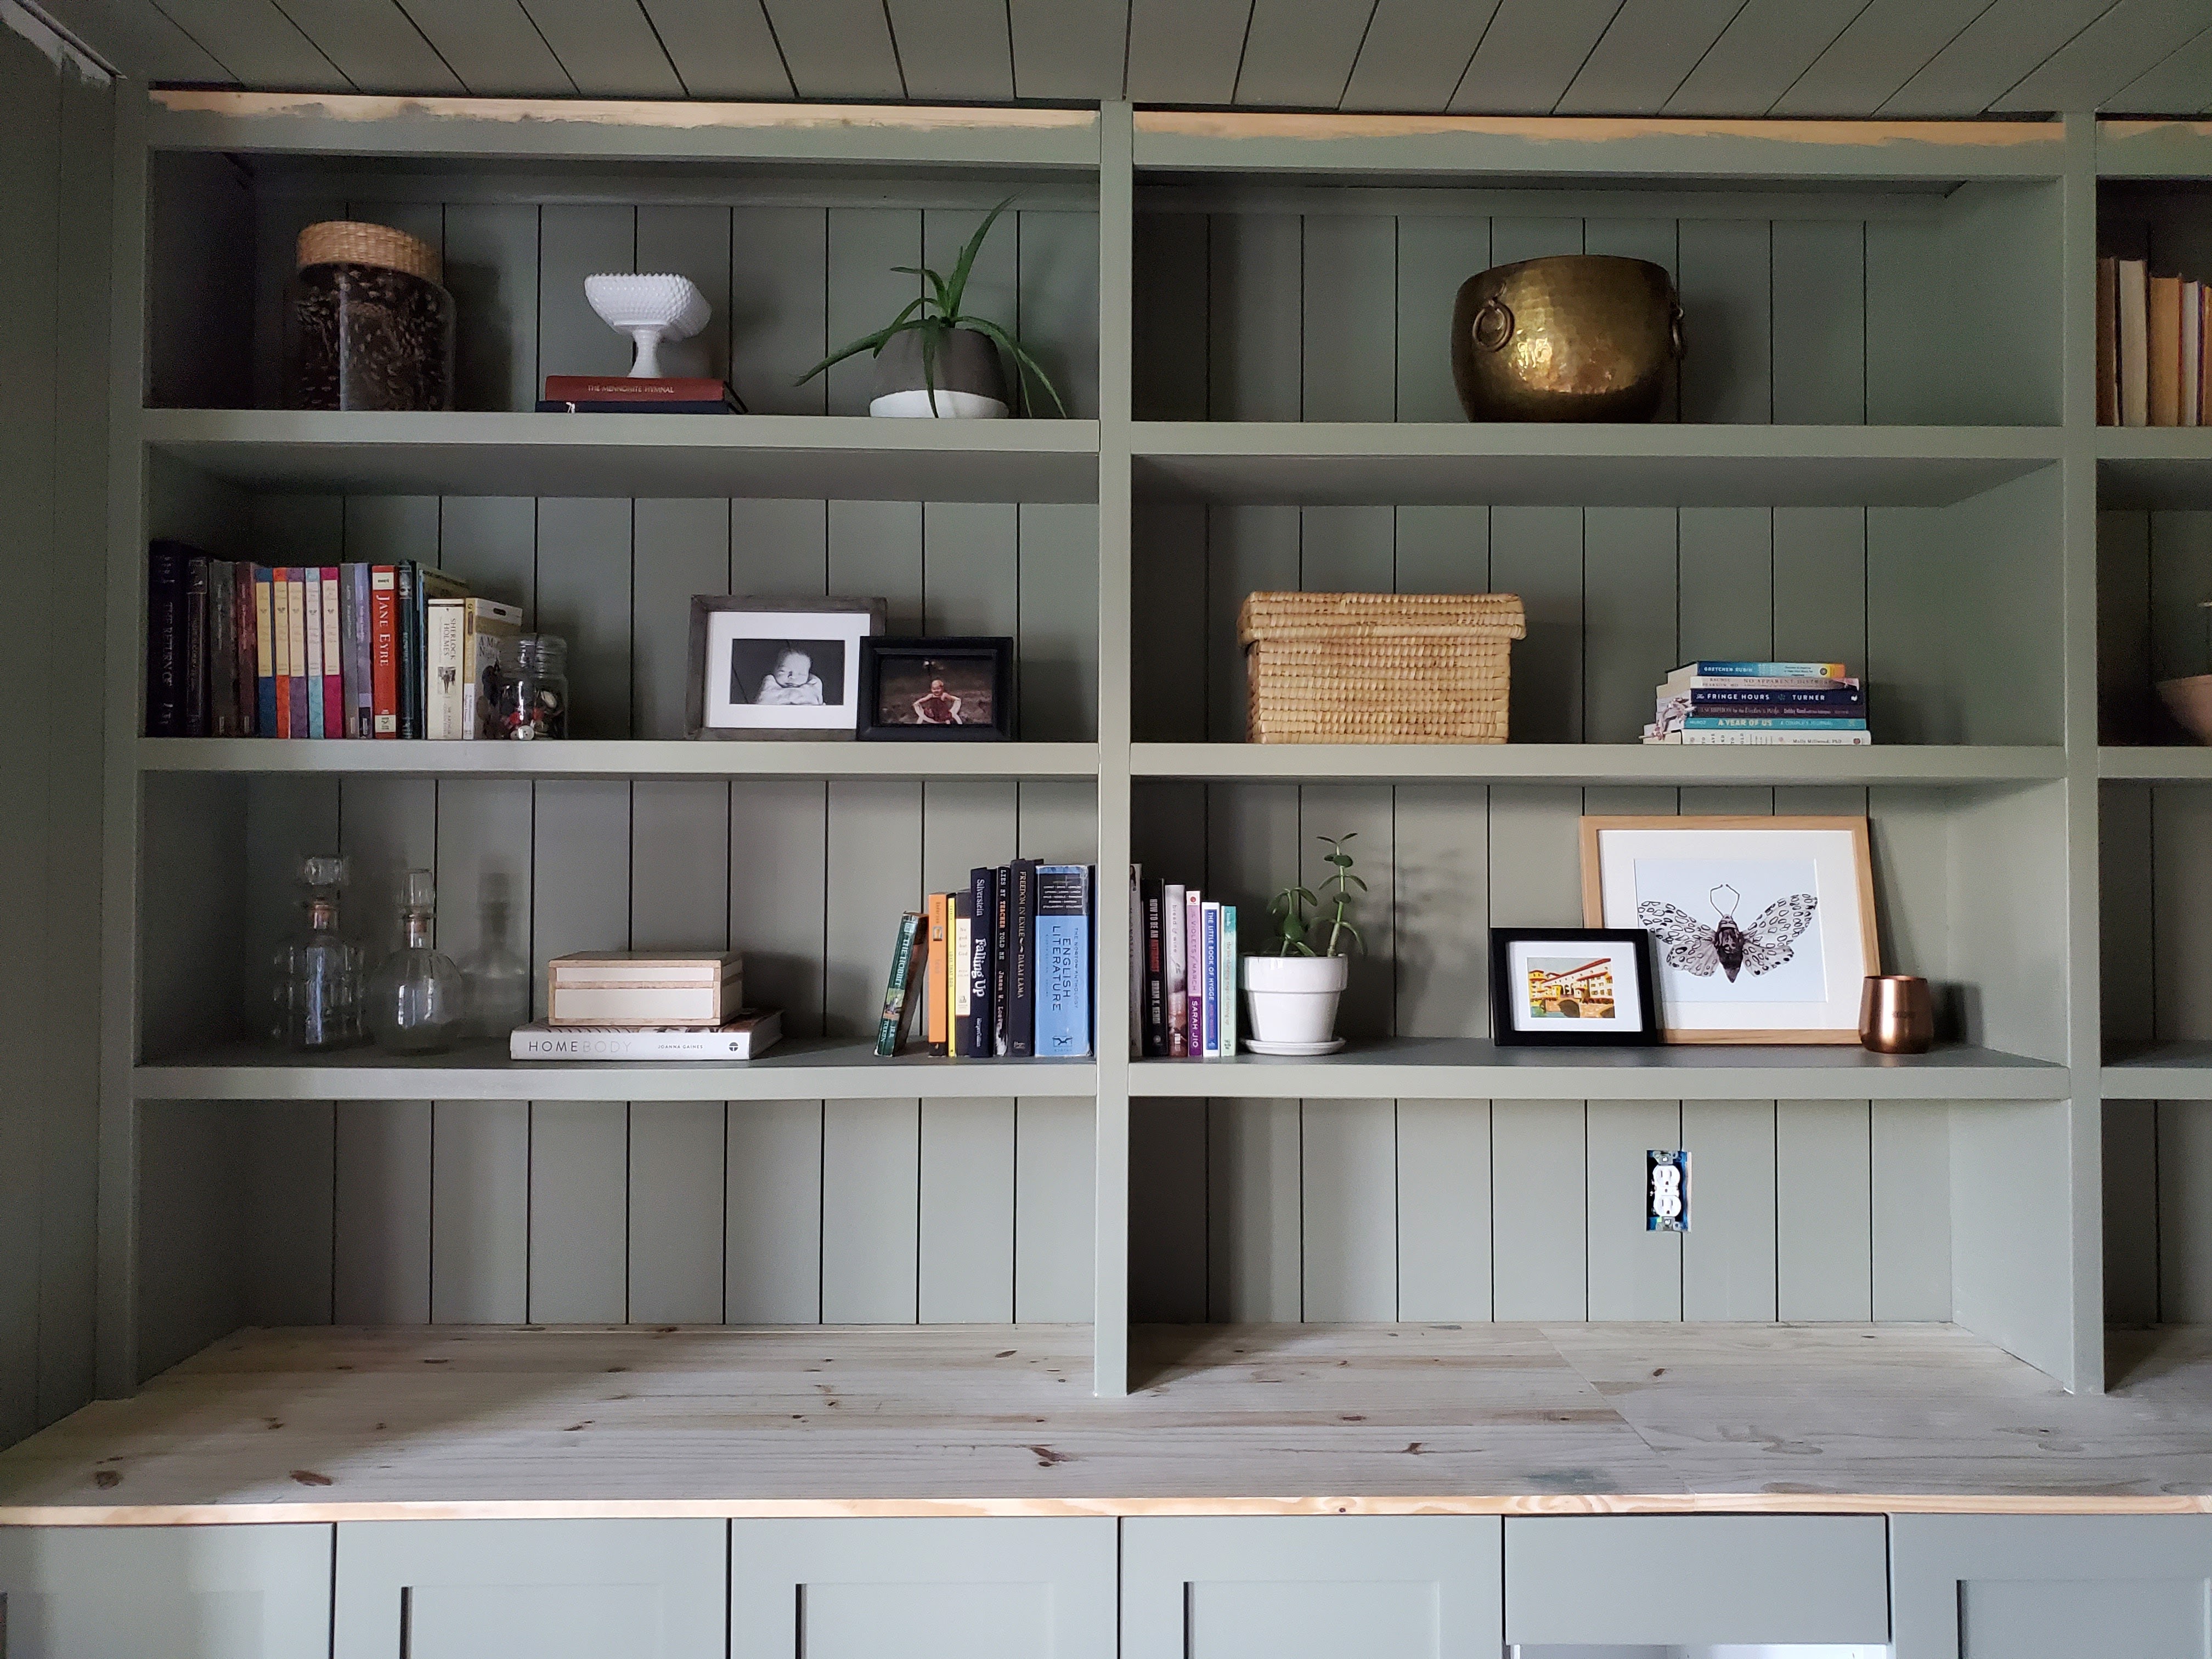
Even if toddler-reach wasn’t a concern, right now we don’t really have a lot of surfaces throughout the house where I can put Christmas decor. The new built-in shelves basically quadrupled (or more!) the amount of surface space I had to put decorations. Truthfully, I still don’t have a ton to fill the shelves but it’s more in here than in any other room and I love how the little decor swaps make it seem so festive!

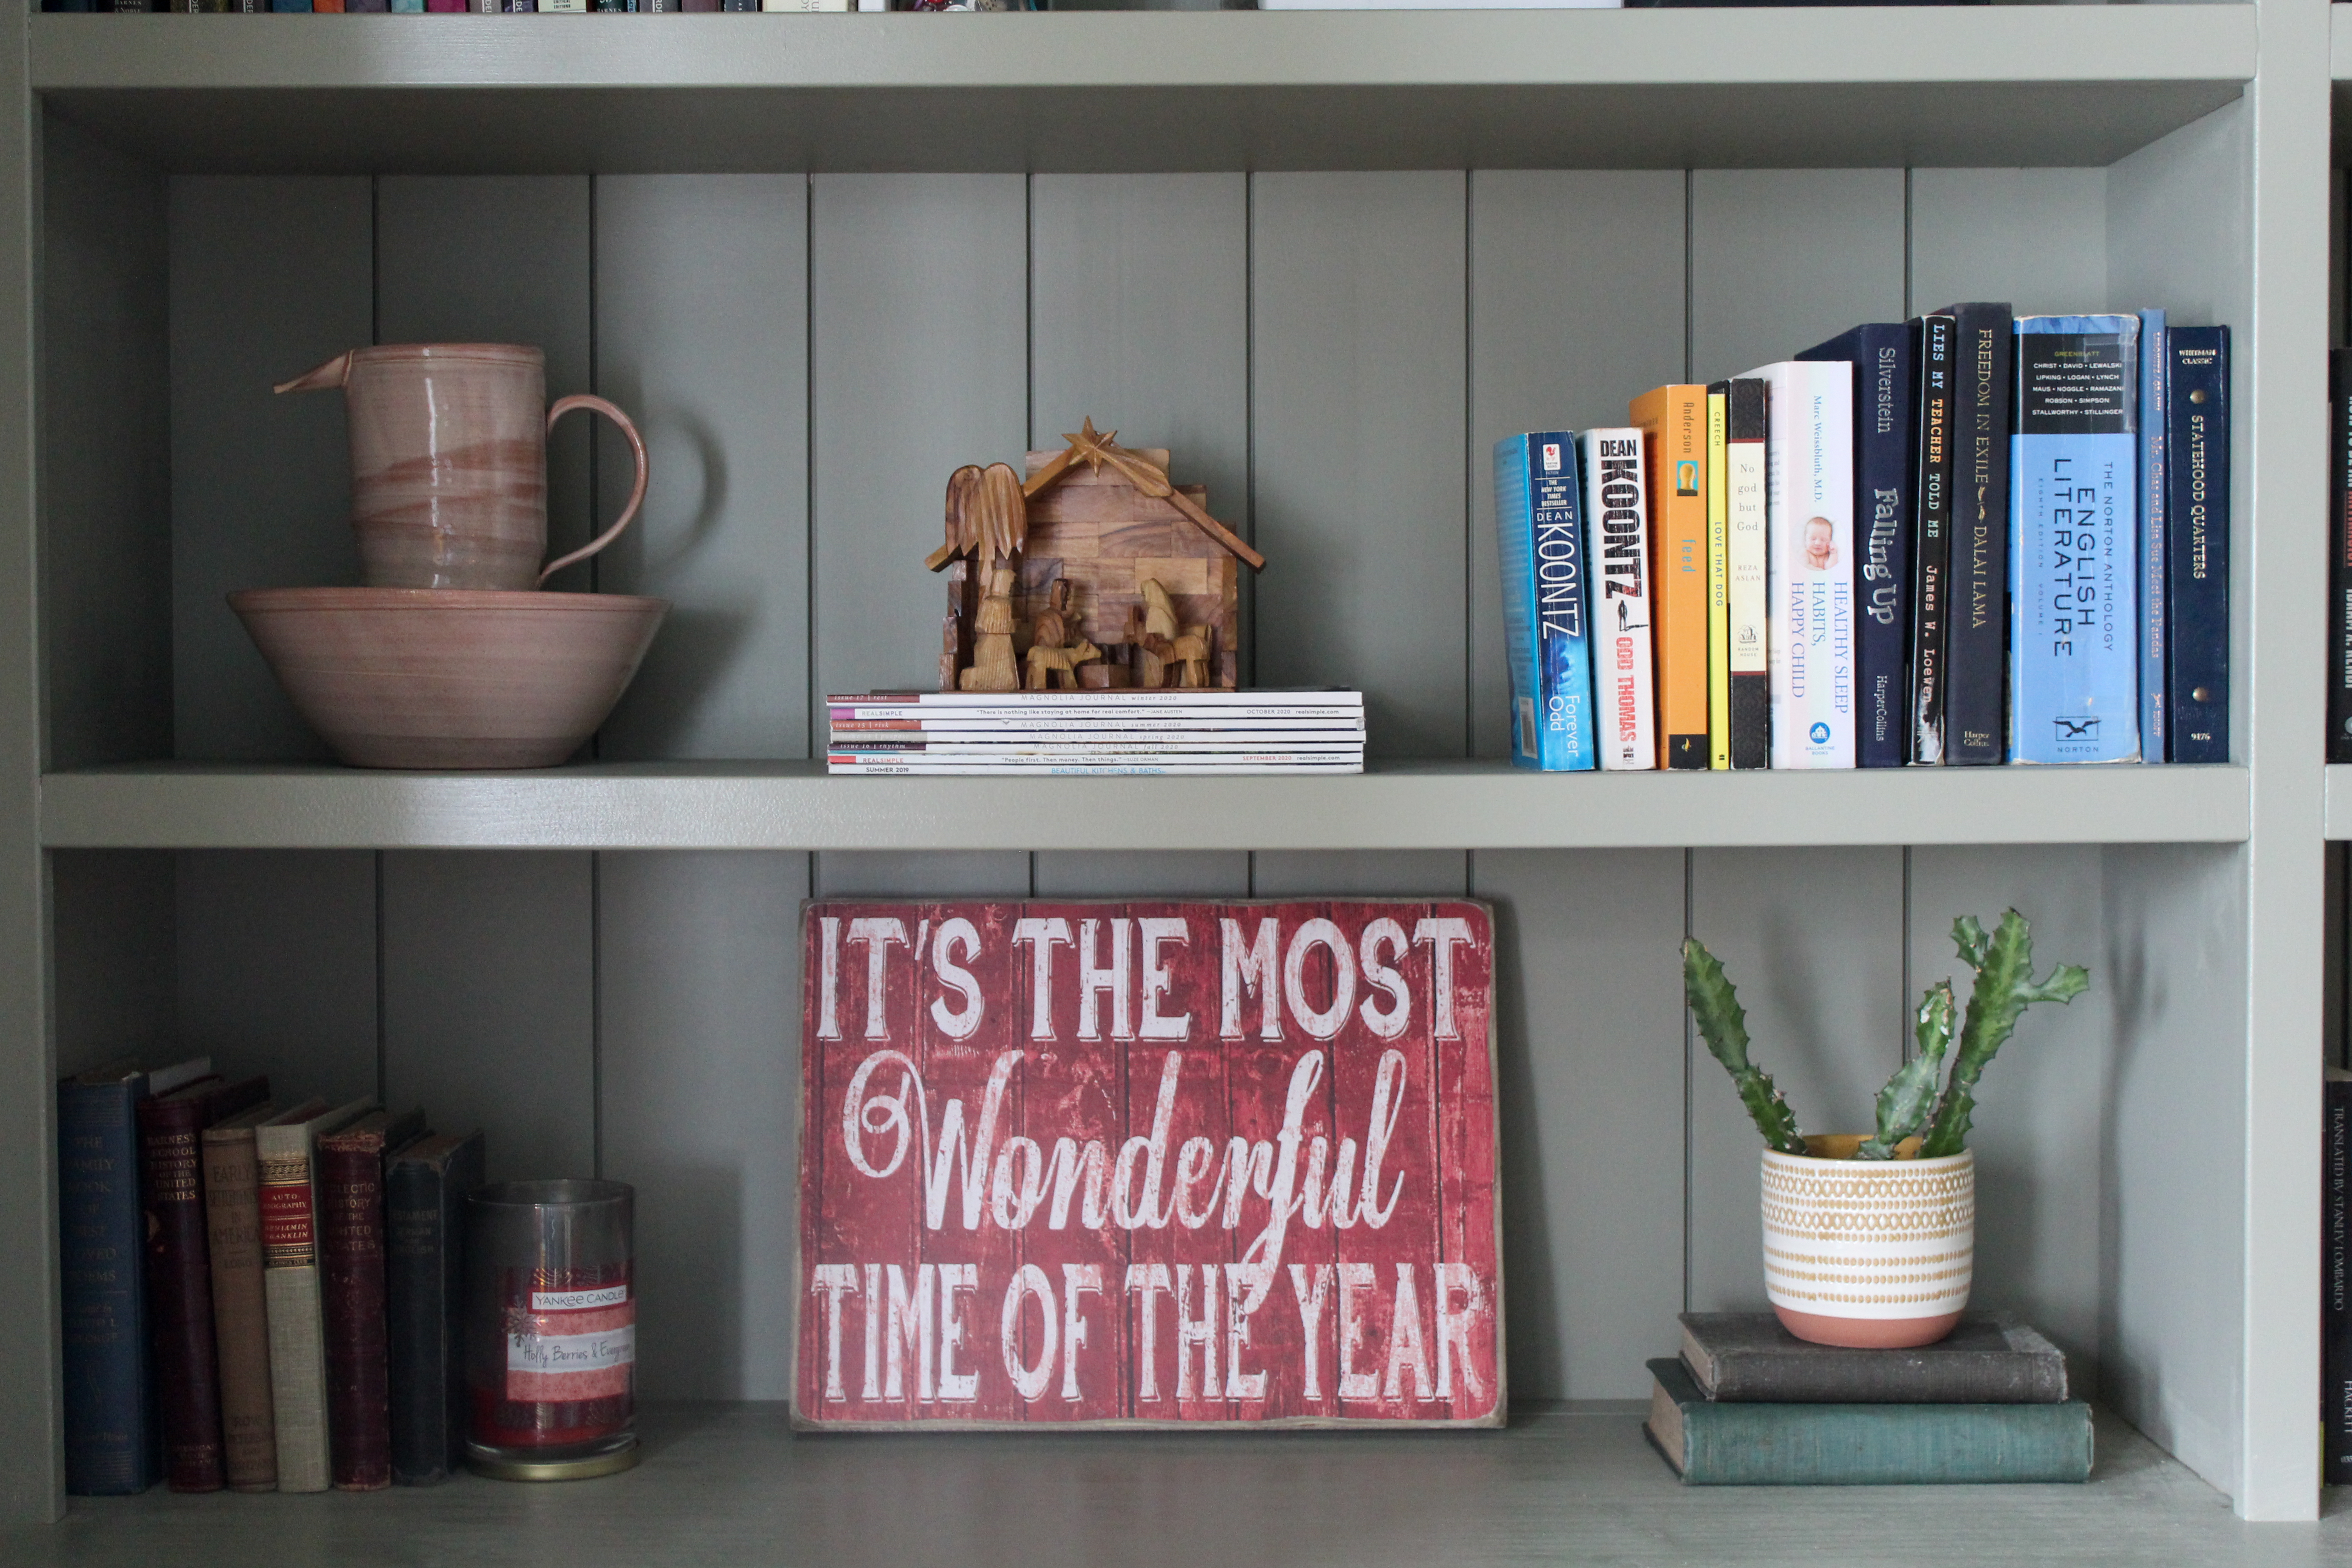
I wish I could include this scent over the blog – it’s just the perfect subtle Christmas-y blend!

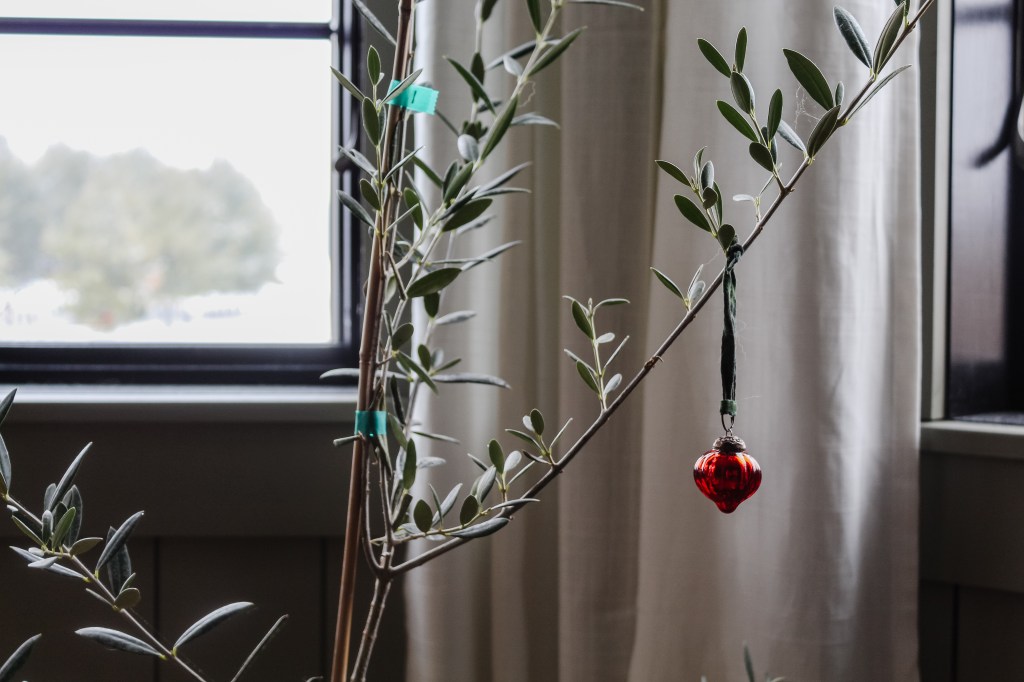
It might sound silly, but my absolute favorite part of my holiday house is this little ornament. It makes me so happy! I love my little Charlie Brown olive tree.

This image has an empty alt attribute; its file name is holiday-home-5.jpg

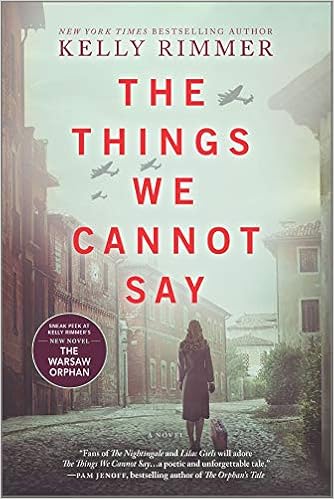
Not Christmas-y, but I am loving the contrasts between holiday red and vintage gold, and I feel like this gorgeous book cover just brings them together beautifully.

That wraps up this year’s decorations! I like to layer in new things over the years, so it really is fun to document what our house Christmas looks like right now since it’s probably the only year it will exactly like this.

Thanks for joining the tour!

Shopping Small for Simple Toddler Christmas Gifts

I looked at my calendar today and was startled to realize that Christmas is next week. Next. Week! This has been such a strange year that has felt so surreal and slow at times, yet here we are so close to Christmas!

Our tree is set up with my favorite ornaments taking front and center!

Our Christmas celebrations look a little different this year for many reasons, and one unexpected thing that is changing this year for us is gifts. As in, I’m actually going to give our kids some. Ha!

I’m a pretty minimal-ish person and while I do love gifts, I don’t like getting stuff just for the sake of having presents. Last year, we left the gift giving mostly to grandparents, aunts, uncles, etc. and kept our family Christmas very small and simple (I even wrapped up some library books for LJ to unwrap and enjoy for three weeks until they were returned – it worked like a charm!)

This year, I decided to ramp up our celebration a bit for two reasons. One, LJ is getting older and understands more of what’s going on – it’s so fun to see his pure joy and excitement opening presents, even small ones. And two, this year has been a hard year for small businesses. This pandemic has caused many small businesses to take a big hit and it became extra important to me to support them with my purchases.

Each year, I try to be intentional with the gifts I personally give my kids and the items that we put on our wish list. Last year, I wrote a post about non-toy gift ideas and also one about intentionally gifting toys with a greater purpose (fair trade, sustainable, eco-friendly, small business, philanthropic mission, etc. The post also includes my favorite brands/shops!) and my philosophy hasn’t changed, so those are good posts to check out to see where I get ideas for gifts. Disclaimer: I understand that items that fit these categories often cost more or are less accessible, and I recognize both the convenience and affordability of big box stores or online companies like Amazon. My children of course get gifts outside of these preferences and that is 100% OKAY. I’m certainly not perfect (you’ll see a couple things I got them are even from the dollar bins at Target) and I don’t expect anyone else to be! While these are goals/preferences, they’re by no means requirements and we’re grateful for and appreciative of each and every gift regardless.

While all the other things listed above are important to me, this year I focused on small businesses first. I tried my best to include products on my kids’ wish lists that are made by smaller brands, but I also encouraged our families to consider purchasing more mainstream toys at local small businesses if possible. A few things on my kids’ wish lists this year were:

PlanToys play food – I love this company’s sustainable mission: sustainable material, sustainable manufacturing, sustainable mind. Bonus that my mom was able to purchase the food and beverage set, breakfast set, veggie set, and fruit set from a locally-owned small business!

A screengrab of Vi opening a PlanToys phone at Justin’s family’s Christmas – she loves it!

Cuddle + Kind dolls – these dolls are high-quality, adorable, and fair trade PLUS with each purchase, the company donates money to humanitarian organizations that provide meals to those in need. Vi has two dolls already (Penelope and Stella) that she carries around everywhere and this year we asked for either Mia or Charlotte.

Bows from Etsy shops – I love having cute bows for Vi and supporting a small business at the same time. I particularly love this one and this one.

Books – We requested books from local small businesses for both kids!

Chalkfull of Design – LJ received a personalized name chalkboard from this small business this year and he’s so excited to practice writing his name!

As for the gifts we’re personally giving this year, I still didn’t get a ton of things, but I did get more than originally anticipated since I wanted to support local small businesses. I thought I’d just show you what I got!

Since Vi is only one and still doesn’t really understand what is going on (and we all know how I feel about clutter haha), she isn’t getting as much as LJ. Even so, I know she’ll love these items! Both she and LJ currently love bathtime so I snagged a few bathtub finger paints for her stocking. The Poke-a-Dot book was found at a small business in my parent’s hometown and I’m so excited for her to unwrap it! She loves books and this one makes fun popping noises that I know she’ll have fun with.

LJ has a few more items since he’s older and understands what is going on. He’s going through a phase where he requests a band-aid for every “injury” (a small bump on the head, tiny scratch on the finger, etc) so he’ll love the PJ Masks bandages! I purchased a cute little tractor + wagon and some farm animals at a locally-owned toy store in Justin’s hometown and I know these will be huge hits for him! I’m putting the tractor and bandages in his stocking and wrapping up the coloring book and animals.

If you follow me on Instagram, you might know that we’re currently in the process of building our main present for the kids: a play kitchen! They’ll be getting play food from other relatives, but since our Christmas is first, I wanted them to at least have something to unwrap and play with when they receive the kitchen. I found this adorable Melissa and Doug cookware set at a local small business and it’s perfect!

I’m also going to wrap up this cute African basket so they have something to carry their fruits and veggies in. I found this at another small business in Justin’s hometown and will wrap it up and let Vi open it since she didn’t get as many gifts as LJ.

While I’m so glad we were able to shop small for many gifts, I want to reiterate that we’re not perfect or expecting anyone else to be. If anything, I’m hoping that by being transparent about all the things I’m giving our kids, both the things from the Target dollar bin and the things from local small businesses, you’ll be encouraged to find a balance that works for you. Maybe that’s trying to find just one gift from a small business. Maybe that’s just focusing on stocking stuffer gifts from small businesses. Maybe it’s asking family members to try to shop small for gifts for you or your kids. For me, the goal isn’t perfection, it’s to try to be more intentional when and if I can. 🙂

Of course, Christmas is certainly about more than just gifts, and we incorporate a lot more than presents into our celebrations, but knowing a few of these gifts helped support small businesses this year does make the celebration seem sweeter. I can’t wait for Christmas morning!

November 2020 Book Reviews

After this past month’s reading, all I can say is “wow.” While they are all very different from one another, each of the three books I read was powerful in its own way, and each one was just so incredibly well written. I’m so excited to talk about them today!

Transcendant Kingdom by Yaa Gyasi

The collaboration that the mice and I have going in this lab is, if not holy, then at least sacrosanct. . . I’m aware that the Christians in my life would find it blasphemous and the scientists would find it embarrassing, but the more I do this work the more I believe in a kind of holiness in our connection to everything on Earth. Holy is the mouse. Holy is the grain the mouse eats. Holy is the seed. Holy are we.

Gifty has seen struggle and suffering around her for most of her life. Her parents struggled to find good jobs in Alabama and provide for their children after immigrating from Ghana. Her brother struggled to cope with a sports injury in high school and became addicted to drugs. Her suicidal mother has battled depression while tightly clinging to her faith for much of her adult life. And Gifty is trying to use her talents in science to understand it all by studying reward-seeking behaviors in mice. This book is a slow burn, character-driven novel. There’s actually not much at all that happens in the overall plot, but the book poignantly journeys through Gifty’s thoughts and experiences, both past and present, and explores her times of deep spiritual belief and wavering faith. It’s definitely not the book to choose if you want to just zone out, as it jumps around in time too frequently and sometimes without warning so it’s easy to get confused. It’s also not the book to choose if you’re looking for a fast-paced plot. It’s one to choose if you’re desiring a rich, thought-provoking, beautifully written look at grief, faith, suffering, and the desire to find hope and meaning in it all.

Untamed by Glennon Doyle

What we need right now is more women who have detoxed themselves so completely from the world’s expectations that they are full of nothing by themselves. What we need are women who are full of themselves. A woman who is full of herself knows and trusts herself enough to say and do what must be done. She lets the rest burn.

This book has been circulating a ton on social media this year and I finally decided to check it out. I hadn’t read Glennon’s previous books or followed her on social media or known much beyond the basics of her life (namely, her somewhat recent marriage to soccer star Abby Wombach after divorcing her longtime husband). This book serves as part-memoir, part-motivational speaker and while much of it centers around the end of her first marriage and then relationship with Abby, it covers a wide range of topics. Glennon writes powerfully about her motherhood journey, addictions, feminism, depression and anxiety, discovering herself, racism, and so much more. There are over 50 chapters touching on so many things that it feels more like a collection of short stories that are connected, yet separate. As it is with most short story collections, I definitely resonated more deeply with some than others. There were some chapters that didn’t land for me, but then others that spoke to me so deeply I teared up. (In that sense, it reminded me of Girl, Wash Your Face, although Untamed is so much better written). Glennon is a gifted storyteller and I especially appreciated reading her takes on raising both boys and girls, navigating an anti-racist journey as a white women, learning to value herself as a woman and mother, and her journey as an activist for social and racial justice. It’s deep, it’s charming, it’s vulnerable, it’s funny, it’s well done.

The Things We Cannot Say by Kelly Rimmer

By now it’s no secret that historical fiction is my favorite, so this dual-perspective novel seemed like it would be right up my alley and I was not disappointed! Alternating between Alina, a Roman Catholic teenager living in Nazi-occupied Poland, and Alice, a present-day wife and mother hoping to fulfil one last request for her dying grandmother, this gorgeously-written novel spins a tale of hope, resilience, and undying love in the face of an unimaginable war. The interesting thing about this book is that there aren’t shock factors so much as twists that are expected to happen, you’re just not sure exactly how they will unfold. Even when I thought I figured out how all the stories connected, I was so intrigued with the why they connected. I don’t know if that makes sense, but I can’t say more without giving things away. You’ll just have to read it and find out what I mean. 😉 My one criticism would be that while I was absolutely captivated by Alina’s story, I didn’t feel like the first half of Alice’s was that interesting. There was a lot written about her life, marriage, and family that felt like it didn’t necessarily have to be included. That being said, I still could not put this book down! I was in full-fledged tears through several chapters and it will stay with me for quite a while. This is easily going to make it to my top recommendations – I loved it!

Honestly, I’m a little nervous for December reading now – this is quite the lineup to have to follow! As always, if you have any great recommendations, please send them my way!

LJ’s Bedroom Refresh!

We’ve been celebrating a few milestones around here! About two weeks ago, LJ transitioned out of his crib into a bed, and shortly after that, we celebrated his third birthday. These events happening so close together made it feel like the right time to give his bedroom a little refresh to make it feel like a “big boy” space.

Since moving into this house, we’ve only done a small amount of work to LJ’s room. We kept the roller shades on the window (even though they have some holes and don’t match each other) because they’re functional and help keep his room dark during daytime naps. We kept the original curtain rods and just hung his old curtains (his old room had one window, and we’ve split those curtains to each cover one window). Again, not super pretty, but it’s been functional for now. We did paint the previously brown walls into a colorblock pattern and I printed out a few pieces of artwork from Etsy, but other than that, I haven’t spent much time decorating. It was time for a little upgrade!

I unfortunately don’t have any pictures from before we painted, but here’s what the room looked like when it was set up as a nursery:

And here’s what it looks like with a new bed!

The bed frame is a hand-me-down from a friend and it works perfectly for our needs. We purchased a new twin mattress from a local business on Black Friday, bought sheets and a comforter, and I shopped my home for a few extra pillows and a throw.

I loved mixing some patterns and textures here – it feels cozy and sweet, but still very toddler friendly!

In addition to the bed, I decided to also do a quick update to LJ’s dresser area. Specifically, I was ready to change up the mirror. We bought this mid century dresser off Craigslist several years ago and I painted it for his previous nursery. When we moved to this house, we decided to add the original mirror back on but . . . I hated it. I don’t like the style, and the glass itself was cloudy and had a few black spots. I dealt with it for a while but was more than ready for a change.

I originally purchased this oval mirror for our guest bathroom renovation but ended up going in a different direction in that space – this mirror had been in storage ever since, just waiting for its time to shine!

Adding in a plant and using some of LJ’s things as decor (I can’t even with the adorable piggy bank!) helped finish off this area and make it both cute and functional.

The rest of the room stayed pretty much as is, I just added a few little touches here and there to level it up a bit.

Someday, we’ll do more work in this room, but these changes are what made sense now. This is the bigger of two rooms for our kids, so if we ever do have a third child, this is the room we’ll have the two siblings of the same sex share (it could switch to a girl’s room someday!) Plus, we didn’t want to spend a lot of money or put in a ton of effort since LJ is three and doesn’t care anyways haha. Full-blown room renovations are fun and certainly more dramatic, but they’re not always realistic or the most practical choice. In this case, a new bed with fresh bedding, an updated mirror, and a few tiny touches with mostly functional decor was enough. It was simple, inexpensive, and will be easy to change as LJ grows and his needs change, and now the room feels just right for his current stage.

Even Macie approves of the space! 😉

Sources

Wall Color: Sherwin Williams Eider White and Nordic Bleu

Dresser Color: Sherwin Williams Slate Tile

Sheets

Gray Comforter

Piggy Bank

Black Oval Mirror

Most other items are thrifted or old!

One Room Challenge Week Six: Our Home Office REVEAL!

It’s the final week of the Fall 2020 One Room Challenge! We’ve been pouring our heart and soul into our home office and I’m so excited to show you how it turned out!

Let’s take a quick trip down memory lane, shall we? Two months ago, the room looked like this:

Fluorescent light, barely functional window shades, mismatched storage – yikes. It was a hot mess combination of storage/overflow/office/extra guest bedroom and unfortunately due to the French doors, we saw the room every. single. day. Since the day we moved in, I’ve been dreaming of this being a cozy home office + library and it makes me so happy to see this vision come to life!

After removing all the old trim and beadboard paneling, Justin and I took primed shiplap and ran the planks vertically all around the room and on the ceiling. We put extra effort into making sure the ceiling planks lined up with the wall planks, and I think that effort was definitely worth it! I chose the color Treron by Farrow and Ball and had it color-matched at Lowe’s for all the walls, ceiling, trim, and built-ins.

The olive green color strikes just the right balance for me – not too dark, not too light, not too brown, not too green. It’s a bit of a chameleon color and changes a little depending on the lighting but it’s just a nice warm that makes the room feel so cozy.

Without a doubt, the star of the room is the gorgeous built-in. This showstopper took the room from no storage to tons of storage. The bottom portion is Ikea cabinets with Semihandmade doors and I love them so much. They look custom-made but for a fraction of the price! If you’ve been following along in my Instagram stories, you know that I had two different options for hardware but didn’t feel like either was quite right so I ordered a third set. I’m still waiting on those cabinet pulls and knobs to arrive and I think they’ll be the perfect finishing touch. Stay tuned!

Back in the planning stages, I debated on whether to do a built-in desk or keep it freestanding, then whether to do all cabinet doors or have a section of drawers as well. I’m so happy with my decision to do a freestanding desk and include a section of drawers in the middle. It provides tons of easily accessible and functional storage and with the desk in the middle, the room actually feels perfectly proportioned.

Justin and I worked together to build the bookshelves from scratch and we are both thrilled with how well they turned out. I intentionally tried to pull in other colors and textures throughout the bookshelves, especially with light colors and natural fibers to break up all the olive green throughout the room. In addition to all our books, the shelves are filled with special mementos, heirlooms, family pictures, and artwork from travels, so it very much feels like us.

I also have functional items throughout – closed storage boxes holding office supplies, decorative jars filled with pens and pencils, trays for papers, etc. The shelves strike the perfect blend of meaningful, beautiful, and functional for us.

I think of this room as a home office and library all in one. As I imagined shelves full of books, I also imagined a cozy area to read them in. The bay window area provided the ideal place to add a comfy reading chair. I had been on the hunt for a reading chair in either yellow/gold, rust, burgundy, or something along those lines but everything I found was super expensive. Then a few weeks ago, I saw someone share a post from the thrift store in my hometown. One of the items pictured was a set of vintage yellow chairs circa 1970s (sold separately for $50 each) and my heart immediately leapt. I sent my mom on a mission to the thrift store to see if the chairs were comfortable and in good shape. They were, and I convinced her to buy one for me for Christmas. Score! Here’s the chair when it first arrived – my parents thought I was crazy, but I knew it had potential.

If you follow me on Instagram, you know I performed a little cosmetic surgery on the chair to remove the flap of fabric at the bottom and this made a huge impact in making it seem more modern.

I brought down the little side table from Vi’s room, but I eventually plan to replace it with something else (I’m feeling a little round table?) and I’ll also add a floor lamp at some point. For now, I’m happy with this space!

In addition to replacing the baseboards, we also tore off the old window casing and added new trim in a style inspired by Jenni Yolo at ISpyDIY. I also painted the existing window frames and grille inserts Tricorn Black by Sherwin Williams.

We had a slight fiasco with the bay window curtain rod because we didn’t realize that the side bars only extended 36″ max and we needed about 42″ but Justin came up with the brilliant idea to buy two cheap telescoping curtain rods and screw them into the angled attachment on the middle window’s curtain rod. This worked like a charm! The curtains are Ikea Ritva. I got them in 118″ length and then used hemming tape to shorten them a bit (I like a little pool at the bottom, but it was originally like 8″ too long). I hung them by attaching pleating hooks to the curtains and then hooking them through the eyelets of curtain rings. Rather than just putting the curtain rod through the loops of the curtain, this gave them a little extra oomph.

Another issue I ran into was rug size. Because of the bay window and angled doorway, the room is anything from square (don’t even get me started on how hard figuring out the crown molding was!). It left an awkward amount of floor space that I really needed a 6×9 rug for, but many of the rugs I loved only came in 5×7’6″ or 7’6″x9’6″. It was a frustrating search! Finally, I decided to try a layered rug look with a simple jute rug at the 6×9 size I needed and a patterned rug I loved in a 5×7’6″ size on top. This solution ended up working so well and I think it helps give the room a casual and cozy feel.

I am so so happy with how this room turned out! It is the room I was most excited about when we first moved in and it is now without question my favorite room in the house.

And it wouldn’t be a reveal without a few final before-and-afters, right?

I had so much fun participating in the Fall One Room Challenge! You can check out all the other fun projects that happened here.

ORC-Guest-400x218.png

And if you missed any of my previous posts on this challenge, you can check them out here:

Week One: The Office Plans

Week Two: The DIY Built-ins!

Week Three: Halfway Point Progress

Week Four: All About Shiplap

Week Five: Cabinet Doors Installed

Sources

Note: Some of these product links are to Amazon. As an Amazon Associate, I earn from qualifying purchases. This means if you purchase something through the Amazon link I provided, I may earn a small commission. None of my recommendations or decisions are based on any commission I might receive from your purchases, they are all things I actually bought for this renovation. The decision to buy something is yours, and whether or not you decide to buy one through the link I provide is completely up to you. Thank you!

Paint Color: Treron by Farrow and Ball (colormatched at Lowe’s) in Eggshell finish (walls + ceiling) and Satin finish (trim + built-ins).

Window Color: Tricorn Black by Sherwin Williams in Satin

Base Cabinets: Ikea

Door and Drawer Fronts: Semihandmade DIY Shaker

Sputnik Chandelier

Chandelier Lightbulbs

Shiplap

Baseboards

Crown Molding

Curtain Rod (keep in mind, we changed out the side window rods with a longer telescoping curtain rod!)

Curtains

Pleating Hooks

Curtain Rings

Olive Tree

5’x7’6″ Patterned Rug

6’x9′ Jute Rug

Desk

Desk Chair is old – this one is similar

Black and White Butterfly Print

Letterfolk Board

Stackable Black Paper Trays

White Storage Box

Almost everything else in the room is thrifted, heirloom, or bought a long time ago.

One Room Challenge Week Five: Cabinet Doors are on!

It’s the second-to-last week of the One Room Challenge and now that all the shiplap is finished, things have really picked up!

ORC-Guest-400x218.png

One thing that got checked off the list this past week was the completion of the window trim. We had trimmed out each window with a 1×4 and Justin then ripped a board into 1/2 inch strips and nailed it around the edges. This helped hide any gaps left in between the shiplap and the 1×4 and gave everything a nice, finished look.

Other than that, the biggest change that has happened this week has been the addition of our cabinet doors!

When we first started planning out the built-ins, we contemplated DIYing cabinet doors. I’m so glad that we ultimately decided to outsource that project because these Semihandmade door and drawer fronts are perfect and were a breeze to paint and install!

Semihandmade is a company that makes different styles of door and drawer fronts that are fit to the same specifications as an Ikea cabinet door. This means you can purchase the Ikea base cabinet, which is a very inexpensive, and then add different doors to create a more custom look. I’m really impressed with how it elevates the look of the cabinets without breaking the bank!

You can order doors in various colors but I went for the unpainted DIY version so I could paint them the exact same color as the rest of the built-in: Treron by Farrow and Ball that I color-matched at Lowe’s. Before painting, I did rub a fresh tack cloth over the fronts and backs of all the doors, because they shipped from the factory covered in a fine layer of sawdust.

I placed each door face down on top of paint cans (so they would be elevated off the ground) and started painting all the backs. I highly, highly recommend painting the backs first so that when you flip them to paint the other side, the back is the painted side that touches the paint cans – if one side is going to get nicked or scratched or stuck after painting, you definitely want it to be the side that rarely gets seen!

(Apologies for the quality and angles of these pictures – I didn’t take photos of this process so these are just screen grabs from the timelapse videos I posted on Instagram).

I used a paint + primer so I did not do a separate layer of primer. I used an angled brush to trim out the edges of each inset . . .

. . . and then I used this six inch foam roller on the rest of the doors to create a really smooth finish.

I painted all the backs of the doors, waited about 3 hours, and then painted a second coat. I let them dry overnight and then flipped them over to paint the fronts. I did the exact same process of two coats, this time also rolling the door sides, and let them dry again overnight. The next morning (probably about 18 hours later), we attached them to the cabinets using the hardware we bought from Ikea. They were very simple to install!

Yesterday, I spent time in the afternoon playing around with arranging the shelves. I’m definitely not done with them, but it was fun to get started with different placements. As you can see, we still need to finish assembling the drawers in the middle, but so far, I’m really pleased with the look!

Other things we need to accomplish this week:

-add the final trim pieces around the door frame

-add thin piece of trim between cabinets and the wall

-paint + install crown molding

-paint + install baseboards

-install cabinet hardware

-paint countertop (while I like the natural wood look, up close it looks silly because we had to use two boards to achieve the length and it’s just too obvious to leave natural)

-paint outlet covers and duct vent to match wall color

-paint the inside of the window frames

-install curtain rod + hang curtains

-move in the rugs, desk, chair, and finishing touches!

Can we get all this done in one week? We’ll see! In the meantime, you can check out all the other guest participants in the One Room Challenge here.

October 2020 Book Reviews

Good morning!

It’s been a while since I’ve had a non-One Room Challenge blog post and that’s because both on the blog and in real life, the month of October was dominated by work on our home office. It’s been such a fun room to design and work on (see our most recent progress here), but it has meant that I don’t have much free time to do things like reading. I only finished two books in the month of October, but I’m hoping that once the office is wrapped up, I’ll have lots of time to read in it!

Don’t the books look SO GOOD on our new home office bookshelves? 😉

My Favorite Half-Night Stand by Christina Lauren

My Favorite Half-Night Stand by [Christina Lauren]

Millie and her four best guy friends all need dates for an upcoming work event, so they decide to all create profiles for an online dating site. After a very unsuccessful first round of suitors, Millie tries her luck again with an alter ego, “Catherine.” This time, she gets matched up with her best friend Reid, and what started out as a joke to see if Reid would figure out who she was turns into a way for Millie to open up to Reid in a way that she never has been able to before. Add in the fact that Millie and Reid do have a bit of a friends-with-benefits thing going on in real life and . . . things get complicated.

I always go into Christina Lauren books with high hopes because the first book I ever read by these authors (it’s a writing duo – Christina and Lauren!) was The Unhoneymooners and I loved it. Unfortunately, so far that’s the one I’ve enjoyed the most and each book afterwards seems mediocre. I really liked all the characters individually (the friend group was so funny!) and loved that the authors did things like including their group chats – it was a fun way to see everyone’s unique personalities and make the reader feel like one of the group. I also liked the idea of Millie and Reid, but I got a little annoyed by parts of the plot and ended up skimming several sections. Overall, this one falls pretty middle-of-the-road for me. If you’re in the mood for a decent, fluffy read that you can skim and finish in a day, this is a good option.

How Not to Hate Your Husband After Kids by Jancee Dunn

This book was selected as a book club book for a podcast I listen too (HERself – highly recommend!) and while the title is definitely a little aggressive (I definitely do not hate Justin), this was a really interesting read. The author details the struggles of her marriage after becoming a parent – the feeling of carrying most of the weight of parenting and housework duties, the frustration of asking for help with chores only to be told an noncommittal “later,” the lack of romance and passion, and the intensity of arguments and fighting. She’s incredibly vulnerable and transparent about the struggles she and her husband faced and then details the information she learned from seeking the opinions of others: everyone from marriage therapists to credentialed researchers to FBI negotiation experts to her friends and family. She slowly starts to implement various strategies and notices how her marriage, her personal happiness, and her family life all improve afterward.

I really enjoyed this book. I was fascinated by her sessions with therapists and appreciated that she addressed the more obvious aspects of relationships (sex, money) and also some of the sneakier aspects as well (clutter, kid chores). There were a lot of little nuggets of wisdom that I gleaned from reading and I think this is a book I’ll come back to again someday. There’s just a lot of great takeaways that can benefit whether you’re a parent to one newborn baby or five teenagers or anything in between. I highly recommend it as a read for parents! And as a side note: I also really enjoyed the HERself podcast episode with this author and definitely recommend that as well!

The One Room Challenge finishes up in two weeks, and just in time because a bunch of my holds from the library recently came in. I’m excited to break in my cozy reading chair in the brand new office soon!

One Room Challenge Week Four: All About Shiplap!

We are four weeks into the One Room Challenge and have finally met a big milestone: all of the shiplap is finished!!

ORC-Guest-400x218.png

This has been a huge project and the shiplap needed to get finished before we could move on to other things like baseboards, crown molding, and final window trim so it was an important thing to check off our list!

Today I’m going to share about the process we used to install shiplap on all the walls and ceilings – it’s the first time we did something like this and we’re really happy with how it turned out!

Items Needed:

Liquid Nails

Caulk gun

Shiplap (we used 8 foot pieces for the walls and 12 foot pieces for the ceiling)

-Nail Gun (we used 1 1/2″ nails for walls and 2″ nails for the ceiling)

-Level

DryDex Spackling and Nail Hole Filler

Receptacle Spacers

Justin also used his miter saw (to cut boards to length), jigsaw (to cut notches for outlets and window trim), and table saw (to rip boards to smaller widths when needed).

Installation:

It made the most sense for us to start in the middle of the wall rather than in a corner because every wall in this room is wonky. Our walls are a touch over 8 feet high, which was nice because there was no need to cut the shiplap for just a plain stretch of wall. We used our liquid nails and caulk gun to run adhesive along the back of the shiplap.

For shiplap on the walls, we used this liquid nails but for the ceiling, we used the heavy duty one since the ceiling boards would be pulled down more by gravity.

This shiplap is super easy to work with because it interlocks and automatically creates the perfect gap between boards.

We also didn’t need to repair any of the walls first (old nail holes, glue from the beadboard we ripped out, etc). All we needed to do was slide in each piece! Since we have those wonky walls, we used a level to ensure each board was running straight up and down.

Then we used a nail gun to attach each board solidly in place.

When we got to outlets, Justin just measured and cut out a notch to fit around the box. We then used receptacle spacers to bring the outlet out from the wall to be flush with the shiplap.

I’d love to say the process was “easy as that” and truly, it is easy to work with this shiplap. If your room is a square, it would be fairly simple to just click each board into place and move around the wall pretty quickly. Our room is not at all that straightforward since we had a bay window and a slanted entry wall to contend with. We also decided to put the window and door trim up first to avoid gaps from the window/door frame and the trim. This meant having to be very meticulous with measuring. We dealt with a lot of funky angles and crazy cuts like this:

It took many hours and a lot of double and triple-checking all our measurements, but I’m incredibly proud of how Justin managed to work with all the crazy angles to make everything fit so perfectly!

When it came to the ceiling, it was a true team effort. We had to use 12 foot boards and each stand on a ladder to get the board in place. Justin used a stud finder to locate all the ceiling joists which was helpful because we could nail directly into the joists for an extra secure hold.

One of us held the board in place while the other nailed and this kept it from sagging before the liquid nails started to dry.

The ceiling was a little more straightforward than the walls. We did have to deal with the angled walls again but knowing that crown molding would cover the gaps between the shiplap and the wall allowed us to have some flexibility with our cuts. The only cut we had to make was for the light in the center of the room, which was much easier than cutting around multiple outlets.

Once the walls were done, it was time to fill the hundreds of nail holes. I tried a different process and I’m really happy with how it worked!

I started out with this spackling and nail hole filler:

I squeezed just a small dab of spackling on my finger

and pressed it into the nail hole.

After making sure the hole was filled, I just swiped it a bit to cover the area.

I waited just a few minutes until it had started to dry a bit, the gently sanded off the excess with my fingers until it was smooth.

The spackling dries white within a few hours and then it’s ready to paint!

I chose the color Treron from Farrow and Ball and got it color matched at Lowe’s. It’s just the perfect olive color: not too deep, not too green, not too brown, and it brings a touch of moodiness and character to the room. If you look really closely, you can see a few of the nail holes but for the most part, it looks great!

Now that the shiplap is done, the project is going to start moving quick! We have two weeks left of the One Room Challenge and lots to do! Stay tuned for more updates!

One Room Challenge Week Three: Slow and Steady Progress

We’re another week in to the Fall One Room Challenge and since last week’s update a LOT has happened! And yet, nothing has been finished.

ORC-Guest-400x218.png

We are very much in the messy middle of this project and if I’m being honest, it feels a little frustrating to not be able to check anything off our list. Our cabinet doors arrived and they are so pretty! But they’re still not painted or attached to the cabinet. We took our ugly fluorescent light down and our new fixture arrived! But it’s not installed yet so we just have wires hanging from the ceiling. We’ve started the window and door trim and I’m loving the new look! But we still need a couple final pieces of trim to complete each one. So many things are in progress and nothing is fully complete, but it feels like we’re nearly to the top of a steep hill and once we get there, we can roll down and everything will pick up speed.

The thing we really need to do in order to reach that hill top is finish all the planking. So much is waiting on that: installing the ceiling fixture, crown molding, window and door trim, baseboards, painting, etc. The planking needs to be done first before we can tackle anything else.

The reason this step is taking so long is because we’re covering all the walls and the ceiling and there’s a lot of measuring and troubleshooting involved. None of our walls are square, we have a bay window, and there are so many tricky little cuts involved.

Just look at the photo below. Between the three windows + trim and the bay window + all the angles on the wall and ceiling, you can see its a lot of precise measuring and cutting with each board used. We’re cutting out notches, figuring out angles, finagling wonky corners – it’s a time-consuming, meticulous process.

It’s also not really a one-person process. The walls are one thing, but the ceiling is absolutely a two person job. We’re using 12 foot planks and there’s just no way for one person to be able to hold the plank in place and nail everything at the same time. So I not only need Justin to be home to keep making progress, but we need our kids to be napping or have someone else watch them in order to work. Needless to say, we’re working with small, inconsistent windows of time to get things done.

This weekend, LJ is going to visit my parents so we’ll have some extra time when Vi’s napping to hopefully finish out the rest of this planking. From there, progress is really going to pick up so I have a feeling that next week’s check-in is going to be full of finished updates! I can’t wait!

Make sure to stop by the One Room Challenge blog to check out all the other projects in progress!

One Room Challenge Week Two: Our DIY Built-ins!

Another week has come and gone in the Fall 2020 One Room Challenge and buckle up because today is a doozy of a post: it’s all about our DIY built-ins!

ORC-Guest-400x218.png

I went back and forth several times with whether to have the desk as a standalone piece of furniture or incorporate it into the built-ins. After mapping out both options with painters tape and placeholder furniture, I decided to go with a full wall of built-ins and a standalone desk to maximize storage.

We started out with base cabinets from Ikea. We went to their kitchen center and one of their employees drew out our plans using software. The software made it so easy to visualize and it was nice to play around with a few different combinations! We settled on four 30″ cabinets with doors and one 15″ cabinet with four drawers to go in the center.

The first step when we got home was ripping out all the beadboard (demo is so satisfying!) and trim. We were not concerned about the residual glue on the wall because we knew it would all be covered up eventually.

I assembled all the cabinets and arranged them in order. My grandpa also came over one day and helped us by moving the electrical outlet in the center of the back wall up a few feet so it would be accessible above the cabinets. Justin attached the cabinet legs and adjusted everything to the correct height. Our purchase from Ikea included a metal railing to attach to the wall and then hook the cabinets directly onto for extra stability. Justin put a lot of work into all those details to make sure the cabinets were level and sturdy!

He also used a jigsaw to cut out a hole in the far left cabinet so that it would be accessible to hook up our printer. Other than the outlet that my grandfather moved, this was the only outlet behind the cabinets so I’m thankful we can still use it!

Once everything was fastened in place, we attached vertical paneling along the walls around the cabinets (today’s post is long enough – I’ll cover this step in more detail in a future post!) and were ready to tackle our biggest DIY yet – the bookshelves!

Our first step was installing a countertop. Butcherblock would have been an easy choice, but it would have also been an expensive choice so we decided to use this edge-glued pine panel instead (making the countertops less than $70 instead of over $300). The option Lowe’s had in store was not quite deep enough, so Justin measured the extra depth we needed and cut a long thin board to match that size exactly. We screwed that board into place against the wall using the metal rails on the Ikea cabinet underneath.

We then used a kreg jig to create screw holes in the bottom of the large panel so we could screw the panel to the long, thin board, creating a deeper counter. We also used screws to attach the front of the panel to the Ikea cabinets, again using the cabinet’s metal rails.

After all this work, we discovered Menard’s had a similar panel that would have been deep enough and saved us all the extra trouble creating and attaching the back piece. Live and learn: always shop around!

The countertop was nearly twelve feet long and there was no way to finagle two six foot pieces so the seam would be hidden underneath a bookshelf support, so Justin used a circular saw to cut two panels to length to meet in the middle.

We used a flat bracket underneath to create stability at the seam between panels. This picture below gives you a good idea of how everything was connected: metal railings to attach counters to cabinets, kreg jig screws to attach the panel to the extra back board, and a flat bracket to attach the two panels to one another.

Since there’s going to be quite a bit of weight on the bookshelves, we also created extra support by screwing metal L brackets to the cabinets and counters.

Once the top was f.i.n.a.l.l.y. in place and as sturdy as possible, we sanded it down so the back board was as flush with the rest of the panel as possible. Then we started on the vertical supports. Justin took 1 x 12 boards and cut them to length, then we used the kreg jig to create three screw holes in the sides. We measured the placement of these holes strategically so that they would be hidden underneath the eventual shelves.

After triple checking that each board was square to the wall and as level as possible, we screwed the boards directly into the wall.

This step involved LOTS of precision and measuring, because we want each vertical support to line up with the line of the cabinet doors (which are ordered and hopefully shipping soon!)

It was finally time for the shelves! We measured and marked (and triple checked) where each shelf was going to go. Justin used scrap oak boards from our garage to cut down thin support pieces. We used premium interior wood screws to attach these pieces to the side boards and back wall where each shelf was going to go. This step was tedious because we had to make sure each and every board was level and in the correct spot so our shelves would all eventually look symmetrical!

Once all the supports were in place and we had checked to make sure everything was level, Justin took 1 x 12 boards and cut them all down to the correct shelf length.

We used a nail gun to nail each shelf into the support pieces. Because the shelves were so long (the only way we could make things look symmetrical), Justin cut extra scrap support pieces and used a kreg jig to attach them to the middle of each shelf.

Next, Justin took very thin plywood and cut it to the same size as each shelf. Using a nail gun, we attached this plywood to the bottom of each shelf so all the support pieces were hidden.

We used scrap pieces of wood to tuck in between the top board and the plywood to correct any bowing so everything looked nice and level.

Then it time to trim out the shelves. Justin took 1×2 primed boards and cut everything to the correct length. He used a nail gun to attach these trim pieces to all the vertical boards first, then went through and cut all the shelf trim pieces to length and nail to the front.

I used plastic wood to fill in all the nail holes and sand them smooth so they’re ready for painting

The end result was that each shelf looks like one nice, thick board. I’m so thrilled with how they turned out!

Justin used his table saw to rip down the scrap pieces of baseboard that we tore out of the room to create thin trim pieces to hide the gap between the vertical panel and top of the wall. Now the only thing we have left to do is install crown molding across the top and the cabinet doors when they arrive (hopefully within the next week or two) and it will be time to PAINT!

I’m so so proud of all our hard work with this project. It was the largest scale DIY we’ve ever attempted and it came with a ton of meticulous measuring, working with wonky walls, and problem solving. But we did it and I love it so much!

Check back in next Thursday to see our continued progress on this room! In the meantime, you can see all other ORC participants here.