Drawing Home Inspiration from our trip to New Orleans

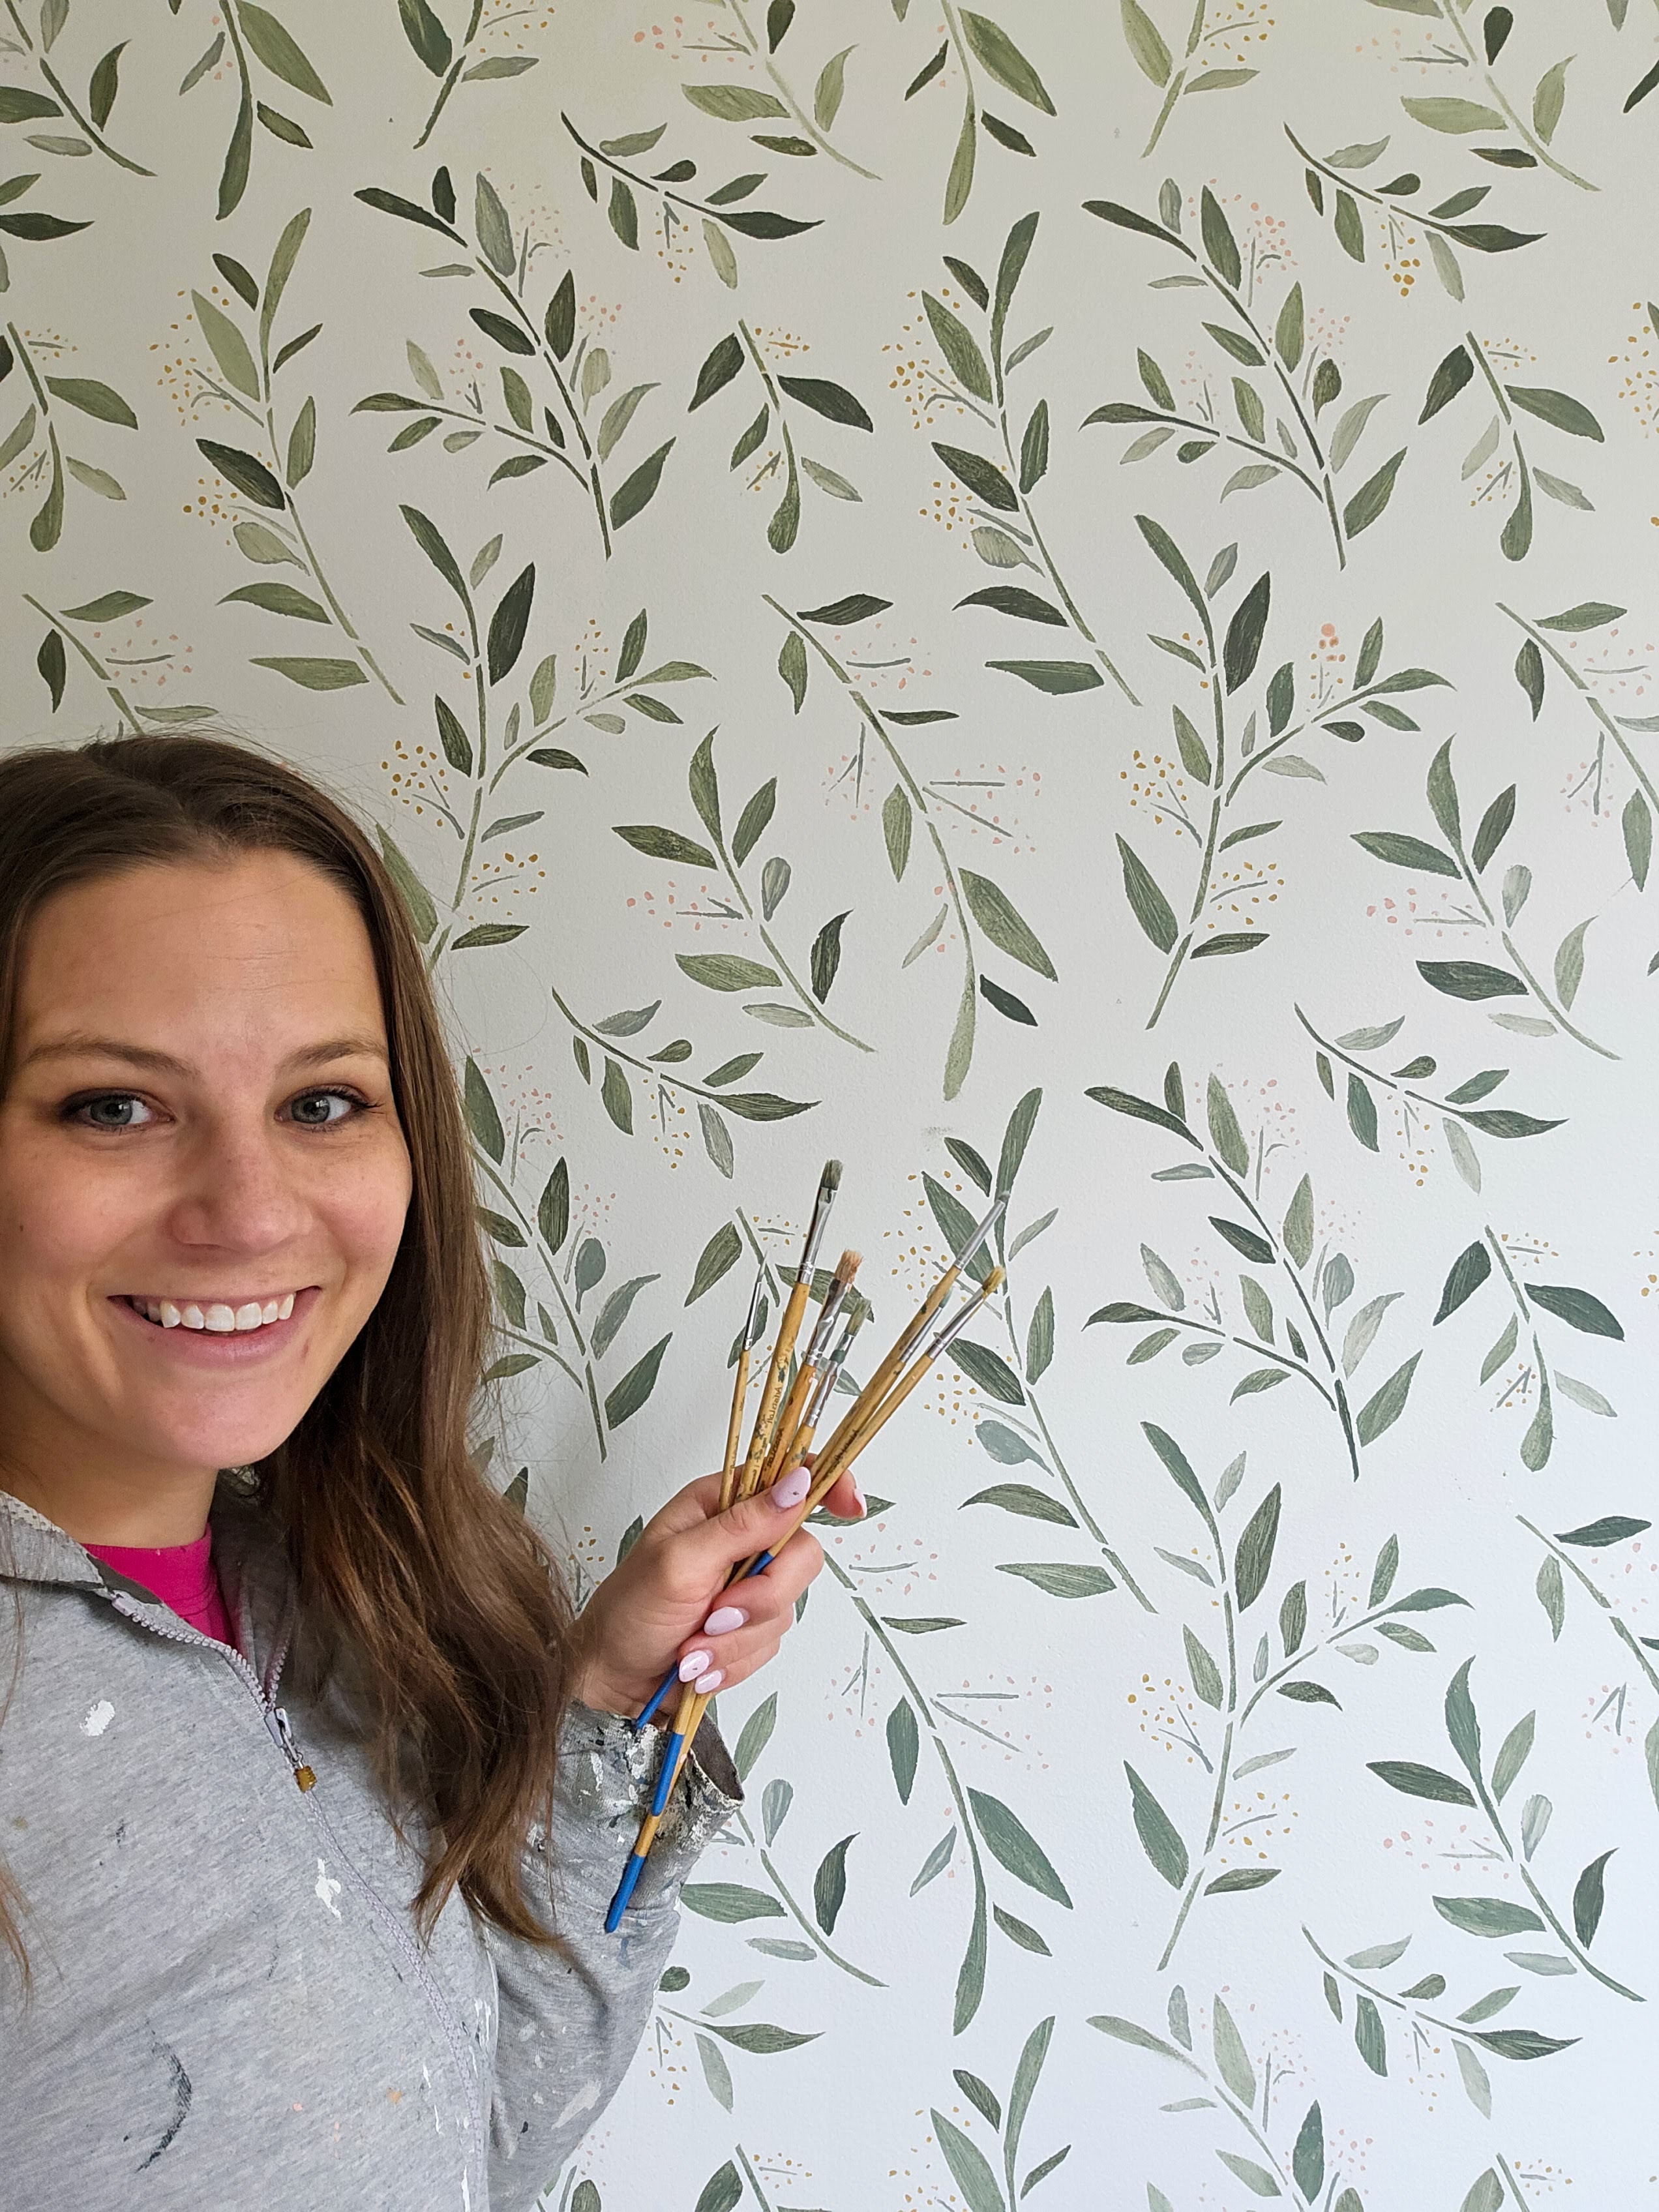
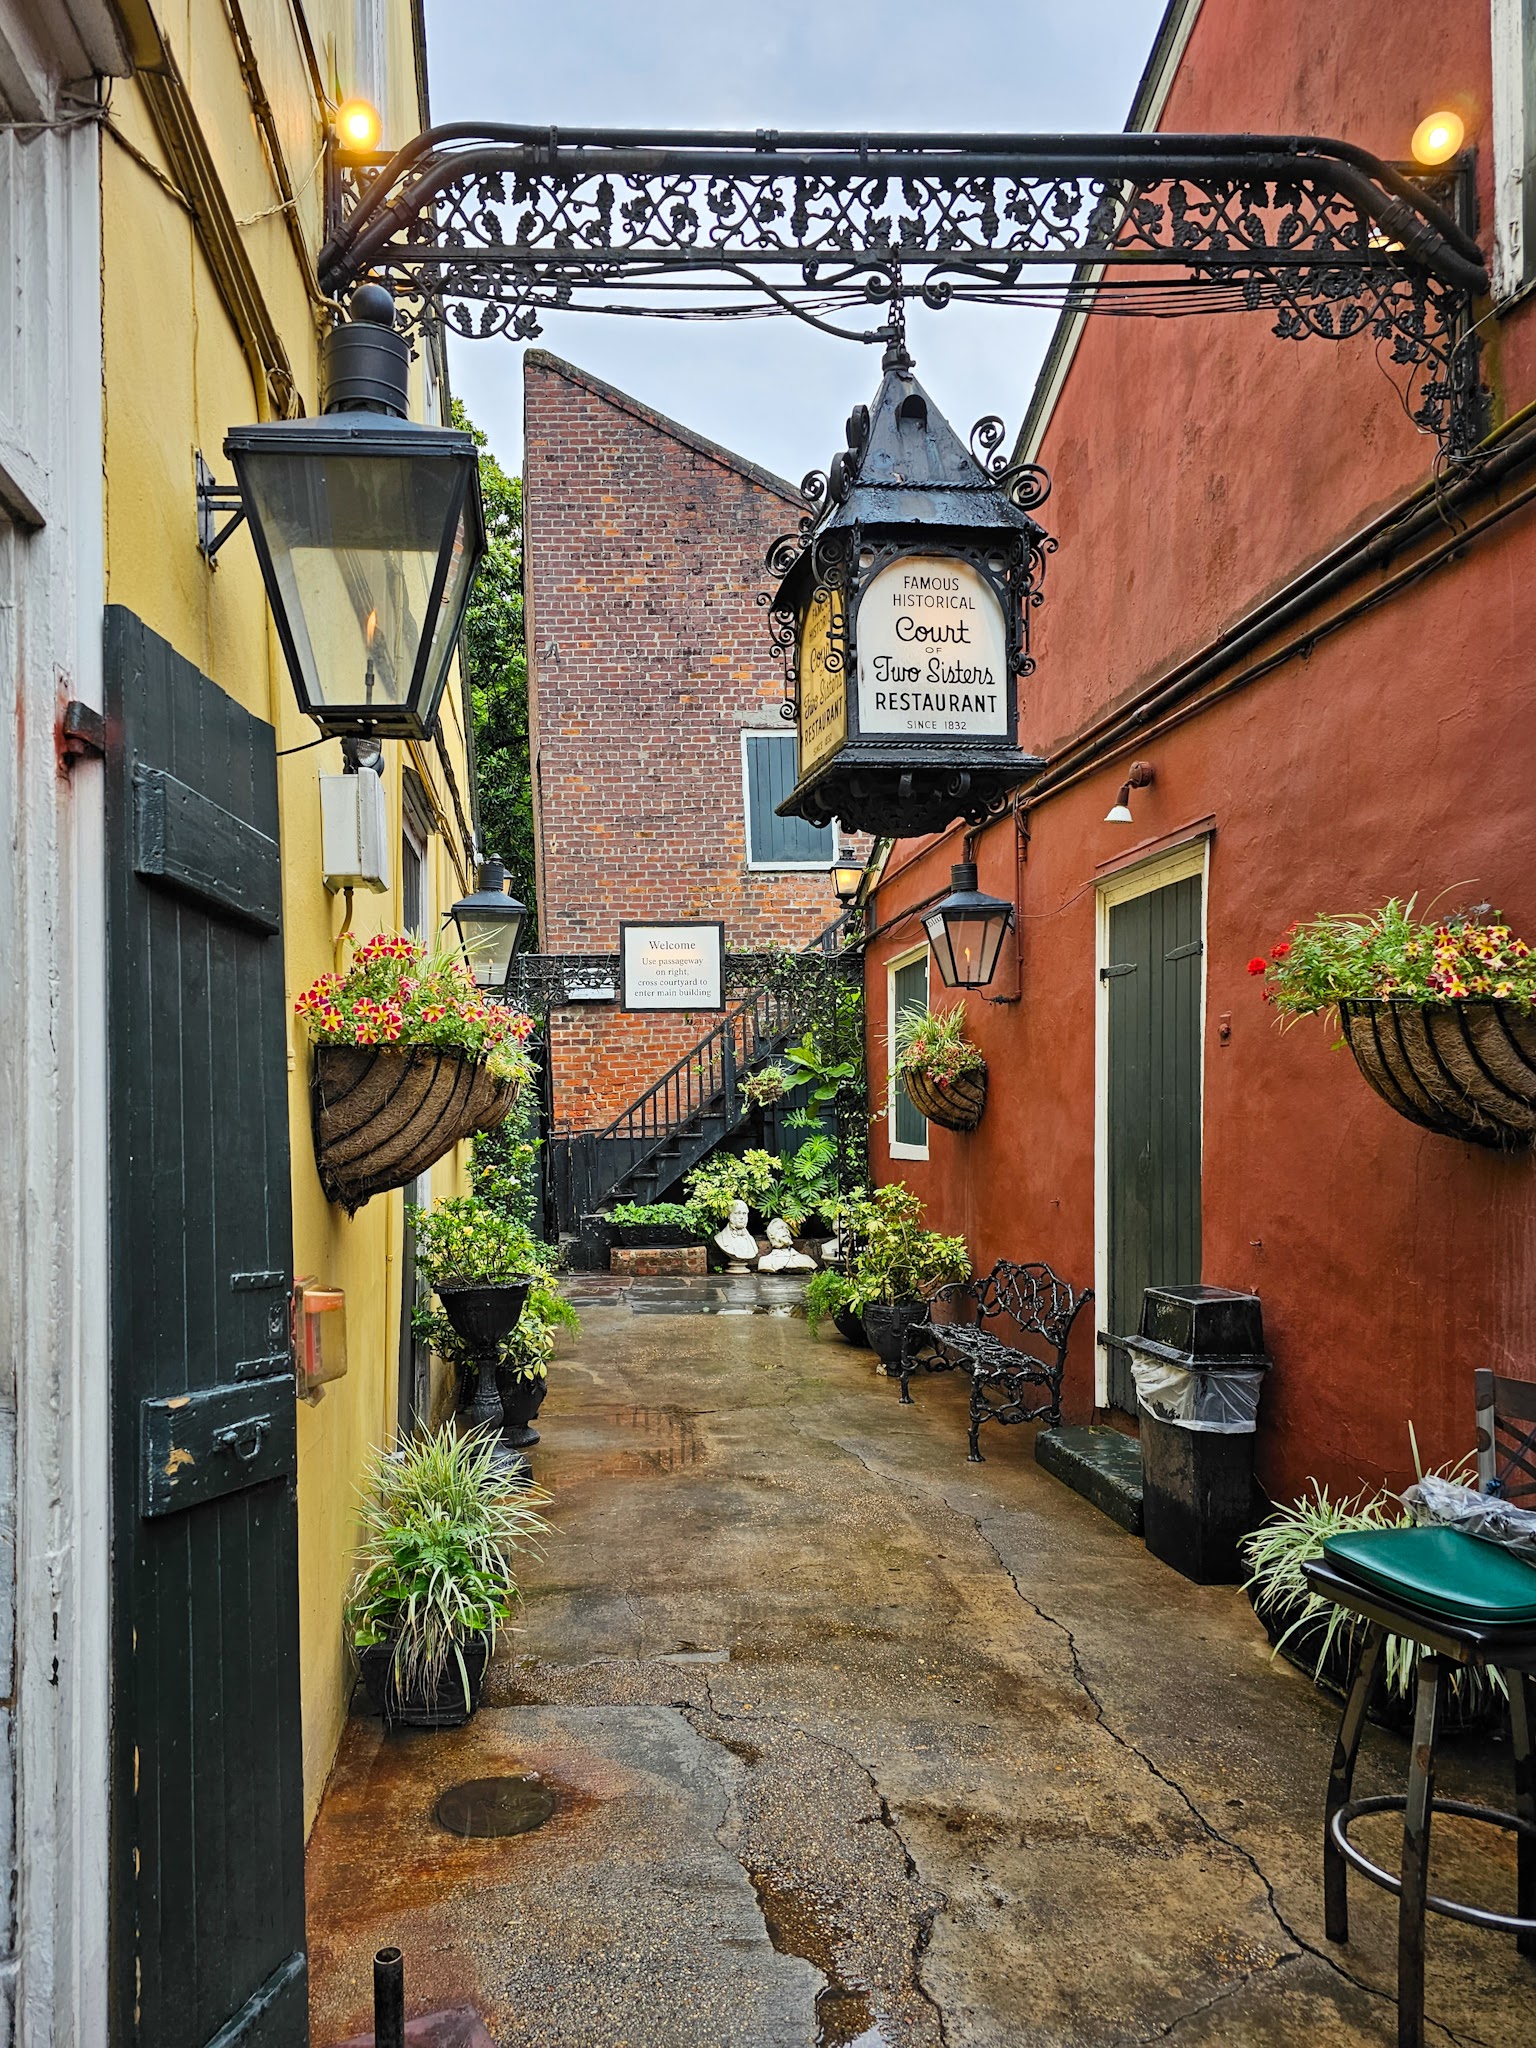
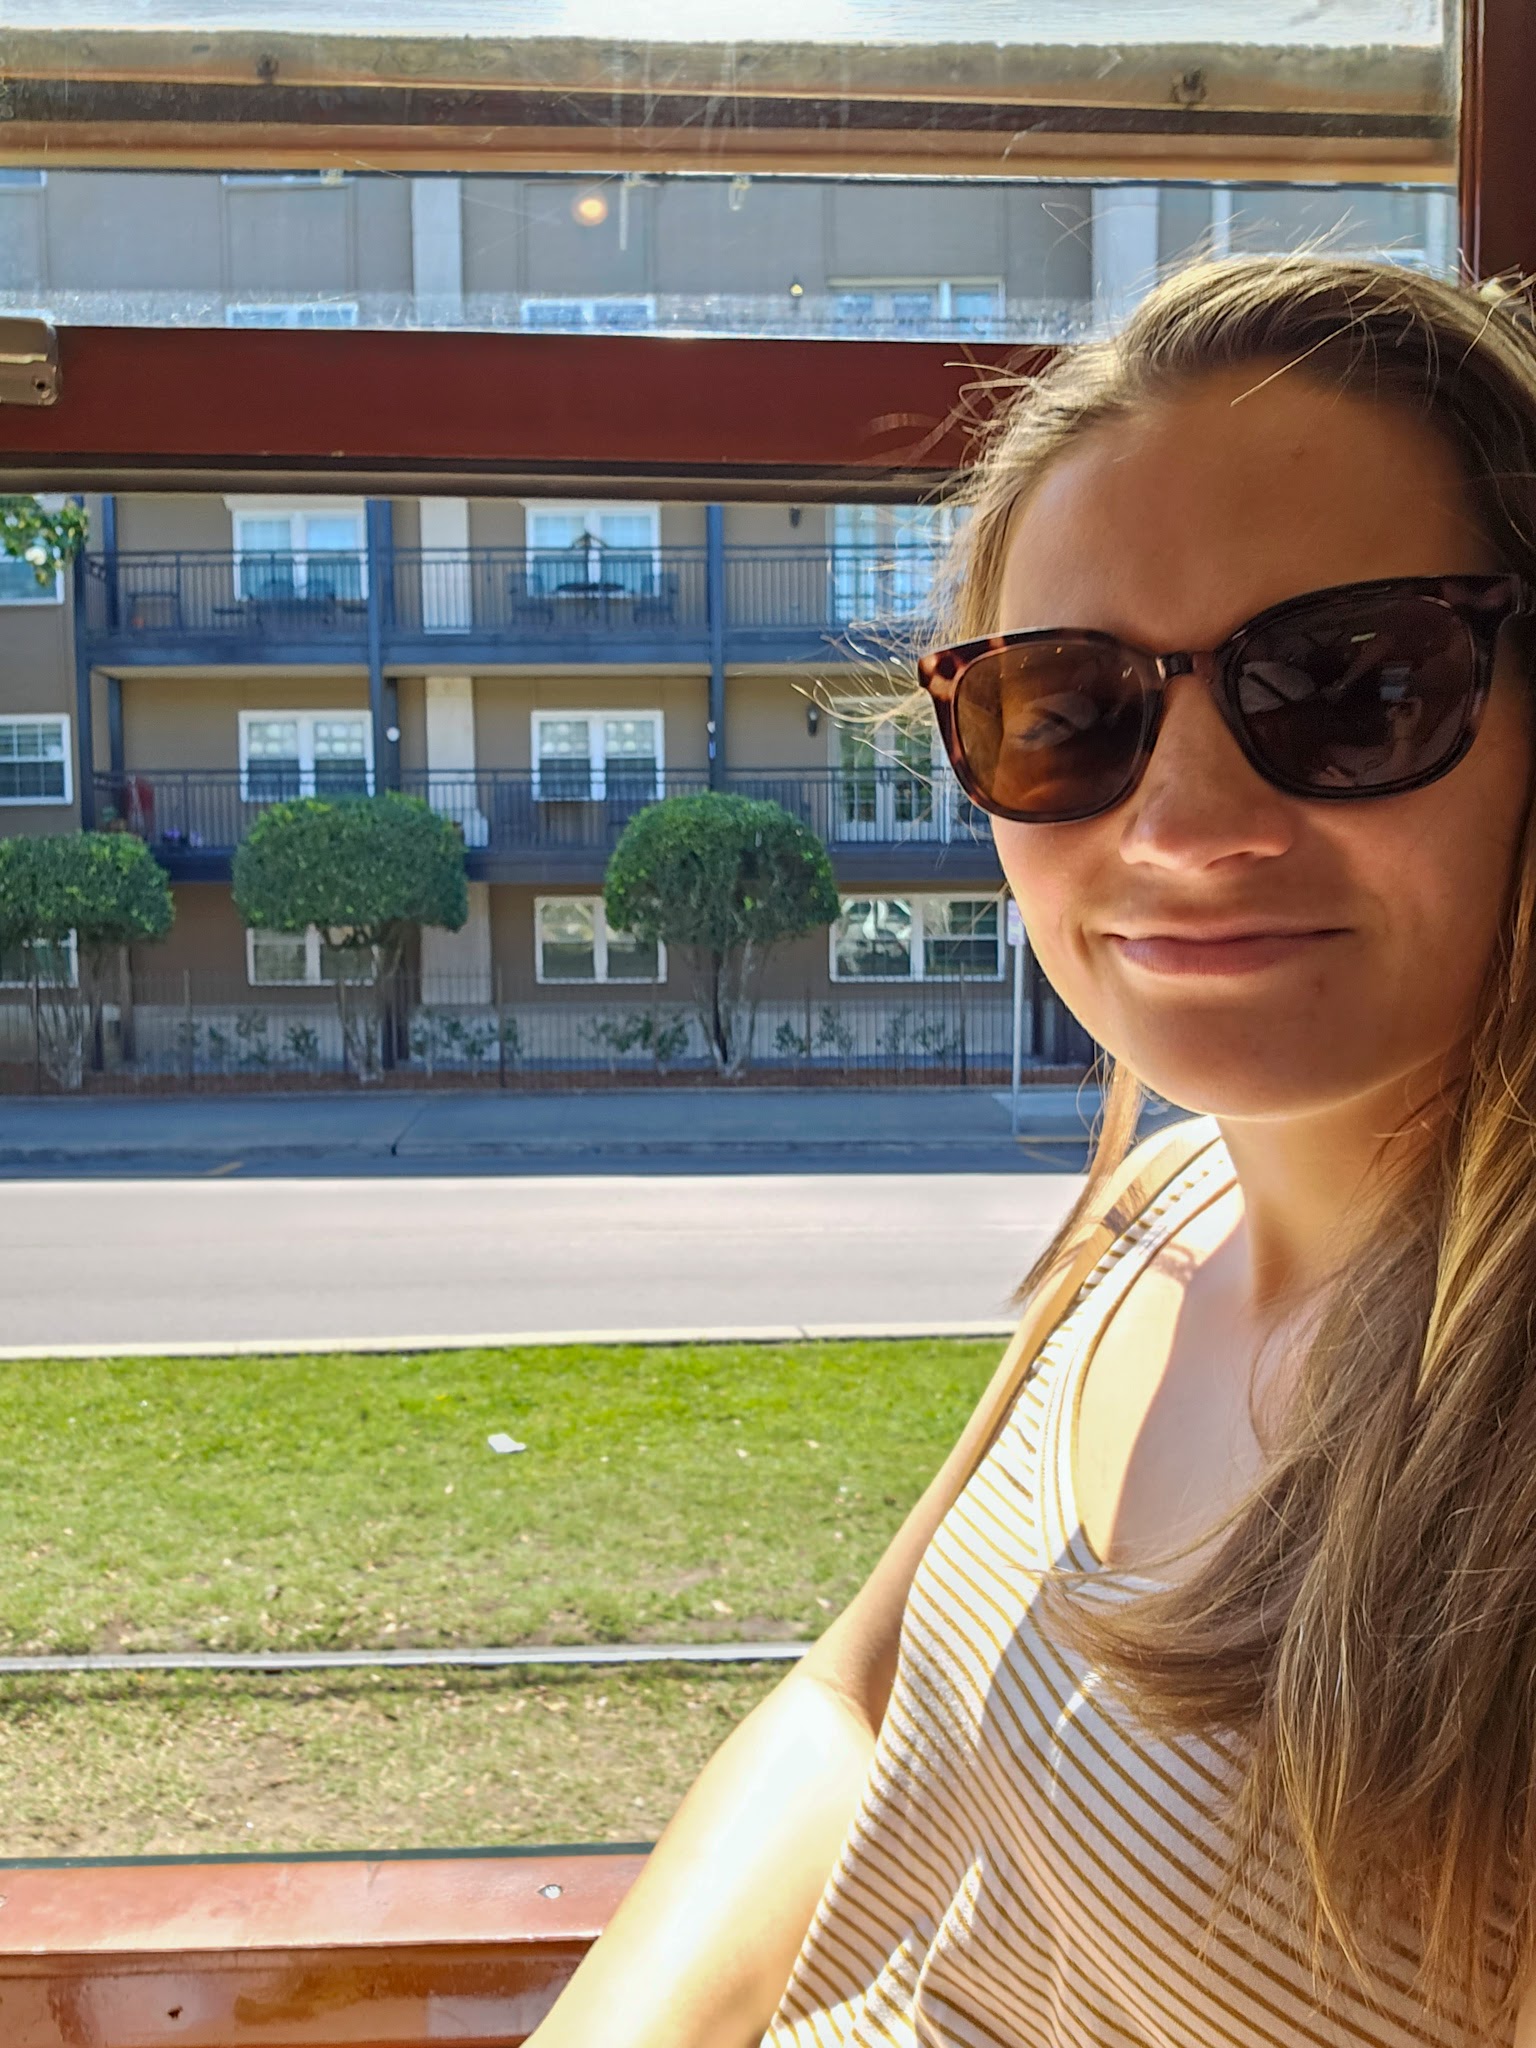
Last week, Justin and I spent 5 days in New Orleans on our first trip away since having our third baby back in August. We went for a work conference for Justin but added a couple days to the front end of the trip so that we had plenty of time for leisure too. It was such a fun getaway and I felt so inspired by the city! It is absolutely full of hidden gems, beautiful buildings, delicious food, fun music, and entertainment unlike anywhere else I’ve traveled before. Even little alleyways had so much character and personality!

I drew an incredible amount of inspiration from this city and made some notes about things I want to incorporate into my own home, so today I thought I’d share them here. Stick around until the end of the post and I also share some of the highlights of the trip and my recommendations if you’re going there yourself!

But first, my biggest design takeaways from our trip:

1. Staircase inspiration

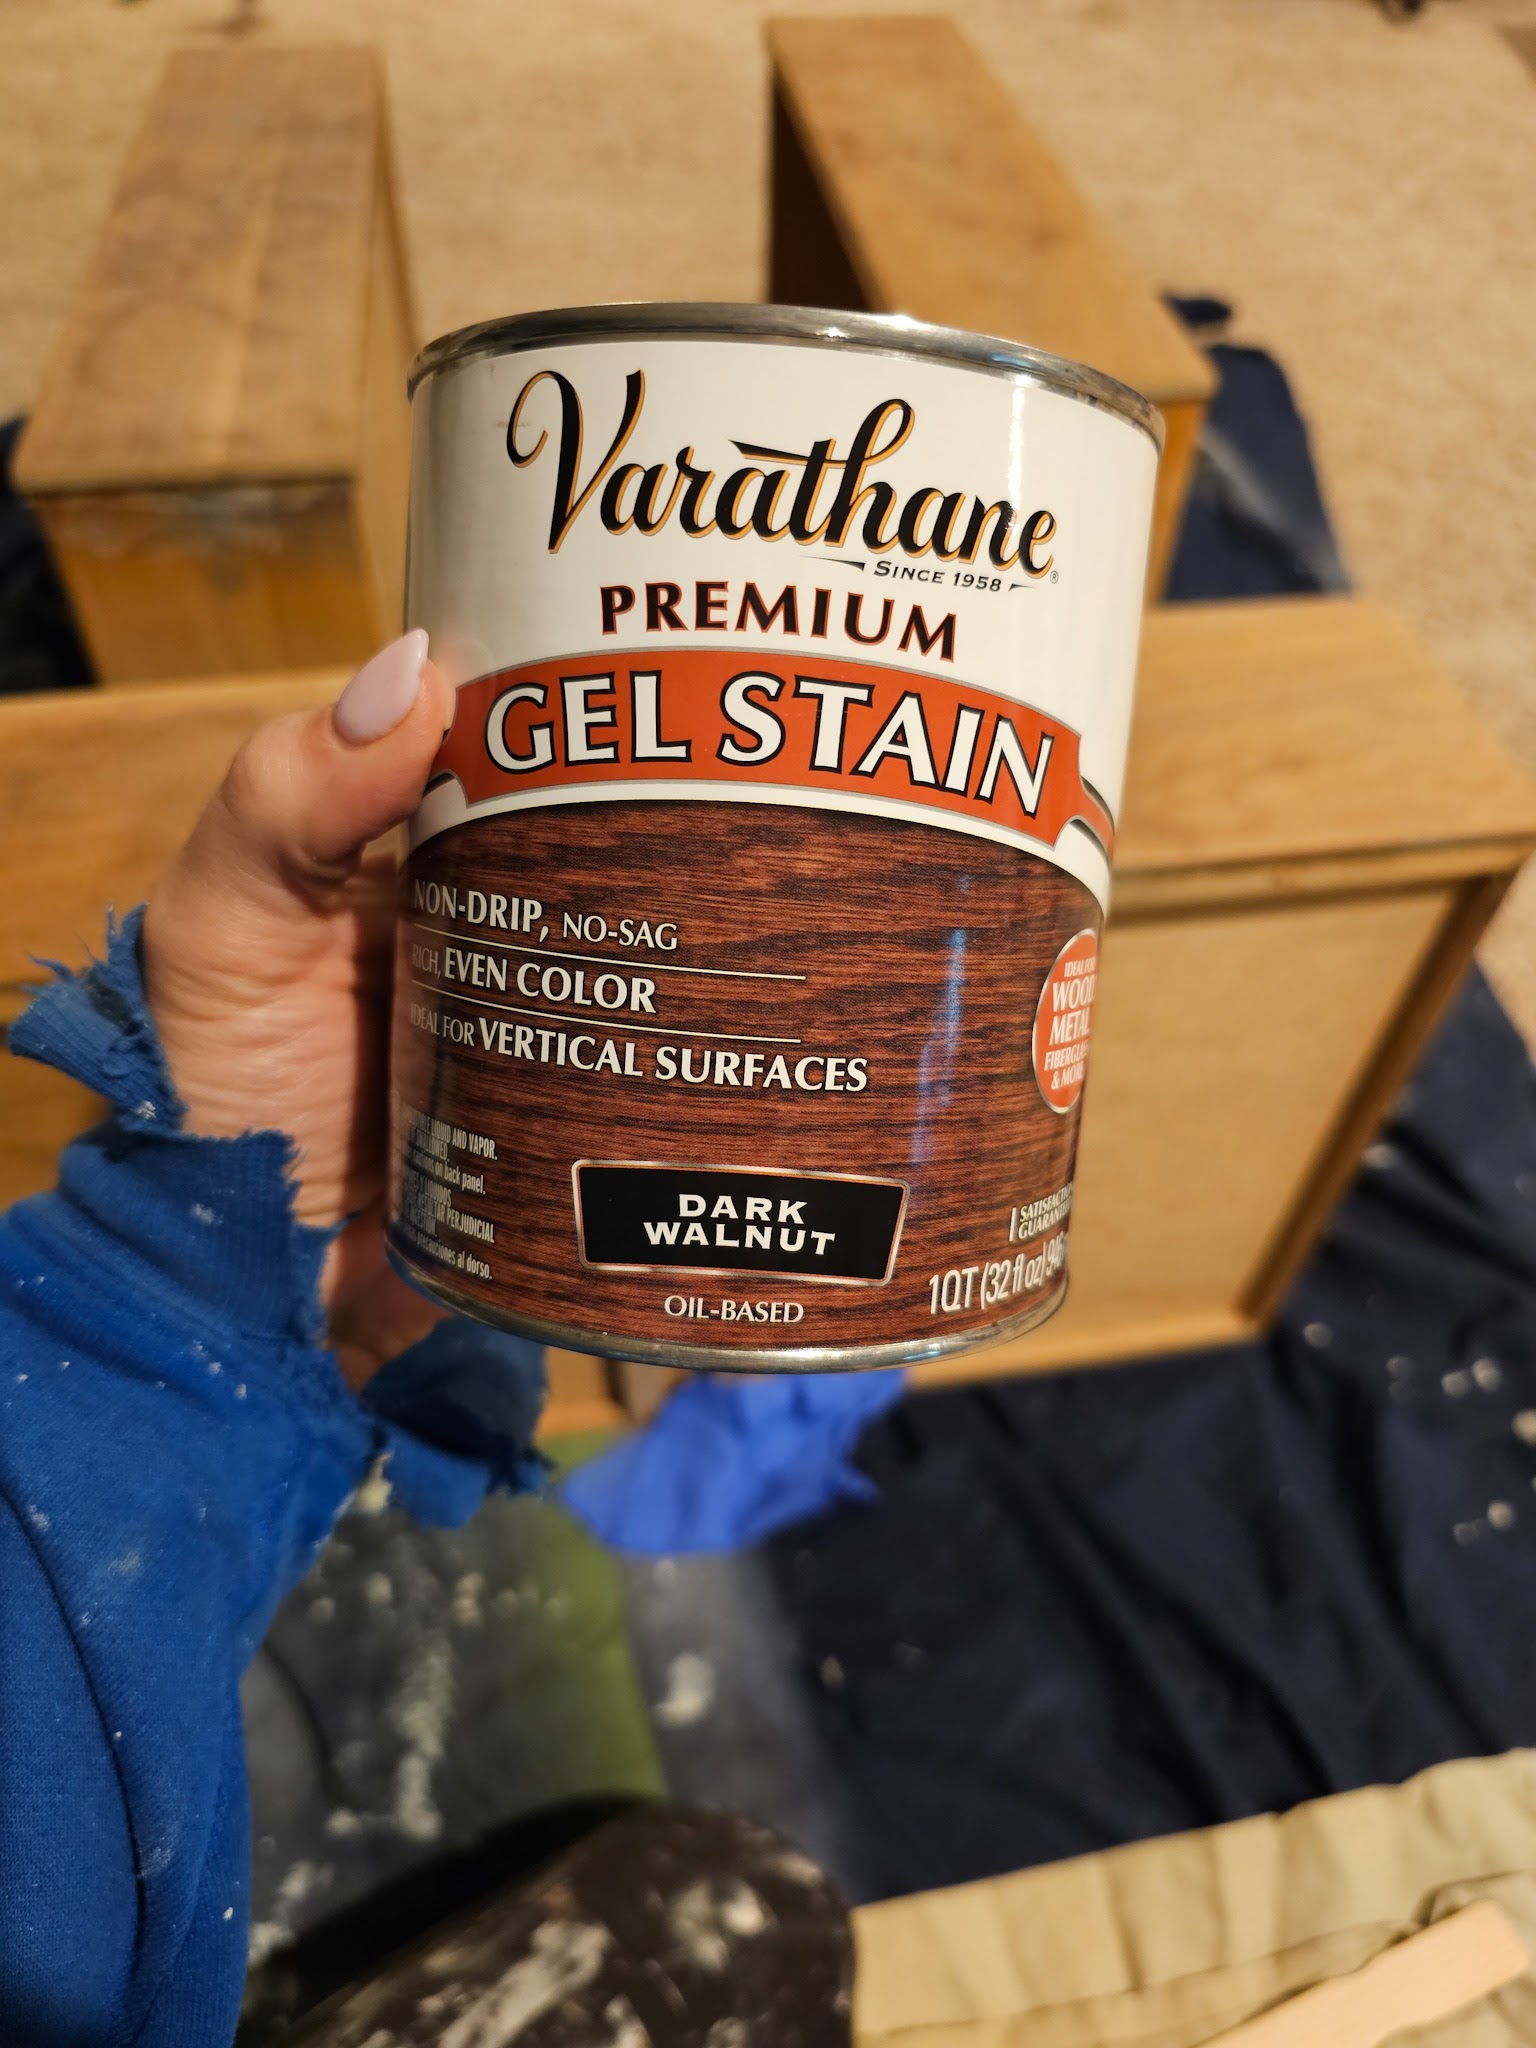
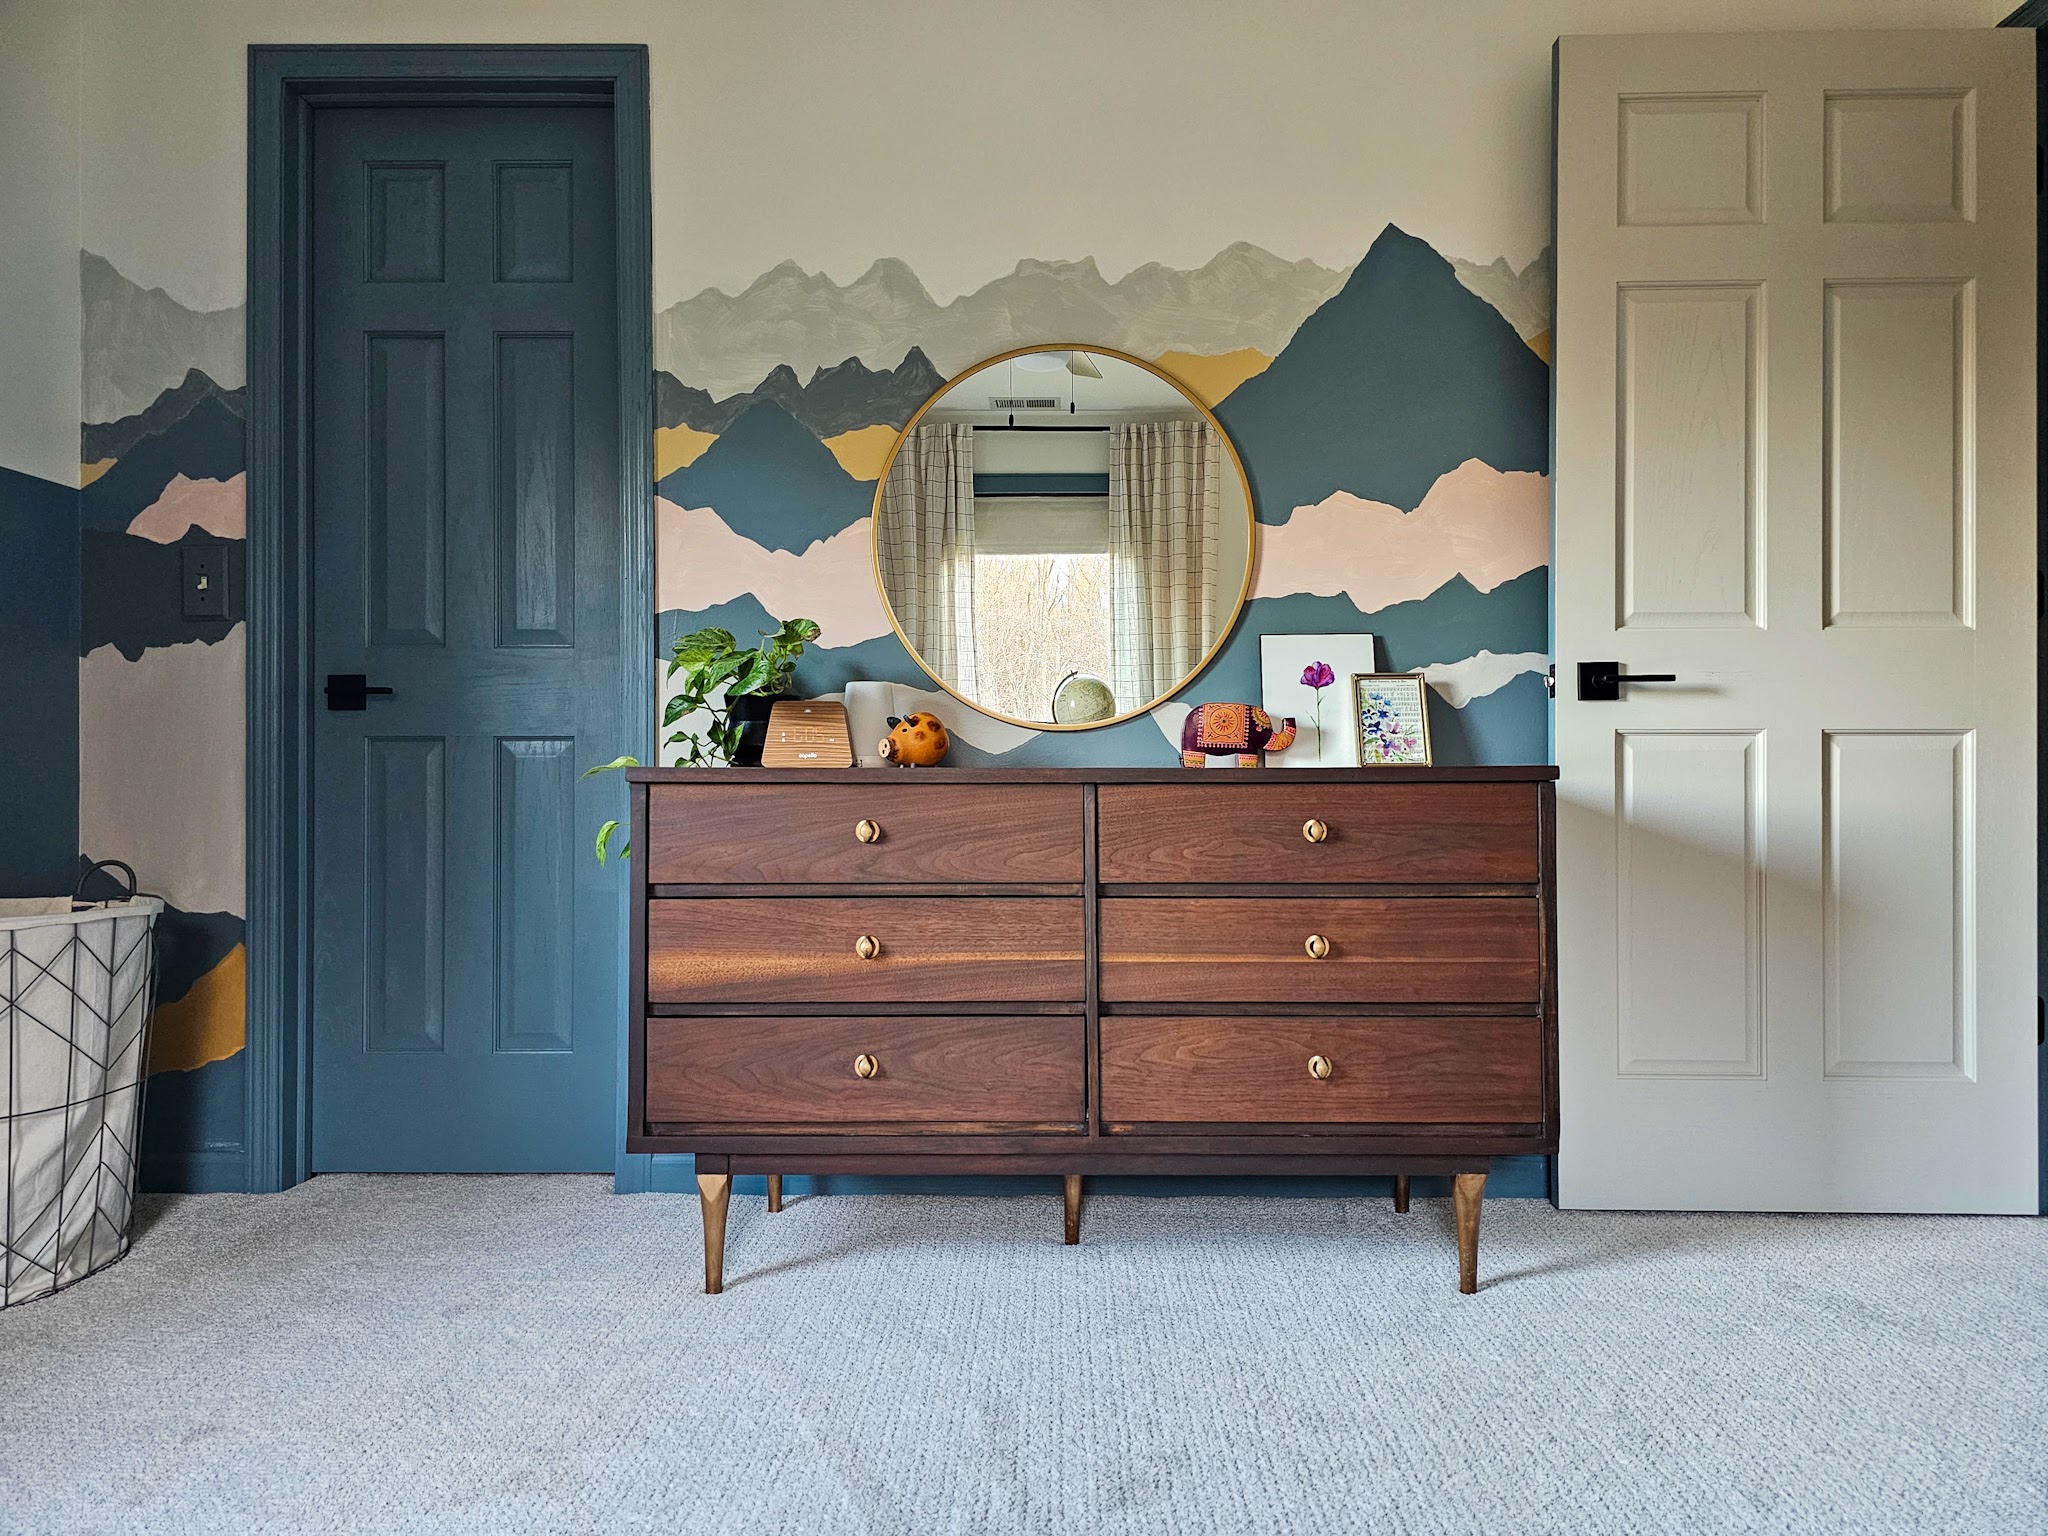
We stayed in a hotel on Canal Street except for the very first night, where Justin chose a cute historic hotel in the Garden District. I could not. stop. staring. at the lobby staircase! For reasons I don’t want to take up space and elaborate on right now, we eventually will need to renovate our staircase and this will definitely be a photo I use as inspiration for that future renovation. I absolutely love how this staircase incorporates clean lines with a traditional vibe and attention to detail. I’m taking notes on the simple balusters, the wood-tone treads, and the simple stringer detail underneath. And look at how the wood-tone handrail extends ever so slightly into the mostly-painted newel! Such a fantastic little detail. (And if you have no idea what I’m talking about, this post from ChrislovesJulia.com taught me so much about staircase anatomy!)

2. Lush greenery in outdoor living spaces

Whether it was a balcony in the French Quarter or a single-family home in the Garden District, I was struck by just how much greenery there was everywhere. It brought so much life and character to every space and I could not get enough!

We have a ton of plants inside our home, and we have woods surrounding our house, but our landscaping has never been high up on our priority list. This trip had me inspired to put more effort into not only our landscaping, but also including some type of potted plants on our porch, deck, and patio.

Something about window boxes and hanging baskets filled with flowers and plants romanticizes outdoor seating and I’m absolutely wanting to incorporate that into our spaces this summer.

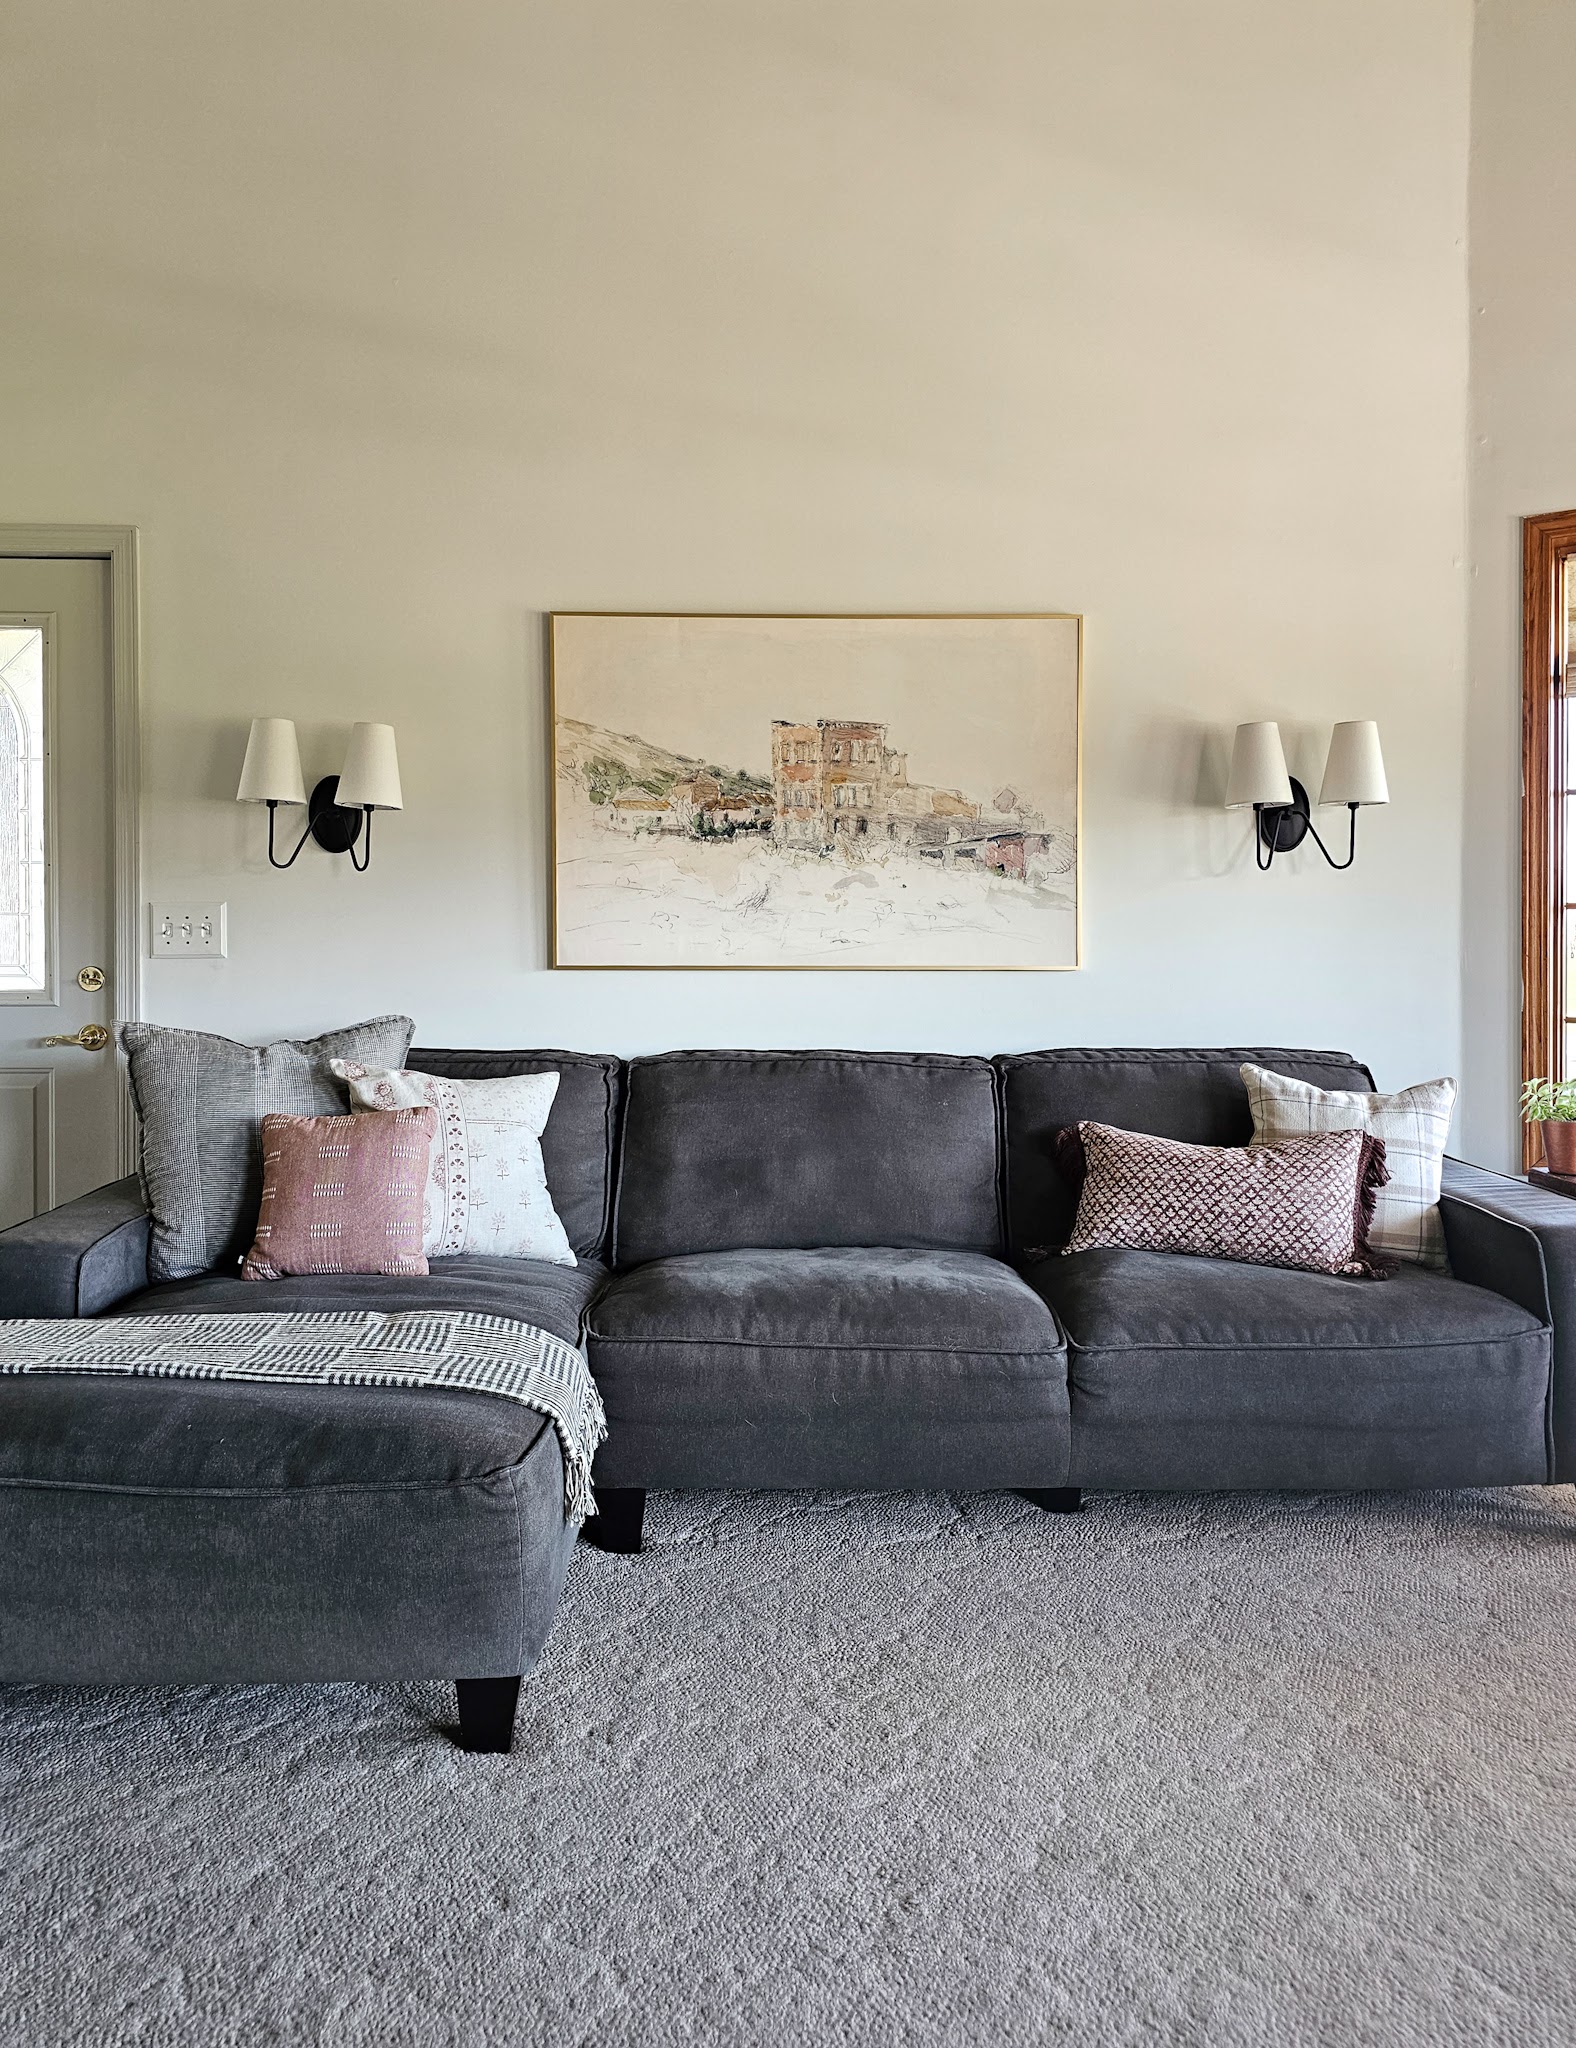
3. Rust is missing from my color palette!

Over and over again, I found myself loving the color palette of the city and I think a big reason why is because it mimics the palette I use in my own home. It’s full of (mostly) muted shades of green, yellow, and pink!

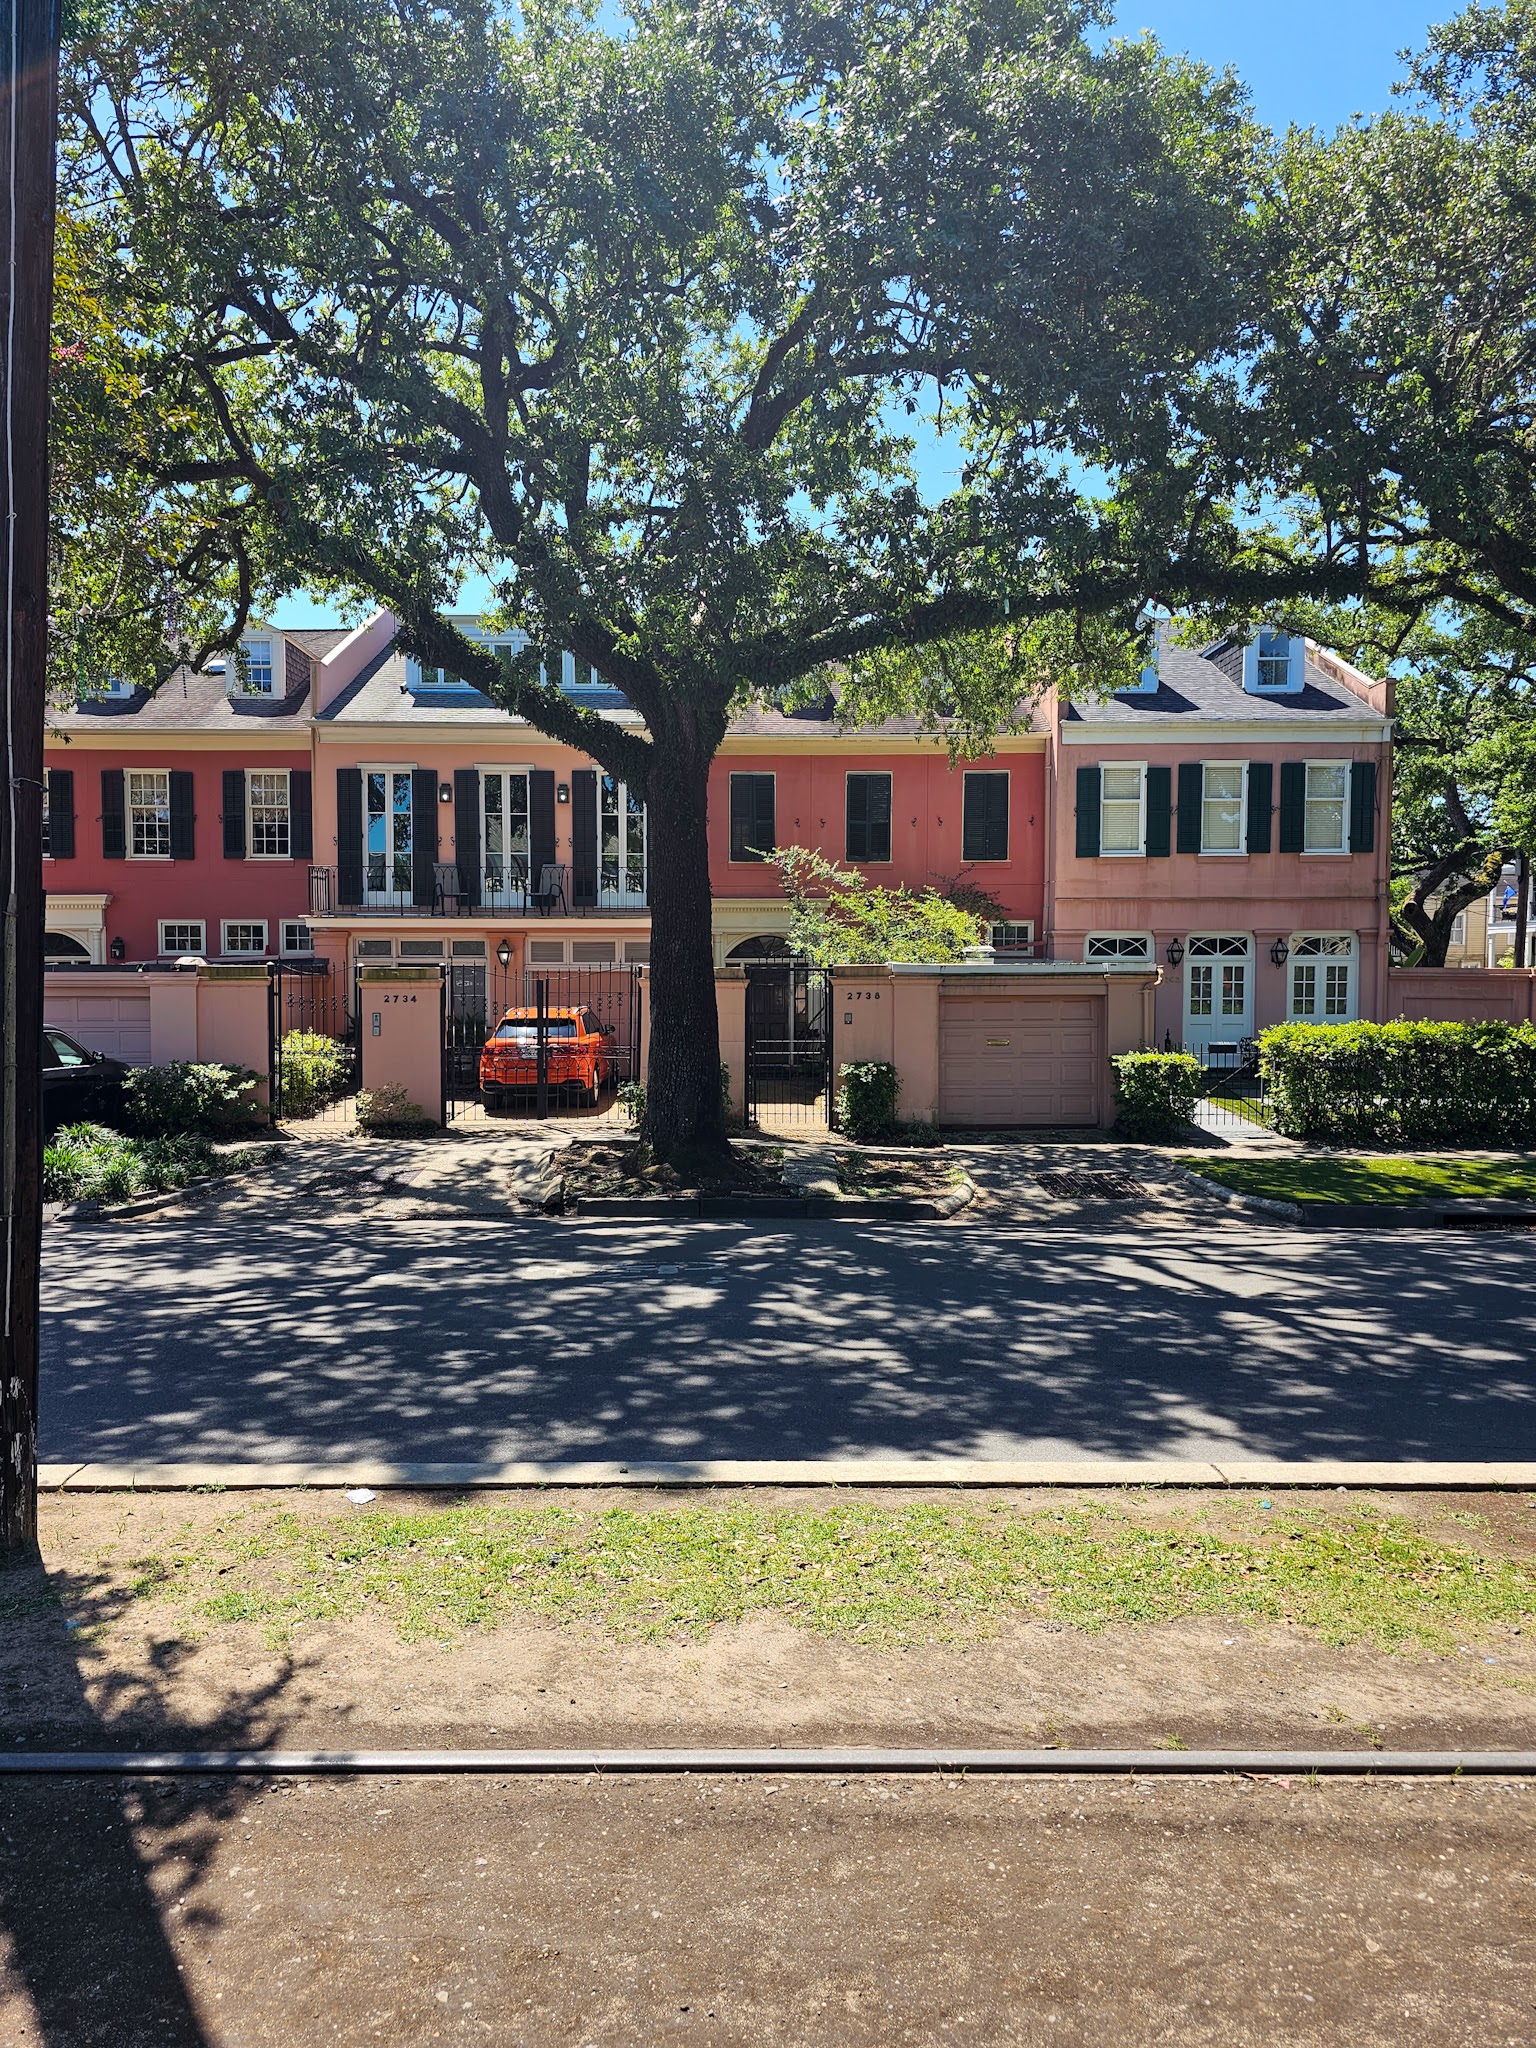
It was confirmation for me that I love the colors in my home but also made me realize there’s a color missing: rust!

I was drawn to the contrast of brick and warm orange-brown painted buildings sprinkled in among the other colors I love. While I might not paint an entire room this color, I’m definitely inspired to find ways to incorporate more of it in my home.

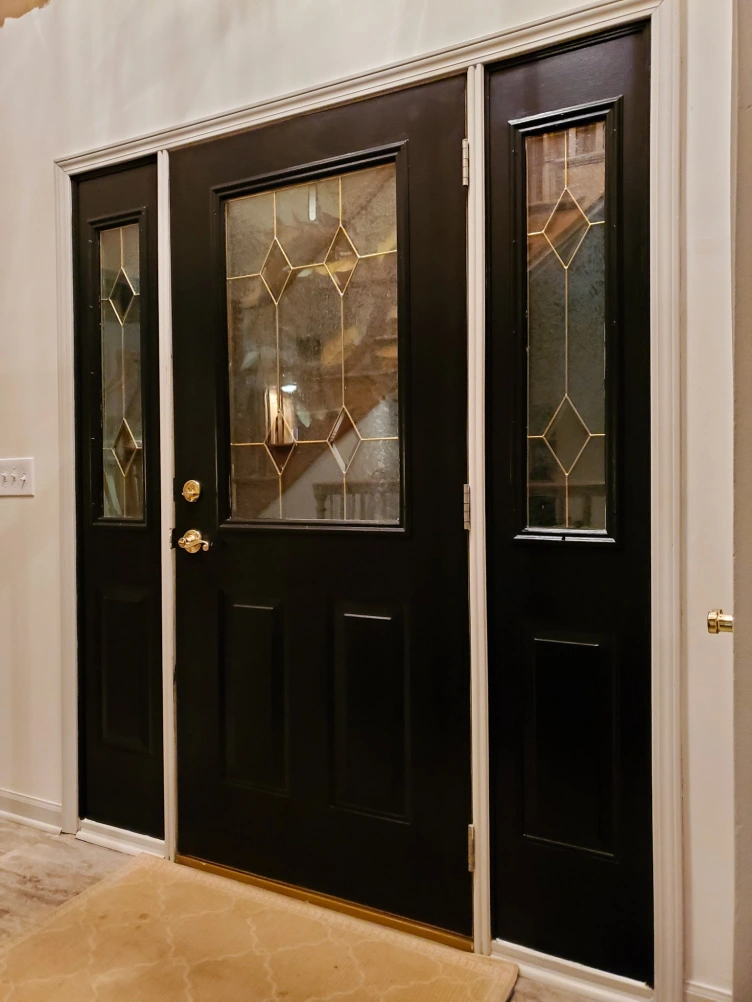
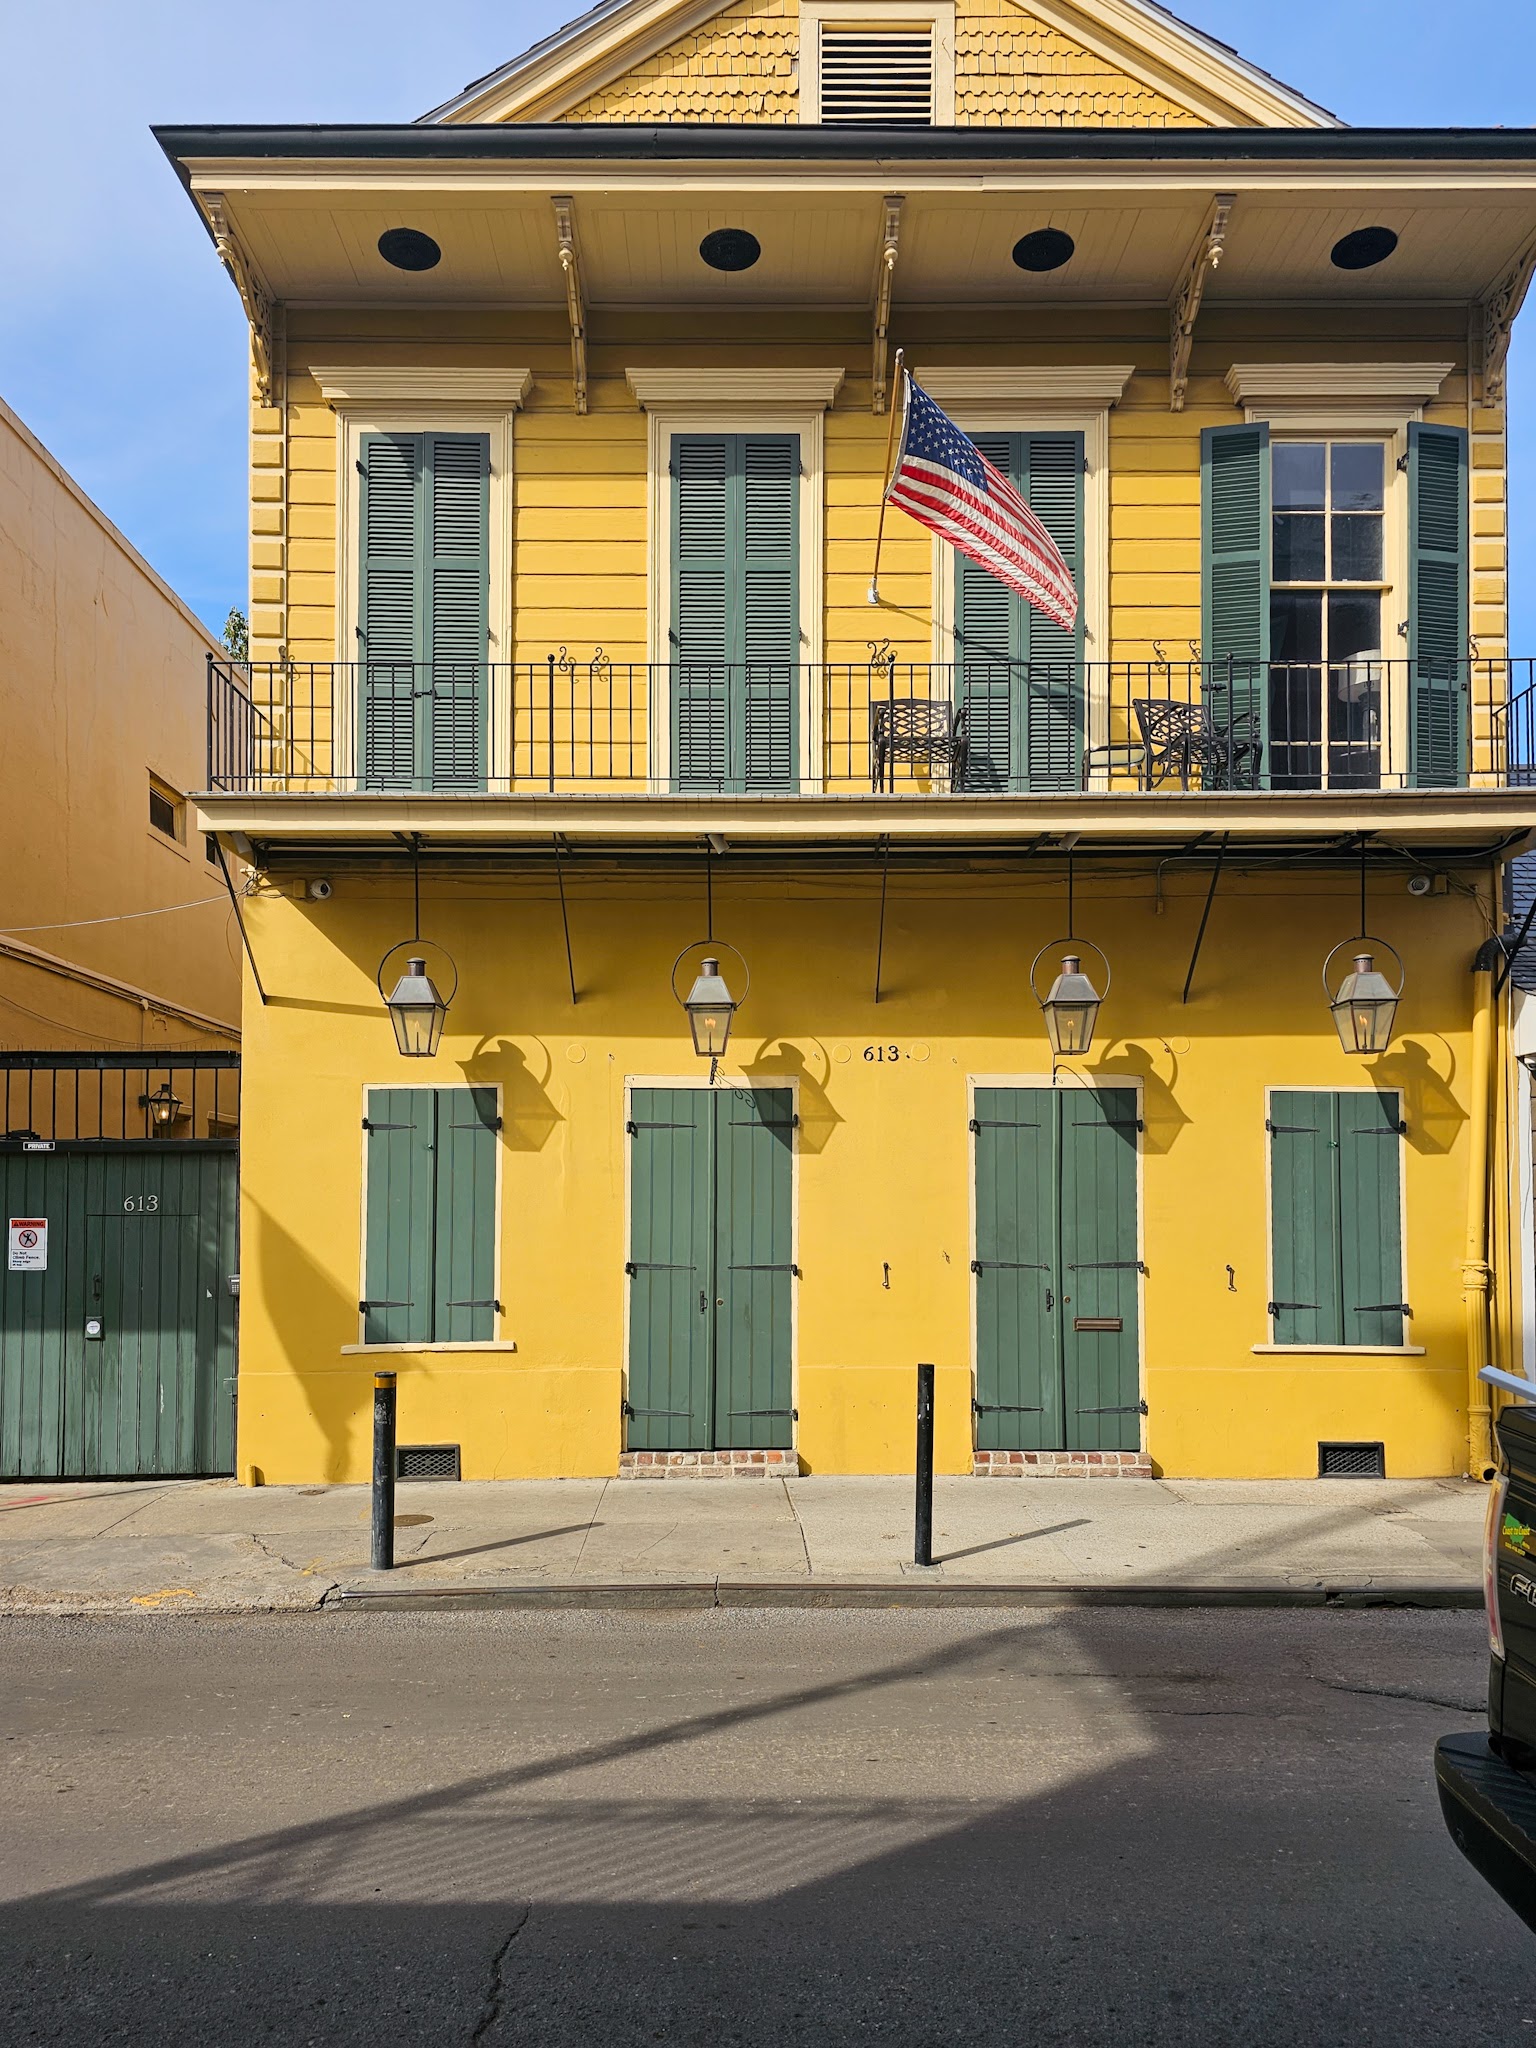
4. Team Window Grids

Some of the windows in our house have grids and some do not. We’ve debated whether we should take the grids off or buy more to cover all the windows – this trip was ended the debate for me. I LOVE window grids. They give so much character to a building and I could not stop gushing over all the grid details on windows and doors.

Just look at this front porch! I was swooning over that window and front door.

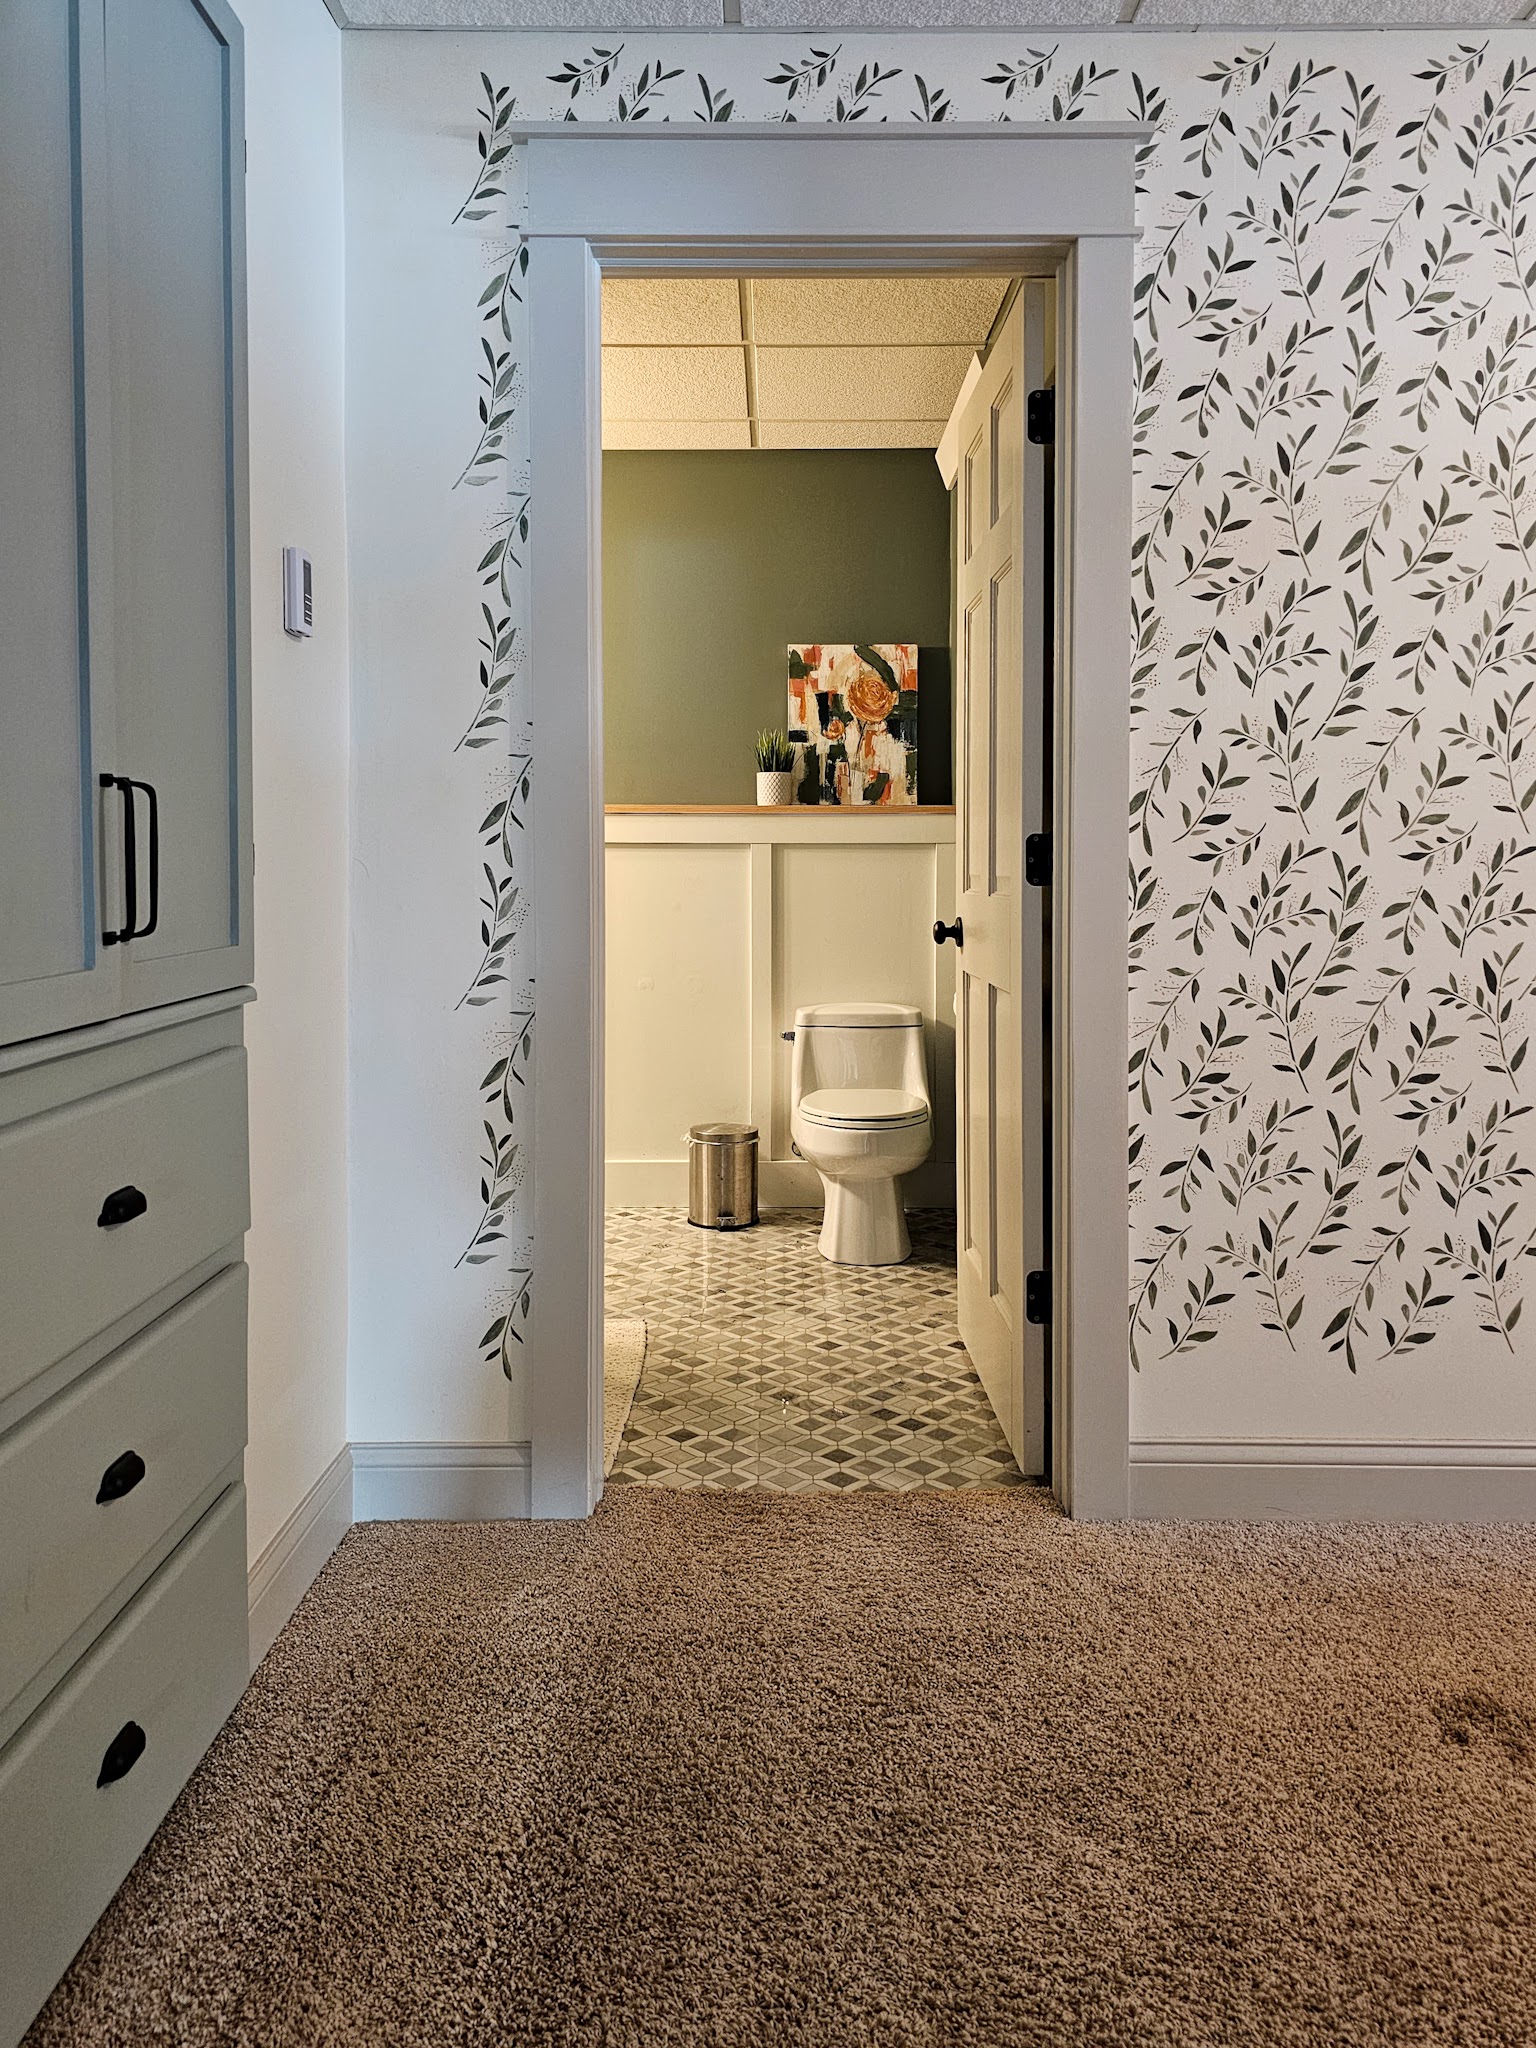
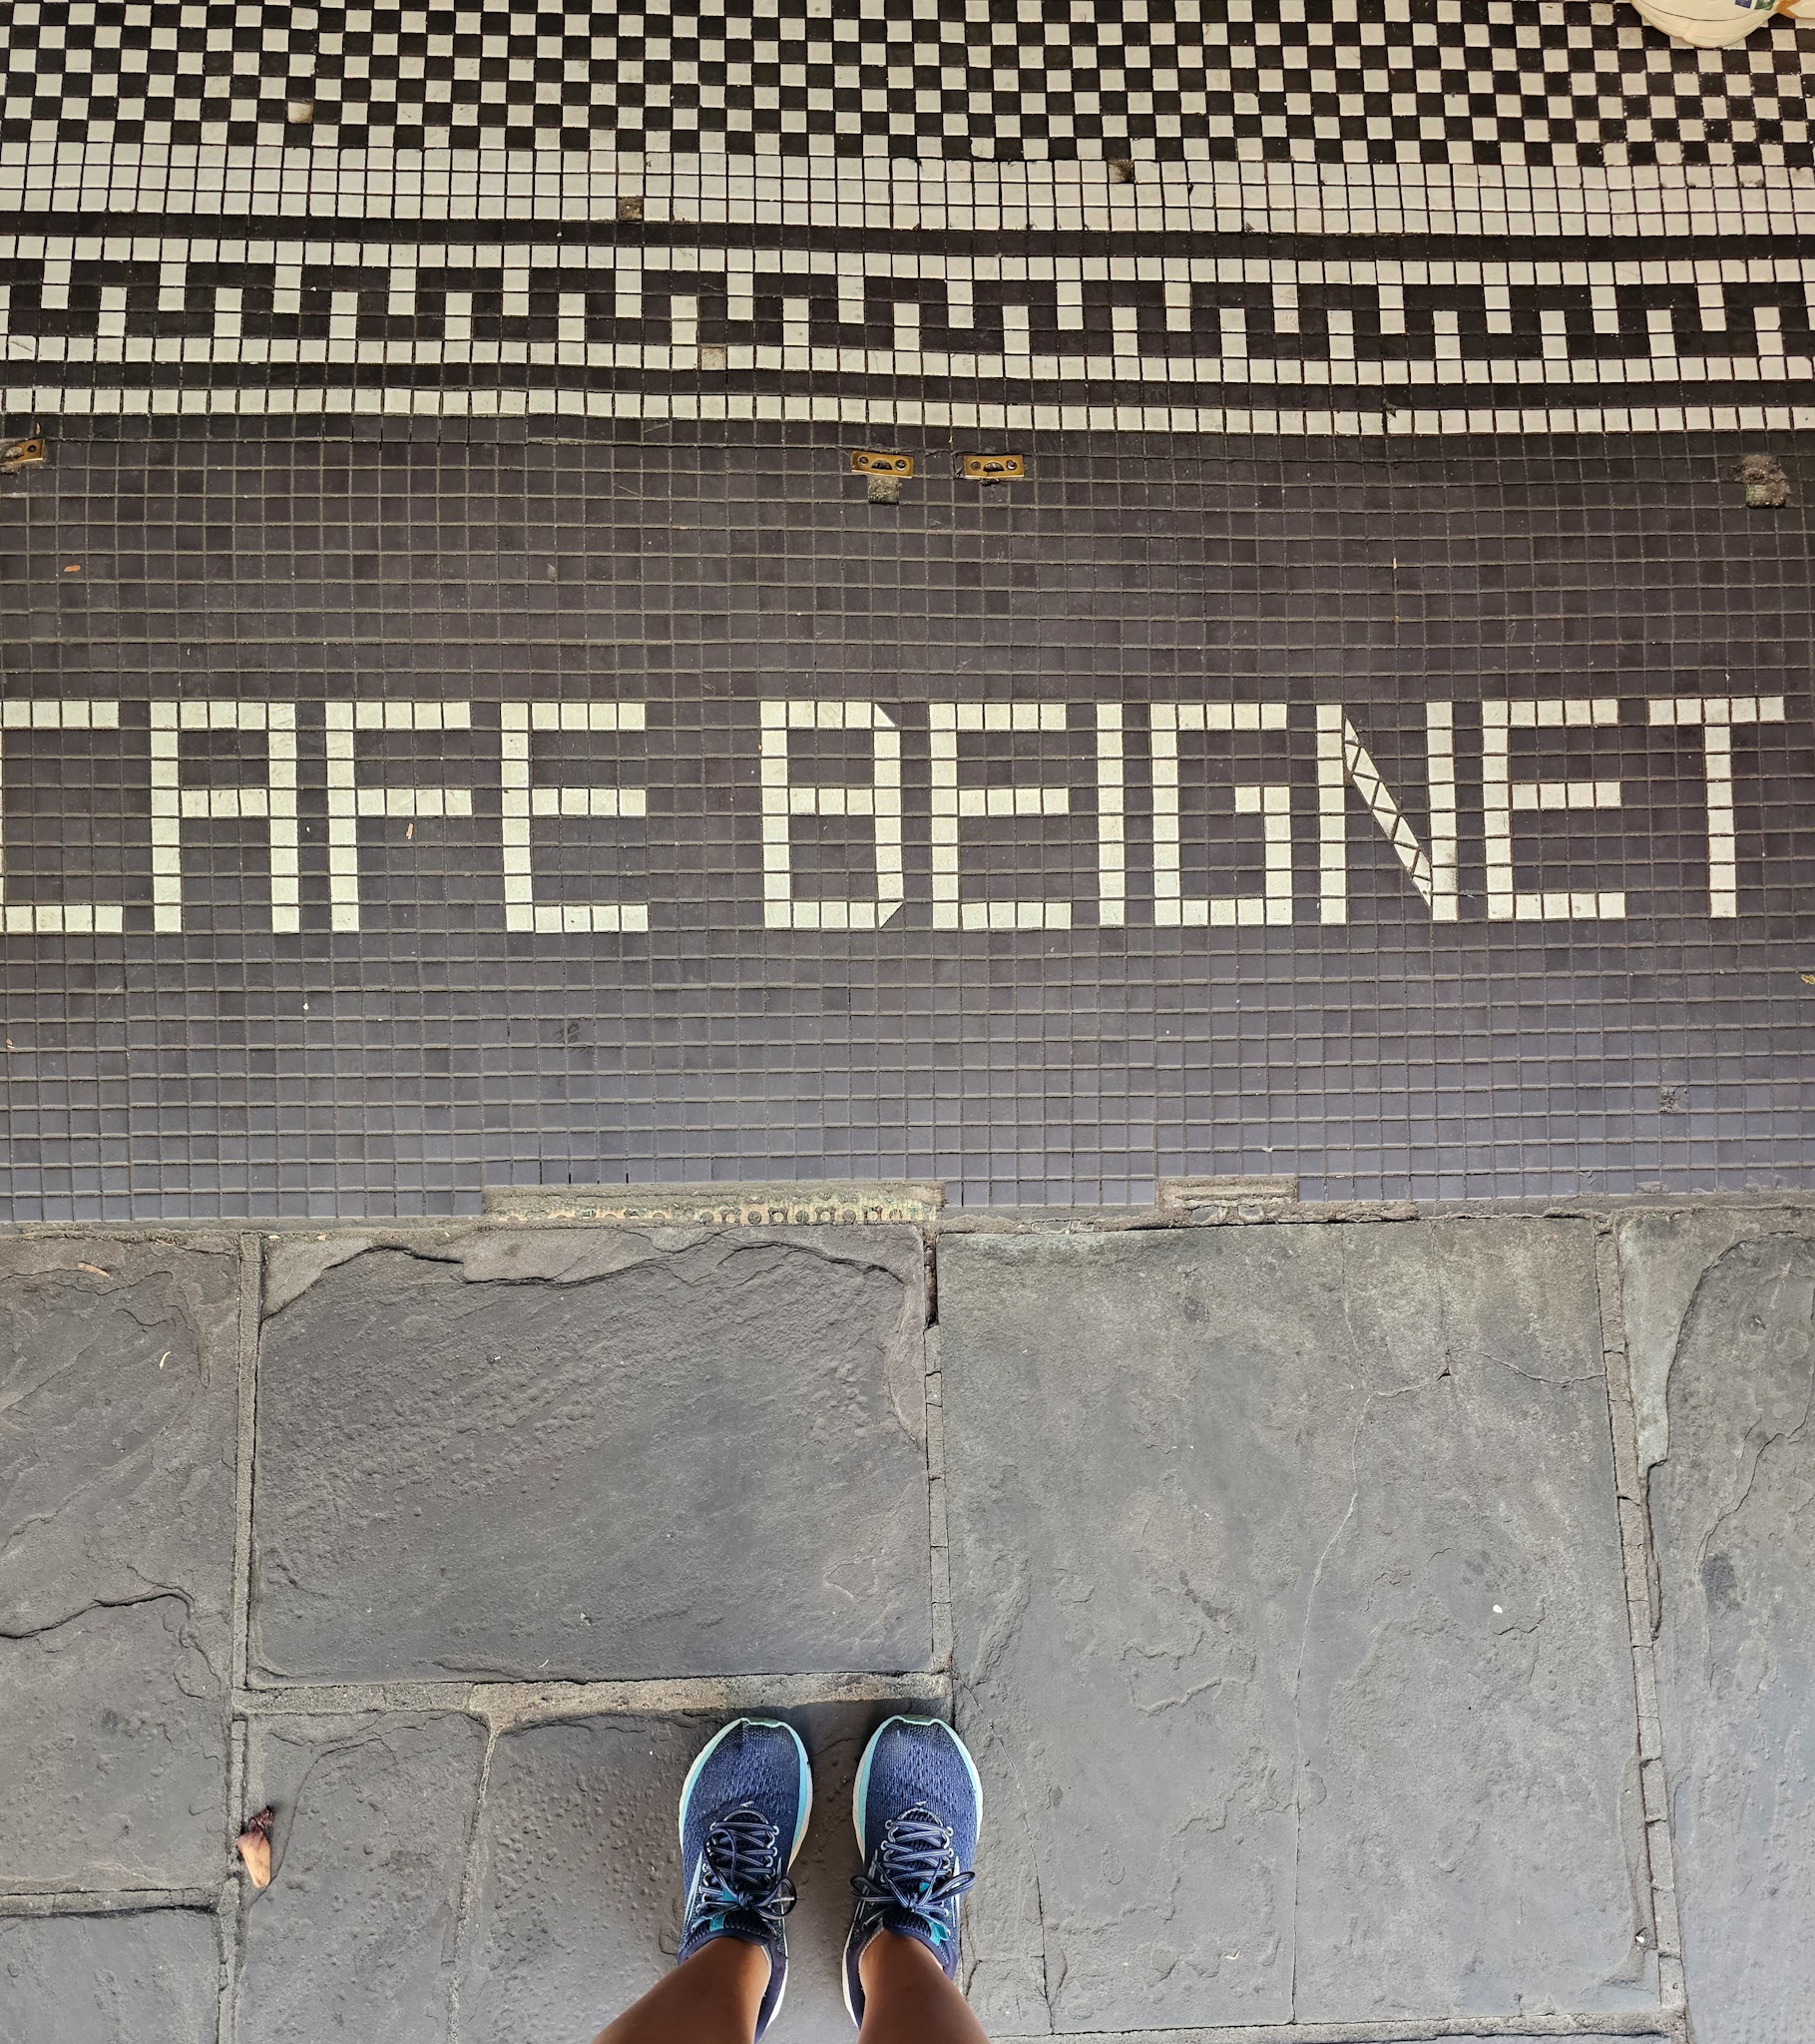
5. Classic Black & White Flooring

Several places had black-and-white flooring patterns and I loved how classic and timeless they were. From the lobby of our first hotel to the floors of cafes, I was drawn to the simple shapes and patterns that laid the foundation for a well put-together space. I especially loved these smaller mosaic tiles and would love to incorporate something like this in a future bathroom renovation.

There’s so much more I could talk about – gas lanterns everywhere! wrought iron railings! roofing materials! window shutters! – but suffice to say this city made a huge impression on me. I will be drawing on this inspiration in my own home for years to come!

And now, I wanted to share some highlights from our trip itself. Honestly, I planned very little in advance. This city is an easy place to go without an agenda and find things to do. Hop on a streetcar and see where it takes you, wander down streets popping into restaurants for food and drinks as the mood strikes, sit in a cafe or on a balcony and people watch – it’s just a fun place to roam and explore and linger and enjoy. Here’s some of what we did:

French Quarter

Our hotel was on Canal Street, which is right next to the French Quarter, so we walked into the French Quarter pretty much every day. I absolutely loved just walking up and down the streets, turning this way and that depending on which street looked most intriguing. The architecture is so unique for the United States and the atmosphere is so fun. Having no agenda and just strolling and people-watching was an adventure in itself, but some streets do especially stand out.

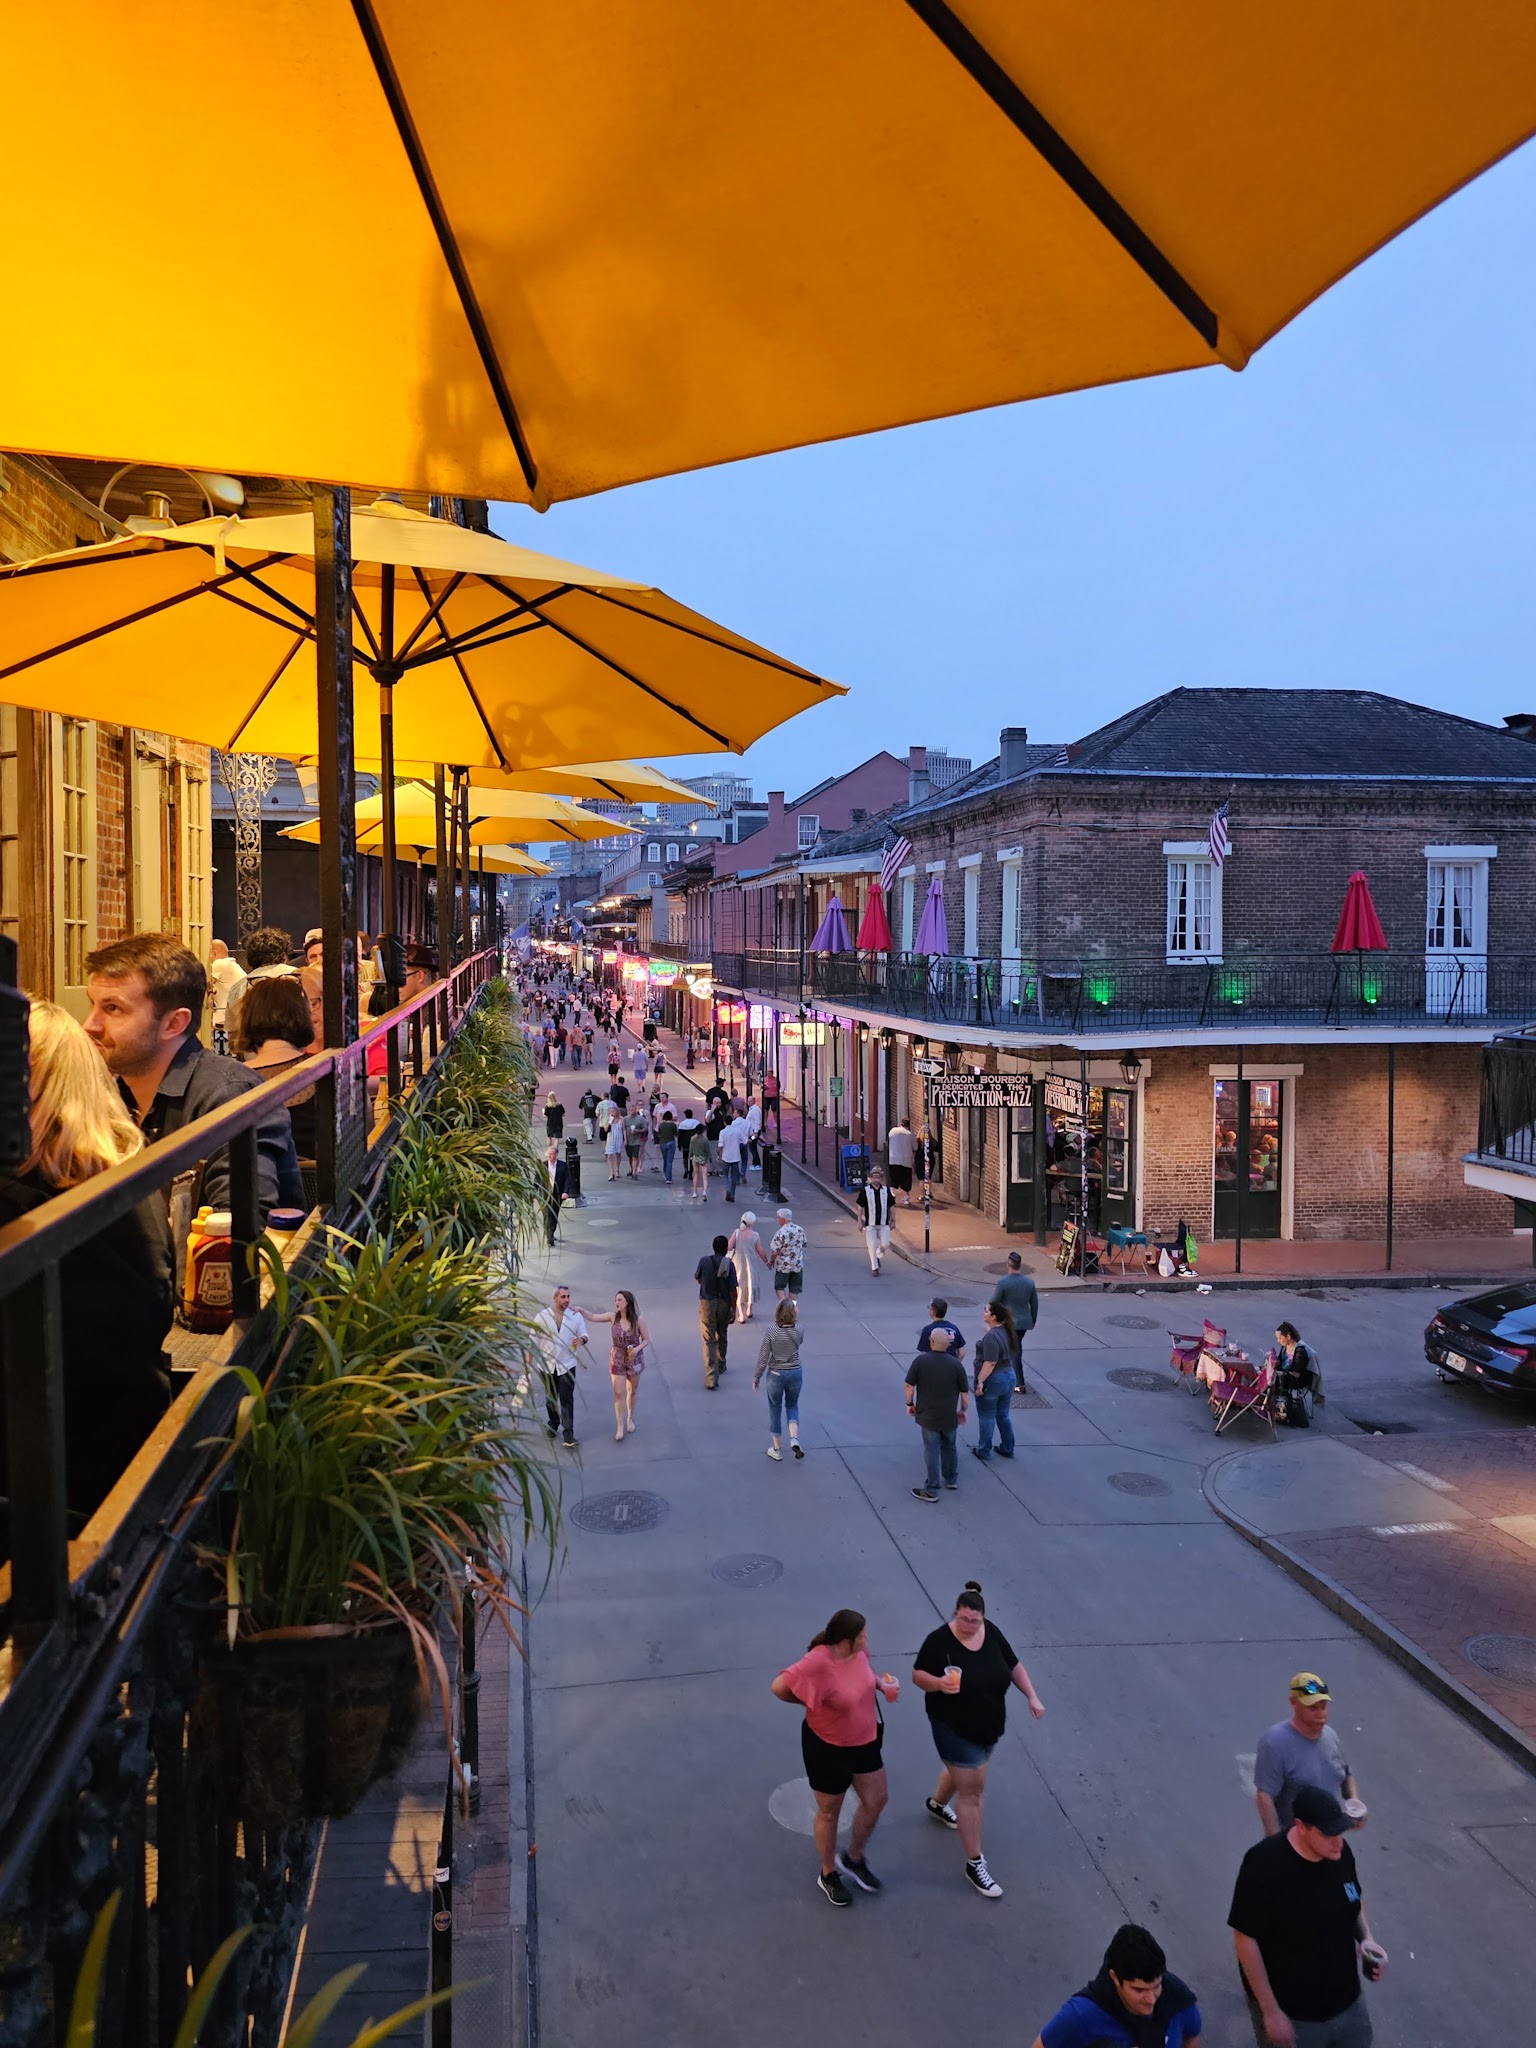
Bourbon Street is the notorious party street and is worth checking out at any time of day; we went up and down it on a weekend afternoon, a weekend night, a weekday afternoon, and a weekday evening, and a weekday night and each time the vibe was different. While Bourbon Street is known for wild partying, Frenchmen Street is known for quality live music. We ate dinner listening to live jazz on Frenchman and it was such a great experience! Royal Street is another popular street and has more of the shopping scene – lots of art, jewelry, clothing, etc.

Other notable things in the French Quarter:

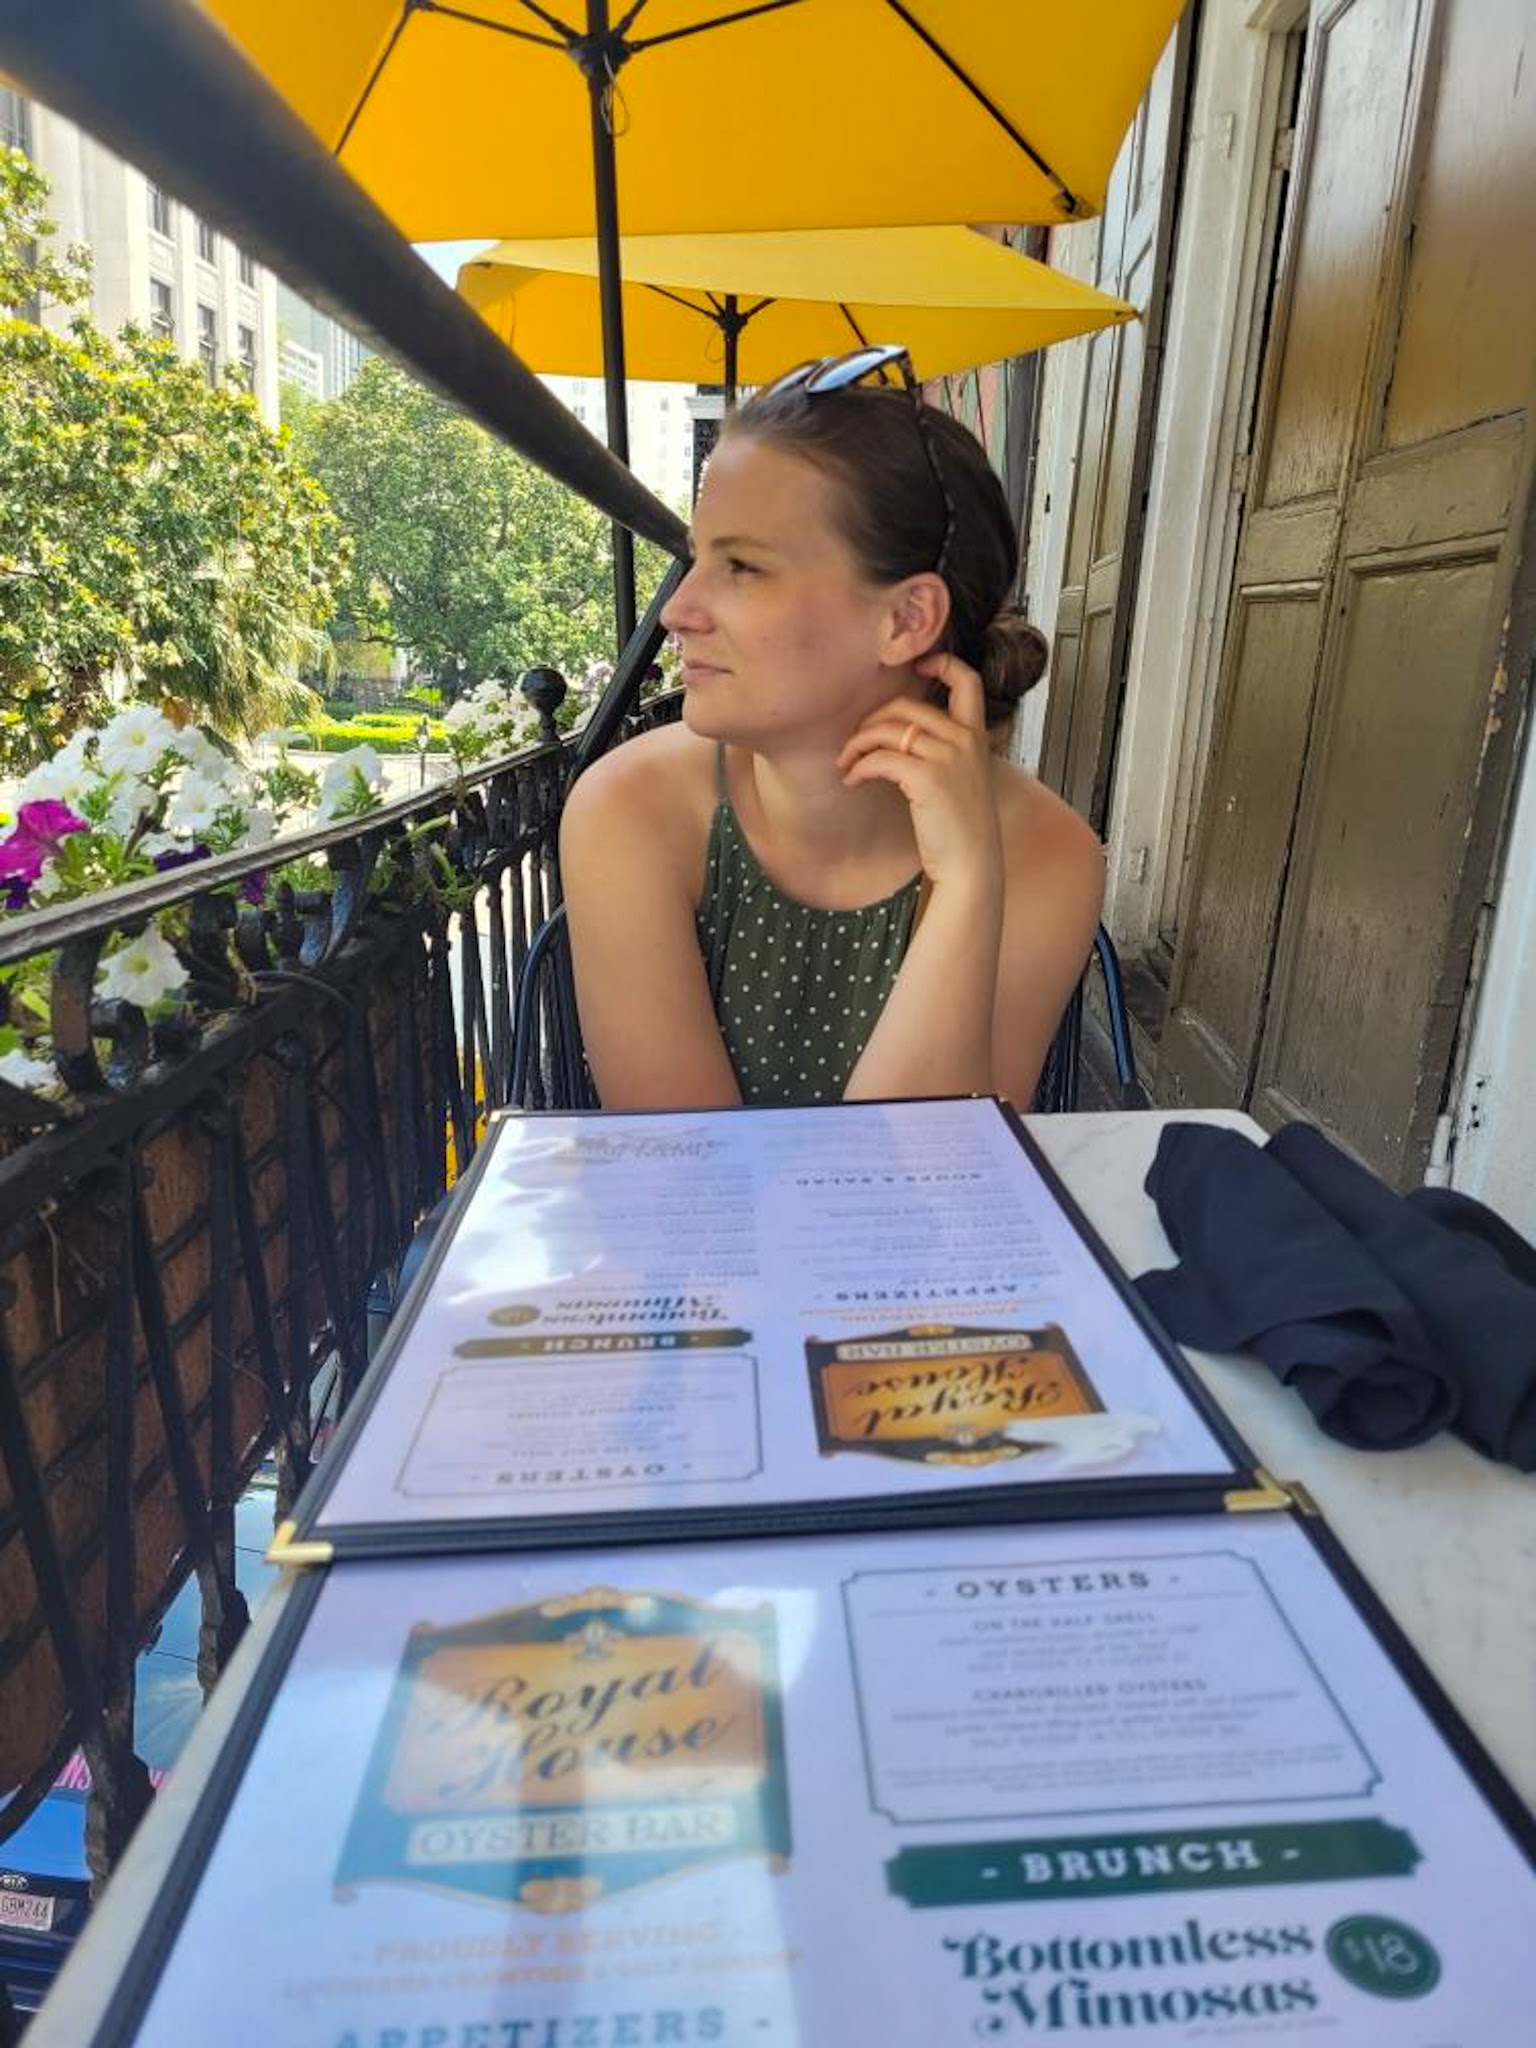
-dinner on a balcony! Such a fun way to people watch while eating, and don’t discount Bourbon Street. Though it’s a party street, it was also where we found one of our most delectable meals at a restaurant named Cornet. We also got balcony seating at Saint John and Royal House Oyster Bar, both in the French Quarter and both delicious. There are so many restaurants though, so pick and choose what speaks to you 🙂 Honestly one night we just grabbed a slice of pizza on Bourbon Street and even that was delicious so you really can’t go wrong!

-art bazaar on Frenchmen Street; a fun night-time market of booths where local artisans display and sell their work

-Saint Louis Cathedral (free to go inside and it’s beautiful!)

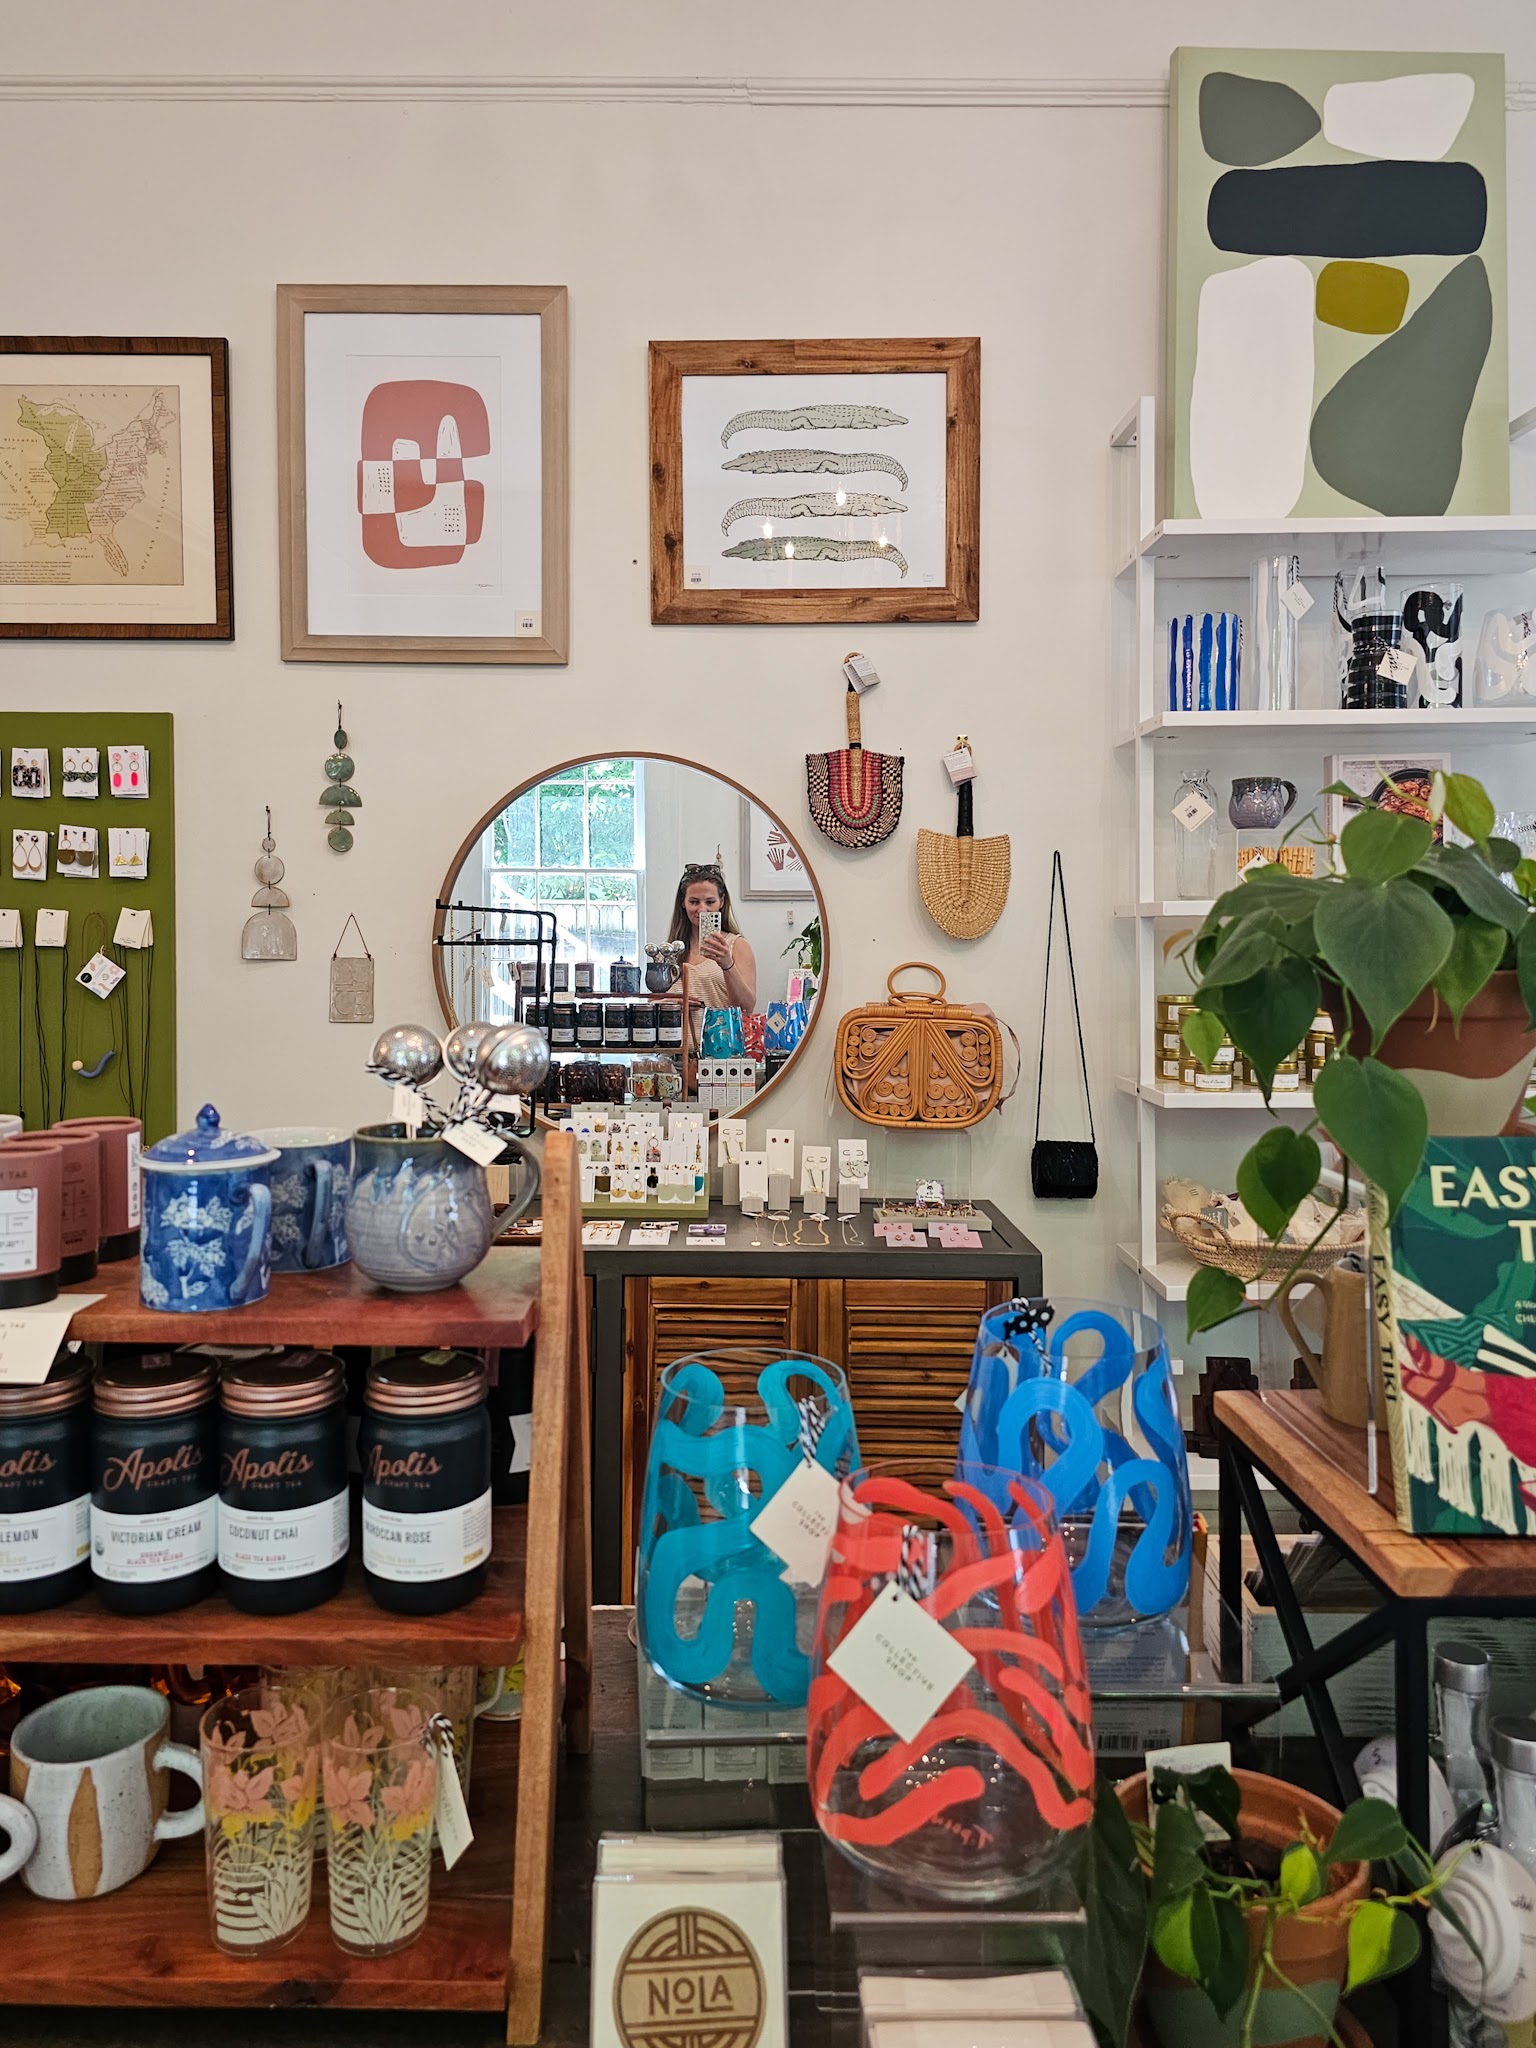
-Jackson Square outside the cathedral is where artists gather to showcase their work. I bought a few pieces from local artists around the square and am excited to have unique artwork that doubles as a souvenir! (This is also where I randomly found my way onto the Today Show!? They were doing a taping here and I got to watch Hoda and Jenna – so fun!)

-Cafe du Monde and Cafe Beignet both have delicious beignets! Make sure to try them both out to determine your favorite – I think I ate 18 beignets total! 🙂

-there’s an iconic bar inside a hotel called the Carousel Bar that we heard about and decided to check out. It’s cool to see but popular and very hard to find an open seat on the moving bar. We went to see it and ended up getting drinks just sitting near the bar and honestly, for how expensive drinks are, it wasn’t worth it. The bar itself is unique but if you’re not actually able to sit at it, I would just peek in, see the bar, and then head somewhere else to grab a drink.

Explore the City by Streetcar

Their streetcar system is a fun way to explore new areas! It’s inexpensive and reliable (we used the app called Le Pass for purchasing multi-day tickets and keeping track of schedules and stops) and I loved watching the city go by as we traveled to different districts!

Speaking of…

Garden District

We took the streetcar into the Garden District one day and enjoyed walking up and down streets admiring the beautiful houses. We found our way to Magazine Street which is full of restaurants and shopping. We went on a Sunday, which I would not actually recommend because a lot of businesses were closed, but we still enjoyed lunch and a few shops!

The Collective Shop on Magazine Street

A random highlight: I spotted a Little Free Library on our walk and picked up a book I’ve been wanting to read. Then a few blocks later we walked by a bar called The Bulldog and they were playing playoff basketball on their outdoor patio TV. We decided to stop and grab some drinks on the patio so Justin could watch the game and I could start reading my book. Just the kind of spontaneous and fun and relaxing vacation moment we both love 🙂

National WWII Museum

When Justin was in his conference one morning I rode the streetcar by myself to the WWII Museum.

I spent three hours inside and honestly could’ve spent three more. It’s fascinating, so informative, poignant, sobering, important, and just incredibly well done. I learned so much and highly recommend checking it out!

City Park

One day Justin and I took the streetcar to the end of the line at City Park, which kind of feels like NOLA’s version of Central Park. We rented electric blue bikes right by the streetcar stop and biked all around the park.

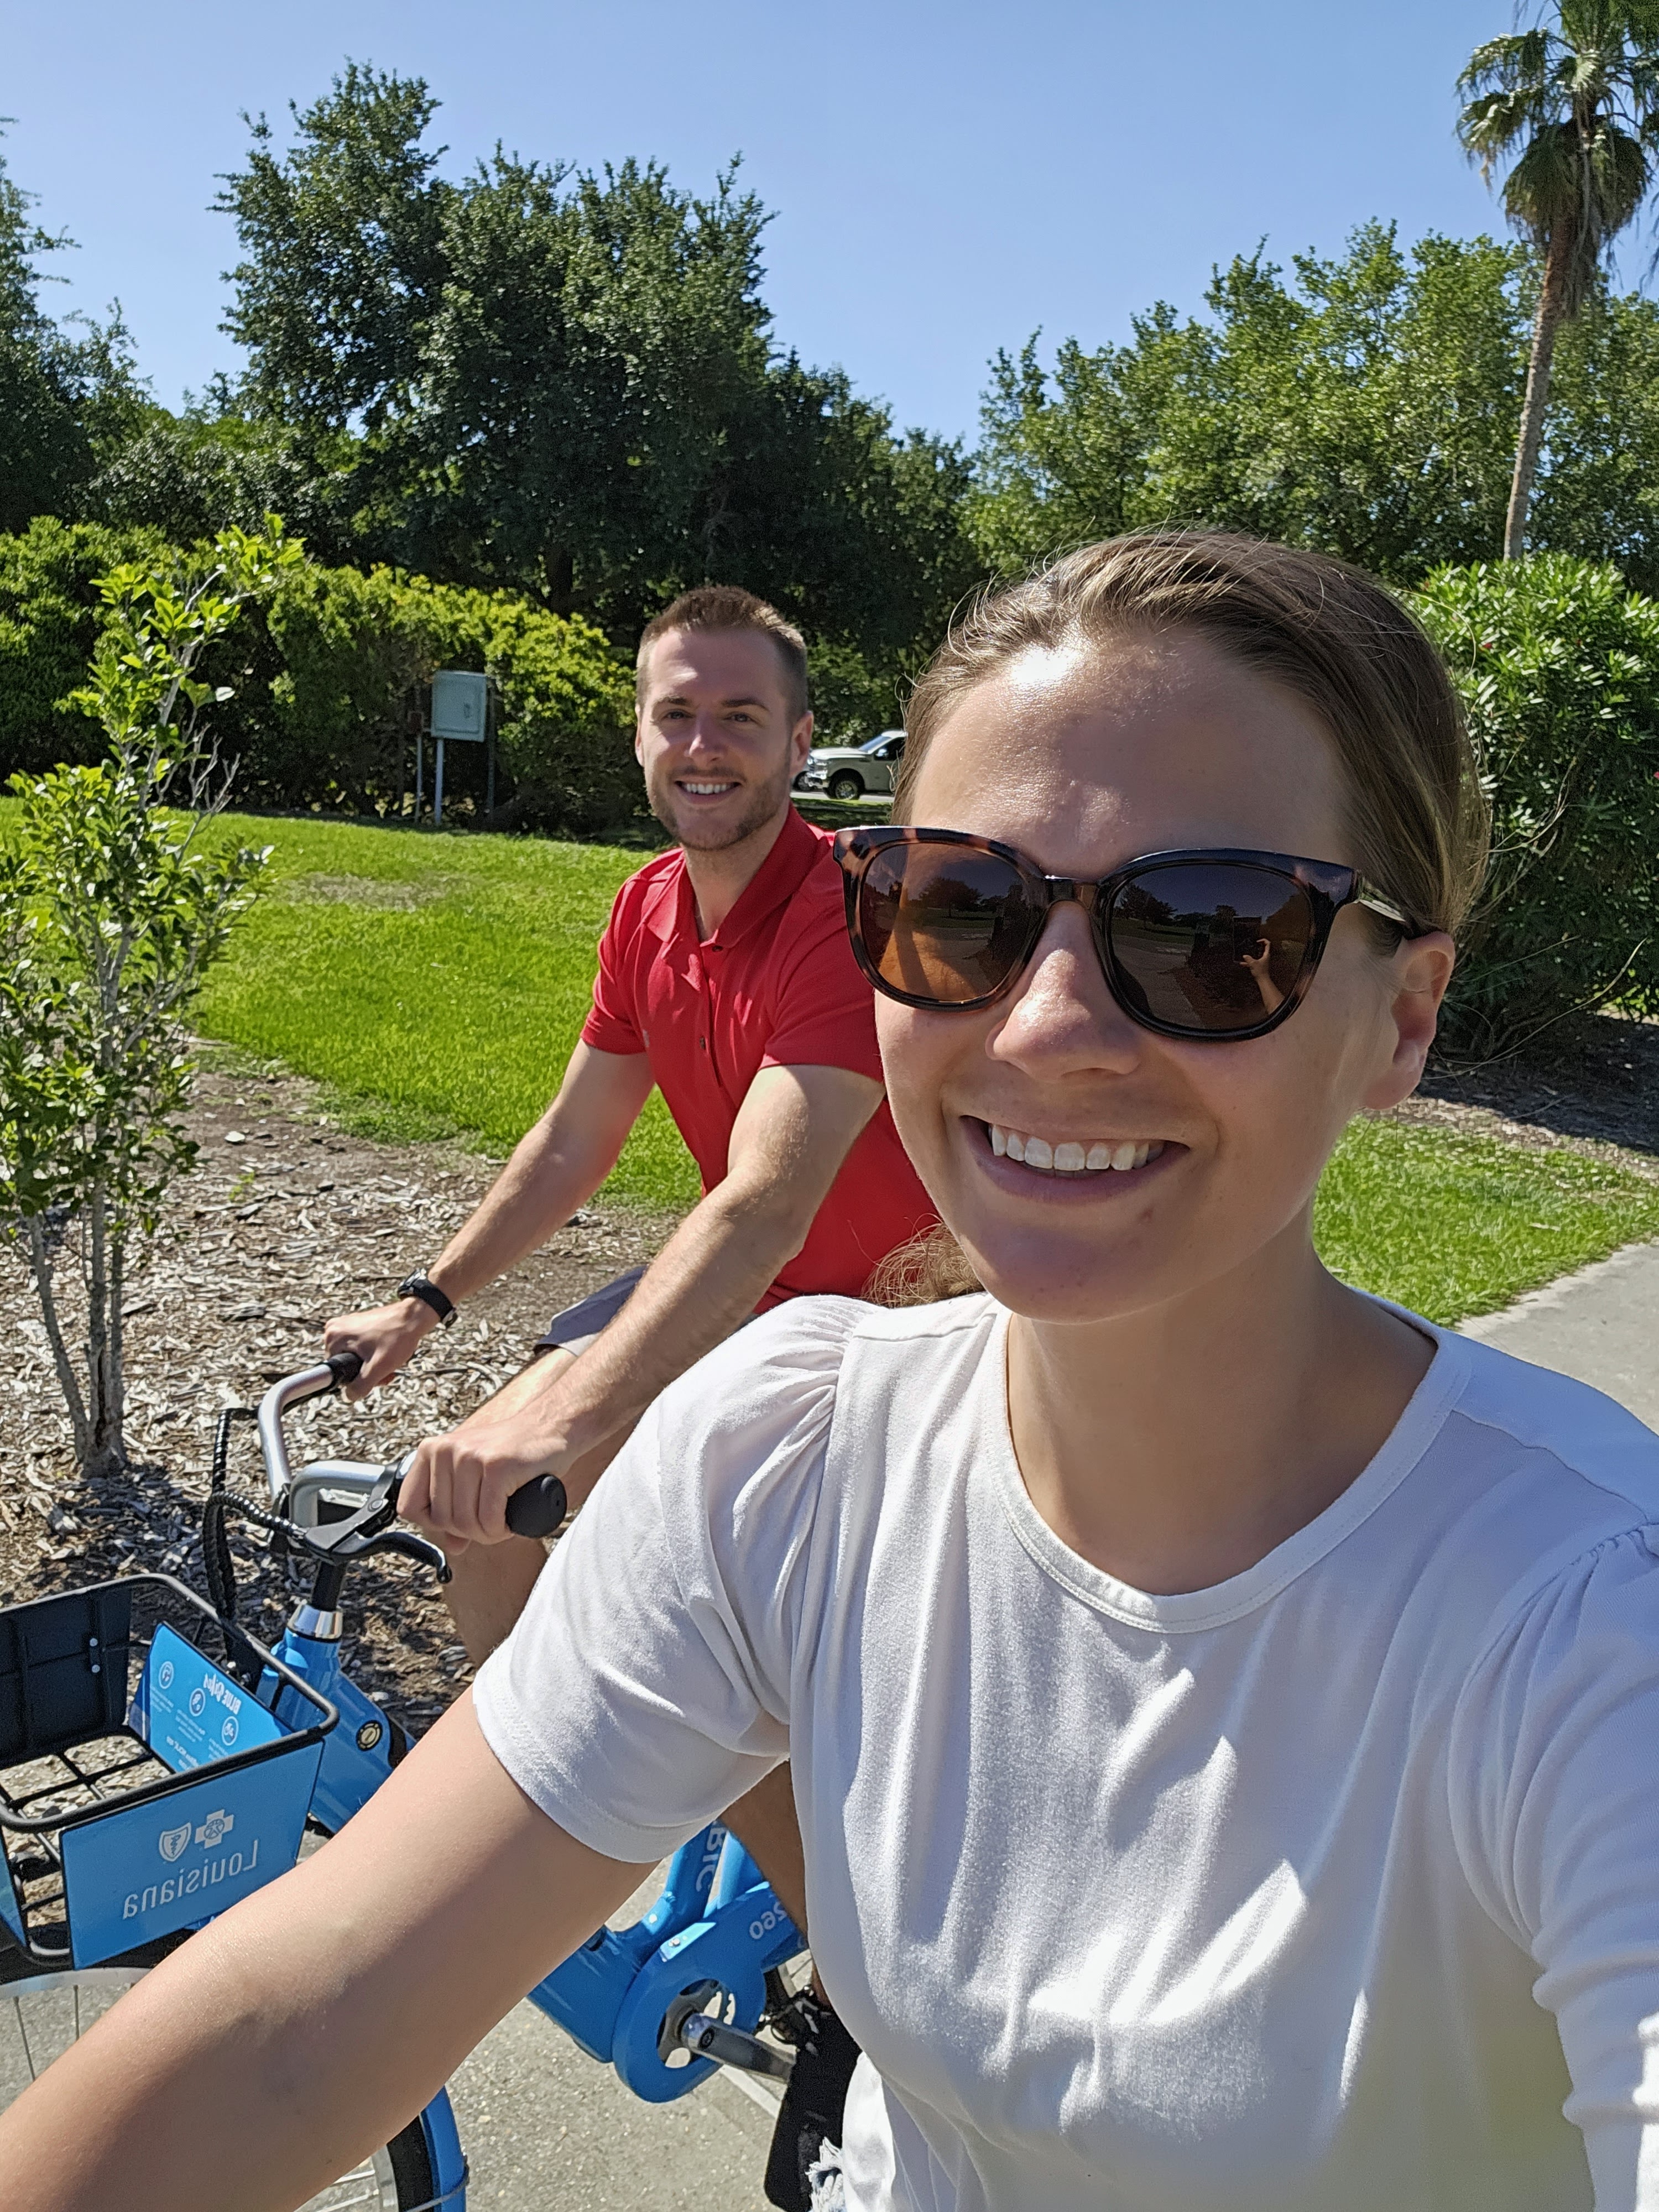
The park is huge and there’s no way we could’ve walked it all so biking allowed us to see way more of it. We ended up spotting a Cafe du Monde location within the park and decided to stop and grab some beignets. Sitting on the patio eating beignets watching people buy flowers at a little cart and a woman blowing bubbles for kids to play in was one of my most contentedly picturesque moments of the trip! In addition to all the walking and biking paths, the park also has a little amusement area and mini golf, as well as NOLA’s Museum of Art which we did not check out but I would love to visit on a future trip.

On the way back to Canal Street, we spotted a little Irish pub and decided to make a spontaneous pit stop for a drink and outdoor patio seating. That’s another bonus of streetcar exploration – you can hop on and off as the inspiration strikes!

Random Closing Thoughts

New Orleans has a bit of a reputation – I talked to many people about our trip and questions I heard over and over are about safety and cleanliness. True, it’s not the cleanest city and you don’t want to walk alone at night. But using normal precautions like keeping your wallet in your front pocket were really the extent of what we did safety-wise. I explored two different mornings by myself while Justin was in his conference (one morning I walked the French Quarter and another I rode the streetcar) and both times I felt safe. There are so many people around always – so many tourists around always – that I always felt like I had a level of protection just by being around others. Overhearing that the couple walking in front of me are tourists from Oregon made me feel safer, you know? I felt like I could easily get help if I needed, and I also just made sure to regularly check in with Justin to keep him aware of my location.

There’s so much more I didn’t talk about here – walking by the river, checking out the outlet mall, the French Market, etc. There’s also things we didn’t do like a swamp tour, river cruise, or anything with the Battle of New Orleans (maybe next time!) It’s a city full of culture, history, and entertainment and my best advice is to just try different things there. Try different foods, try a museum, try a new mode of transportation. It’s such a fun place to explore!

A Day in the Life {4.24.23}

Lately I’ve been feeling in a little bit of a DIY rut – the world feels a little extra overwhelming and heavy with recent tragic headlines and I haven’t been feeling super motivated to share projects. I decided to scale back on social media and focus more on the smaller things that are within my control – things like being present with my family, taking my kids to the zoo and to drop off food at a free food pantry in our area, speaking to my senator’s staff members about legislation I think is important, etc. It felt good to make small positive differences in the world. And with all that being said, it also felt like a perfect time to document a day in our life and appreciate the everyday moments with our little family.

A few times a year, I like to take a pause from my DIY content to document a day in our life. I treat these like little journal entries – they’re a snapshot into our lives on any given day and it’s always just a perfectly imperfect, ordinary day, blurry photos and all. So here is what our day looked like this past Monday!

April 23, 2023

It was a bit of an unusual weekday morning because I usually choose to wake up before my kids to get things done (it makes such a difference in our days!) Our kids also know to wait until 7:00 am before coming out of their room. But today, I chose to sleep in and well, they did not.

So instead of lots of early morning productivity, I got some 6:40 am snuggles and a whole lot of jumping in my bed! I’ll take it 🙂

We headed downstairs for breakfast. My kids alternate with cereals, waffles, toast, eggs, and today they both wanted cereal.

I made my typical breakfast of two over-easy eggs, some chicken sausage, and half an avocado. I like to sprinkle salt, cracked pepper, and nutritional yeast on top of the eggs for some extra flavor!

After breakfast the kids requested some bubbles, so we had fun chasing, popping, and ninja-chopping them.

Around 8:20, the kids asked for their tablets so I first got them totally ready to go (socks and shoes on, school bags ready) and then I enjoyed quiet time with my devotions and a snuggly dog at my feet.

I had to wake up this sweetie around 8:40 so we could leave for school – he always wakes up so happy and smiley! My strategy when we’re cutting it close is to quick change him and give him his bottle in the car seat while we head to school.

Preschool drop off line! LJ goes four days a week and Vi goes two so today was just a day for him.

Vi asked for my phone to take pictures on the way home, so this is what my van looks like on any typical day. A little dirty, grocery bags on the floor, minion stickers on the seat. This is my minivan mom life, ha!

Ollie Bear wasn’t quite finished with his bottle when we got back home so I enjoyed some snuggles while he finished.

Vi and Ollie and I spent a big chunk of the morning playing in the playroom together. She is so sweet with him and I love watching their little bond grow.

Around 10:30, Ollie went down for his nap and so I started on a load of laundry. Vi really loves anytime she can be a helper and has recently started pulling up her little stepstool to help me put the clothes in the washer.

I got a little bit of work down while Vi played independently and then she asked to play some games. Around 11:15 Ollie woke up from his nap and joined the party.

Vi has a very kind heart and is often willing to defer to whatever other people want to do, so it’s always nice to just give her some time to choose the games we play and really focus on connecting with her.

After picking LJ up from preschool we had some lunch. Today was a random mix of “let’s clean our our fridge” so it’s a smorgasbord.

And for Ollie, avocado 😉

Around 2:00 pm Ollie went down for his second nap. Often I can just put him in his crib and he’ll fall asleep on his own but today I soaked up a few extra snuggles!

The big two enjoyed some time on their tablets and I headed to my office to get some work done for my job as a virtual assistant.

Around 3:00 pm the big two and I headed downstairs and I got a quick bike ride in while they played nearby.

After my ride LJ wanted to show my his “workshop” of Lego creations and farm equipment so we played there together for a while.

Headed upstairs to switch over the laundry with Vi and start a second load.

This little guy woke up around 4:45 pm and was all smiles!

LJ and Vi had set up a station on the staircase landing so we played there until Justin came home.

Once Justin got home we headed outside to play. Our neighbor recently loaned us a go kart for our kids and they love taking it for a (slow and cautious haha) ride!

I quick changed while Justin handled dinner for the kids because I had to head off too . . .

. . . a kindergarten parent meeting. How can we already be here!? Feeling all the feels!

I was supposed to have a girls’ night with friends after orientation but it got cancelled due to scheduling conflicts so Justin told me to just head to the basement when I got home to enjoy some time by myself and he would handle bedtime. Don’t have to tell me twice!

When I headed upstairs around 8:50 pm, all the kids were asleep and Justin had folded the laundry. This man is SUCH an incredible husband, father, partner. So thankful for him!

Finished off the day with some reading and dog snuggles. It was a great day!

To see previous Day in the Life posts, you can check out the links below:

November 16, 2018

July 9, 2019

January 14, 2020

March 26, 2020

February 13, 2021

September 13, 2021 

June 2, 2022

September 9, 2022

Fresh Artwork + Pillows in the Living Room

This week I made some more progress in the living room with a few small changes that made a big impact.

The living room is the slowest renovation we’ve tackled so far. I shared the mood board back in October and since then, I’ve painted the walls and ceiling, swapped out the ceiling light fixture, and hired an electrician to hardwire two sconces. We also purchased one new chair for the bay window area. That’s it! Basically, I’ve been taking this Phase One renovation in, well, phases, and every so often I come back to do a little bit more. This week, I finally finished off this wall:

Before-ish

Midway

After

Let’s start with the artwork, as that was a driving force in all the other decisions with this view. From the start of planning this room, I had this print from Juniper Print Shop in mind. I like that it has interest, but it’s not overwhelming. The wall is huge and I had no chance of filling it; with a bold ceiling already I wanted to just have the art be a bridge between the couch and ceiling. It’s named Italian Hills and reminds me of Justin and my trip to Italy 7 years ago. I was drawn to the soft, muted colors used – it’s the same color palette that’s reflected throughout the rooms in the rest of the first floor so it felt like a great way to tie everything together.

I purchased the print as a digital download. Their website says their digital files are formatted to print up to 24×36 inches but I was able to have it printed locally at a larger size and I’m happy with the end result. (They do offer oversized prints too but I wanted a different size than they offer – more on that in a minute).

With the print in mind, I went a little bit crazy in Target and bought 13 different pillows to try out on the couch. I wanted to play off the colors in the artwork and chose patterned pillows with shades of green, taupe, and mauve. My vision was to have a mix of colors and patterns for a cozy, collected feel and I tried out numerous combinations before settling on these five.

Of the 13 pillows I bought, I’m only keeping 3. The large green pillow and small square pillow were actually two I already had – a reminder to always shop your own home first! A few new pillows gave a fresh feel to the ones I already have and I love how they all look together.

Because I was bringing in interest with the artwork and a mix of colored and patterned pillows, I wanted to keep the frame for the artwork pretty simple and streamlined. This gold frame from Frame It Easy was perfect for its understated elegance!

In the interest of full transparency, I received this frame from Frame It Easy in exchange for sharing on Instagram and providing them with photos for marketing. A blog post was not part of the contract, but I’m choosing to share about the frame and company here because I’m genuinely happy with the product and like how it looks in my living room.

Frame It Easy can create frames in whatever size you want – even if it’s super unconventional, like 14 5/8″ x 31 1/4″. I mentioned before that I wasn’t able to use the oversized prints Juniper Print Shop offers and that’s because none of their offered sizes fit the wall space in between the sconces like I wanted. I used painters tape to measure out different proportions and settled on 51″ x 34″ as my desired size. Frame It Easy asks you to put in the dimensions of your artwork and then creates a custom frame to fit. You can also upload your photo or artwork and have them print it, but due to the size of mine (and the file size given by Juniper) I had it printed locally.

Frame It Easy provided me with a link to share – if you’re interested in ordering, you can access their website through this link and you will automatically get 10% off your order, no additional code required! (I do not make a commission off of sales).

I originally used the acrylic cover that came with the frame, but because of the large bay window area in the room, there was SO much glare no matter what angle you were looking from. It really distracted from the artwork and I knew it would always bother me, so I removed the cover and am much happier with it now. I know I run the risk of my kids getting their fingerprints on the print but it felt like a risk worth taking to get to actually see all the details in the art without the glare.

I’m super happy with this wall in the living room and feel like it’s in a good place for now. It does make it pretty obvious though that the rest of the room still needs some work – as you can see from this view, the windows stick out like a sore thumb. Painting them is next on my list for this room!

Sources:

Wall Color: SW Alabaster

Ceiling Color: SW Urbane Bronze

Trim Color: SW Agreeable Gray

Pillows: patchwork, lumbar, plaid

Italian Hills Print

Frame It Easy Specs:

Art Size: 51″ x 34″

Outside Frame Size: 51 3/16″ x 34 3/16″

Style: Ashford in Satin Gold

Cover: Clear Acrylic (I removed)

Backing: Acid Free Foamcore

Order Here for 10% off your order (offer good through May 24, 2023)

A Peek into all our Office Storage

It’s been four years since we first walked through our house and from the very first showing, I had a vision for our home office. The room had no permanent storage, but I envisioned built-in bookcases along one wall and was so glad to bring that vision to life back in 2020. We have SO much storage space now and today I wanted to take a look at all the ways I utilize different types of storage in this room.

My desk has two small drawers that house basically what you would expect to find in a desk: notepads and sticky notes in one drawer and office-y bits and bobs (rubber bands, paper clips, binder clips, erasers, flash drives, etc) in the other. These are the things I’m often reaching for throughout the day as I work from home.

When designing the built-ins, I knew I had the option to do floor-to-ceiling bookshelves a la Beauty and the Beast, but I also knew that having some closed storage for my family was crucial. Utilizing cabinets on the bottom half was a game changer for our home’s organization!

I store typical office supplies like our printer, paper, notebooks, folders, and cords in the cabinets but they also house a lot of random things like construction paper and tubs of art supplies, my paint swatch decks and wallpaper samples, computer bags and tripods, and all of our family’s many, many games.

I originally wanted all the cabinets to have shelves and doors but we used Ikea cabinets and I couldn’t get a configuration to work in the allotted space. I had to pivot and include a set of drawers in the middle, which ultimately worked out better than all doors anyways! I love having a set of drawers to easily store things like my office backstock (rolls of tape, extra sticky notes and paperclips, etc), my stapler, all our batteries, command strips, envelopes, labels, etc. I’m so thankful for the drawers!

In addition to holding all my books, I also wanted to utilize the open shelves for beautiful and functional storage. Some items, like my spare buttons and calligraphy utensils, are stored in simple glass jars and are out on display. I have a little utensil holder for easy access to all my pens, pencils, and a few notebooks and also have black stacked paper holders to house school papers.

For not-so-display-worthy items, I rely on storage boxes.

I have all my permanent markers hidden in this pretty white box out of the reach of little hands. It’s stacked on top of another, larger box filled with all my sewing supplies.

This woven basket box houses all the greeting cards I have on hand. Several years ago I made some simple dividers to categorize the stash and they make it so easy to grab a card for the right occasion!

I also have some sneaky hidden storage. Tucked behind a large art print are utilitarian things like scissors and a tape dispenser, plus a pottery bowl filled with the little knick-knacks my kids pick up as birthday party favors, arcade game prizes, school holiday toys, etc.

These trinkets cause SO much clutter in my house; my kids bring them home and love playing with them for a few days, then lose interest and my house is littered with tiny toys. When that happens, I just quietly pick them up and dump them in this bowl. I can still “find” them if my kids ask or start to look for them, but they’re also out of sight, out of mind, and my kids usually end up forgetting about them.

Once the bowl gets full, I donate the trinkets to LJ’s previous preschool teacher to use in her prize box so they can have new life in someone else’s house. 😉 For the record, my kids almost never look for the toys after I put them in the bowl – easy come, easy go!

It’s hard to imagine our home without the office now. It’s such a great space for keeping our things stored and organized, which allows the rest of the house to stay streamlined with way less clutter around. It’s an all-star of a room for sure!

Reflections on Our Kitchen Reno Two Years Later

Two years ago, in April 2021, I upgraded our kitchen with a mostly surface-level renovation.

I painted the cabinets, windows, walls, and ceiling. We swapped out the light fixture and added some new barstools. The most demo-heavy aspect was ripping out the old stone backsplash and repurposing the bead board paneling we took from our office renovation as our new backsplash. I kept the cabinet hardware, all the appliances, the counters, faucets, and flooring the same. All in all, it cost right around $1000 and took a couple long weekends but this kitchen felt like a totally different space. And I’ve loved it ever since!

Before

After

Last year, I did a check in where I talked about how the kitchen is holding up (and the few lingering things I needed to address at that time). Since that post, things have continued to hold up well. We have just a couple spots where the paint continues to chip off a bit on our most heavily used cabinets but other than that, the drawer and door fronts are all looking perfect! I still love all my choices with this renovation two years later.

This kitchen has always been a great reminder that small updates and Phase One projects can be so worth it. Truthfully, Justin and I still hope to someday remodel the kitchen and rework the layout to eliminate some of the persistent problems we run into. Eventually, we’ll be upgrading the 20-year-old appliances. I’ve been collecting and analyzing flooring samples because that is definitely a future upgrade as well. There are so many things we’re planning to change down the road . . . but I’m so glad we did a smaller update first to love the space we’re in NOW.

The kitchen is the heart of our home. We’re in it every single day, multiple times a day. Most days, it looks like this shot of a recent Saturday morning:

The island feels like our command center: we food prep and eat meals and do homework and art projects and bake and talk about our days and plan for the future and sort mail and do so many more things around the island. We spend a lot of time here and so it makes sense to me to want to really like the space we’re in.

We could have waited. We could have said “ehh, we know eventually we want to re-do the whole thing so let’s just save the money and effort and do it all at once down the road.” We could have lived with the perfectly functional, but totally not “us,” kitchen for 10 or more years. And it would have been fine. But to me, I think it was so incredibly worth it to make small but impactful changes to make the space something we love to look at and be in as it is right now. This Phase One update gave me a new appreciation for what already existed and it makes me happy to walk into this room multiple times a day. I am no longer itching to take on a huge, expensive, time-consuming remodel; although I still want it someday, I’m very content living with our current space for now! It’s like the Phase One actually gave more life and longevity to this space because it reflects our family and fits in with the rest of the house so much better now. And honestly, if the major remodel never happens, it would be okay if it stays just as it is. It was worth the cost of paint + a new light fixture +barstools. It was worth the time and effort to paint the cabinets and replace the backsplash. It did not have to be all or nothing – a middle ground was worth it!

I guess I wanted to share these reflections in case you need some encouragement to try a small update now while you dream/hope/plan for a bigger change down the road. Maybe you dream of a full-blown bathroom renovation someday, but right now a fresh coat of paint and a new mirror would make you enjoy the space more right now. Maybe you hope to replace your flooring but for now, a new rug would make the space feel cozier. Maybe it’s swapping out one light fixture. Maybe it’s painting your existing coffee table/nightstands/dining chairs/etc to change their look to something new. Maybe it’s even doing a Phase One in phases – painted cabinets one month, replace a light fixture a few months later, swap out some bar stools a few months after that. Don’t discount small upgrades – $5, $10, $20, or $50 changes can have a big impact too and you know I’m all about thrifting and secondhand finds to stretch a small budget farther. A plant, a candle, a pillow, artwork – so many things can change the way a space feels!

I think this can apply even to renters – back when I rented a townhome with some friends, we asked the landlord if we could paint. He said yes, we could paint, but we had to take on the cost. I’ve heard the argument not to “waste” money on a rental, but to me, it was VERY worth getting a low-budget can of paint, a brush, and a roller and spending a day painting my bedroom. I lived there for TWO YEARS! Even though it was a rental and it was temporary, two years is a long time and it was not a waste to me to actually love being in my space everyday. In fact, it felt like a form of self care to create a little haven in my room – totally worth it.

I’ll step off my soapbox now, but I hope this encouraged you to not wait for a huge remodel or gigantic budget. Maybe that’s never going to be in the plans, or maybe it’ll happen 5, 10, 15, 20 years down the road. You’re still living in your space every day – today, tomorrow, the day after that – and there are a lot of things you can do, big and small, to love your home a little more right now.

Easy, Functional Lego Storage

About six weeks or so ago, Justin and I completed a DIY Lego table for our kids. It has been a big hit with our children, particularly LJ, and has already gotten a ton of use. I knew when we completed the table that I needed to also address the storage for all the excess Legos and the past six weeks have made that even more evident. I finally took some time yesterday afternoon to organize our stash and I can’t believe the huge difference it made!

We had been working with a hodgepodge of storage bins: bright blue divided bins from when Justin was a kid, random clear bins from around our house, and white narrow bins I originally bought for the Legos. I totally blanked on taking a before picture, but I took a video of my organizing process and grabbed this screenshot from the beginning to give you an idea of the chaotic storage situation.

It took me a long time to find bins that would work for my purposes. I wanted lidded, stackable bins that were somewhat cute since they will always be out and visible. Size-wise, I didn’t want them to be too tall, since we don’t want a deep pile of Legos inside, but they needed to be tall enough to fit some type of divider. I also did NOT want them to be clear, which ended up being the hardest requirement! A lot of bins fit all my other parameters but were clear; I specifically did not want clear because when the Legos are put away, I want them to be somewhat discreet. The whole purpose of the Lego table was to corral Lego creations and keep tiny pieces up off the floor, away from little ones. By having opaque bins, I figured they’d be less enticing for curious little hands. Whenever babies or toddlers are in the basement, there is always adult supervision but I figured any extra help to keep them uninterested in the Lego space is going to be beneficial.

I thought I had hit the jackpot with these cute white bins, but I didn’t factor in the inset lids and bottoms – these plastic dividers fit inside but were slightly too tall to allow the bins to stack with the inset. I kept searching and finally landed on these Ikea bins – they were a little taller than I would have liked but they fit all other requirements so I decided to go for it. I chose the Kuggis in 10.25″ x 13.75″ x 6″ size.

I wanted adjustable dividers to customize sections based on the amount of Legos in that category. These plastic dividers were perfect! The length fit perfectly inside the Ikea bin; to adjust the size to fit the width of the bin, I just bent the divider back and forth at whatever length I needed. Sometimes it broke just with bending, other times the bend helped weaken the plastic and I could cut it with a scissors easily. I also used the scissors to trim off any sharp edge of plastic to keep edges smooth and safe for the kids.

I have no grand illusions of this staying perfectly organized, so I didn’t stress out too much over categories. I just tried to divide things in a general way that would make pieces easier to find. LJ’s exact words were “Mom, this looks so much better!”

My kids can’t read yet so I kept bin labels simple. I used cardstock, markers, and a few cutouts from an old Lego instruction book to remind them what was in each bin.

LJ could tell right away what each picture meant, so mission accomplished! Justin and I did decide on two catch-all bins of all the “weird” pieces that don’t really fit any category and we divided them into a big piece bin and a small piece bin; the former teacher in me loves the chance for them to start to recognize those simple words as they play!

I’m super happy with the result of this quick organization. It was such an easy way to *ahem* . . . simplify the chaos. 😉 And honestly, even if the divided categories don’t end up lasting and all the Legos end up in piles in the bins, I’m satisfied knowing the storage bins will continue to hold up and keep things discreetly contained for years to come.

March 2023 Book Reviews

Hello and Happy Last Day of March! You know what that means – time for another monthly book review!

I read four books this month and they were about as varied as it gets: fantasy/romance, domestic thriller, biography of a Founding Father, and a sourcebook for eco-conscious living. It was an unusual mix for sure! Let’s dive in.

The Very Secret Society of Irregular Witches by Sangu Mandanna

As an orphan and a witch, Mika is very used to being on her own. Apart from a rare gathering with other witches here and there, she mostly keeps to herself and moves around a lot. Then one day, a mysterious invitation is sent to her: there are three young witches in need of training in a house in the English countryside. Would Mika consider coming to be their teacher? Intrigued, she arrives at Nowhere House where she finds an eclectic bunch of unrelated people who have formed their own little family within the safe haven of the estate. It’s possibly reckless and dangerous to have so many witches living in one spot, but Mika can’t help but feel like she’s finally found a place to belong…even if there are a few people who don’t seem entirely welcoming (like the handsome but cranky librarian, Jamie).

My library always has a little display of books based on a theme and during February there were a variety of love stories. I saw this one on display, thought the cover was cute, and decided to check it out. Unfortunately, my enthusiasm for the book kind of dwindled from there. I found this one hard to get into, and I couldn’t get invested in the characters or the conflict. To be completely honest, the writing felt simplistic and tried too hard; it was fairly tame and sweet and then would have a random swear word or sexual reference that felt really jarring. The lone steamy scene felt weird and out of place, particularly because Mika and Jamie did not have very believable chemistry. Their sunshine-meets-grumpy dynamic felt forced to me and I cringed through a lot of their interactions. I liked the idea of the diverse, quirky cast of characters, but none of them had much depth and I found myself wishing for a lot more character development. I don’t mean to bash this book – it was a Goodreads Choice Awards for Fantasy in 2022 so apparently a lot of people like it! I think if you’re in the mood for a cutesy, if predictable, story that has a magical cottagecore vibe and doesn’t require a lot of effort, you might like this one. It was just a big miss for me. [Here’s an example of how reading is so subjective: This book, which I did not at all enjoy, has a higher Goodreads rating than Love at First, which I read last month and adored so much that it made my top recommendations list. Not every book is going to resonate with every reader so take all reviews, mine included, with a grain of salt].

Watching You by Lisa Jewell

From Goodreads: Melville Heights is one of the nicest neighbourhoods in Bristol, England; home to doctors and lawyers and old-money academics. It’s not the sort of place where people are brutally murdered in their own kitchens. But it is the sort of place where everyone has a secret. And everyone is watching you.

Ooopph – a description like that sucked me right in! This book is a rotating-narrator look at the people in a neighborhood: Tom, the handsome headmaster of the local school who everyone seems infatuated by, Jenna, the teenaged girl who doesn’t trust him or the ramblings of her paranoid mother, Joey, the lonely woman who recently got married but is unsatisfied with her life, and Freddie, Tom’s son who keeps track of it all through secret photos and spying. I loved this one! It was twisty, turny, compulsive, and binge-worthy. I could not put it down! The pace was perfect: just when I felt like we had been going off of unanswered questions too long and felt the need for dots to start connecting, revelations started happening. My brain was swirling around various possibilities and while I did guess some of the twists (and the killer!) in advance, there were plenty of twists that I did not see coming. There is a strong believability factor in this book, which makes it a great domestic thriller – you can just imagine a neighborhood like this where people are watching each other’s comings and goings. It wasn’t jumpy or gory so it’s an excellent choice in thriller if you don’t like actually being scared while reading. I highly recommend!

The Revolutionary: Samuel Adams by Stacy Schiff

This biography was chosen by an online book club I’m a part of and while I do really enjoy history and learning about important people and events, this is probably not a book I would have chosen on my own. That being said, I am glad I read it! It’s FULL of information about Samuel Adams and before this I knew nothing. Now that I know just how much he contributed to the Revolutionary War, I’m actually shocked that the only thing I knew before reading was his name (and honestly, I really only knew that because of the beer company). I found it fascinating to see how Adams contributed to the ideas that led to mindset shifts and ultimately led to revolution – without his efforts I truly think things would have looked totally different. He was an absolutely critical Founding Father! As much as I did gain from reading, I also have to say this book was a hard read. The vocabulary is high-level, the sentences are long and intricate, and I found myself having to reread paragraphs to be able to understand. It’s definitely a more challenging read than other biographies I’ve read so just be aware of that if you’re interested in reading it.

Remodelista: The Low Impact Home: A Sourcebook for Stylish, Eco-Conscious Living by Margot Guralnick & Fan Winston

From Goodreads: Low-impact living is about making thoughtful, eco-friendly choices in your home. But being sustainable doesn’t have to mean sacrificing style. That’s where Remodelista comes in. In this comprehensive guide, they decode the secrets to creating a home that’s good for the planet—and totally livable.

This was another book I saw on display at my local library and I was immediately intrigued. I spent the next couple weeks casually reading section by section when I had some leisure time here and there. I really enjoyed flipping through and got lots of inspiration! I will say, the actual interiors weren’t as inspiring to me as the tips and suggestions for more eco-conscious living, but I took lots of notes on things that interested me as I was reading and I have many things I want to implement within my own home over time. If you’ve been here awhile, you likely know that sustainability is very important to me and I found this book to have TONS of good information. I actually want to have my own copy as something to refer back to and use as a sourcebook in the future so I’ll be on the lookout for a secondhand copy 😉 If you’re interested in sustainable living, this is a great resource!

What have you been reading lately?

Spring Cleaning my To-Do List

Hello and Happy Monday! This week is starting off so much stronger than last week – we had a nasty GI bug travel through our family and to say it was no fun is an understatement. Thankfully Ollie and I escaped it but the majority of my time was spent taking care of everyone else and helping aid recovery in whatever way I could. I did manage to get in some time towards the end of the week finishing up another stenciled wall in the guest bedroom so we’re continuing to make progress there!

While the stenciled wall is coming along, it is obviously somewhat tedious and a long process, so I’m going to be sprinkling in some smaller projects to break up the monotony. This week I decided to take some time to do a bit of “spring cleaning” of my project to-do list. Basically, I have a list in my head of the things, both big and small, that I want to accomplish in my house and I’m going to challenge myself to complete a few of the small things this week. I realized that several items were started or connected to the month of March in a previous year, so in the spirit of March almost being over yet again, I decided to tackle all those March-related things.

1. Finish Upgrading the Rustic Dresser

In March 2022, I shared how I made some mistakes in buying this dresser off Facebook Marketplace, which I originally intended to upgrade for my sister’s nursery (thankfully I found a much better option!) This one has just been sitting in our workshop for a year and it is beyond time for it to move on and go somewhere else. It’s already sanded down and Justin recently replaced a missing board on one side. This week, I’m going to stain +polyurethane it and then donate it to a family in need in my community. I’m glad to get it out of our space and very thankful it can go to someone else who needs it!

2. Update the Staircase Gallery Wall

In March 2021, I shared how I started a gallery wall by our spiral staircase. My goal was always to continue to build on this and add pictures as our family grows and now feels like the perfect time. Most importantly, we need to add some photos of Ollie! I’ve been collecting photos and frames to add to the wall so this should be a pretty fun and easy task.

3. Finish the Playroom Baseboard Trim

Also in March 2021, I updated and painted the window trim in the playroom. I later went through and painted the baseboards to match the wall color. The ONLY thing I didn’t paint was the piece of trim at the bottom of the wallpapered wall – I couldn’t decide if it should match the blue of the other walls or be a white to blend in more. I’ve decided on white and it’s time to get it painted and finished!

4. Make a Simple Phone Call!

And finally – also back in March 2021 (what a busy month that was!) I painted the front door of our house. This is significant because notice in the top left corner of the picture how the white paint stops? IT’S STILL LIKE THAT. Two. Years. Later.

It’s been a halfway-painted, two story foyer for 2+ years and it’s to the point now where I’m so used to it it doesn’t even really register for me how ridiculous it looks, ha! I cannot actually paint the second story level of our foyer because it’s way too high and complex, but I’ve just never gotten around to calling/getting quotes for hiring it out. So this week, I’m making the calls. This is probably the easiest item on the list and yet somehow the one I’m looking forward to the least (what is it about making phone calls!?) but I’m hoping that the fact that I’m writing about it here will help keep me accountable. It’s high time our foyer gets finished!

I’m also hoping to keep plugging away at the guest room stenciled wall – my mother-in-law is coming to visit on Friday for a week so we’ll see if I can get another section done before she arrives!

Next Up: Changes Coming to the Guest Suite!

This mid-afternoon blog post is brought to you by Daylight Savings Time, which I am blaming for being sleep-deprived this morning and not hitting “publish” like I thought I had. So Happy Monday afternoon!

The longer we have lived in this house, the more I feel like I’ve honed in on a specific vision for it. I’m so glad we didn’t do major renovations when we first moved in; living here has shown me how we actually need certain spaces to function and that has completely changed my mind on some ideas I had when we first bought the home. As I’ve spent nearly four years tackling smaller renovations room by room, I’ve cultivated spaces that feel right for our family and it’s been really gratifying to see those spaces now work together throughout the house like pieces to puzzle.

That being said, I have been feeling like some of my earliest projects don’t quite fit that puzzle very well. These renovations happened so early on that I didn’t necessarily have the “whole house vision” in mind and now that I do, I’m wanting to go back in and re-address some things. There’s one space in particular I’ve been thinking about a lot lately and feel ready to tackle: our guest suite!

When we first moved into our house, the guest suite immediately rose to the top of the project list. Technically, it couldn’t be considered a bedroom at the time because there was no window, but I immediately saw the potential. We hired a contractor to put in a window, strip the wallpaper, and demo the en suite bathroom – you can catch up on the initial renovation in previous posts (click here for the bedroom and here for the bathroom).

We initially finished the guest suite in early 2020 – just in time for a global pandemic and a very long pause on hosting guests. Ha! Eventually, I decided I wanted to add a bit of interest to the plain white walls and started a botanical wallpaper look using paint and a stencil. It was fairly labor intensive and I wasn’t sure I wanted to go all the way around the room so I paused after two walls. Along the way I also updated the bed and bedding and swapped out the nightstands for the ones from Justin and my bedroom (I still love all those changes!)

I recently had some inspiration for the guest suite that I think is going to make it make so much more sense with the rest of the house – it gave me that excited, adrenaline feeling in my gut that made me know this is the right direction to take the room! Here’s what I am going to be addressing:

1. Finishing the Faux Wallpaper. I do want to complete the wallpaper look all the way around the room and I’m going for it. I know that it will be time consuming, but I truly believe it will be worth it!

2. Paint the trim + doors + built-ins dark. Initially, I chose white walls and a light greige contrast trim because I thought it would help brighten the fairly dark room (the window is partially shaded by our back deck and with that + the angle of the house compared to the path of the sun, it never receives direct, bright sunlight). Now I have more confidence in leaning into the natural shadowiness of the bedroom and I want to go dark green on the trim. The goal is a cozy, moody retreat!

3. Finally update the ceiling light! The last remining boob light (if you know, you know) in our home has numbered days and I cannot wait to see it go.

4. Repaint the en suite bathroom. With the wallpaper going on every wall in the bedroom and the trim going dark green, I think I’ll need to change the guest bathroom color. I am currently leaning towards a pink and again, it’s giving me that adrenaline feeling of being nervous for a dramatic change but also excited because I think it’s the right call.

5. Replace the carpet. We are finally ready to get new carpet in the works throughout the whole basement. The current carpet is very worn, stained, pulling up in places, and just very much in need of being replaced. I do want to replace with another carpet because a) our basement gets very cold and carpet is such an easy way to keep it warm and cozy and b) this is a big rec space/entertaining space for kids and carpet makes more sense to me for kids to play on.

I’m starting this week on the wallpaper stencil – you can follow along on Instagram for the play-by-play!

Restoring a Thrifted Dresser (+ the finished Kids Room!)

Over the past week, I’ve been working to remove the paint from the kids’ shared dresser and restore it to a natural wood finish. It all came together yesterday and to say I’m in love is putting it mildly!

Before

After

Somewhere between 7-8 years ago, Justin and I bought this vintage midcentury dresser on Facebook Marketplace for $30. It had signs of wear and tear and the easiest solution at the time was to paint it, so I chose a mid-tone blue and gave it a little upgrade. It has lived happily as a kid dresser for the past 5.5 years (even serving as a changing table when LJ was younger) and is still one of my favorite thrifted finds to date.

I recently completed the mountain mural accent wall in the kids’ shared bedroom, and when I got everything back in place, things didn’t feel quite right. It seemed like a lot of painted surfaces: painted walls, painted trim, painted door, painted dresser. It also felt really heavily blue! I knew I needed to bring in some natural elements and decided to try to strip the paint off of the dresser. I had never attempted this before but figured worst case scenario would be I could just repaint it in a different color if stripping didn’t work.

After doing a bit of research online, I bought a product called Citristrip to try. First things first, I removed the drawers and hardware and placed the drawers face up on a drop cloth (I save old bedsheets for this purpose!) I wore a double layer of latex-free gloves and assembled things in my basement where there is a big open space and plenty of circulating air – Citristrip is safe to use indoors but I still wanted lots of ventilation.

I poured it out directly onto the dresser and used an old paintbrush to roughly apply it everywhere. After some trial and error I learned that thicker is better – you want a pretty thick layer on top of the paint!

I stashed the brush in a ziploc baggie and let the Citristrip soak in, quickly learning that leaving it on longer produces better results. You don’t want it to dry out, but you do want to give it time to work. And when it works, it looks wild!

My mind was blown! I kept thinking the paint looked like really elaborate frosting and couldn’t believe how much it bubbled up. The first round, where I did a light layer and only left it on 30 minutes, left a lot of residue but the second round, where I poured it on thick and left it on 2 hours, took nearly everything off!

I used a plastic scraper to remove the paint; sometimes I needed to do a bit of extra scraping to get it all off but it did not require a lot of muscle or effort to do the vast majority!

The main frame of the dresser took an extra round of Citristrip because the paint layer was thicker, but once I got everything stripped it was time to clean off the reside. I used mineral spirits (again, you want ventilation and gloves!) and a clean cloth to wipe down the surfaces; it works best to give the mineral spirits plenty of time to fully dry before sanding.

The dresser had a very thin layer of wood veneer on almost everything (more on that in a bit) and sanded well for me. I used an orbital sander, first with 80-grit sandpaper, then 120-grit, then 220-grit to get the surfaces down to raw wood. At this point, I started to feel optimistic that this was actually going to turn out well, because things were looking so much better!

I wiped everything down with a tack cloth and then it was time for gel stain – I chose this dark walnut color.

I have never used a gel stain before but it’s super easy to apply: I painted the stain on using a brush, first going in the direction against the grain, then immediately going over it with the brush again (without adding more stain), this time with the grain.

I let it set 2-3 minutes and then wiped it off with an old pillowcase (I’m telling you, save your old bedding for projects!) Here’s a look at two drawers in the process, one with the stain wiped off and one with it still soaking:

One unusual thing I hadn’t remembered about the dresser was that the top is actually laminate. Hmmm. The paint stripped off it fine and I used 220-grit sandpaper to get the remaining residue off, but it’s hard to tell how much of the gel stain it took. The walnut color I chose pretty closely matched the original color and I was afraid of blotchiness so I did the whole top at one time; it looks great with the rest of the dresser and definitely did darken, so it at least took some of the gel stain. It worked out and I’m happy with the result!

The legs did not take the stain well, although that’s probably because I didn’t want to sand them, so I decided to pivot and use Rub n Buff. My goal was to try to match the patina of the original brass drawer pulls. I removed the legs and used just a tiny bit of product, rubbing it in with an old cloth. I was pleasantly surprised to see the legs really did look similar to the drawer pulls!

After everything had a chance to dry, I put it all back together in my kids room and WOWZA, this was exactly what the space needed!

I LOVE the richness of the warm walnut color. It is seriously stunning, and the patina on the brass hardware + faux patina on the legs brings so much character!

This is still a $30 thrifted dresser, so it’s far from perfect, but I just think she’s a showstopper now. I am so so happy with how this dresser now ties in with the other wood tones throughout and completes the room . . . even though I don’t really ever think a room is totally finished. Our needs and tastes are constantly evolving and I like to make little tweaks to our rooms here and there along the way. Plus this room will likely need an overhaul of sorts down the room when there are two teenage boys sharing it (!!!) That being said, the kids’ room feels like it’s in a really good place for their current stage of life so for now…it’s done. 🙂

Sources:

Wall Color: Sherwin Williams Eider White and Nordic Bleu

Bedframes: Vintage

Dresser: Vintage

Windowpane Curtains

Blackout Blinds

Curtain Rods

Sconces

Vi’s Sheet Set

LJ’s Sheet Set

Yellow Quilts

Striped Throw Blanket

Round Mirror